End to end approach to create a deployment pipeline using GitLab as your source code management tool
Contents
Overview
Skill Level: Advanced
This recipe describes the basic steps to deploy and end-to-end multi-arch OpenShift solution combining GitLab, Quay.io, RedHat OpenShift and IBM Power. It was created by Sonia Garudi (Sonia.Garudi1@ibm.com) and Sneha Kanekar (Sneha.Kanekar1@ibm.com).
Ingredients
GitLab is a complete DevOps platform offereing an end-to-end approach to manage the whole workflow of project which includes managing the sharing of code between different team members, bug tracking, wiki space and continuous integration and deployment pipeline features. As GitLab still does not provides official support for the POWER architecture, this recipe is going to demonstrate how you can easily integrate POWER as part of a GitLab multi-arch application lifecycle which is deployed in a RedHat OpenShift cluster.
To sucessfuly complete this recipe, you will need the following:
Step-by-step
1. About GitLab Runner
GitLab Runner is an application that works with GitLab CI/CD to run jobs in a pipeline.You can choose to use GitLab’s pool of resources or install the GitLab Runner application on the infrastructure that you own or manage (which is the case of POWER). Runners communicate with GitLab over HTTPS, entirely through connections initiated from the Runner to GitLab and never in reverse.
When you register a runner, you must choose an executor. An executor determines the environment each job runs in. GitLab Runner implements a number of executors that can be used to run your builds in different scenarios :
- SSH
- Shell
- Parallels
- VirtualBox
- Docker
- Docker Machine (auto-scaling)
- Kubernetes
- Custom
For POWER, we have tested and validated the follwing executors:
-
- SSH: allows you to execute builds on a remote target by executing commands over SSH.
- Shell: allows you to execute builds locally to the machine that the GitLab Runner is installed. It supports all systems on which the Runner can be installed.
- Docker: when used with GitLab CI, connects to Docker Engine and runs each build in a separate and isolated container using the predefined image that is set up in .gitlab-ci.yml and in accordance in config.toml.
- Kubernetes: when used with GitLab CI, connects to the Kubernetes API in the cluster creating a Pod for each GitLab CI Job. This Pod is made up of, at the very least, a build container, a helper container, and an additional container for each service defined in the .gitlab-ci.yml or config.toml files.
2. Building, Installing and Configuring GitLab Runner
As the GitLab Runner source code currently doesn’t have support for POWER (yet) you will need to buil dyour own version to get started. The code changes are available here. To build your own GitLab Runner for POWER, use the following steps (which were executed in a x86_64 virtual machine with Ubuntu 20.04):
apt-get update; apt-get upgrade -y;
apt-get install -y mercurial git-core wget make build-essential binfmt-support qemu-user-static qemu-user ruby-full rpm
# install docker
git clone https://github.com/Unicamp-OpenPower/docker.git
./install_docker.sh
vi /etc/docker/daemon.json and add
{
"experimental": true
}
service docker restart
# prepar a GO dev env
git clone https://github.com/rpsene/goconfig.git
cd ./goconfig
source ./go.sh install
cd go-workspace/src/
# clone the runner source code
git clone https://gitlab.com/rpsene/gitlab-runner.git
cd ./gitlab-runner/
git checkout -t origin/rpsene-ppc64le
# build the runner
make deps
ou
make package
ls ./out/
Once you have built GitLab Runner, you can copy it to the ppc64le target where it is going to be installed. For your convenience, you can download it from here. To learn about how to registry a new GitLab Runner, click here. Once you are the GitLab Runner configuration page, you can start the registration process, which will be similar to the following:
# gitlab-runner-linux-ppc64le register
Runtime platform arch=ppc64le os=linux pid=35086 revision=7f7f3727 version=13.7.0~beta.342.g7f7f3727
Running in system-mode.
Enter the GitLab instance URL (for example, https://gitlab.com/):
https://gitlab.com/
Enter the registration token:
6brN1FUqKijp4UE_gGMX
Enter a description for the runner:
[flattish1.fyre.ibm.com]:
Enter tags for the runner (comma-separated):
ppc64le-runner
Registering runner... succeeded runner=6brN1FUq
Enter an executor: docker-ssh, shell, ssh, virtualbox, docker+machine, custom, docker, kubernetes, parallels, docker-ssh+machine:
shell
# gitlab-runner-linux-ppc64le run
Runtime platform arch=ppc64le os=linux pid=35102 revision=7f7f3727 version=13.7.0~beta.342.g7f7f3727
Starting multi-runner from /etc/gitlab-runner/config.toml... builds=0
Running in system-mode.
At GitLab user interface, this is what the configuration will look like:
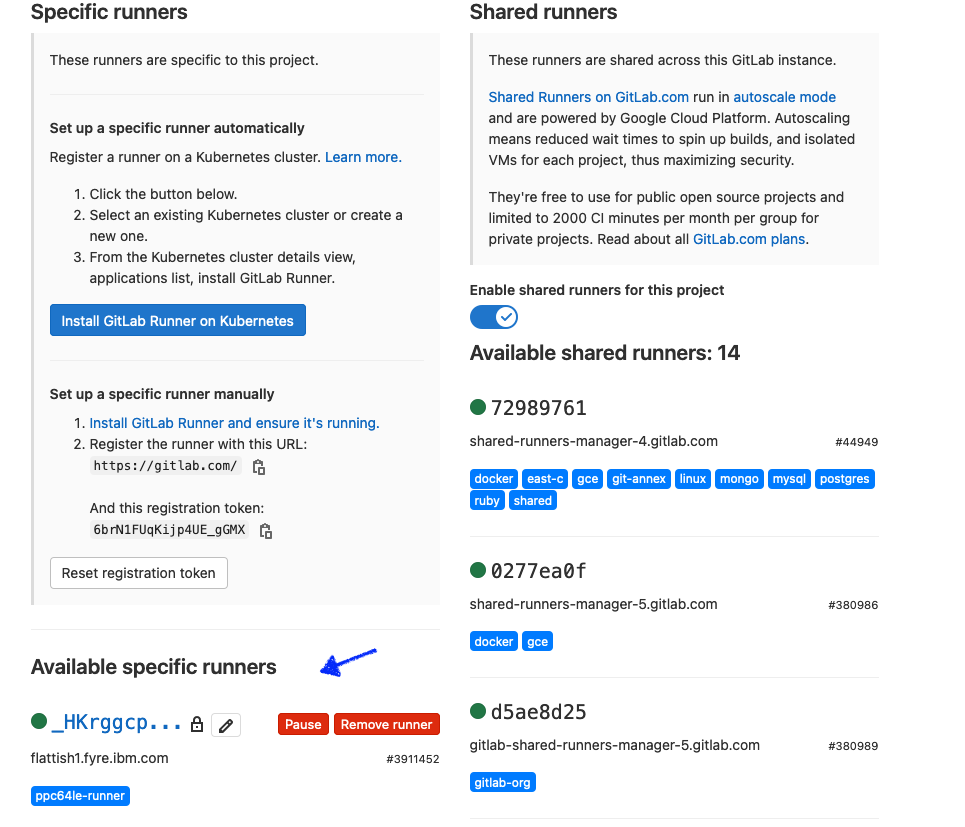
Once configured, you are able to start using it to build your project.
3. Building and Deploying a Multiarch Application on OpenShift from GitLab
A key part of this recipe is to achive the following pipeline:
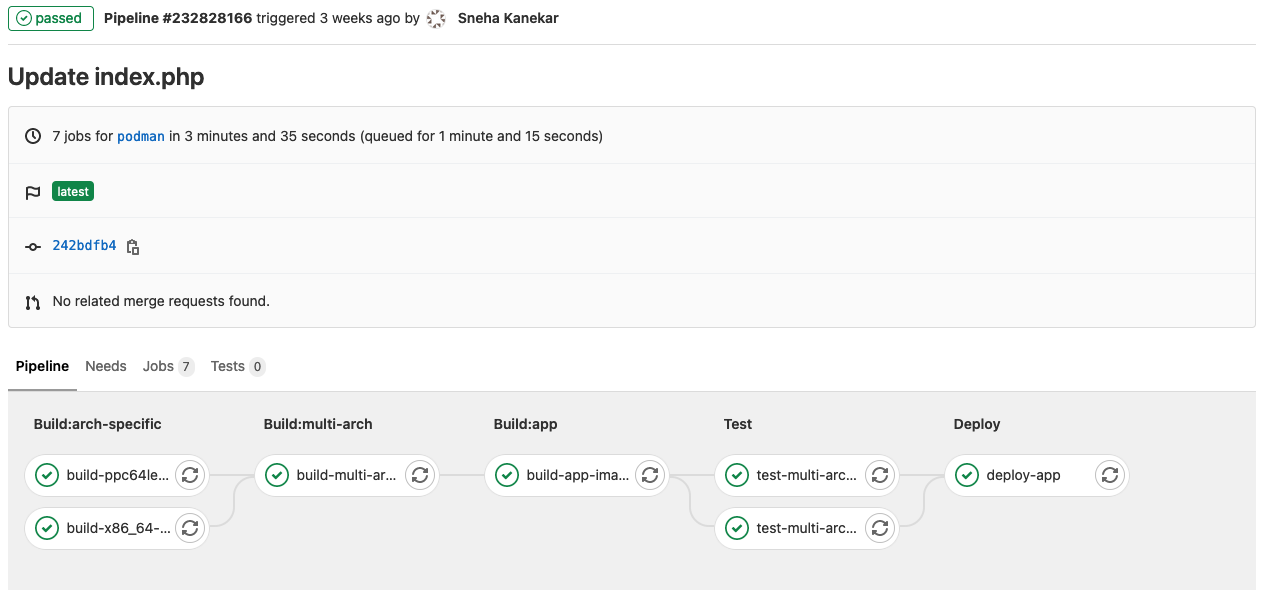
To do so, the first step is to have your project created at GitLab, the GitLab Runners correctelly registered and a RedHat OpenShift cluster up and running. Example:
# add .gitlab-ci.yml file to configure Gitlab CICD pipeline.
example at https://gitlab.com/skanekar/sample-web-app/-/blob/master/.gitlab-ci.yml
# add the application source code to your repository.
example at https://gitlab.com/skanekar/sample-web-app/-/tree/master
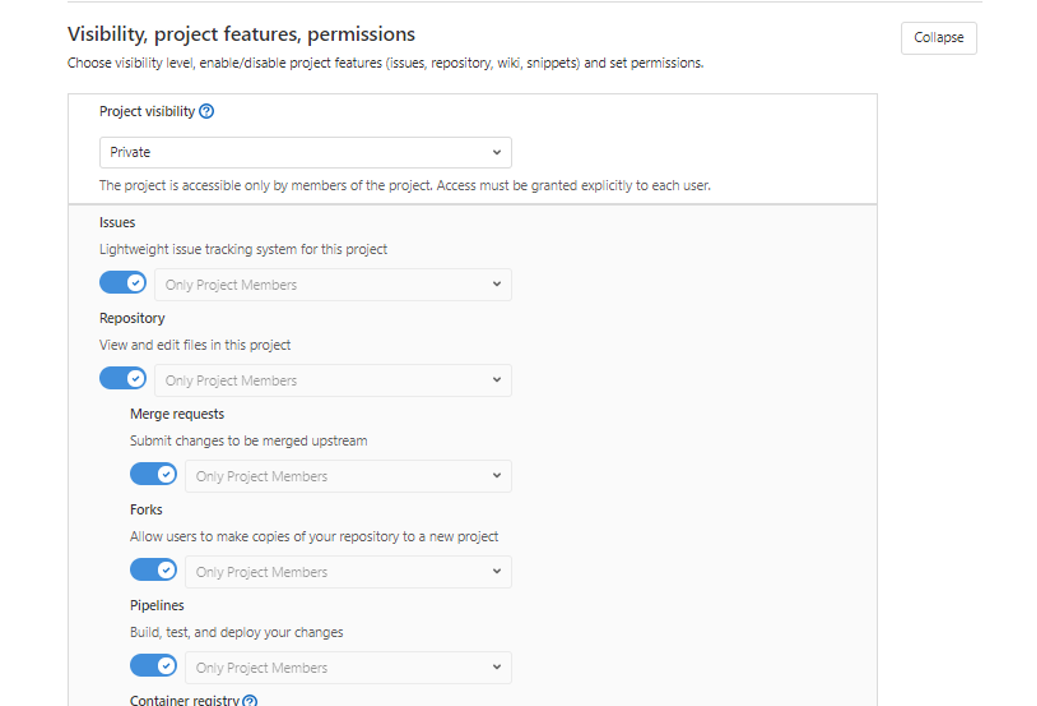
Once completed, configure the build pipeline at GitLab. Go to Settings -> General -> Visibility, project features, permissions and
make sure that Pipelines option is enabled.
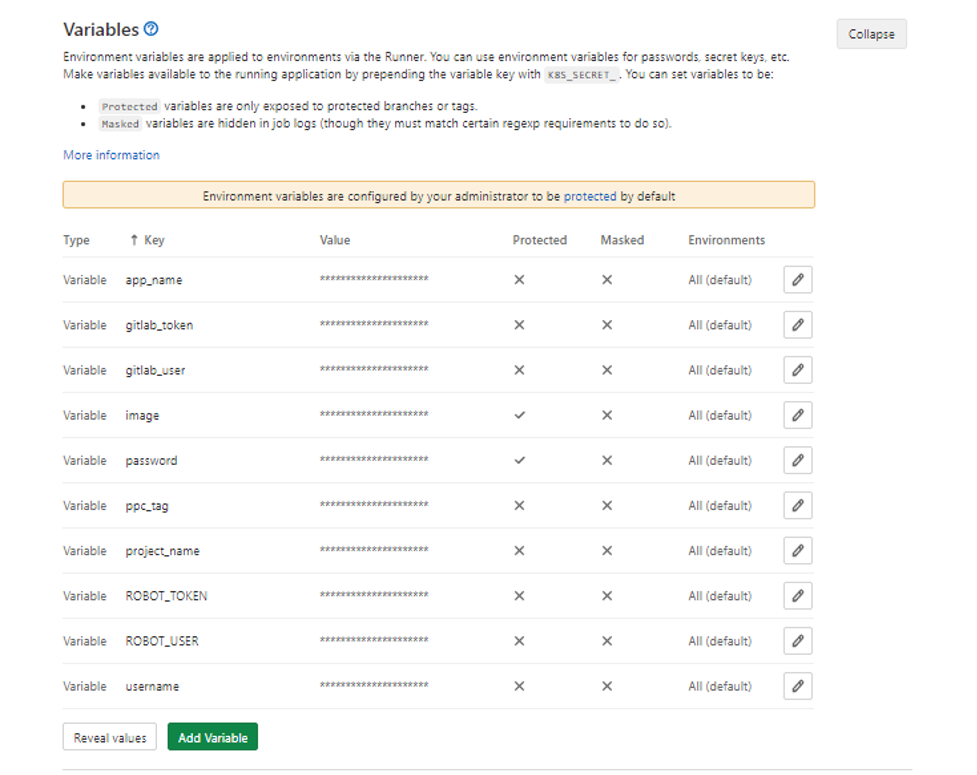
Go to Settings -> CICD -> Variables and add all the required environment variables. These variables will be accessible for all the jobs in your pipeline.
As we are build a multi-arch container image for the application (which means that we can run it from either x86_64 or ppc64le clusters), we are going to host all the images at quay.io. To configure your container repositories, follow the steps below:
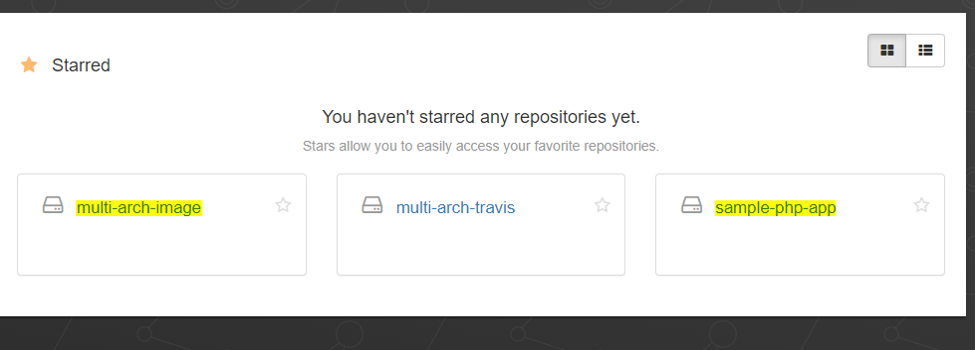
- Login at quay.io and create the repositories you are going to use to host your containers. We have created two for this recipe: multi-arch-image and sample-php-app (ensure you do the same steps for both):
- Go to settings of the multi-arch-image repository. Under User and Robot Permissions section, click on the dropdown and select Create robot account.
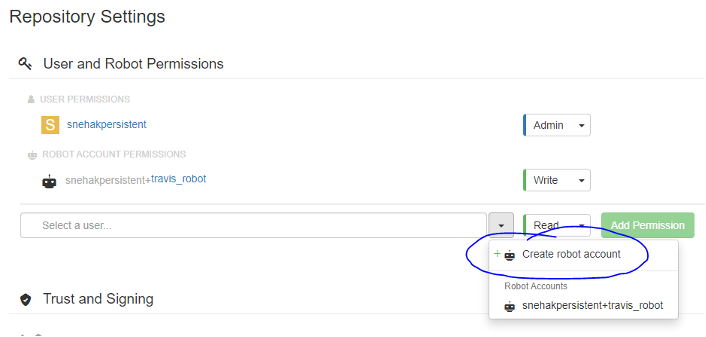
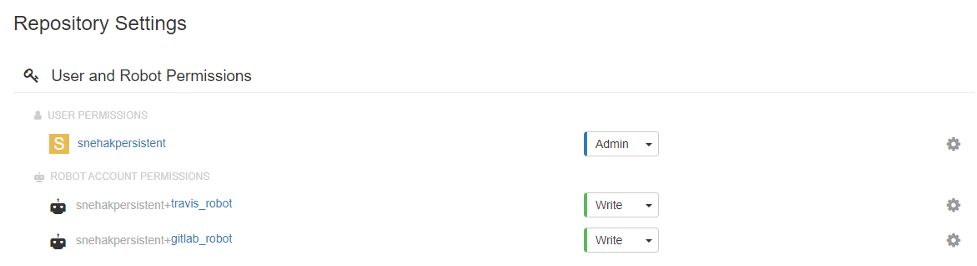
- Grant write permission to the robot account.
With the quay.io repositories properly configured we can now create the multi-arch images and deploy the application using RedHat Openshift. The .gitlab-ci.yml has the following stages to carry out the process of building images and deploying the image on Openshift cluster:
stages:
- build:arch-specific
- build:multi-arch
- build:app
- test
- deploy
1. Stages 1 and 2: building the images for each architecture
# a. building ppc64le image: the build.sh script builds the specified
# arch image using the Dockerfile present in <arch>/Dockerfile location in repo.
# In this case, it will build image for arch ppc64le.
build-ppc64le-image:
stage: build:arch-specific
tags:
- shell-ppc
script:
- chmod +x ./build.sh; ./build.sh
# b. building x86_64 image: same as previous step, it builds image for arch x86_64.
build-x86_64-image:
stage: build:arch-specific
tags:
- shell-x86
script:
- chmod +x ./build.sh; ./build.sh
# c. building multi-arch image: the create-multi-arch.sh script builds a multi-arch
# image using docker manifest command. It adds images from step 1a and 1b to the manifest list.
build-multi-arch-image:
stage: build:multi-arch
tags:
- shell-ppc
script:
- chmod +x ./create-multi-arch.sh; ./create-multi-arch.sh
2. Stage 3: building the application image from the multi-arch image at quay.io
# a. create a Docker file with the app deployment steps. Use the multi-arch image from
# quay repository (created in step 1b) as base image for this, as done in this example.
# b. Use the build_app.sh script to build the application image.
# The docker build -f <path to Dockerfile> -t <image>:<tag> command is used to build
# the application image. The Gitlab CI is configured to build the image every time any
# change is made to the application source code.
# c. Pushing the application image to quay.io: the script pushes the created application
# image to the quay repository.
build-app-image:
stage: build:app
tags:
- shell-ppc
script:
- chmod +x ./build_app.sh; ./build_app.sh
3. Stage 4: test the multi-arch image
test-multi-arch-image-on-x86_64:
stage: test
tags:
- shell-x86
script:
- docker pull quay.io/snehakpersistent/multi-arch-image:latest
- docker run --rm quay.io/snehakpersistent/multi-arch-image:latest
test-multi-arch-image-on-ppc64le:
stage: test
tags:
- shell-ppc
script:
- docker pull quay.io/snehakpersistent/multi-arch-image:latest
- docker run --rm quay.io/snehakpersistent/multi-arch-image:latest
4. Stage 5: connecting to the RedHat OpenShift cluster using a GitLab SSH executor running in the bastion node and deploying the application
It is important to make clear that for this specific step we have added the RedHat OpenShift Bastion as a GitLab Runner (using the executor with the Shell option enabled) so we can safely run the oc commands without setting the secrets as part of GitLab.
deploy-app:
stage: deploy
tags:
- ssh-ppc
script:
- oc login -u=$username -p=$password
- ocprojectcheck=0
- oc project $project_name || ocprojectcheck=$?
- echo $ocprojectcheck
- if [[ $ocprojectcheck == 1 ]];
then
oc new-project $project_name ;
oc new-app --name $app_name $image:$ppc_tag ;
fi
- if [[ $ocprojectcheck == 0 ]]; then oc import-image $image:$ppc_tag ; fi
- if [[ $ocprojectcheck == 1 ]]; then oc expose svc/$app_name ; fi
In the next recipe we are going explore more options on integrating CICD tools to deploy OpenShift applications.
#Openshift #cicd #gitlab