Previously, we covered Adminhosts and TM1Servers where we built up our Adminhost address and used this to display all available Planning Analytics servers. The ability to add multiple Adminhost was added so we can navigate between environments.
Rest API Examples with JavaScript listing Adminhosts and TM1 Servers
We now move onto selecting a Planning Analytics server and initiating a logon, we will also introduce a few elements of JavaScript (and the GitHub project).
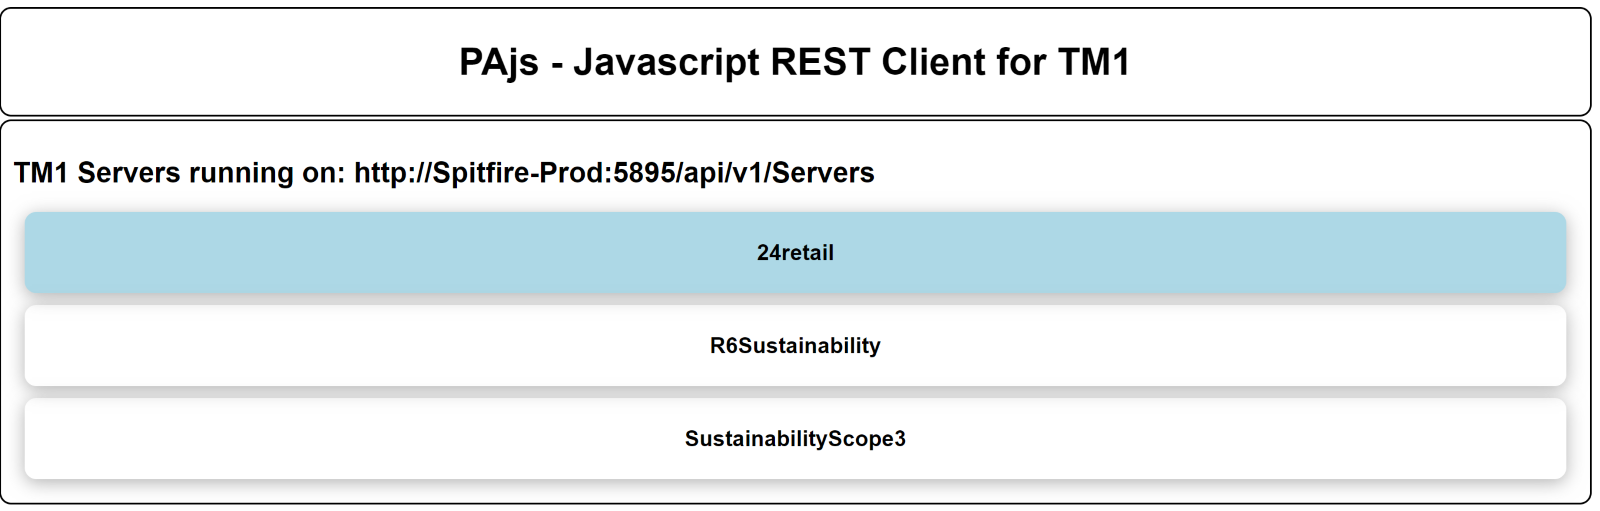
Our (slightly amended) Adminhost screen lists our currently running Planning Analytics servers; 24Retail, R6Sustainability and SustainabilityScope3
To generate the Adminhost page I pulled each of the “Name” items from the Adminhost request and placed them on a series of buttons by looping each server in the Adminhost response:

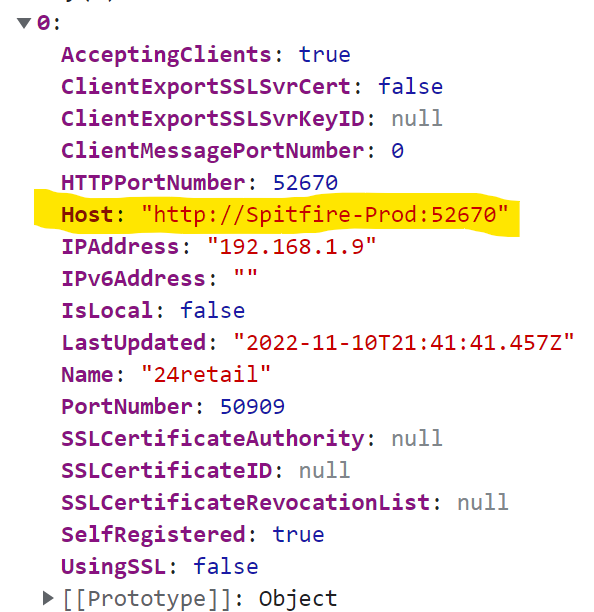
If we Inspect the Adminhost page and view the Console we can see the activeAdminhost link and subsequent response:

To view the console you can select Control + Shift + I or right click in the main window and select “Inspect”
Expanding the 24Retail grouping gives us a lot of useful information, we can tell if the server was Self Registered, Accepting Clients, what the HTTPPortNumber is, if the server is using SSL etc.. It is easily possible to add all these details to the server buttons but for a clean look I have taken only the name.
Each server button has an EventListener which runs the “selectServer” function when it is clicked:
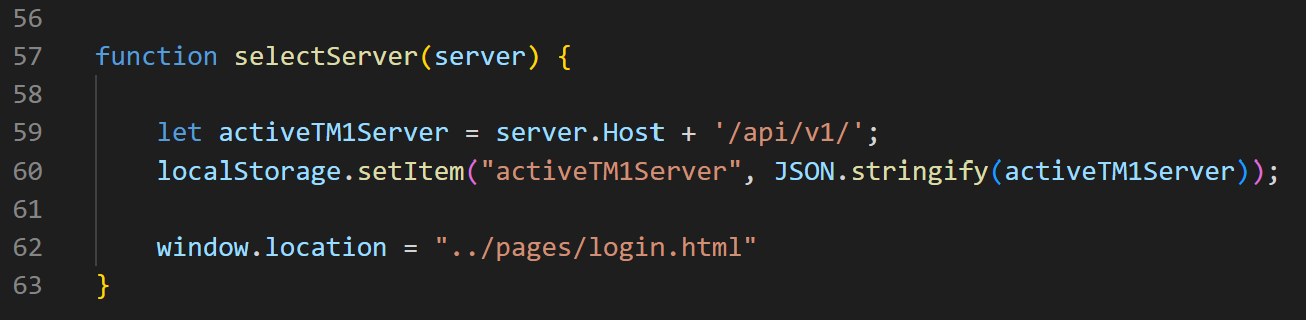
This function takes the details of the response from the 24Retail grouping found above. We create a variable named “activeTM1Server” which stores the “Host” item from the 24Retail response
We tag on “/api/v1/” to create the default API definition for Planning Analytics servers.
This variable is stored as a localStorage variable named “activeTM1Server”.
JSON.Stringify is used to convert a JavaScript value to a JSON String so it can be saved as a localStorage variable.
The final line of the function will open the login.html page in the current browser.
The key part to note here is that the server.Host item lists the adminhost name with the HTTPPortNumber for the selected server. We then add the API definition to build up the unique Planning Analytics server URL:
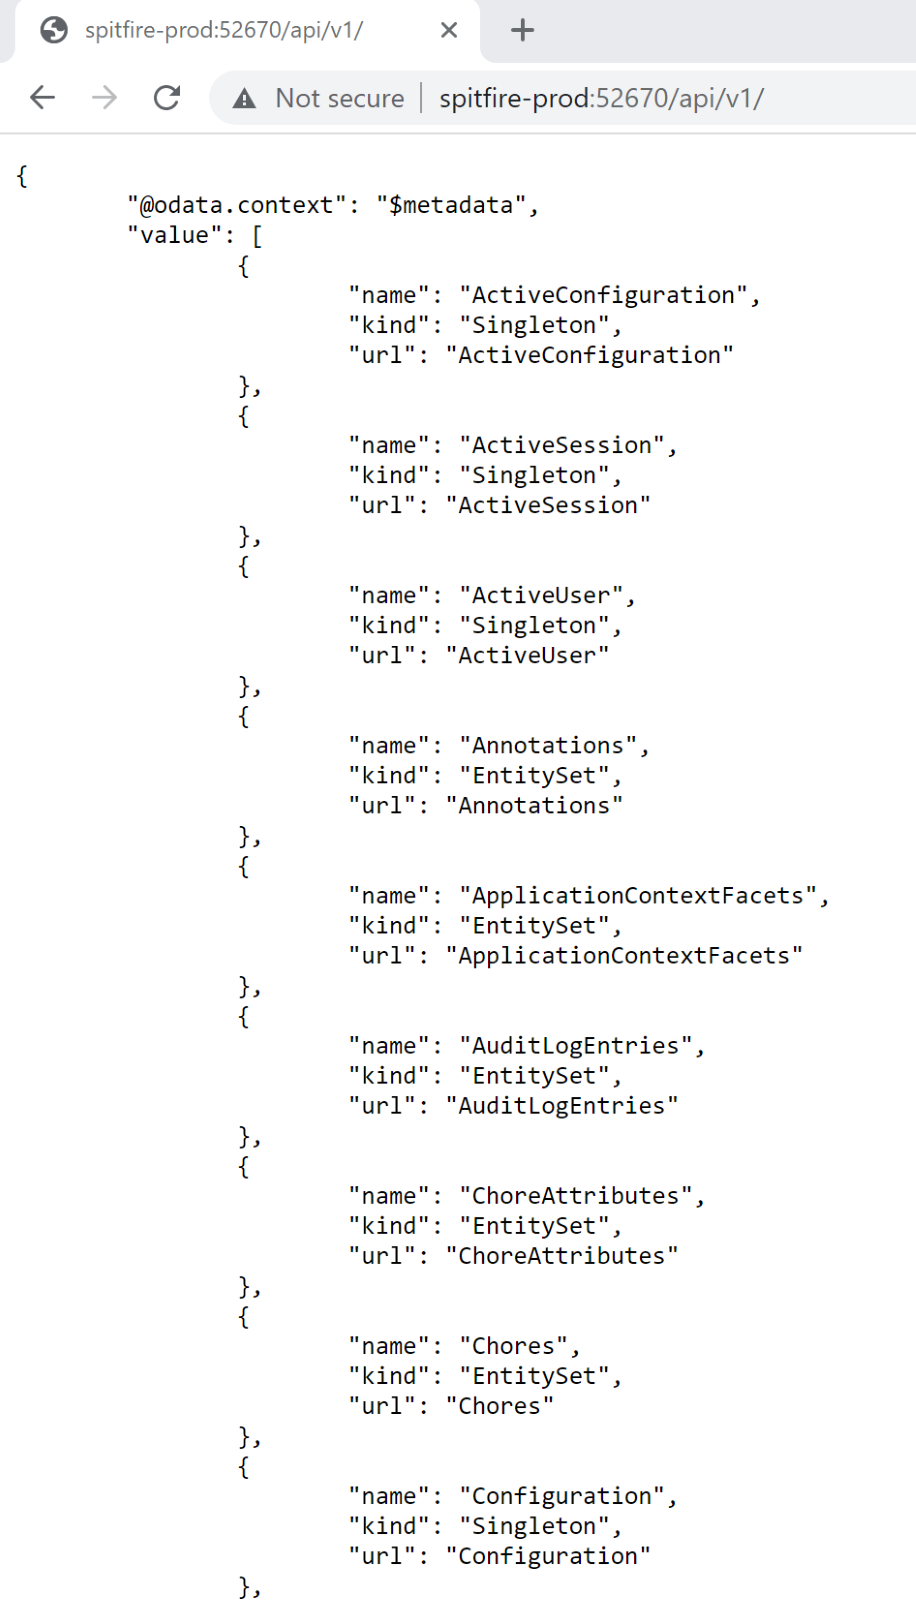
http://Spitfire-Prod:52670/api/v1/
If we click this URL we will see a metadata JSON response document:
This will come in handy later, back to our function and we’re being navigated to the login page:

To get details of Adminhosts and for running TM1 Servers we have not had to authenticate.
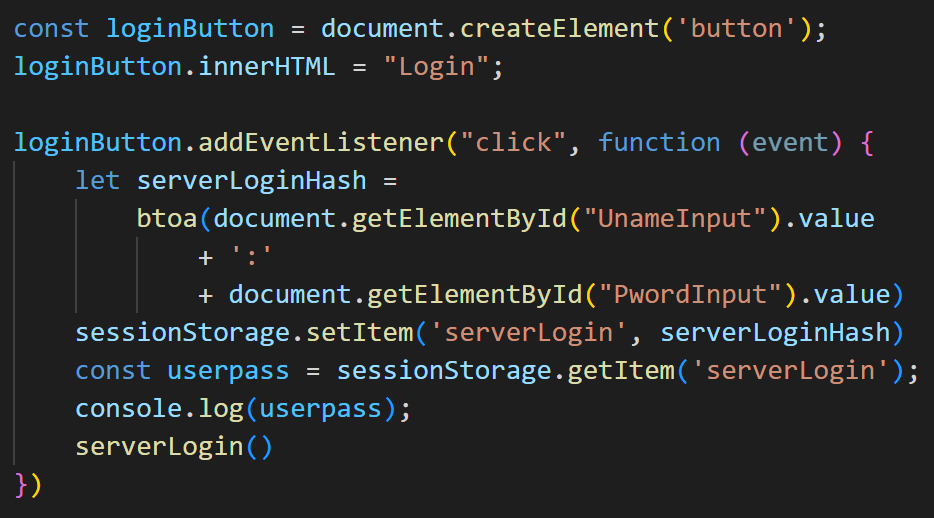
Now we are working directly with a TM1 Server we need to authenticate. The REST Api accepts a Base64-encoded ascii string of the “Username:Password”
To achieve this, we pull the required data from the login page and wrap it in a btoa() function
Note that we store the authentication credentials in a sessionStorage variable (I.e. the variable is only available during the users browser session).
Input username and password and select the Login button (note that at this moment in time only IntegratedSecurityMode=1 is supported, more will be added in due course).
Providing we have authenticated successfully we get to the main TM1 Server page and those metadata items should make more sense. A future blog post will cover the Singleton/ EntitySet details.
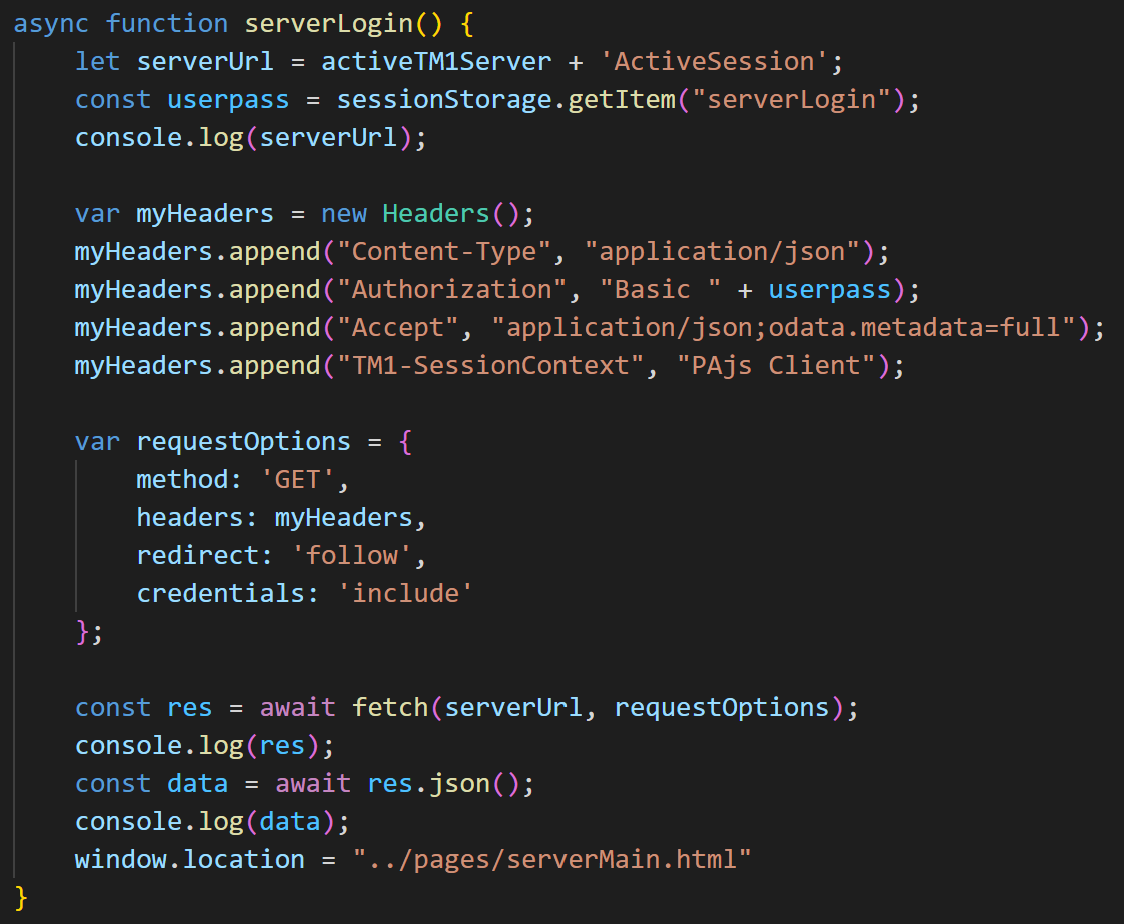
When authenticating we make a GET request to the ActiveSession endpoint:
As mentioned above this is due to change to include support for other security modes so I will not cover this section in detail at this time. Having said that it should remain largely the same.
For testing I have “odata.metadata=full” set but this is typically set to “odata.metadata=none”, this will be covered in another blog post.
The TM1-SessionContext is set to “PAjs Client” as this will be the identifier for TM1Top/ Workspace Administration to identify where actions have been initiated from.
Once the function completes then the user is directed to the serverMain.html page as seen above.
At this point I can now select any of the sidebar items to query the details against my chosen server:
Each sidebar selection will update an “activeItem” localStorage variable and will update the GET request to the activeTM1Server:

On each sidebar selection then the whole page is reloaded so a new GET request is made for the new selection.
This project has been named “PAjs” and is a JavaScript REST Client for TM1. You can download the client from the Github page which can be found here:
https://github.com/EddStuart/PAjs
Instructions for getting started can be found in the README.md file and on the main page in the GitHub repository.
The project is a work in progress, we have a developmental branch named “update-object” which is looking to copy a process from the Active TM1 Server to a defined second server on the same/ different adminhost, once this is complete then I’ll be looking at copying other objects between servers and updating/ comparing configuration between instances.
Thanks for reading and my next post should be out new week
#PlanningAnalyticswithWatson