Co-Authors:
Mo Ying (moyingbj@cn.ibm.com) - Tech lead of Cloud Pak for Watson AIOPs Server Foundation
Li Hong (lihongbj@cn.ibm.com) - Developer of Cloud Pak for Watson AIOPs Server Foundation
Li Xin (llixinn@cn.ibm.com) - Solution Architect of SWAT
Background
What is Single Node OpenShift?
RedHat Single Node OpenShift (SNO) is a full-blown Kubernetes distribution that puts both control and worker capabilities into a single node while making the footprint smaller than a normal OpenShift cluster. It is a welcome addition to the long list of OpenShift deployment options. It enables new use cases for small and resource-constrained solutions, while still enabling the well-proven Kubernetes orchestration and management capabilities.
Why Deploy Cloud Pak for Watson AIOps on Single Node OpenShift?
The main purpose of providing this type of deployment option for Cloud Pak for Watson AIOps is to help sales teams and customers to set up Cloud Pak for Watson AIOps Proof of Concept (PoC) or demo environment, quickly and easily. Here are the benefits:
1) Simplified cluster provisioning. Launching a Single Node OpenShift cluster is fairly easy when compared to launching a normal OpenShift cluster set up. This can improve the cluster provisioning and maintain efficiency greatly, which was a big pain point for anyone who wanted to try Cloud Pak for Watson AIOps or other Cloud Pak products that depend on OpenShift. Sometimes, new users can find they get bogged down in cluster preparation before they can even start to deploy Cloud Pak.
2) Reduced hardware requirements. The minimum resources required by Single Node OpenShift are 8 vCPU, 16 GB RAM, 120 GB storage. This is a great optimization compared to the resources required by normal multi-node OpenShift cluster. It is important for people who just want to taste Cloud Pak features because they do not want to invest a lot of hardware resources when they are trying out the product. Although the minimum resource required by a Single Node OpenShift cluster is insufficient for a typical Cloud Pak for Watson AIOps deployment, it has been verified that a typical deployment for Cloud Pak for Watson AIOps v3.5 PoC or demo environment using x-small profile only needs 32 vCPU, 80 GB RAM.
3) Recover from a snapshot. As the Single Node OpenShift cluster is normally installed on a single VM, it's easy to create a snapshot for the VM after you finish the Cloud Pak for Watson AIOps installation. Then, you can recreate the whole environment at any time by recovering from the snapshot. This is very useful in some cases. For example, if you want to share your environment with others, you can send them the copy of the snapshot, so that they can recreate the Cloud Pak for Watson AIOps instance with exactly the same settings, easily and quickly. Another example is that, if you ruined your current demo environment for some reason, instead of spending another few hours to provision a completely new environment, which is very inefficient, you can just recreate it from the snapshot quickly.
Prerequisite
Installing Single Node OpenShift
Before you start to deploy Cloud Pak for Watson AIOps, you need to install the Single Node OpenShift cluster. At the time of writing, we use OpenShift 4.10 to verify the installation. You can refer to its official online document here to learn how to install a Single Node OpenShift cluster.
Increasing Pod Capacity
In OpenShift, there is a default value for the pod capacity on each node. For example, if it is 250, then this means 250 pods can be deployed, at most, on each node. For Single Node OpenShift, since there is only one node acting as both master and worker where all pods are deployed on this node, the default pod capacity can not support a typical Cloud Pak for Watson AIOps deployment as the number of pods spawned by a Cloud Pak for Watson AIOps deployment with default settings has already exceeded 250. Because of this, the pod capacity value must be enlarged. This can be done by adding the following label to the MachineConfigPool master resource first:
oc label machineconfigpool master custom-kubelet=large-pods-num
Then, apply the following kubeletconfig settings:
apiVersion: machineconfiguration.openshift.io/v1
kind: KubeletConfig
metadata:
  name: set-max-pods
spec:
  kubeletConfig:
    maxPods: 430
    podsPerCore: 25
  machineConfigPoolSelector:
    matchLabels:
      custom-kubelet: "large-pods-num"
Save the above YAML manifest into a file, e.g.: set-max-pods.yaml, then apply it:
oc apply -f set-max-pods.yaml
Wait a short time for the change to take effect, then verify the result by checking the node manifest as below:
oc get node <sno-node-name> -o jsonpath='{.status.capacity.pods}{"\n"}'
If everything works fine, you should see that it returns “430”, which is the value that we set just now.
For more information on managing the maximum number of pods per node, please refer to Managing the maximum number of pods per node.
Installing Cloud Pak for Watson AIOps (AI Manager)
After the cluster is ready, you can install Cloud Pak for Watson AIOps on it. Generally, the steps to install on a Single Node OpenShift cluster are very similar to the steps that you see for a normal installation on multi-node OpenShift cluster. Taking Cloud Pak for Watson AIOps 3.7 as an example, you can follow the installation instructions documented on IBM Docs here, to start the Cloud Pak for Watson AIOps installation on a Single Node OpenShift cluster. If you choose to install using GitOps, then follow the steps below.
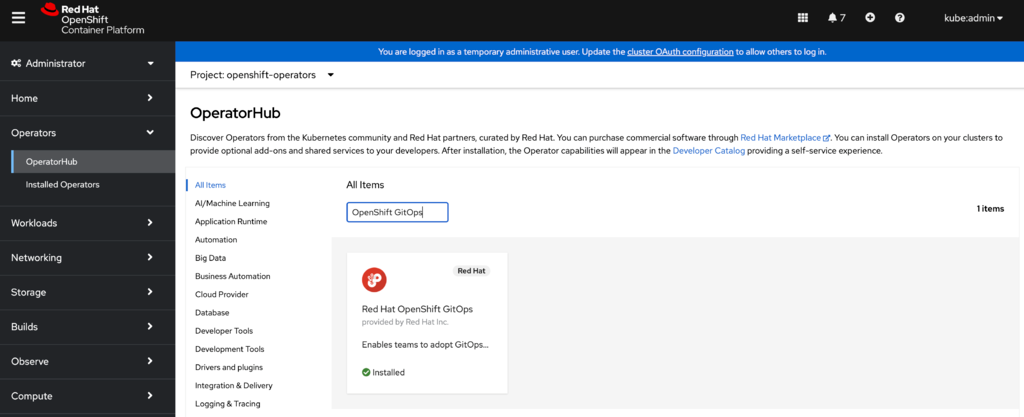
1) Install RedHat OpenShift GitOps Operator on your cluster via OpenShift Web Console -> Operator Hub. This will bring up a RedHat maintained Argo CD instance which is the GitOps tool that drives the overall CP4WAIOps installation.
2) Install Cloud Pak for Watson AIOps by creating ArgoCD applications, one by one, using GitOps per installation document here. Please note, some adjustments specific to Single Node OpenShift are needed as below:
Choosing a Storage Type
In this post, we use ceph as the storage. This storage type is not officially supported by Cloud Pak for Watson AIOps, but it is something that can be quickly setup using GitOps when you create a PoC or demo using Cloud Pak for Watson AIOps.
Following the GitOps installation document, when you create ArgoCD application for ceph on a Single Node OpenShift cluster, you need to define HELM VALUES FILES as values-sno.yaml :
Fixing a Redis Deployment Failure
Redis is one of the underlying components used by other Cloud Pak for Watson AIOps components at the upper layer. By default, it is not designed to run on a single node cluster. The minimum number of Redis instances for a deployment is 3. When deploying on a single node cluster, you will notice that during the installation, the remaining Redis pods deployment will be blocked after the first pod is deployed. This is because both the RedisSentinel custom resource and the Redis Deployment manifests have the podAntiAffinity settings as below:
podAntiAffinity:
  requiredDuringSchedulingIgnoredDuringExecution:
  - labelSelector:
      matchExpressions:
      - key: app.kubernetes.io/example-label
        operator: In
        values:
        - members-value1
    topologyKey: kubernetes.io/hostname
This deployment failure can be addressed by manually deleting the above settings from the RedisSentinel custom resource and the Redis Deployment manifests.
Maybe you also need to delete redis StatefulSet podAntiAffinity as below:
$ oc patch sts c-example-redis-m -p '{"spec": {"template": {"spec": {"affinity": {"podAntiAffinity": null}}}}}'
Once they are deleted, you can delete the corresponding Redis pods to enforce the changes, or wait for them to auto-restart. After all Redis pods are restarted, you will see all the pods are now able to be scheduled on the same node. You should then see that the installation process will move forward smoothly till all enabled Cloud Pak for Watson AIOps modules are up and running. Then, you should be able to explore your Cloud Pak for Watson AIOps deployment running on the Single Node OpenShift cluster!
Using x-small Profile
If you are interested in setting up a Cloud Pak for Watson AIOps environment for a PoC or demo purpose, using minimum resources on a Single Node OpenShift cluster, you can try the “x-small” profile when installing Cloud Pak for Watson AIOps, using GitOps steps below as extra configurations needed before you start to install AI Manager.
Note: This profile is not an officially supported profile, but instead, a customized profile that relies on the resource customization capability provided by Cloud Pak for Watson AIOps. It should only be used in non-production environment.
-
Create ArgoCD application named resource-lockers using below settings. This is to enable the capability to patch customization to existing profile.
-
GENERAL
-
SOURCE
-
DESTINATION
-
Create ArgoCD application named cp4waiops-custom using below settings. This is to patch x-small settings based on the officially supported small profile.
-
GENERAL
-
SOURCE
-
DESTINATION
-
PARAMETERS
-
Fix the redis deployment failure by running oc apply command with below yaml manifest to patch Redis deployment specifically.
apiVersion: redhatcop.redhat.io/v1alpha1
kind: ResourceLocker
metadata:
  name: redis-resource-locker
  namespace: resource-locker-operator
spec:
  patches:
  - id: redis-sen-locker
    patchTemplate: |
      spec:
        size: 2
        members:
          affinity:
            podAntiAffinity: null
    patchType: application/merge-patch+json
    targetObjectRef:
      apiVersion: redis.databases.cloud.ibm.com/v1
      kind: RedisSentinel
      name: example-redis
      namespace: cp4waiops
  serviceAccountRef:
    name: resource-locker-operator-controller-manager
Installing Event Manager
You can also deploy Event Manager on a Single Node OpenShift cluster. In general, if you are trying to deploy a standalone Event Manager (aka NOI) into an OpenShift Cluster, the resource requirements are described in documentation here.
For a trial size deployment, the total hardware requirements for a Netcool Operations Insight system deployed on a Red Hat OpenShift cluster (including both the Netcool Operations Insight and Red Hat OpenShift related hardware) will be 4 28vCPU 88G Memory nodes.
According to our test, the minimum resource requirements for a Single Node Openshift with Event Manager installed is one 24 vCPU 96G Memory node. And it can also carry small workload which is sufficient for PoC & Test scope.
Before you start to install Event Manager on SNO, make sure your SNO cluster has block storage class configured. You can check the storage options here. In our environment, we're using VMware vSphere storage for SNO cluster.
Contrary to deploying AI Manager in SNO, deploying standalone, Event Manager does NOT require to Increasing Pod Capacity for SNO as described above.
Now, follow the official documentation for the installation:
After you create a NOI instance from the IBM Cloud Pak for Watson AIOps Event Manager operator , it will take 40~60 minutes to complete the installation in SNO.
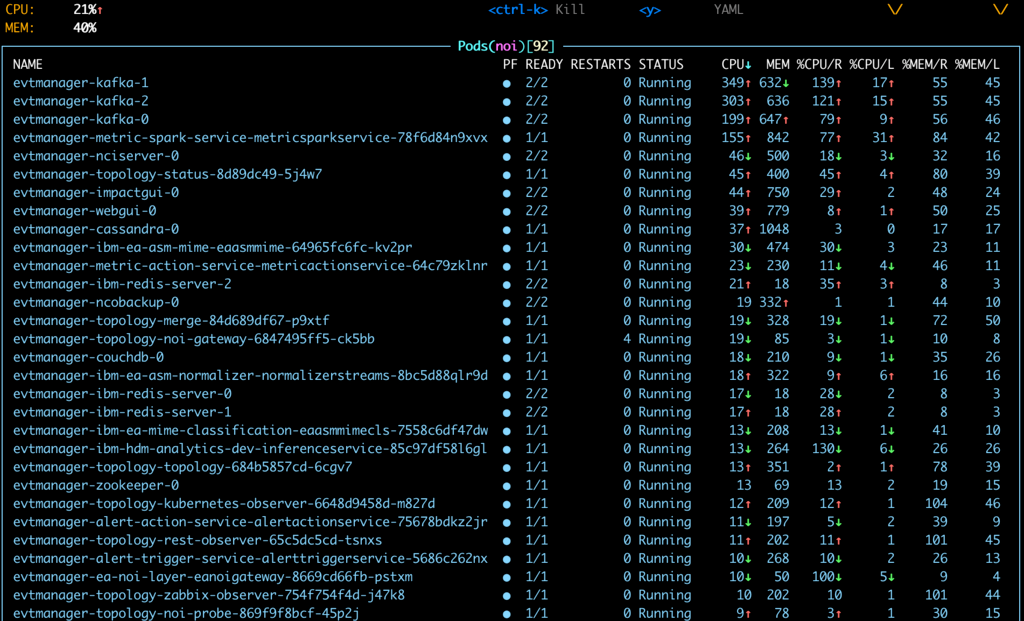
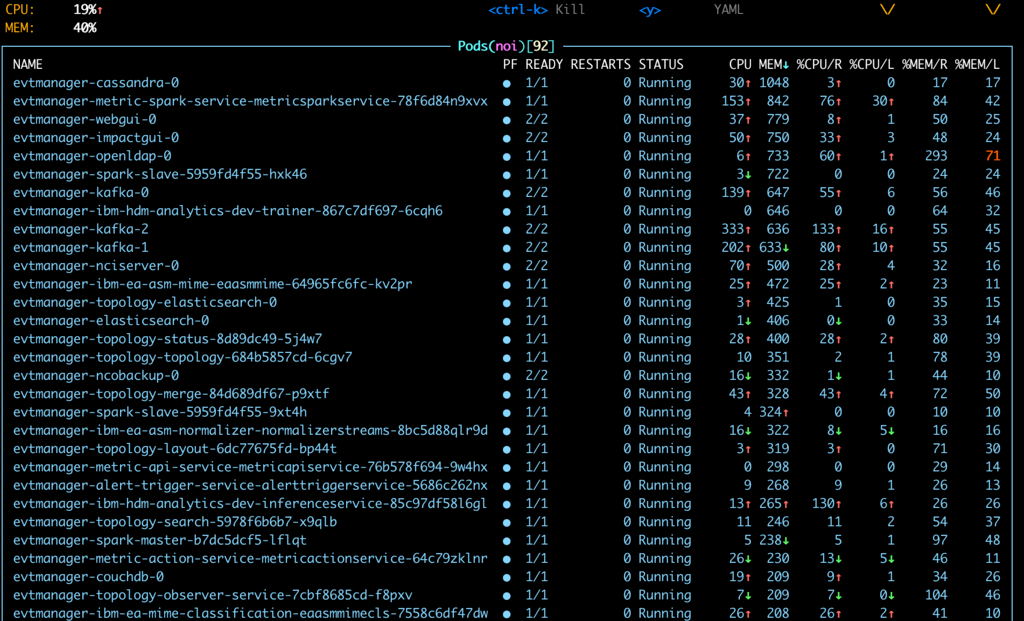
Check the node usage after deployed Event Manager:

Persistent Volumes being created:
(The thin storage class was automatically created during SNO deployment in vSphere infrastructure via this automation):
# oc get pv
NAME                                       CAPACITY   ACCESS MODES   RECLAIM POLICY   STATUS   CLAIM                                          STORAGECLASS   REASON   AGE
pvc-1b019dc8-5220-4cb0-ab2f-1f08be06e1f5   75Gi       RWO            Delete           Bound    noi/data-evtmanager-elasticsearch-0            thin                    9h
pvc-343e6da0-4093-4743-8a0b-4d516f3d8f36   5Gi        RWO            Delete           Bound    noi/data-evtmanager-topology-file-observer     thin                    9h
pvc-5673172e-5d24-4006-8f10-fb1900e1f421   10Gi       RWO            Delete           Bound    noi/data-evtmanager-ibm-minio-0                thin                    9h
pvc-61154ab9-60cd-4488-bdd9-e2c17f604fca   50Gi       RWO            Delete           Bound    noi/data-evtmanager-kafka-2                    thin                    9h
pvc-63bb65ea-0641-4fb5-a89f-81b0b36c947d   50Gi       RWO            Delete           Bound    noi/back-evtmanager-cassandra-0                thin                    9h
pvc-6ba9df34-0f89-49fe-b532-1370530aac03   50Gi       RWO            Delete           Bound    noi/data-evtmanager-cassandra-0                thin                    9h
pvc-76a18442-6b7d-41c4-a4d3-7a2473d9f0bd   5Gi        RWO            Delete           Bound    noi/data-evtmanager-zookeeper-0                thin                    9h
pvc-865499d3-7221-4b39-838c-0327948d1851   5Gi        RWO            Delete           Bound    noi/space-evtmanager-nciserver-0               thin                    9h
pvc-992463bc-3521-4986-bfb5-20cc494a952a   5Gi        RWO            Delete           Bound    noi/evtmanager-impactgui-pvc                   thin                    9h
pvc-9fab7591-c69e-4493-8237-fcb25ccebbf2   5Gi        RWO            Delete           Bound    noi/evtmanager-ncoprimary-pvc                  thin                    9h
pvc-a7cea067-e063-4339-8d0f-4d8e2cf21ea0   5Gi        RWO            Delete           Bound    noi/evtmanager-ncobackup-pvc                   thin                    9h
pvc-bb26faed-1444-41fb-8c9e-1f4cc95e4d8d   1Gi        RWO            Delete           Bound    noi/evtmanager-openldap-pvc                    thin                    9h
pvc-c4078ebe-7f24-4670-a4d9-42618e5c712c   50Gi       RWO            Delete           Bound    noi/data-evtmanager-kafka-0                    thin                    9h
pvc-d99ce190-025a-4474-bae3-84c1bdf025d3   20Gi       RWO            Delete           Bound    noi/data-evtmanager-couchdb-0                  thin                    9h
pvc-dd48fa13-c1a3-4891-8241-a1a9f0c0fed6   75Gi       RWO            Delete           Bound    noi/data-evtmanager-topology-elasticsearch-0   thin                    9h
pvc-f674eb1e-9ab8-4cd0-8b51-b32134b8c170   50Gi       RWO            Delete           Bound    noi/data-evtmanager-kafka-1                    thin                    9h
Amount of pods in NOI namespace:
$ oc get po -A|wc -l
203
$ oc get po -n noi|wc -l
93
Pods of top CPU usage in idle workload:
Pods of top Mem usage in idle workload:
Conclusion
This article walks you through the steps and provides tips on how to use Single Node OpenShift cluster, a very lightweight cluster deployment option provided by RedHat, to install Cloud Pak for Watson AIOps, including AI Manager & Event Manager. This is very suitable for sales teams and customers who want to setup a Cloud Pak for Watson AIOps proof-of-concept or demo environment quickly, easily, and with less resources required.
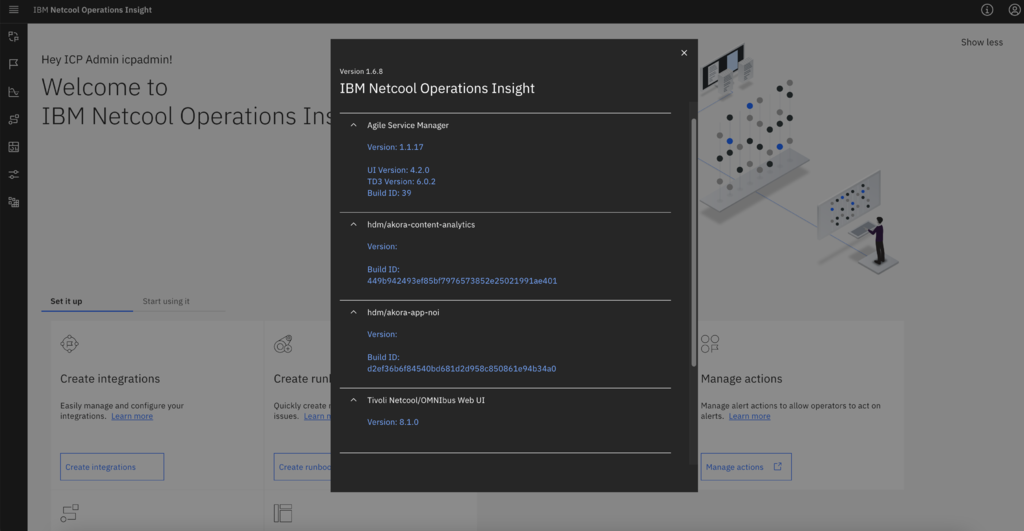
Cloud Pak for Watson AIOps includes AI Manager and Event Manager. This deployment approach has been verified for AI Manager using Cloud Pak for Watson AIOps 3.6 and 3.7, as well as Event Manager using NOI 1.6.5, 1.6.6, 1.6.7 and 1.6.8.