Since the very first release, Runbook Automation includes an integration with BigFix. This allows BigFix customers to leverage their existing automation capabilities. In this Blog Post, I will present an easy-to-follow step-by-step guide. At the beginning you will just have your BigFix Fixlet. At the end, you will have a fully automated Runbook, executing that Fixlet inside a runbook.
Overview: What do I need to do?
Let’s start by giving you a short overview of what needs to be done. Go from “Zero” to your automatable Runbook with BigFix automation with these easy steps:
- Choose the fixlet and make a note of its properties
- Log in to CEM with a Manager Role Account
- Define the connection from CEM to BigFix
- Cloud only: Do the Secure Gateway setup
- Create the BigFix automation inside CEM
- Test (and debug) the Automation
- Create a Runbook with the Automation
- Test drive the Runbook and check the results
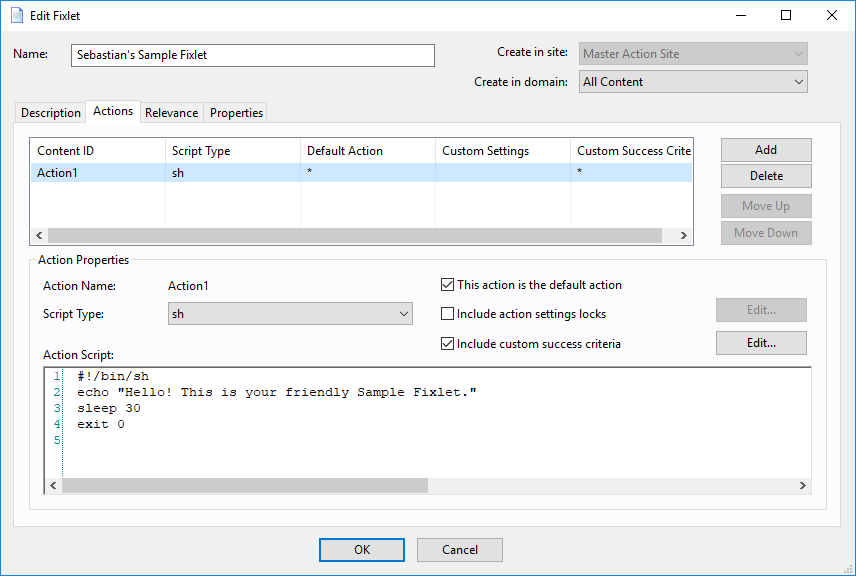
Choose the fixlet and make a note of its properties
We begin our small journey on the BigFix console, with which you are most likely already familiar with. As you already use BigFix, you probably have a trusty fixlet available you want to take out for a test drive.
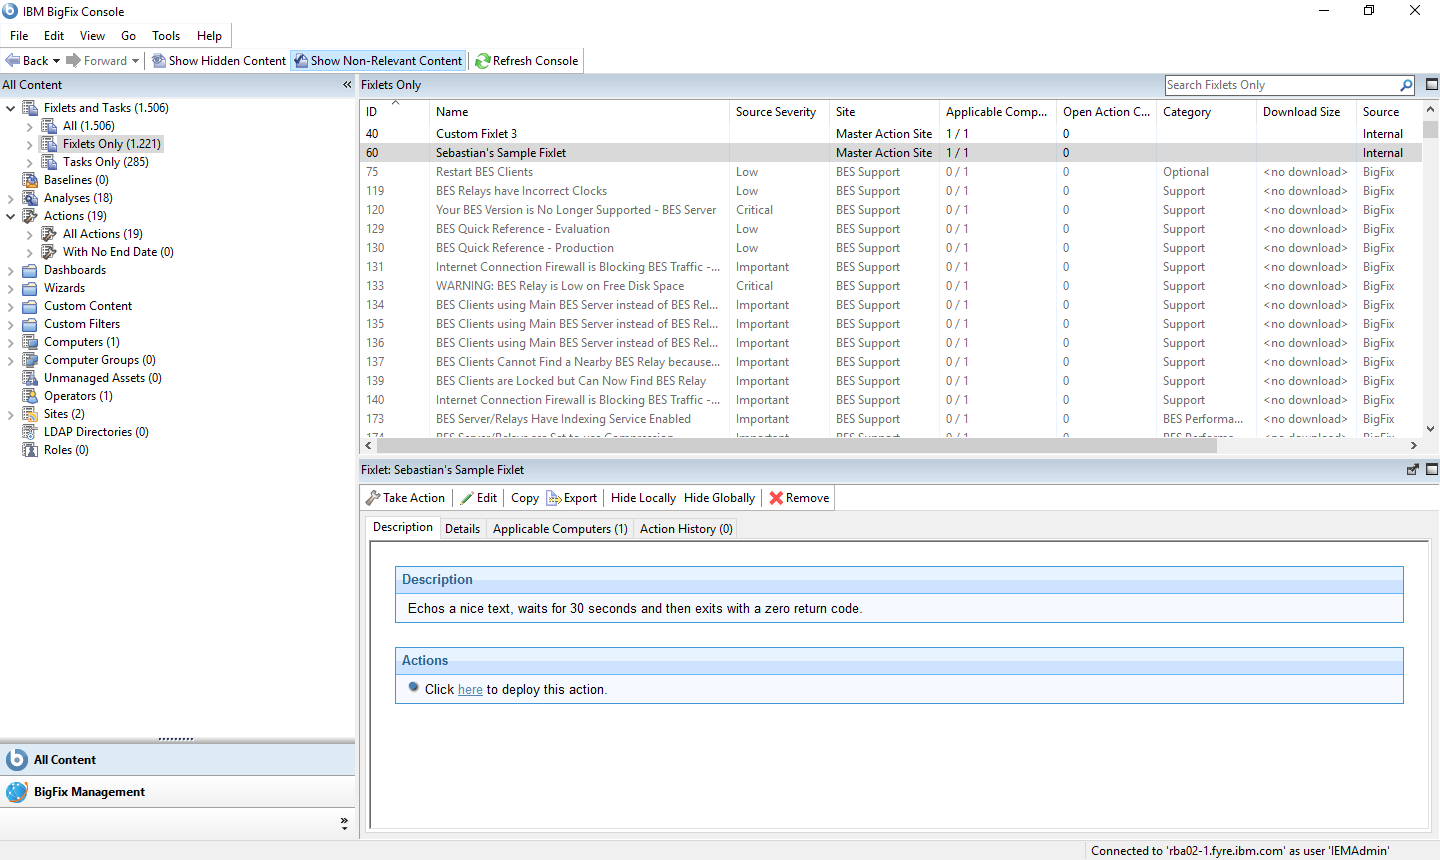
View the details of the fixlet and make a note of the following properties: ID, action, and site name. Afterwards also note the hostname of your BigFix server and the user/password combination of the user you are accessing BigFix with. Additionally make a note of at least one computer name, where you will want to run your fixlet on.
 opening applicable computers, let’s you see the computers the fixlet may run on. Note the name of at least one.
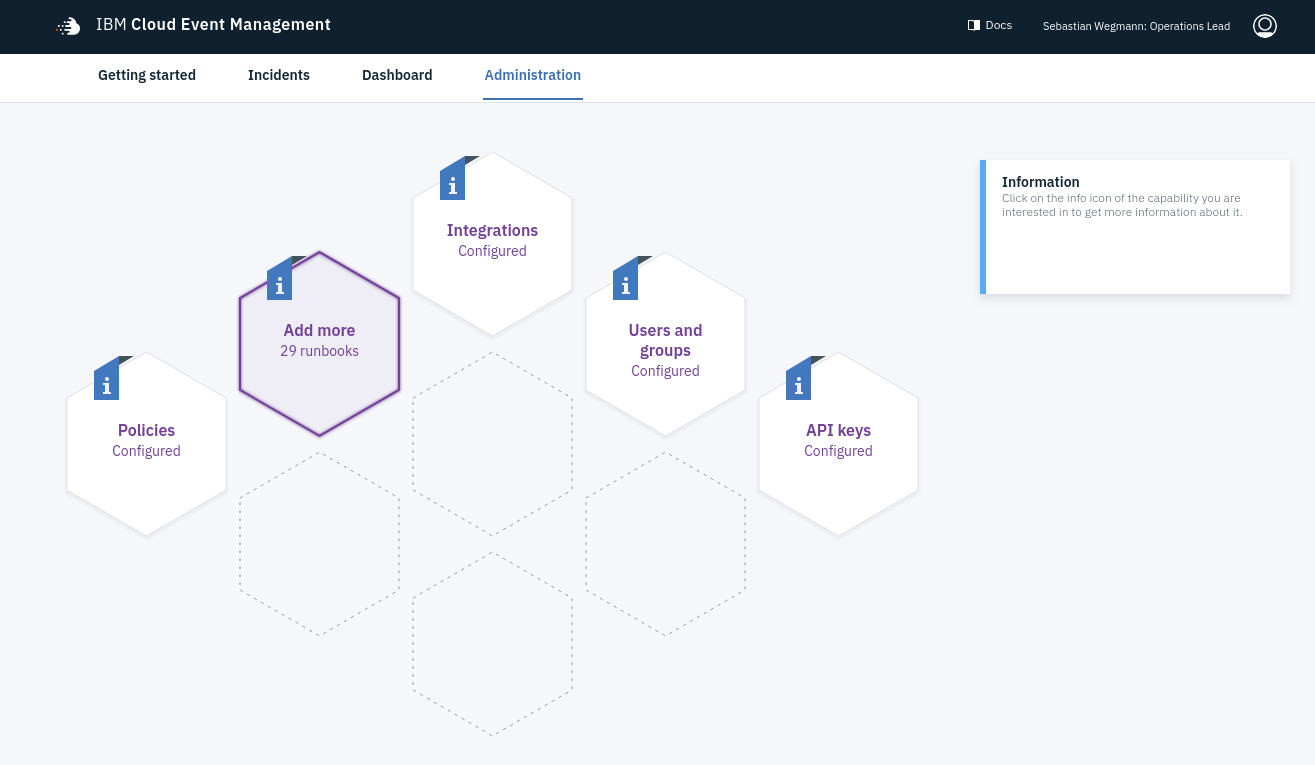
Log in to CEM with a Manager Role Account
The next step is easy: Just use your account to log in to CEM. No matter whether you are a Cloud or ICP user. Just make sure, you have the “Manager Role”, to be able to configure everything. Then navigate towards Runbooks.
Define the connection from CEM to BigFix
 Navigate to BigFix connection
In order for CEM to be able to send and receive data from your BigFix server, you need to define the connection. At this point we need some of the information you wrote down in step #1. Enter the data for the BigFix server location, user name, and password. Optionally you can also specify a certificate to enable secure connections. In the screenshots of this post, I skipped that however. If you are an ICP user, you can directly save the connection and skip the following step. Cloud users need to setup the Secure Gateway connection first and continue with the next step.

Cloud only: Do the Secure Gateway setup
Click on the Link “Download Secure Gateway Client”.
 Navigate to “Clients” and click “Connect Client”
On the page navigate to the Docker installation instructions. You can copy the the docker command displayed there to download and install the Secure Gateway Client on a machine, that can access both: The internet and your BigFix server.
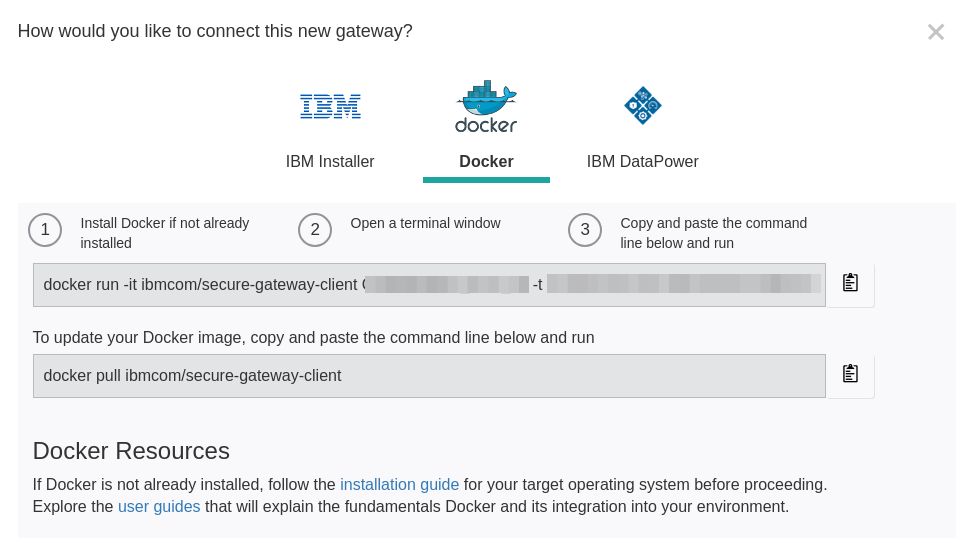
After doing this, exit the docker container with the shortcut CTRL+P followed by CTRL+Q (this ensures, that the container will continue to run, instead of shutting down, when you exit it). The running Secure Gateway Client will establish the capability to send request from the cloud-based CEM to your local BigFix server (and back).
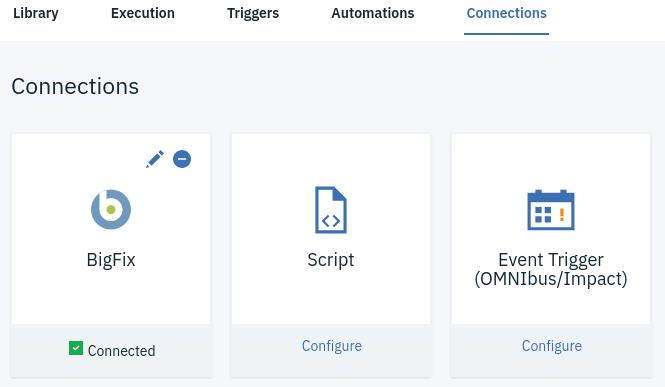
After having done this, go back to the BigFix connection page and save it. On the “Connections” tab of Runbooks you should now see the BigFix connection with a green checkmark and the label “Connected”.
Create the BigFix automation inside CEM
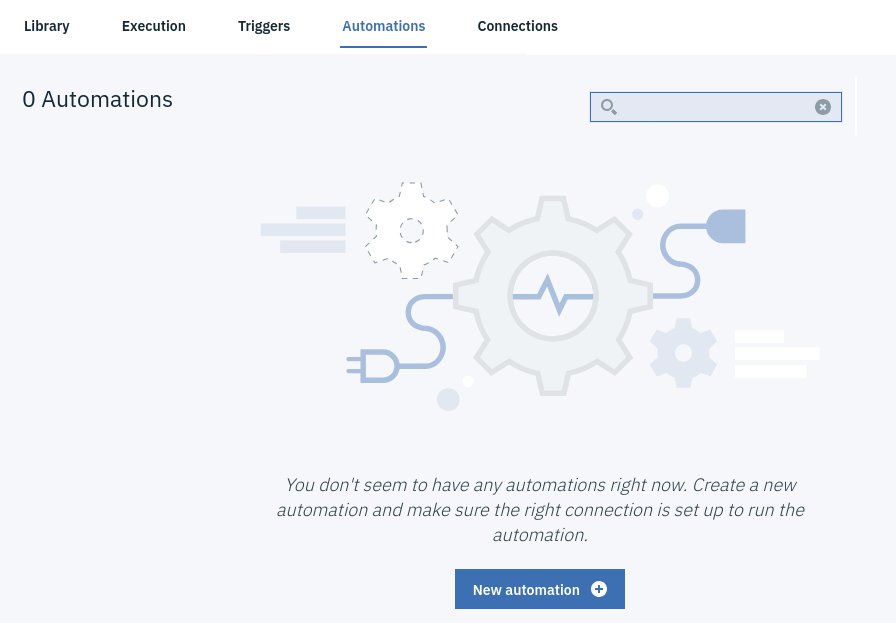
Our next task will be to create the “Automation”. To do this, open the “Automations” tab inside the “Runbooks” part of CEM.
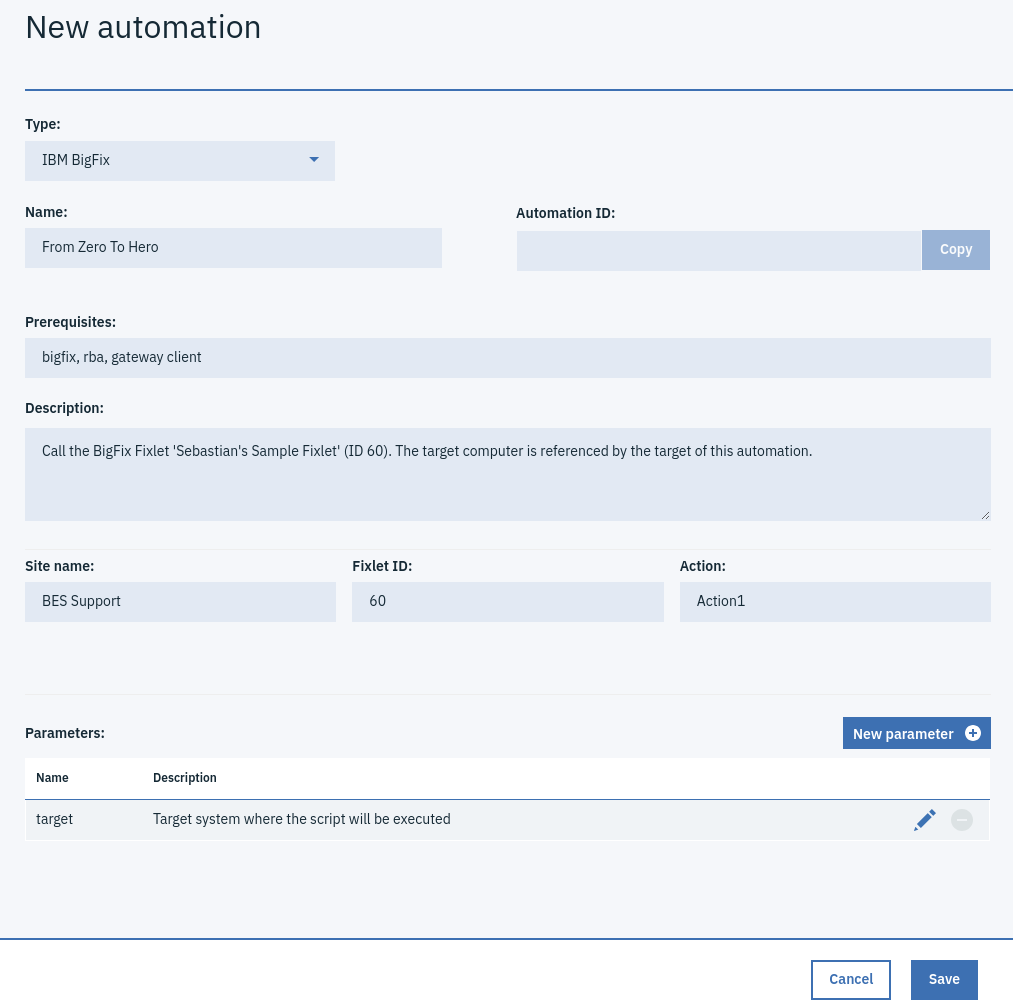
Click on “New Automation” and create a new automation. In the screenshot you can see my automation with the values from my BigFix installation. It is important to have the values from step #1 at hand and enter them correctly, otherwise you won’t be able to find the fixlet. If you did everything right, saving will successfully create the automation. If an error has been made, an error message will appear.
Test (and debug) the Automation
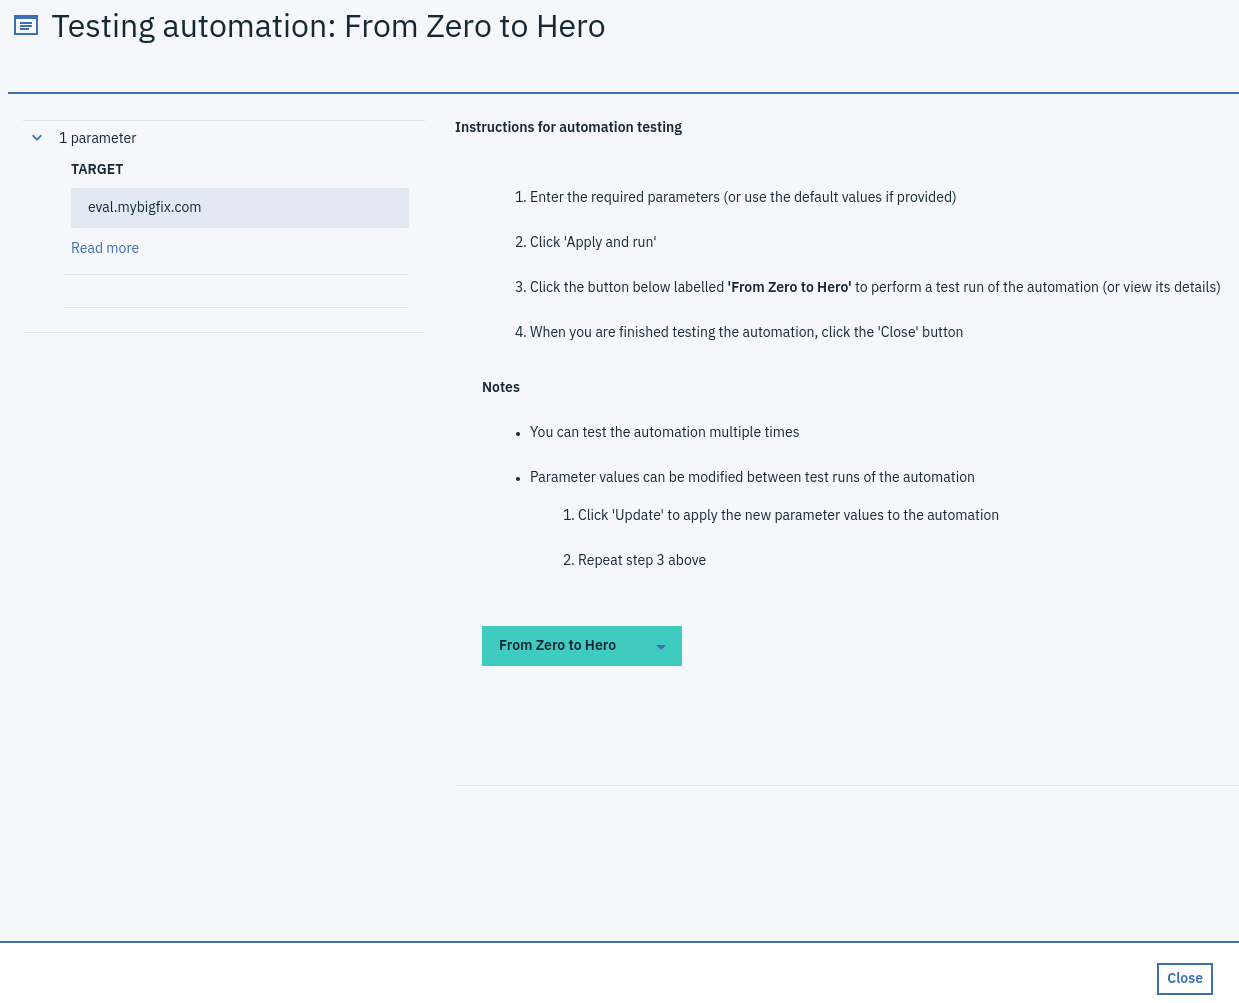
If you are like me, you will want to immediately try out the new automation. See whether it works and be happy when it does. For this, CEM has the “Test Automation” feature. Use this and enter the computer name (hopefully written done during step #1) as the target parameter. All automations need such a target, so the automation knows where to execute the content. If the automation fails, try to correct any mistakes you might have made. You should be able to see an execution request coming into your BigFix console for the fixlet in question. When your automation works, you are ready for the next step.
Create a Runbook with the Automation
A bare automation won’t cut it, though. For a real asset you need a Runbook as well. So we will create just that. Go to the “Library” page and click on “Create New Runbook”. On the runbook editor enter the information you want. You can define a name, a description, and some tags. All those help others to identify and find your Runbook.
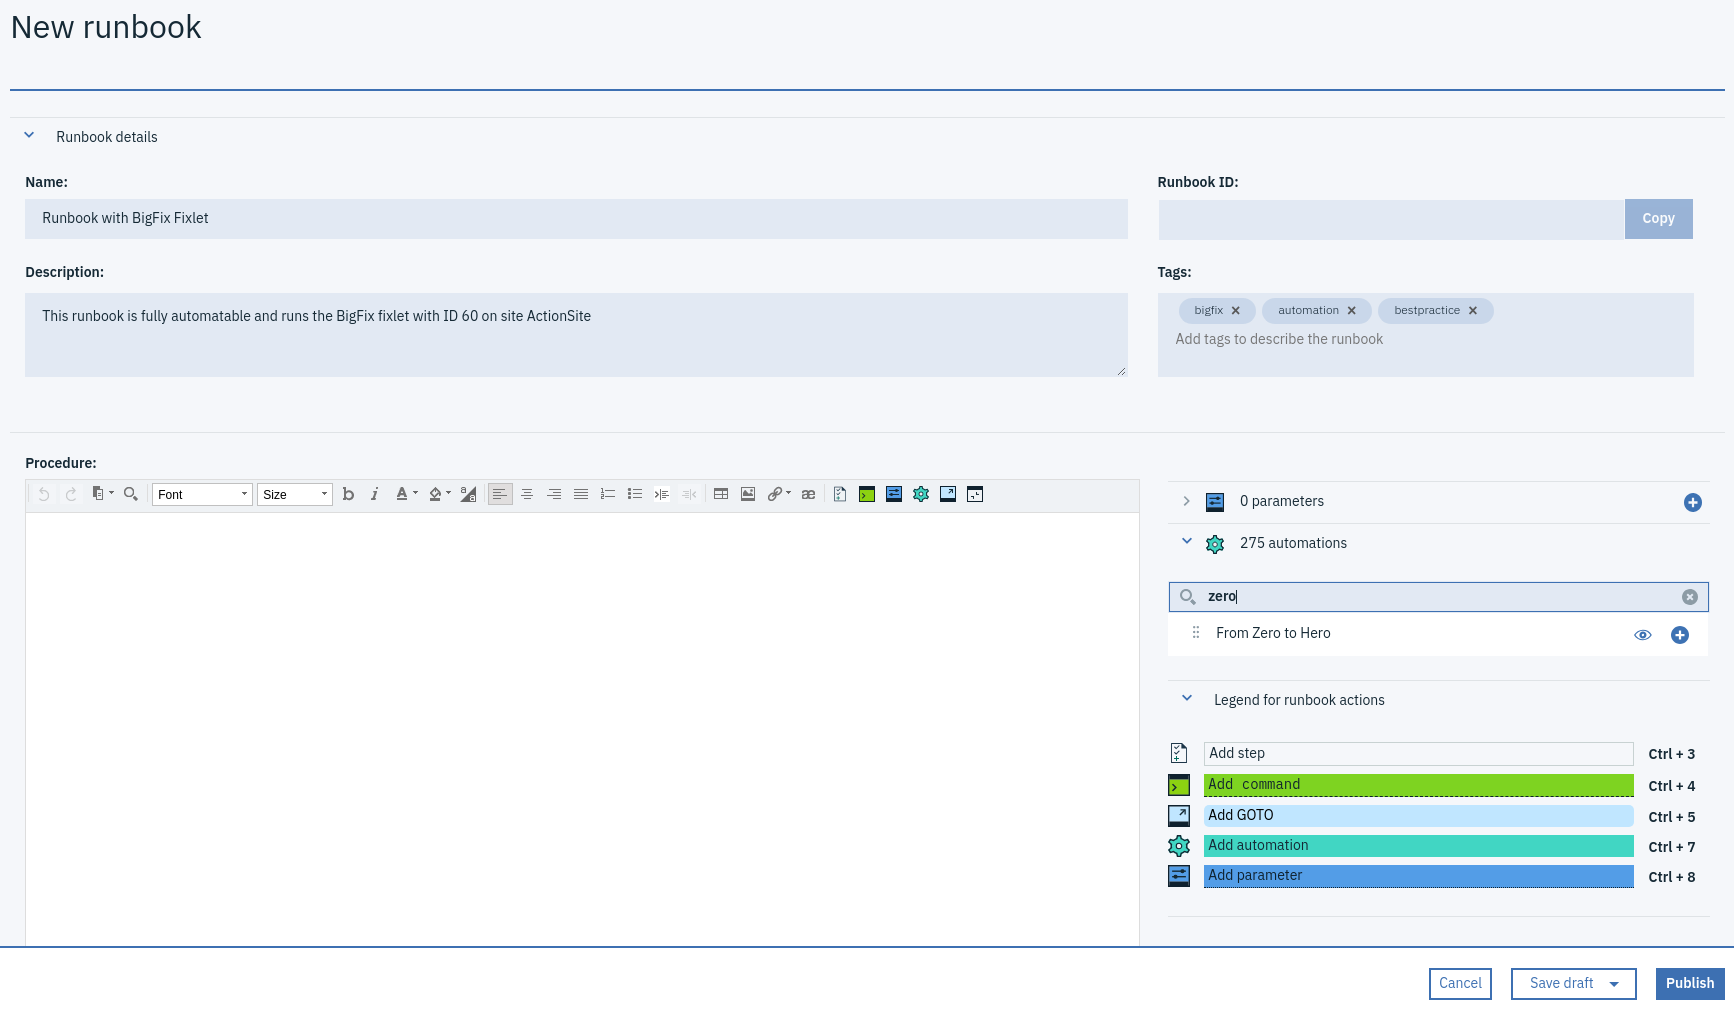
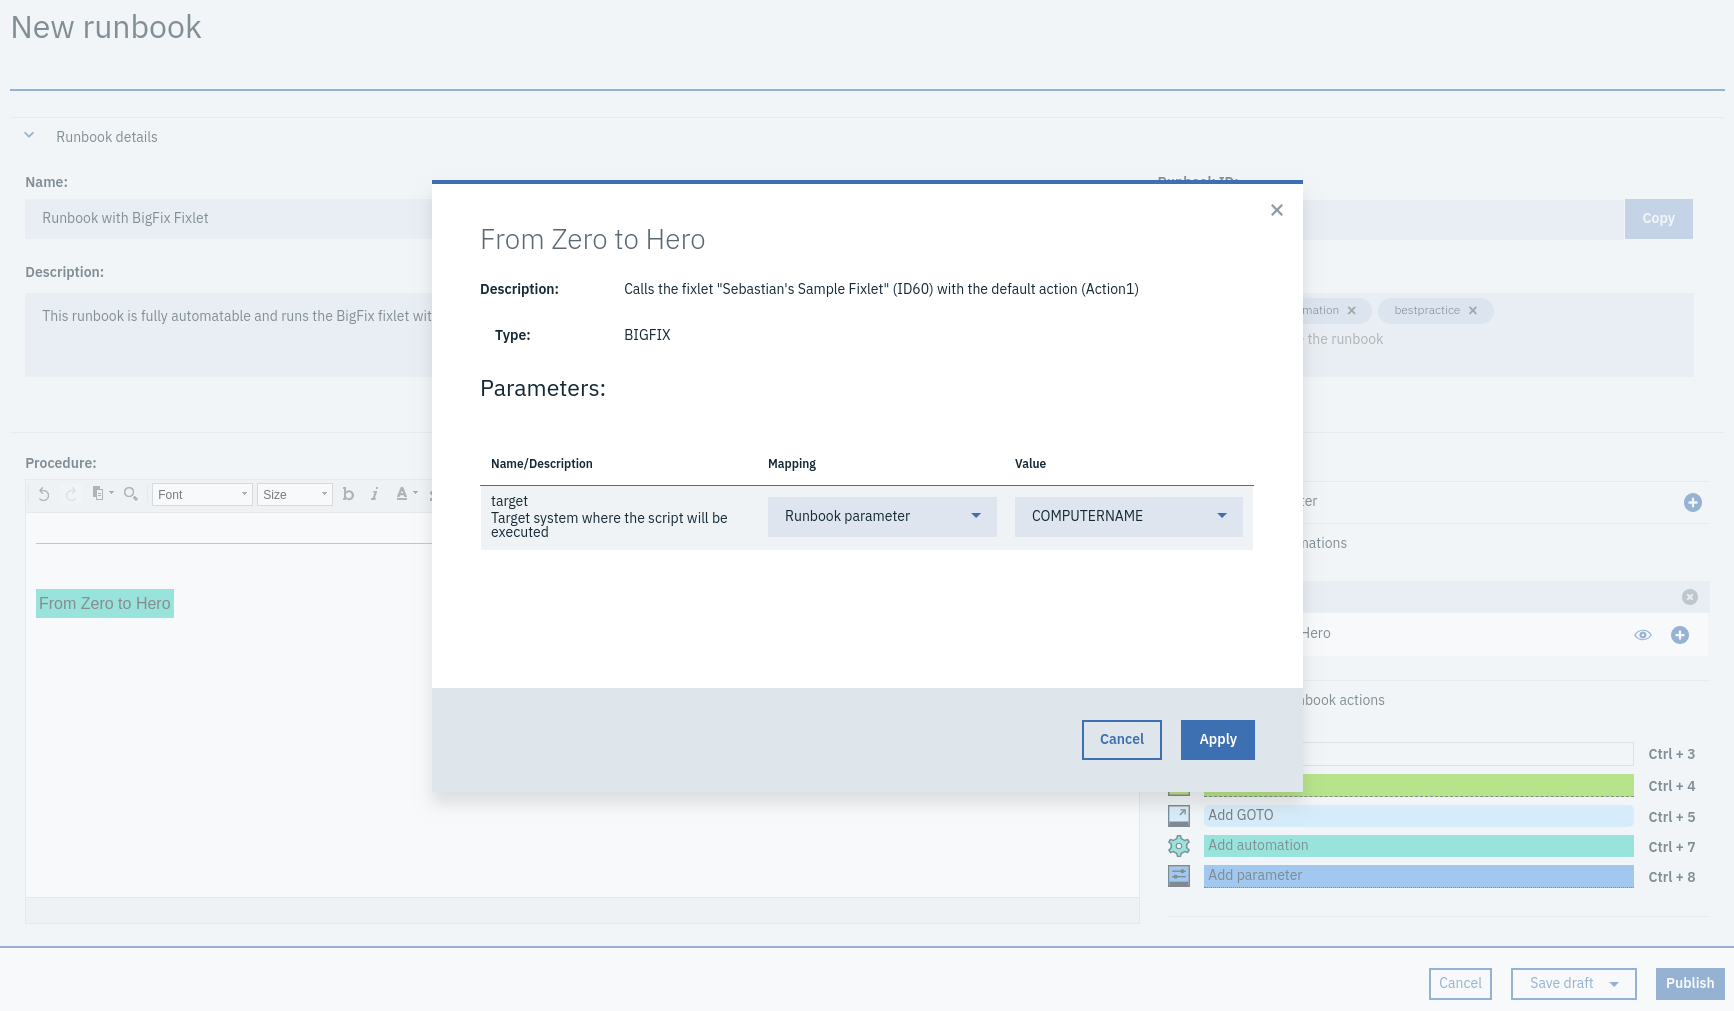
In the large editor field you define the actual content. We want our Runbook to be fully automatable. This means all steps need to contain an automation. For now we will start with exactly one step and pull the automation into it. You can drag & drop it from the right side where the defined automations are present.
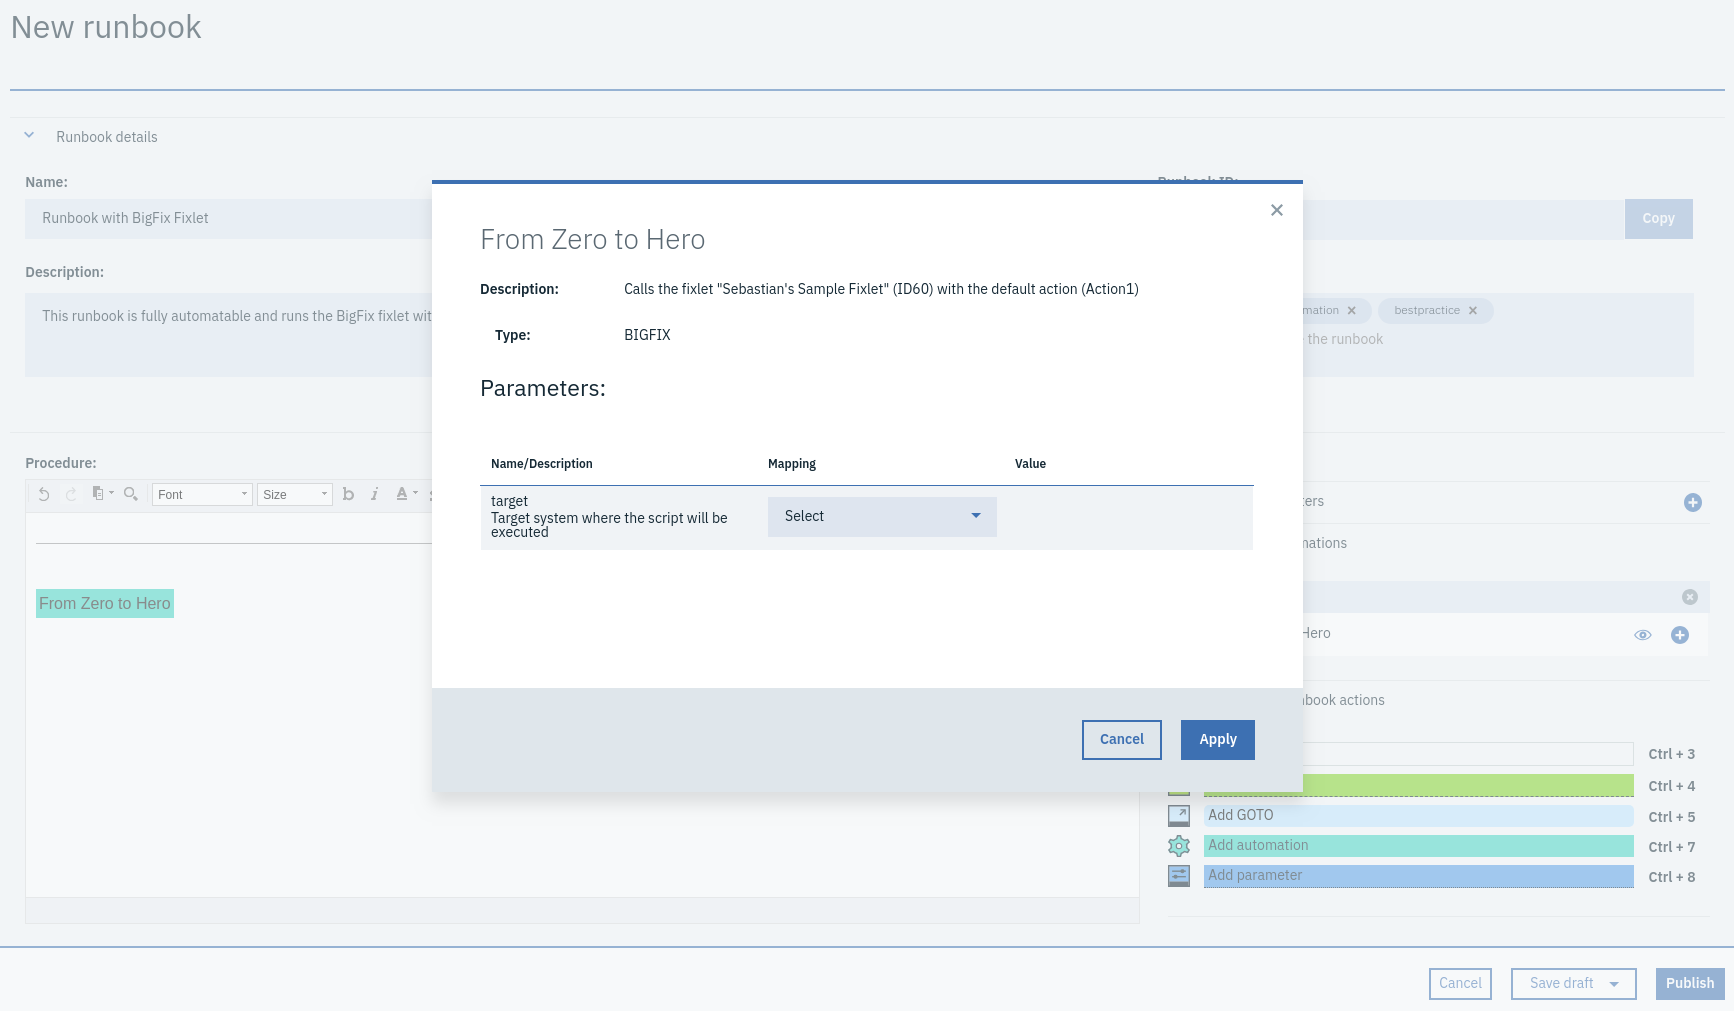
After adding the automation, you need to map the input parameters for the automation. We already established, that we will need a target parameter for the automation, to determine where the automation will run on. So now we map this target parameter by creating a new runbook parameter.
Test drive the Runbook and check the results
To conclude our little step-by-step guide, we’ll run the Runbook. This is also the workflow your Operations team will when using the Runbook to perform a change action or resolve an issue. Go to the “Library” page. If you started with a fresh subscription, your runbook from the previous step will be the only one. If you can’t find your runbook immediately, e.g. because you already created a lot other runbooks before, start typing the name of your runbook on the upper right hand side, until you see your runbook.
Use the “Execute” action indicated by the power train icon to run it. Enter the parameter with the computer name from step #1 and define it as the runbook parameter. Run the automation in step 1 and then finish the runbook.
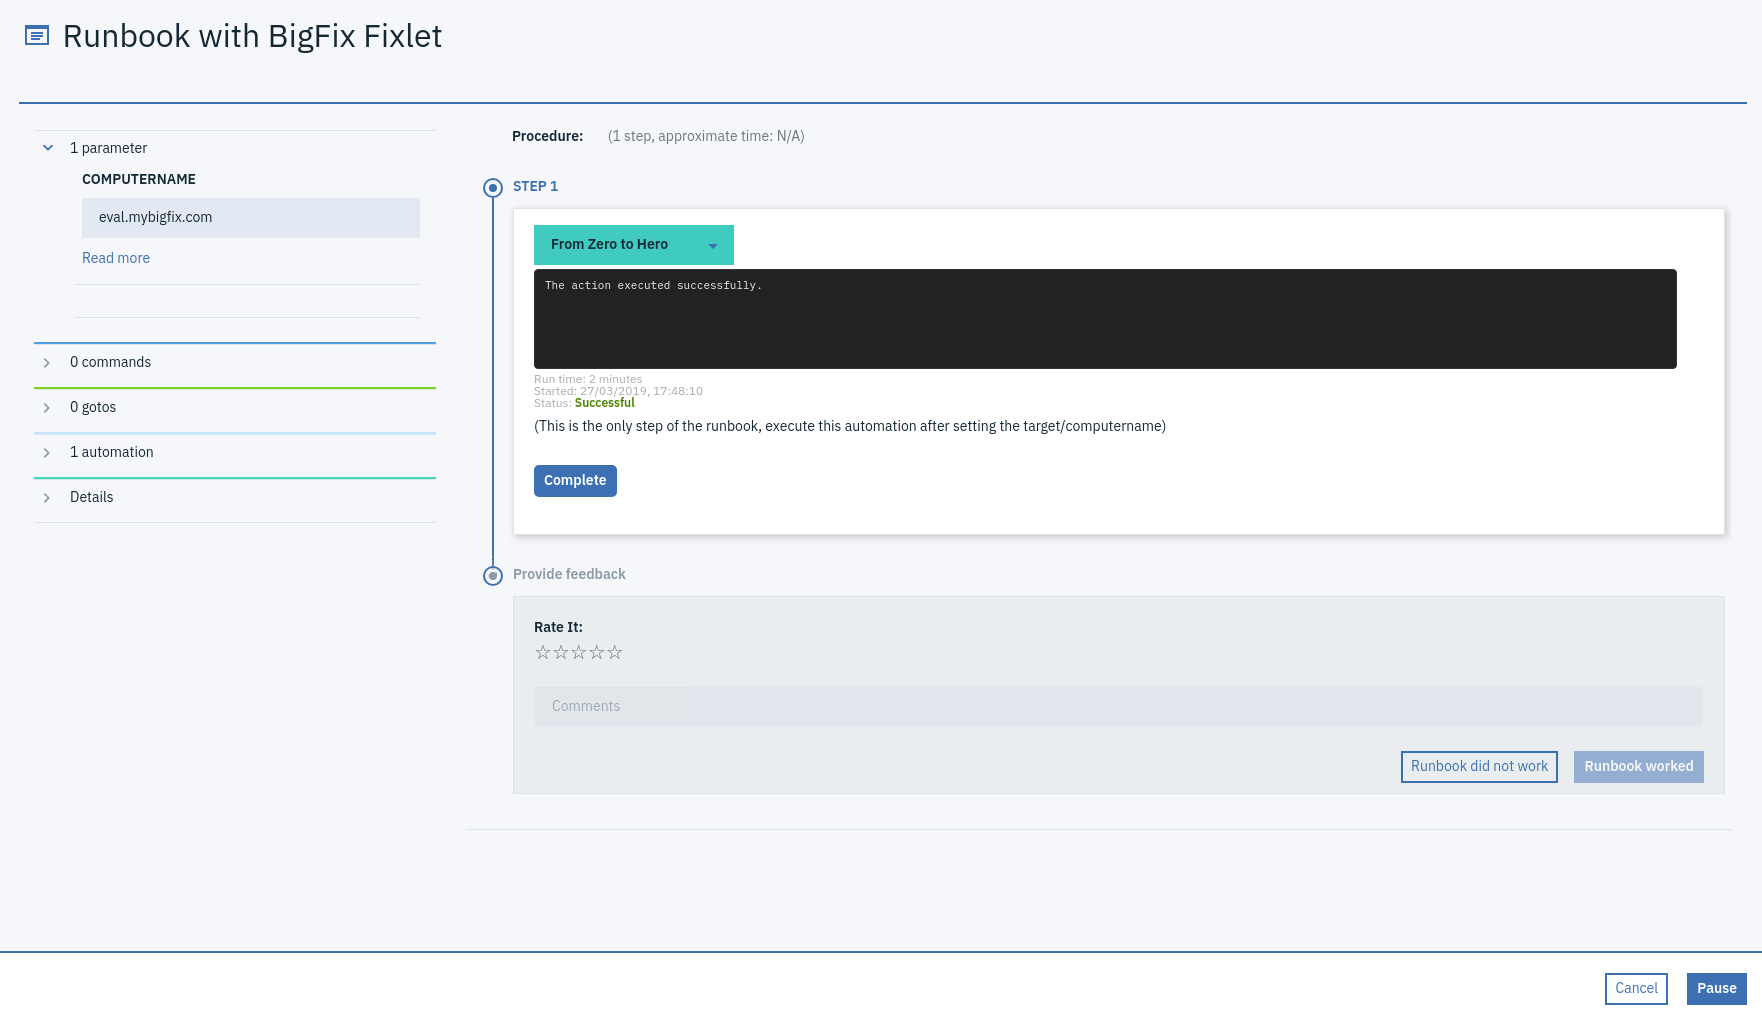
Afterwards you can see the execution record either in the “History” page of the Runbook or on the “Executions” page.
 This is the execution record
Conclusion and additional Information
In this little guide you learned how to leverage your BigFix fixlet inside CEM. There are possible next steps we will explore in the future, like linking the Runbook you created to an Omnibus event and executing it everytime that event occurs or doing the same for an CEM incident. During this guide you also learned how to setup a Secure Gateway connection for your Cloud environment and some basic navigation inside the CEM application.
If you want to know more, here are some links which might be interesting for you:
#how-to#BigFix#Integration#RBA#cem