by Francisco Javier Martinez Gomez
TCR installs an embedded lightweight database (Derby) to house reporting artifacts. The derby database is not supported in production and it is recommended to use an relational database such as DB2. So, it is strongly recommends to migrate from derby database to a relation DB.
1. Create the database with endoding=UTF-8 and protocol TCP/IP
We can use this script template to create the content store. Replace the database_name with the name of the database, for example TCRDB and userID with the user that tcr will use to connect to the content store, for example cognos. The database user account must exist for the product function and you must run the script as a user with sufficient privileges to access and create database:
CREATE DATABASE database_name ALIAS database_name USING CODESET UTF-8 TERRITORY US;
CHANGE DATABASE database_name COMMENT WITH 'IBM Cognos Content Store';
CONNECT TO database_name;
UPDATE DATABASE CONFIGURATION USING APPLHEAPSZ 1024 DEFERRED;
UPDATE DATABASE CONFIGURATION USING LOCKTIMEOUT 240 DEFERRED;
CONNECT RESET;
CONNECT TO database_name;
CREATE BUFFERPOOL database_name_08KBP IMMEDIATE SIZE 1000 PAGESIZE 8K;
CREATE BUFFERPOOL database_name_32KBP IMMEDIATE SIZE 1000 PAGESIZE 32K;
CONNECT RESET;
CONNECT TO database_name;
CREATE SYSTEM TEMPORARY TABLESPACE TSN_SYS_database_name IN DATABASE PARTITION GROUP
IBMTEMPGROUP PAGESIZE 32K BUFFERPOOL database_name_32KBP;
CREATE USER TEMPORARY TABLESPACE TSN_USR_database_name IN DATABASE PARTITION GROUP
IBMDEFAULTGROUP PAGESIZE 8K BUFFERPOOL database_name_08KBP;
CREATE REGULAR TABLESPACE TSN_REG_database_name IN DATABASE PARTITION GROUP
IBMDEFAULTGROUP PAGESIZE 8K BUFFERPOOL database_name_08KBP;
CONNECT RESET;
CONNECT TO database_name;
CREATE SCHEMA db2COGNOS AUTHORIZATION userID;
COMMENT ON SCHEMA db2COGNOS IS 'IBM Cognos Content Store';
GRANT CREATETAB,BINDADD,CONNECT,IMPLICIT_SCHEMA ON DATABASE TO USER userID;
GRANT CREATEIN,DROPIN,ALTERIN ON SCHEMA DB2COGNOS TO USER userID WITH GRANT OPTION;
GRANT USE OF TABLESPACE TSN_USR_database_name TO userID;
GRANT USE OF TABLESPACE TSN_REG_database_name TO userID;
CONNECT RESET;
1.1 create the user “cognos” in the OS
1.2 create a script with the above template named: create_database.bat/sh
1.3 from “command window/DB2” we run the script with Administrator or db2admin or from “command line processor” (DB2) run the above sentences.
2. Set up database connectivity for the content store database:
2.1 if you are using type 2 jdbc connectivity , install the DB2 client on the Content manager if you are using type4 jdbc connectivity for DB2, you are not required to install the DB2 client in the content manager.
Note: the db2 driver can be checked running java com.ibm.db2.jcc.DB2Jcc -version
2.2 on Windows , stop the DB2 services and the HTML Search sever
2.3 copy the files db2jcc.jar, db2jcc_license_cu.jar from DB2_install/sqllib/java directory to Tip_install_dir\profiles\TIPprofile\InstalledApps\TIPCell\IBM cognos8.ear\p2pd.war\WEB-INF\lib and TCR_component\cognos
\webapps/p2pd/WEB-INF/lib directory
2.4 on Windows , restart the DB2 services nd the HTML search server.
2.5 on Unix with type2 jdbc, ensure that the 32bit db2 libraries are ne the library search path, which is usually the $DB2DIR/lib directory or $DB2DIR/lib32.
3. Set the flag in the web user interface to allow inclusion of user configuation in content store export
3.1 http://hostname:16310/ibm/console
3.2 Administration + configuration + dispatcher and services
3.3 click on the dispatcher
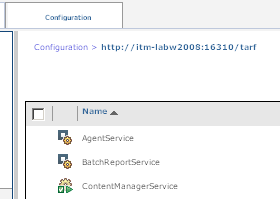
3.4 Next to “contenManagerServices” click “set properties”
3.5 Settings + in value column
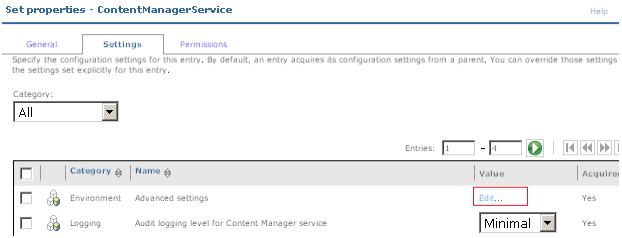
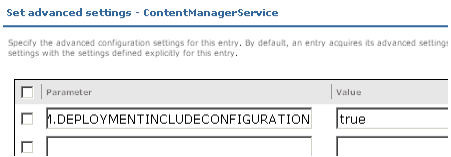
3.6 Click “Edit” and select “override the settings acquired from the parent entry”
3.7 In parameter type in uppercase CM.DEPLOYMENTINCLUDECONFIGURATION in value type true. + OK
4. Export the Entire Content Store:
4.1 cognos administration (http:hostname:16310/ibm/console )
4.2 Configuration + content Administration + click in “new export” button and follow the instructions in the new export wizard.
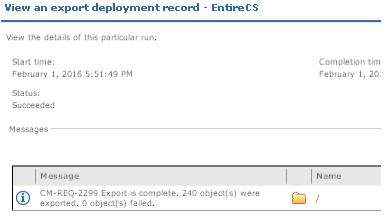
4.3 “Select the entire content store” and select if to include the user account + next
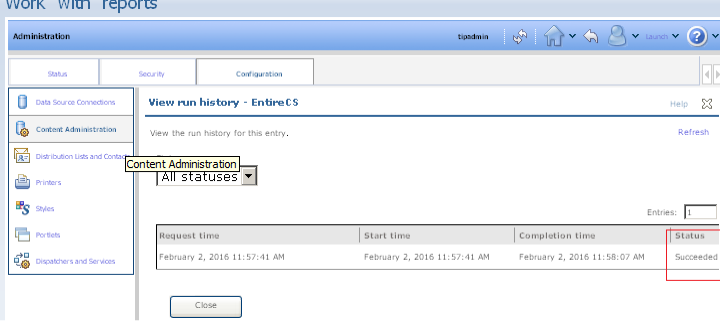
4.4 we can check it has been executed correctly. Now we can move the archive.
LAST STEPS:
5. Stop the TCR server: stopTCRserver.cmd/sh server_name -user user-name -password password
6. Open the “cognos configuration”
windows: all programs + TCR + ibm cognos configuration
unix: TCR_component/cognos/bin/tcr_cogconfig.sh
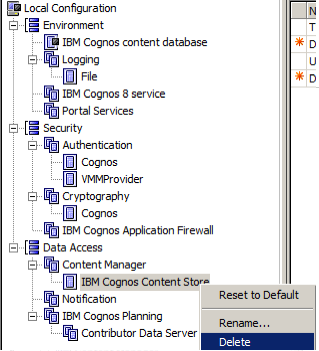
7. Remove the existing CS by right click “IBM cognos content store” and select delete
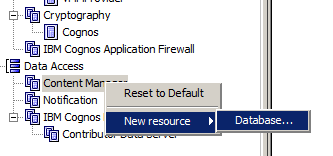
8. Add the new content store.
8.1 under data Access + content manager + database...
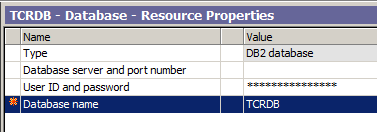
8.2 In database name type the name of our database , for exmpel TCRDB
8.3 Set the right values to new CS database, for example if the connection is type 2:
if the connection is type4:
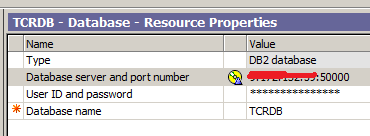
8.4 Save and check the test and eventually exist of the configuration.
9. Start the TCR server to create the tables in the new Content Store.
NOTE: you must log in with the same user that we used to install TCR
TCR_component_dir\bin\startTCRserver.cmd/sh
NOTE: wait around 15 minutes for the new tables to be created. If we got some problem the we should check the TCR_component\cognos\logs\cogserver.log
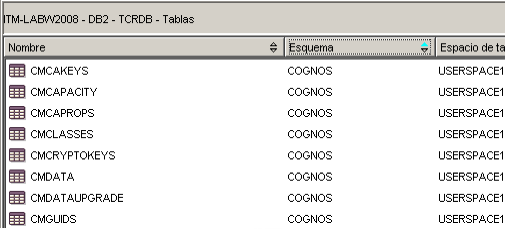
The cogserver.log should report something similar to:
lization_SESS Initialization_REQ Thread-47 CM 6023 1 Audit.cms.CM StartService ContentManagerService Info CM-SYS-5159 Content Manager is running in active mode.
x.x.x.x:16310 16772 2016-02-02 11:19:13.698 +1 Election_SESS Election_REQ Thread-47 CM 6023 1 Audit.cms.CM UPDATE /content Warning CM-REQ-4296 An HTTP request to the connector "{connector}" timed out.
x.x.x.x:16310 16772 2016-02-02 11:19:14.853 +1 BootstrapConfigurePublish na 0 Thread-47 DISP 6017 1 Audit.Other.dispatcher.DISP.com.cognos.pogo.contentmanager.coordinator.CMBootstrap StartService dispatcherBootstrap Info DPR-DPR-1002 Successfully registered the dispatcher http://:16310/tarf in Content Manager.
10. Import the content store:
10.1 Open the (http:hostname:16310/ibm/console ) + Launch + administration
10.2 On configuration + Content Administration
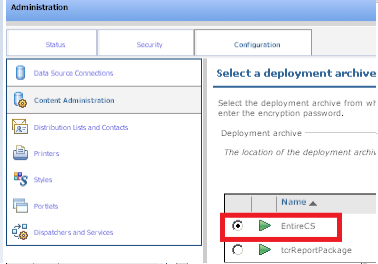
10.3 click on “new import...”
10.4 In “deployment archive” box click the deployment archive that we want to import . In our case the entire content store.
10.5 ok + next + select “include user account information” + next
10.6 “save and run once” + finish + run + ok (it my take some minute to end)
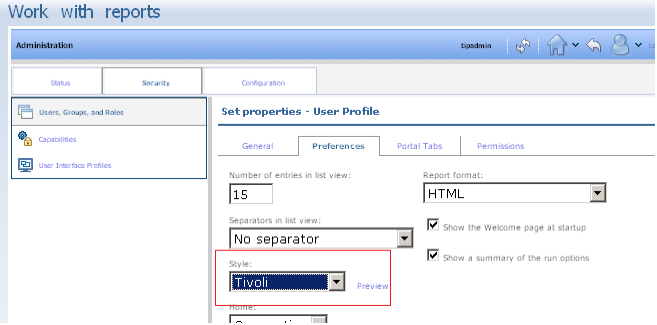
11. Select Tivoli as the default style for the user profile.
11.1 Launch + Administration + security + click “users, groups, and roles”
11.2 Click on “cognos” name
11.3 In the toolbar, click on “edit default user profile”
11.4 Preferences tab and select “tivoli” as the style.
11.5. OK
12. Eventually Restart the TCR. StopTCRserver.sh/cmd and startTCRserver.cmd/sh
#HowTo#TCR#ITM