This article was originaly published in 2016.03.21
You must have heard of the Docker project by now. From Wikipedia, "Docker uses the resource isolation features of the Linux kernel ... to allow independent containers to run within a single Linux instance, avoiding the overhead of starting and maintaining virtual machines." Ultimately, Docker has made OS-level virtualization practical and mainstream with their imaging system, APIs, image registries, and a thriving ecosystem. Microservices are increasingly popular and these demand different delivery tools. Docker is a response to that need and as a result more teams are able to undergo the transformation to cloud. Datadog recently published this study about Docker adoption that contains some interesting results.

Traditional VM hypervisors compared to Linux Containers
From one perspective, containers and microservices are much simpler than monolithic or distributed architectures. Lightweight components, dedicated to specific processes, immutable and autonomous, and all loosely coupled with each other. In reality however microservices are a complexity tradeoff. Widespread use of microservices and container platforms means more metadata to manage and variables to control such as persistent storage, port mapping, container names, networking, and more. Consider managing these items across each environment for every application. Configuration data is heavily externalized in cloud-native applications. The challenges for an organization become governance and visibility as opposed to integration and maintenance. Furthermore, most organizations do not have the luxury of going all-in on containers simply because they have so much invested elsewhere. Revisiting the drawing board is costly when you have an age-old, monolithic application on your hands, so refactoring is done gradually to enable existing applications for the cloud in the most non-intrusive way possible.

A single microservice is simple, but the architectural approach as a whole leads to complexities such as management, visibility, and coordination.
Microservices are the future and enterprise IT shops should recognize the journey ahead of them. Also, enterprise adopters of Docker should be aware that while containers are powerful, they also redirect complexity from the overall architecture of a system to the configuration and data surrounding the system. Management of all those containerized microservices is where organizations will start to feel pain, and that pain is compounded when they have to integrate with traditional architectures and delivery pipelines. One of the core principles of the Twelve-Factor App is strict separation of configuration from code. If you adhere to this principle then the need for container orchestration is that much greater.
Container Orchestration Tools
In general, there are two schools of container orchestration tools: runtime orchestration, i.e. tools that deal with the operational aspects of container execution, and deployment orchestration of containers (typically automated in a promotion model). Runtime orchestration tools for containers include the likes of Kubernetes and Apache Mesos, which offer canary deployments, scaling in both directions, and rolling updates (no downtime). The foremost deployment orchestration tool for multi-container applications is Docker Compose. Some issues however are that it does not integrate with traditional IT architectures, nor does it aid in the management of metadata or understand promotion paths. What if any of your application components are not running in a container? What about organizations looking to evolve over time? This is the majority of enterprise development organizations today and surely they need container orchestration tools too. In fact, they need tools that not only support microservices AND legacy architectures, but also a strategy for transitioning at an appropriate pace. UrbanCode Deploy is the ultimate DevOps framework. The tool has potential to consolidate disparate automation from across the enterprise and centrally govern all of it. UrbanCode Deploy complements the value of Docker Datacenter with centralized deployments, separation of duties, visibility into environment inventory, and rapid rollback. UrbanCode Deploy also manages properties and environment variables across target runtimes, which alleviates the headache of governing varied configurations for each microservice in a promotion model. In March 2015, the first set of Docker plugins for UrbanCode Deploy were released. With the Docker automation plugin for Deploy, a Docker container is just like any other application component. This is the simplest and most natural way to model containers in UrbanCode Deploy. The Docker automation plugin is also the approach for systems that are a mix of containers and traditional IT. Recently, our team of geniuses at IBM also released a Docker Compose plugin. With the Docker Compose plugin, a component in UrbanCode Deploy maps singularly to a Docker Compose file which represents your application. This means better support for applications which are solely comprised of microservices, and less repetitive work. Lest we forget, there is a myriad of other plugins for UrbanCode Deploy that basically allow organizations to build automation in the same way for every platform. If any components of your application are Docker containers, it is transparent to Deploy inside of an application process. As I said, UrbanCode Deploy is the ultimate DevOps framework. My plan is to write a series of blog posts about "microservices management" which articulate the value of using Docker Datacenter with IBM UrbanCode Deploy. IBM itself is doing a lot with Docker now so I am likely to have plenty of interesting things to write about. In this initial commentary, I will focus on the basics. Specifically, the Docker source and Docker automation plugins for IBM UrbanCode Deploy. Install these now.
A Simple Tutorial with WordPress
We start by modeling our application in UrbanCode Deploy. There is an official Docker image for WordPress on Docker Hub. We will use that as well as MySQL which is also running in a container (there is an official image for that too). First, create the components library/wordpress and library/mysql using the Docker Template component template that is installed with the Docker automation plugin. This is a standard naming convention for components that represent Docker containers in UrbanCode Deploy, i.e. namespace/repository. Set the Source Configuration Type to Docker Importer. Here is a screenshot of my component configuration for library/mysql
: 
Import versions of these two components. Unlike most component versions in UrbanCode Deploy, versions for Docker images are not copied to CodeStation (the checkbox will be ignored). The Docker source plugin will poll the registry and import all version tags using statuses. Click Import New Versions on the Versions subtab for both components, and view the output of the import process. It should look something like this:

Several versions should be listed on the Versions subtab now for each component. Each version corresponds to a version tag in the Docker image repository: 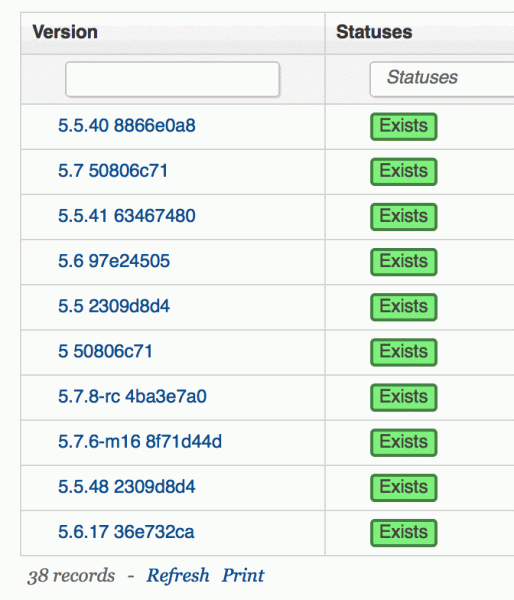
Great! We have defined the components and created some versions. Now let's create the application in UrbanCode Deploy, as well as its environments and environment resources. Create a new application called WordPress with our two components and several environments as follows: 
My resource hierarchy for the LOCAL environment looks like this:

Create a similar hierarchy for the other environments. We can use a single Docker daemon for all environments, or we can have the daemons distributed across multiple agents. Once the resources have been created for a particular environment, add those as base resources for the associated application environment: 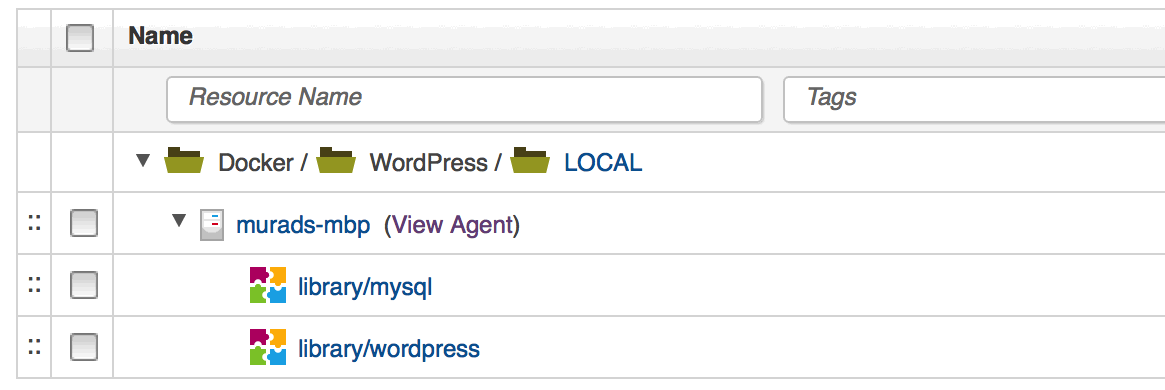
If I click on the LOCAL resource group above, I am brought to the resource group itself. If I then switch to the Configuration subtab, I can set properties specific to resources in the LOCAL environment. For example:
 The docker.opts property is referenced by the component template processes. Since I am using Docker Machine with the boot2docker VM on my Mac, I have to send several options to the Docker client in order to reach the daemon properly (docker-machine config <machine-name> will output these). The other properties are referenced in the component configuration as you may recall. Note that deployment processes may fail if these properties are not defined. The two components in this application must also be linked using container links. Since I generally prefer not to modify out-of-the-box template processes, I recommend copying the Deploy process under the library/wordpress component and pasting it right back as a copy, then you can rename that copy to Deploy w/Link to MySQL or something similar. Modify the design of this copied process by editing the properties of the Run Docker Container step and adding a link directive to the Run Options field, as follows:
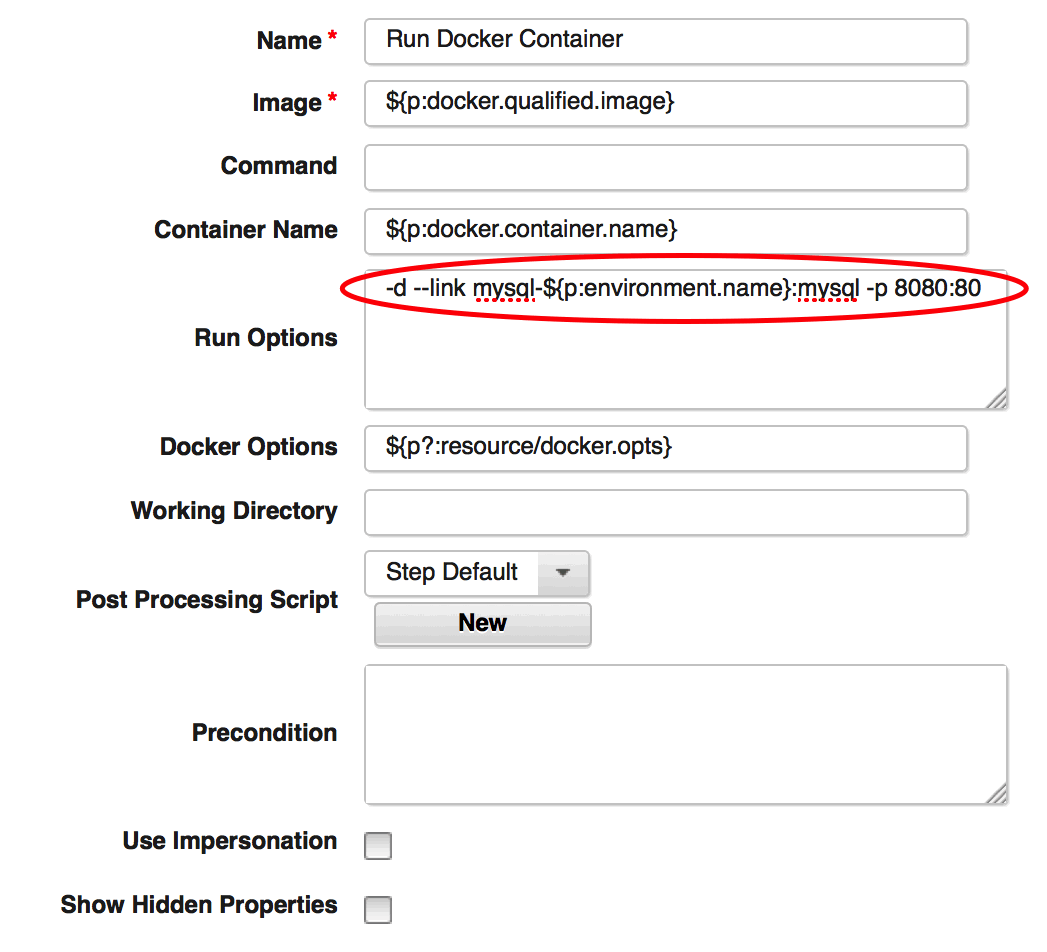
Now, take a look at the descriptions for both Docker image repositories on Docker Hub. Notice the environment variables that are used by these images. I can create Environment Property Definitions to correspond to these, flag them as required if they are, and even set default values. For example, in the library/mysql component, I created the following Environment Property Definition within the component configuration:

This property has to be fed to the docker run command for the library/mysql component. Similar to how we copied and edited the Deploy process for library/wordpress, make a copy of the Deploy process under library/mysql, rename it, then edit the Run Options field for the Run Docker Container step to include this environment variable as an option:

We are almost there. The final piece is to build and test the application process. If I were to launch these containers manually, the commands would be:
docker run --name wordpress-db -e MYSQL_ROOT_PASSWORD=password -d mysql
docker run --name wordpress-app --link wordpress-db:mysql -p 8080:80 -d wordpress
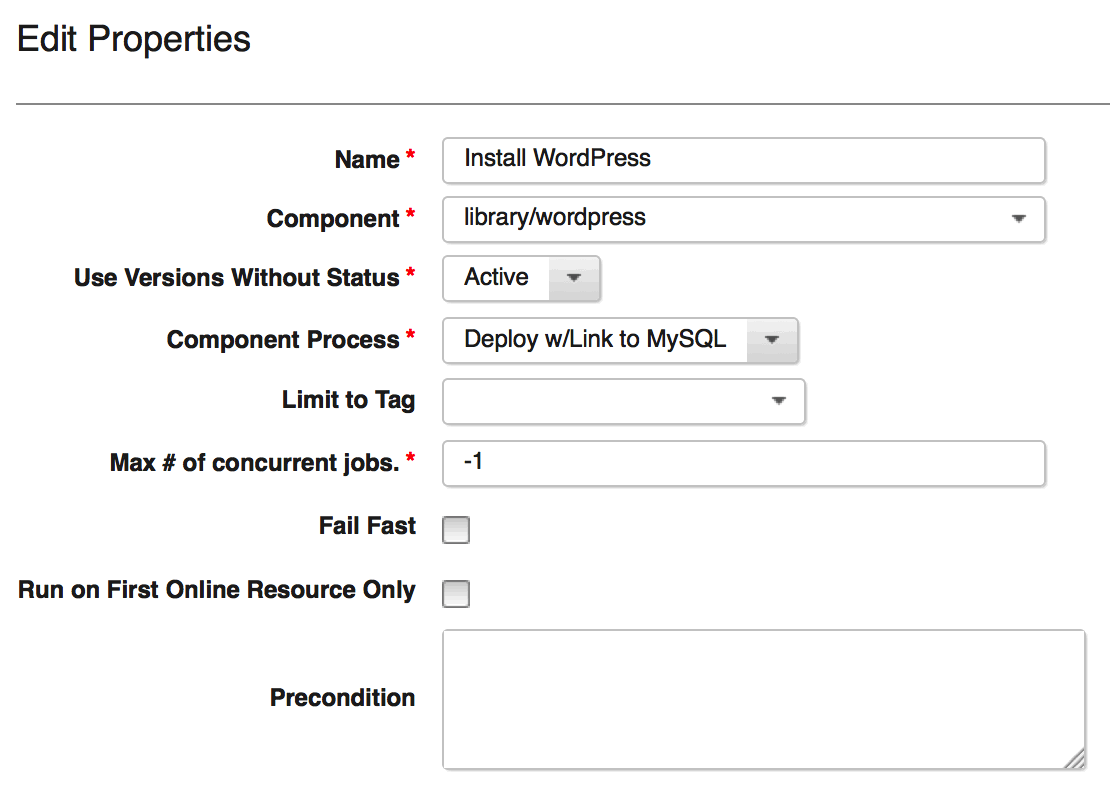
After running these commands, I should be able to hit WordPress at http://localhost:8080 (where localhost is the machine hosting the Docker engine). We will use these commands as the basis for building our application process. Create a new application process called Deploy WordPress and navigate to the process designer. Drag the Install Component step over from the palette and release, change the component to library/mysql, the component process to Deploy w/Password (or whatever name you chose), and the name of the step to Install MySQL before clicking OK. Repeat this for library/wordpress as pictured:
Finally, connect the steps from Start to Finish and save the process. This is a relatively simple application process that should look like this:
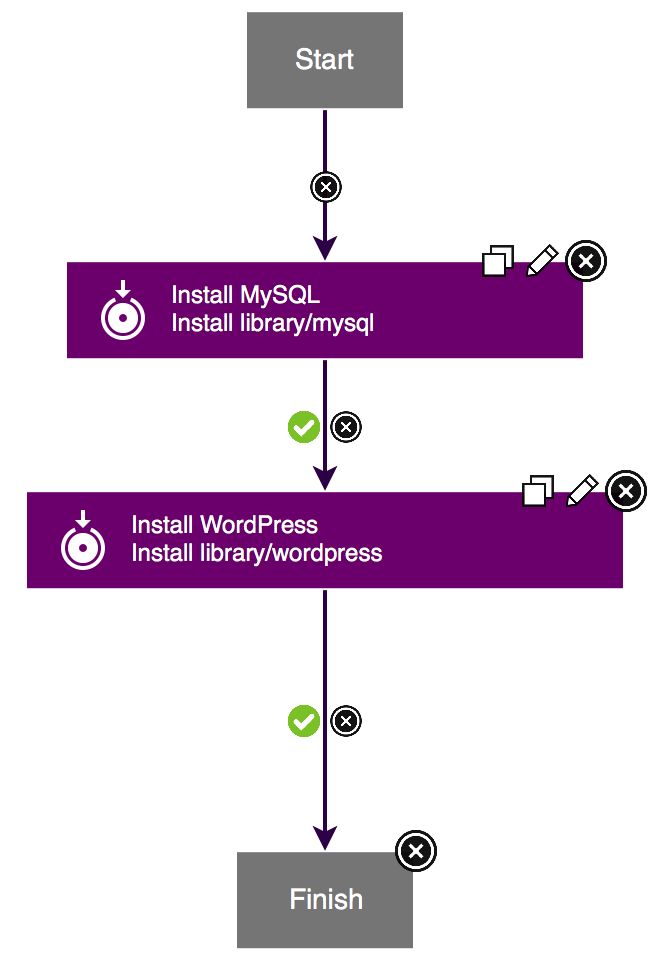
And that's it! Now, request the Deploy WordPress process against one of your environments. An additional caveat I noticed is the "fpm" versions of library/wordpress work a bit differently, so avoid those for now. Otherwise, if all goes well, you should have a running WordPress instance to toy with now: 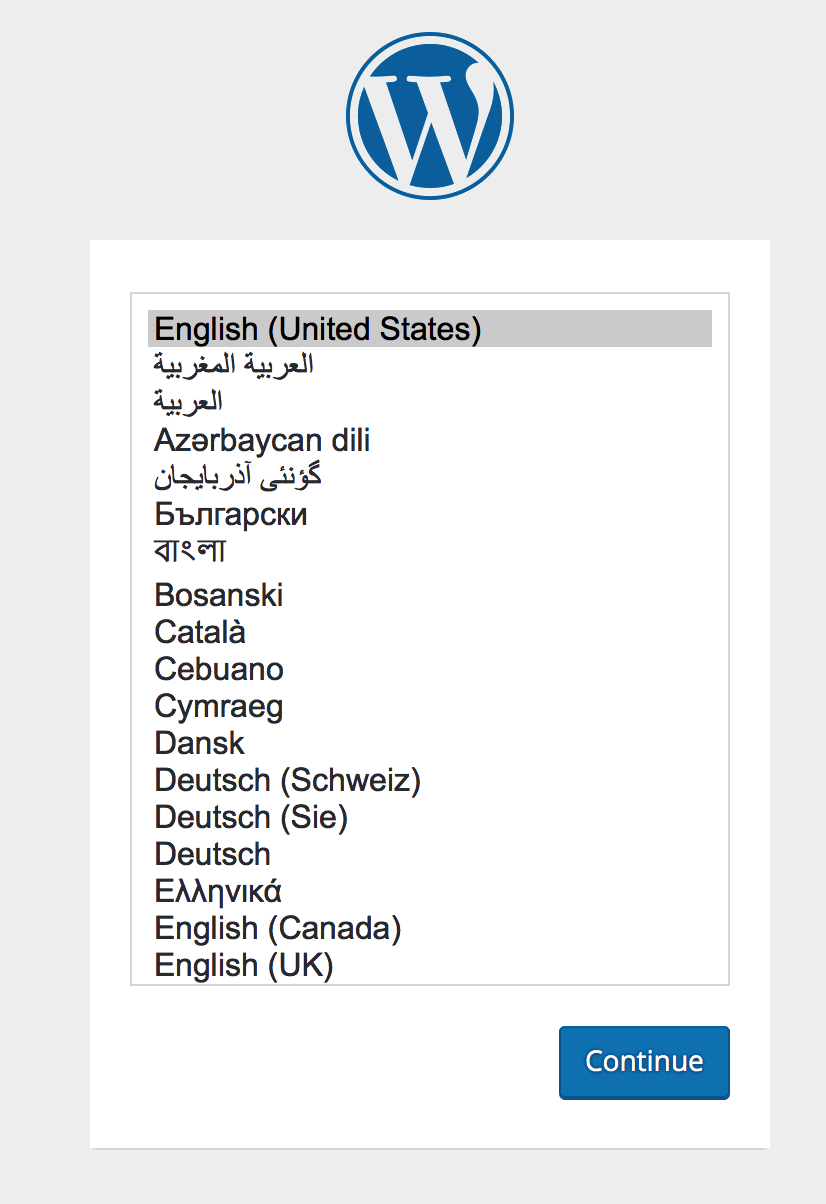
#docker#DevOps#UrbanCodeDeploy