Authored by @Siddalinga Swamy Mathad and @RAMKUMAR RAMALINGAM
Co-Authored by @Chethan P and @Nidhi S
The IBM Connector Development Kit (CDK) is a user interface-based development tool enabling connector creation directly within your browser, without the need for coding. CDK offers an intuitive and guided user experience for building and testing your connectors. Further insights into IBM CDK can be found in Part 1 of this series. In Part 2, you discovered the process of crafting a custom connector from the ground up using IBM CDK. Part 3 focused on constructing a custom connector by importing an OpenAPI document into IBM CDK.
In this article, you will learn how to construct an event connector within IBM CDK. Currently, CDK exclusively facilitates the creation of event connectors utilizing polling mechanisms.
In the context of an application, an event refers to any change or action that takes place within it. App Connect allow you to set up polling events, which periodically check for new or updated items and can trigger a workflow as a result. For example, let's say you want to automate a process every time a new order is created in Salesforce. To do this, you can use the polling event node as the starting point for an event-driven flow in App Connect.
Prerequisites
-
Identify the SaaS application for which you want to build a custom connector. Ensure that the application provides either an OpenAPI document that can be downloaded or well-defined documentation of its APIs, including request/response structures and security protocols.
-
The SaaS application's APIs should include request/response functionality with date and time properties, allowing queries based on item creation or update timestamps.
-
Make sure you have acquired an account for the application with authorization access to invoke the application APIs.
-
If you haven't already, create an IBM ID. An IBM ID is necessary to develop a custom connector and to download existing community connectors from IBM Automation Explorer.
-
After logging in with your IBM ID, review and accept the user terms to authorize IBM's use of your connector and logging within IBM App Connect.
Developing Event connectors in CDK
In CDK, the Polling Events framework relies on the RetrieveWithWhere operation to query the application and retrieve new or updated events. Therefore, a crucial prerequisite for creating polling events is to have the RetrieveWithWhere operation already defined and in place. This operation serves as the foundation for polling events, enabling CDK to fetch the necessary data and generate the desired events.
Creating actions to support date and time properties for queries
Note: The steps below assume you are already know how to build a connector in the CDK, if you are not familiar on how to develop a connector using CDK, refer our series - Part1, Part2 and Part3
Step 1: Create an action with the 'RetrieveWithWhere' action type.
To build an event that triggers a flow when an Order created or updated in the application, you need to first create a RetrieveWithWhere action using “GET /list_orders” API.

Step 2: Ensure response contains date-time properties that captures created or updated time information. The App Connect polling events framework relies on these timestamp values to identify events. These properties shall be of ‘datetime’ data type.

Step 3: Make sure the above created or updated timestamp properties are part of request query parameters as well. That means we can send these parameters as queries to the application API. And these parameters must support ‘Greater Than’ filter operator. Read the documentation for more information.

Event Creation Tab layout

-
The second tab, located next to the action tab, is the Events tab where users can configure events.
-
By default, CDK adds all groups having RetrieveWithWhere actions as events groups.
-
Under the groups section in the left panel, supported events are displayed. Initially, all events are shown by default.
-
If you like to remove certain configured events from the connector, you can click ‘Enable or disable events’ link and unselect the events you want to disable.
-
Checkboxes are present next to each group in the right panel, allowing users to select or deselect groups for events. Based on the selection, the left panel updates accordingly.
-
Similarly, checkboxes are provided next to each event under a group in the right panel. Users can select or deselect individual events under a group. Again, the left panel updates based on the selection.
-
The Created Timestamp Property dropdown lists all date parameters. Users need to select one that represents the created date timestamp. If you don't find the required property, then go back to corresponding RetrieveWithWhere action to add the parameter.
-
In the Created Query Template textbox, users should add the query template. Each application may have a different style for sending queries in the API. For example, if the application uses the format "/order?$filter={createdTime gt 10/05/2024 10:30 PM", then the template should be added as "/order?$filter={createdTime gt ${value}}".
-
If the API expects a time zone offset, users can select the Application timezone value from the dropdown.
Similarly, users can configure "Updated" and "New or Updated" events.
New Event Creation - Event details
-
If Created timestamp property is queryable - The Created timestamp property filter lists all date parameters present in both the Request and Response tabs, as well as any date parameters exclusive to the Response tab. Once you've selected the created timestamp properties present in both the Request and Response tabs, you'll be prompted to include the Created query template, specifying the value to be added as indicated. For example, if the application uses the format "/order?createdFrom=10/05/2024 10:30 PM", then the template should be added as "/order?createdFrom=${value}".

-
If Created timestamp property is not queryable - When the Created timestamp property is present in the Response only, the tool will prompt you to select the Updated timestamp property, which includes timestamp properties found in both the Request and Response. This enables you to query and determine whether items are new or modified. Following a similar approach as before, the tool will then guide you to input the Updated query template using the same format as previously mentioned.
Updated Event Creation
-
In this step, you must select both the Created timestamp property and the Updated timestamp property. Once you've chosen both properties, you'll need to add the Updated query template field, using the same format as before.

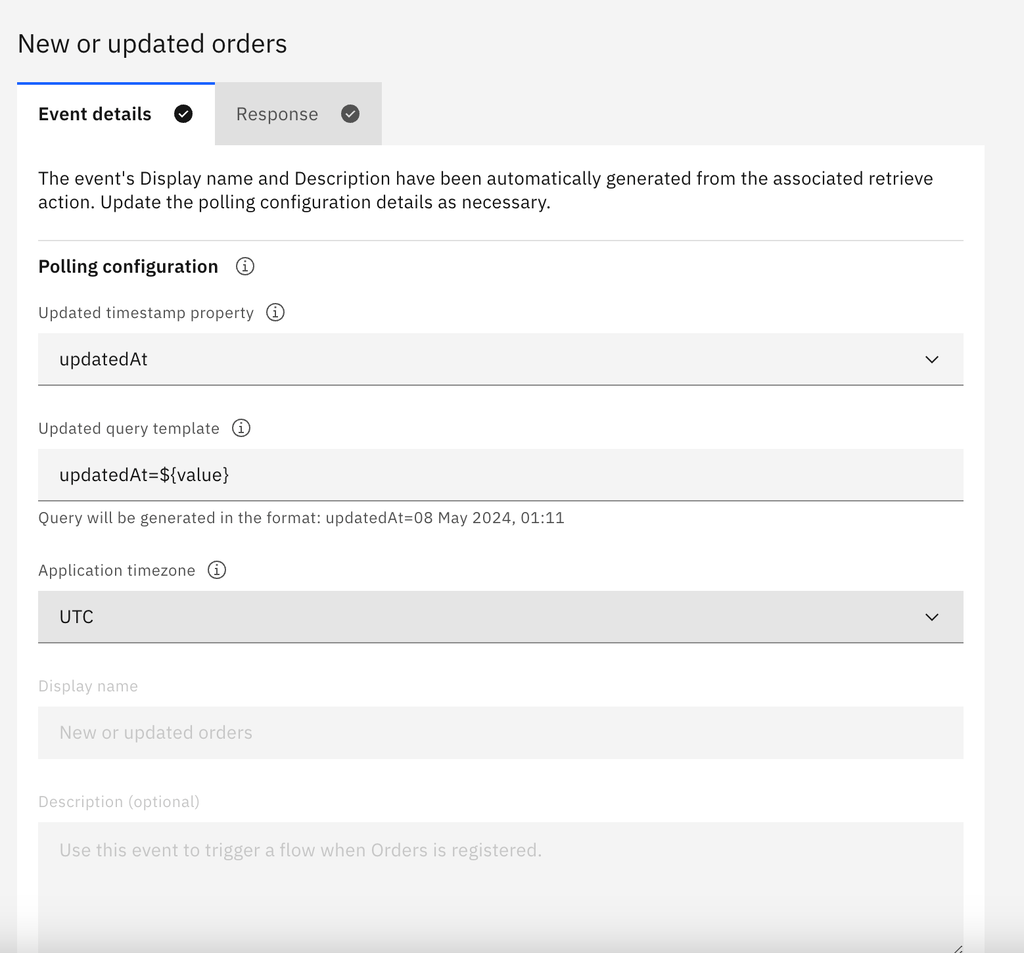
New or Updated Event Creation
-
To proceed, choose the relevant Updated timestamp property, and based on your selection, include the Updated query template field using the same format as before.
Event Test Tab layout
CDK provides the ability to test events within CDK without the need to import connectors in App Connect while building. This helps ensure that the correct polling configuration has been configured.

-
The event test tab, located next to the Test actions tab, allows users to test events.
-
The left panel displays all configured events, grouped accordingly, and each event can be selected individually for testing.
-
In the event test configuration panel, there is a single field titled for example, "Check for 'new orders' every (minute)", which is set to a default of 1 minute and cannot be edited. This indicates that events will be polled every 1 minute
-
The "Try out event" button is used to start event polling, and once polling has commenced, the button text changes to "Listening for events".
-
Once the event polling has started, the right-side panel opens, displaying the event response.
Testing Created Events
Prerequisites:
-
Ensure that the connector is marked as completed.
-
Check if the connector is already connected. If not, connect it with an existing account.
Steps:
- Click on the Test events tab.
-
Select the polled event you wish to test, then click on Try out event.
-
The CDK listens for new events for up to 3 polling cycles, and the test results are displayed in the right-side panel on each event received.
-
Expand any accordion to find the polled event, we show only 1 events per poll cycle even though connector might have returned more. Verify that you were expecting given number of events across all 3 poll cycles and ensure the displayed event and its data is accurate, and represent the event it is configured for.
-
Click the "x" button to close the Test results side panel.

Using Connector in AppConnect
Now that you've successfully created an event in the connector and tested it, you can download the connector as a private connector to use within your App Connect instance. This will allow you to deploy the connector in IBM App Connect and integrate it into your workflows easily and efficiently.
Once the connector is uploaded in App Connect, the configured events will be displayed as follows:

After uploading the connector in App Connect, the flow editor page will display the configured events, enabling users to choose the required event. This allows for easy integration of the connector into workflows, enhancing the efficiency of the overall process.
