Authored by @RAMKUMAR RAMALINGAM and @Siddalinga Swamy Mathad
Part 1: Using the Connector Development Kit: Create, Customize & Contribute your own Connectors
In this article, you will learn how to build a custom connector from scratch using IBM CDK with examples.
IBM Connector Development Kit is a UI-based development kit that allows you to create a connector in your browser without code. CDK provides an intuitive and guided user experience to build and test your connector.
Creating a custom connector from scratch is all about creating connector actions by describing the APIs you want to connect to so that the connector understands the API operations and data structures. This option allows you to create a connector without the need for importing an Open API document.
Prerequisites
- Identify the SaaS / on-prem application, for which you wish to build a connector. Ensure the target application has well-defined REST APIs with support for JSON payload.
- Create your IBM ID, if you don’t have one already. IBM ID is mandatory to create a custom connector and to download an existing community connector from IBM Automation Explorer.
- After you log in with your IBM ID, please review and accept the user terms to allow IBM to use your connector and log within IBM App Connect.
In this section, we will see how to create a connector for the Order Desk SaaS application with a few actions. Order Desk helps you to automate and streamline your order management workflow, it is a hosted order management system that allows you to integrate your store’s workflow with many other third-party providers.
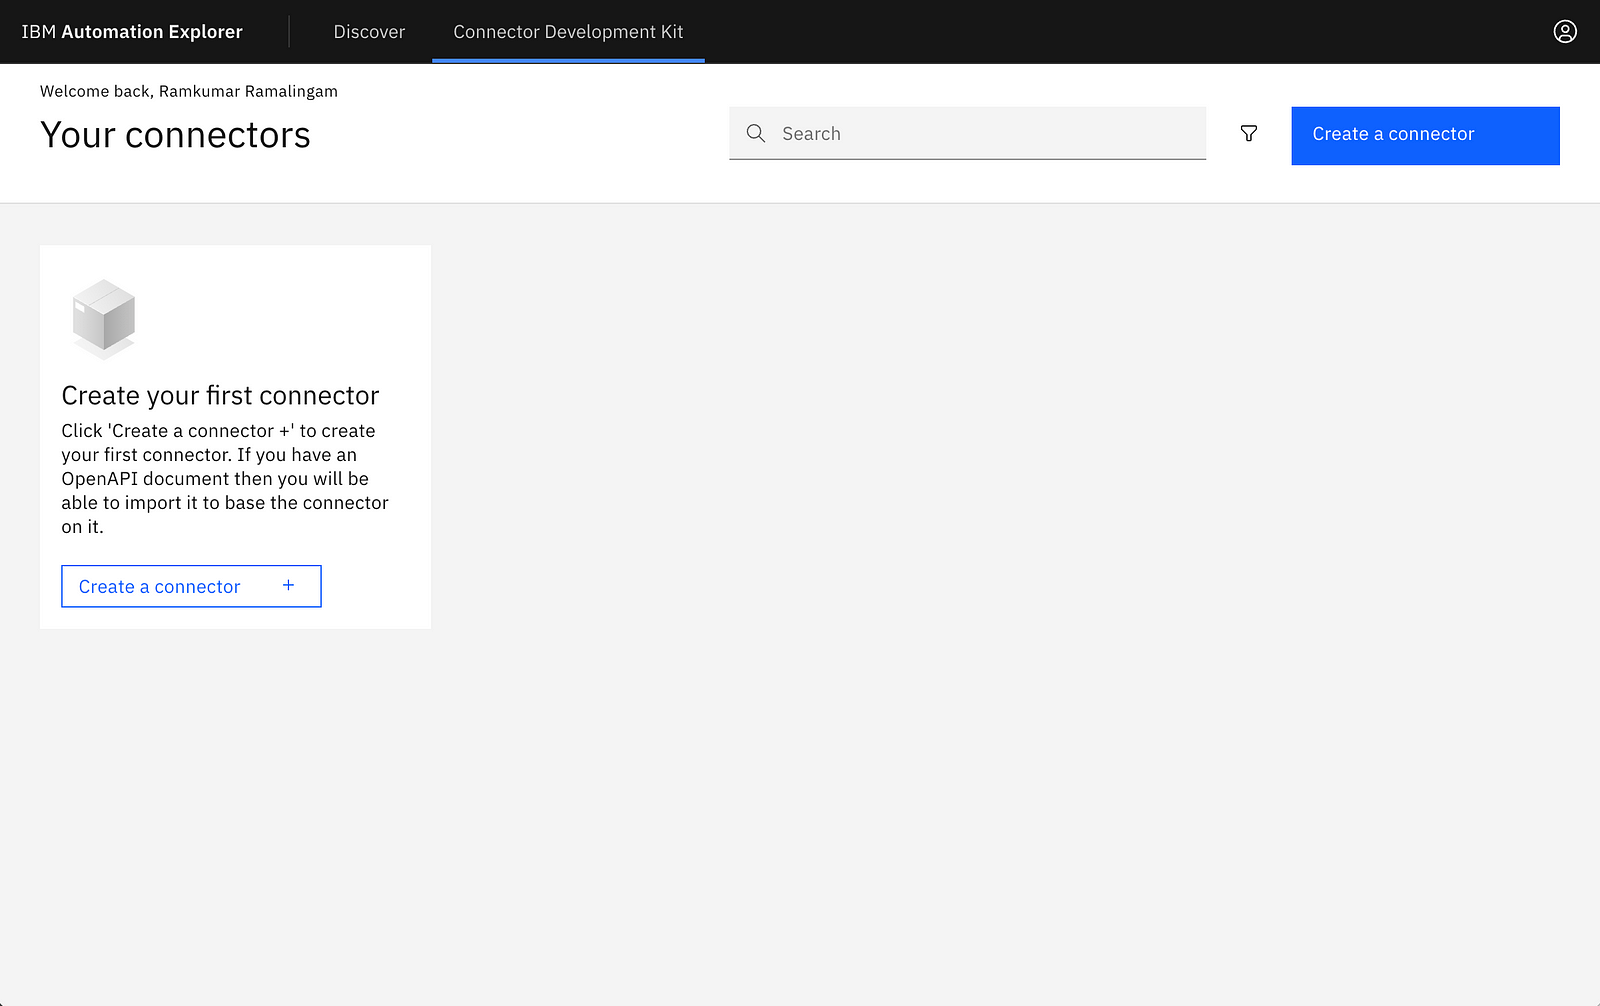
Step 1: Create a connector
Create your first custom connector by clicking on the “Create a connector” button.
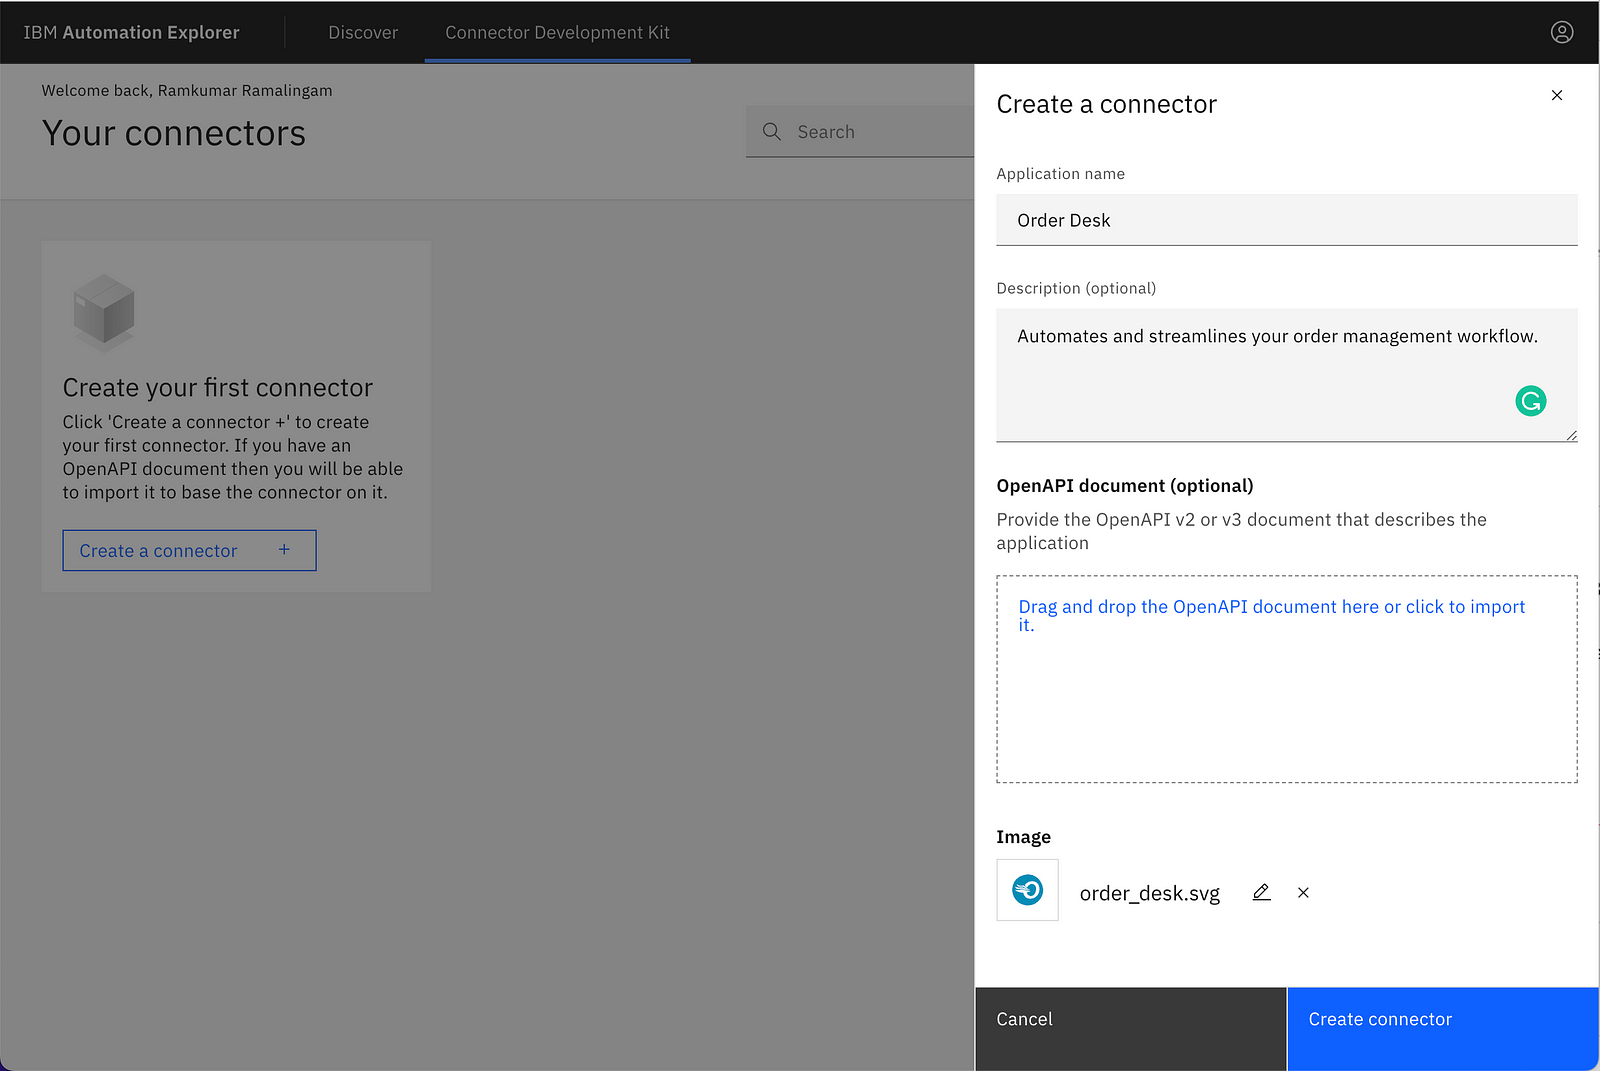
Enter the connector name, and description, upload the icon you like to use with your connector and click on Create connector button.
As we are building this connector from scratch, you don’t have to worry about providing an Open API document.
Step 2: Configure authentication type
CDK supports multiple authentication types like Basic, Bearer Token, API Key, OAuth2 Authorization Code, OAuth2 Password, OAuth2 Implicit, and OAuth2 Client.
The Order desk application support API key-based authentication as documented in their API docs. Select the API Key as authentication type from the right-hand side options and add ORDERDESK-STORE-ID and ORDERDESK-API-KEY as mandatory properties and set their location as header as shown in the picture below.
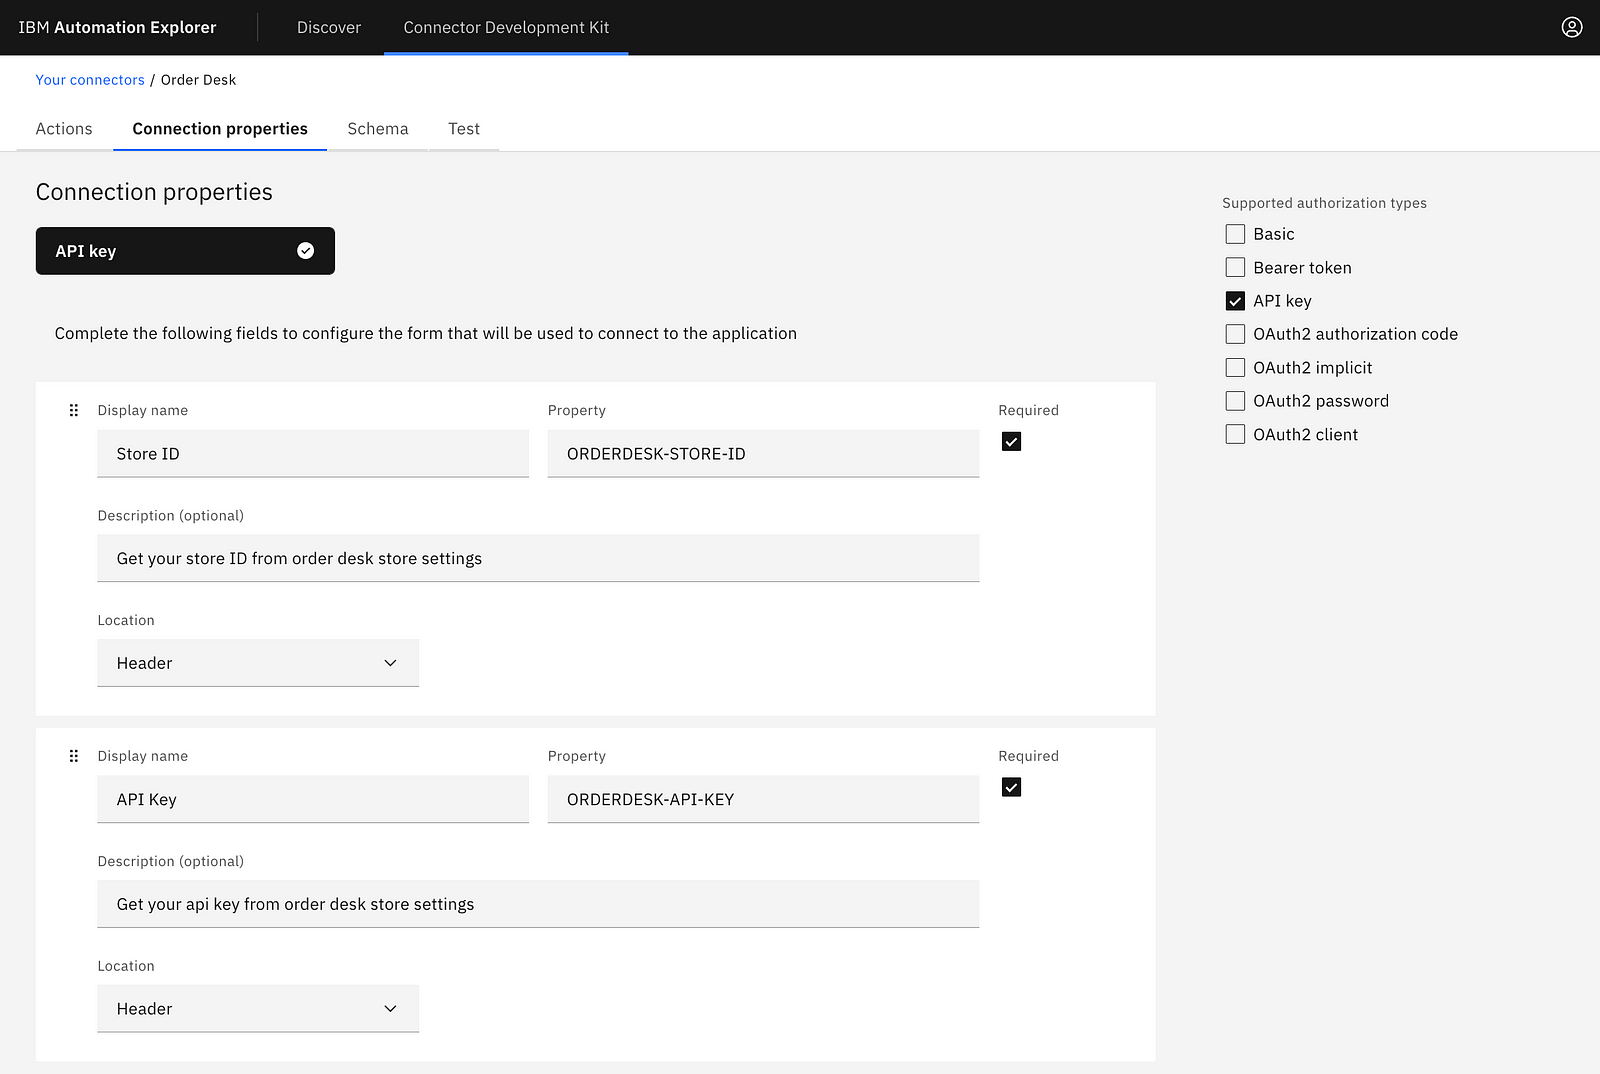
You can also add the display name and description to this property, to show a user-friendly name and description while the users are creating a connection.
Step 3: Create your first action
Let us develop our first action in the connector for the test API of the Order Desk application as documented here.
Refer to the testing endpoint REST API documentation https://apidocs.orderdesk.com/#querying-the-testing-endpoint before you proceed with creating this action in the connector.
NOTE: It's recommended to create a group before you create an action in the connector. A group allows organizing the actions based on a specific object. For example, all CRUD operations on the Order object can be grouped under the Orders group similarly all CRUD operations on the Shipment object can be grouped under Shipments.
Let's create a Test group and add a Test API action under this group. Configure all the details about the Test API like action type, method, base path, and server URL as per the API documentation.
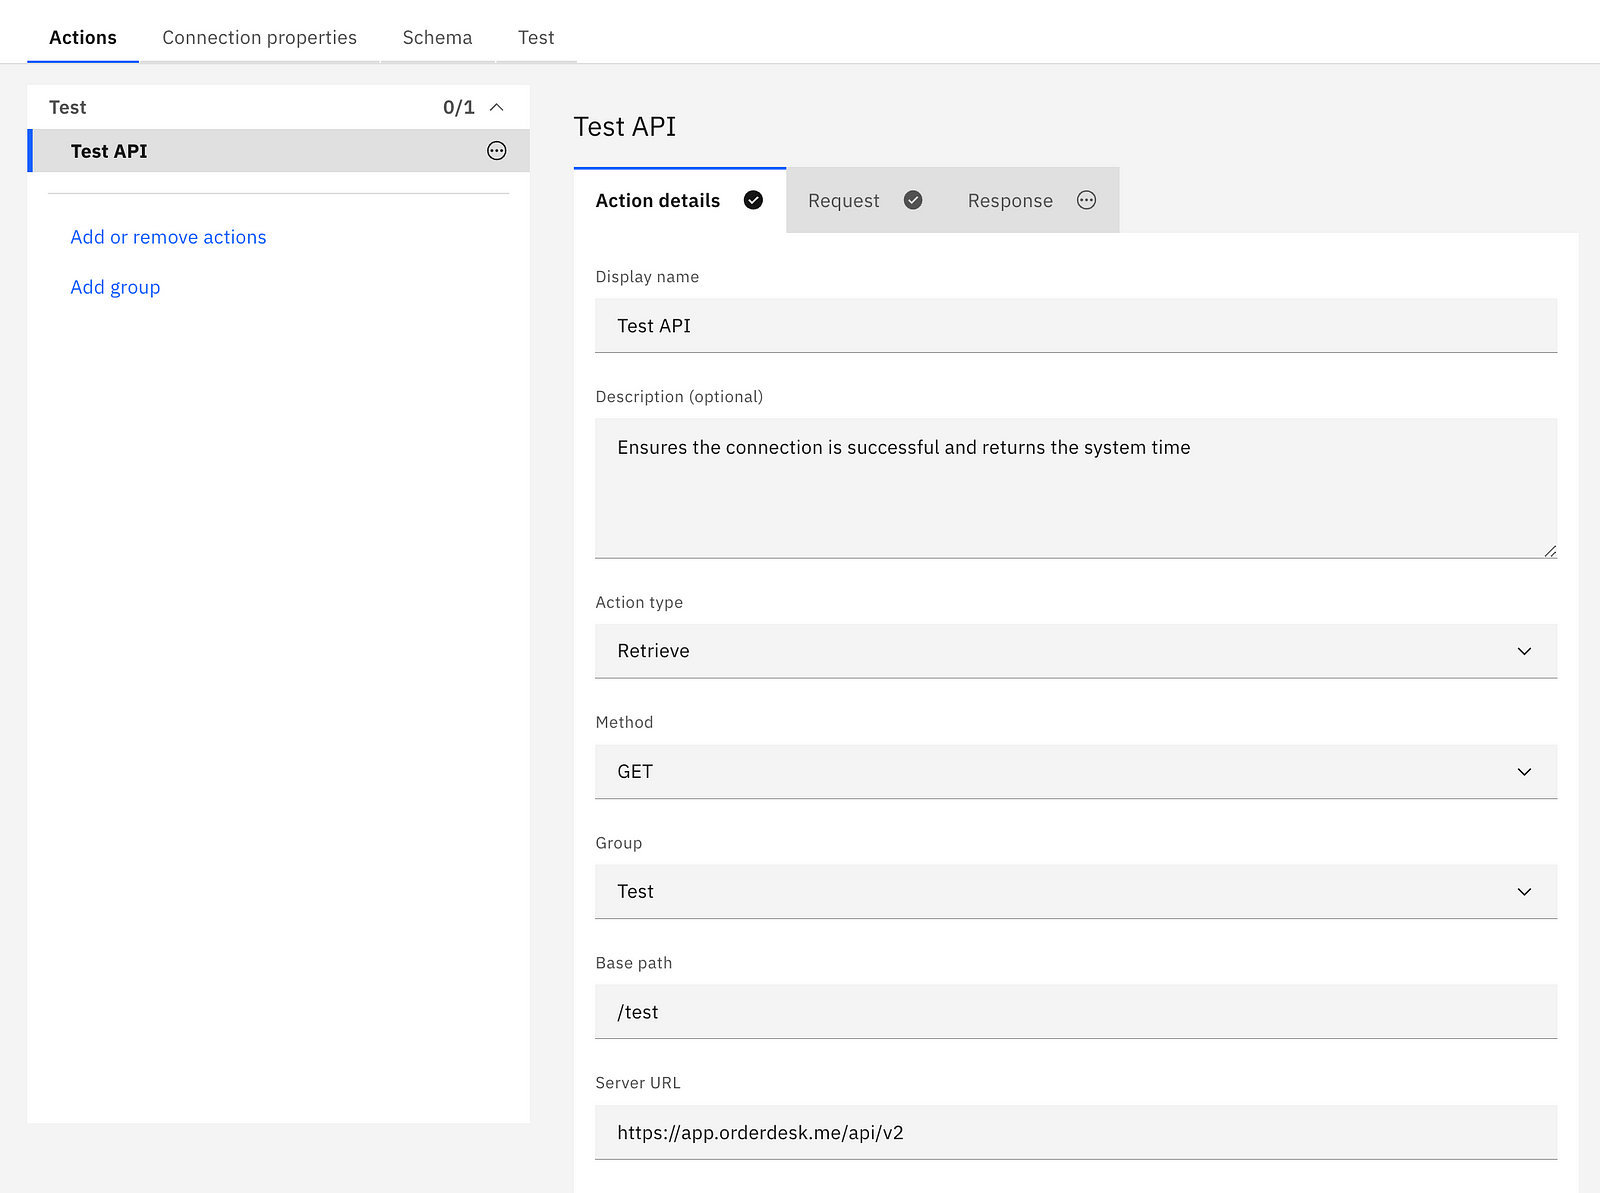
Once you have configured all the details, you will notice a tick mark appearing in the Action details tab indicating that you have provided all the required details, and now you can move to the request tab to configure the request properties.
As the Order desk test API is just a GET method with no parameters, we can directly move on to the response tab without configuring anything in the request tab.
In the response tab, click on Add or Remove button to create a new schema for the Test API response, from the API docs copy and paste the sample JSON of the response payload as shown below.
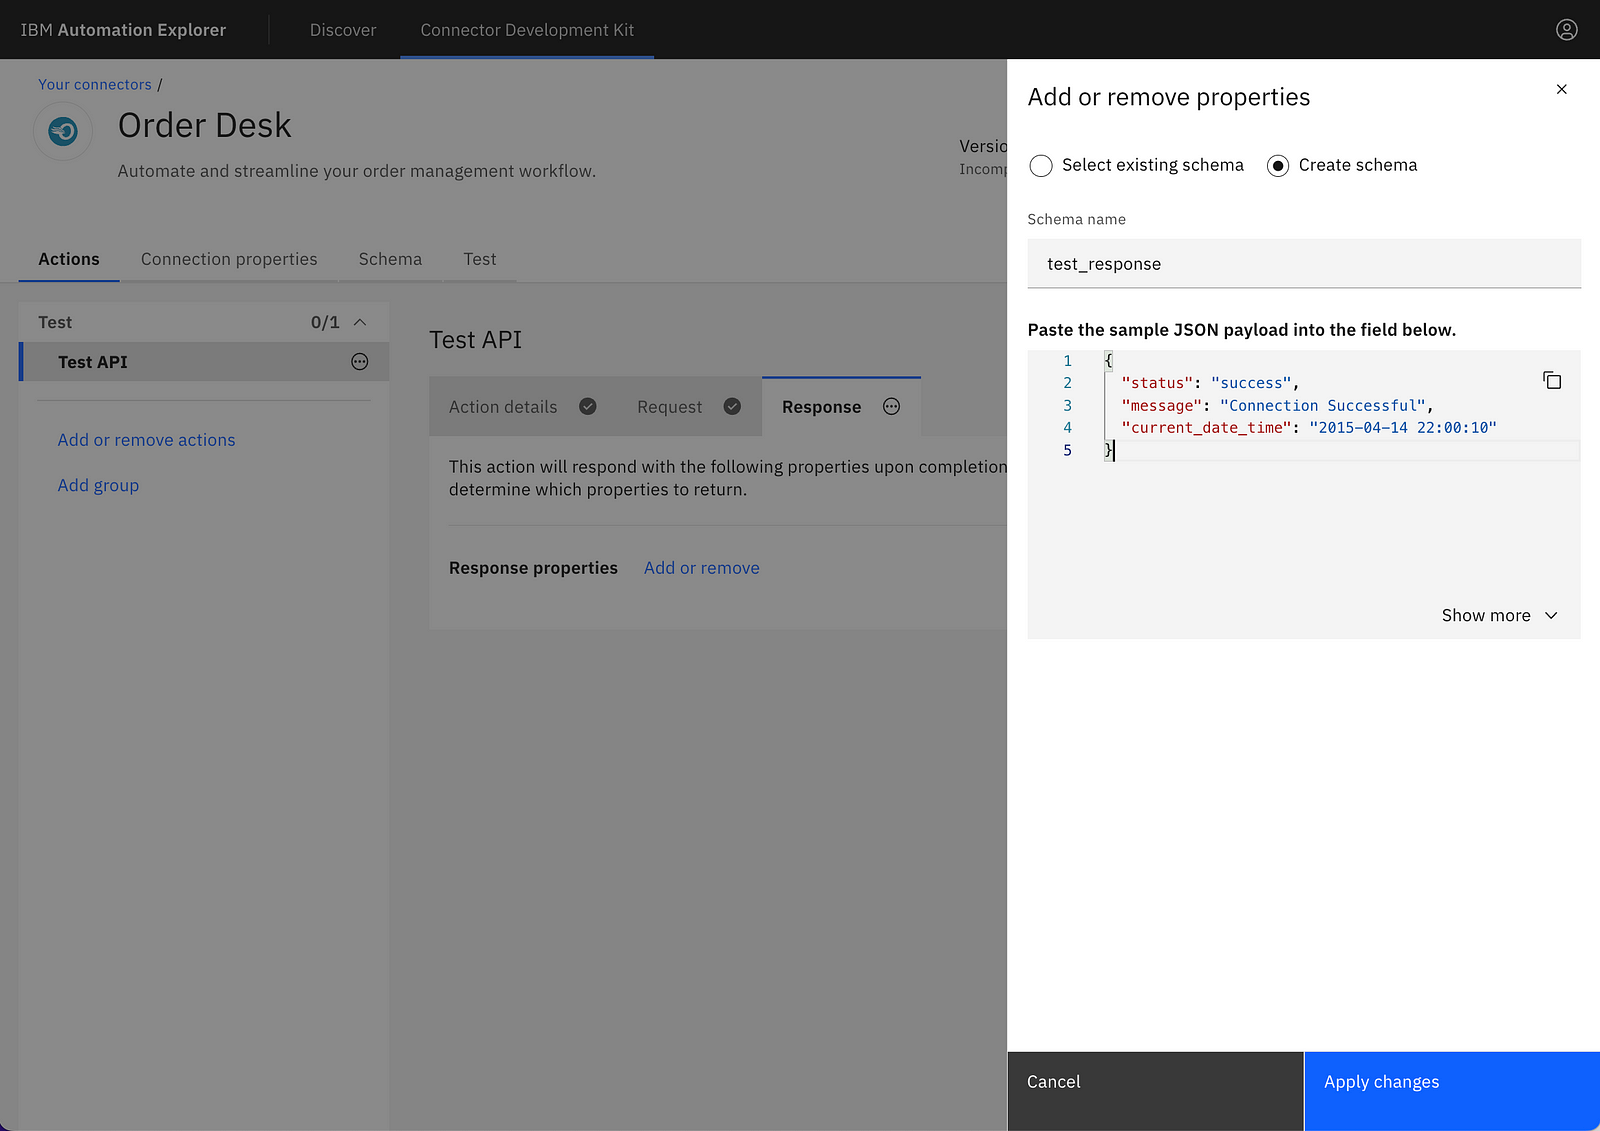
This completes the configuration of the test API action in your connector and you are now ready to test this action in CDK.
Step 4: Test an action
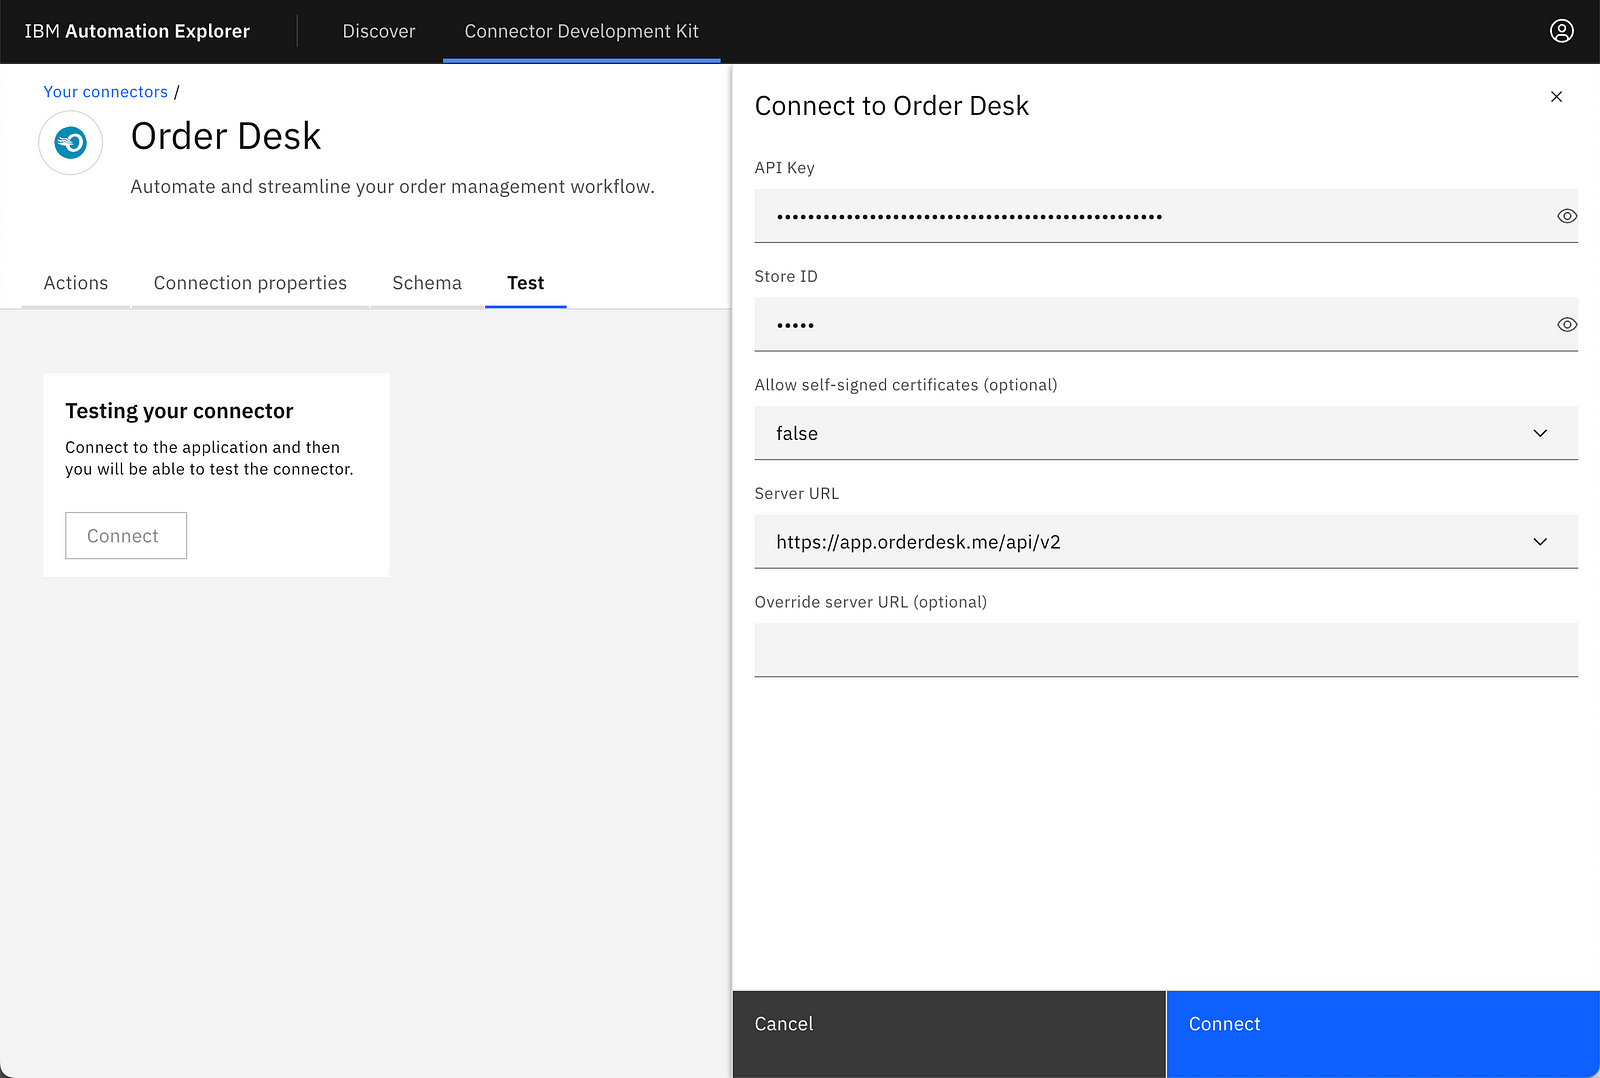
Click on the Test tab in CDK to test your connector actions. It's mandatory to create a connection to the target application before you can test the connector.
Click on the connect button on the Test tab, to create a connection.
In order to connect to the Order Desk API, go to the Store Settings and click on the API tab to create an API Key. You’ll be presented with an API Key and Store ID. Using the generated API key and Store ID, create a connection as shown below.
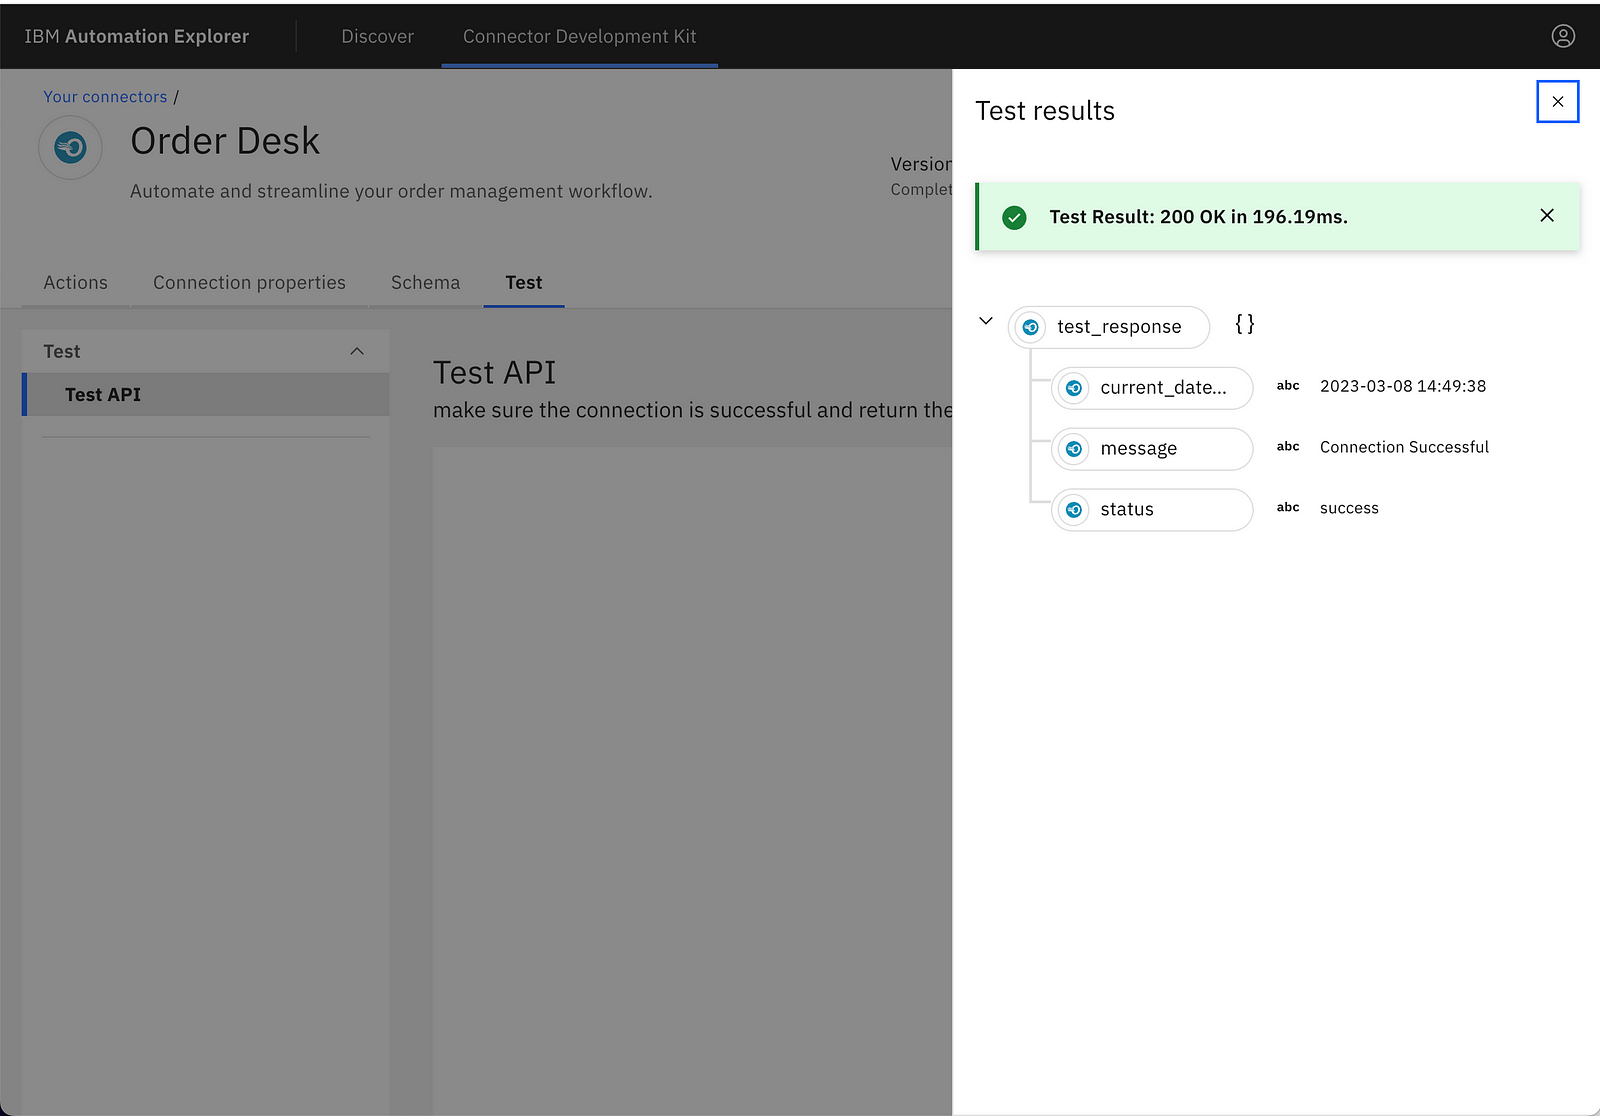
After the successful creation of a connection for the Order Desk connector, you should be able to test the action. A successful test response indicates that you are able to successfully create a connection and tested the action for the Order desk connector.
Step 5: Create your second action
Now that we have successfully created and tested our first action for the connector, let us develop our second action in the connector to create an order in the Order Desk application.
Refer to the create an order REST API documentation https://apidocs.orderdesk.com/#create-an-order before you proceed with creating this action in the connector.
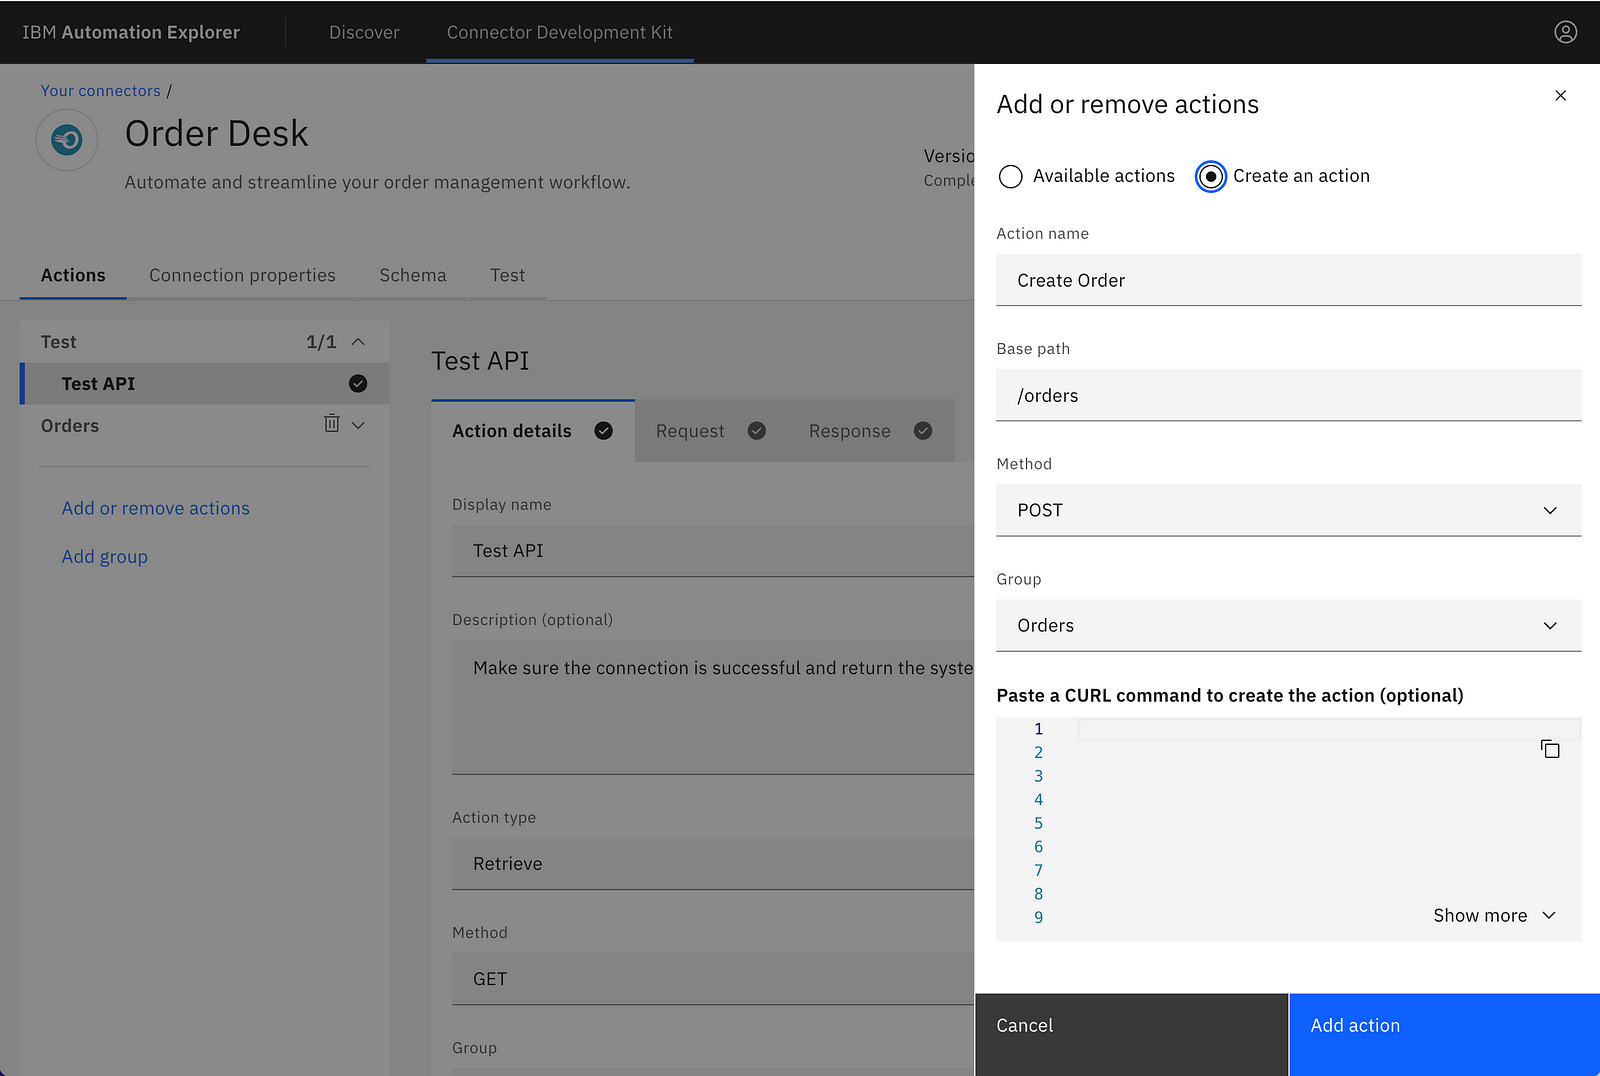
Let’s create an Orders group first and add a Create Order action under this group. Configure all the details about the Create Order API like action type, method, and base path as per the API documentation.
Now let's configure the request properties for Create Order action by creating a new schema called order_request, and from the API docs copy and paste the sample JSON of the request payload for order creation as shown below.
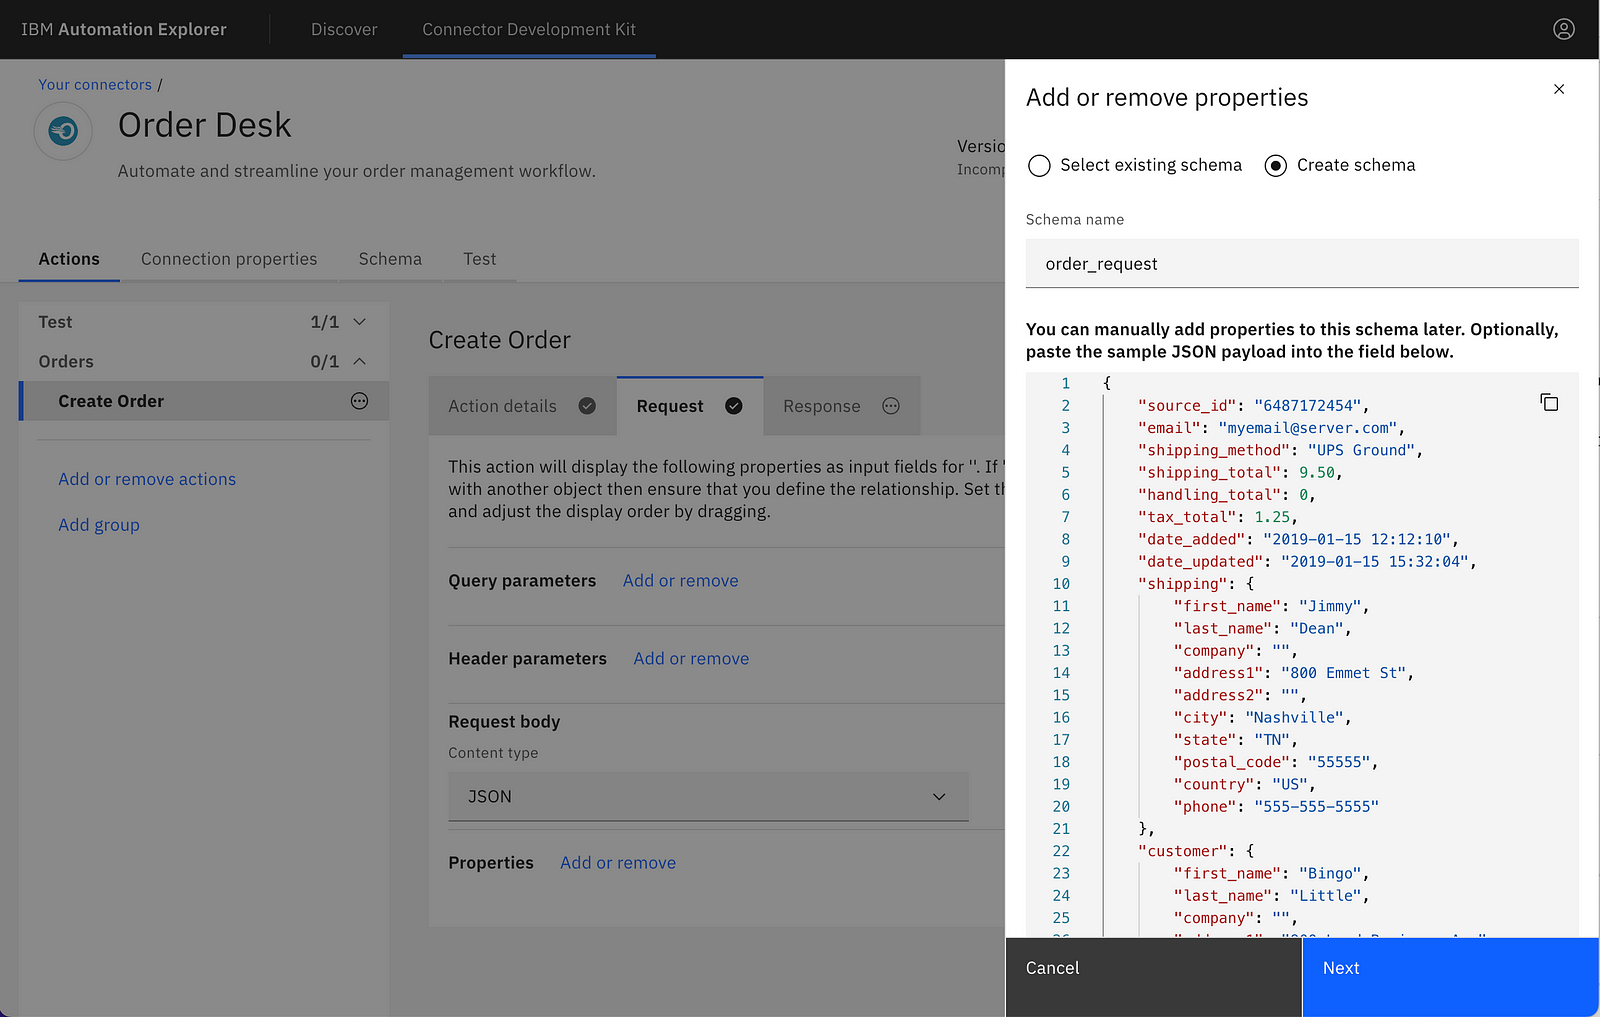
As a next step, before your schema is created CDK allows you to remove the properties from the schema if you feel they are not relevant OR should not be shown to the connector users.
In this case, let's remove the date_added and date_updated properties from the schema (as shown in the below image), as they are automatically handled by the system if they are not provided manually.

Once you have successfully removed the unwanted properties from the schema, the CDK allows you to set the display order for the properties through which you can rearrange the properties in a manner that, the most important ones appear on the top and the least important properties go to the bottom. This helps increase the productivity of the connector users while they perform data mapping.
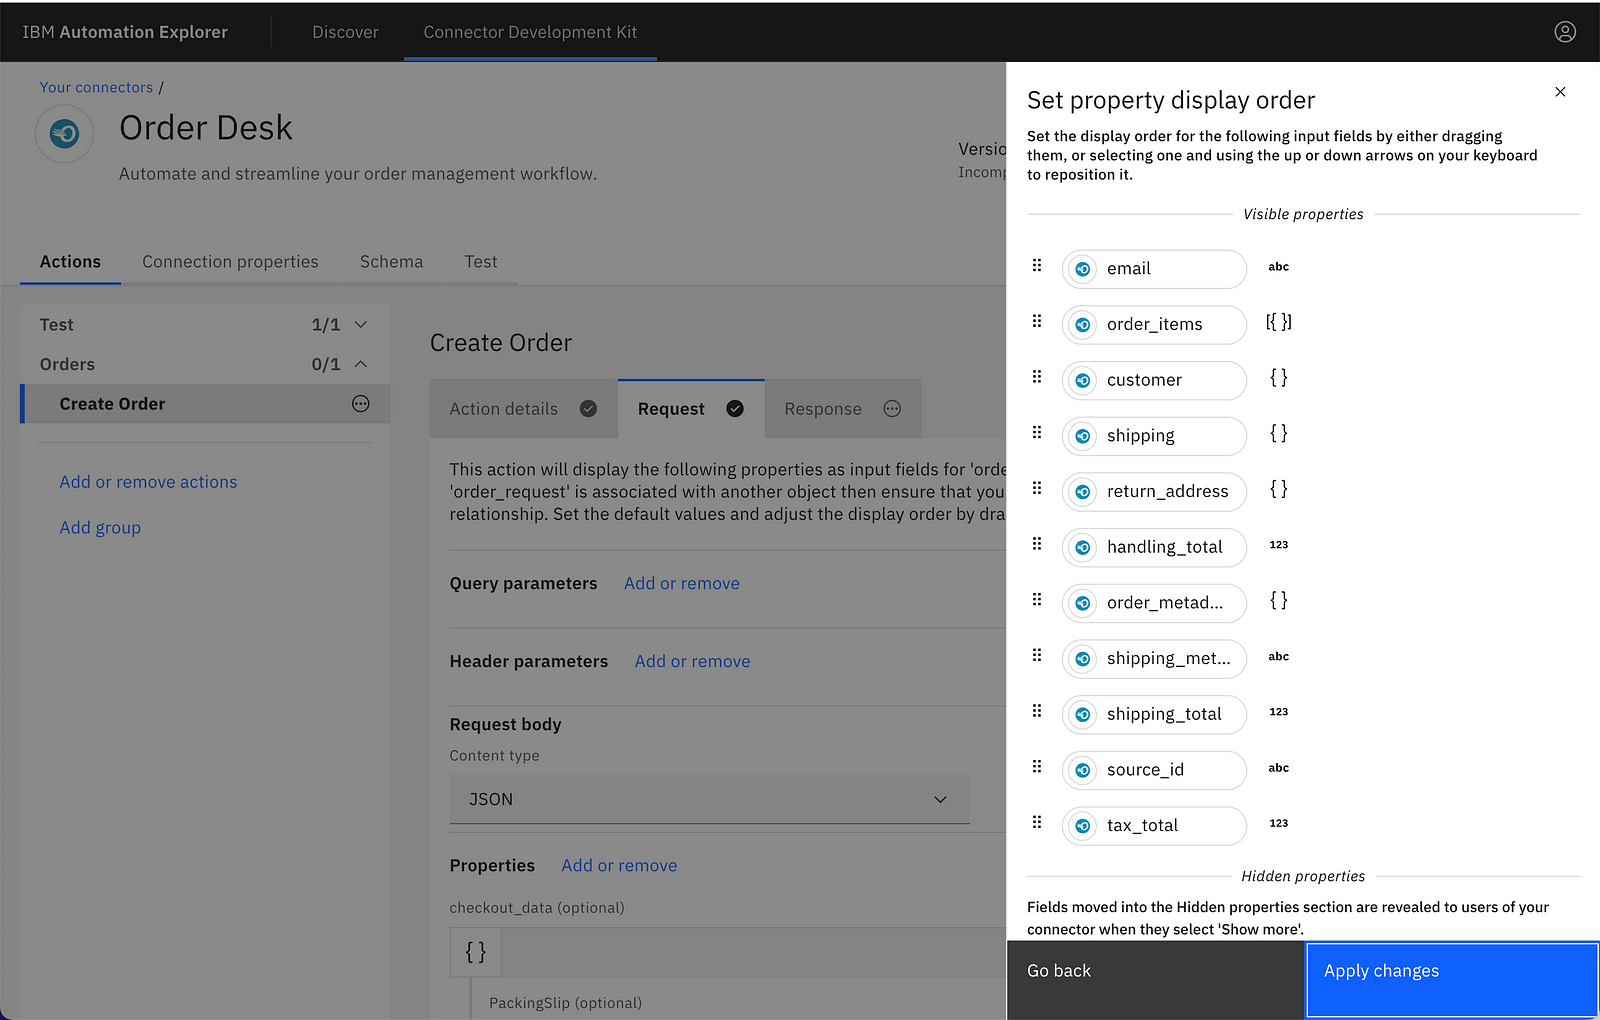
After you set the display order, the order_request schema for the request payload will be created accordingly.
Similar to the request properties, now let’s configure the response properties for Create Order action by creating a new schema called order_response, and from the API docs copy and paste the sample JSON of the response payload for order creation as shown below.
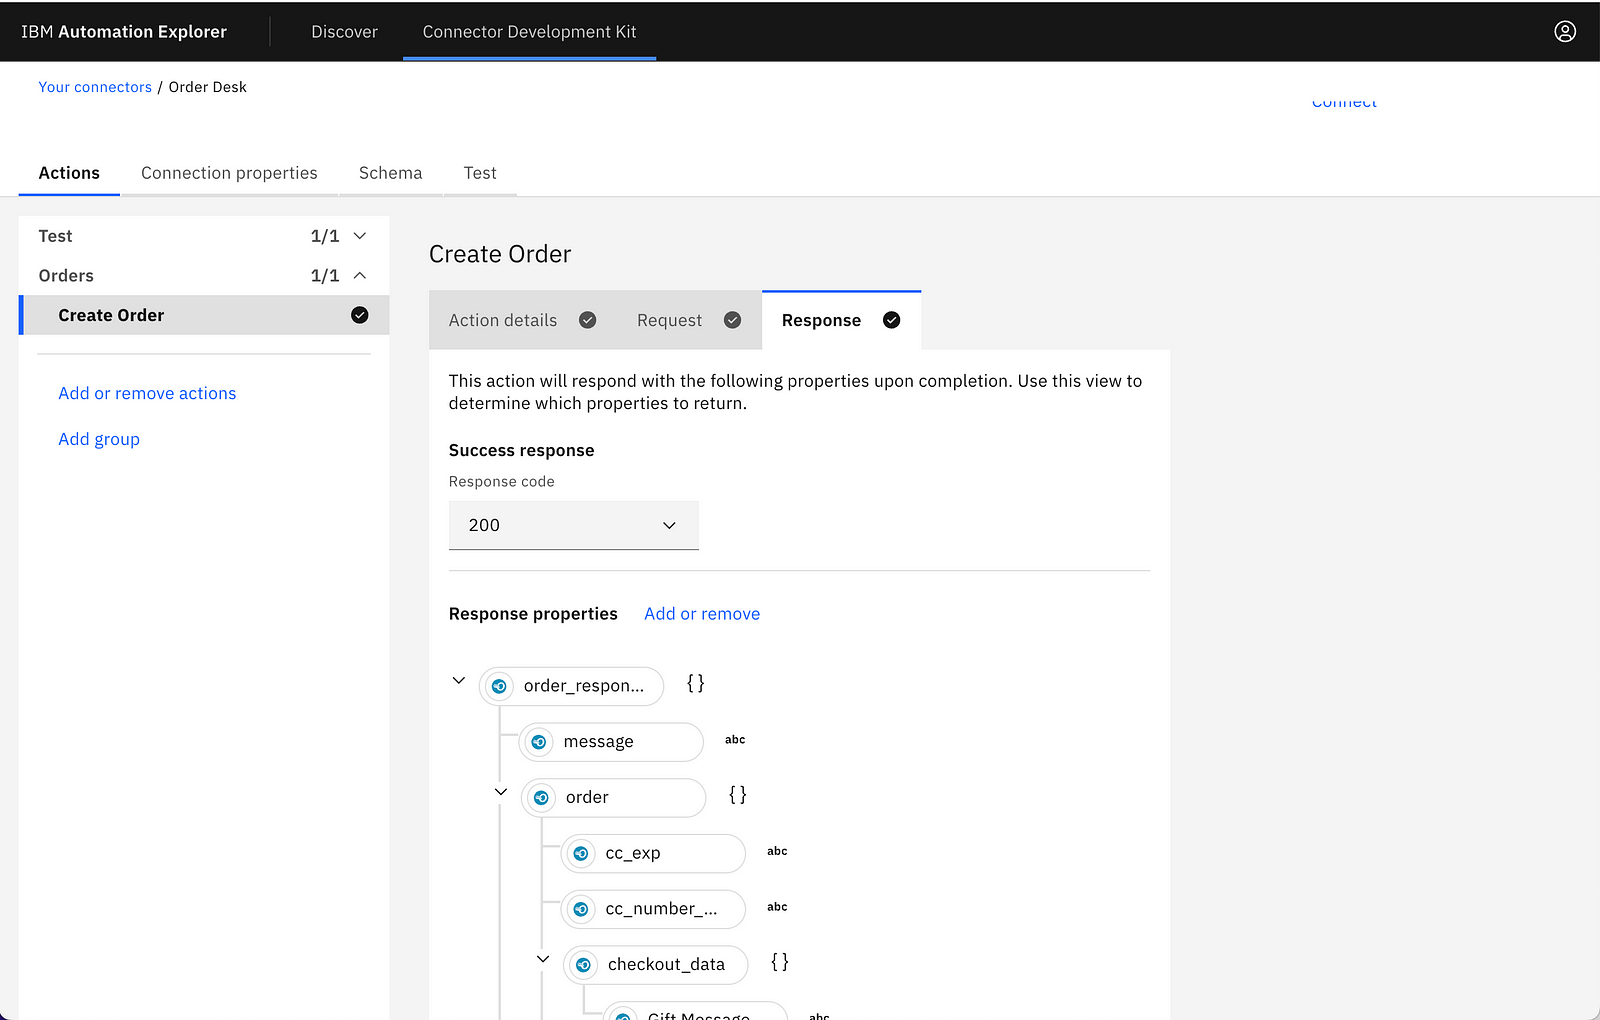
This completes the configuration of the Create Order action in your connector and you are now ready to test this action in CDK.
Step 6: Download the connector
Now that we have completed building 2 actions in the connector and tested them successfully, let us download the Order Desk connector as a private connector to use within your App Connect instance.
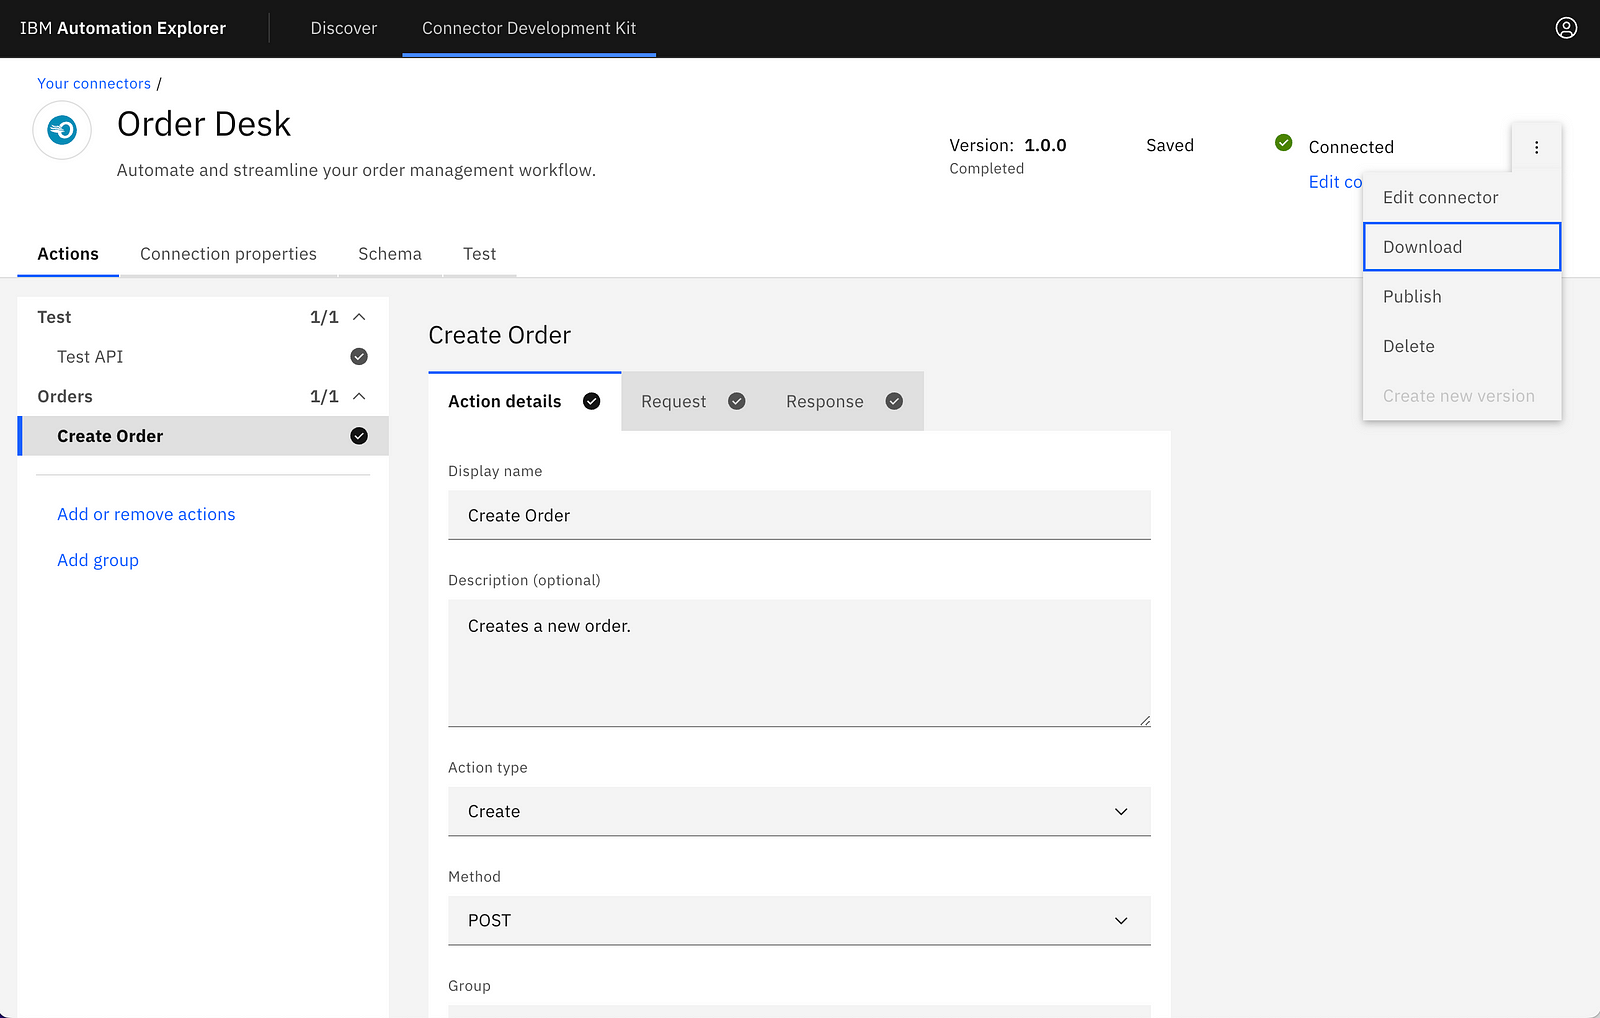
Once you click on the Download from the top right menu option, your Order Desk connector will be downloaded as Order Desk — Connector.car file in your local file system. You can import this file in your App Connect instance as shown in Step 7.
You have the option to make your connector public and make it available to the wider community so that anyone can download your connector and import them into their App Connect instance. For more details on publishing your connector go to Step 8.
Step 7: Deploy your connector in IBM App Connect
Now let's deploy your custom connector in IBM App Connect. Login to your App Connect instance and click on the + icon in the catalog page that allows importing a connector or API.
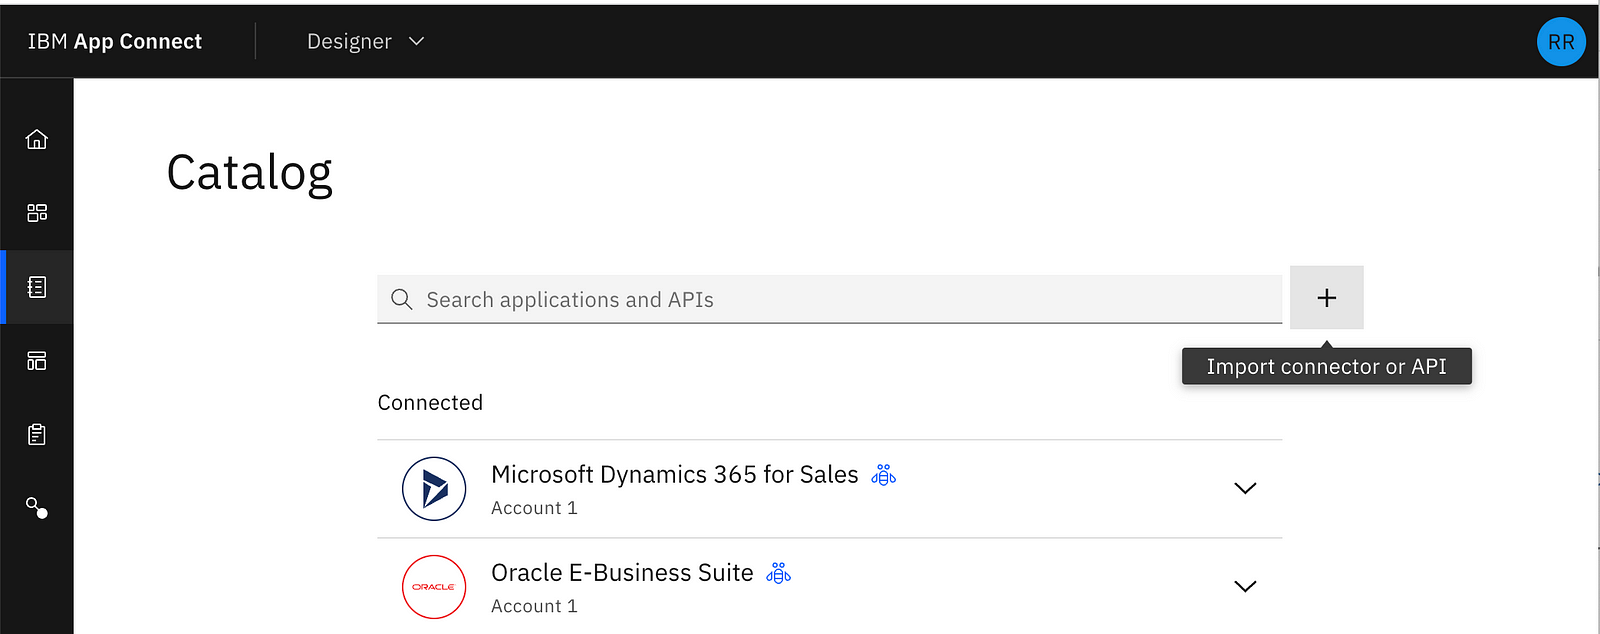
Clicking on the + icon opens up a sliding window that allows you to drag and drop the Order Desk — Connector.car file to complete the import of the connector. Ensure to select the document type as a community connector.

Click Next to complete the connector import. You should now see the connector listed in the catalog as shown below.
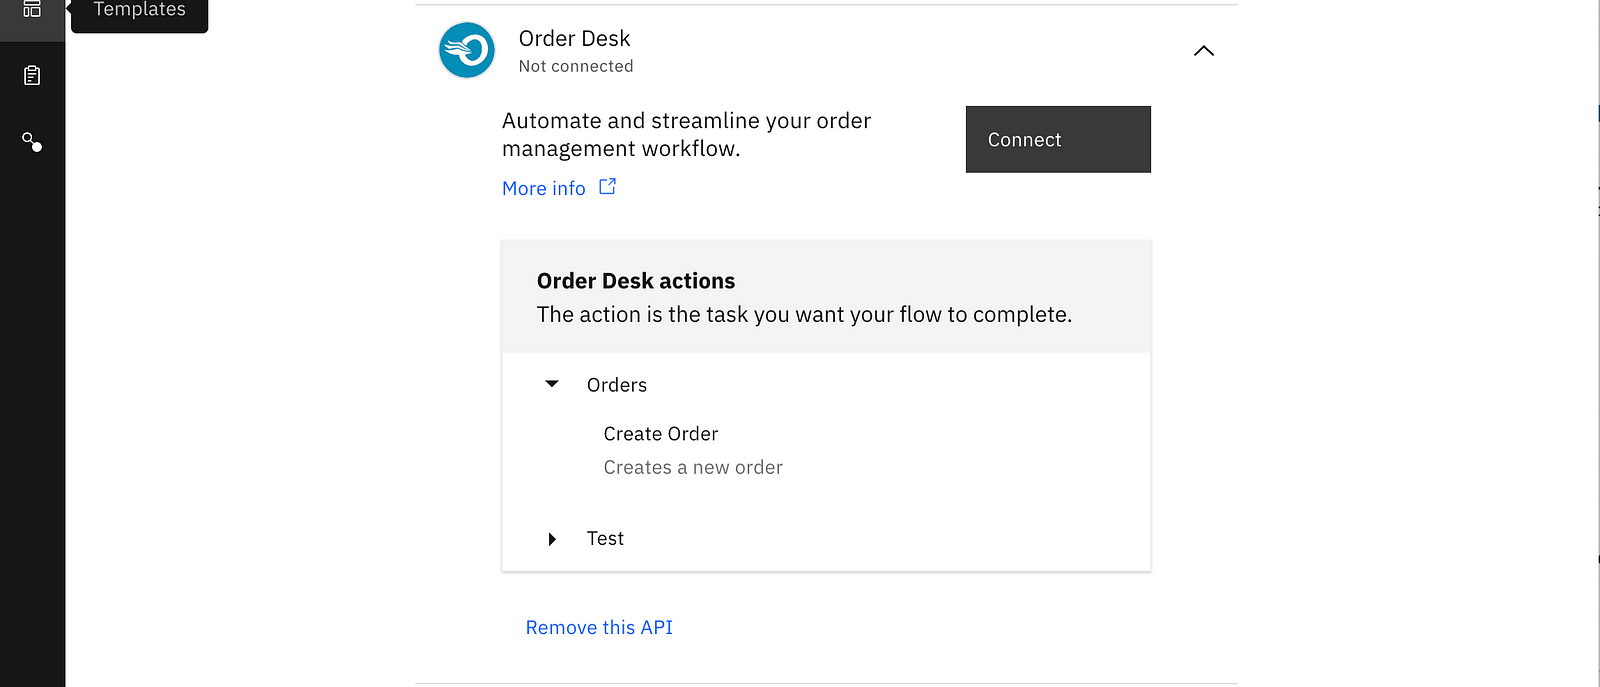
You can now create an account for your connector and use them in your integration flows, just like any other in App Connect.
Summary
In this article, by following steps 1 to 6 you have learned how to create a custom connector from scratch using IBM CDK. In step 7 you have learned how to import your CDK-built custom connector into IBM App Connect.
Please make use of our community forum to ask for help and to provide your feedback for any improvements you like to see in IBM Automation Explorer and CDK.