IBM Cloud Pak for Integration provides DataPower as an Integration Runtime in a container form-factor underpinned by OpenShift. When you spin up a DataPower instance with the default setting, you will notice the WebGUI, XML Management Interface are not enabled on the DataPower container. This configuration needs to be enabled using a Config Map on OpenShift.
Here are the product versions at the time of writing this blog.
CP4I v2021.2.1
OCP v4.7.23 hosted on ROKS
DataPower v10.0.3.0
As part of this blog we spin up a standalone DataPower appliance (container) with WebGUI, XML Management interface, and a user defined port for incoming API traffic.
For detailed information refer to https://ibm.github.io/datapower-operator-doc/
Note: You must login as CP4I admin to OpenShift before running any OpenShift commands
Step 1: Create a secret on OpenShift which stores the admin user id's password.
oc create secret generic dp-credentials --from-literal=password=IBM@1234
Step 2: Create a config file - datapower.cfg which stores the CLI commands
DataPower runs these commands at startup to enable web-mgmt and xml-mgmt interfaces. By default RMI (Rest Mgmt Interface) is enabled.
datapower.cfg
# configuration to enable web-mgmt and xml-mgmt
top; configure terminal;
web-mgmt
  admin-state enabled
  idle-timeout 9000
exit
xml-mgmt
  admin-state enabled
exit
Step 3: Create a Config map which stores the configuration file information
oc create configmap dp-webui-config --from-file=datapower.cfg
Step 4: Create a DataPower instance
Create a file with the following contents. The license values are for NonProduction.
For more license options check ->https://ibm.github.io/datapower-operator-doc/guides/licenses/
datapowerService.yaml
apiVersion: datapower.ibm.com/v1beta3
kind: DataPowerService
metadata:
  name: dp
  namespace: cp4i
spec:
  domains:                    #This section uploads the config map
  - name: default
    dpApp:
      config:
      - dp-webui-config
  license:
    accept: true
    license: L-RJON-C2XKPU
    use: nonproduction
  replicas: 1
  resources:
    limits:
      memory: 4Gi
    requests:
      cpu: "1"
      memory: 4Gi
  users:
  - accessLevel: privileged
    name: admin
    passwordSecret: dp-credentials    #This section sets the admin credentials
  version: 10.0-cd
Next, run the oc command to create the DataPower instance.
oc apply -f datapowerservice.yaml
Wait for a few minutes for the DataPower pod to be "Ready"

Step 5: Create the service for exposing required ports
datapower_svc.yaml
apiVersion: v1
kind: Service
metadata:
  name: dp-svc
spec:
  ports:
    - name: rmi-port
      protocol: TCP
      port: 5554
      targetPort: 5554
    - name: xmi-port
      protocol: TCP
      port: 5550
      targetPort: 5550
    - name: webgui-port
      protocol: TCP
      port: 9090
      targetPort: 9090
    - name: api-traffic-port
      protocol: TCP
      port: 3000
      targetPort: 3000
  selector:          # Ensure the selectors match the labels of the DataPower pod.
    app.kubernetes.io/component: datapower
    app.kubernetes.io/instance: cp4i-dp
    app.kubernetes.io/managed-by: datapower-operator
    app.kubernetes.io/name: datapower
    app.kubernetes.io/part-of: ibm-datapower-dp
    statefulset.kubernetes.io/pod-name: dp-0
  sessionAffinity: None
  type: ClusterIP
Next, run the oc command to create the service
oc apply -f datapower.svc.yaml
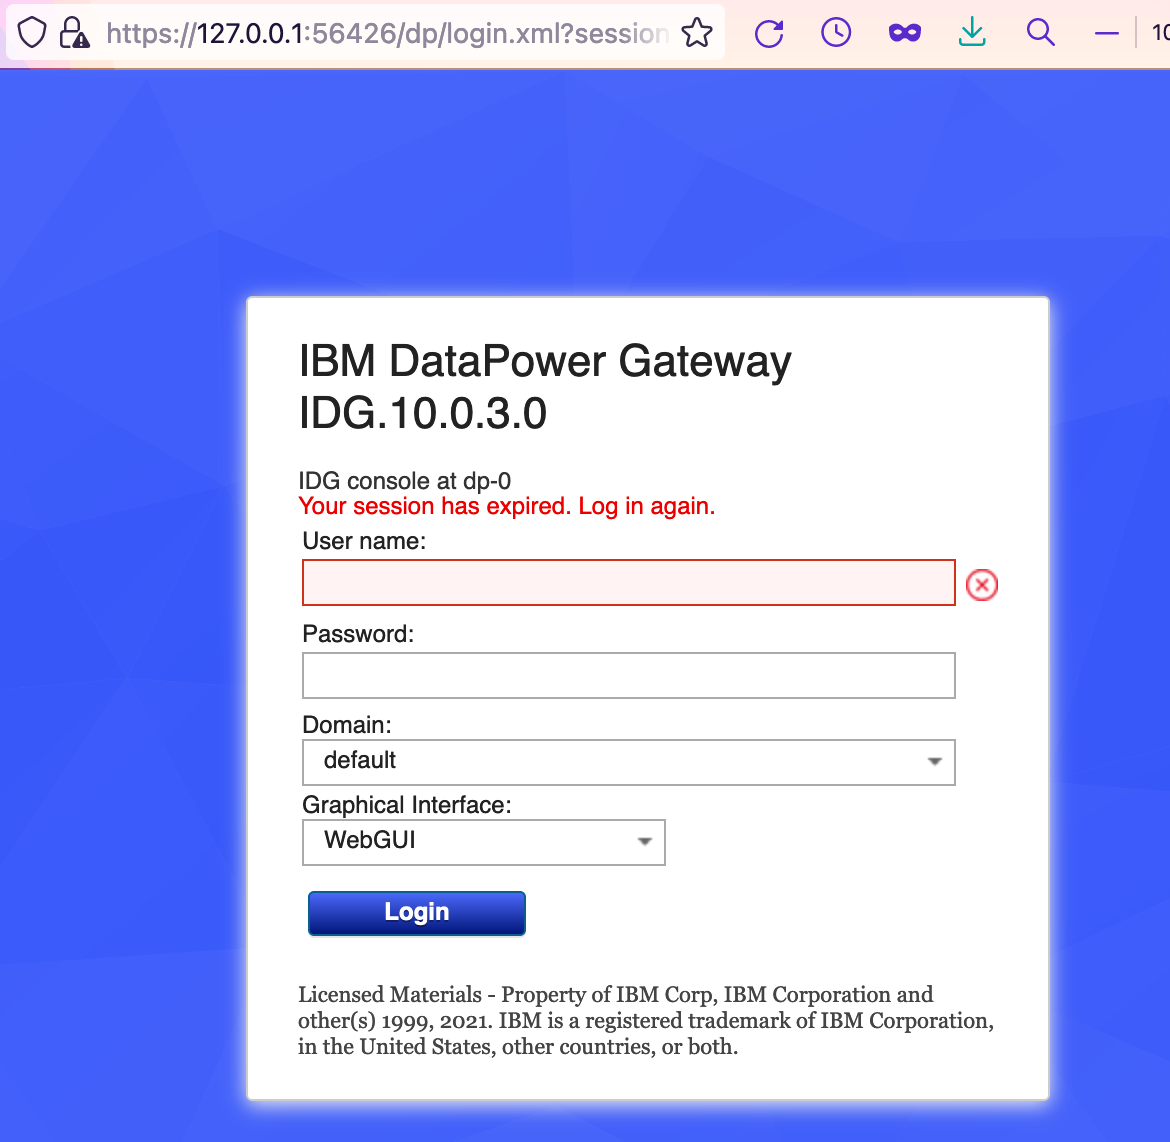
Step 6: Verify if the DataPower WebGUI is enabled
Run the following command and then access the WebGUI using the port displayed on the prompt.
oc port-forward dp-0 :9090
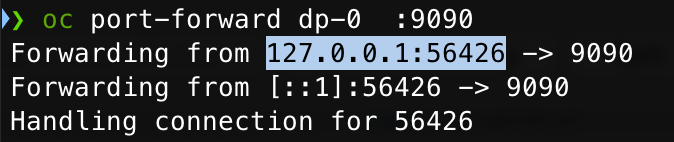
WebGUI is accessible using https://127.0.0.1:<forwarded-port>
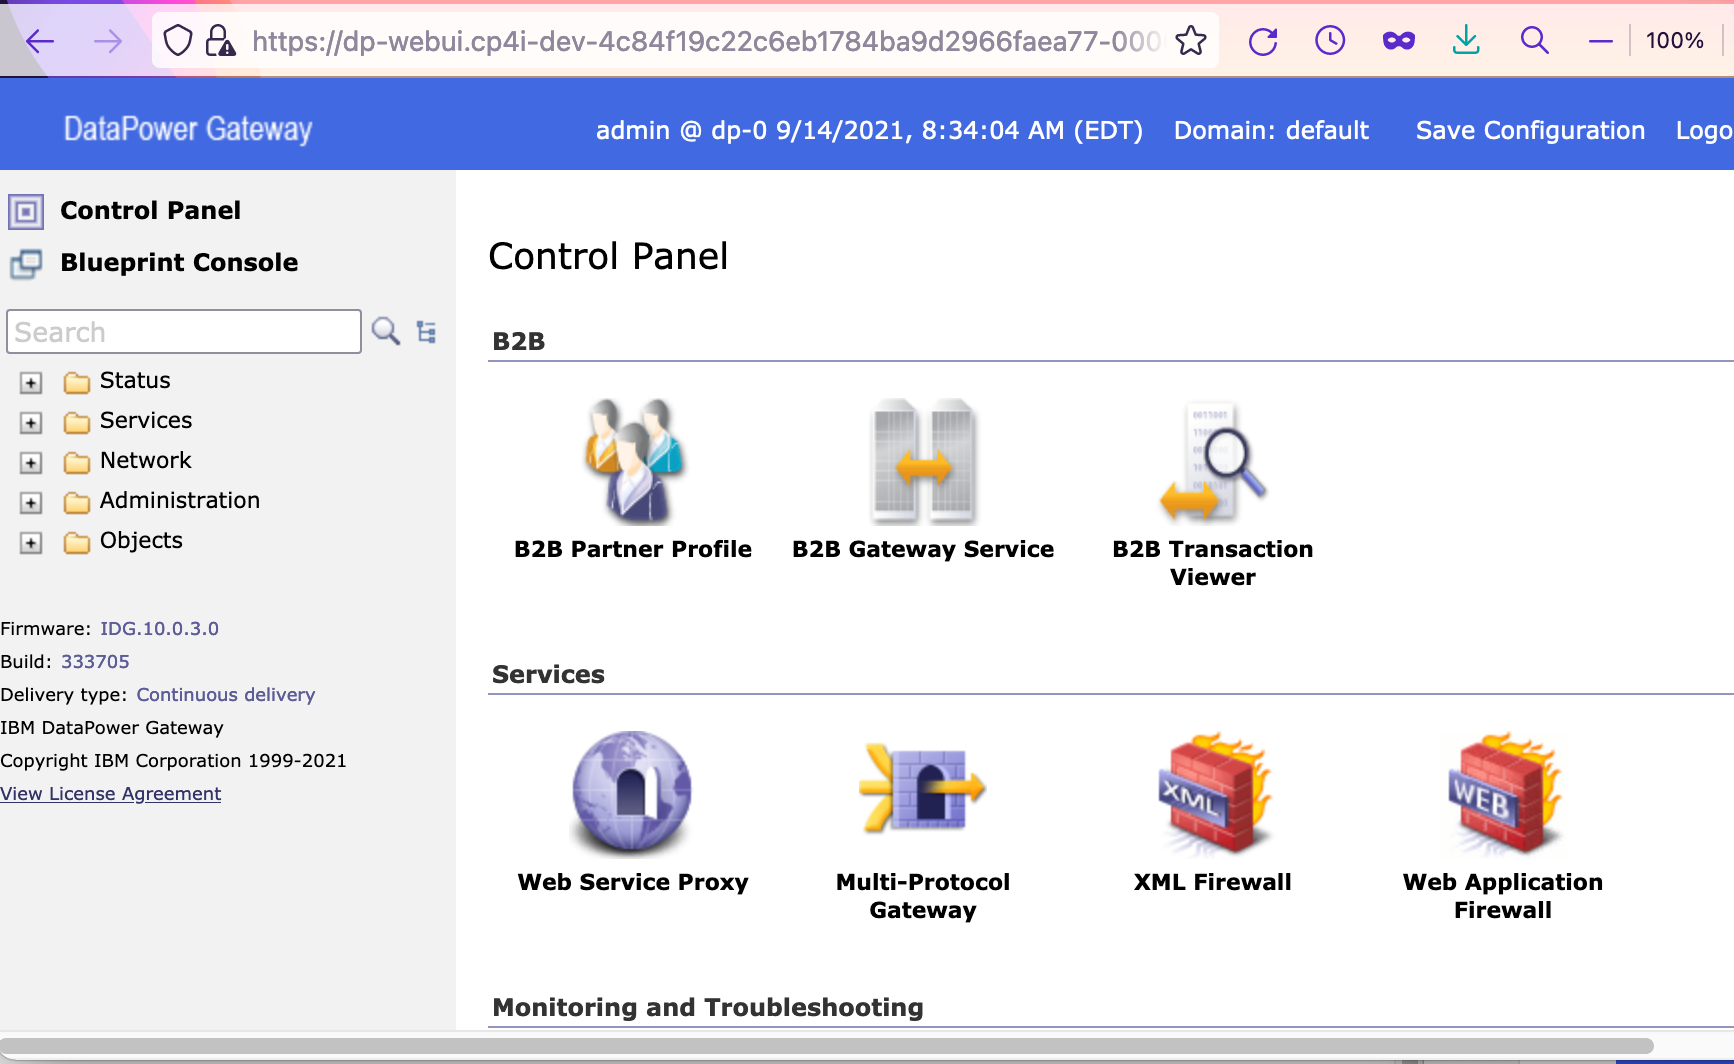
Step 7: Create new routes to access WebGUI, XML management service, API traffic
It may not be practical to run port-forward each time to access the WebGUI and other DataPower endpoints. Hence we must create routes to make them accessible at all times. Use the following commands to create the routes for WebGUI, XMI and API traffic respectively. To form the hostname, you need to choose a unique prefix and append it with the domain name for the OCP cluster.
WebGUI
oc create route passthrough dp-webui --service=dp-svc --hostname=dp-webui.cp4i-dev-4c84f19c22c6eb1784ba9d2966faea77-0000.eu-gb.containers.appdomain.cloud --port=9090 -n cp4i
REST Management Interface
oc create route passthrough dp-rmi --service=dp-svc --hostname=dp-rmi.cp4i-dev-4c84f19c22c6eb1784ba9d2966faea77-0000.eu-gb.containers.appdomain.cloud --port=5554 -n cp4i
XML Management Interface
oc create route passthrough dp-xmi --service=dp-svc --hostname=dp-xmi.cp4i-dev-4c84f19c22c6eb1784ba9d2966faea77-0000.eu-gb.containers.appdomain.cloud --port=5550 -n cp4i
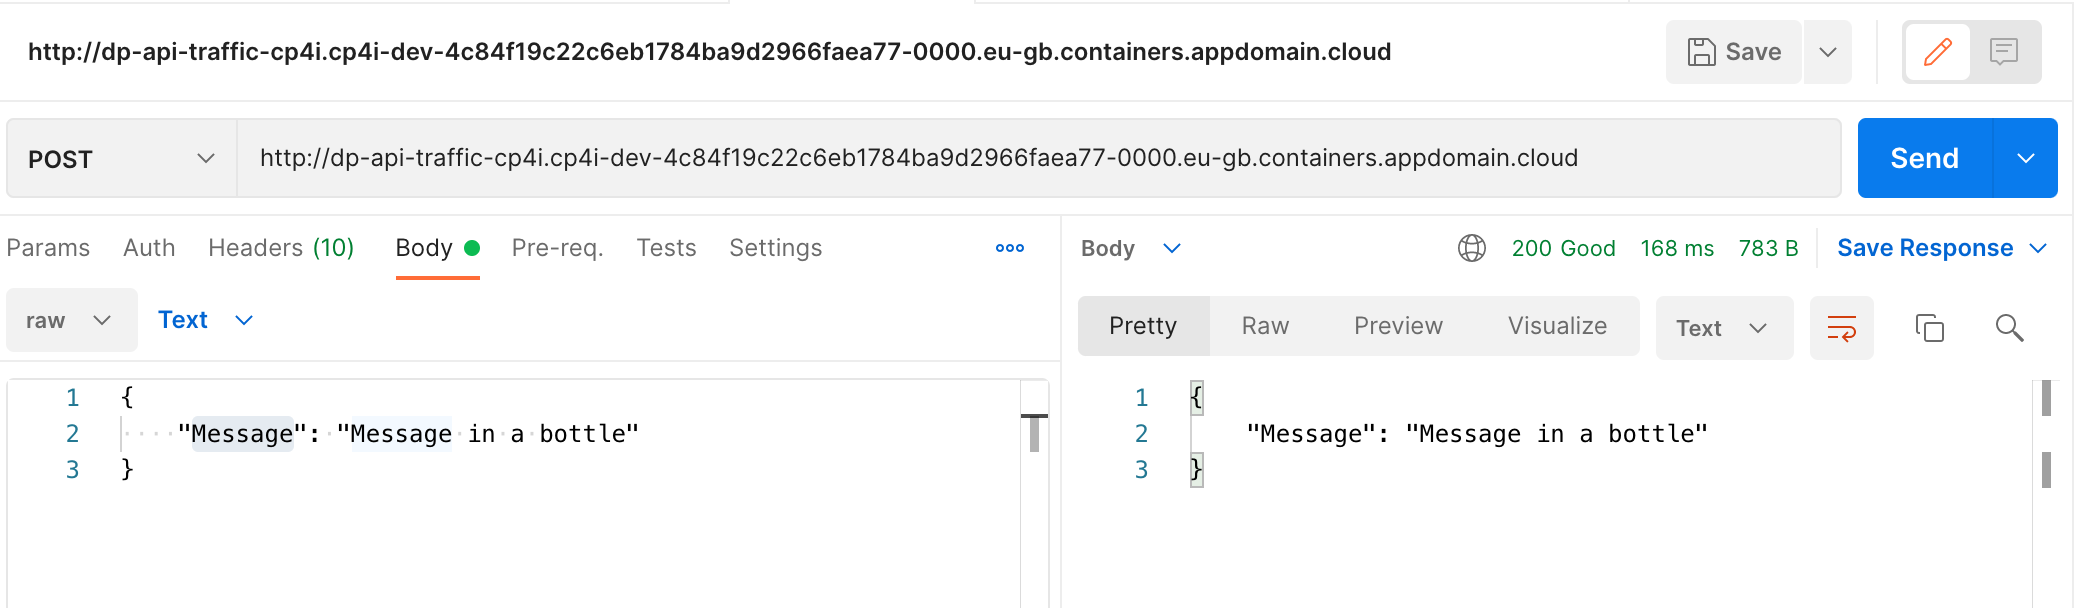
HTTP traffic on port 3000
oc expose svc/dp-svc --name=dp-api-traffic --port=3000
You can now use the new routes to access the WebGUI, XML and API traffic
WebGUI:
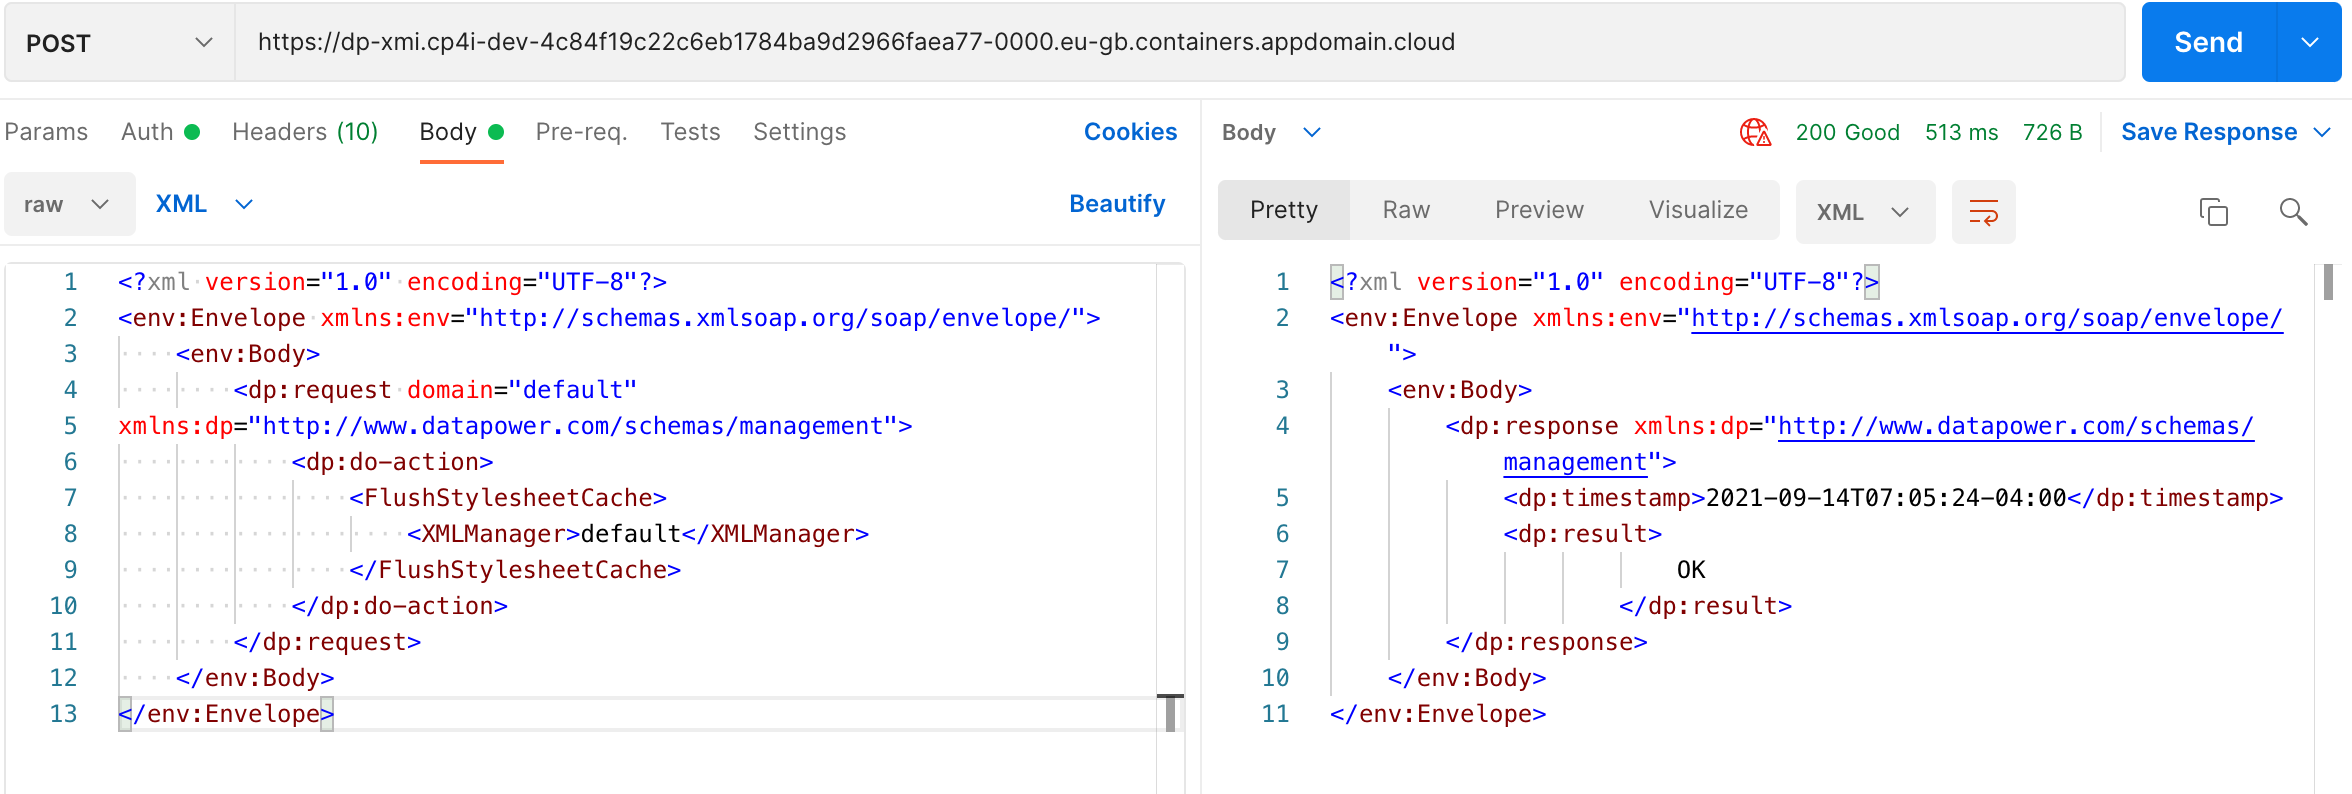
XML Management Interface:
API Traffic:
To test the API traffic, I deployed a loopback service at port 3000 on DataPower.