New vulnerabilities are discovered daily in container images requiring a continuous process of vulnerability evaluation and fix to prevent security breaches. Independently on the selected platform to run those container images, the vulnerability management process is mandatory.
IBM Cloud Security and Compliance Center (SCC) Workload Protection provides a set of capabilities for defining and implementing the vulnerability management process for images created in a CI/CD pipeline, running in an orchestrated container platform such as Kubernetes or OpenShift and also for container registries.
Container registries become the last step of any image deployed in serverless solutions, which usage is growing in the last few years. IBM Cloud Code Engine is a fully managed solution for running applications and jobs that abstracts the operational work for building and managing Kubernetes allowing developers to focus on their applications.
The Challenge of a Vulnerability Management with Code Engine
When running on Kubernetes, Workload Protection provides a continuous runtime scanning for detecting new vulnerabilities, the lack of access to the infrastructure may be a challenge for having full and constant visibility of the container image vulnerabilities when running serverless.
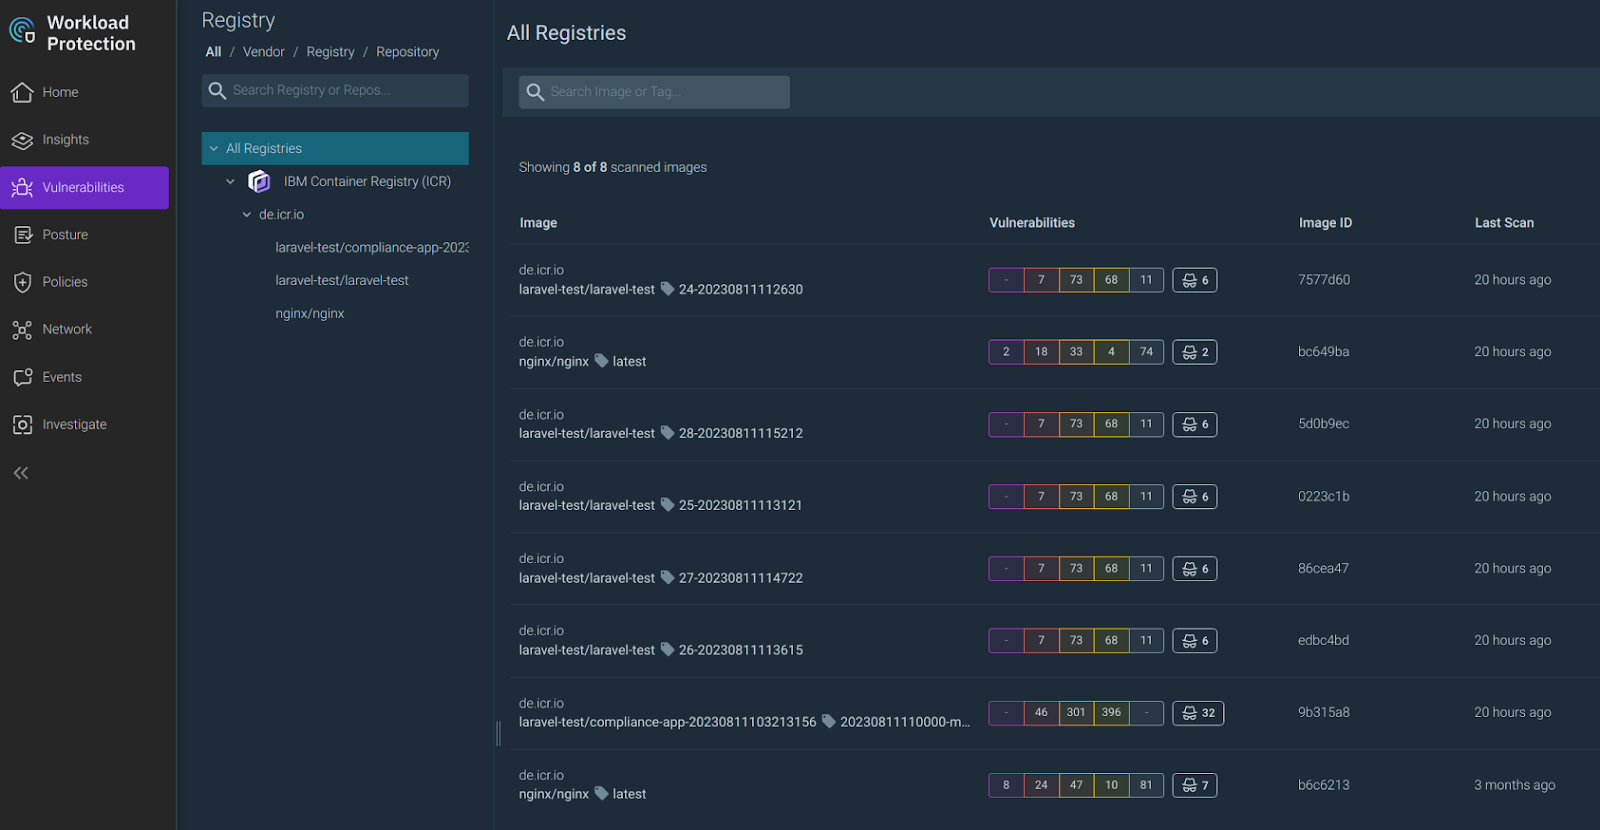
However, in order to centralize in a single pane of glass all vulnerabilities scanned in pipelines or runtime it’s necessary to automate the execution of Workload Protection Registry Scanner within Code Engine.
This way, all the images that are running in Code Engine are periodically scanned for detecting new vulnerabilities without the need to install the registry scanner in an orchestrated platform.
Running Registry Scanner in Code Engine
To facilitate the configuration and installation, we are going to use IBM CLI but you can also use the UI.
Before starting, you need to cover the following prerequisites:
-
Install IBM CLI and Code Engine plugin
-
One Workload Protection instance. If you don't have it, create it in the IBM Catalog. You can start with a free trial for 30 days.
-
Get Workload Protection API Token. You can get it under your user Settings / Sysdig API Tokens
-
Create an API Key for accessing the IBM Cloud ICR. The user will be iamapikey and the password the API Key
-
Your IBM Cloud account ID. It will be used for the ICR integration from the Registry Scanner
1. Create IBM Cloud Code Engine Project
Run the following command:
ibmcloud ce project create --name wp-registry-scanner
2. Create a config map
This configuration includes ICR and Workload Protection references.
You can see all Workload Protection endpoints depending on your region here.
# Registry configuration
registry:
  url: <ICR url>
  user: from-secret
  pass: from-secret
  type: icr
  accountId: <IBM account id>
  memberAccountsRoleName: OrganizationAccountAccessRole

secure:
  baseUrl: https://<region>.security-compliance-secure.cloud.ibm.com/
  apiToken: from-secret

filter:
  maxAgeDays: 2000
  maxTagsPerRepository: 5
  maxRepositoriesPerRegistry: 500
Note: in case that you want to customize the Registry Scanner behavior, such as image age or maximum tags, you can review the available options here.
ibmcloud ce configmap create --name registry-scanner-config -f config.yaml
3. Create ENV variables for Secrets
In this secret, you define the ICR user and password based on API Key and the Sysdig API Token to interact with Workload Protection.
REGISTRYSCANNER_REGISTRY_PASSWORD=<api key with access to ICR>
REGISTRYSCANNER_REGISTRY_USER=iamapikey
SECURE_API_TOKEN=<Workload Protection api token>
ibmcloud ce secret create --name registry-scanner-secret --from-env-file secret.env
4. Create the job
You need to mount the config map and secret and also add arguments to the runtime view:
ibmcloud ce job create --name registry-scanner --image quay.io/sysdig/registry-scanner --mount-configmap /config=registry-scanner-config --env-from-secret registry-scanner-secret -a "--config" -a "/config/config.yaml" -a "--scan_runner" -a "new-vm-scanner"
The arguments are defining the path to the config map we previously created and the scanner type of Workload Protection
5. Create cron and attach to this job
In order to configure the Workload Protection registry scanner to run periodically, configure a Cron Subscription.
For example, configure the Registry Scanner to run every 12 hours:
ibmcloud ce subscription cron create --name registry-scanner-cron --destination-type job --destination registry-scanner --schedule '0 */12 * * *'
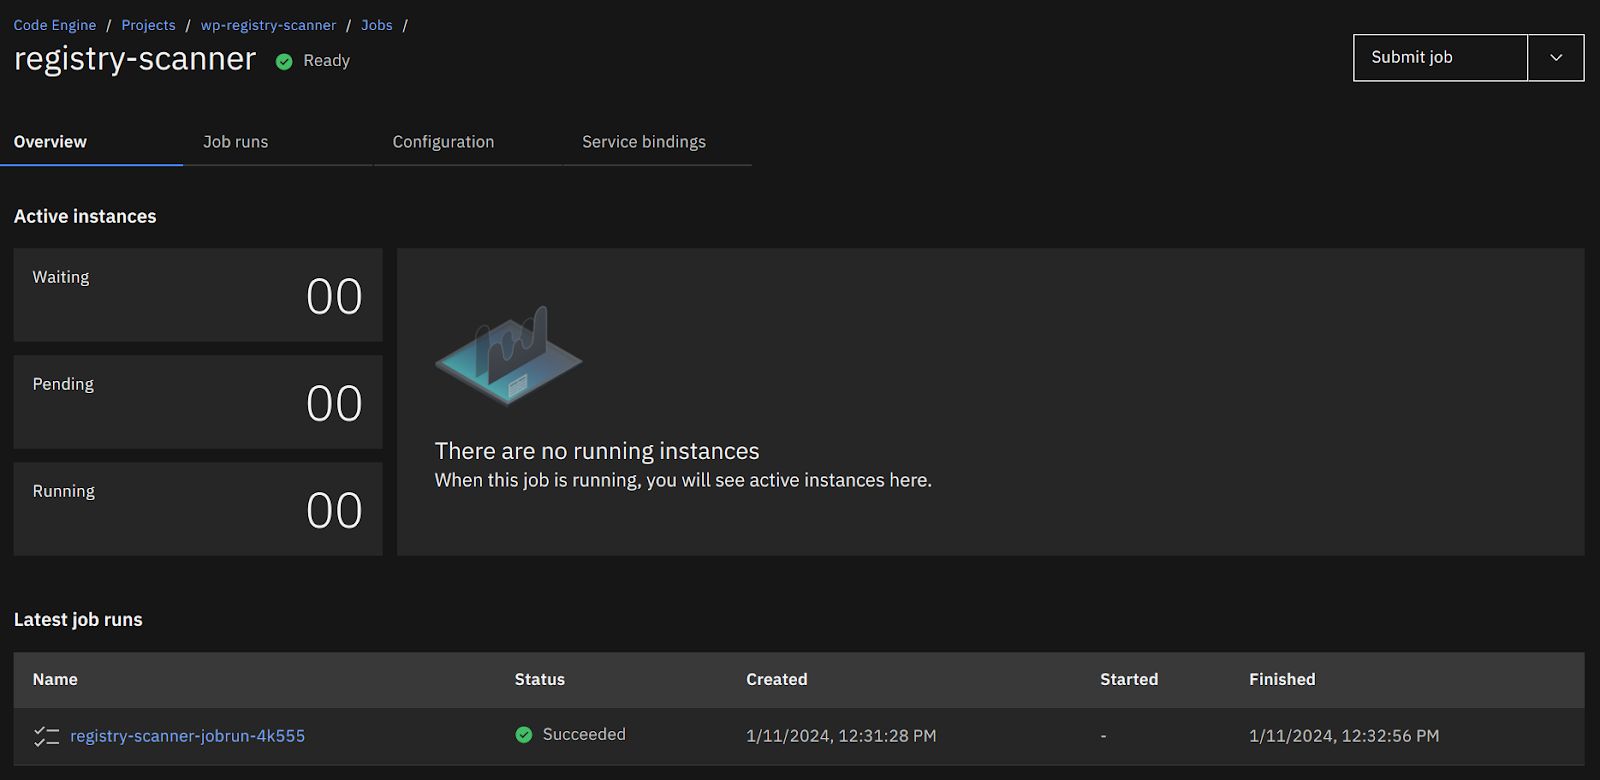
6. Validate the Registry Scanner has run successfully

Note: If you find any issue, you can check the Logs of the job to identify the root cause


Conclusion
Container environments are evolving fast into managed services such as IBM Cloud Code Engine. Customers' responsibility remains the same regarding their workload's security.
Combining Workload Protection vulnerability management capabilities with IBM Cloud Code Engine automation allows you to keep your environment security in a few simple steps.
What’s next?
If you want to learn more about how Workload Protection can help you secure your cloud-native applications, take a look at the following resources and visit the IBM Cloud catalog. You can request a 30-day free instance. You’ll be up and running in a few minutes!