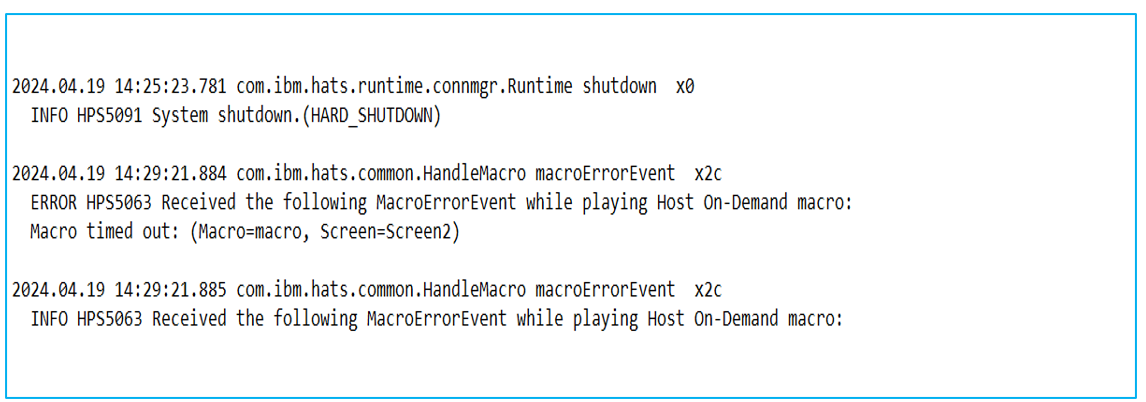
In HATS, during a macro failure or improper transformation, the application automatically logs the screen contents by dumping them into the message logs.
Figure 1: Dumping Macro Failure Screen Contents into log files
Figure 2: Dumping Transformation Failure Screen Contents into trace files
HATS version 9.7.1 provides a new Screen Trace Control feature to enhance screen tracing security and control. Users can use the Screen Trace Control option to control the printing of screen contents in the trace/log files, which occurs in certain incidents.
Steps to control the printing of screen into logs:
1. Create a HATS project.
2. Go to Project SettingsàRenderingàScreen Trace Control.
Figure 3: Screen Trace Control
3. Select the Allow screen trace control checkbox.
Figure 4: Select Allow Screen Trace Control
4. Users can select Apply to all screens checkbox or add required screens to the screen trace control table.
5. An error message appears if the user fails to select either the required screens from a table or the Apply to all screens option.
Figure 5: Select either the required screens or Apply to all screens
6. Apply to all screens - If the user selects the Apply to all screens checkbox, the screen contents will not be dumped into the traces, and the screens in the table and
the Add button will be disabled.
Figure 6: Select Apply to all Screens option
7. Steps to register the required screens
Note: Clear the Apply to all screens checkbox to register the required screens into the table.
i. Click the Add Button.
Figure 7: Add the required screens
ii. A Screen Trace Control window will appear.
iii. Enter the name you want to use for this screen trace control.
Note: This is the name that will appear in the screen trace control table list of screens.
Figure 8: Giving a name to the Screen Trace Control
iv. Click Next, and a Screen Recognition Criteria window will appear.
v. Choose the host screen upon which this screen trace control will be based. The choice will default to the location (host terminal or screen capture) from which you started. Select the screen you want to work with for this screen trace control.
Figure 9: Giving Screen Recognition Criteria
vi. Click Finish, and a Recognition Criteria for Screen window will appear.
vii. The user can also specify recognition criteria for the screens.
Figure 10: Adding Custom Recognition Criteria
Viii. Click Finish.
8. The host terminal opens next, and a wizard names the screen.
9. The user is prompted to choose whether to use the live terminal or screen capture. If applicable, users can select a specific screen capture. The user can then specify the screen recognition criteria they want to match to recognize the screen.
10. The user must select Macros, Transformation, or both to control the printing of the screens into the trace file or message logs.
Figure 11: Select either Macro or Transformation
11. An error message appears if the user fails to select either Macros or Transformation.
Figure 12: User fails to select either macros or transformation option
12. For example, the Sign On screen is selected and registered as screen trace capture, and the macros option is selected. If the Sign On macro fails, the screen contents will not be dumped into the trace files. Run the application and check the trace/log files (under project EAR). No screen content is dumped into log files.
Figure 13: User selects Macro Option

Figure 14: No screen contents dumped into log files
13. Likewise, if the user wants to check transformation failure, the user needs to enable trace settings in the runtime properties file using the trace. RUNTIME=9 property. Here, the transformation option is selected. Run the application and check the trace/log files (under project EAR). No screen content is dumped into log files.
Figure 15: User Selects Transformation Option
Pamarthi Padmavathi
Lab Services, IBM HACP & HATS