Utilizing BPM to assign context and variables using Coachview Artifacts

Contents
Overview
Skill Level: Beginner
In this recipe we will be showing one way of firing boundary events via buttons in a table. We also show how to use a data attribute to store on screen value for usage.
Ingredients
Step-by-step
1. Initial CSHS Creation
Build a clientside human service.
I’m calling it Contextual Table.
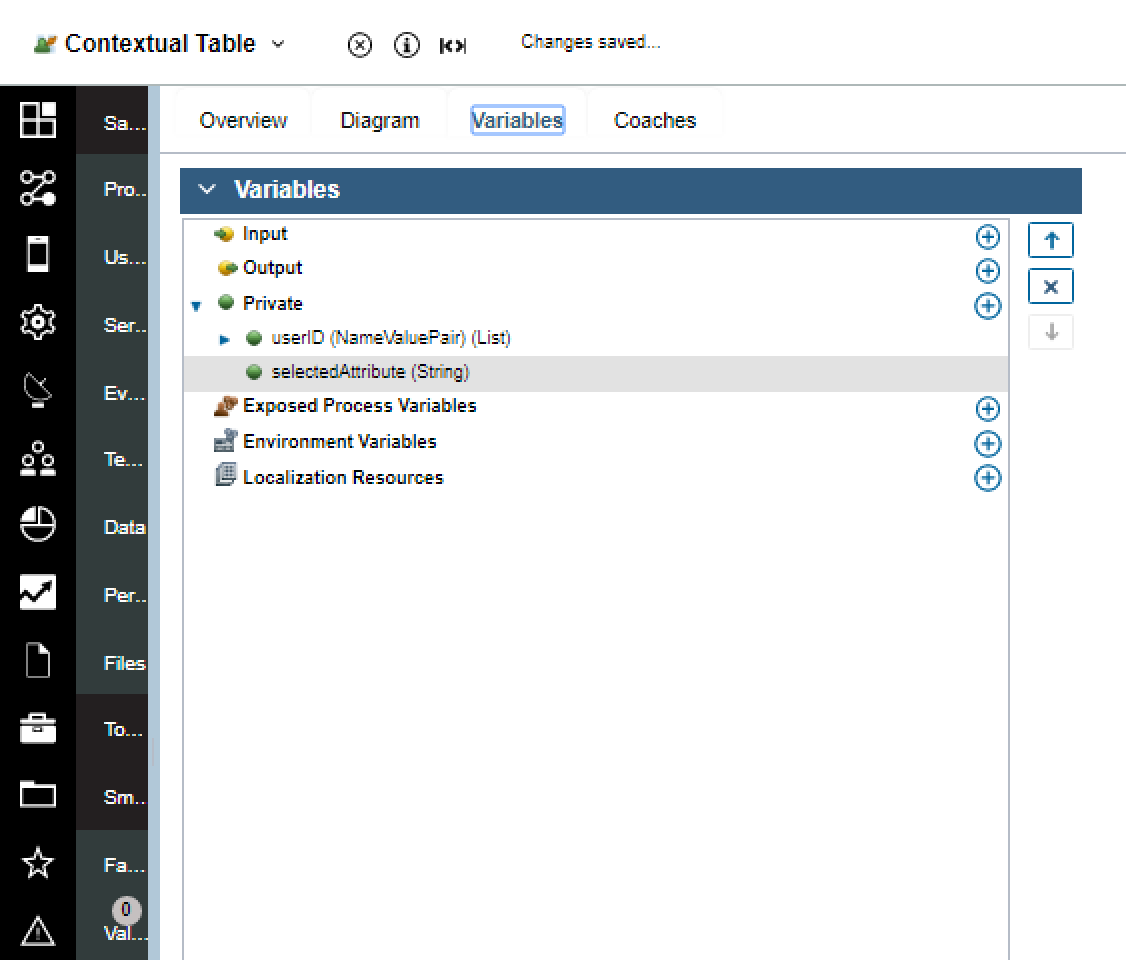
Variables
- Add a private list of nameValuePairs to the variables. Call this userID.
- Add a single string called selectedAttribute
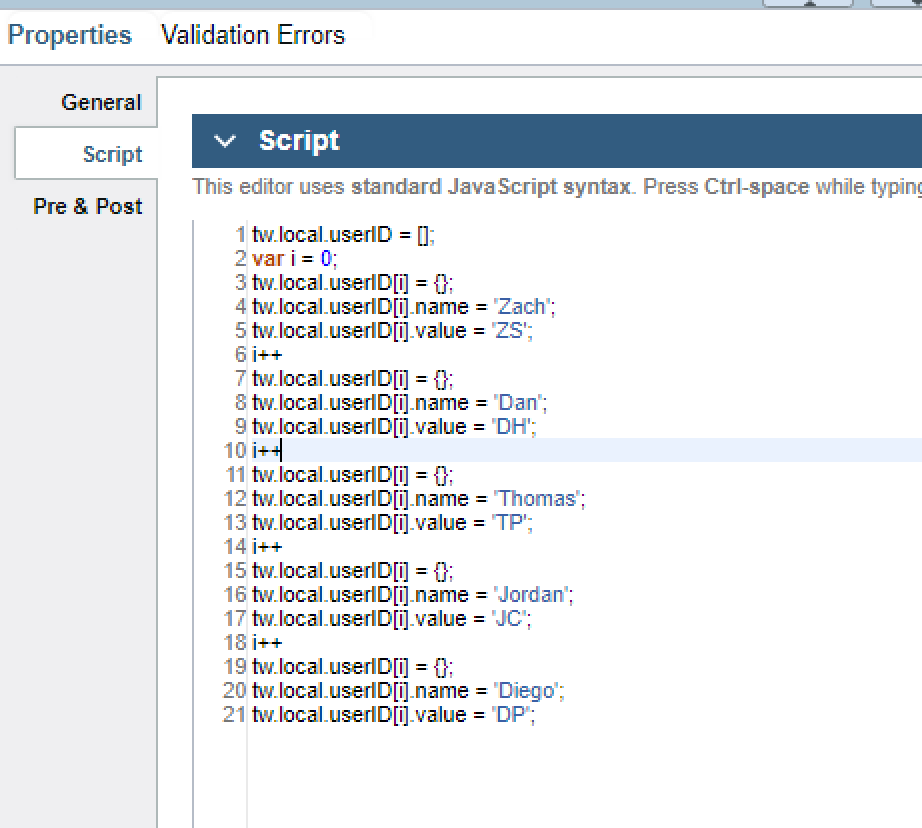
On the diagram initialize a sample list of users and IDs in a piece of clientsideJS that will populate our table.
2. Build your main coach
- Navigate to your coach and delete the OK button.
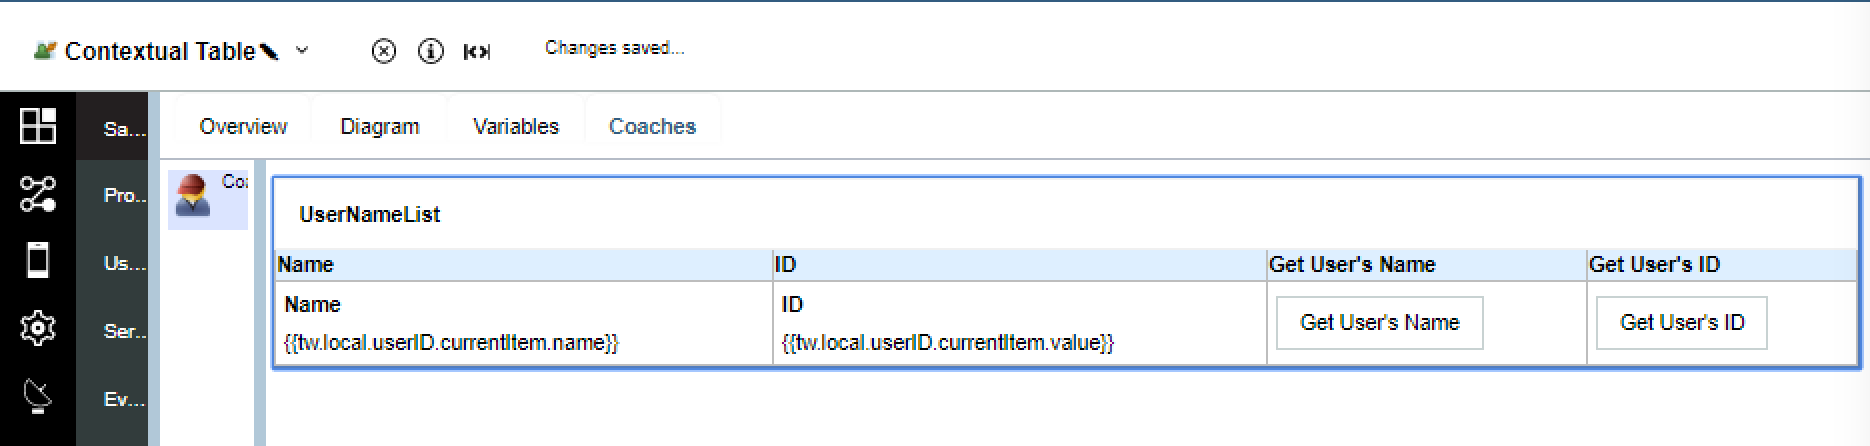
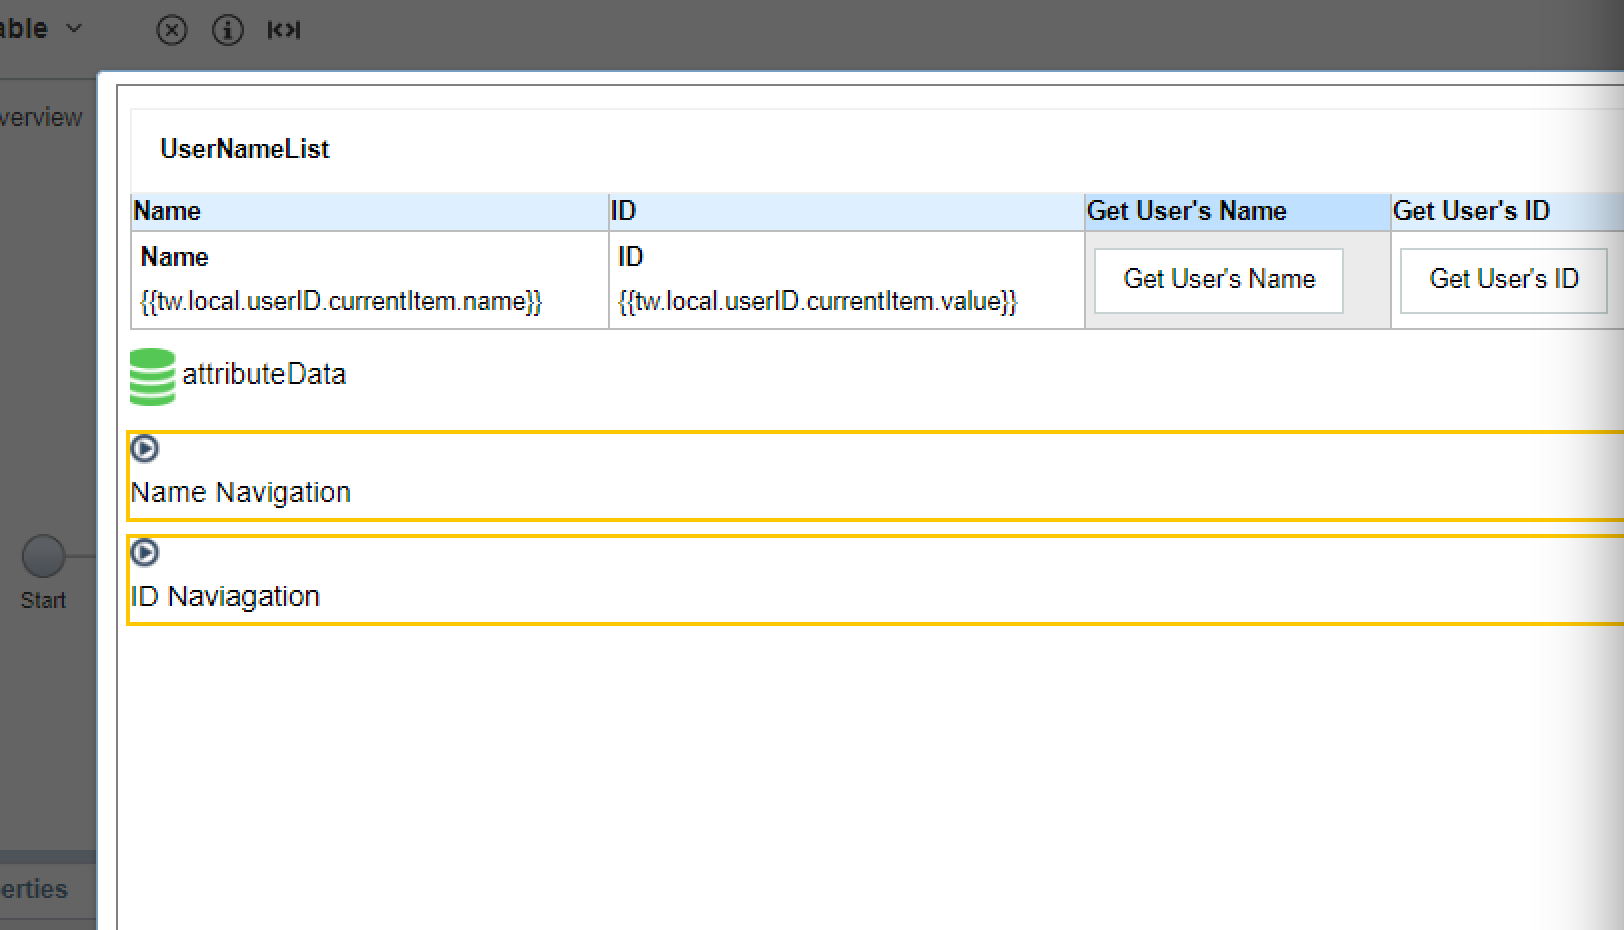
- Drop a table UI component on screen and assign the table CV to userID.
- Add output text cvs into the table and assign each field to currentItem name and value of userID.
- Also add two buttons, labeled get user’s name and get user’s ID.
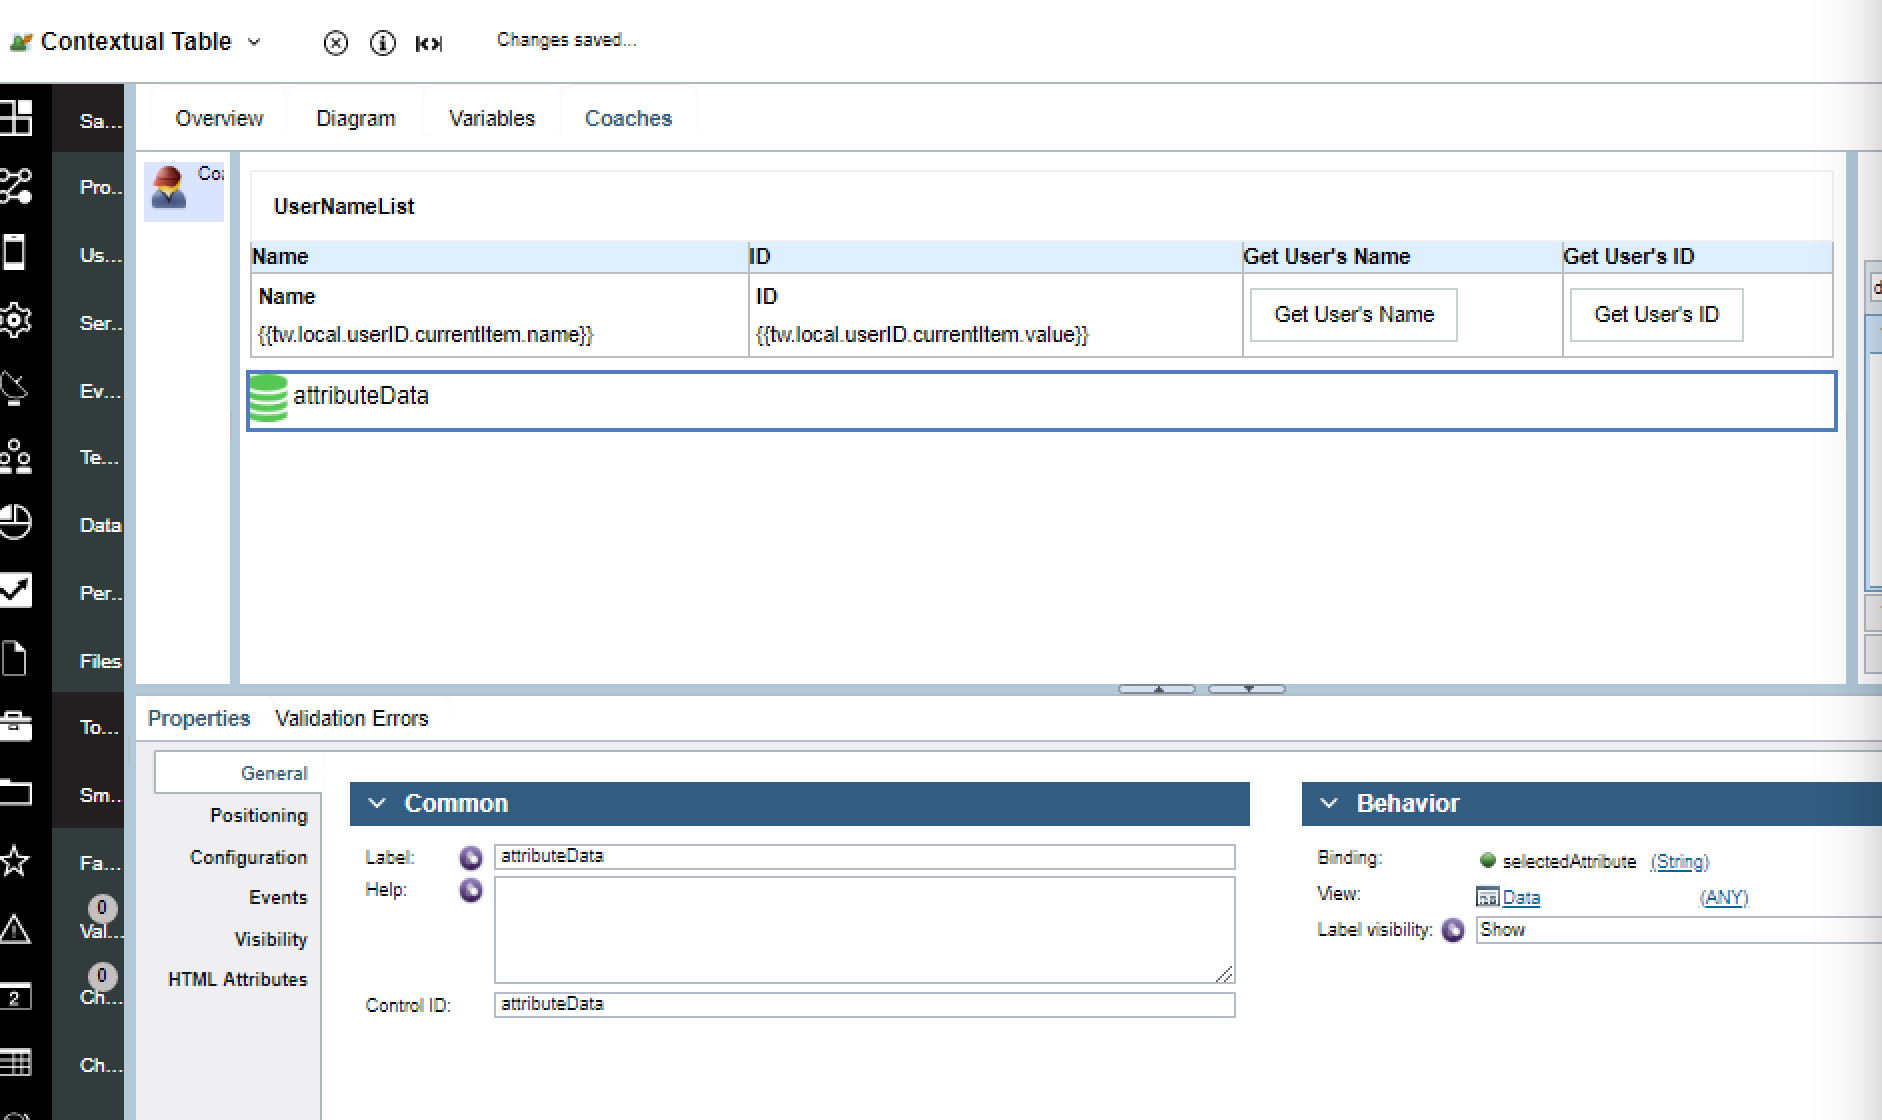
At the bottom of the screen add a data CV and edit the controlID to say attributeData, and bind to selectedAttribute
Add two navigation events at the bottom of the screen under the data object. Change their controlIDs to nameNavigation and idNavigation respectively
3. Event Javascript
Select the first button and add this code to the onClick
var currentRow = this.ui.getIndex(); //Gets which row the current item is
var rowName = this.context._parentView.context.binding.get(‘value’).items[currentRow].name; // Gets the name of the item in the current row index
page.ui.get(‘attributeData’).context.binding.set(‘value’,rowName); //Sets our attribute data object to the right value
page.ui.get(‘nameNavigation’).context.trigger(); //Triggers the name navigation boundary event
Select the second button and add this code to the onClick
var currentRow = this.ui.getIndex();
var rowID = this.context._parentView.context.binding.get(‘value’).items[currentRow].value;
page.ui.get(‘attributeData’).context.binding.set(‘value’,rowID);
page.ui.get(‘idNaviagtion’).context.trigger();
4. Diagram level changes
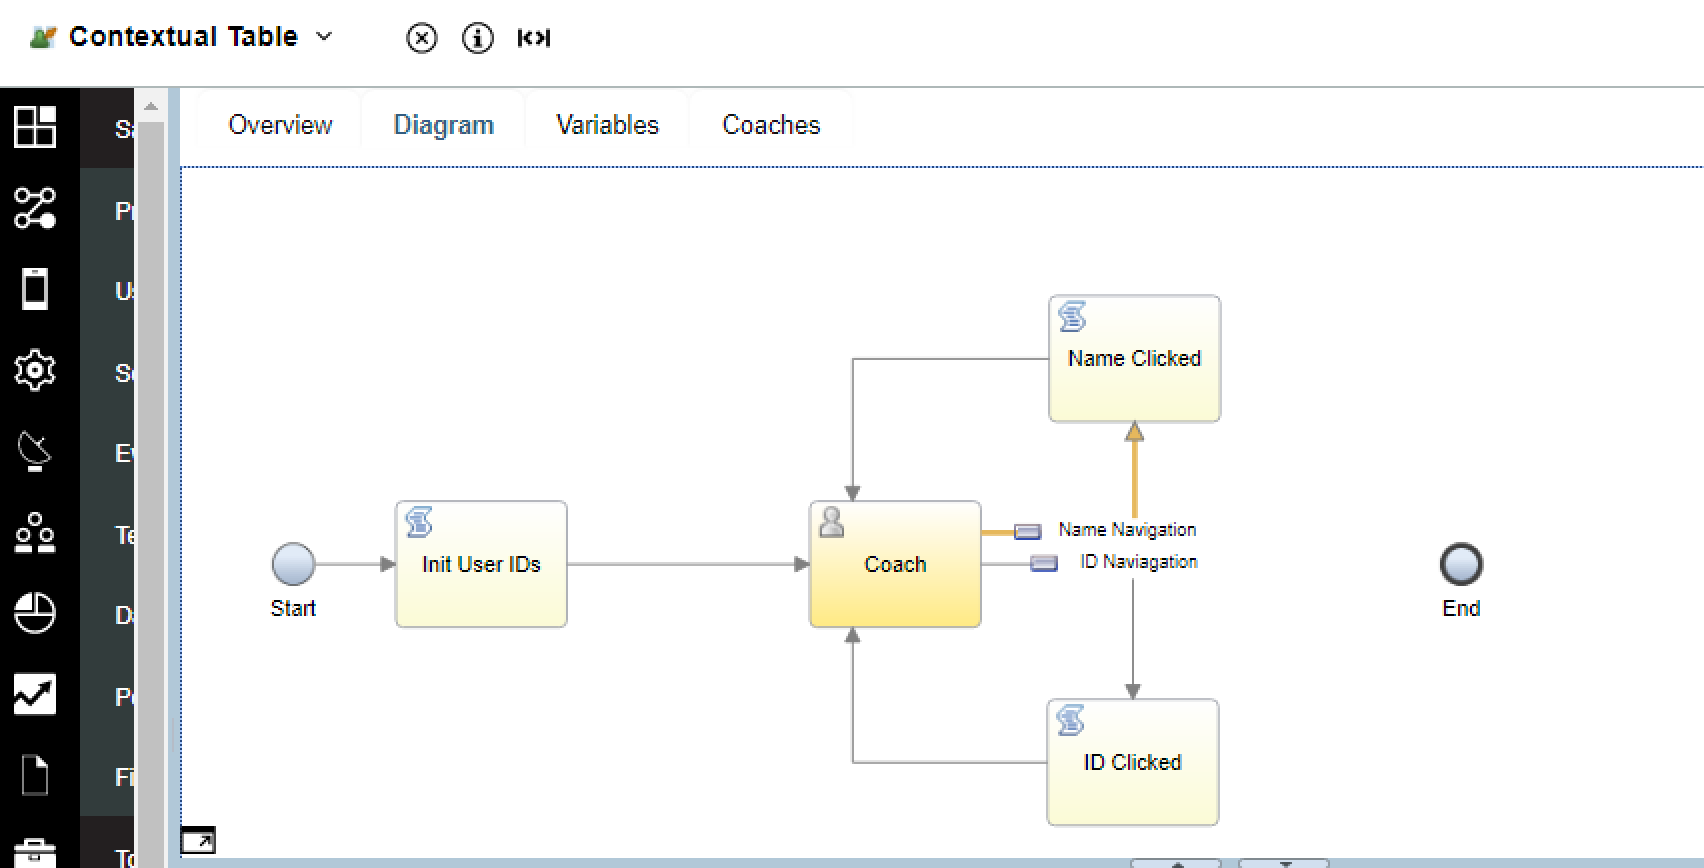
Go to your diagram and draw the boundary events to pieces of client side Javascript each, then back to the coach as seen below.
Add this code to the Name Clicked CSJS
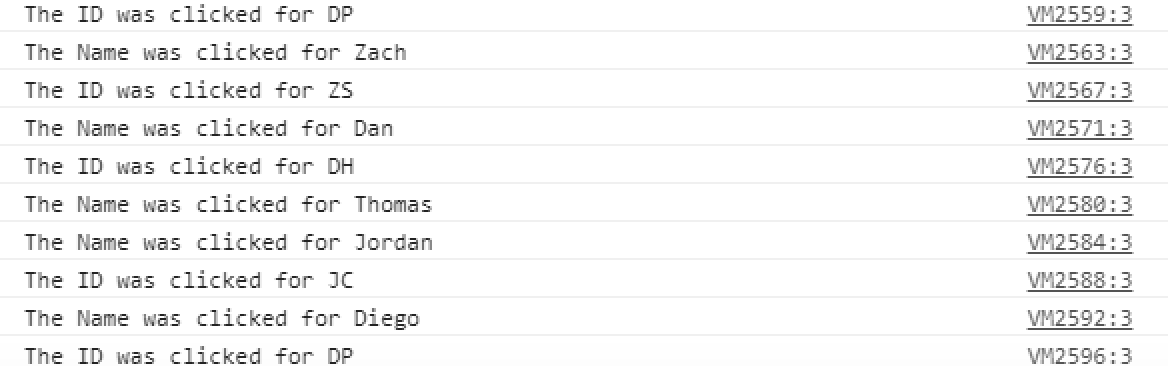
console.log(‘The name was clicked for ‘ + tw.local.selectedAttribute);
Add this code to the ID Clicked CSJS
console.log(‘The ID was clicked for ‘ + tw.local.selectedAttribute);
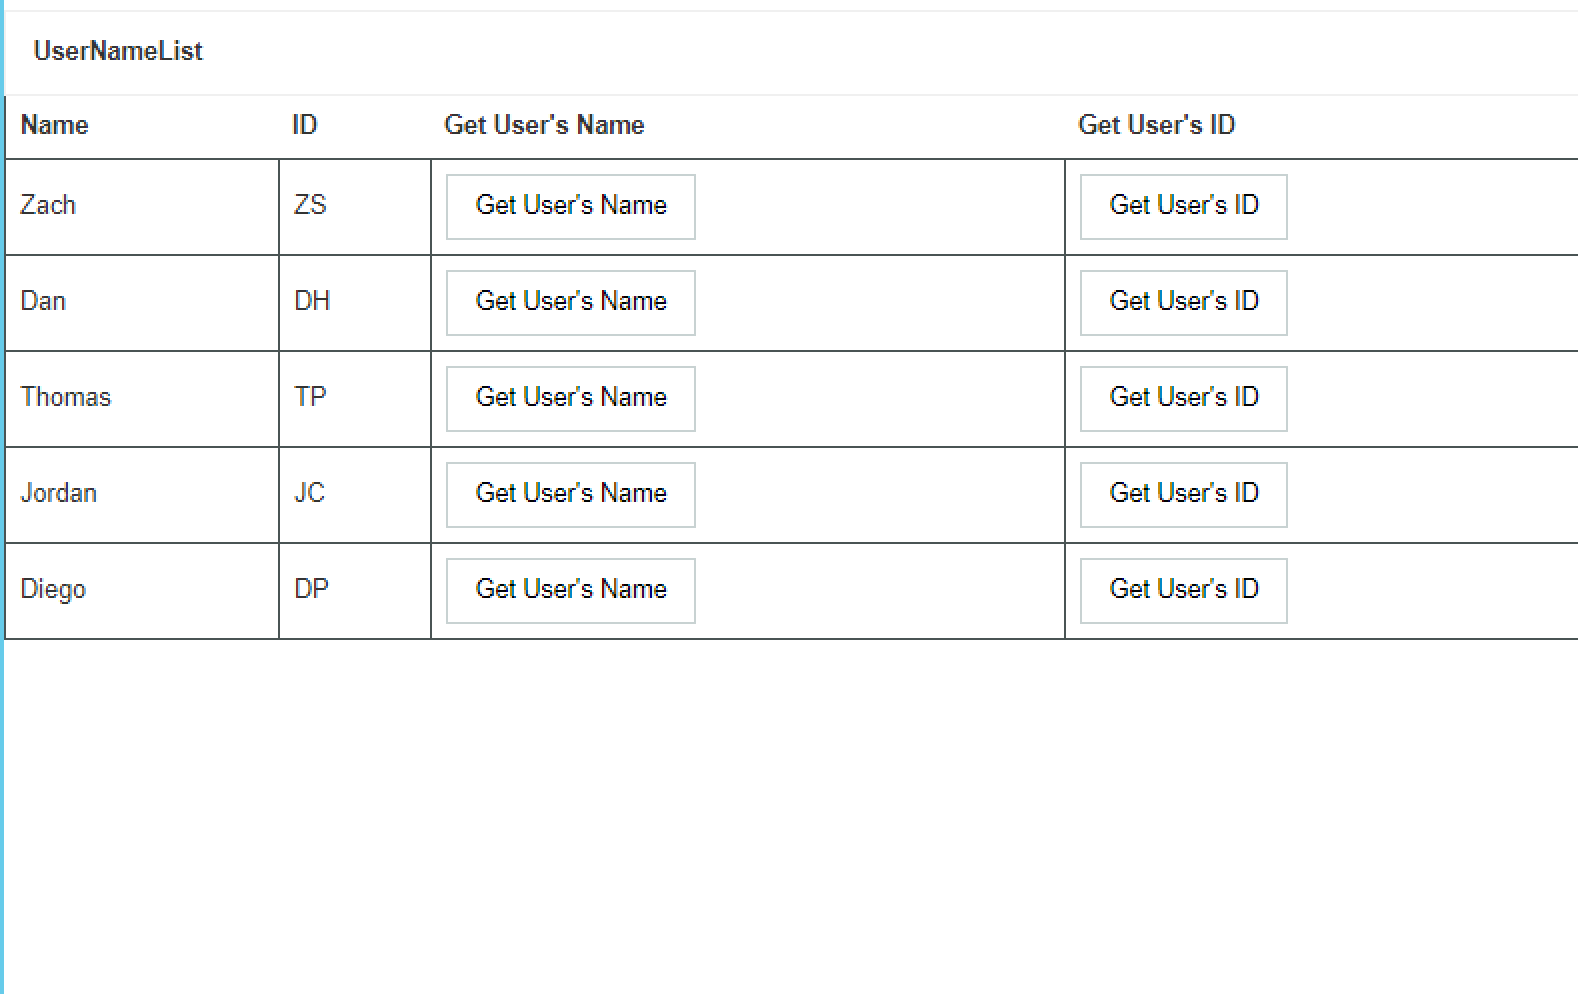
5. Run and view your console as you click the buttons.
6. Questions?
For any questions please email me at zachary.silverstein@ibm.com