The stages features was added to IBM Case Manager several years ago. It provided a built-in way to define, track and visualize the high level stages that a case goes though during its lifecycle. In addition to providing a "I am here" capability, stages can also be used as a precondition to case activities to ensure they start or become available at just the right time.
A case's stage value can be displayed in the Case List widget and is also emitted for reporting and dashboards you create. If you add optional durations to your case stage definition, those values are used to help determine the health of a case.
In this simple example built using BAW 22.0.1, we will explore how to interact with a case's stages from one of its orchestrated processes.
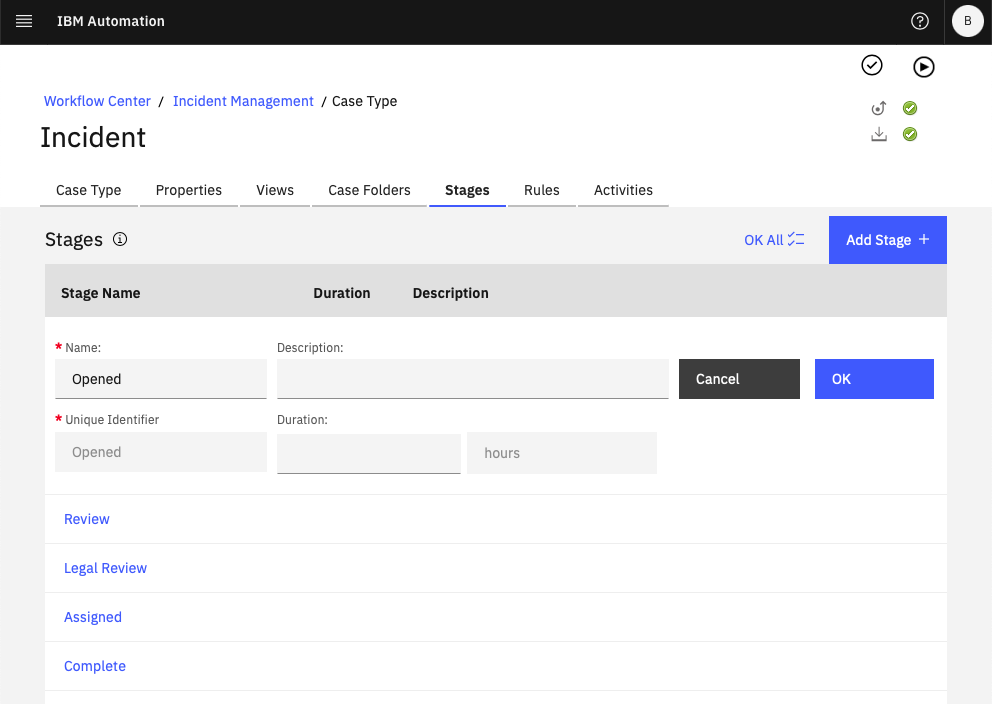
We start by adding the stages shown below to our case type.
We then add a case activity that will automatically start a process when the case is created.
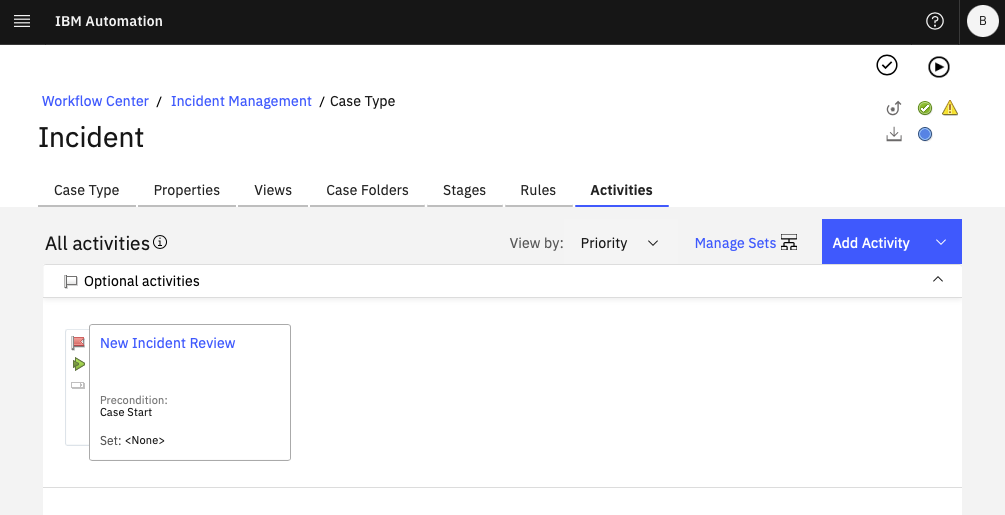
When you create a new activity with process for a case, a simple default process flow is created for you. This flow creates a single user task that is available to members of any of the case roles you have created for your project by looking in their "My Work" in-basket.
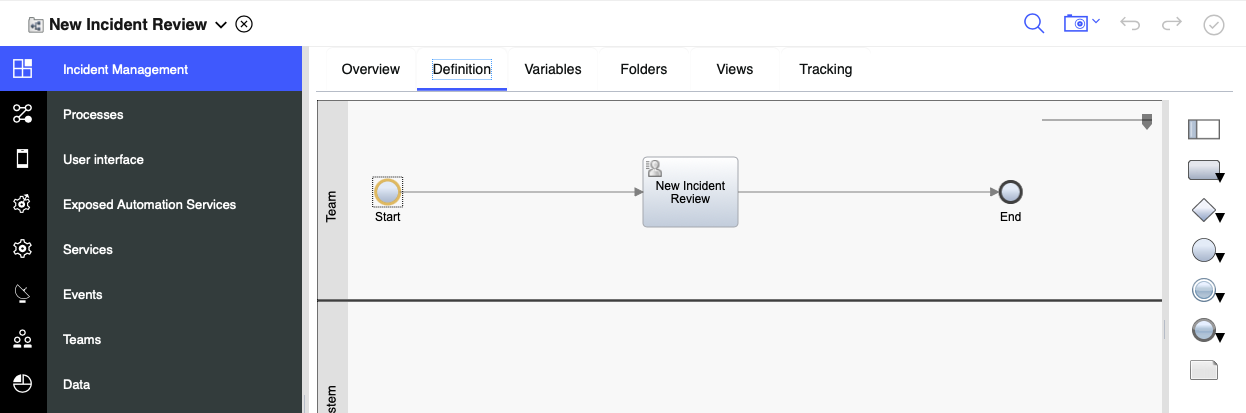
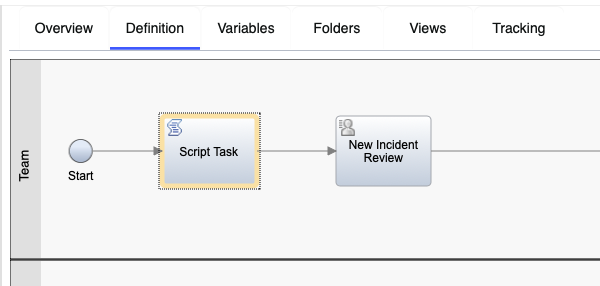
To interact with the process's parent case stages, we add a
script node to the flow by dragging it from the palette.
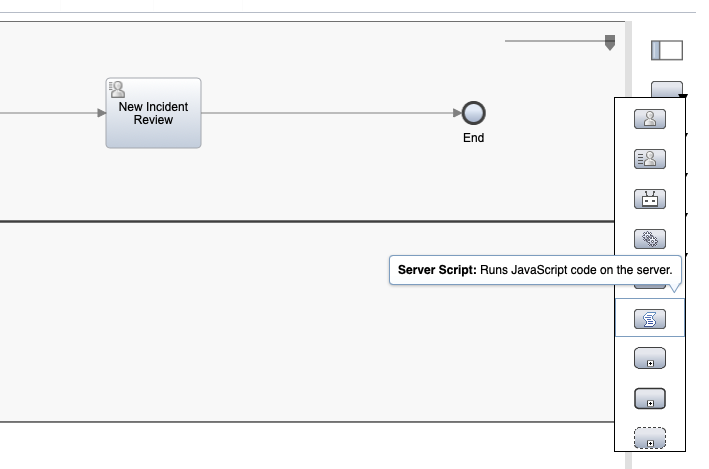
We drop a script node directly on the line going into the user task to insert it there.
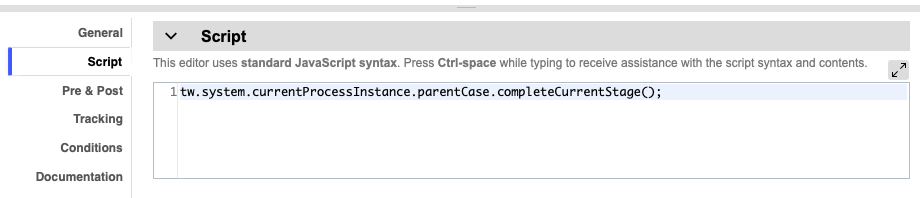
Next we give it an appropriate name and then enter the script that uses the case javascript API to control the case's stages.
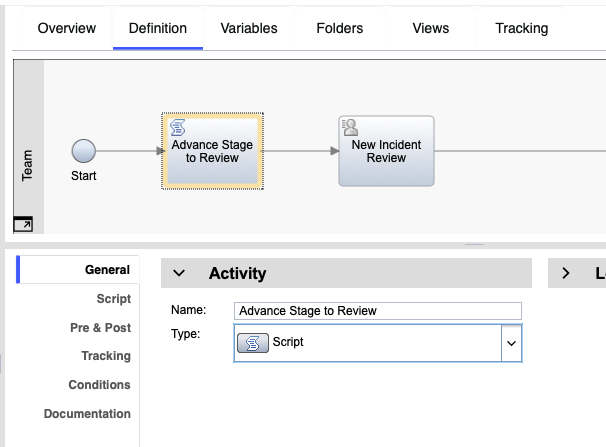
When entering this simple script, you can use the auto-complete feature by pressing the CTRL-SPACE keys as you type. What this script does is move the case's stage from where it currently is to the next
enabled stage. In our example, the case automatically starts in the
Opened stage we defined and by completing that, it will transition to the
Review stage.
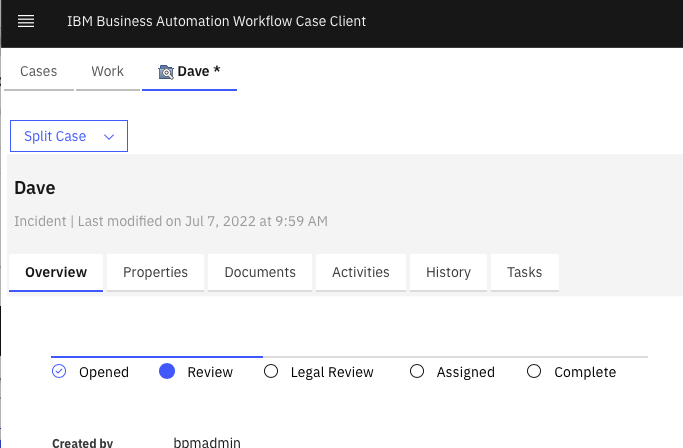
Deploying our project and trying it out, we see that after creating a new case and opening it, our automatic activity has started, launched its process and run our script since we can see from the
case stages UI view that we are currently on the Review stage.
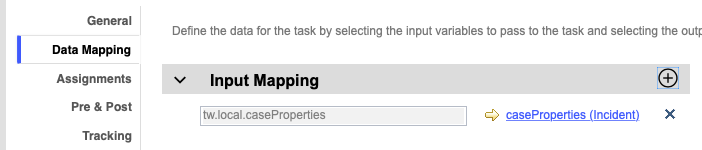
For even more fun, let's replace the default user task step with a customized one. You can do this very quickly by first selecting the user task in the flow and mapping in the case properties content object variable since you will probably want to display some of them (you can also do this later but this approach will save you a few clicks later).
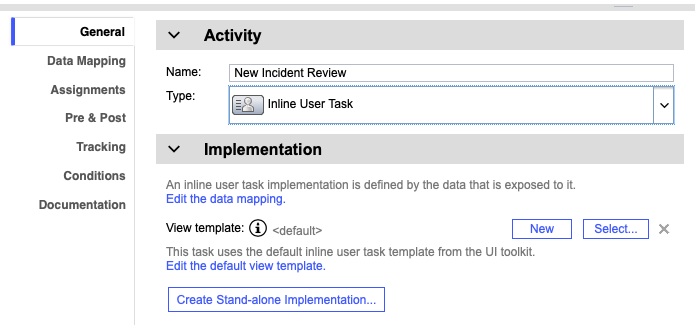
You can then click the handy
Create Stand-alone implementation action at the bottom of the
General section. That will replace the built-in default client-side human service (CSHS) with a new customizable one.
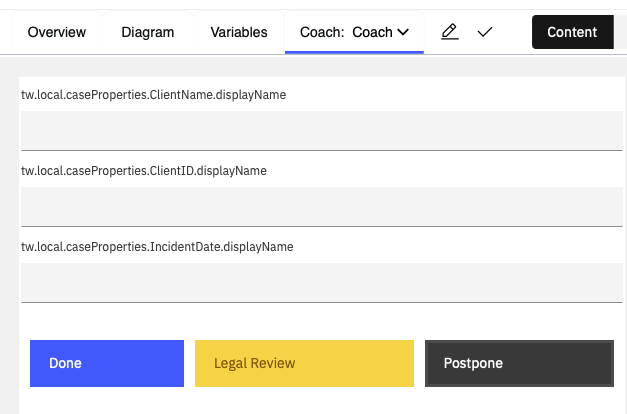
Open the CSHS by double-clicking it in the process flow. Once you see the UI flow for the CSHS, click the Coach/Page node to display the editor. We can start by deleting the big default UI view that is initially there, leaving only the buttons at the bottom. We can then go to the palette on the right, find the
Variables section, and since we mapped the case properties into the CSHS node, they are available to drag onto the page. This will automatically create appropriate input controls for each case property and bind to them.
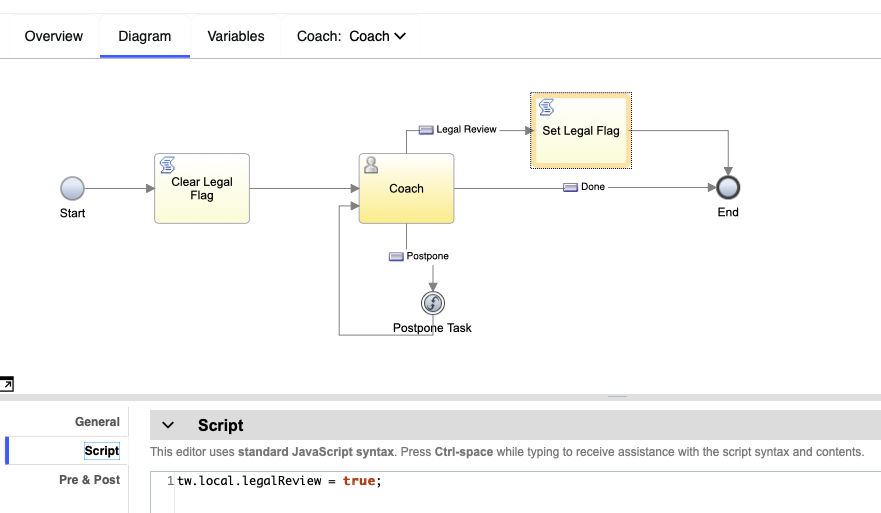
We also want to drag a new button from the palette to provide the option to optionally request a Legal Review be performed on any new case,
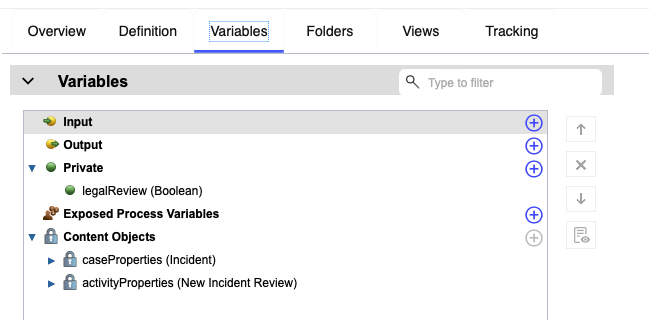
Back on our CSHS flow, we add a new Output variable to indicate to our underlying process which option was selected by the user.
We add two script nodes to set that variable. The first node sets it to false and the second one is connected to our
Legal Review button and sets the variable to true as shown below.
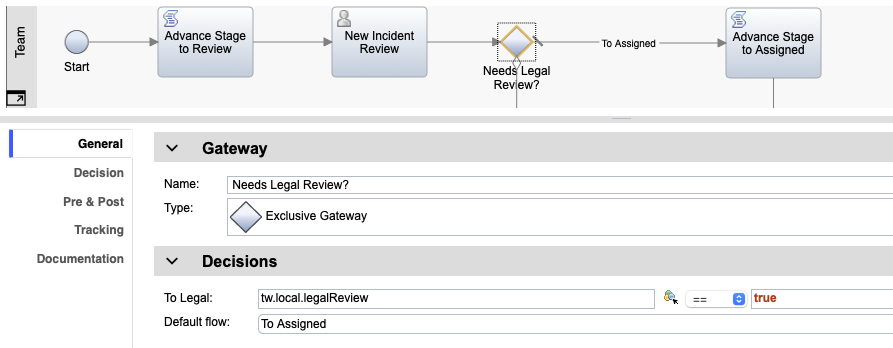
Back in our process flow, we add a few more nodes to handle whether we need a Legal Review or not. Start by selecting the user task node again and going to the Data Mapping section. You will now see that in the
Output Mapping section, our new legalReview variable is available. Since we don't yet have a process variable to map it into, just click the
magic wand (oh, you ask, is that what that is!) in the header of the output mapping list. This will allow you to automatically create and map the appropriate process variable for the data coming back from the CSHS.

Now that we have the result of the user's choice, we can add a
Gateway node to our flow and test the value of the legalReview variable.
We can then use a couple more script nodes to advance our case's stage appropriately. The one handing the path to the Legal Review (legalReview=true) just uses the same script we added to our first script node. The one on the other path (legalReview=false) makes one extra API call to disable the Legal Review stage by passing in the stage's symbolic name.
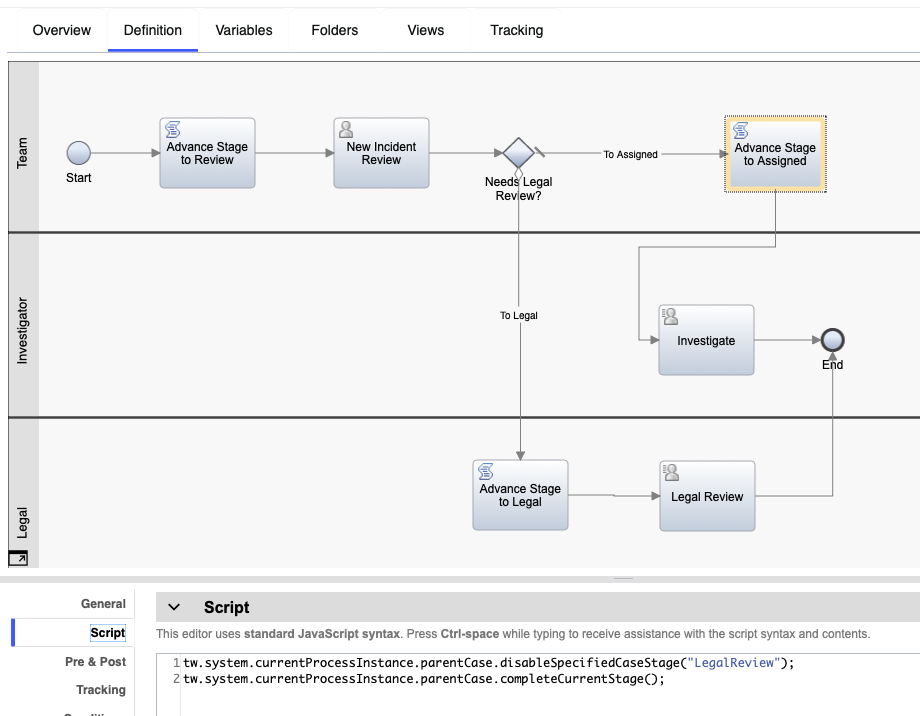
As you can see below, when a case skips the Legal Review stage using the
disableSpecifiedCaseStage call, that stage is removed from the Stages UI view and the call to complete the Review stage will skip right over it and start the Assigned stage.

If we take the other path, the Legal Review stage will remain in the UI view and will become active when the Review stage is completed.

This approach provide a more accurate account of what stages a case went through.
As easy as it is to add these simple scripts to your flow, it is worth noting that you can create a
service flow that wraps the script and does the same thing. You can then simply drag that service flow onto your process flow when you need it; no script typing required!. You can even put a service flow like this into your own
toolkit so you can easily reuse it in other projects.
#BusinessAutomationWorkflow(BAW)#BusinessProcessManager(BPM)#CaseManager