One of the key capabilities Business Automation Workflow (BAW) brought to case was the use of the Client-side Human Services (CSHS) user interface framework for not only process task UIs, but now also for case related ones such as the page you see when adding a case, looking at a case instance details or splitting a case instance into another case/case type.
Having a common framework allows technologies, skills, resources and common component reuse across all areas of a project's UI creation and customization.
When you create a new case project, a default set of UIs are automatically associated with the various actions and artifacts you add. Historically, the BAW Case client (previously called the IBM Case Manager Case Client before combining with IBM BPM to become BAW) provided you with UI pages built using a widgets based framework and underlying components it shared with its Navigator host environment. Although very powerful and in many ways, customizable, the widgets framework did not give a page designer the fine grained customization one might expect of other web page builders. Custom widgets could be created and added to the design palette, but the creation of those was a fairly complex programming exercise.
Having a set of default pages already associated with your project meant that you could have your new case solution up and running in the client in minutes, leaving the customization of those pages for a later time. Currently, new BAW case projects still use these pages and widgets as their defaults and existing solutions continue to support these page as before.
In this example, we are going to replace the widgets based Add Case page with a new customized CSHS based one in a new case project to show just how easy it is.
We will start in the BAW 22.0.1 Workflow Center where we find and manage the workflow projects we create.
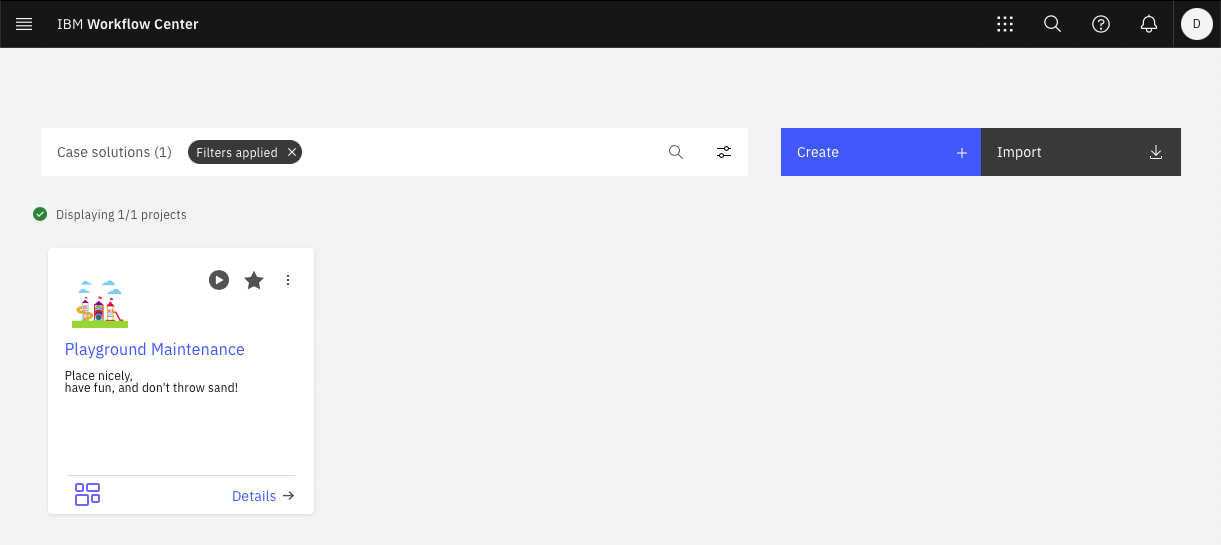
We head into the Case Solutions area and click the Create button to define our new project.
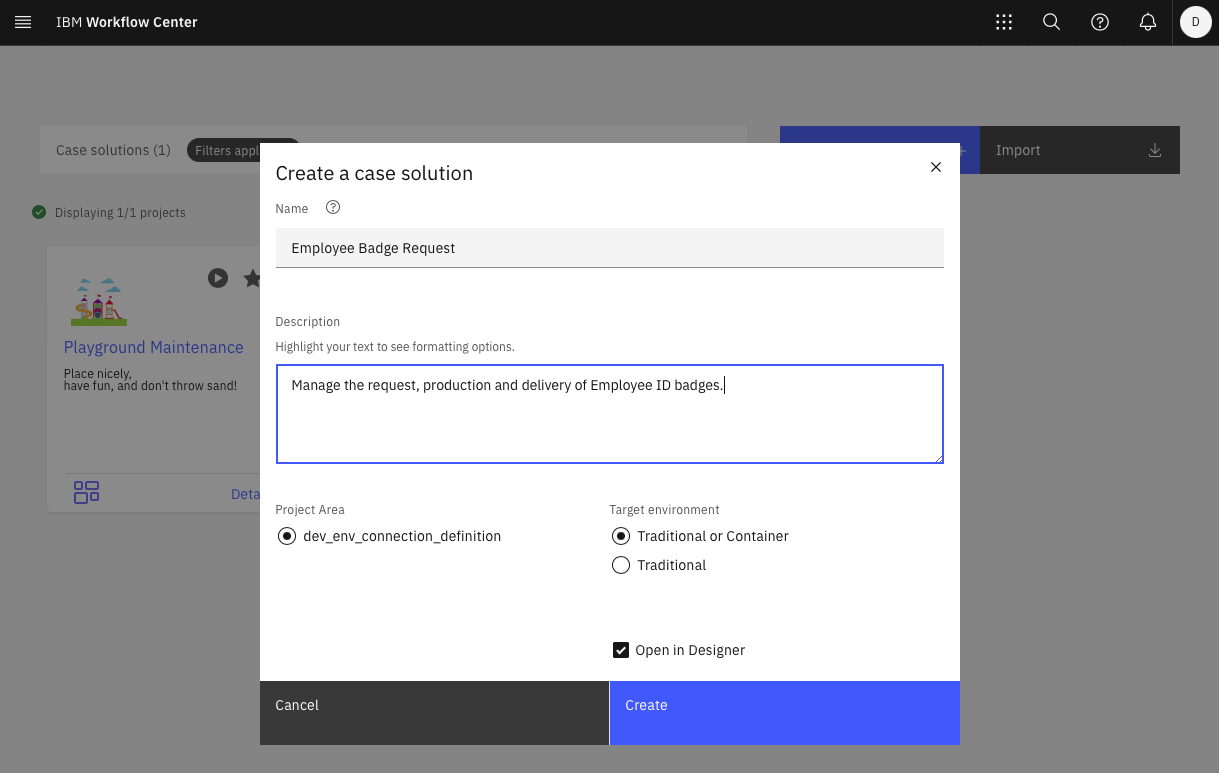
Click Create and off to Case Builder we go to start modelling our new solution.
The first place we are going to go is to the Roles tab to define our primary end user role whose members will be able to access our solution.
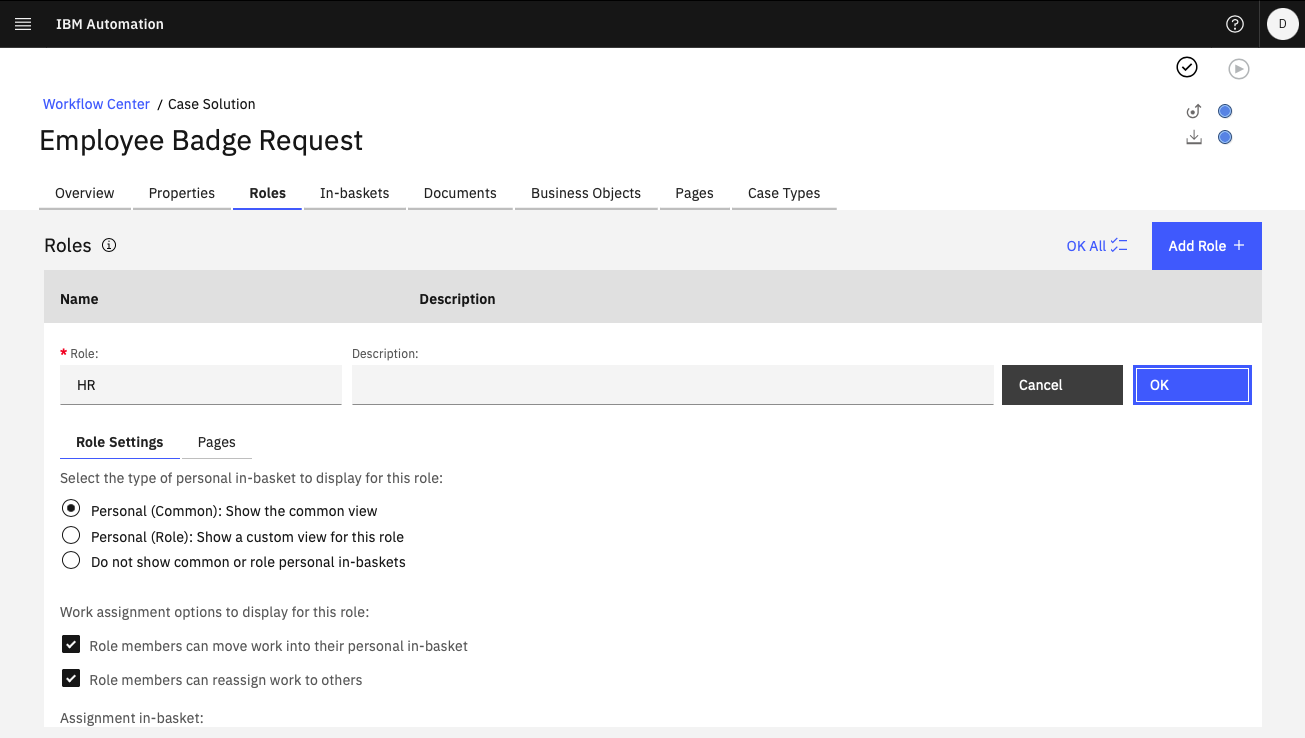
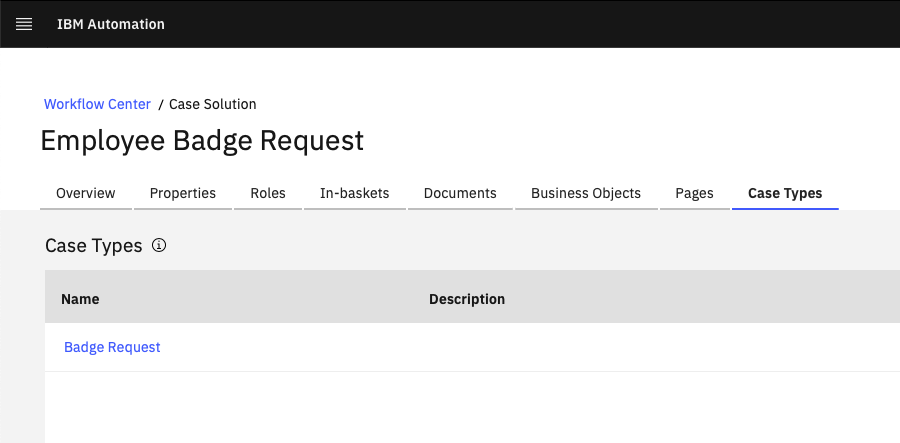
On the Roles tab, click the Add Role button, enter HR as our role name and click OK to add it. With that out of the way, let's go define our case type that will be used as the model for each instance of a badge request we get. We do this by clicking the Case Types tab.
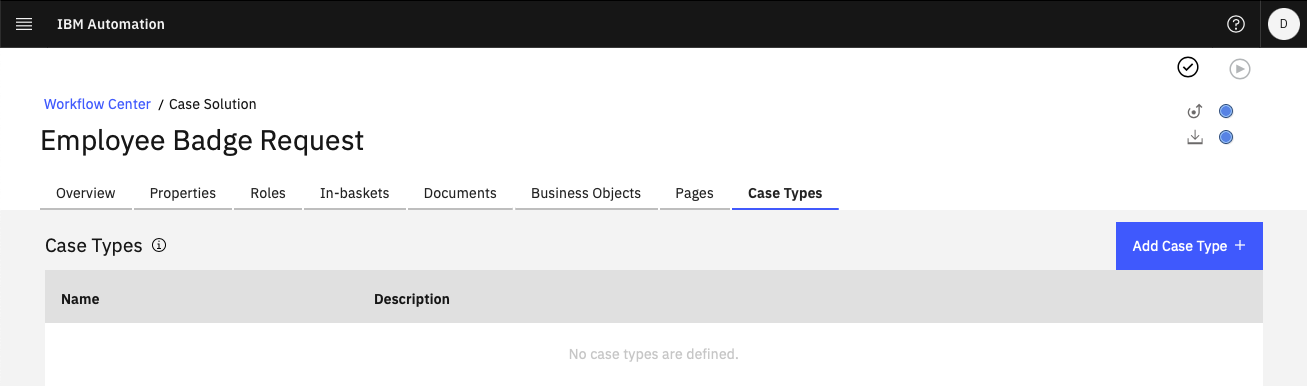
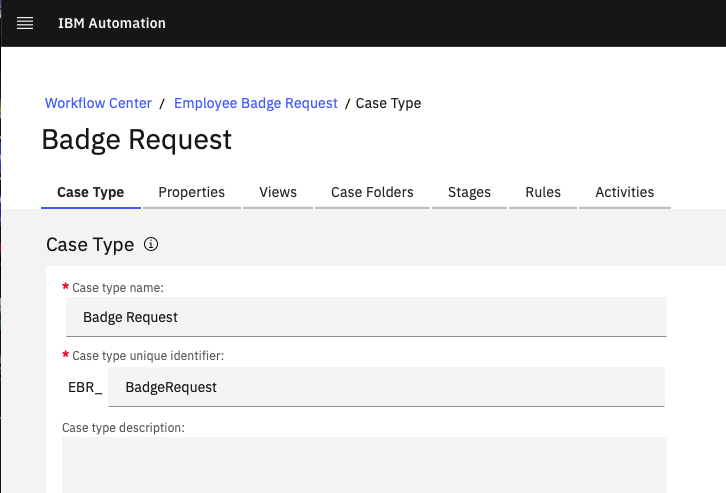
Click the Add Case Type button and enter Badge Request as the name for our new case type.
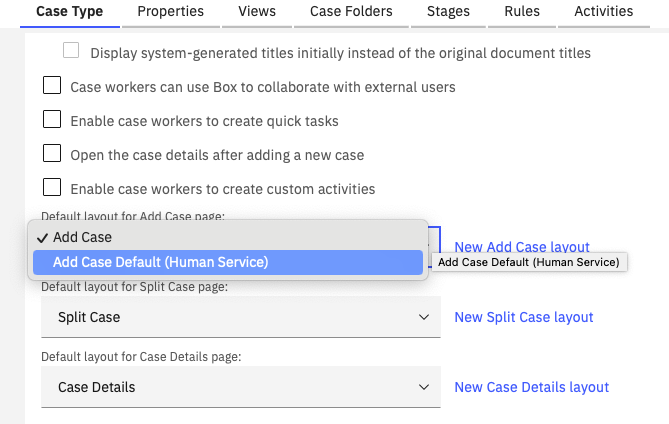
If you then scroll down a bit, you will see an area that shows what UI page layouts are associated with your new case type.
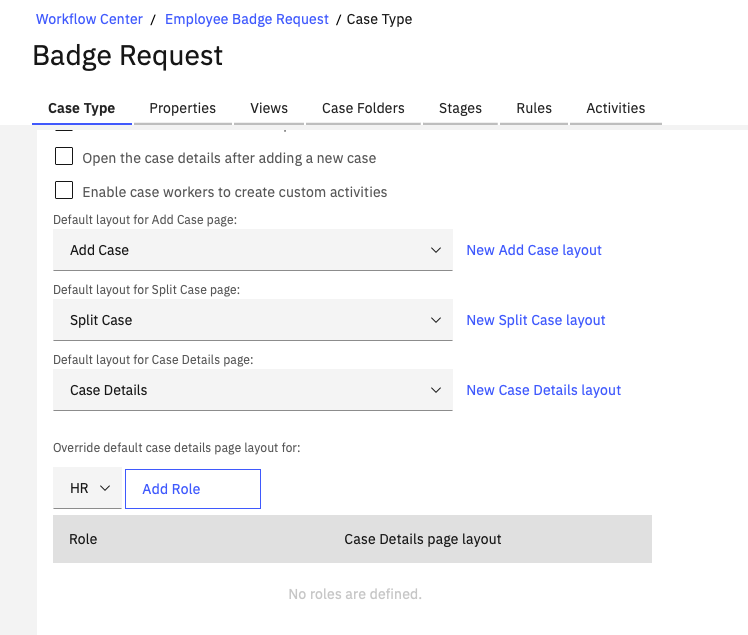
We will come back to that in a minute after we define a few more things and try out our new solution in the Case Client.
There are a set of tabs associated with various areas of your new case type. Click the Properties tab so that we can start specifying the data we want our case type to hold.
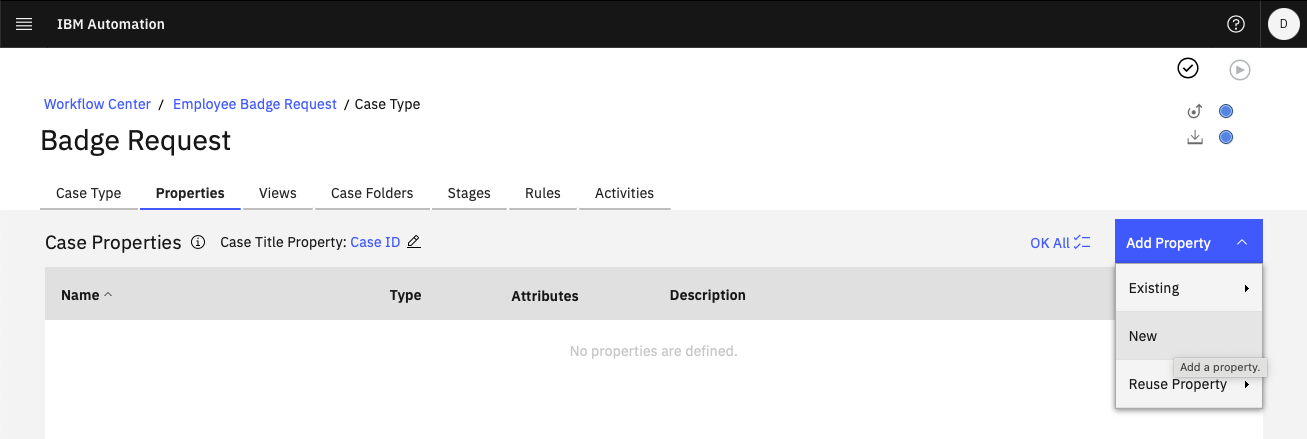
Click the Add Property button and select New from the menu.
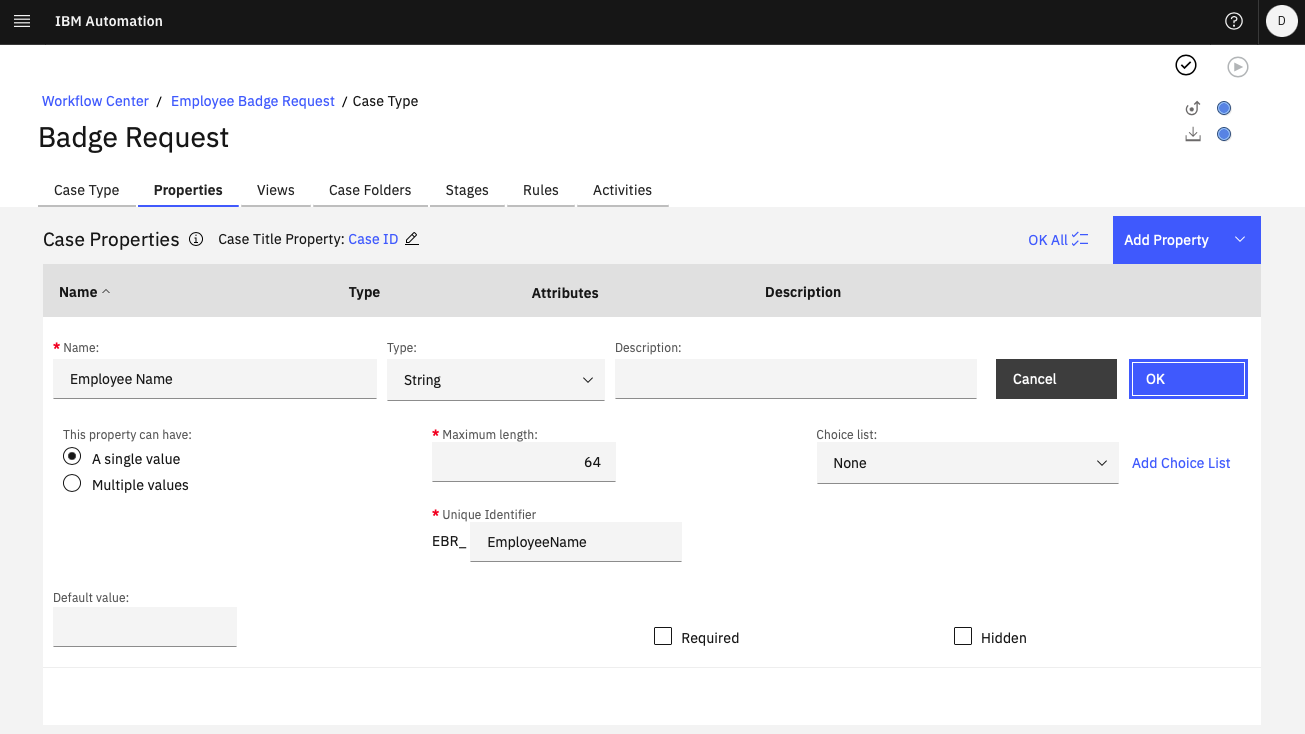
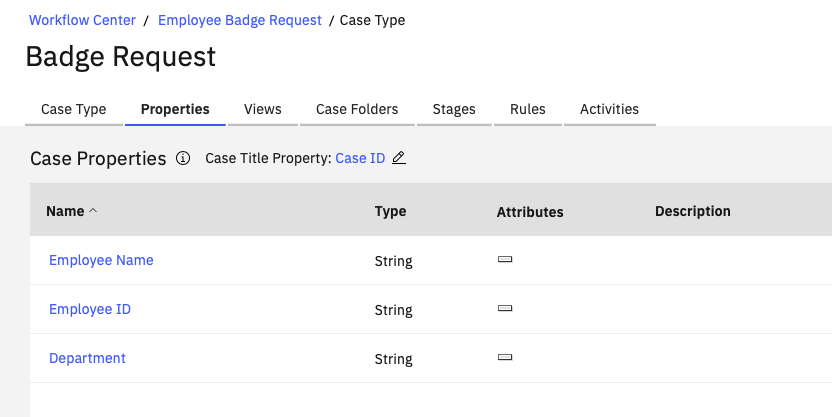
Enter Employee Name and click OK. Repeat this again for a new property named Employee ID and one for Department.
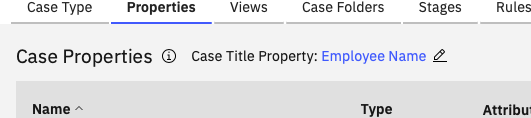
One other nice thing to do while we are here is to specify the Employee Name as our Case Title. This will give it a nicer value than the default unique case ID the system will generate for each new case instance we create.
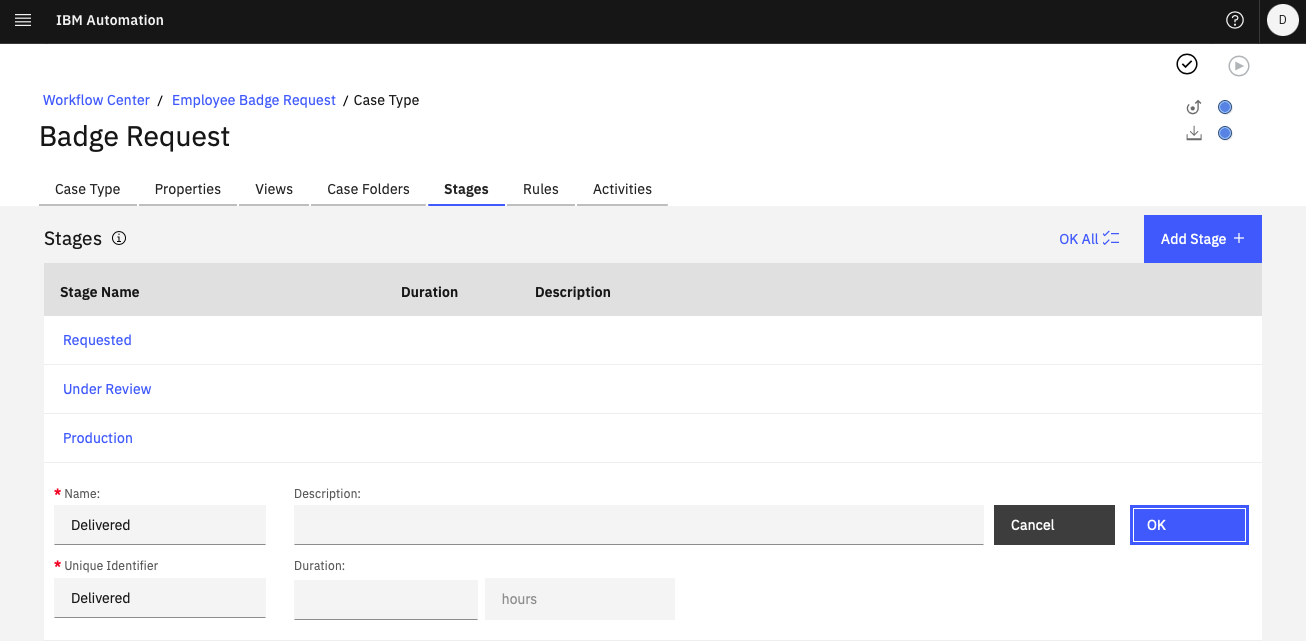
Finally, lets add one more thing to our case type. Click the Stages tab and in a similar way, add the four main stages a case will go through during its lifecycle. Use the Add Stage button and enter each of the following stage names, clicking OK after each (or click OK All to commit them all at once).
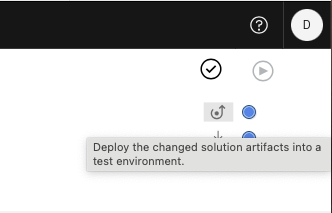
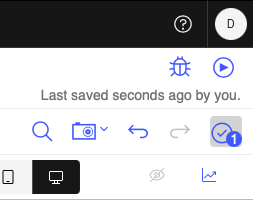
There, we have created the key parts of our Badge Request case solution and can now deploy it into our test environment and try it out in the Case Client. To do this, head to the top right of the Case Builder screen and click the Deploy icon to push our solution artifacts over to the runtime system.
For those curious, the deployment action formats and moves our new design artifacts from the design object store to the runtime's target object store where the Case Client looks for them and where all the cases you create are stored
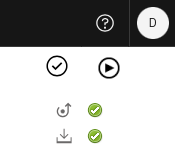
Once deployment is complete, you can click the Play button to launch your test version of Case Client in a new window.
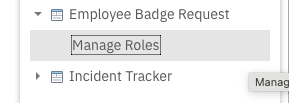
Since this is the first time we have visited our new solution in the Case Client, we need to add ourselves into the role we created for the HR folks.

Click the dropdown menu next to our Employee Badge Request solution name and select Manage Roles.
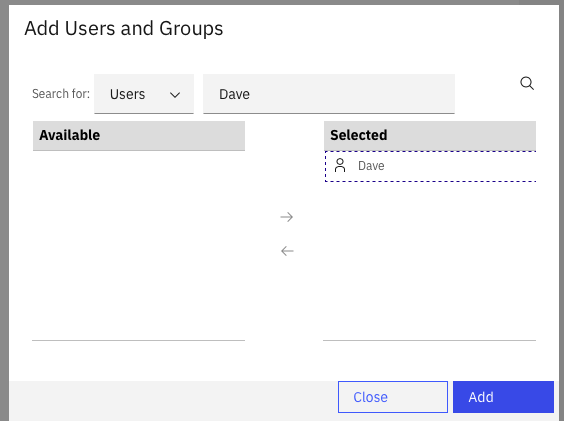
With the HR role selected in the list on the left, click the Add Users and Groups button and add your current user to the role. Click the Add button when you are done.
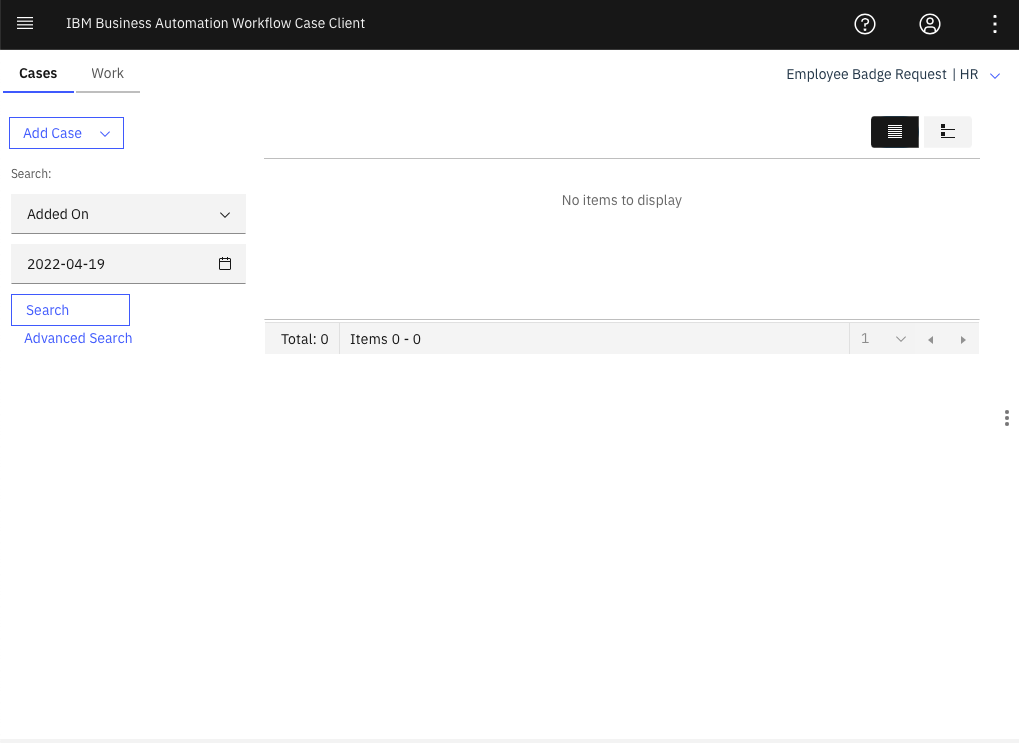
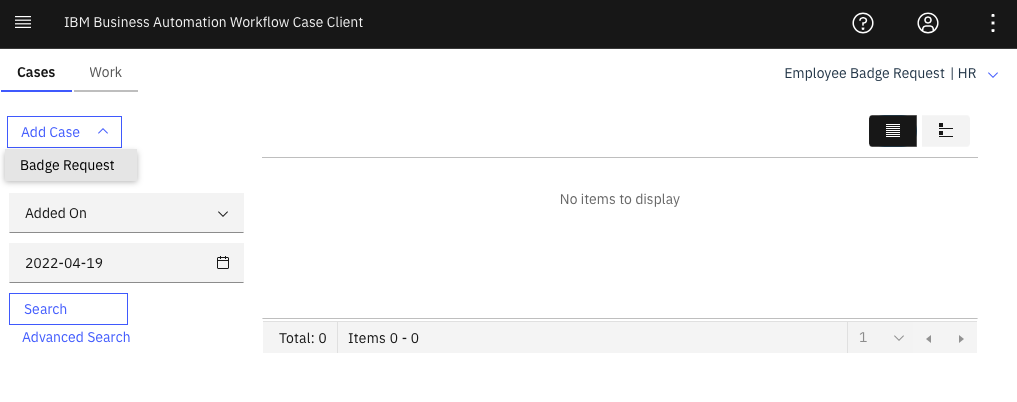
Your solution will reload its UI pages based on your current role and you will be taken to the Cases page, one of two default pages (the other is the Work page) that are always shown by default in the solutions page tabs. Other page tabs will come and go as you open solution artifacts like case instances or process tasks. This default page is made of three widgets, a toolbar at the top, a search widget on the left, and the case list on the right.
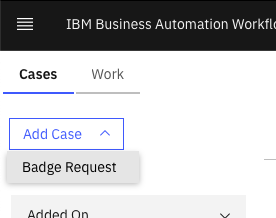
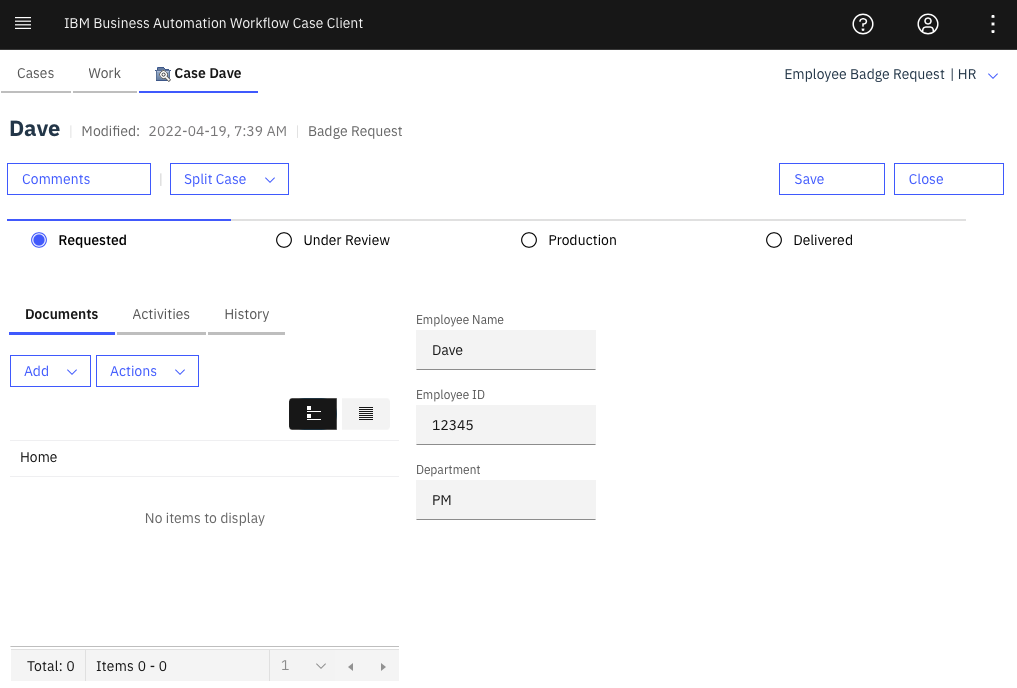
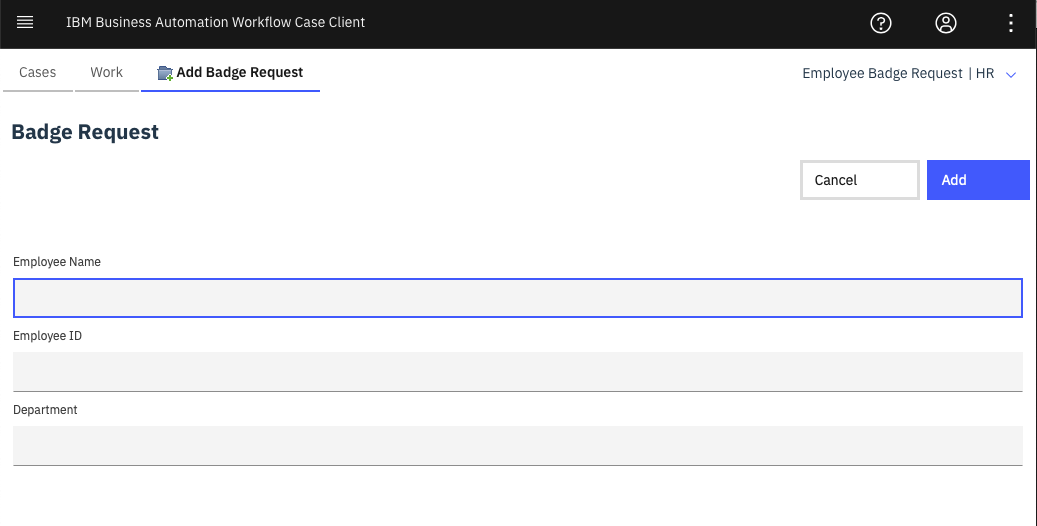
We add our first badge request case instance by clicking the Add Case button and selecting our Badge Request case type from the list.
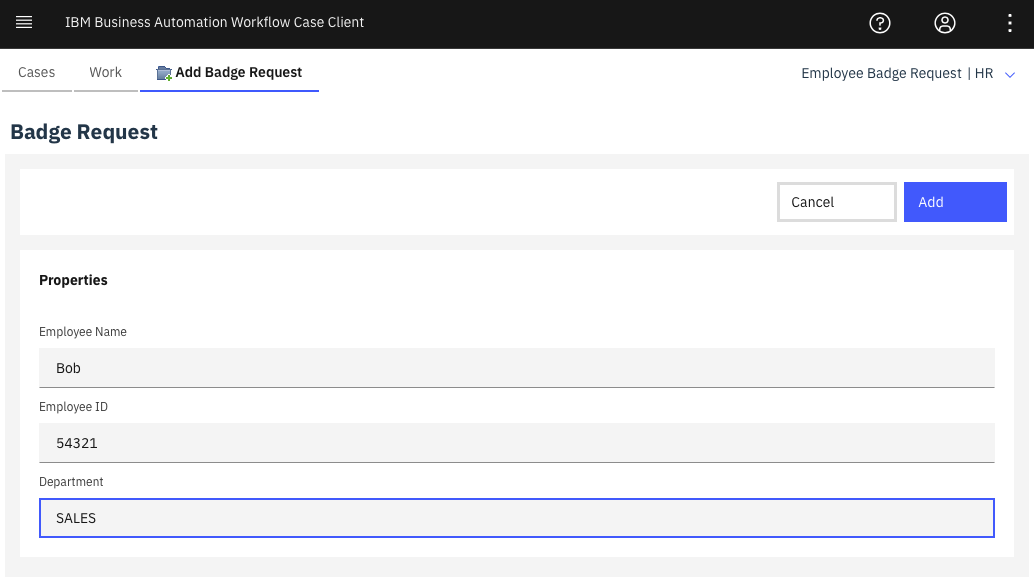
You will now see that the default Add Case page for our case type has opened into a tab and the case properties we defined are displayed, ready to be filled in.
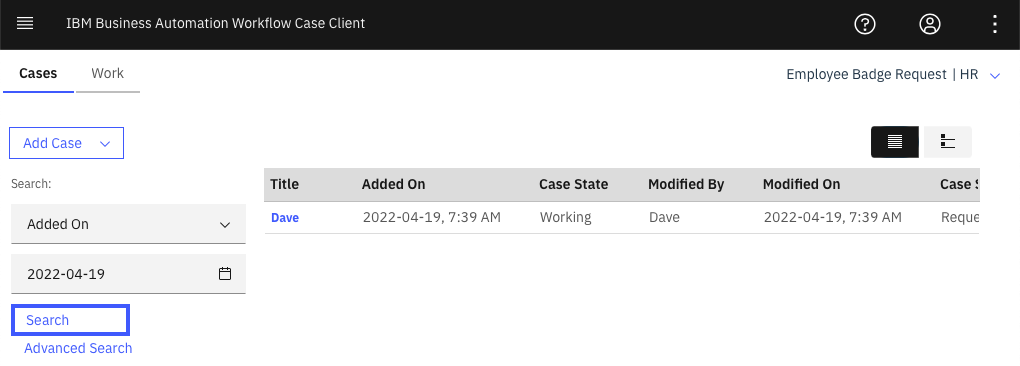
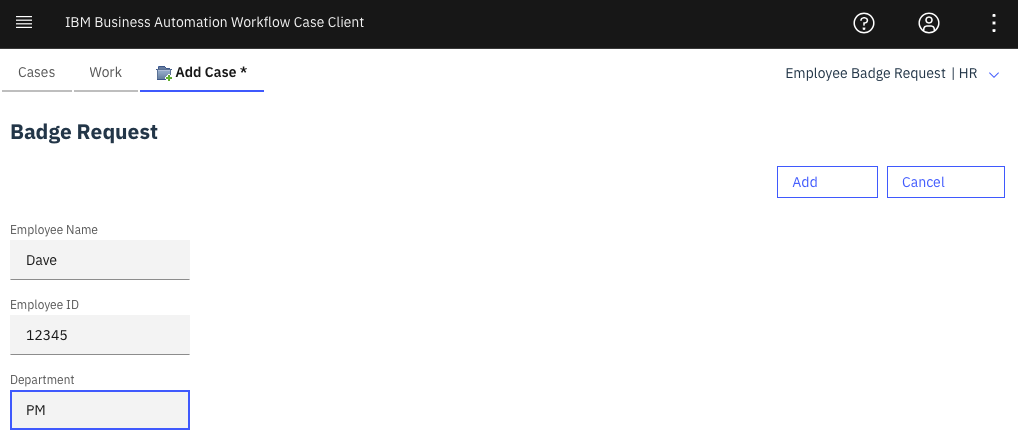 Enter some data for the new case and click the Add button. The Add Case page will close and you will be taken back to the Cases page. Since the Search widget is set to search for case created on today's date, just clicking the Search button will return the new case instance in the Case List. Notice the nice case title we set instead of the generated case ID.
 Clicking the value under the Title column will open the default Case Details widget page.
We are done adding and viewing our first case! Time to go back to Case Builder and customize the Add Case page using a Client-side Human Server.
Select the Case Types tab again and click the Badge Request case type to edit it. Remember that page layouts section on the Case Type tab? Let's change the default Add Cases page from the classic widget page to the default Client-side Human Service page.
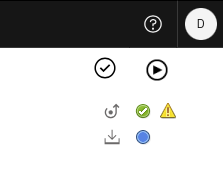
Click the Deploy Icon and then the Run button again to try out our change.
The Case Client window will reload again, this time remembering the last role you used.
Click the Add Case button again and select the Badge Request case type. This time you will see the default Client-side Human Service page for adding a case instead of the classic widget one.
On the surface it might seem very similar to the previous page, but when it comes to customizations, the differences become very obvious. Fill in some new data and click the Add button to create another case. It is now time to create a customized version of this page.
Head back to Case Builder / Case Types and click the Badge Request case type to edit it again. Scroll back down to the page layouts section and this time, click the New Add Case layout link next to the dropdown menu that is currently showing our default add case CSHS selection.

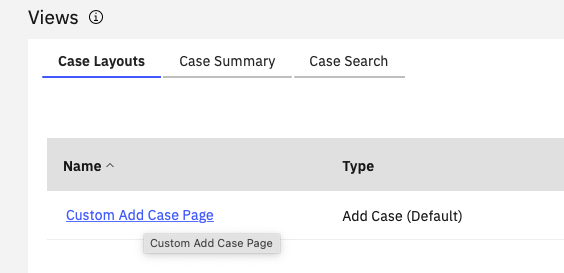
You will be taken over to the Views tab and a new entry for our new CSHS page layout will be started.
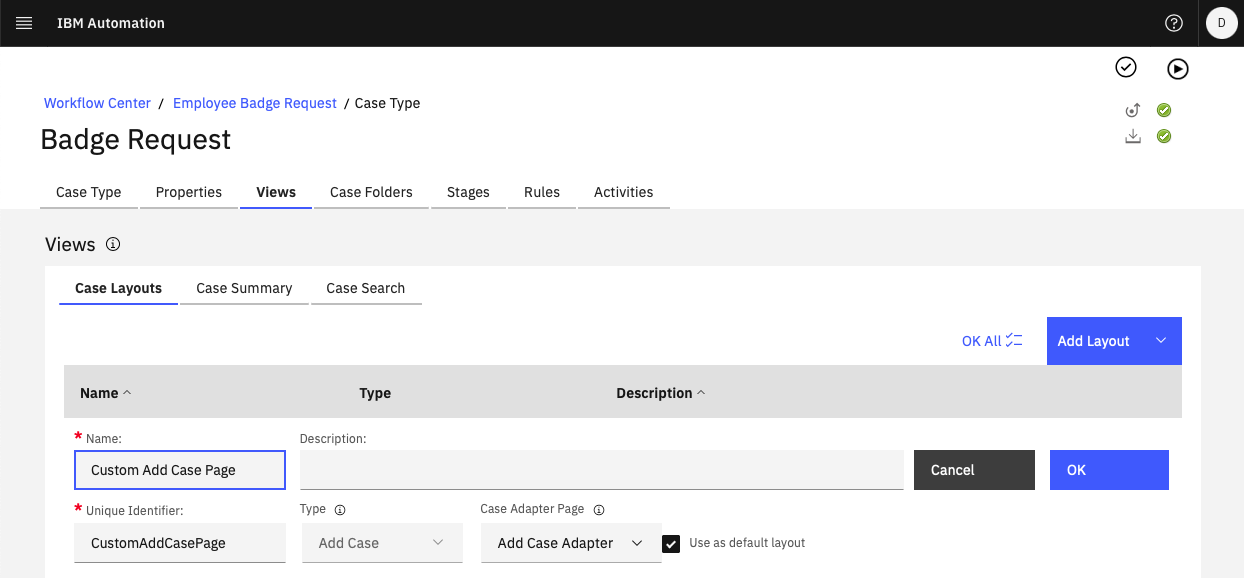
Give it a name similar to what you see above and just take note that its Type was automatically set to Add Case (since we clicked the link next to that selection on the previous page) and that the Case Adapter Page is set to the default Add Case Adapter (we will discuss what Adapter Pages are in another blog). Click OK to save the new page layout and then click its name to head over to the CSHS editor.
The CSHS editor will open in a new window as shown below. This, and the other artifacts you see here, are stored in the process side of your new Badge Request project.
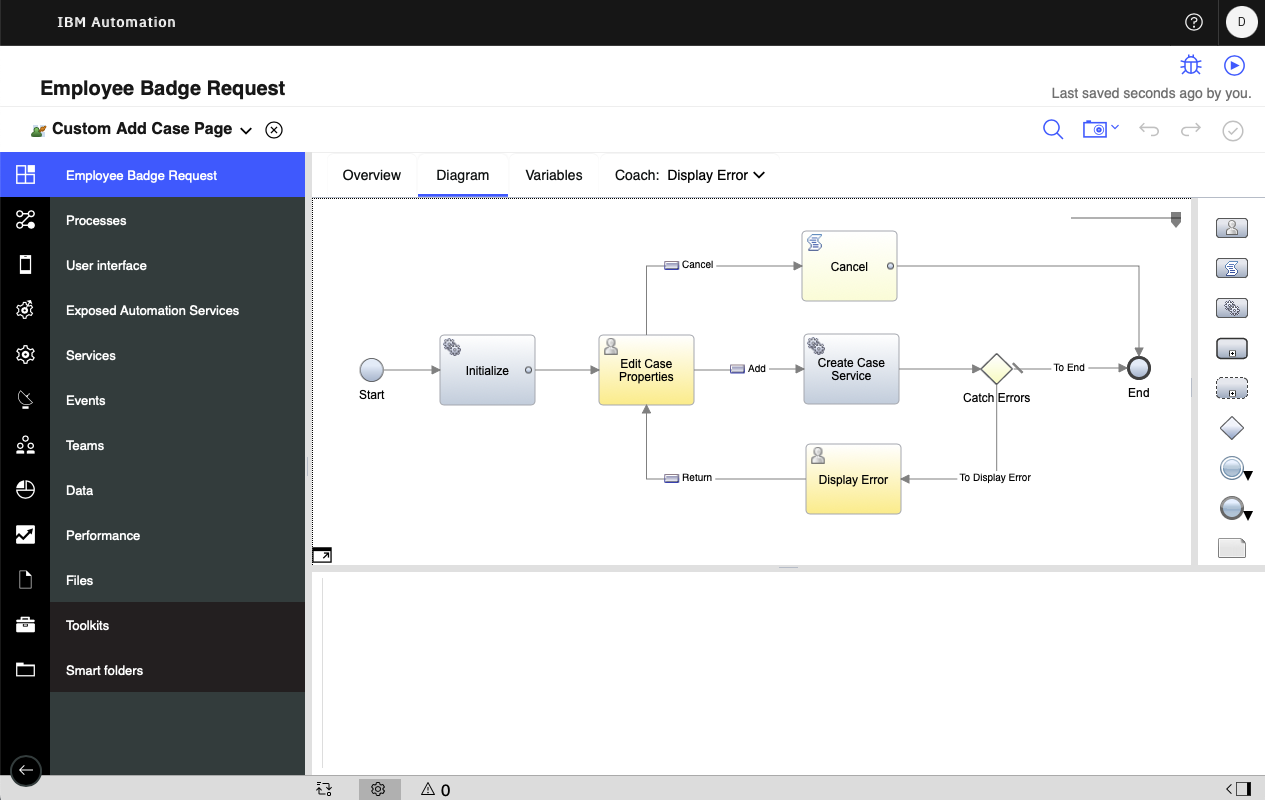
So you might be thinking "I though I was going to see a page editor, not something that looks like a process flow!". A fair question, but this is what makes a Client-side Human Service (CSHS) different from just a "UI Page".
In its simplest form, it is a set of steps that occur when a UI is being displayed to the end user. It has a start, some setup, a step where the actual UI page is displayed, and then some handling of what was captured in the UI and finally an end. The real power here is that a CSHS can actually be a set of pages that a user can be guided through with logic added between each page to determine where to go next. Even if you don't need that sort of multi-page fill experience, the ability to perform advanced pre and post processing of data is very powerful.
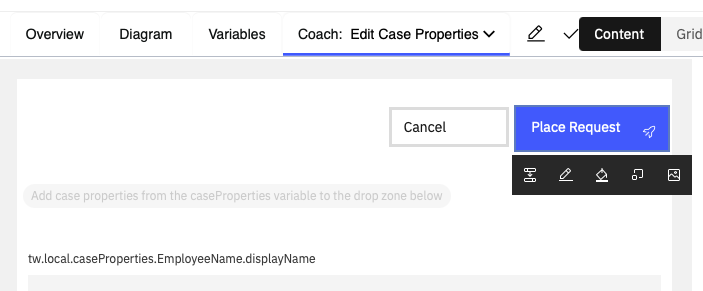
Double-click on the yellow Edit Case Properties step to open the actual page editor for that step.
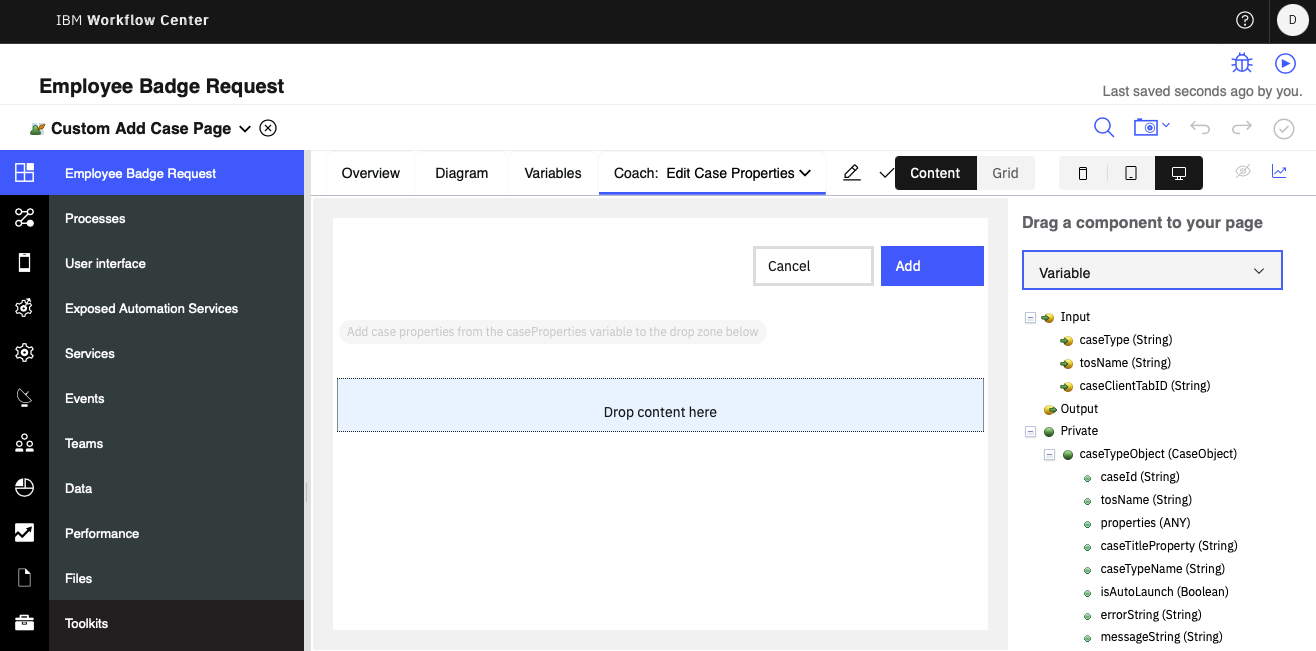
The editor provides a page canvas where you draw your page by dragging and dropping various UI views onto it. A UI View is a small component that displays a specific way and performs a certain function.
On the right of the canvas, there is a palette of these UI Views and other items you can drag to the page. From the dropdown menu at the top of the palette, select the Variable subsection to see the data being managed by this CSHS that can be added to your page. If you scroll down in that list of variables, you will see a set of properties that should look familiar.
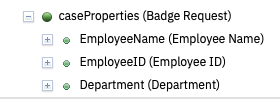
They are our case type properties that were define in Case Builder. You can drag individual properties anywhere you want onto the page. For now, let's grab them all by clicking and dragging the caseProperties (Badge Request) node and dropping them all into the "Drop content here" drop zone.
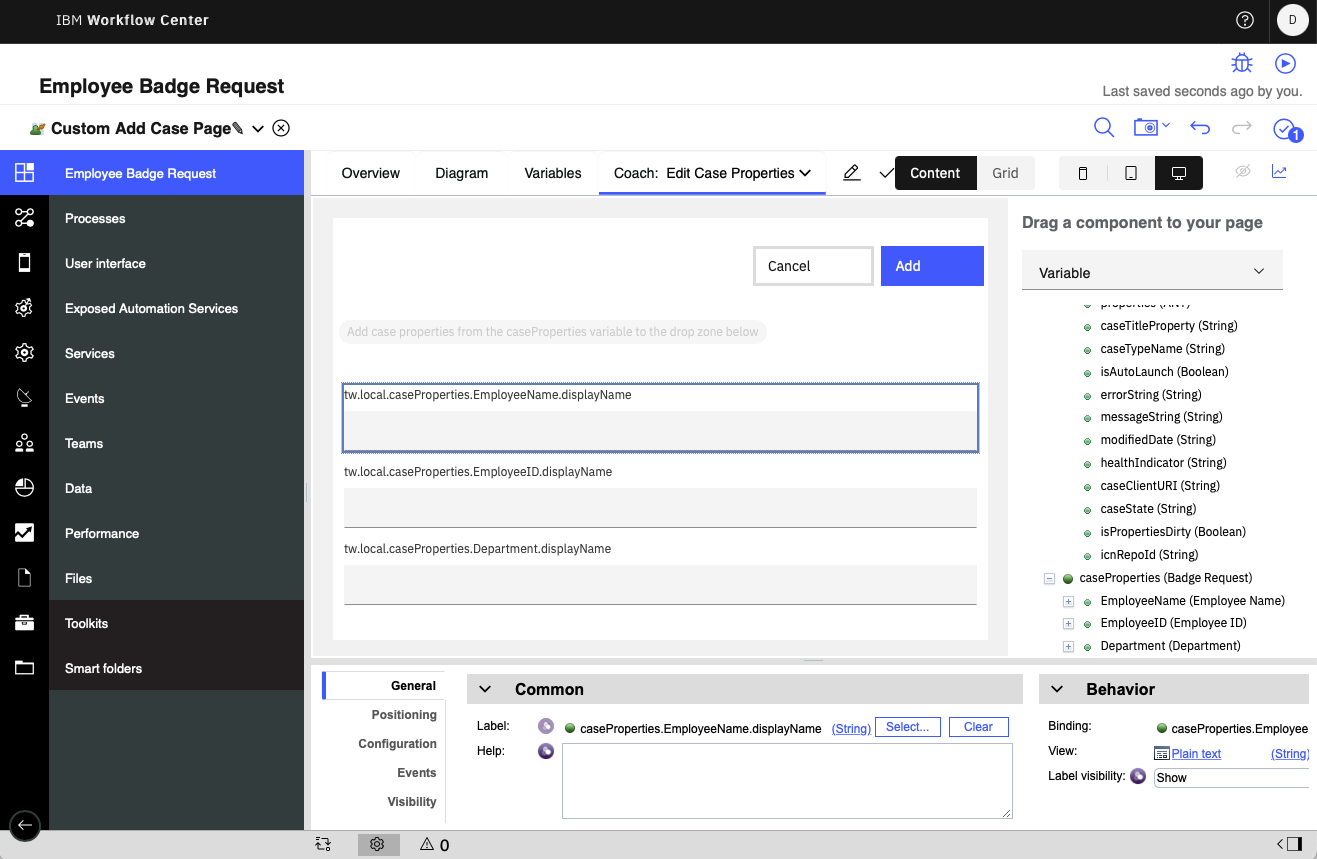
You have basically replicated what the default Add Case page looks like at this point. Let's save this and see how it looks. Click the Changes check mark icon at the top right to commit your changes to the CSHS and then switch back over to the Case Builder window.
Once back in Case Builder, deploy your changes once again and then click the Play button to reload the Case Client.
Once back in the Case Client, click the Add Case button again to display your new custom Add Case CSHS page. It looks pretty similar to the default page but we will change that next.
Click Cancel and head back over to the CSHS editor (if you had closed that window, you can go back to Case Builder and open it again the same way you did before.
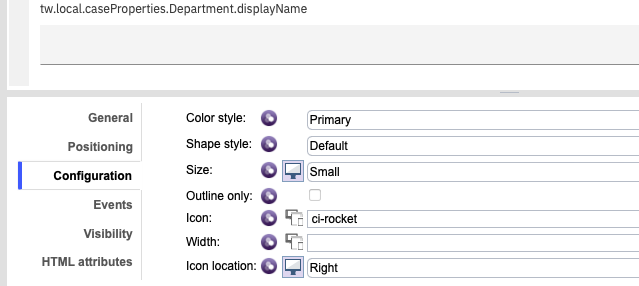
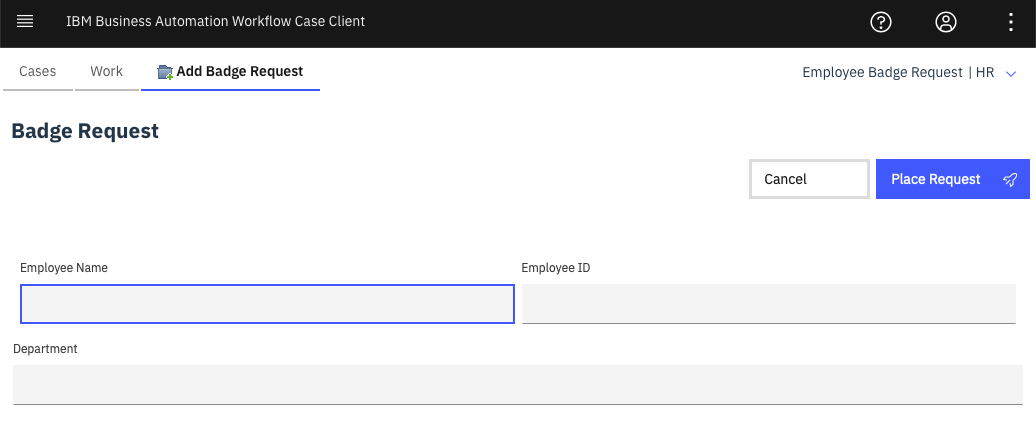
Let's make a few changes to our Add Case page. First, let's rename the button to "Place Request". Select the button and from the menu that appears below it, click the Pencil to edit the button label. Press the Enter key to save your changes and then select the button again to get back to the menu. Select the last item in the menu that lets you select an icon for your button. In the window that appears, type "rocket" and select the icon from the results.
Select the Add button again and look down at the bottom of the editor window to see the setting panel, In there, select the Configuration section, twist open the Appearance options and change the Icon location to Right. As you can see, there are a lot of other options in this area. We will save those for another day.
All done! Next, head over to the palette on the right and in the filter, type horizon. You should see a few matches appear in the palette.
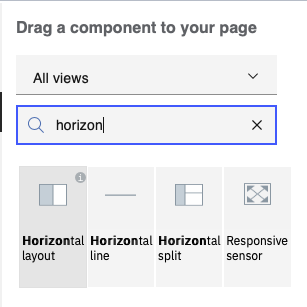
The one we want is the Horizontal layout. Click and drag it from the palette to the space just above the first case property on the canvas. The orange line shows you where the item will be inserted.
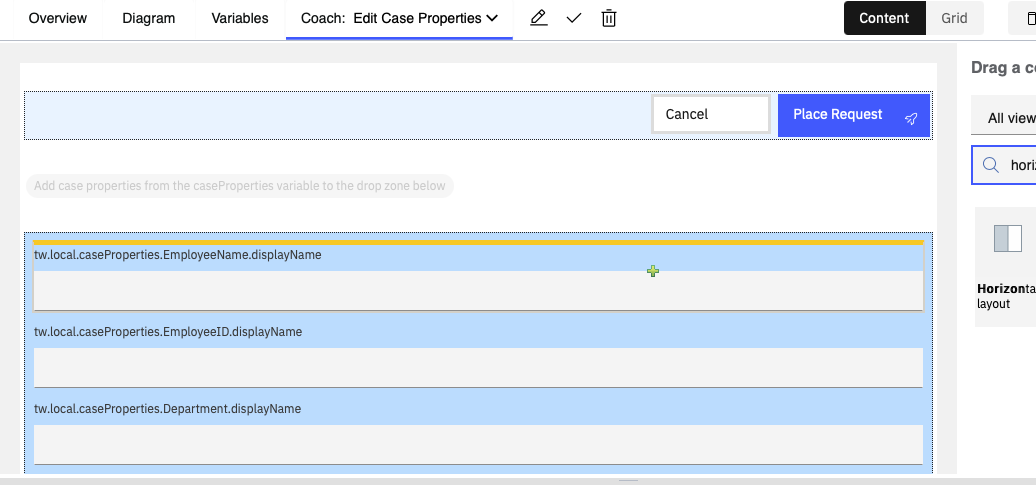
You will see a new drop area appear above the case properties.

Drag the Employee Name property into the drop zone for the horizontal layout. Then drag the Employee ID property onto the right side of the Employee Name that is now in the horizontal layout.
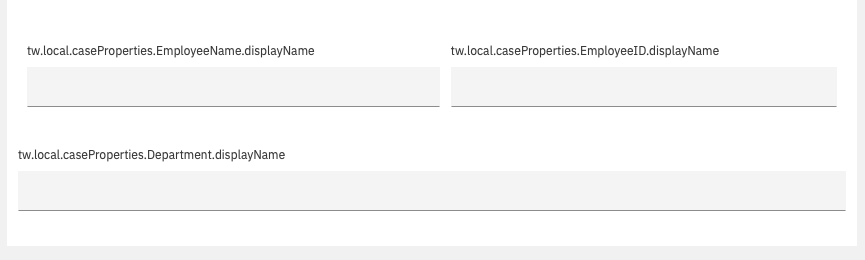
All done! Click the Changes checkmark icon again to commit your changes and this time just head right back over to the Case Client window since we didn't make any other changes to the project in Case Builder. Click the Add Case button again and check out your great work!
 For more fun, try changing the default case details page to your own custom one using the same techniques.
Here is a link to an older, but still relevant, IBM Redbook on using the Client-side Human Service framework to build UIs.