Deploying Maximo on Air-gapped (Private) Azure Redhat Openshift (ARO)
In this blog post, we will walk through the process of Installation Maximo App Suite (MAS) on Air-Gapped (Private) Azure Redhat Openshift cluster.
Let's understand the basic keywords used so far.
- Azure Redhat Openshift (ARO)
Azure Red Hat OpenShift provides highly available, fully managed OpenShift clusters on demand, monitored and operated jointly by Microsoft and Red Hat. Kubernetes is at the core of Red Hat OpenShift. OpenShift brings added-value features to complement Kubernetes, making it a turnkey container platform as a service (PaaS) with a significantly improved developer and operator experience.
- Maximo App Suite (MAS)
IBM Maximo® Application Suite is a set of applications for asset monitoring, management, predictive maintenance and reliability planning.
- Air-Gap/Private Setup
An air gap is a security measure that involves isolating a computer or network and preventing it from establishing an external connection. In this case creating the cluster which is disconnected from the internet and has limited network connectivity.
Versions
ARO Cluster Creation
Please follow the below detailed document on steps to create private ARO cluster.
(Make sure to set apiserver and ingress visibility to private as mentioned in the document)
https://learn.microsoft.com/en-us/azure/openshift/howto-create-private-cluster-4x
In order to connect to a private Azure Red Hat OpenShift cluster, you'll need to connect from a host that is either in the Virtual Network you created or in a Virtual Network that is peered with the Virtual Network the cluster was deployed to.
For this example, We have created the VM in the same virtual network to access Openshift. Please follow below document on VM creation.
https://learn.microsoft.com/en-us/azure/virtual-machines/windows/quick-create-portal
Azure Container Registry(ACR) Creation
Image Registry is required to store and manage images required in the installation process.
Azure Container Registry is a managed registry service based on the open-source Docker Registry 2.0. Create and maintain Azure container registries to store and manage your container images and related artifacts.
Azure Container Registry is used as the example however you are free to use other Registry on Azure.
Please follow the below document on steps to create Azure Container Registry from Azure Portal
https://learn.microsoft.com/en-us/azure/container-registry/container-registry-get-started-portal?tabs=azure-cli
Make sure to use private endpoint to restrict access to Azure container registry. Please follow below document to setup private endpoint.
https://learn.microsoft.com/en-us/azure/container-registry/container-registry-private-link
Mirror Images on Azure Container Registry
The images which are required by installation process needs to be mirrored on ACR.
We will use the MAS CLI to mirror the images.
Please follow below link on instructions to install and run MAS CLI.
https://ibm-mas.github.io/cli/
Use the CLI tool from the VM we have created in the first step since that VM has the connectivity to ACR.
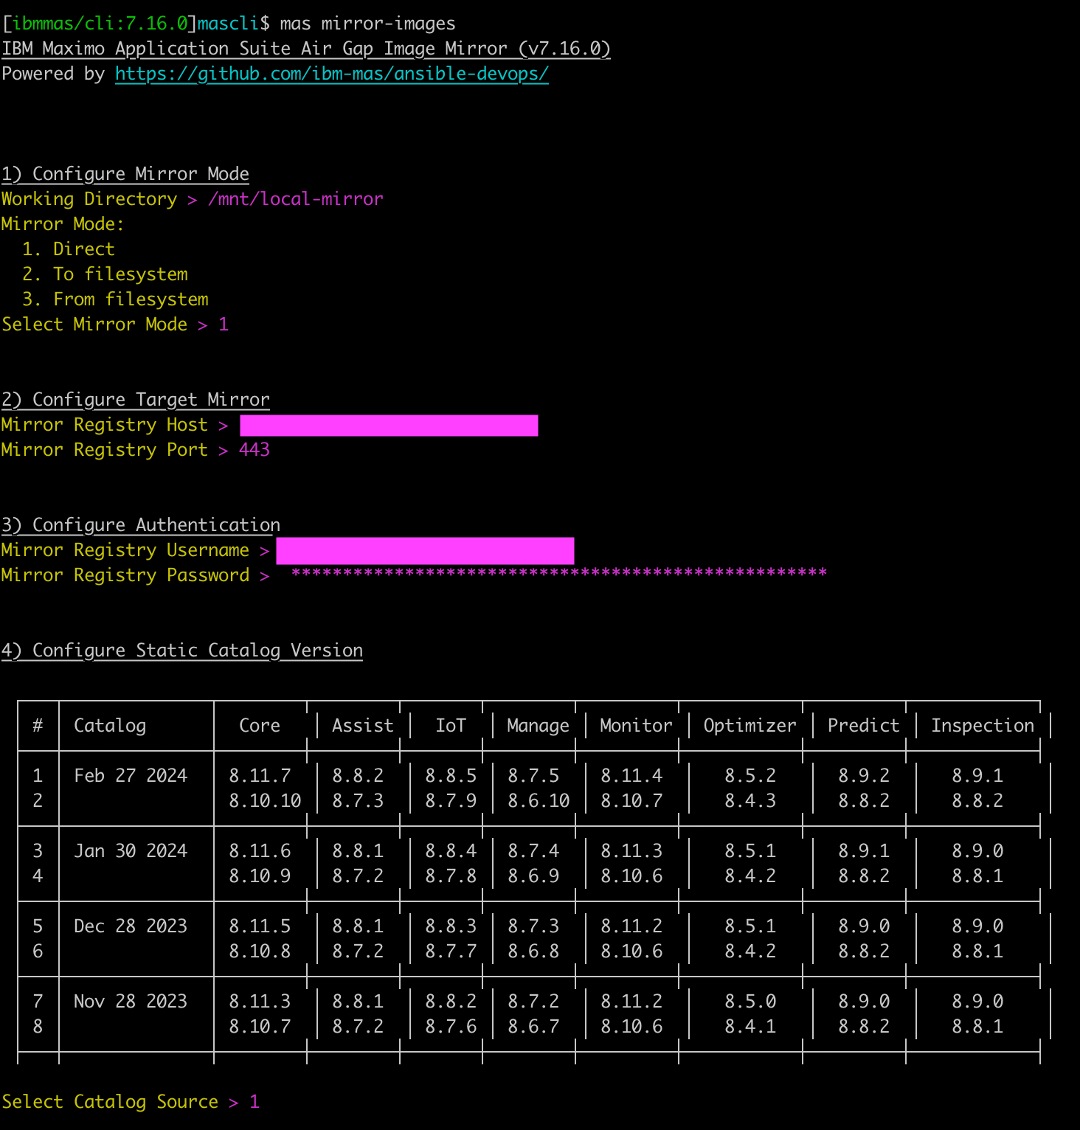
Start the interactive mirroring process by running below command
docker run -ti --pull always quay.io/ibmmas/cli mas mirror-images
Within the interactive prompts, Provide details for ACR, Working directory and catalog.
Confirm and review all the details to start the mirroring process, Wait for the completion.
Additionally, If the environment does not allow any access to Redhat registries.
Please use MAS CLI to mirror necessary Redhat catalog.
Run the following command to start the interactive process.
docker run -ti --pull always quay.io/ibmmas/cli mas mirror-redhat-images
Provide the necessary details like ACR, Redhat pull secret, OCP version.
#sustainability-featured-area-2