Overview and Audience
This document attempts to document the flow for a developer who interacts with Jira for bug and story tracking, git for source code management, and Jenkins from a build perspective. We will also see that the solution can integrate nicely with IBM UrbanCode Deploy (now DevOps Deploy) for deployment.
Audience: IBM Tech Seller or Business Partner
Let’s get started!
A Day in the Life of a Developer using Jira and GitHub
Imagine a developer needs to address a bug with an application called “Online Botanicals”. For this scenario, we are going to update the “Title” for the application that appears in our browser as shown here:

To get started, follow these steps:
- In Jira, create a new story we will use to track our work by clicking “Create issue” as shown below:

- Switch the type of issue to “story” and enter a description like: “Update OB website and title” and press Enter.
- Open up the issue and assign it to yourself (or someone else) as shown below:

- Enter a description if you like as shown below and click Save.
- Close the dialog window by click the “x” in upper right corner.
NOTE: you will see this Jira story show up as a “dot” in an UrbanCode Velocity (now DevOps Velocity) value stream. We will show this to you a little later in this guide.
- Open a terminal window which we will use to setup a new develop branch in git for our changes. I change directory to my local copy of the repository as shown below and run a “git pull” and “git status” to make sure my local copy is up-to-date.
- Run these commands to create your own “develop-randy” branch:
# git checkout -b develop-randy
# cd OnlineBotanicals-WEB
# vi index.html (change title) and save your changes as shown below:

- Run these commands to add your changes to your develop-randy branch in git and it is very important that you include the Jira story number in the front of your commit message (e.g. “ONB-18” in this case):
# cd ..
# git status
# git add .
# git commit -m “ONB-18 Updated the title for the application and fixed bug”
# git push –set-upstream origin develop-randy

- In the Jira web console, move your Jira story from “To Do” to “In Progress” by dragging and dropping the issue into the “In Progress” area for the ONB board as shown below:

- In your browser, navigate to the GitHub repository you are working with. Notice that your “develop-randy” branch appears and there is a notification of a push and a but to help create a “pull request”:

- Click the “Compare & pull request” button and you will see this screen:

- Change the “base repository” for the destination to Muriel’s repository as shown above.
- You will see this message:

- Add a comment and be sure to prefix comment with “ONB-18” as shown above. Click the “Create pull request” button.
NOTE: this is important for tracking a “dot” in a UrbanCode Velocity value stream
- You will now see this screen:
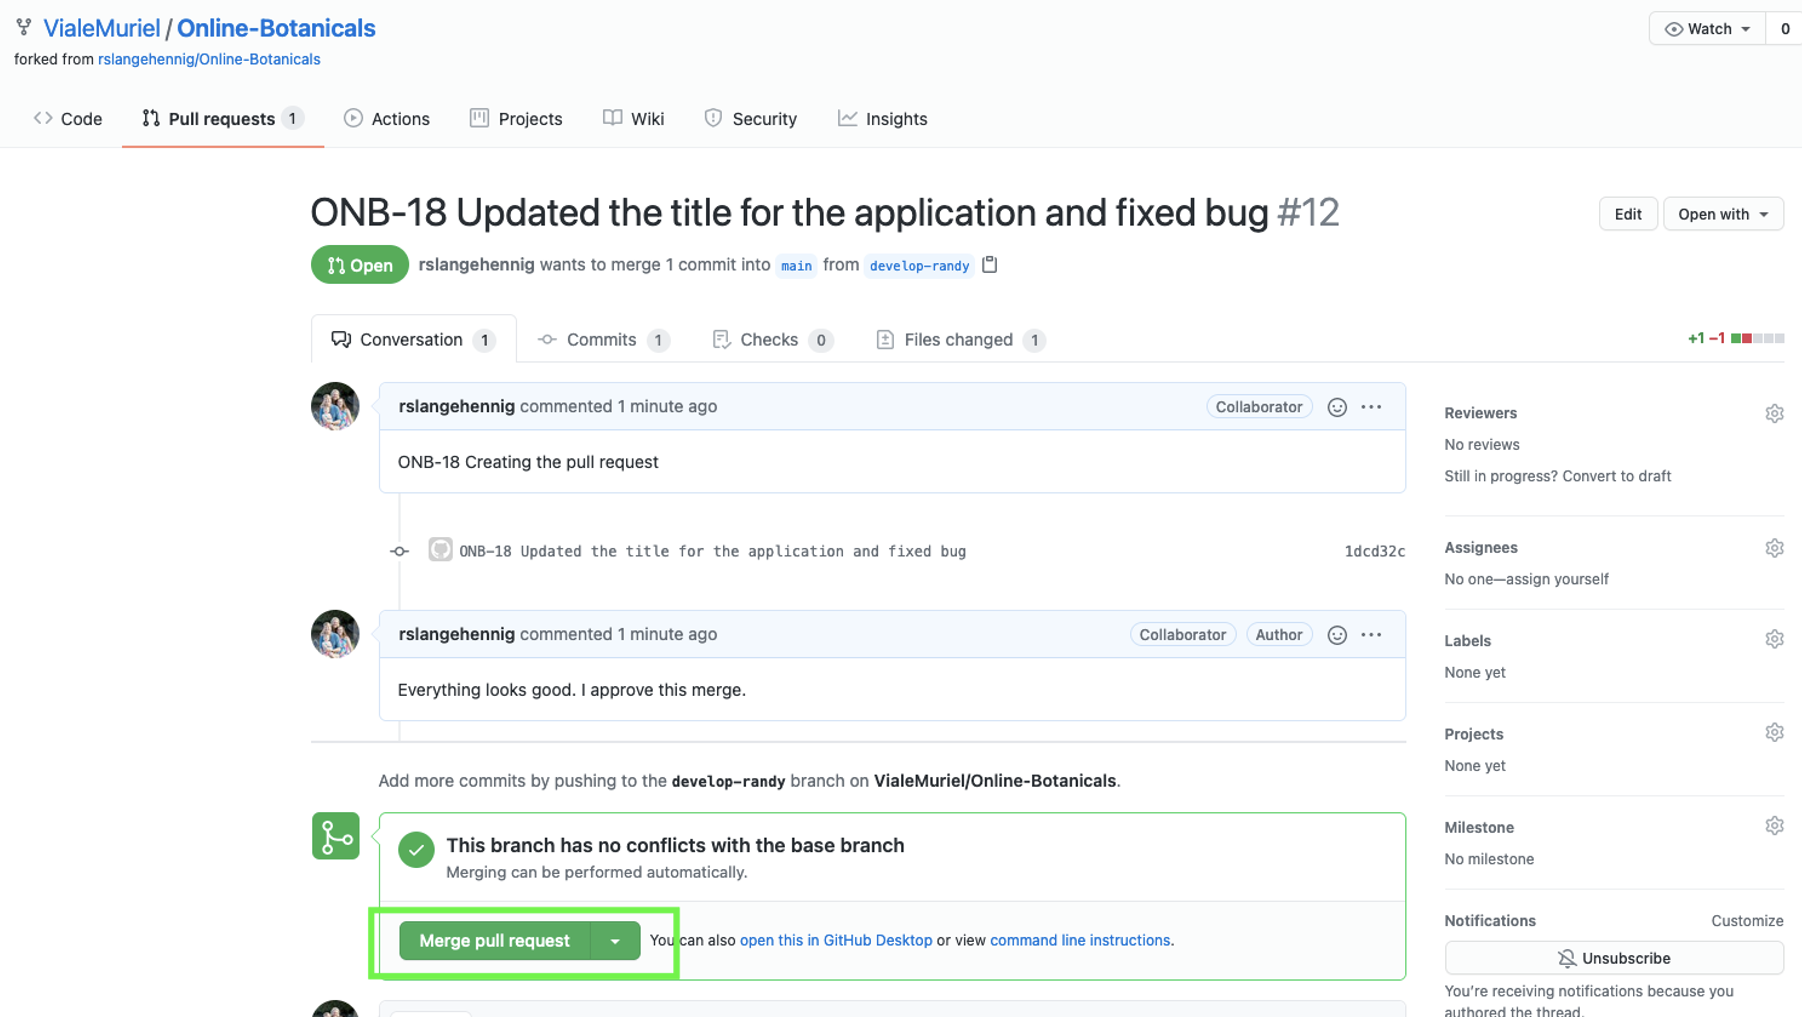
- Click the “Merge pull request” button as shown above. You will see this screen:

- Click “Confirm merge”
- Your pull request will move into the “merged” state as shown below:

- At this point, we can initiate our Jenkins job (or we can configure an automatic build of the code on commit using a commit hook).
- In Jenkins, click the “Build Now” button as shown below:

- The build should complete successfully as shown below:

NOTE: this Jenkins pipeline includes a stage that “sends metrics about the build to UrbanCode Velocity” as you can see above.
- This build process is setup to automatically trigger a deploy in IBM UrbanCode Deploy (UCD) to our DEV environment as shown below:

- The deployment will involve a two-tier application (an application running on a WebSphere app server and a API service running as a docker container in the cloud). The deployment should succeed as shown below:

- Notice the application updates are shown in the DEV environment as shown below:

- Back in Jira, move your story from “In Progress” to “Done” since the deployment was successful and the smoke test passed. See the screen shot below which shows the developer moving the story to “Done”:

- This concludes the developer code changes. This now look at what UrbanCode Velocity and the value stream you can configure to track our work.
Velocity Value Stream
As we were working on these issues, Velocity can reflect the work for the development team in a “value stream” as well as more interesting “insights”. To review this capability, follow these steps:
- In your web browser, login to your Velocity instance.
- Click on “Value Streams” as shown below:

- Click on “Online-Botanicals" as shown above
NOTE: you can configure “Favorites” so you can quickly navigate to the value streams important to you.
- You will see your value stream as shown below:

- Notice the two dots in the “DEV 2” environment. Hover over these dots and you will see your “story” that we just worked on in Jira as shown below:

NOTE: this is achieved by configuring the Jira integration in Velocity and configuring your VSM with the integration data it requires. This guide will not get into those details but will stay high level.
- If you click on your story, you can view details that are gathered with the “story” as it progresses from “Backlog” to “PROD” as shown below:

- The Jira story shown above can accumulate data including pull requests, test results, code scanning results, and more. Further, this dot will move as we progress from DEV to QA and then to PROD. Close this dialog window.
- Click on the “Swim Lanes” sub-tab as shown below:

- Using the swim lanes view, we can see all the team members and the work they have in the “Backlog”, “To Do” and more to gauge the teams workload and performance:

NOTE: Development teams find this information very valuable for “standup” meetings to quickly review the work for the day and to address any challenges the team might have.
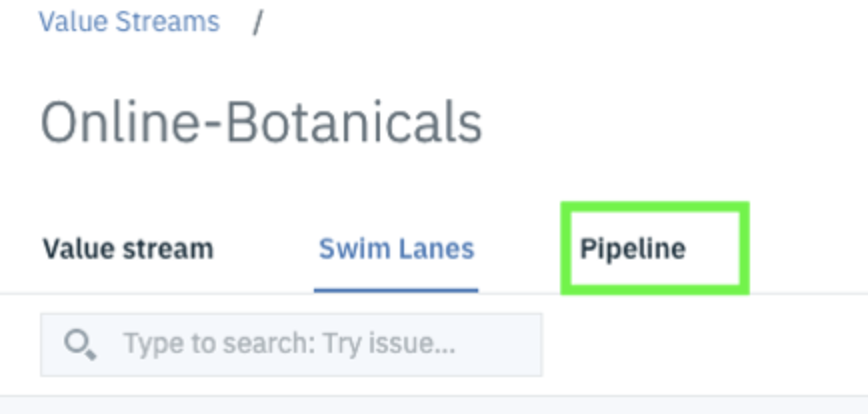
- Click on the “Pipeline” sub-tab as shown below:
- A pipeline can be used to aggregate multiple applications and provide visibility as to what is deployed in each target environment. Velocity supports applications or projects found in IBM UrbanCode Deploy, Jenkins, Ansible, Azure DevOps, and more. This is achieved by configuring the integrations in Velocity.

- You can initiate deployments from this pipeline if you like and create "deployment plans" or "templates" for each environment. Here is a very simple example for PROD:

- Let's now look at some "insights" or data gathered in Velocity in our final section of this guide.
Viewing Reports and Gaining Insights with Velocity
Follow these steps to see some of the dashboards and reports available in UrbanCode Velocity to give your team insights:
- Click on the “Insights” tab as shown below:

- Click on the “Delivery Performance” dashboard as shown below:

- Notice the charts shown for this dashboard and that you can “Add charts” to the dashboard as shown below:

- You can filter the results on the left-hand pane by “Application” or “Value Stream” and more.
- Click the “magnifying glass” icon for the “Deploy Counts” chart as shown below:

- This allows you to see details around all of your deployments as shown below:

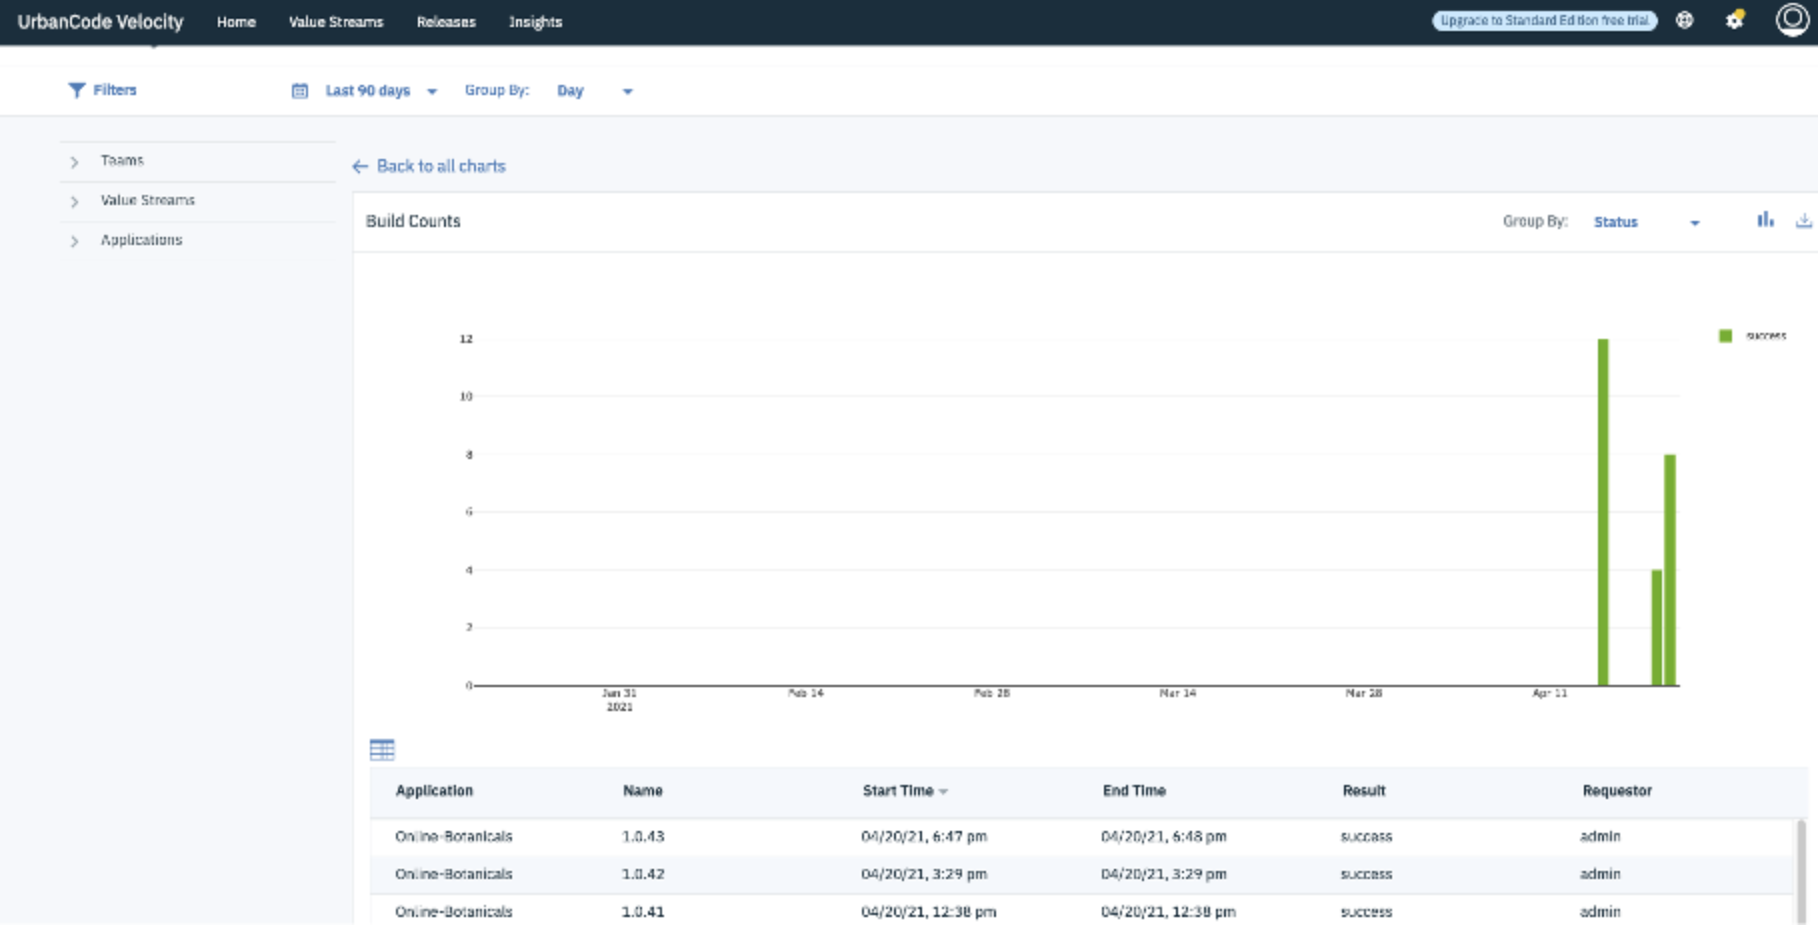
- You can do a similar thing with your “Build Counts” as shown below:
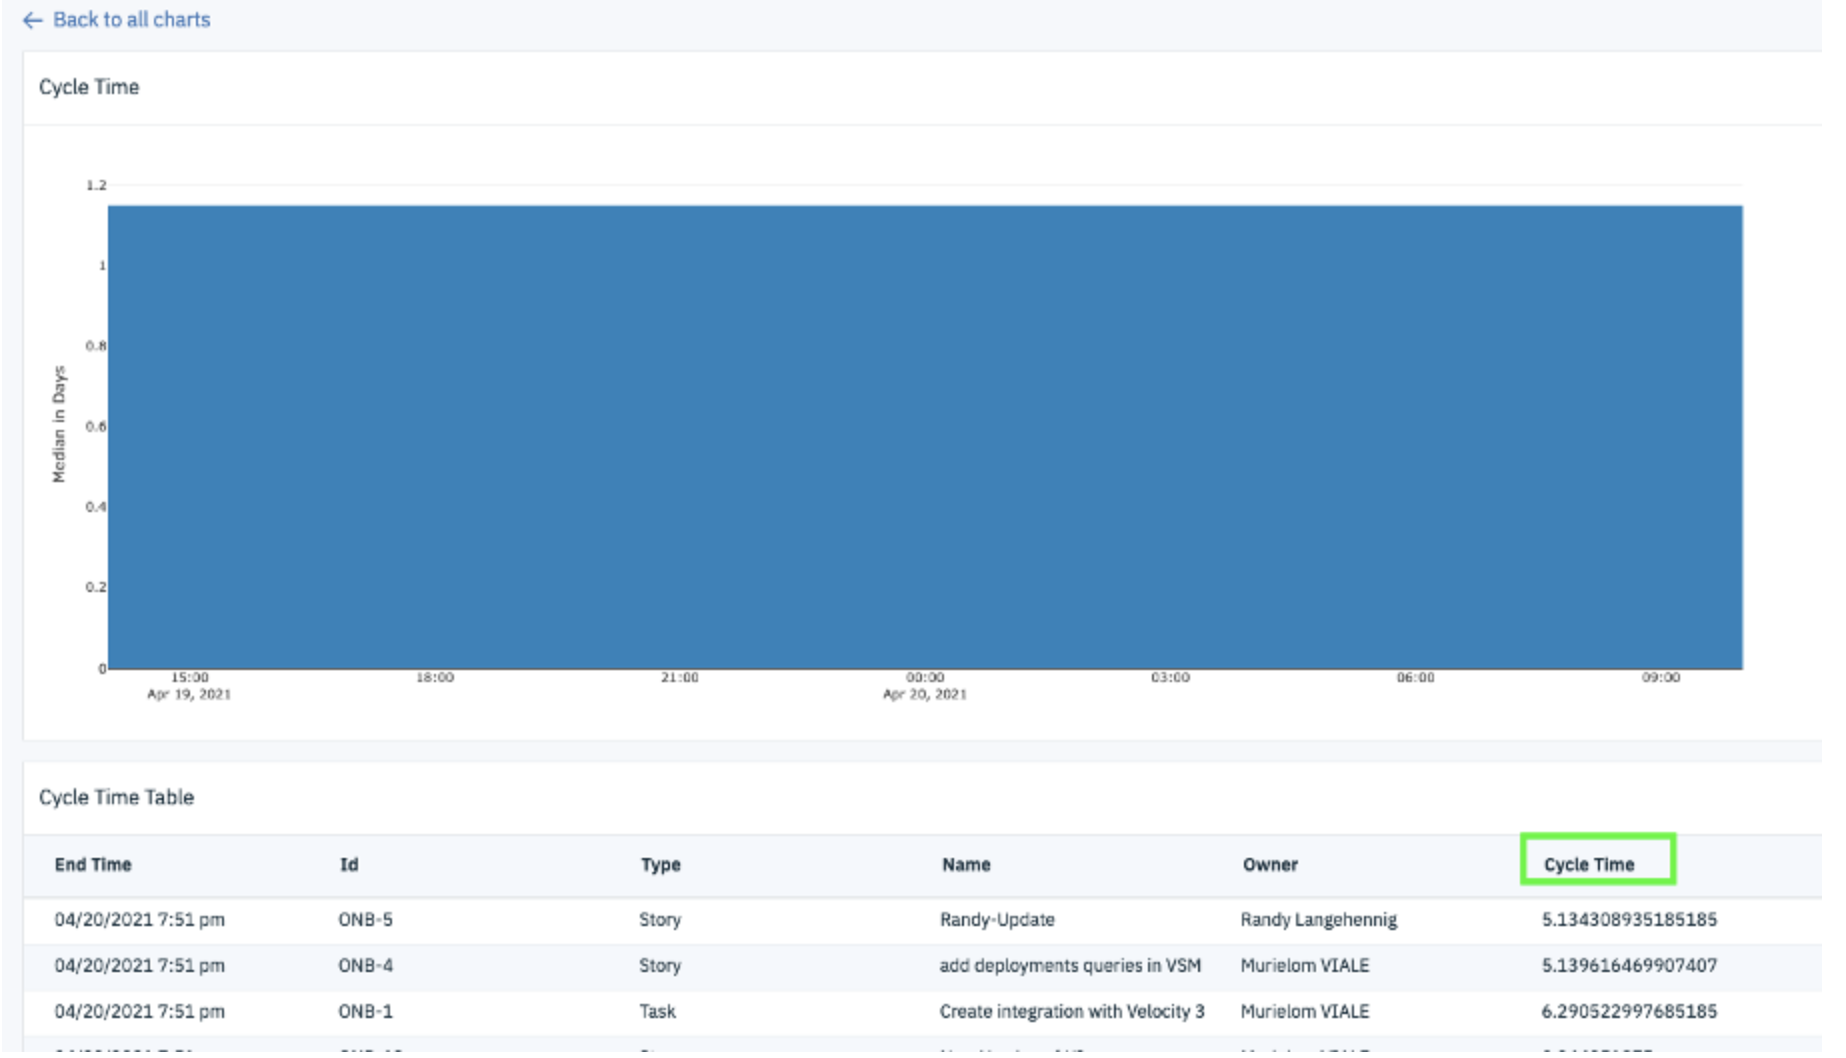
- You can also notice that Velocity calculates “cycle time” for the value streem and you can see some data for this as well:
- The cycle time data can be shown on your value stream, along with other metrics important to you as shown below in the “Metric bar”:

This concludes this quick tour of UrbanCode Velocity and how it can integrate with tools in your DevOps tool chain including Jira, Jenkins, GitHub, and IBM UrbanCode Deploy. I hope you found this helpful as a quick introduction to the key concepts and capabilities in IBM UrbanCode Velocity. More detailed discussions on how to configure the solution will be coming in future blog posts.