Introduction
Kubernetes is a powerful platform for working with application containers. However, as application complexity increases and containers change and evolve, managing your application becomes challenging. UrbanCode Deploy (now DevOps Deploy) works with Kubernetes to simplify your application deployment. With UrbanCode Deploy, you may easily change the versions of the containers used in your application without the need of editing a YAML file or using the command line. You gain a visual representation of which container versions are deployed where. You may easily roll back container versions in your application without editing a YAML file or using the command line. You may even alter properties of your application by using UrbanCode Deploy with Kubernetes.
In this article, we will go through a simple tutorial showing how UrbanCode Deploy enhances your Kubernetes experience.
UrbanCode Deploy Requirements
UrbanCode Deploy version 6.2.2 or higher is required for this tutorial. In addition, an agent must be installed on a machine which contains a Kubernetes client.
The following UrbanCode Deploy plug-ins must be installed:
- Kubernetes (LINK) version 8 or later
- Docker Registry (LINK) version 18 or later
- Docker (LINK) version 5 or later
Additionally, the following templates should be installed. Templates may be found on GitHub at UrbanCode/Templates-UCD
- Docker Component template (LINK)
- Kubernetes Component template (LINK)
- Kubernetes Application template (LINK)
Kubernetes Guestbook Example
In this tutorial, we will work with the Kubernetes Guestbook example which may be found on GitHub at https://github.com/kubernetes/examples/tree/master/guestbook. Specifically, we will use the all-in-one example to deploy our application using a single YAML file. Download the file guestbook-all-in-one.yaml from https://github.com/kubernetes/examples/blob/master/guestbook/all-in-one/guestbook-all-in-one.yaml
Walkthrough
Create a Component to Manage the YAML File
- In UrbanCode Deploy, go to Components and click the Create Component button.
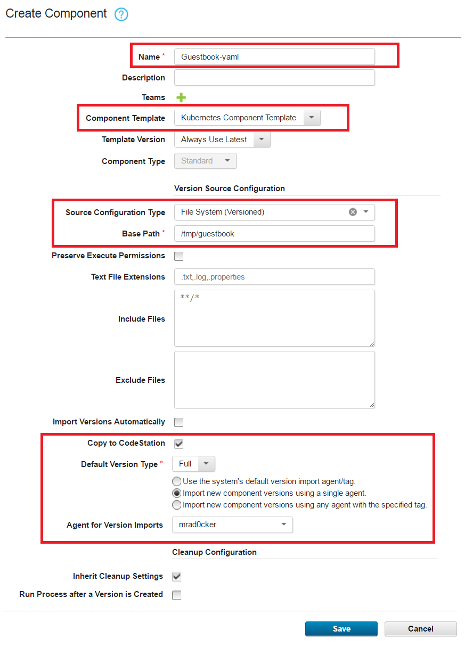
- Enter a name for your component (such as Guestbook-yaml)
- In the Component Template field, choose Kubernetes.
- We will need to store the guestbook-all-in-one.yaml file as a component version artifact. While there are various ways to do this, for this tutorial we will follow these steps:
- On the machine containing your agent, create a directory structure /tmp/guestbook/1.0
- Place your guestbook-all-in-one.yaml file in /tmp/guestbook/1.0

- Back on the Create Component page in UrbanCode Deploy, in Source Configuration Type field, select File System (Versioned)
- In the Base Path field, enter /tmp/guestbook
- Check the Copy to CodeStation checkbox.
- Under Default Version Type, select Import new component versions using a single agent and choose the agent on your Kubernetes machine.
- Click the Save button
Below is a screenshot of what your Create Component page may look like:
- With the component created click on the Versions tab.
- Click the Import New Versions button.
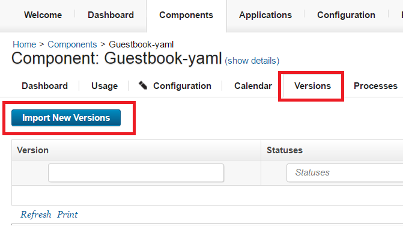
- Click the Refresh link until your version appears as imported:

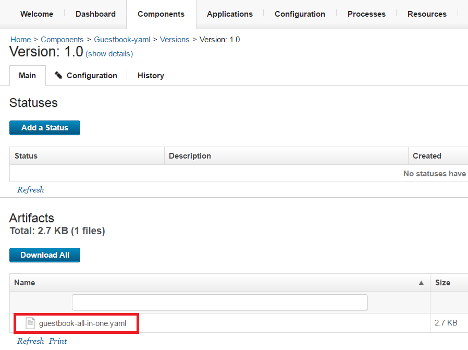
- Click on your version and verify your guestbook-all-in-one.yaml file appears as a component version artifact:
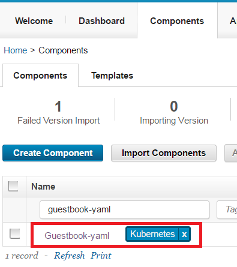
- Go back to your Components page, find the component you created, and add a Kubernetes tag:
UrbanCode Deploy Application Setup
Next, we will create an application in UrbanCode Deploy to represent our Guestbook application.
- In UrbanCode Deploy, click Applications, then click the Create Application button.
- Give your application a name (such as Guestbook).
- In the Application Template field, select Kubernetes Application Template
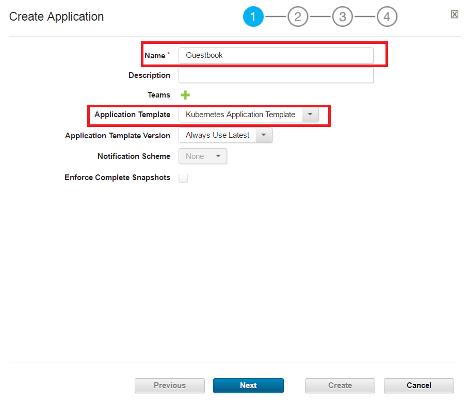
- Click the Next button.
- On the next page of the wizard, select the component you created (which has the Kubernetes tag) from the drop-down.
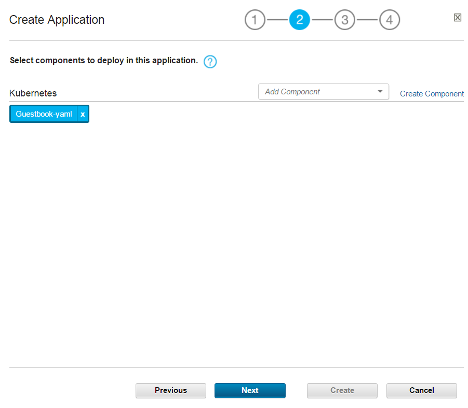
- Click the Next button.
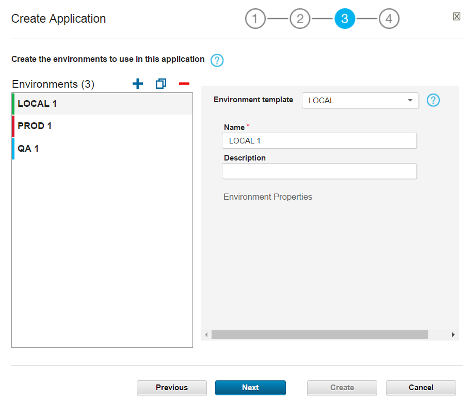
- The next step defines the environments for your application. You may change the names and number of environments if desired, then click the Next button.
- Next drag an agent from the left its corresponding environment on the right. When complete, click the Create button.
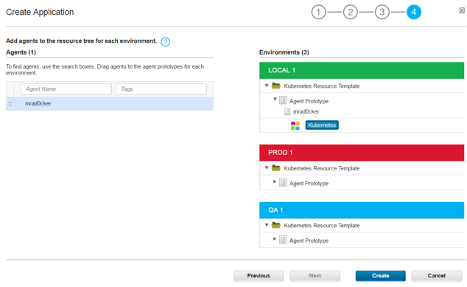
Your application is created.
Run the Application Process to Deploy the Application
Important: This step in the tutorial assumes your Kubernetes client is connected to your Kubernetes server. Manually connect your client to your server if you haven’t done so already. Going forward, you may edit properties or add a step to connect for you. See section Connecting to the Kubernetes Server of this tutorial for more information.
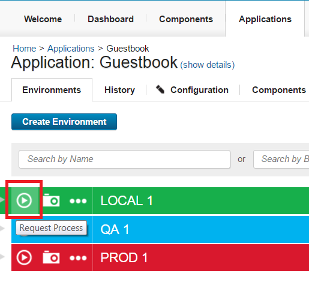
- Click the Request Process button for the environment you wish to deploy to.
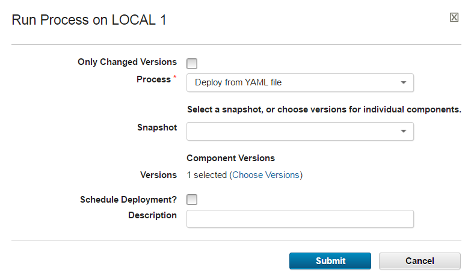
- Uncheck the Only Changed Versions checkbox.
- Verify the Process field is set to Deploy from YAML file
- Click the Choose Versions link and select version 1.0 of your YAML file
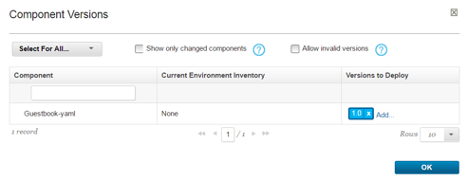
- Click the Ok button.
- Click the Submit button to execute the process.
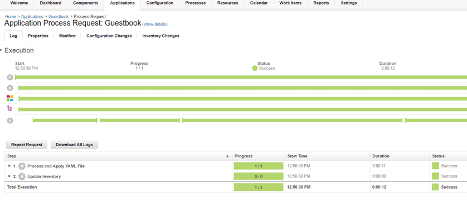
Verify the Results
- Go back to your application and click on the environment you deployed to.
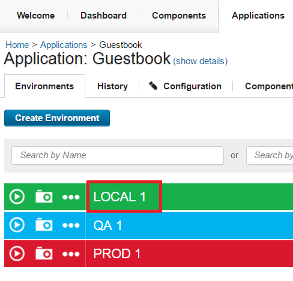
- Verify components have been created for each container image in your YAML file and their version is reflected in the Inventory.
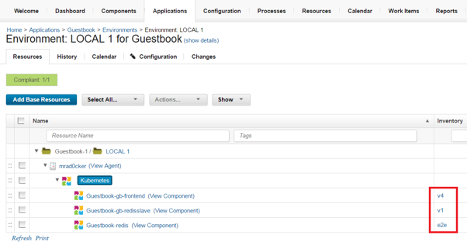
Important: Component names should remain in the format ApplicationName-imageName
- On your Kubernetes client machine, run the kubectl get services command and verify your frontend, redis-master, and redis-slave services are running (see the Kubernetes Guestbook example site for more info).

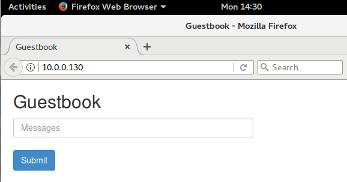
- On one of your Kubernetes node machines, open a browser and enter the frontend service’s IP address and port. For example, if kubectl get services returned the screenshot above, enter 10.0.0.130:80.
- Verify the Guestbook application is running.
Importing Component Versions
UrbanCode Deploy can import container image version information from your container registry, allowing you to easily deploy new versions of containers with your application. We will next look at ensuring the image version are imported into UrbanCode Deploy correctly.
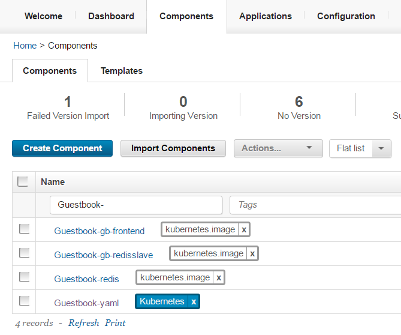
- In UrbanCode Deploy, click on Components and verify your original component representing your YAML file is present and that new components have been created for each container image referenced in your YAML file.
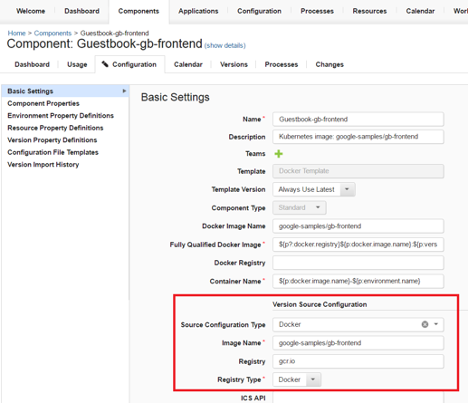
- Click on the component representing the gb-frontend image.
- Click on the Configuration tab.
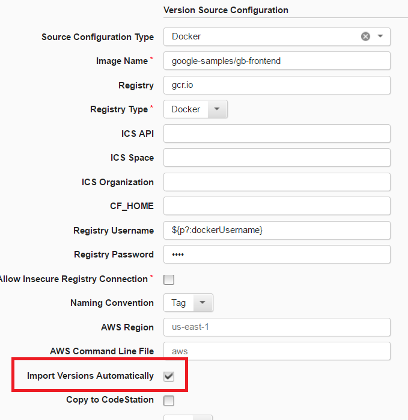
- Under the Version Source Configuration heading, verify Source Configuration Type is set to Docker, the Image Name and Registry values are correct, and the Registry Type field is set to Docker.
- UrbanCode Deploy can periodically check your image registry for new versions and automatically import the version information. To do so, check the Import Versions Automatically checkbox.
- Click the Save button if you have made any changes.
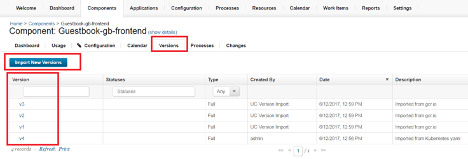
- Click on the Versions tab. If Import Versions Automatically is set, versions for your container image may have already been imported. If you do not see additional versions, click the Import New Versions button to start the import and refresh until the versions appear.
- Repeat these steps for the other components representing container images to verify their versions are imported into UrbanCode Deploy.
Change the Version of a Container
For the sake of this tutorial, let’s say that the latest version of the gb-frontend container has a problem and must be rolled back to version 2. In reality, rolling back to this version will most likely break our application, however this example will show how easy it is to change container versions using UrbanCode Deploy.
- In UrbanCode Deploy, go to Applications and click on your application.
- Click the Request Process button for the environment you wish to perform a rollback on.
- Uncheck the Only Changed Versions checkbox.
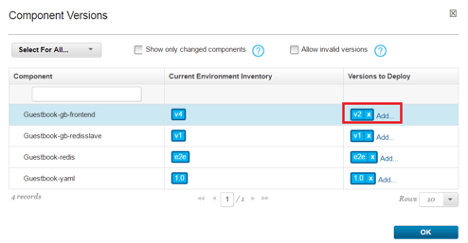
- Click the Choose Versions link.
- For each component, choose the desired version to deploy. Specify v2 for the gb-frontend component.
Important: Always choose a version for the component referencing the YAML file, even if deploying the same version of the YAML file.
- Click the OK button.
Result: The process executes and your application is now using version v2 of the gb-frontend container.
Extending the Tutorial
This tutorial has shown how UrbanCode Deploy can dynamically change container image versions found in Kubernetes YAML file and deploy the YAML file, allowing users to easily view and alter which containers are running in which environment. You may extend this tutorial by replacing values in the YAML file with tokens, then add a Replace Tokens step to the component process to replace the tokens with values specified by the user. For example, you could change a port value from 80 to @port.value@, then use the Replace Tokens step to replace @port.value@ with a value specified by a property.
The Component Process
Let’s take a closer look at the Process and Apply YAML file included in the Kubernetes component template.
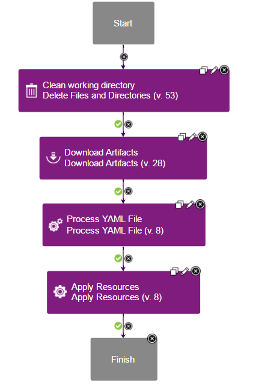
- The Clean working directory step deletes all files in the agent’s working directory to ensure it is empty
- The Download Artifacts step downloads the yaml file from the UrbanCode Deploy component and places it in the agent working directory.
- The Process YAML File step reads the YAML file and creates components and resources for any container images if they do not already exist. The step then creates a copy of the YAML file named ibm-ucd-kubernetes.yaml with updated image version information depending on what the user has selected in UrbanCode Deploy.
- The Apply Resources step runs a kubectl apply command against the ibm-ucd-kubernetes.yaml file.
Connecting to the Kubernetes Server
The Kubernetes component template’s Process and Apply YAML File includes a step named Apply Resources. This step has properties such as User Name and Password which may be used to authenticate with your Kubernetes Server. You may set these values to environment or application properties if you want to store credentials at the environment or application. You may also add a step to explicitly connect to the Kubernetes Server, perhaps by using the Set Credentials step provided with the Kubernetes plug-in for UrbanCode Deploy.
#Kubernetes
#UrbanCodeDeploy