In this blog entry I would like to present how to use the IBM Spectrum Scale with CSI Operator on Openshift 4.2 by introducing a sample Tensorflow deployment with assigned GPFS storage. The basic concepts of CSI, storage provisioning, deployment and service routes will be covered in detail. At the end I will show common configuration errors and a way how to fix them by checking the debug logs.
The setup needed for it requires to have an IBM Spectrum Scale 5.0.4 cluster running on Openshift 4.2 worker nodes. A sample architecture for this may look as presented on the chart below. In this case, GPFS filesystems are mounted remotely from an ESS3000 machine providing huge and high availability storage.

CSI Operator setup
CSI Operator is an easy way to deploy CSI driver for Spectrum Scale. This enables the possibility to use GPFS filesystems from IBM Spectrum Scale in your Openshift infrastructure. Its official website on github is
https://github.com/IBM/ibm-spectrum-scale-csi-operator.
The recommended way to install the operator is to use the build available on operatorhub.io (
https://operatorhub.io/operator/ibm-spectrum-scale-csi-operator).
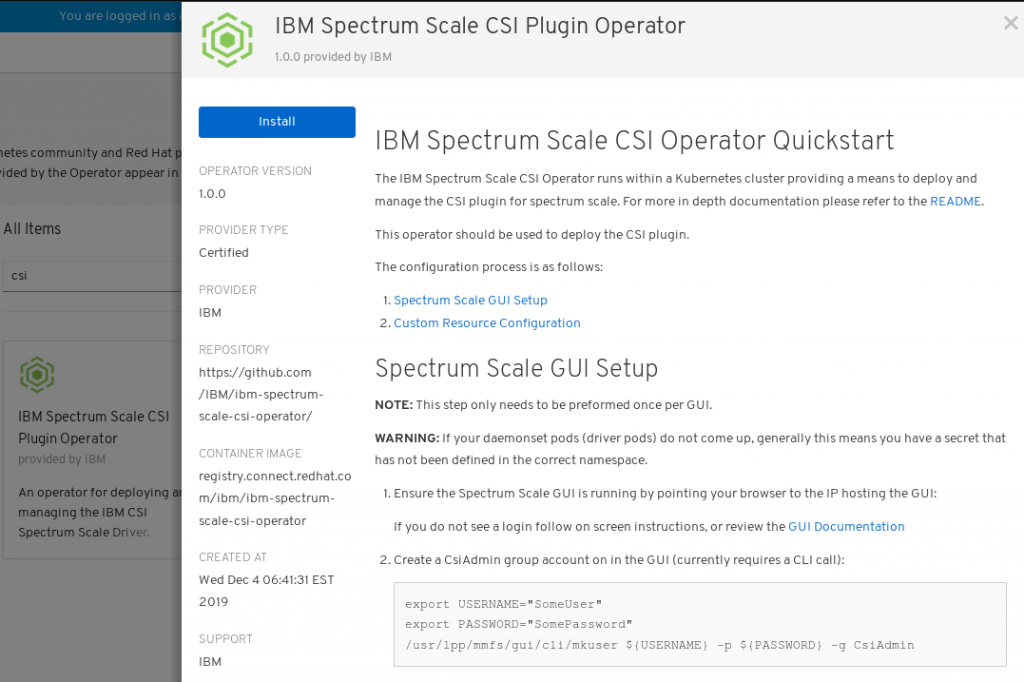
This can be performed interactively by using the Openshift Web Console. As Administrator, go to Operator -> OperatorHub, there, search for 'IBM Spectrum Scale CSI'.
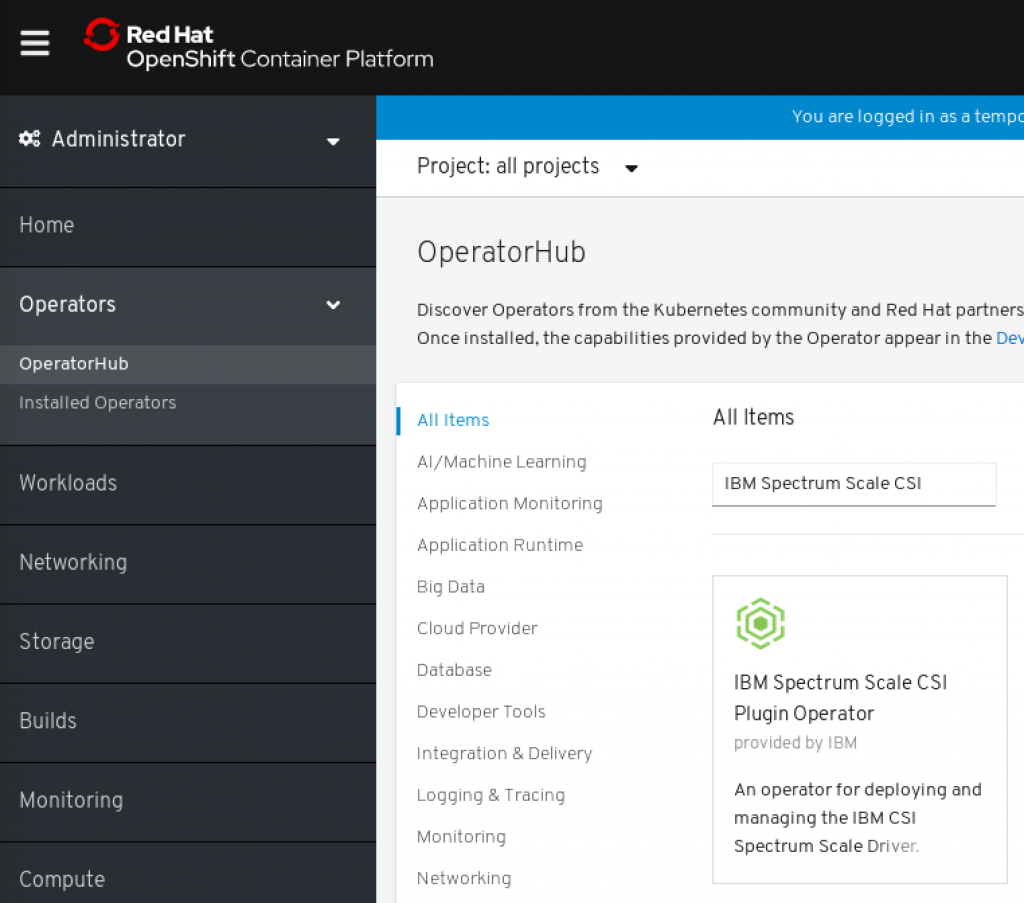
Select it and click on install.
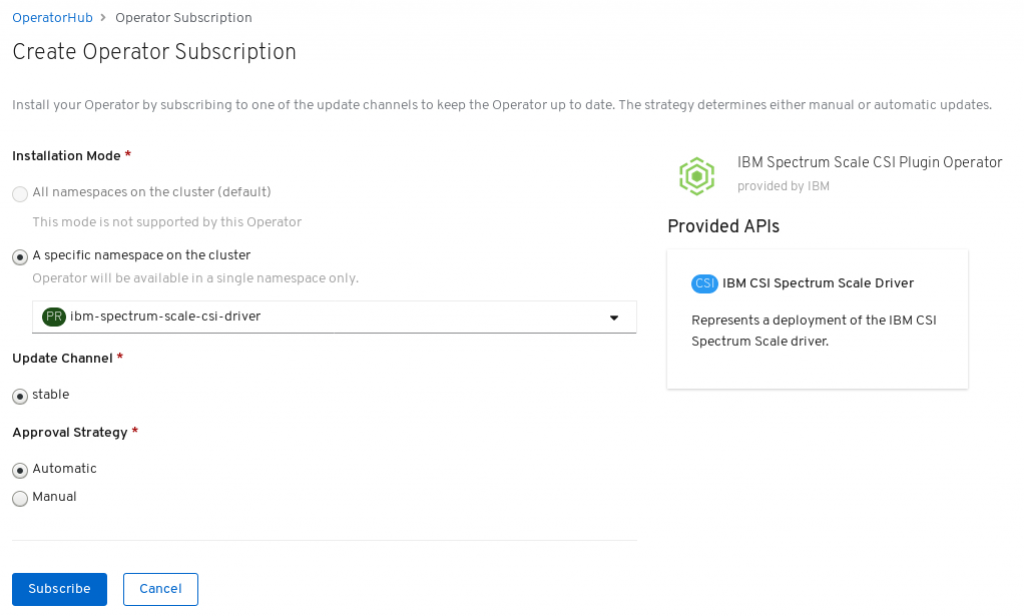
Then, you need to select workspace to deploy the operator. Use here
ibm-spectrum-scale-csi-driver.
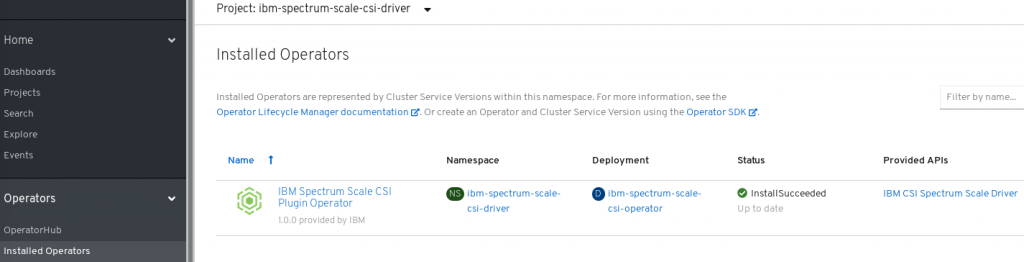
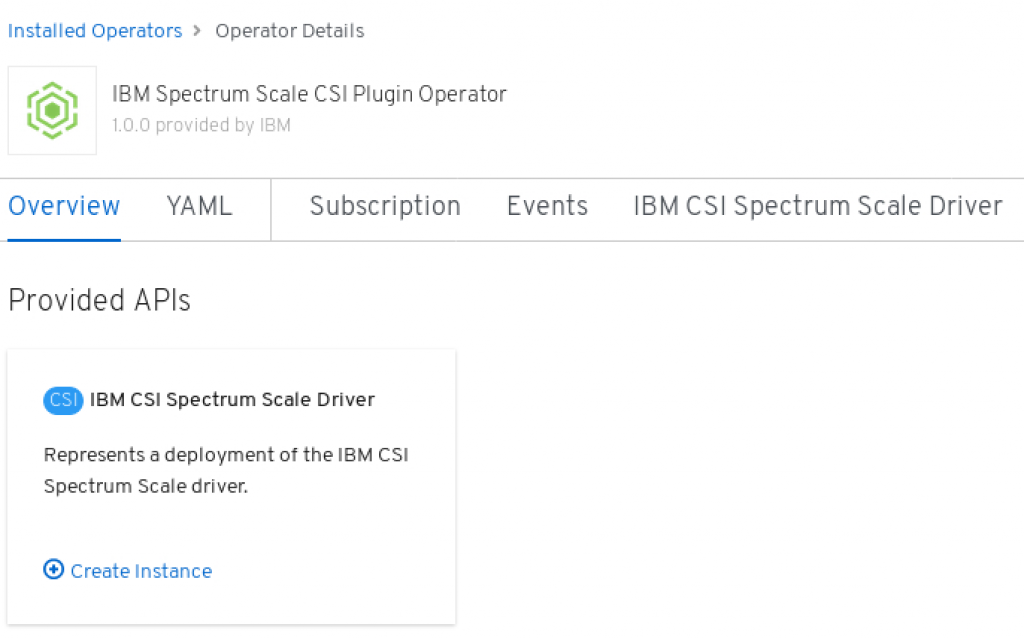
Now, on Installed Operator panel, you will see the IBM Spectrum Scale CSI Operator if you select as project ibm-spectrum-scale-csi-driver or 'all projects'.
With the installation completed, you can create an instance of the CSI driver for using the GPFS filesystem. But first, you need to create a dedicated user for the CSI driver. On a cluster you want to use for storage go to the GUI node and create csiadmin user with your own password. Execute this command:
/usr/lpp/mmfs/gui/cli/mkuser csiadmin -p Passw0rd -g CsiAdminNow, convert the username and password to base64 format by using echo with -n flag enabled (without trailing newline).
echo -n csiadmin | base64
Y3NpYWRtaW4=

echo -n Passw0rd | base64
UGFzc3cwcmQ=
You need to store these credentials in a secret, which can be created in the web console or with a yaml file by using
oc create -f my_secret.yaml command. In our case, we have two secrets for local and remote cluster. You can insert your own values in the bold marked fields.
Local gui secret
apiVersion: v1
data:
  username: Y3NpYWRtaW4=
  password: UGFzc3cwcmQ=
kind: Secret
type: Opaque
metadata:
  name: csisecret-local
  namespace: ibm-spectrum-scale-csi-driver
  labels:
    app.kubernetes.io/name: ibm-spectrum-scale-csi-operator # Used by the operator to detect changes, set on load of CR change if secret matches name in CR and namespace.
Remote gui secret
apiVersion: v1
data:
  username: Y3NpYWRtaW4=
  password: UGFzc3cwcmQ=
kind: Secret
type: Opaque
metadata:
  name: csisecret-remote
  namespace: ibm-spectrum-scale-csi-driver
  labels:
    app.kubernetes.io/name: ibm-spectrum-scale-csi-operator # Used by the operator to detect changes, set on load of CR change if secret matches name in CR and namespace.
With the preparation of secrets completed, we can now deploy a CSI driver for using the gpfs storage. On the web console, click on 'Create instance':
You need to fill out a yaml file with credentials of your cluster(s) and GUI server(s). The file content looks as follows:
apiVersion: csi.ibm.com/v1
kind: 'CSIScaleOperator'
metadata:
    name: 'ibm-spectrum-scale-csi'
    namespace: 'ibm-spectrum-scale-csi-driver'
    labels:
      app.kubernetes.io/name: ibm-spectrum-scale-csi-operator
      app.kubernetes.io/instance: ibm-spectrum-scale-csi-operator
      app.kubernetes.io/managed-by: ibm-spectrum-scale-csi-operator
    release: ibm-spectrum-scale-csi-operator
status: {}
spec:
# The path to the GPFS file system mounted on the host machine.
# ==================================================================================
  scaleHostpath: "< GPFS FileSystem Path >"

# Below specifies the details of a SpectrumScale cluster configuration used by the
# plugin. It can have multiple values. For more details, refer to the cluster
# configuration for the plugin. https://github.com/IBM/ibm-spectrum-scale-csi-driver
# ==================================================================================
  clusters:
    - id: "< Primary Cluster ID - WARNING: THIS IS A STRING NEEDS YAML QUOTES!>"
      secrets: "secret1"
      secureSslMode: false
      primary:
        primaryFs: "< Primary Filesystem >"
        primaryFset: "< Fileset in Primary Filesystem >"
#        inodeLimit: "< node limit for Primary Fileset >" # Optional
#        remoteCluster: "< Remote ClusterID >"            # Optional - This ID should have seperate entry in Clusters map.
#        remoteFs: "< Remote Filesystem >"                # Optional
#      cacert: "< CA cert configmap for GUI >"            # Optional
      restApi:
      - guiHost: "< Primary cluster GUI IP/Hostname >"
#
# In the case we have multiple clusters, specify their configuration below.
# ==================================================================================
#    - id: "< Cluster ID >"
#      secrets: "< Secret for Cluster >"
#      secureSslMode: false
#      restApi:
#      - guiHost: "< Cluster GUI IP/Hostname >"
The namespace in the yaml file must be the same as you specified for the operator. In our case it would be ibm-spectrum-scale-csi-driver. Also, make sure you insert proper filesystem name (use a local one for a remote filesystem) and GUI credential together with a respective secret name.
Now, let's see some typical use cases with related sample yaml files. For all of them it is assumed that the secret files pointing to csadmin user credential for local and remote GUI are specified.
Important! Make sure the filesystems you want to use in Openshift are mounted with quota option enabled (mmchfs yourGpfsFilesystem -Q yes) and filesetdf flag is active for correct 'df' output on pods with dynamically provisioned storage (mmchfs yourGpfsFilesystem --filesetdf). Also, you don't need to create manually a fileset for the primaryFset option - it will be created automatically by the CSI driver. You can also use an existing one.Example 1: GPFS cluster with local filesystems only - Local filesystem as a primary filesystem with a local GUI
apiVersion: csi.ibm.com/v1
kind: CSIScaleOperator
metadata:
  labels:
    app.kubernetes.io/instance: ibm-spectrum-scale-csi-operator
    app.kubernetes.io/managed-by: ibm-spectrum-scale-csi-operator
    app.kubernetes.io/name: ibm-spectrum-scale-csi-operator
  name: ibm-spectrum-scale-csi
  release: ibm-spectrum-scale-csi-operator
  namespace: ibm-spectrum-scale-csi-driver
spec:
  clusters:
    - id: '17399599334479190260'
      primary:
        primaryFs: gpfs0
        primaryFset: csifset
      restApi:
        - guiHost: 10.10.1.21
      secrets: csisecret-local
      secureSslMode: false
  scaleHostpath: /mnt/gpfs0
status: {}
Example 2: GPFS cluster with local and remote filesystems - Local filesystem as a primary filesystem with a local GUI and a remote GUI for locally mounted remote filesystems
apiVersion: csi.ibm.com/v1
kind: CSIScaleOperator
metadata:
  labels:
    app.kubernetes.io/instance: ibm-spectrum-scale-csi-operator
    app.kubernetes.io/managed-by: ibm-spectrum-scale-csi-operator
    app.kubernetes.io/name: ibm-spectrum-scale-csi-operator
  name: ibm-spectrum-scale-csi
  release: ibm-spectrum-scale-csi-operator
  namespace: ibm-spectrum-scale-csi-driver
spec:
  clusters:
    - id: '17399599334479190260'
      primary:
        primaryFs: gpfs0
        primaryFset: csifset
      restApi:
        - guiHost: 10.10.1.21
      secrets: csisecret-local
      secureSslMode: false
    - id: '4473793006880872527'
      restApi:
        - guiHost: 10.10.1.52
      secrets: csisecret-remote
      secureSslMode: false
  scaleHostpath: /mnt/gpfs0
status: {}
Example 3: GPFS cluster with local and remote filesystems - Locally mounted remote filesystem as a primary filesystem with a local and remote GUI
apiVersion: csi.ibm.com/v1
kind: CSIScaleOperator
metadata:
  labels:
    app.kubernetes.io/instance: ibm-spectrum-scale-csi-operator
    app.kubernetes.io/managed-by: ibm-spectrum-scale-csi-operator
    app.kubernetes.io/name: ibm-spectrum-scale-csi-operator
  name: ibm-spectrum-scale-csi
  release: ibm-spectrum-scale-csi-operator
  namespace: ibm-spectrum-scale-csi-driver
spec:
  clusters:
    - id: '17399599334479190260'
      primary:
        primaryFs: remote_fs0_1m
        primaryFset: test
        remoteCluster: "4473793006880872527"
        remoteFs: fs0_1m
      restApi:
        - guiHost: 10.10.1.21
      secrets: csisecret-local
      secureSslMode: false
    - id: '4473793006880872527'
      restApi:
        - guiHost: 10.10.1.52
      secrets: csisecret-remote
      secureSslMode: false
  scaleHostpath: /mnt/remote_fs0_1m
status: {}
Important! In this setup you will still be able to create volumes on your local filesystems as the configuration requires connection to the local GUI as well.Storage provisioning
With the CSI driver configured you can now assign storage from your gpfs filesystems. For this you have two possibilities:
- Dynamic provisioning
- Static provisioning
Dynamic provisioning
In dynamic provisioning, the persistent volumes are created and assigned automatically when a developer creates its own persistent volume claim (PVC) with a storage request.
In CSI driver, there are two dynamic approaches:
- lightweight mode
- fileset mode
Each of them requires to specify a dedicated Storage Class, which then can be used for creating PVCs. This can be performed in the web console or in yaml files. In the following section, sample yaml files will be introduced.
Important! If you don't enforce quota on root user, then he can use all available gpfs storage on a filesystem (thus, ignoring the storage request value as stated in a PVC). To enforce quota for root user, execute the command mmchconfig enforceFilesetQuotaOnRoot=yes -i.Lightweight mode
In this mode, you need to provide a relative path to an existing directory in a fileset. The storage class looks as follows:
apiVersion: storage.k8s.io/v1
kind: StorageClass
metadata:
   name: ibm-spectrum-scale-csi-lt
provisioner: spectrumscale.csi.ibm.com
parameters:
   volBackendFs: "gpfs0"
   volDirBasePath: "testfset/testdir"
reclaimPolicy: Delete
Then, you can create a simple PVC with request of 1Gb. This will create a new directory under testfset/testdir for storing user data.
apiVersion: v1
kind: PersistentVolumeClaim
metadata:
  name: scale-lt-pvc
spec:
  accessModes:
  - ReadWriteMany
  resources:
    requests:
      storage: 1Gi
  storageClassName: ibm-spectrum-scale-csi-lt
Fileset mode
By using this mode, a new fileset will be created automatically in a given filesystem. You can specify properties of the fileset in a storage class in 'parameters' elements. Currently, the following entries are supported:
- volBackendFs - the filesystem, on which you want to create fileset
- clusterId - cluster ID of your gpfs cluster
- uid - owner's Linux user id. Default is root
- gid - owner's Linux group id. Default is root
- filesetType - can be set to dependent or independent. Default is independent
- parentFileset - name of a parent fileset. This parameter can only be used in combination with 'dependent' filesetType. Make sure the fileset used as a parent is independent and linked
- inodeLimit - inode limit
By assigning a new PVC using a storage class, a new fileset will be created as defined by the parametes above.
Important! For locally mounted remote filesystems use as volBackendFs their local name but for cluster Id the remote cluster Id.Sample storage class on a remote filesystem for creating independant filesets for root:
apiVersion: storage.k8s.io/v1
kind: StorageClass
metadata:
   name: ibm-spectrum-scale-csi-remotefs
provisioner: spectrumscale.csi.ibm.com
parameters:
   volBackendFs: "remote_fs0_1m"
   clusterId: "4473793006880872527"
reclaimPolicy: Delete
Sample PVC requesting 1Gi for this class:
apiVersion: v1
kind: PersistentVolumeClaim
metadata:
  name: scale-remotefset-pvc
spec:
  accessModes:
  - ReadWriteMany
  resources:
    requests:
      storage: 1Gi
  storageClassName: ibm-spectrum-scale-csi-remotefs
Now, an example for a local filesystem will be introduced. Notice the local cluster ID used in the yaml file for the storage class.
apiVersion: storage.k8s.io/v1
kind: StorageClass
metadata:
   name: ibm-spectrum-scale-csi-fileset
provisioner: spectrumscale.csi.ibm.com
parameters:
   volBackendFs: "gpfs0"
   clusterId: "17399599334479190260"
reclaimPolicy: Delete
Sample PVC for the local filesystem with 1Gi requested:
apiVersion: v1
kind: PersistentVolumeClaim
metadata:
  name: scale-fset-pvc
spec:
  accessModes:
  - ReadWriteMany
  resources:
    requests:
      storage: 1Gi
  storageClassName: ibm-spectrum-scale-csi-fileset
With storage class defined you can easily create new PVCs and assign them to your pods. This storage handling is performed automatically by the IBM CSI driver.
Static provisioning
Static provisioning requires the administator to create persistent columes (PVs) manually. A sample template for it is presented below:
apiVersion: v1
kind: PersistentVolume
metadata:
  name: static-scale-static-pv
spec:
  capacity:
    storage: 1Gi
  accessModes:
    - ReadWriteMany
  csi:
    driver: ibm-spectrum-scale-csi
    volumeHandle: "clusterID;FSUID;path=/gpfs/fs1/staticdir"
The clusterID must be provided, filesystem id and the path to an existing directory. The filesystem id can be obtained by executing mmlsfs with --uid flag:
mmlsfs gpfs0 --uid
flag                value                    description
------------------- ------------------------ -----------------------------------
 --uid              C0A80115:5DC1DF36        File system UID
Important! Use local cluster ID for all your filesystem, even for remotely mounted. The following example shows how to use the static provisioning with a remote filesystem, providing an id label as well:
apiVersion: v1
kind: PersistentVolume
metadata:
  name: pv-images
  labels:
  id: images
spec:
  capacity:
    storage: 10Gi
  accessModes:
    - ReadWriteMany
  csi:
    driver: ibm-spectrum-scale-csi
    volumeHandle: 17399599334479190260;099B6A42:5DC52700;path=/mnt/remote_fs0_1m/static/images
The persistent volume is ready to be used. If you would need to bound your PV to a specific PVC then you need to match the PV's id in the selector tag. Off course, the storage request must be equal or less than the PV provides. Also, use an empty, non-existing storage class ("") so that not a default one will be used.
apiVersion: v1
kind: PersistentVolumeClaim
metadata:
  name: scale-static-pvc
spec:
  storageClassName: ""
  accessModes:
  - ReadWriteMany
  selector:
    matchLabels:
      id: images
  resources:
    requests:
      storage: 10Gi
Important! Although you need to specify matching values for a storage request in order to create a relationship between PV and PVC, they will be ignored by the CSI driver as it cannot enforce gpfs quota for static volumes. In this case a pod using static volume can allocate all available gpfs storage in a filesystem. Make sure you control your data usage or set PV's and PVC's access mode to ReadOnlyMany to create a read-only volume (option not supported in CSI driver 1.0) or make your files or directories immutable with mmchattr -i yes fileOrDir.Sample Tensorflow deployment
The following yaml file presents a tensorflow deployment on jupyter with a static persistent volume created in the previous chapter. The volume will be mounted with write permissions in a pod under /usr/data/images.
apiVersion: apps/v1
kind: Deployment
metadata:
  labels:
    run: tensorflow
  name: tensorflow
spec:
  replicas: 1
  selector:
    matchLabels:
      run: tensorflow
  template:
    metadata:
      labels:
        run: tensorflow
    spec:
      containers:
      - image: tensorflow/tensorflow:latest-py3-jupyter
        name: tensorflow
        volumeMounts:
        - name: mypvc
          mountPath: /usr/data/images
      volumes:
      - name: mypvc
        persistentVolumeClaim:
          claimName: scale-static-pvc
          readOnly: false
Validate you have the deployment running:
oc get deployment
NAME         READY   UP-TO-DATE   AVAILABLE   AGE
tensorflow   1/1     1            1           37m
Then, connect to a pod to get the token required to log in to jupyter notebook.
oc get pods
NAME                          READY   STATUS      RESTARTS   AGE
tensorflow-55b7b545b8-8crqw   1/1     Running     0          38m

oc rsh tensorflow-55b7b545b8-8crqw
# jupyter notebook list
Currently running servers:
http://0.0.0.0:8888/?token=0d6250611c12a15f203f68a2123f1f3144b24f94fbde77f9 :: /tf
Copy the token
0d6250611c12a15f203f68a2123f1f3144b24f94fbde77f9. It will be needed later.
Now, create a service used to expose port 8888 of jupyter notebook on the pods. A sample yaml file looks as presented below.
apiVersion: v1
kind: Service
metadata:
  name: tensorflow-service
  labels:
    run: tensorflow
spec:
  ports:
    - port: 8888
  selector:
    run: tensorflow
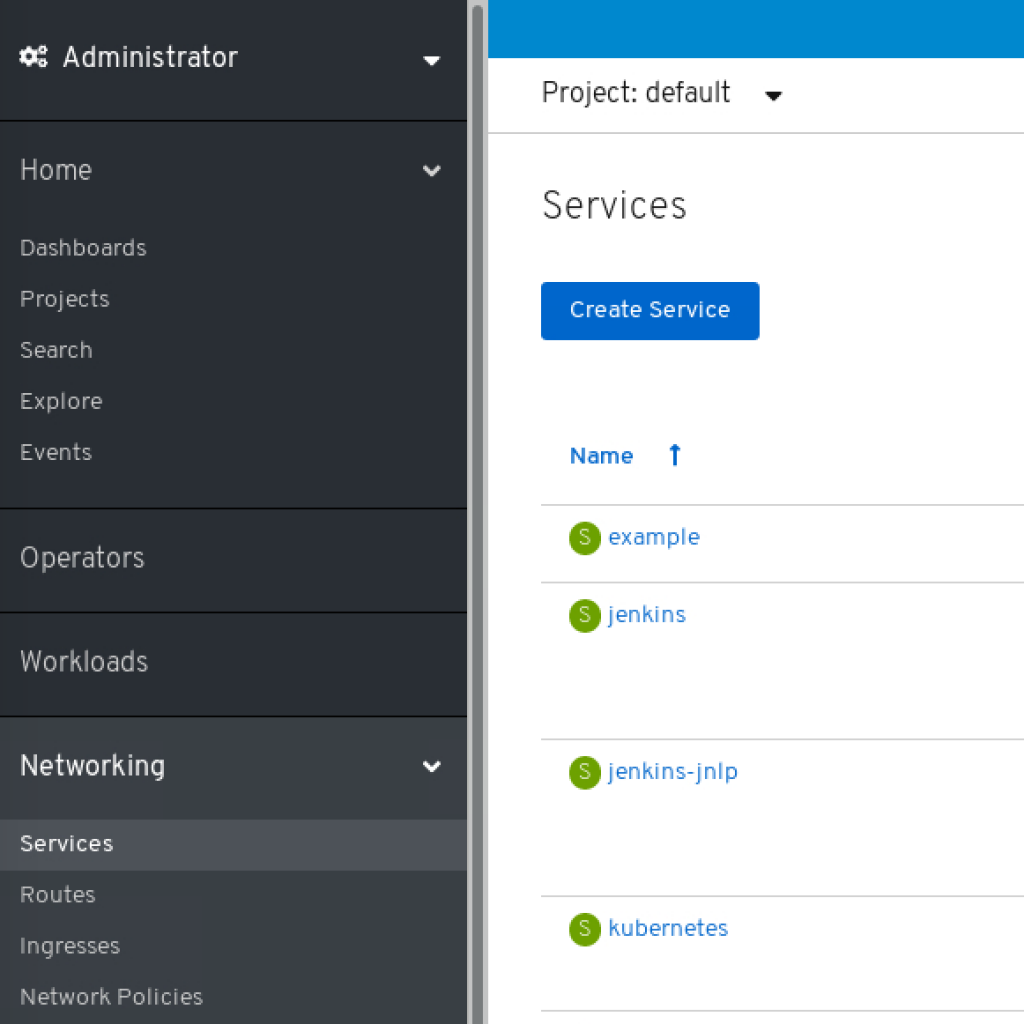
The service can also be performed interactively on the Openshift Webconsole under Administrator->Networking->Services. There, click on 'Create Service' and provide the values as in the yaml file.
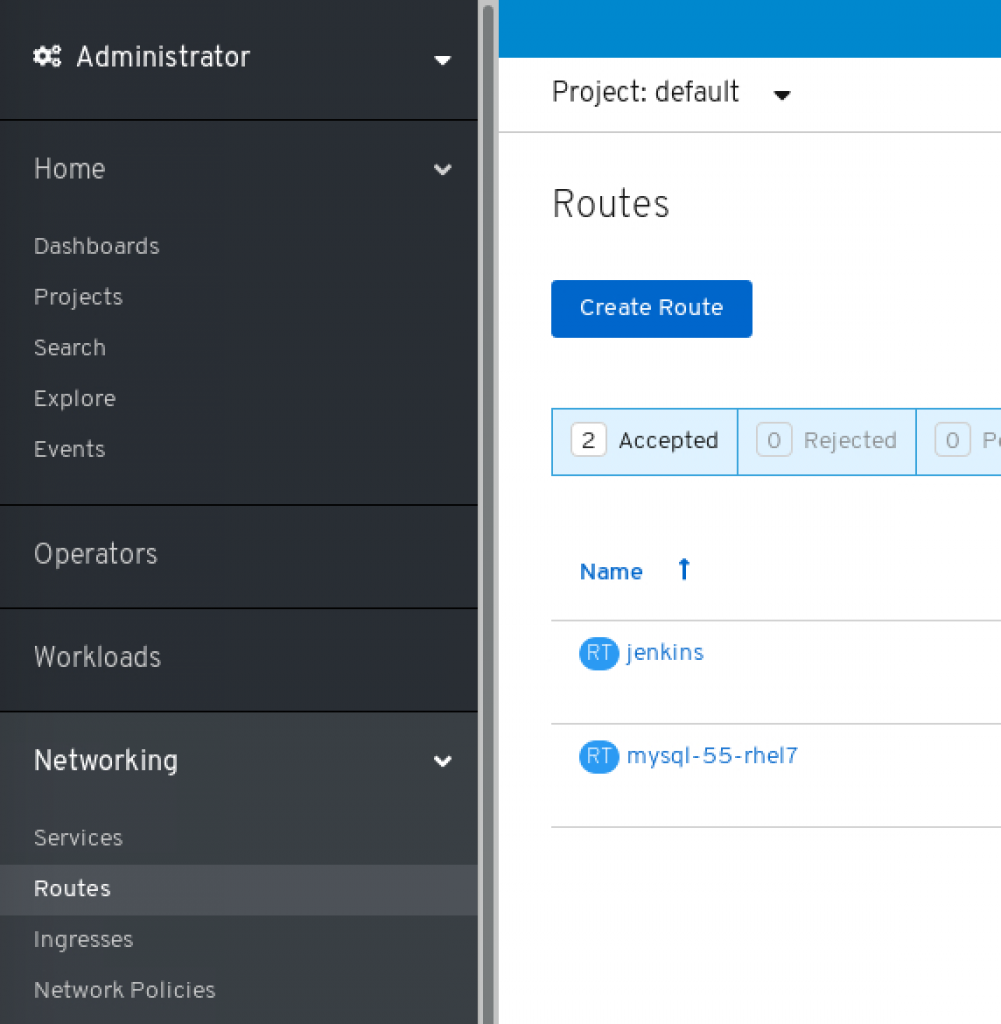
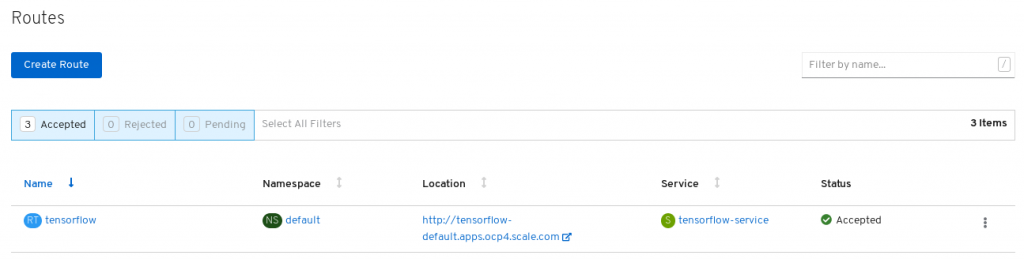
The route needs to be created in order to assign an URL to the deployment. Go to Administrator->Networking->Routes.
Click on 'Create Route'. There insert name, which used will be part of a generated URL, select tensorflow-service as service and target port 8888. Click on 'Create'.
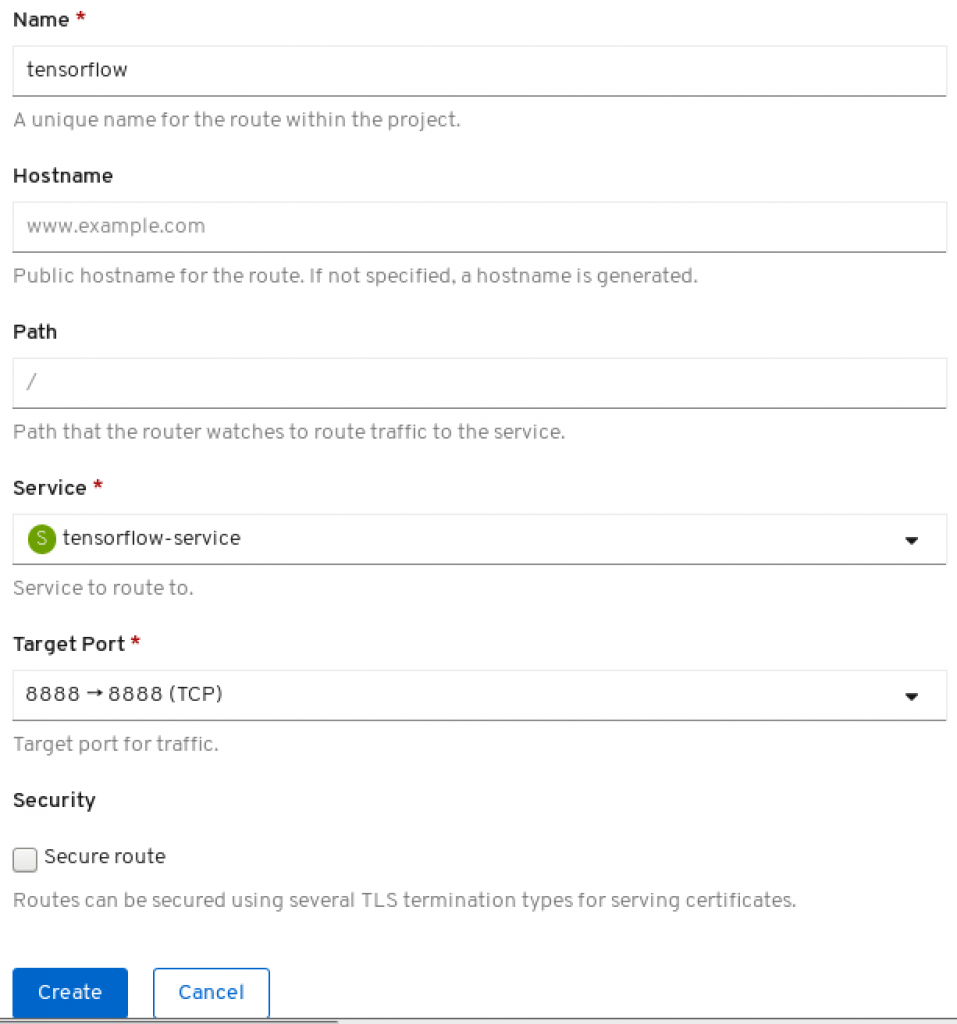
The URL is now available. In our case the Jupyter notebook with Tensorflow would be available under
tensorflow-default.apps.ocp4.scale.com. Visit this URL.
Here, you need to provide the token you saved before.
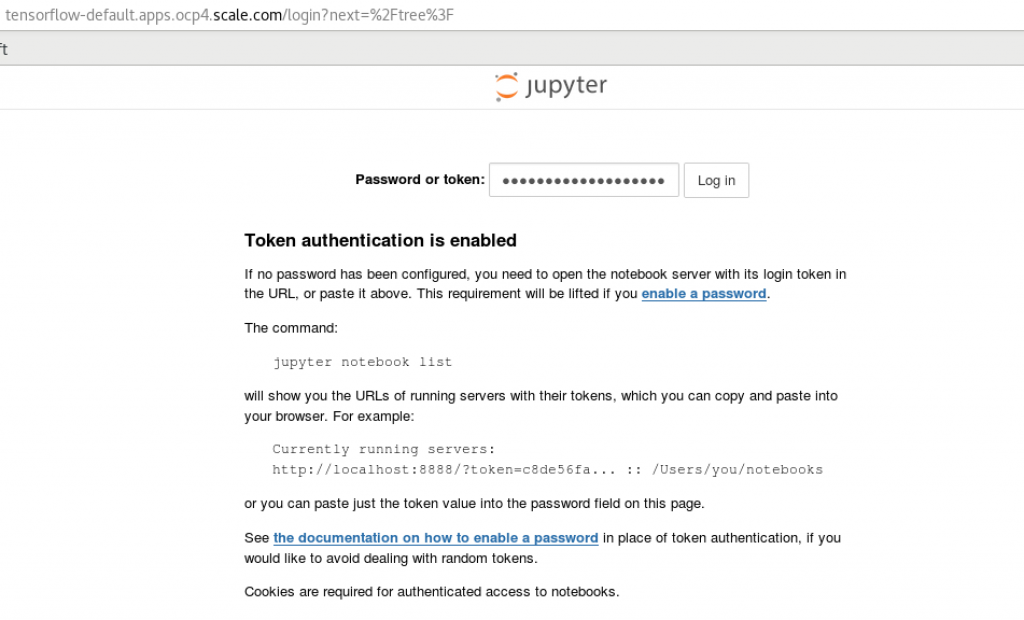
Now, you can access the Jupyter notebook UI and try samples created for Tensorflow.

You can access your data provided in the static persistent volume. It is mounted on /usr/data/images as defined in the yaml file for deployment and ready to use.
oc exec -it tensorflow-55b7b545b8-8crqw -- df -hT
Filesystem             Type     Size  Used Avail Use% Mounted on
overlay                overlay  200G   80G  121G  40% /
tmpfs                  tmpfs     64M     0   64M   0% /dev
tmpfs                  tmpfs     63G     0   63G   0% /sys/fs/cgroup
shm                    tmpfs     64M     0   64M   0% /dev/shm
tmpfs                  tmpfs     63G  4.1G   59G   7% /etc/hostname
/dev/mapper/sr650-root xfs      200G   80G  121G  40% /etc/hosts
remote_fs0_1m          gpfs      15T   36G   15T   1% /usr/data/images
tmpfs                  tmpfs     63G   24K   63G   1% /run/secrets/kubernetes.io/serviceaccount
tmpfs                  tmpfs     63G     0   63G   0% /proc/acpi
tmpfs                  tmpfs     63G     0   63G   0% /proc/scsi
tmpfs                  tmpfs     63G     0   63G   0% /sys/firmware
Troubleshooting
Common errors seen in the CSI driver.
Failing CSI podsError message:
Back-off restarting failed container
Reason: Incorrect GUI credentials provided. Make sure your csiadmin user exists in your GUI and his username and password (both base64 encoded) are correctly defined in the secret. Also, check if the password of the csiadmin has not expired - this can be seen on a GUI node after executing
lsuser command (/usr/lpp/mmfs/gui/cli/lsuser).
Failing PVCsError message:
Error [Remote call completed with error [400 Bad Request]]
Reason: Your gpfs filesystem is not mounted on your worker nodes or the filesystem has not enough inodes. This can also have another reasons. Check if your filesystem is working properly and has enough space for new data.
Error message:
AttachVolume.Attach failed for volume "pvc-164fd2ed-8abe-46e4-a649-d2a6904f82cd" : rpc error: code = Internal desc = ControllerPublishVolume : SKIP_MOUNT_UNMOUNT == yes and either fs0 or fs0 in not mounted on node vm14.bda.scale.com.
Reason: You use different hostnames for nodes in your Openshift and GPFS cluster. Make sure the hostnames used for GPFS daemon or admin network (can be seen in mmlscluster output) are the same as in presented by
oc get nodes.
df output shows incorrect size on pods with dynamically provisioned storageYou need to enable filesetdf flag for your filesystems.
mmchfs yourGpfsFilesystem --filesetdf
Checking CSI state and debug logIn order to see CSI components execute the following command. In the example, the CSI is deployed in namespace ibm-spectrum-scale-csi-driver.
oc get all -n ibm-spectrum-scale-csi-driver
Check if the states are correct.
A sample output looks as follows:
NAME                                                   READY   STATUS    RESTARTS   AGE
pod/ibm-spectrum-scale-csi-attacher-0                  1/1     Running   0          30d
pod/ibm-spectrum-scale-csi-n5bhs                       2/2     Running   0          30d
pod/ibm-spectrum-scale-csi-operator-75f65c5999-pqn9w   2/2     Running   0          30d
pod/ibm-spectrum-scale-csi-provisioner-0               1/1     Running   0          30d
pod/ibm-spectrum-scale-csi-xcm68                       2/2     Running   0          30d

NAME                                              TYPE        CLUSTER-IP     EXTERNAL-IP   PORT(S)    AGE
service/ibm-spectrum-scale-csi-operator-metrics   ClusterIP   172.30.79.94
To see debug log for a CSI pod, you need to execute the command below. Make sure you insert your own pod name in the marked entry.
oc logs -c ibm-spectrum-scale-csi ibm-spectrum-scale-csi-n5bhs -n ibm-spectrum-scale-csi-driver
#Softwaredefinedstorage#spectrumscale#IBMSpectrumScale#BigDataandAnalytics#csi#ess3000#tensorflow#Workloadandresourceoptimization