The recently launched IBM Spectrum Fusion hyperconverged appliance helps you to work with its intuitive management graphical user interface for networking resources that associated with the appliance.
This tutorial focuses on how you can add Links and configure their settings based on the VLANs that you defined earlier.
Before you start with this tutorial, you can keep the IBM Documentation for IBM Spectrum Fusion handy, which also provides a good starting point for reference and learning.
After you have successfully installed and configured the IBM Spectrum Fusion appliance in your premises or environment and you want to add another Link to your IBM Spectrum Fusion appliance as part of the network configuration, you will need to carry out some steps.
So, let’s walk through this tutorial to learn and understand about how you can add Links from the IBM Spectrum Fusion user interface on to your network for the IBM Spectrum Fusion appliance.
- Log in to the IBM Spectrum Fusion appliance by using the IBM Spectrum Fusion user interface. See the following figure for reference about the welcome page:
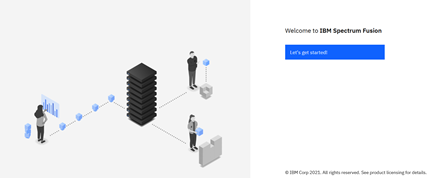 Figure 1: IBM Spectrum Fusion welcome page
- Click Let’s get started.
- On the login page, log in to your account with your user credentials by specifying the username and password.
You are welcomed by the Dashboard page on the IBM Spectrum Fusion user interface, which consists of various sections such as Compute, Storage, Network, Events, OpenShift, Software capacity, and Backups.
You can view all the relevant information for each of these sections based on the administrative, management, or configuration actions that you have carried out earlier from the IBM Spectrum Fusion user interface.
As we are interested to know about how to add Links as part of the network configuration for the IBM Spectrum Fusion appliance, let’s understand a bit about the Network section. See the following figure for reference.
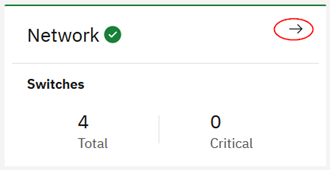 Figure 2: Network section on Dashboard
- The Network section displays information about the total number of switches, the total number of switches in critical and warning state, and the throughput and latency in GBps.
- To go to the Network page, click the arrow mark (as marked in the former figure) in the Network section on the Dashboard Alternatively, click the IBM Spectrum Fusion Dashboard menu in the top-left corner of the user interface and click Manage > Network. See the following figure for reference.
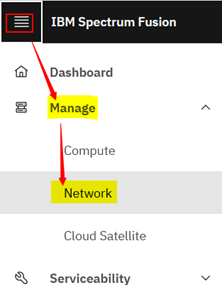 Figure 3: Menu to access Network page
The Network page is displayed, which provides you with all the information about the Network configuration on your IBM Spectrum Fusion appliance. See the following figure.
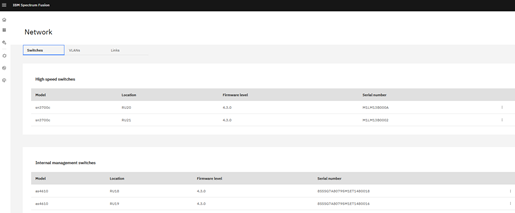 Figure 4: Network page (Switches tab by default)
Three tabs (Switches, VLANs, Links) that constitute the Network page help you to configure your network configuration further that are based on your business requirements. By default, you land on the Switches page.
As we want to add a Link, let’s proceed with these steps:
- Click the Links The Links section is displayed. See the following figure for reference.
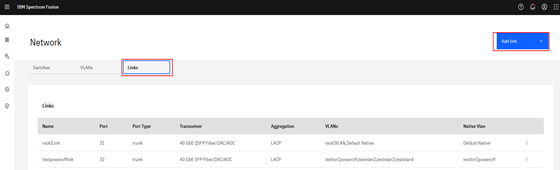 Figure 5: Network page (Links tab)
This page provides all the Links information in a tabular form.
The columns of the Links table are as follows:
- Name: Indicates the name of the link.
- Port: Indicates the port that you specified when adding a link.
- Port Type: Indicates the type of port that you selected.
- Transceiver: Indicates the transceiver that you selected.
- Aggregation: Indicates the aggregation that you selected.
- VLANs: Indicates the VLANs that you selected.
- Native VLAN: Indicates the native VLAN that you selected.
- To add a link, follow these steps:
-
- On the Network page, click the Add link See the following figure for reference.
 Figure 6: Add link button
-
- The Add link pane is displayed. See the following figure for reference.
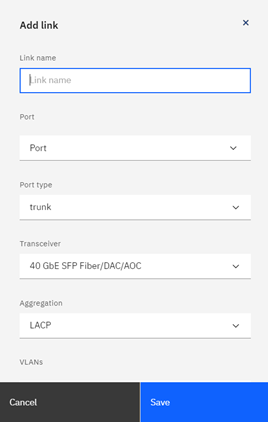 Figure 7: Add link page
-
- Provide the link details in the following fields:
-
-
- Specify a name in Link name to uniquely identify a link.
- Select one of the available options from the Port list. The port selection is made on both switches. You can select more than one port.
- Select a type from the Port Type list.
- Select one of the available options from the Transceiver list. The transceiver defines the speed and wire type to be used for the link.
- Select one of the available options from the Aggregation list.
- Select one or more VLANs from the VLANs list. You can assign multiple VLANs from this multi-select label list. The Native VLAN list is populated with the selected VLANs.
- Select the VLAN from the list.
-
- Click Save to apply your changes.
Once you have saved and applied your changes, you will see that the new link record is created and is added in the Links table of the Network page.
 Figure 8: Links table
With this procedure, you have successfully added a link in the Network page of the IBM Spectrum Fusion user interface to meet your business requirement. Similarly, you can add more links to your network.