Customizing IBM Cloud Identity
Branding Email and SMS templates
Customizing the experience of your application is something that all consumers of IBM Cloud Identity have in common. Fortunately, you can brand almost every page, multi-factor page, and error page that end user facing. Following the steps below provides how to obtain the branding package, manipulating the template, and packaging the branding files back up for upload. We will use curl as it is cross platform but using an API program like Postman provides a better GUI for manipulating API calls.
Note: Once you upload the package, the changes are now live.
Step 1 / Create an API key
Create an API client ID and secret with the following permissions:
- Read templates
- Manage templates
Note: Creating an API key is performed by going into the admin portal under the Settings tab, and selecting API Access.
Step 2 / Authorize API
With your new API client ID and secret in hand, obtain an access token by running the following curl command:
curl -X POST \
https://{tenantUrl}:443/v1.0/endpoint/default/token \
-H 'Content-Type: application/x-www-form-urlencoded' \
-d 'grant_type=client_credentials&client_id={clientid}&client_secret={clientsecret}&scope=openid'
You will receive a JSON respoinse with an access token. Copy this to your clip board for later use.
Step 3 / Download branding templates
With the access token you received, make the following API call to download all template files. It is important to run this command everytime you make a change to get the most up to date templates.
curl -X GET \
https://{tenantUrl}/v1.0/branding/download \
-H 'Authorization: Bearer {access_token}' \
-o branding.zip
This will download a file called branding.zip to the folder that you're terminal window is currently in.
Step 4 / Customize the templates
First, unzip the branding.zip file. You will see a parent folder called templates.
Email Templates
There are multiple email templates that end users will see within IBM Cloud Identity from email one time passcodes for second-factor authentication and notification type messages (example: reset password).
Note: You can add styles and classes the email HTML, however be aware that you will need to host any CSS or JS files that the client needs to reference in order for the email body to render correctly. Otherwise, you'll need to include the CSS and JS inline.
One-time passcode template (email)
-
In the templates folder, navigate to templates\authsvc\otp_delivery_email\default\default.
Note: You can localize the email template within the templates\authsvc\otp_delivery_email with the corresponding language folder (ie. fr = french).
-
Edit the XML file page.xml in a text editor.
-
Change the sender email account by replacing the value within the <Sender><Value> tags.
-
Change the subject line of the email by replacing the value within the <Subject><Value> tags.
-
In between the <Message><Value><![CDATA[ ... ]]></Value></Message> tags, you may add any HTML that you wish, including stylesheets and other JS that needs to be loaded to render the page. Ensure that your HTML lies within the CDATA brackets.
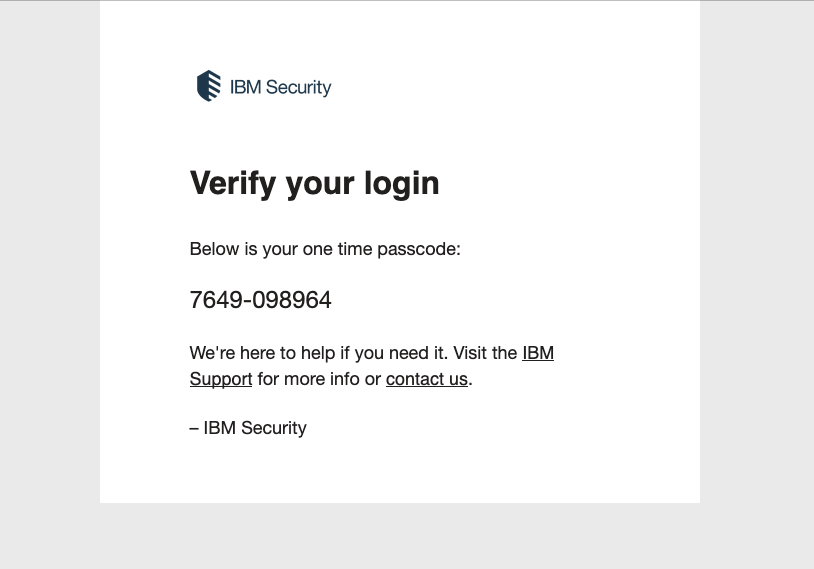
Example email branded OTP message:

User management emails / notifications
-
In the templates folder, navigate to templates\USER_MGMT\UserManagementEmails\default\default.
Note: You can localize the email template within the templates\USER_MGMT\UserManagementEmails\default with the corresponding language folder (ie. fr = french).
-
There are multiple templates in here to edit. Each one needs to be individually customized. They all follow this same pattern.
- Open the
email_*.xml that represents what you want to customize.
- Change the sender email account by replacing the value within the
<Sender><Value> tags.
- Change the subject line of the email by replacing the value within the
<Subject><Value> tags.
- In between the
<Message><Value><![CDATA[ ... ]]></Value></Message> tags, you may add any HTML that you wish, including stylesheets and other JS that needs to be loaded to render the page. Ensure that your HTML lies within the CDATA brackets.
SMS Templates
Currently there is only one brand-able SMS template and that is for one time password delivery for second factor authentication.
-
In the templates folder, navigate to templates\authsvc\otp_delivery_sms\default\default.
Note: You can localize the email template within the templates\authsvc\otp_delivery_sms with the corresponding language folder (ie. fr = french).
-
Edit the XML file page.xml in a text editor.
-
In between the <Message><Value></Value></Message> tags, You can add any message you wish but the variables that are supported are @OTP_STRING@ (ie. 7890-123456). New lines returns are reflected in the SMS body, as well as tabs, so be aware. @OTP_LIFETIME@ (ie. 5) in minutes is another variable that you can provide.
Step 5 / Upload the templates
- Zip (compress) the
templates parent folder after you are done.
- With the same access token you used, make the following API call to upload all template files.
Note: Ensure that data=@ prefixes the filepath in this API call.
curl -X GET \
https://{tenantUrl}/v1.0/branding/download \
-H 'Authorization: Bearer {access_token}' \
-H 'Content-Type: multipart/form-data'
-d 'data=@path/to/file/templates.zip'
You should expect a 201 Created response if all checks out.
Your templates are now immediately live in production. If you don't see your template live, then either the upload failed, or your browser has cached the older templates. Try a private browser without cache in order to test accurately.