Mac Automation
Mac automation is a powerful feature that allows users to automate and streamline repetitive tasks on their Mac computers. One of the most popular ways to automate tasks on a Mac is by using AppleScript, a scripting language developed by Apple for automating various aspects of macOS and its applications.
About AppleScript:
AppleScript is a powerful scripting language developed by Apple Inc. for automating and controlling various aspects of macOS and its applications. It allows users to automate repetitive tasks, customize their workflows, and control various system functions. In this blog, we will explore the basics of AppleScript and how it can be used to enhance productivity on a Mac computer.
Prerequisites for executing automated scripts:
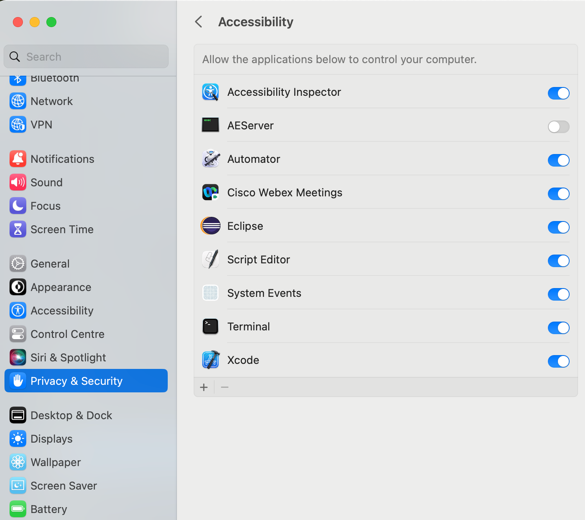
Open System Preferences → Security Privacy → Privacy → Accessibility → Add the following applications
1. Eclipse
2. Accessibility Inspector (high sierra+ only)
3. Automator
4. Script Editor
5. terminal
6. Xcode (high sierra+ only)
7. System Events (From folder /System/Library/CoreServices/System Events)
1. Getting Started with AppleScript
AppleScript is a high-level scripting language that is easy to learn and use. To get started, open the Script Editor application on your Mac, which can be found in the Utilities folder. The Script Editor provides an integrated development environment (IDE) for writing, editing, and debugging AppleScripts.
2. Writing Your First AppleScript
Let’s start by writing a simple AppleScript that displays a message dialog box. Open a new script document in the Script Editor and type the following code:
““
display dialog “Hello, World!”
““
Save the script file with a .scpt extension and run it by double-clicking on the script file. You should see a message dialog box with the text “Hello, World!”.

3. Controlling Applications with AppleScript
AppleScript can also be used to control various applications on your Mac. For example, you can use AppleScript to open a specific application, select a menu item, or even simulate mouse clicks and keyboard presses.
To control an application with AppleScript, you first need to target the application. You can do this by using the ‘tell‘ statement, followed by the name of the application. For example, to open the Safari web browser, you can use the following code:
““
tell application “Safari”
activate
end tell
““
This code tells Safari to activate, which means it will be brought to the front and become the active application.
4. Automating Tasks with AppleScript
One of the main benefits of using AppleScript is its ability to automate repetitive tasks. For example, you can use AppleScript to automate the process of open a aap installation popup and adding username and password leading to software installation.
Here’s an example
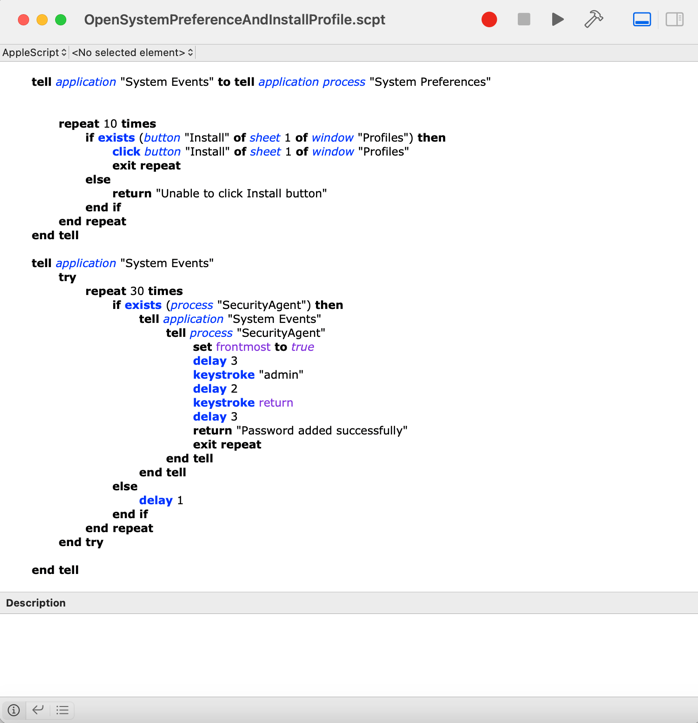
How to use AppleScript to automate tasks on a Mac:
1.Automating Simple Tasks with AppleScript
AppleScript can be used to automate simple tasks such as launching an application, opening a file, or even typing text. For example, to open the Safari web browser, you can use the following AppleScript code:
““
tell application “Safari”
activate
end tell
““
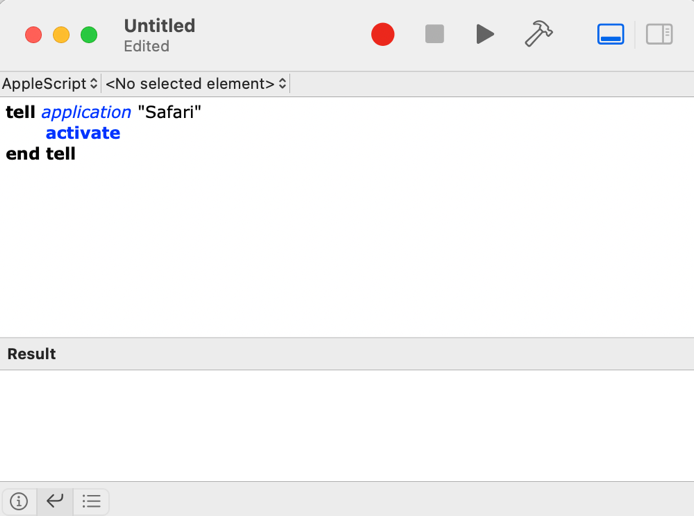
This code tells Safari to activate, which means it will be brought to the front and become the active application.

Similarly, you can use AppleScript to open a file or folder by specifying the file path, like this:
““
tell application “Finder”
open “/Users/username/Documents/example.docx”
end tell
““
2.Automating Tasks with User Input
AppleScript can also be used to automate tasks that require user input. For example, you can create a script that prompts the user to enter their name and then uses that input to create a new file with their name. Here’s an example:
““
set theName to (display dialog “Enter your name:” default answer “”)’s text returned
set thePath to “/Users/username/Documents/” & theName & “.txt”
set theFile to open for access thePath with write permission
write “Hello, “ & theName & “!” to theFile
close access theFile
““
This script prompts the user to enter their name, and then creates a new file with their name and writes a greeting message to the file.
3.Automating Complex Tasks with AppleScript
AppleScript can also be used to automate more complex tasks, such as manipulating data in spreadsheets or databases. For example, you can use AppleScript to automate the process of importing data from a CSV file into a spreadsheet application like Microsoft Excel or Apple Numbers.
Here’s an example script that imports data from a CSV file into an Excel spreadsheet
““
set theCSVFile to choose file with prompt “Select a CSV file to import:”
set theWorkbook to open workbook workbook file name “example.xlsx”
set theWorksheet to worksheet 1 of theWorkbook
set theRange to range “A1” of theWorksheet
set theData to import theCSVFile ¬
with delimiter “,” into theRange
save theWorkbook
close theWorkbook
““
This script prompts the user to select a CSV file to import, opens an Excel workbook called “example.xlsx”, selects the first worksheet, and imports the CSV data into the worksheet starting at cell A1. Finally, it saves and closes the workbook.
4.Creating AppleScript Applications
You can also create standalone AppleScript applications that can be run by double-clicking on them, without the need for the Script Editor. To create an AppleScript application, simply save your script with the extension “.app” instead of “.scpt”.
For example, you can create an AppleScript application that opens your favorite websites by creating a script like this:
““
tell application “Safari”
activate
open location “https://www.google.com”
open location “https://www.youtube.com”
open location “https://www
end tell ””
5. Debugging AppleScript
Debugging AppleScript can be challenging, especially for beginners. The Script Editor provides several tools to help you debug your scripts:
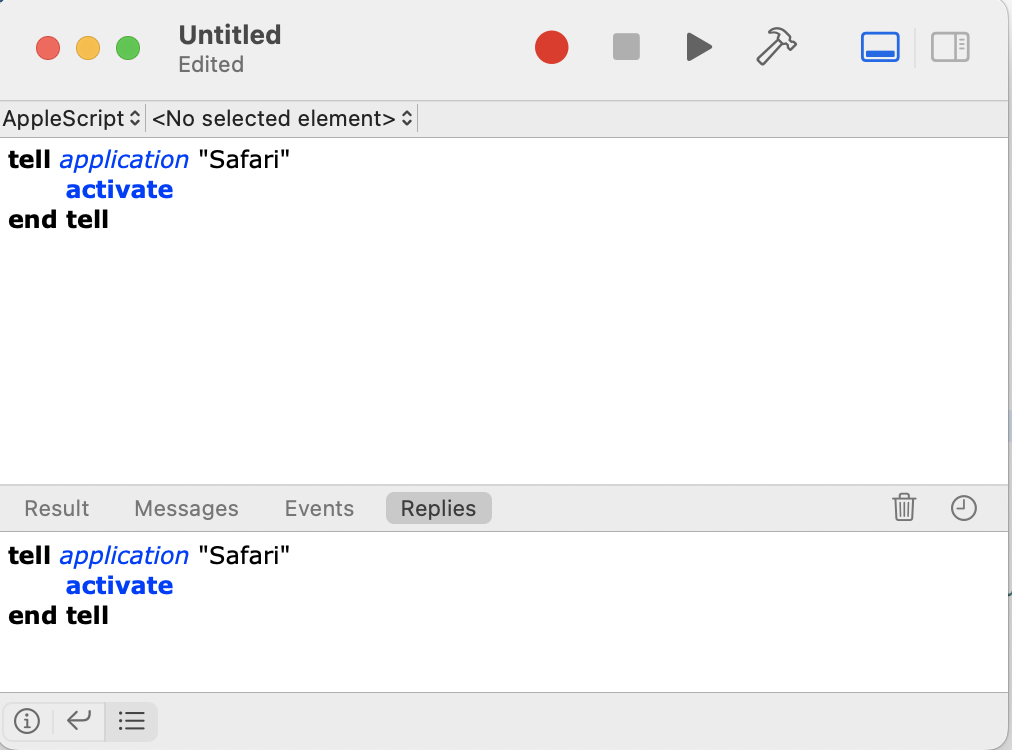
As seen in the above picture, navigate to the replies tab before running the script in order to see the logs.
Automator:


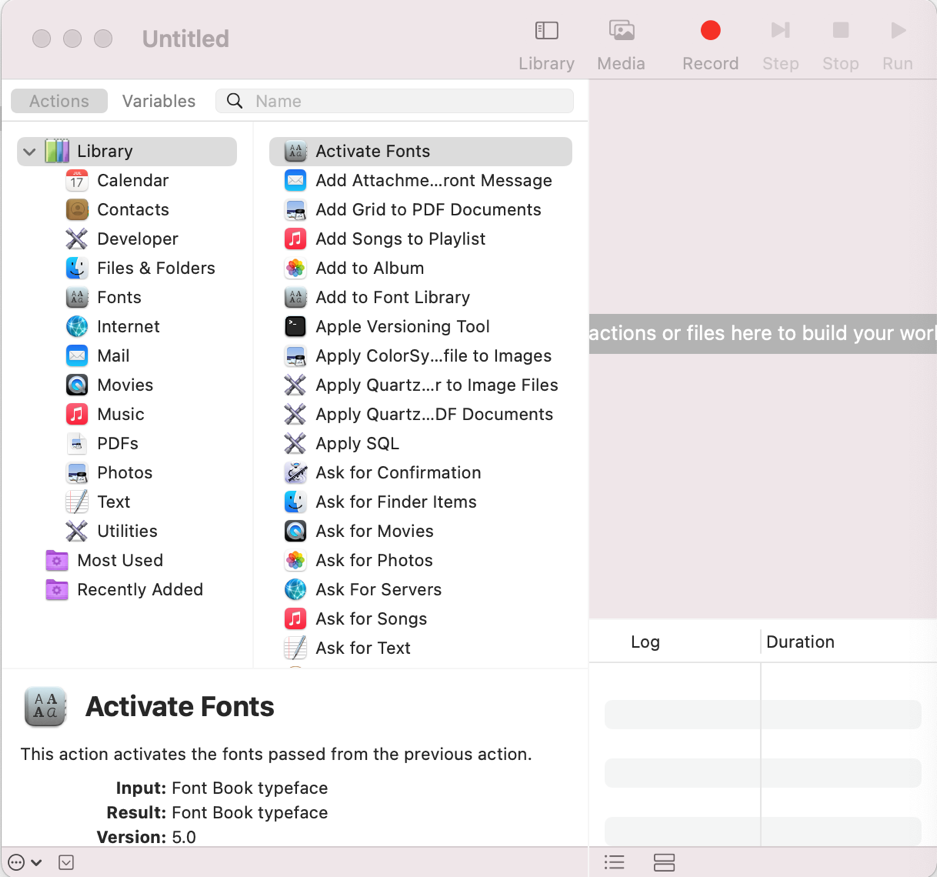
Automator is a powerful built-in tool on macOS that allows users to record, create, and automate workflows. One of the useful features of Automator is the ability to record and automate Mac UI actions. In this blog, we will explore how to record and automate Mac UI actions using Automator. What is Automator?
Automator is a tool built into macOS that allows users to create workflows, which are a series of automated actions that can be triggered by a single command. Automator includes a library of actions that can be combined to create custom workflows, and it also supports AppleScript, which allows users to write custom scripts to automate tasks. Recording Mac UI Actions
Automator includes a feature that allows users to record their actions on the Mac UI and turn them into a workflow. To record an action, follow these steps:
1. Open Automator from the Applications folder on your Mac.
2. Click on File > New to create a new workflow.
3. Choose “Quick Action” or “Application” as the type of workflow you want to create.
4. Click on the “Record” button in the toolbar.
5. Perform the actions you want to record on the Mac UI. For example, you can click on buttons, type text, or move windows.
6. When you are finished recording, click on the “Stop Recording” button in the toolbar.
Automating Mac UI Actions
Once you have recorded your actions, you can turn them into an automated workflow that can be triggered by a keyboard shortcut, a menu item, or a button. To automate your Mac UI actions, follow these steps:
1. Click on the “Run” button in the toolbar to test your recorded actions.
2. If everything is working correctly, save your workflow by clicking on File > Save.
3. Choose a name and location for your workflow and click on Save.
4. To trigger your workflow, you can assign it a keyboard shortcut or add it to the Services menu.
Conclusion
Automator is a powerful tool that can save you time by automating repetitive tasks on your Mac. By recording and automating Mac UI actions, you can create custom workflows that are tailored to your specific needs. If you’re not familiar with Automator, take some time to explore its features and see how it can help you be more productive on your Mac.
You can also customise the scripts:
Sample example :
1. Start recoding in Automator
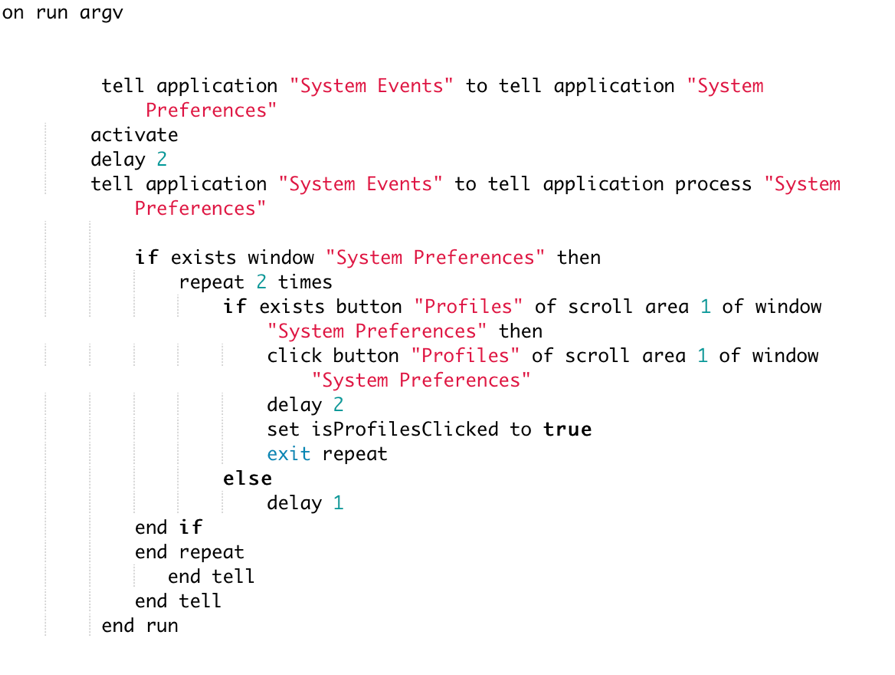
2. Click on the Profile under system preferences :
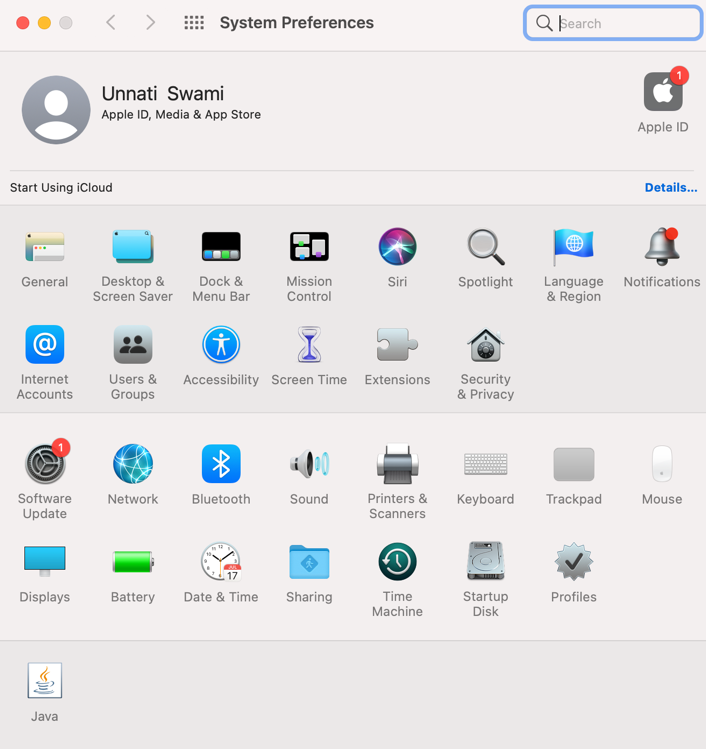
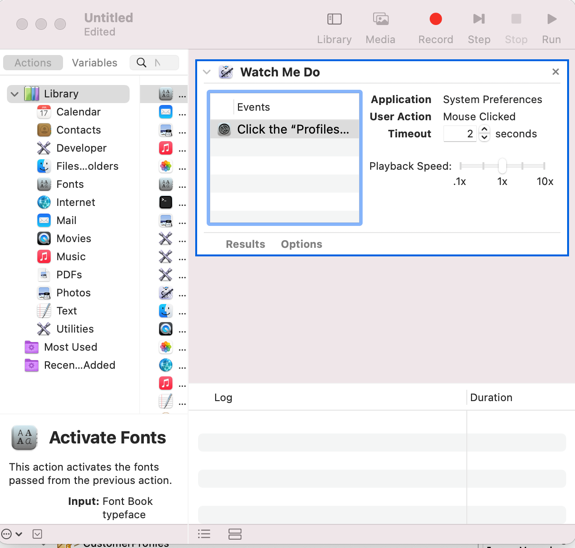
3. Stop recording in the automator
4. Copy the above script from automator and paste in Script Editor.
5. The script would look like :
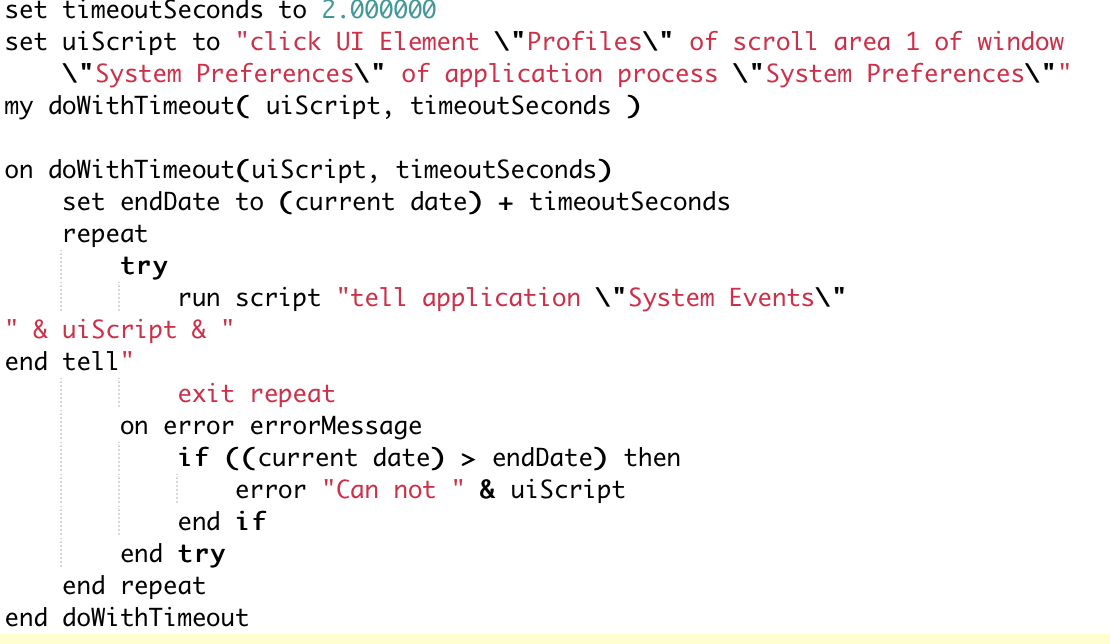
The same can be customised to write an apple script as seen below :