Author - @Lakshmeesh C Hegde
Microsoft launched the new REST-based Exchange Online management V3 module to boost security in September 2022. The company has already started deprecating Remote PowerShell for Exchange Online V2 in favor of V3. Learn more about the deprecation of the V2 module.
Exchange Online REST API
The Exchange V3 module (unlike the V2 module) is backed by the REST API. It has better security, performance, and reliability.
Install Exchange Online Module
System requirements
The workstation used for remote PowerShell administration must meet the following requirements:
For Exchange Online
- Operating system: Windows Server 2016 (or later).
- Microsoft .Net Framework 4.8 or later and Windows Management Framework 5.1 (which should already be installed on the supported systems)
- Exchange Online PowerShell V3 module installed.
Requirements for EXO V3
The previous version of the Exchange Online PowerShell module (EXO V2) was only supported on Windows and required PowerShell 5.x. EXO v3 module however fully supports PowerShell 7, macOS, and Linux.
Install Exchange Online
Note: Please skip this section & follow the steps under "How to update from PowerShell V2 to V3 module" if the Exchange Online PowerShell V2 module is already installed on your system.
We need to set up the system before we can install the Exchange Online PowerShell V3 module.
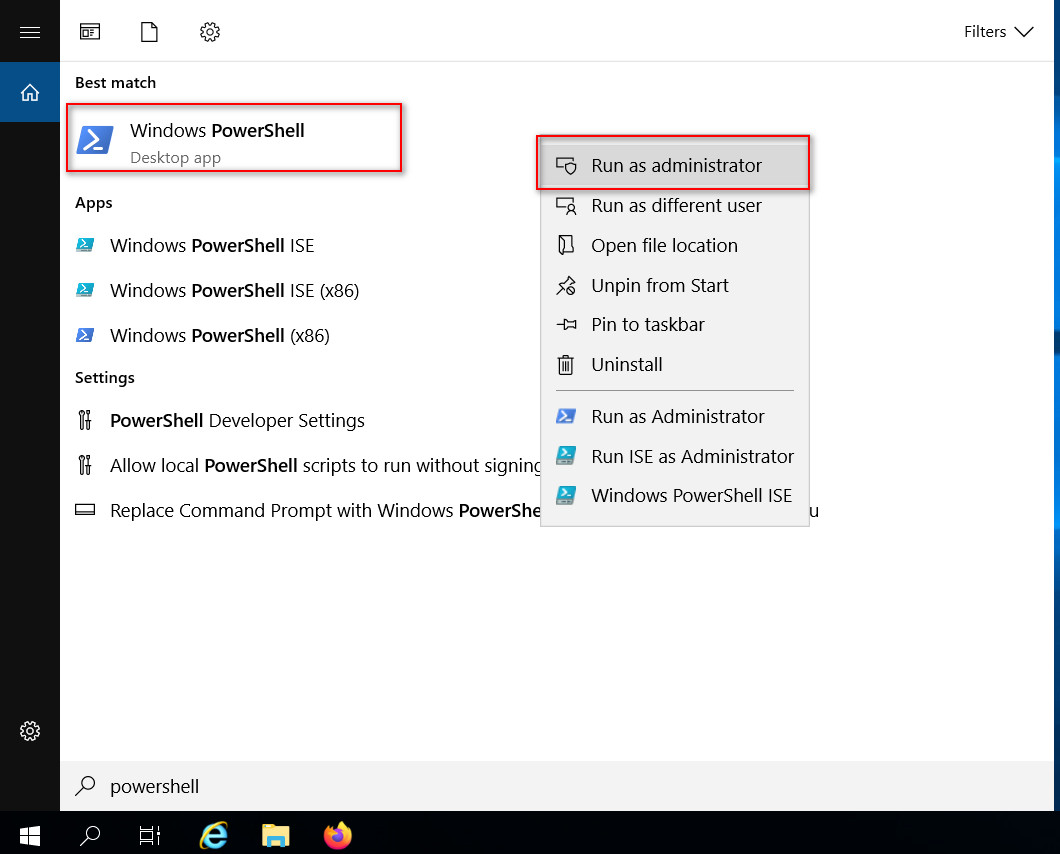
Start the following commandlets
|
[Net.ServicePointManager]::SecurityProtocol = [Net.SecurityProtocolType]::Tls12
Install-Module PowershellGet -Force
Update-Module PowershellGet
Set-ExecutionPolicy RemoteSigned
Install-Module -Name ExchangeOnlineManagement -RequiredVersion 3.6.0
|
By default, we can’t install scripts. To require all PowerShell scripts that you download from the internet are signed by a trusted publisher, run PowerShell as administrator, and run the cmdlet. Press Y and press Enter.
Run the command Install-Module PowershellGet -Force. When asked to install NuGet provider, press Y and follow with Enter


If Install-Module PowershellGet -Force already installed


Install the Exchange Online Management module. Press Y and Enter.
How to check the Exchange Online Management version?
|
Get-InstalledModule -Name ExchangeOnlineManagement
|
How to install the PowerShell V3 module?
To install the new Exchange Online PowerShell module, we need to run the following command after running all the commands from the "Install Exchange Online" section.
|
Install-Module -Name ExchangeOnlineManagement -RequiredVersion 3.6.0
|
How to update from PowerShell V2 to the V3 module?
To update the Exchange Online PowerShell module, simply start your Exchange Online PowerShell console with admin permissions and run the following commands.
PowerShell modules are often updated, including the Exchange Online Module. The latest version EXO V3 comes with a couple of improvements that make it worth updating the PowerShell Module.
|
Update-Module -Name ExchangeOnlineManagement
|
If, for some reason, you’re unable to run an update, you can uninstall the old module and install the new module using the following commands.
|
Uninstall-Module -Name ExchangeOnlineManagement
Install-Module -Name ExchangeOnlineManagement
|
Once you agree to everything, the new V3 module should be installed in a moment.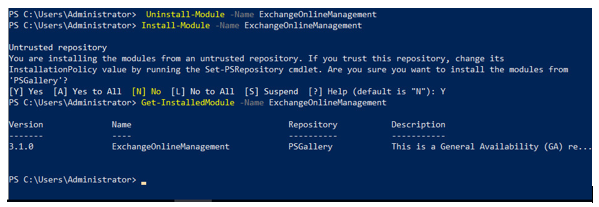
How to Validate Exchange Online credentials on Cloud Extender Config Tool?
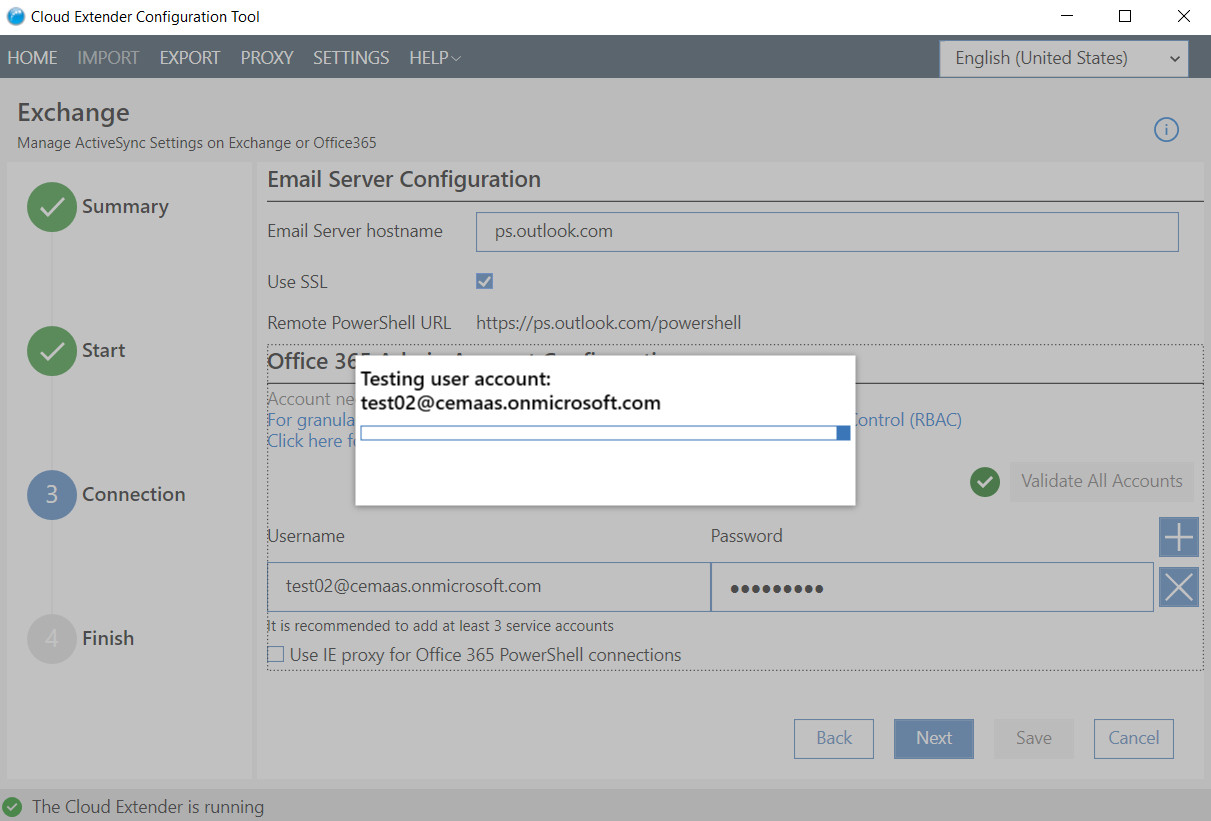
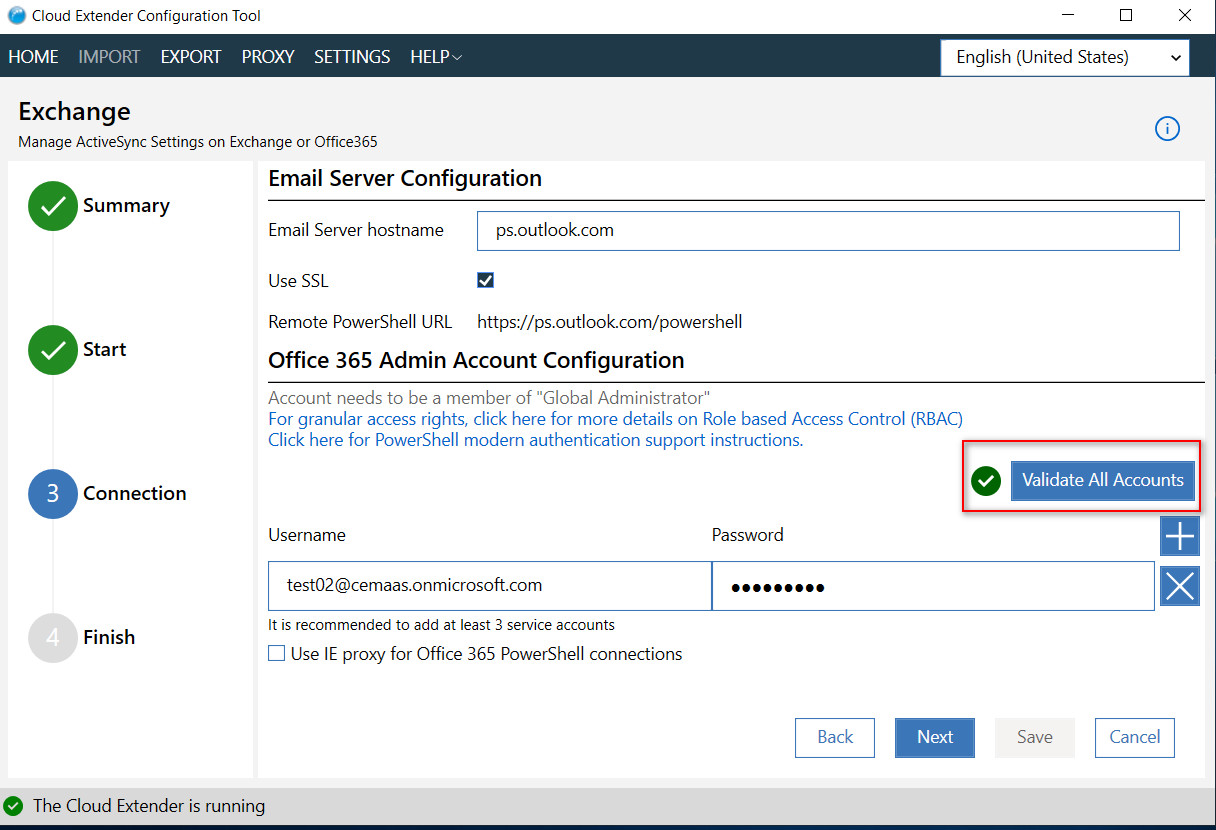
Step 1: Open the Cloud Extender Config Tool and navigate to the Exchange module.
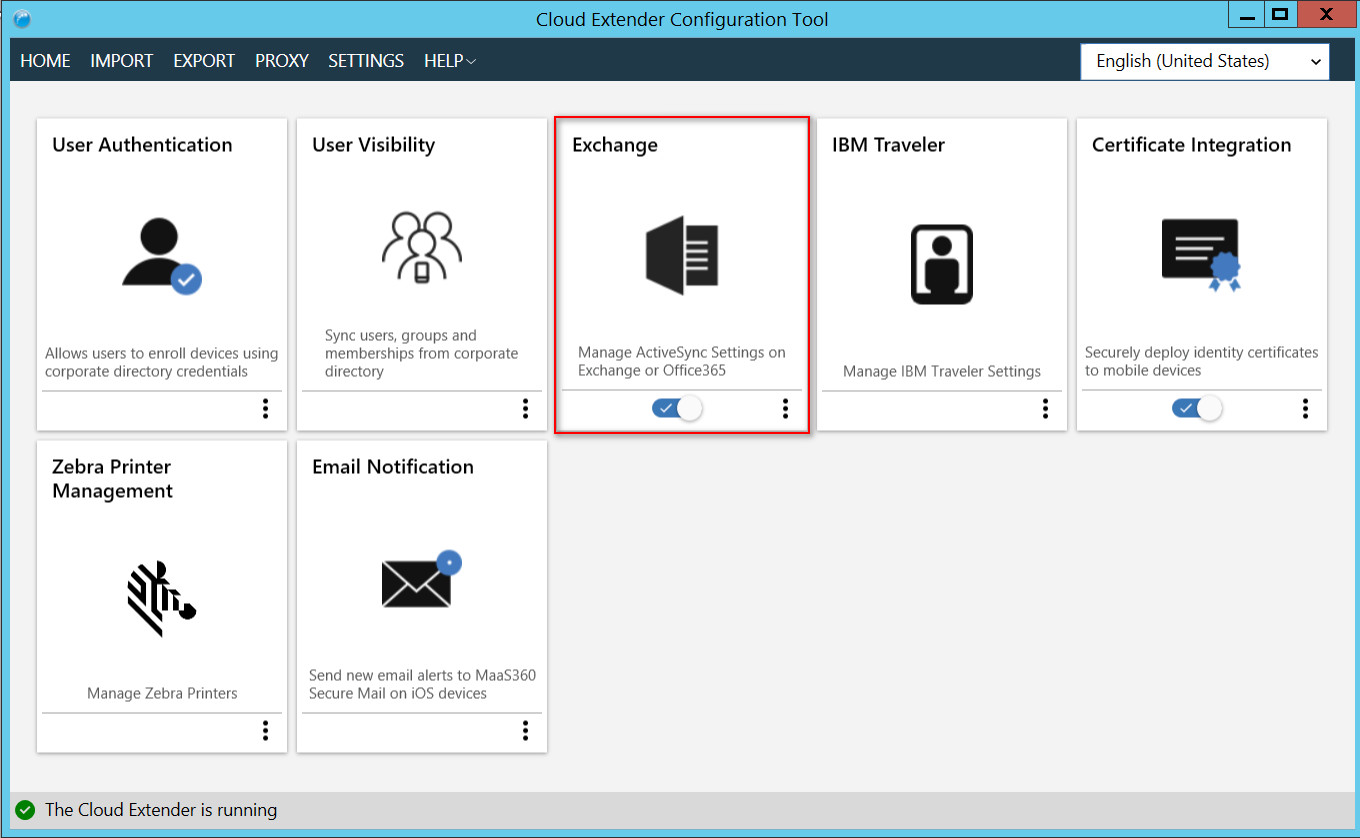
Step 2
1. Enter the hostname.
2. Enter the Username and password.
3. Click on Validate All Accounts.
4. Click on Next
5. Click on Save
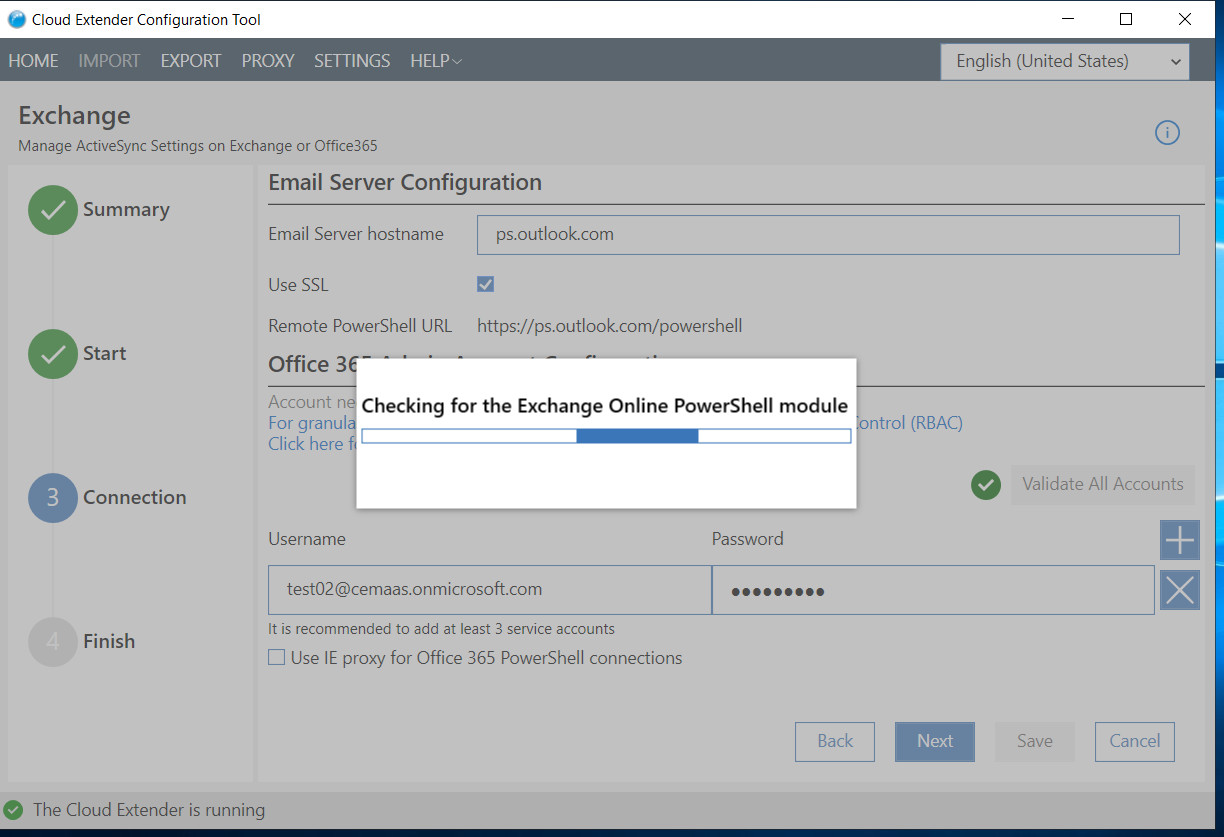
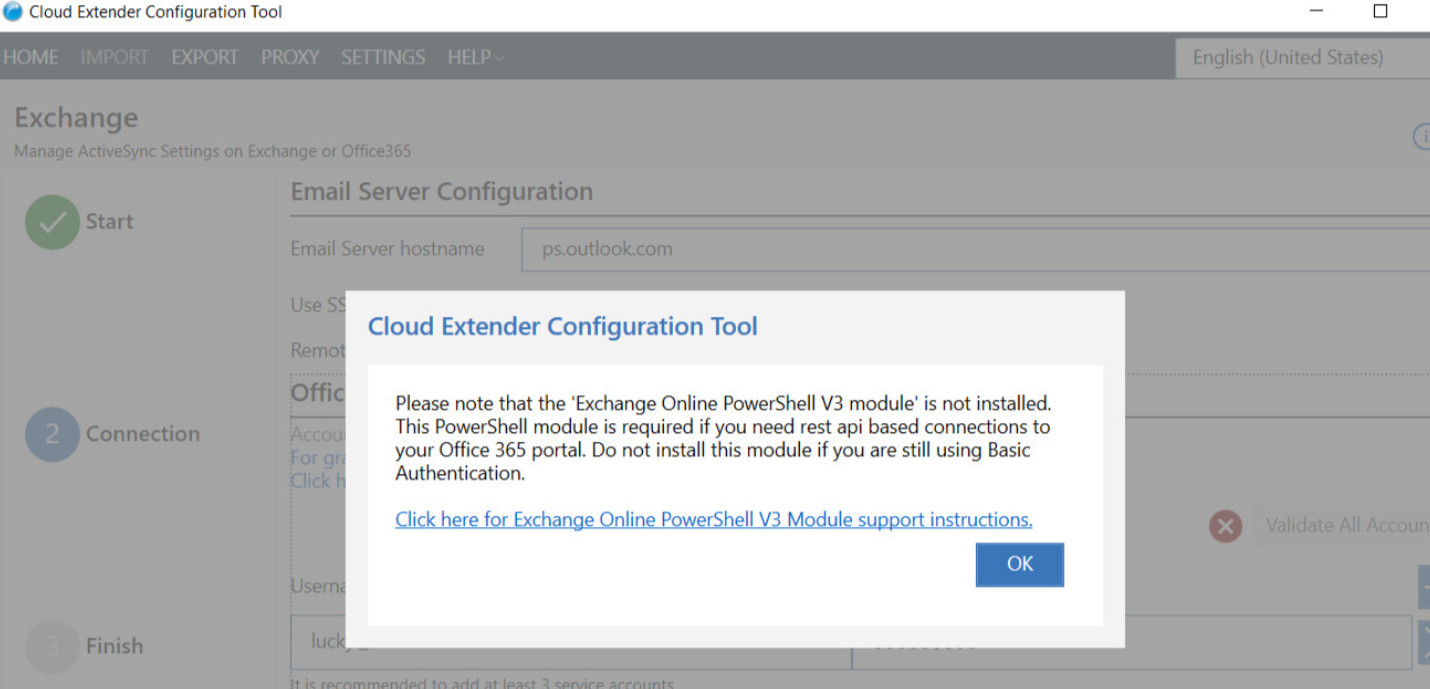
The following prompt is displayed if the PowerShell V3 module is missing on the system. Please follow the steps mentioned in the “How to update from PowerShell V2 to V3 module “ section to update the module.
Troubleshooting
If you see the following message in PowerShell

OR
Following error on the Cloud Extender config tool
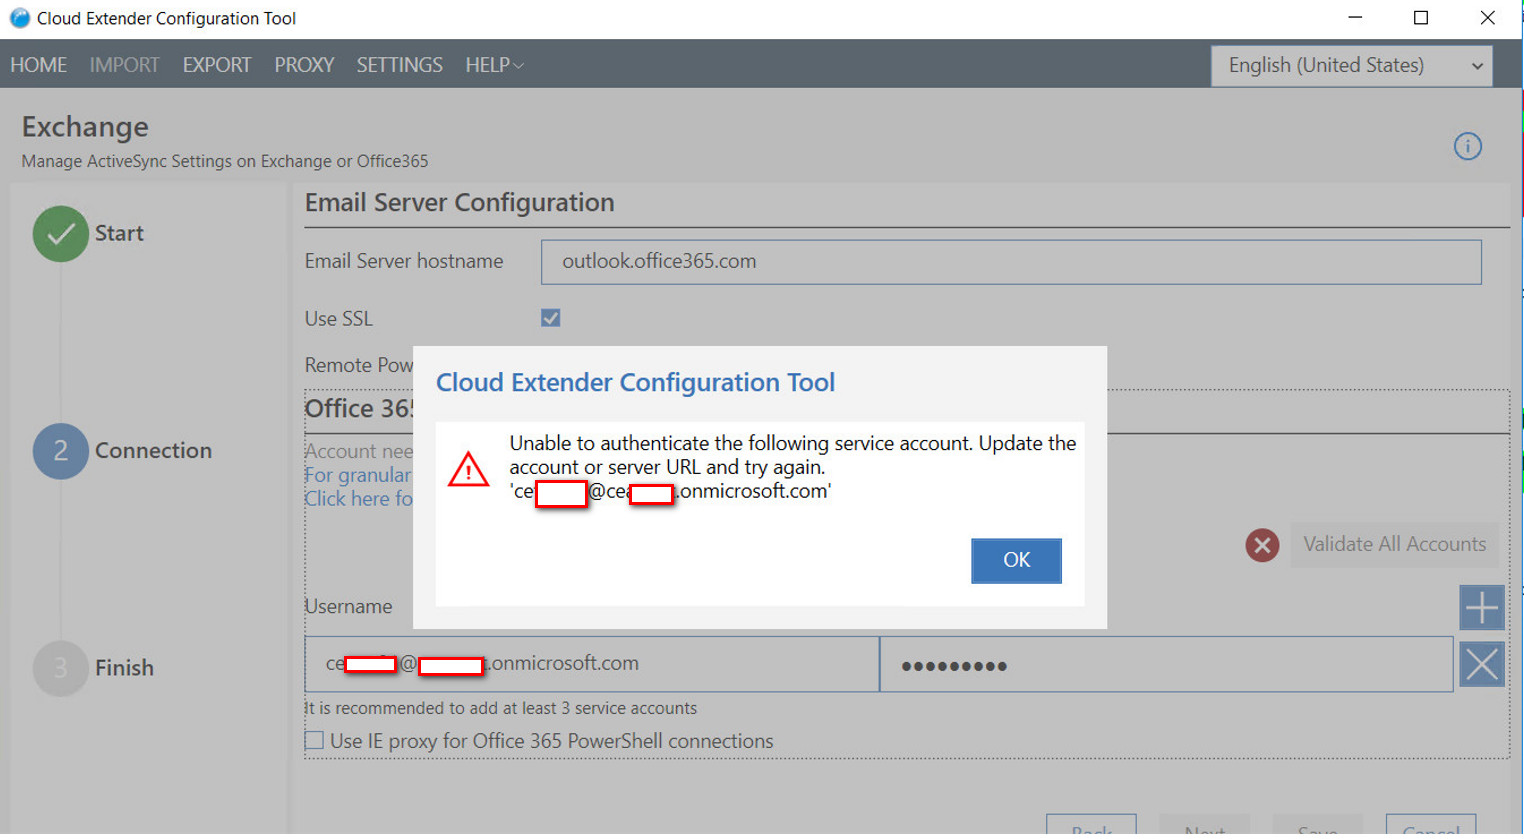
then the issue is related to TLS 1.2 protocol.
To solve the issue please follow the below steps:
- Back up the current Registry on the CE Server.
- Make the below changes in the Registry on the CE server
3. TLS 1.2 registry key
|
[HKEY_LOCAL_MACHINE\SOFTWARE\Microsoft\.NETFramework\v2.0.50727]
"SystemDefaultTlsVersions" = dword:00000001
"SchUseStrongCrypto" = dword:00000001
[HKEY_LOCAL_MACHINE\SOFTWARE\Microsoft\.NETFramework\v4.0.30319]
"SystemDefaultTlsVersions" = dword:00000001
"SchUseStrongCrypto" = dword:00000001
|
- Stop and Restart CE services and check if the issue persists.
- If the issue persists, reboot the CE server and check again if the issue persists.
Want to verify your credentials?
Use PowerShell to connect remotely to Exchange Online:
- Start the PowerShell console on the workstation.
2. Enter:
|
$Credentials = Get-Credential
|
3. and provide administrative credentials.
4. Enter the following command:
|
Connect-ExchangeOnline -Credential $Credentials
|
5. Once you finish working with the remote PowerShell session, close it with the following command:
| Disconnect-ExchangeOnline |
Having issues with the V3 module and want to switch to V2?
If you need more time or having issues with the V3 module you can switch to V2 by re-enabling RPS from Microsoft 365 admin center.
Refer to the following article to re-enable RPS Deprecation of Remote PowerShell in Exchange Online – Re-enabling or Extending RPS support - Microsoft Community Hub
After re-enabling RPS, run the following commands from the PowerShell console on the system in administrator mode.
|
Uninstall-Module -Name ExchangeOnlineManagement
Install-Module -Name ExchangeOnlineManagement -RequiredVersion 2.0.5
|
Wrapping up
The new Exchange Online module is powerful and makes working with Exchange Online a lot easier. I hope this article helped you to enable the Exchange Online PowerShell V3 module with Modern Authentication.
If you have any questions, just drop a comment below.
#blog-home-3
#Highlights
#Highlights-home