IBM Security Verify Governance Identity Manager provides excellent capabilities to implement user and provisioning lifecycle processes. These processes are configured in Administrative Console UI and accessed by end users via Service Center UI. IM also used to have Self-Service User interface, but it has been deprecated for a long time now and its use is highly discouraged. Although Service Center UI provides all basic functionality for end users and mangers, it does not always sit right with the company’s GUI landscape and generally either does not contain required features or offers them in a different order or view. In this case organization has an option to fix that using REST interface by developing custom portlet for a specific functionality or a custom user interface which is utilizing preferred technology.
One of the typical challenges clients experience with IM REST APIs is its authentication process. There are a few examples provided in documentation (https://github.com/gthrasher/Think2018/), but this page lacks an example for authentication for C# language, which is the purpose of this article. C# is a programming language developed by Microsoft for .NET Framework and it is used to develop different types of applications. From the language syntax point of view C# is very close to JAVA. Although .NET framework does provide means to access HTTP objects and work with JSON responses, it is significantly easier to work with a framework which is specifically designed to work with REST APIs. For C# it is a RestSharp framework (https://restsharp.dev/ ). This text will go through setting general authentication process, which can be the base of the separate authenticator class or authentication service. Working with TLS certificates and other possible general C# actions are outside of the scope of this article.
General IM authentication flow happens in three stages, which are as follows:
- Obtain a JSESSION cookie
- Using JSESSION cookie, obtain LTPAToken cookie
- Using both cookies obtain a CSRFToken.
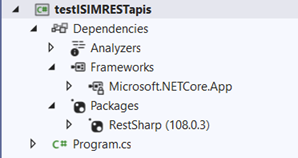
It is recommended to do the development using Microsoft Visual Studio IDE either community or professional edition. This tool will be a big help in working with C# and RestSharp framework. To start with the development, create a project and link RestSharp dependency for your project:

.NET dependency should be added to the project automatically. In package declaration part of the code add declaration for the RestSharp framework if it is not there yet:
using System;
using System.Collections.Generic;
using System.Linq;
using System.Net;
using System.Net.Security;
using System.Runtime.CompilerServices;
using System.Security.Cryptography.X509Certificates;
using System.Text;
using System.Threading.Tasks;
using RestSharp;
Basic flow for the RestSharp framework is to initiate API connection with instance of the RestClient class, initiate the request with RestRequest class and then execute the call. It is recommended to use the same instance of the RestClient class as it carries all necessary settings and cookies with it once initialized (https://restsharp.dev/usage.html#recommended-usage).
For better maintainability it is recommended that properties for the call are read from the external property repository, for the sake of testing properties can be hardcoded:
// session URL placeholders
string baseURL = "https://localhost:9443";
string sessionIDurl = "/itim/restlogin/login.jsp";
string lTokenUrl = "/itim/j_security_check";
string cTokenUrl = "/itim/rest/systemusers/me";
For connection using TLS protocols you need to use trusted certificates. To avoid processing TSL options you can disable TLS validation only in development environments:
var options = new RestClientOptions()
{
RemoteCertificateValidationCallback = (sender, certificate, chain, sslPolicyErrors) => true
};
For other available REST Client option class settings consult .NET and RestSharp framework documentation.
Next step is to initialize rest client using options class:
RestClient client = new RestClient(options);
Next initialize the JSESSIONID call and execute it:
RestRequest requestsid = new RestRequest(baseURL + sessionIDurl);
RestResponse responsesid = await client.GetAsync(requestsid);
The responsesid attribute will contain the response from the REST API including errors and cookies. RestClient class has a cookie jar which will automatically add all new cookies to it and send it back to REST APIs in the next call. However, to build a custom Authenticator class one will need to access these cookies. Cookies are stored in a cookie jar as a collection and can be accessed through iterating of this collection. In real life scenario cookies will be returned in an attribute or collection to the service requesting the authentication.
To get the second cookie the credentials for the IM APIs are required so the preparing the call will look somehow like this:
// initializing request object
RestRequest requestltpa = new RestRequest(baseURL + lTokenUrl);
// adding auth parameterss
requestltpa.AddParameter("j_username", "apiuserid");
requestltpa.AddParameter("j_password", "ApipassworD");
Of course, in a real example IM credentials need to be externalized and not hardcoded. The actual call in this case is a POST call:
// Calling APIs
RestResponse responseltpa = await client.PostAsync(requestltpa)
Now both cookies can be fetched from internal cookie jar, for example in the following way:
List<Cookie> cookies2 = responseltpa.Cookies.ToList();
foreach (Cookie r2cookie in cookies2)
{
Console.WriteLine("Cookie Name: " + r2cookie.Name + " value: " + r2cookie.Value);
}
Next, we need to fetch the CSRF token to complete the authentication process. This is done in a following way:
RestRequest requestcsrf = new RestRequest(baseURL + cTokenUrl);
requestcsrf.AddHeader("Accept", "*/*");
RestResponse responsecsrf = await client.GetAsync(requestcsrf);
Technically RestClient will try to initialize headers like “Accept” automatically, but sometimes it is not enough, and it needs to be done specifically. Otherwise, the call is similar to two other calls. To access this token there is an alternative way:
// Get header directly
Console.WriteLine("CSRF Token : " + responsecsrf.Headers.SingleOrDefault(x => x.Name == "CSRFToken"));
Once the basics are proven to work, the custom authentication class can be built for IM authentication. The general guidelines on how to build custom authenticator class can be found here: https://restsharp.dev/authenticators.html#custom-authenticator.