Amazon Web Services, one of IBM Cloud Identity's out of the box connectors, is launching session tags at the end of October 2019 which give customers of AWS the ability to pass identity attributes from their identity provider into an AWS session and create permissions rules in AWS IAM service based on these attributes. These attributes will be used to grant access to AWS resources during that session, in other words, attribute-based access control (ABAC) for fine grained entitlements. Customers can now create mapping rules between IBM Cloud Identity's directory service and the application configuration for AWS to ensure the user attributes are passed into the session when their users federate into AWS.
IBM Cloud Identity is one of the first vendors to support these session tags natively in the product. IBM Cloud Identity has enhanced its already existing SAML integration with AWS to support these session tags natively in in the out of the box connector for single-sign on. When you log into Cloud Identity as an admin and add a new AWS application, you will see expanded options to support these session tags.
Session tags overview
To find out more information on how to configure the AWS IAM services to support these session tags and to configure permissions based off them, please see AWS's documentation here.
Note: IBM Cloud Identity will support session tags via SAML only at this time.
For AWS to consider an attribute a session tag, the attribute in the assertion must have PrincipalTag:{attribute} as a prefix. Where {attribute} is replaced with a value.
For example, to add https://aws.amazon.com/SAML/Attributes/team attribute as a session tag (this is maintained on the AWS side), it must be added with the name as https://aws.amazon.com/SAML/Attributes/PrincipalTag:team.
As an optional addition, for session attributes to persist across multiple sessions in scenarios where users use one session to assume another session, an additional assertion attribute called TransitiveTagKeys must be specified.
For example, to make the team attribute in above example available across sessions, you can add an attribute with name as https://aws.amazon.com/SAML/Attributes/TransitiveTagKeys and map it with a fixed value attribute in Cloud Identity's attribute service having value as the name of the attribute marked as principal tag.
How to configure session tags in Cloud Identity
Step 1) Create an AWS connector
- From the admin console, go to the menu bar at the top right and select Applications.
- Click Add Application, and search for
AWS in the field and select it.
- Configure the AWS SAML configuration according the convient steps on the right side of the connector.

Step 2) Configure team attribute
For this example, I'll use a fixed value attribute, but you can configure each user to populate this attribute via your onpremise IdP or via a custom attribute of a user in the Cloud Directory.
- From the admin console, open the menu and select
Configuration.
- On the sub-navigation, click
Attributes.
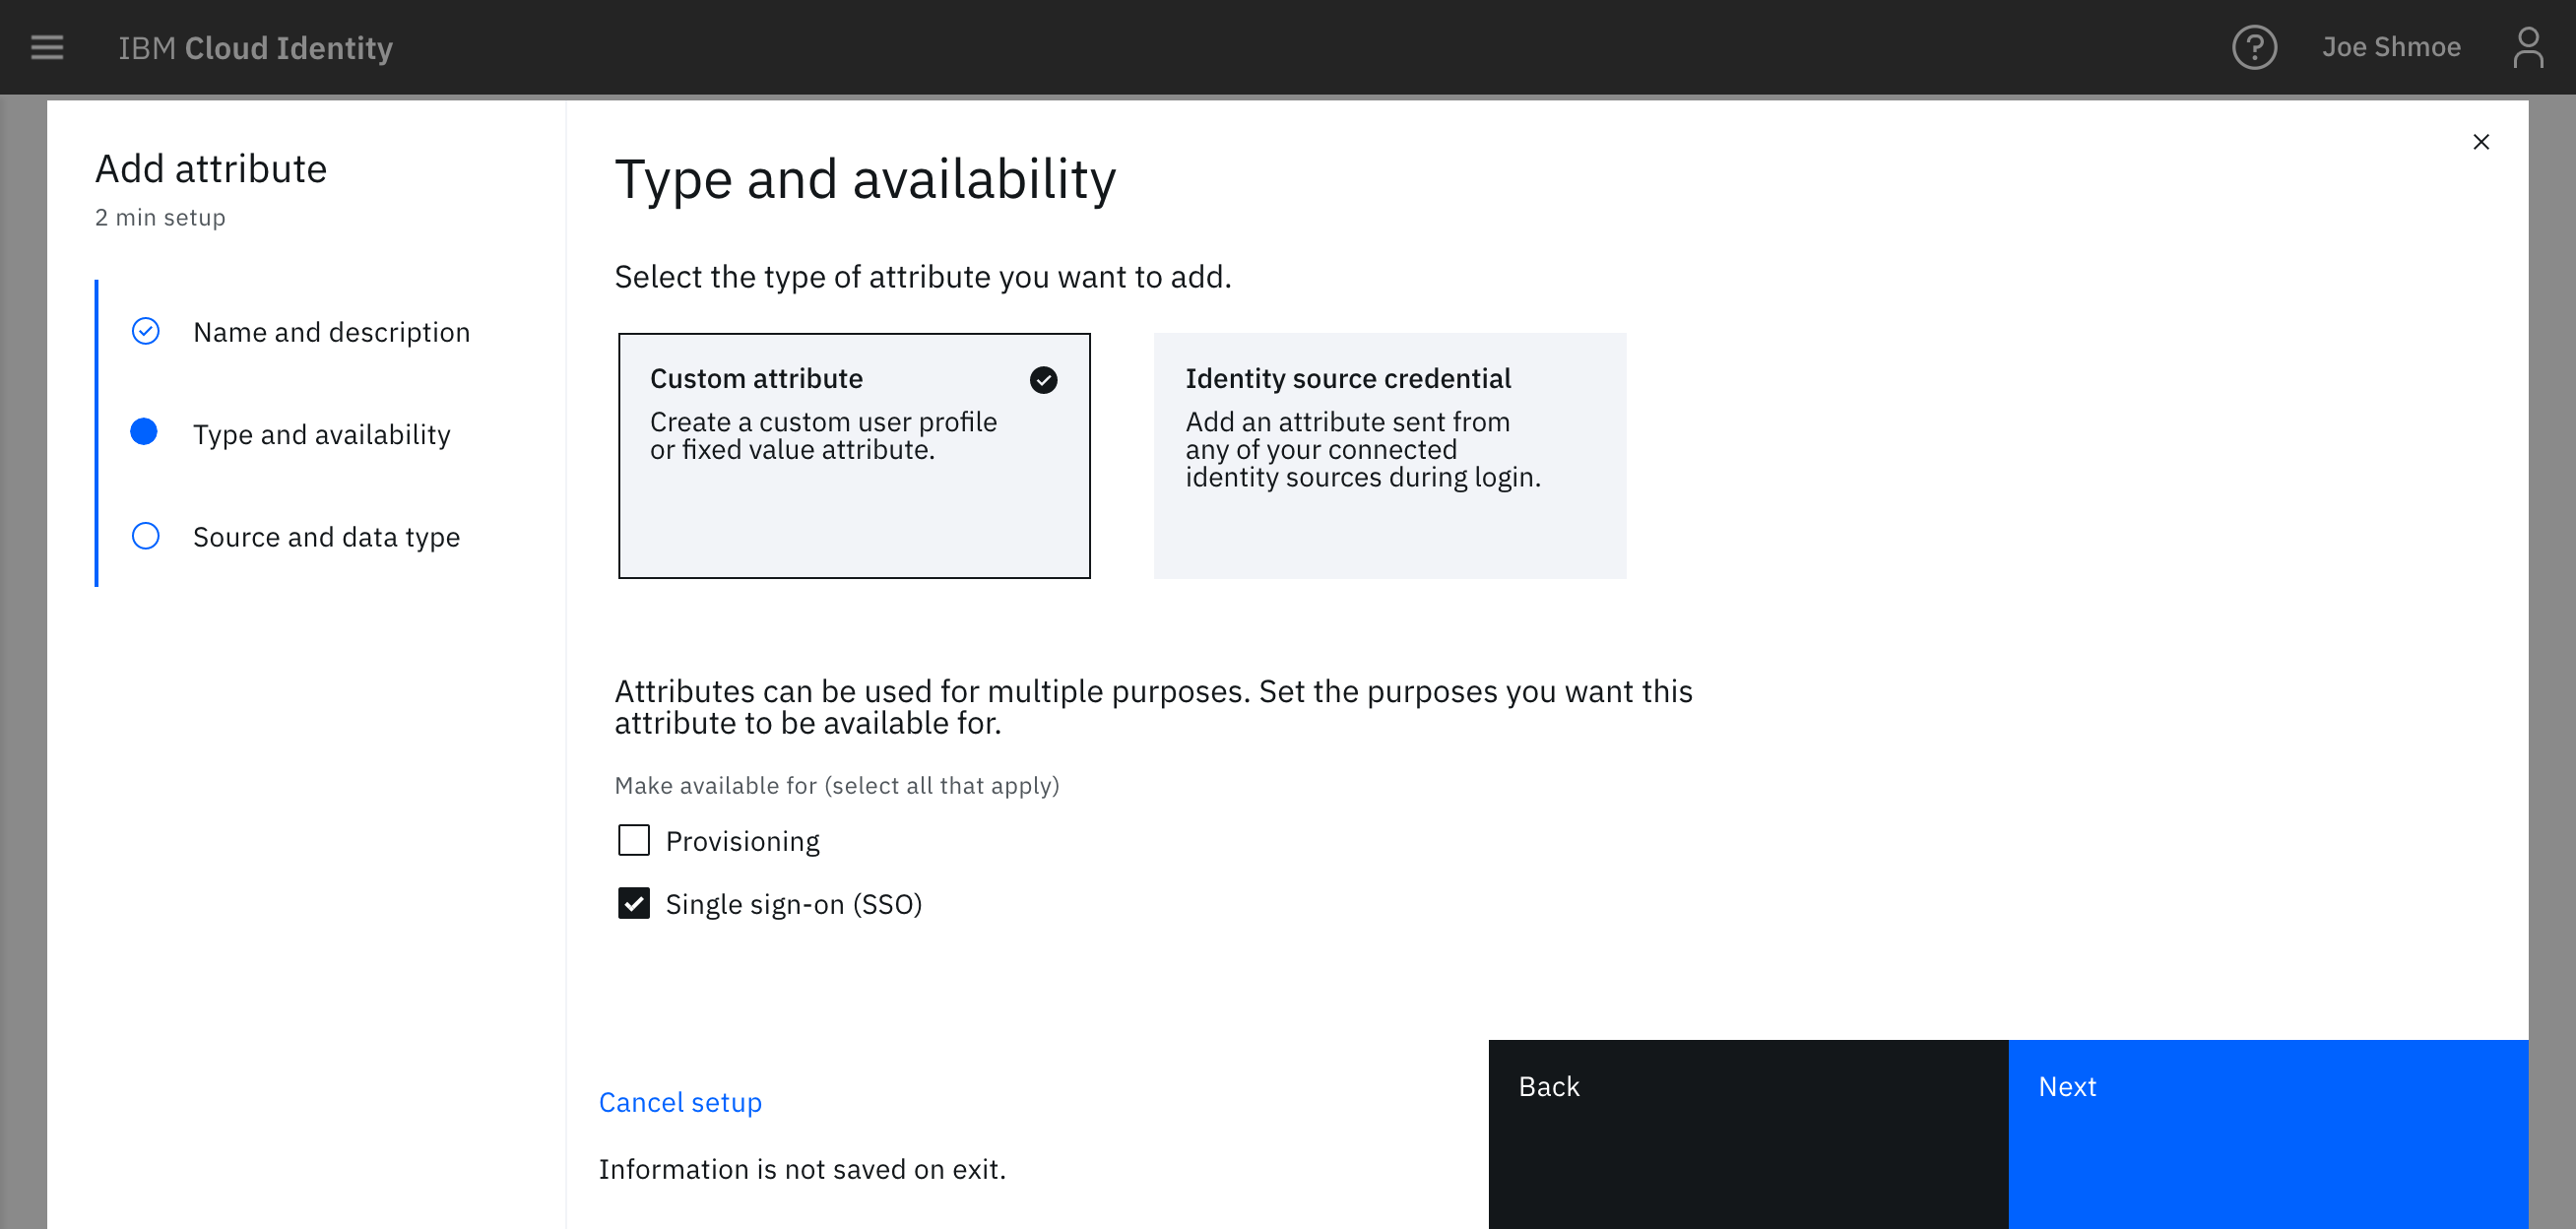
- Click Add Attribute.
- Choose Custom Attribute and click the checkbox to enable Single-Sign on.
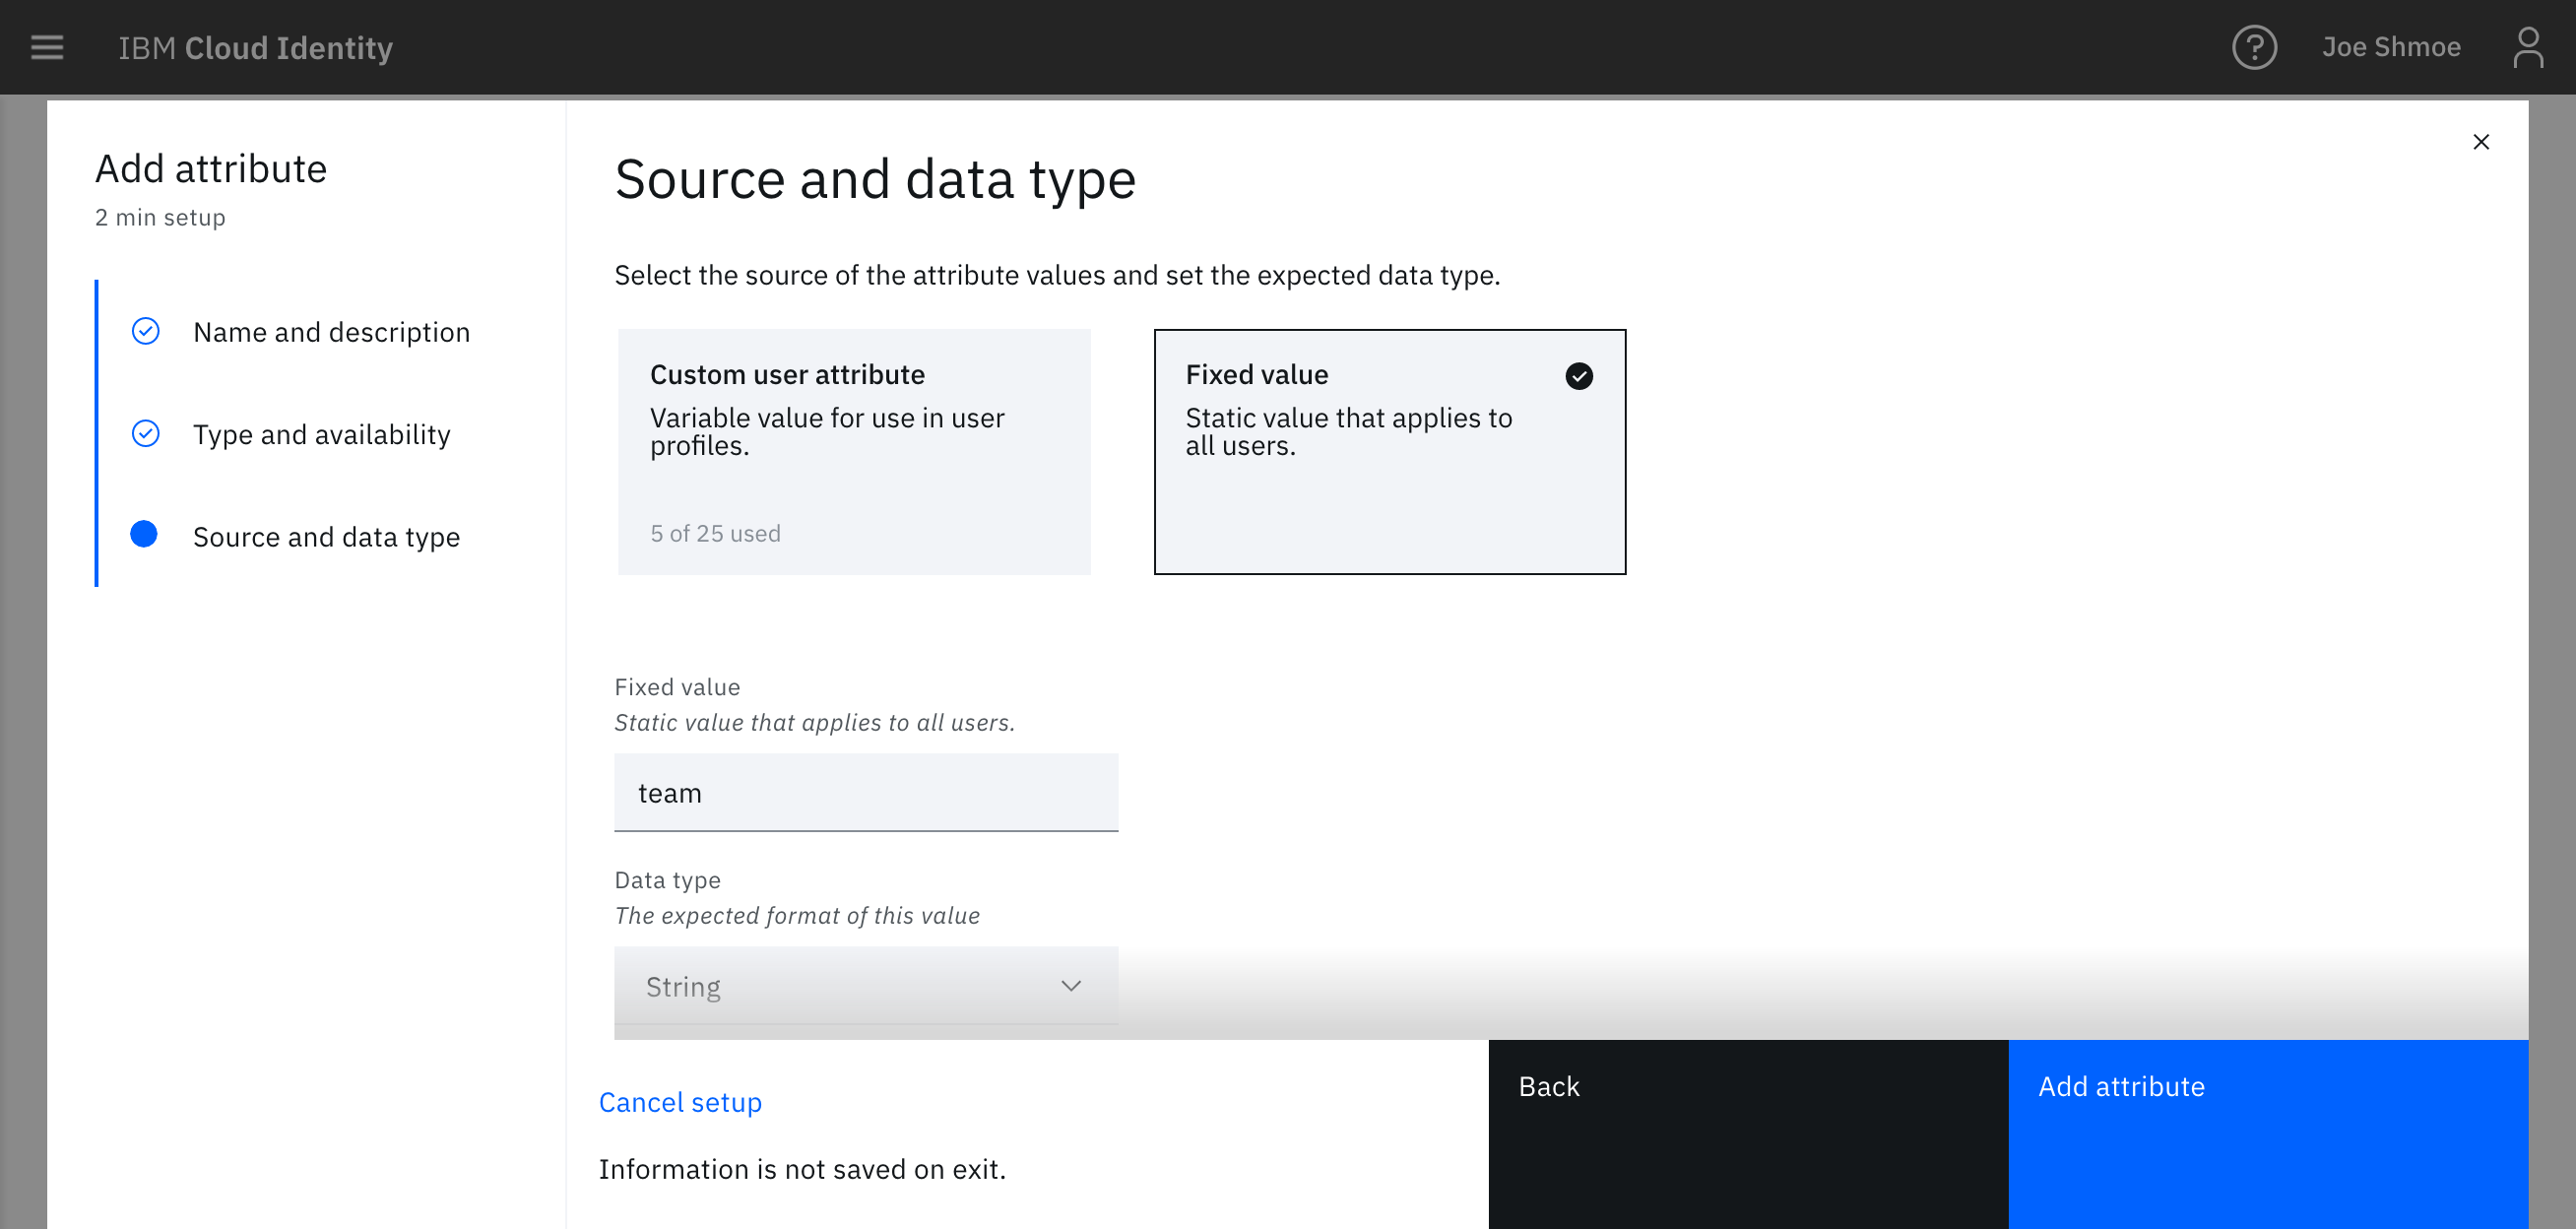
- On the next screen, choose Custom Attribute to create a user profile attribute that you can assign a value to at a user level and then choose Fixed Value to assign an attribute at a global level.
- Create a new attribute called
AWS_Team.
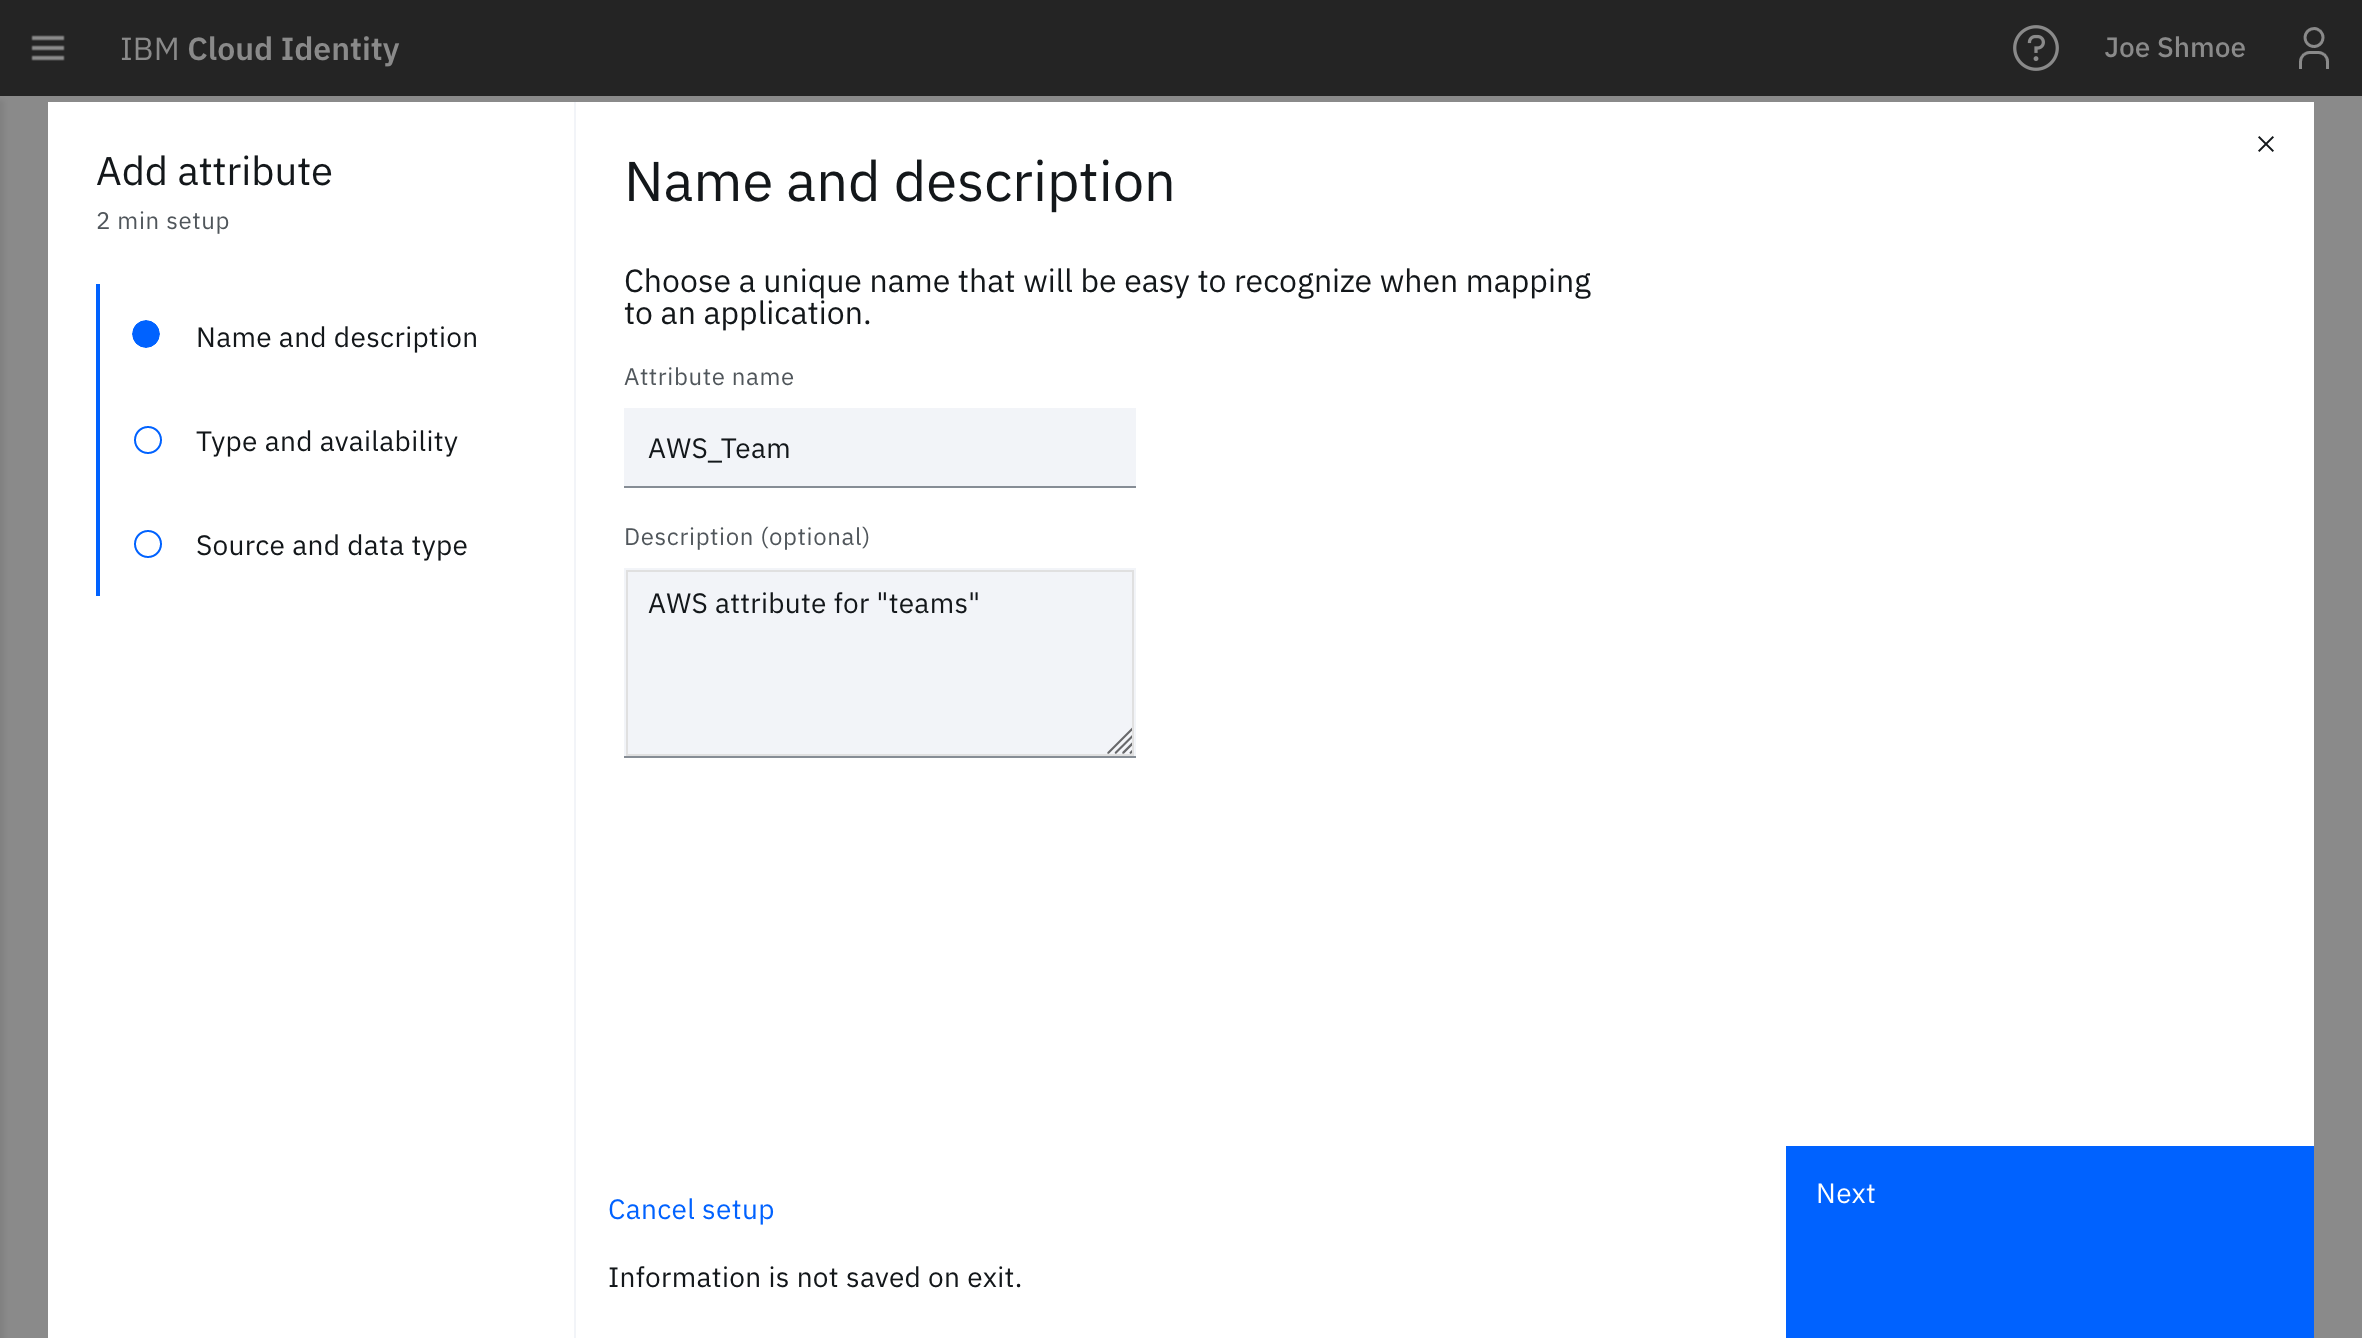
- Set the value of the attribute. (eg. projectTeamA). Leave the data type as a string.

Step 3) Configure TransitiveTagKeys attribute
For transitive tag keys, it may be beneficial to set these via a Fixed Value attribute rather than deriving from a user record, but there may be use cases for both scenarios.
- From the admin console, open the menu and select
Configuration.
- On the sub-navigation, click
Attributes.
- Click Add Attribute.
- Choose Custom Attribute and click the checkbox to enable Single-Sign on.
- Choose Custom Attribute to create a user profile attribute that you can assign a value to at a user level or choose Fixed Value to assign an attribute at a global level.
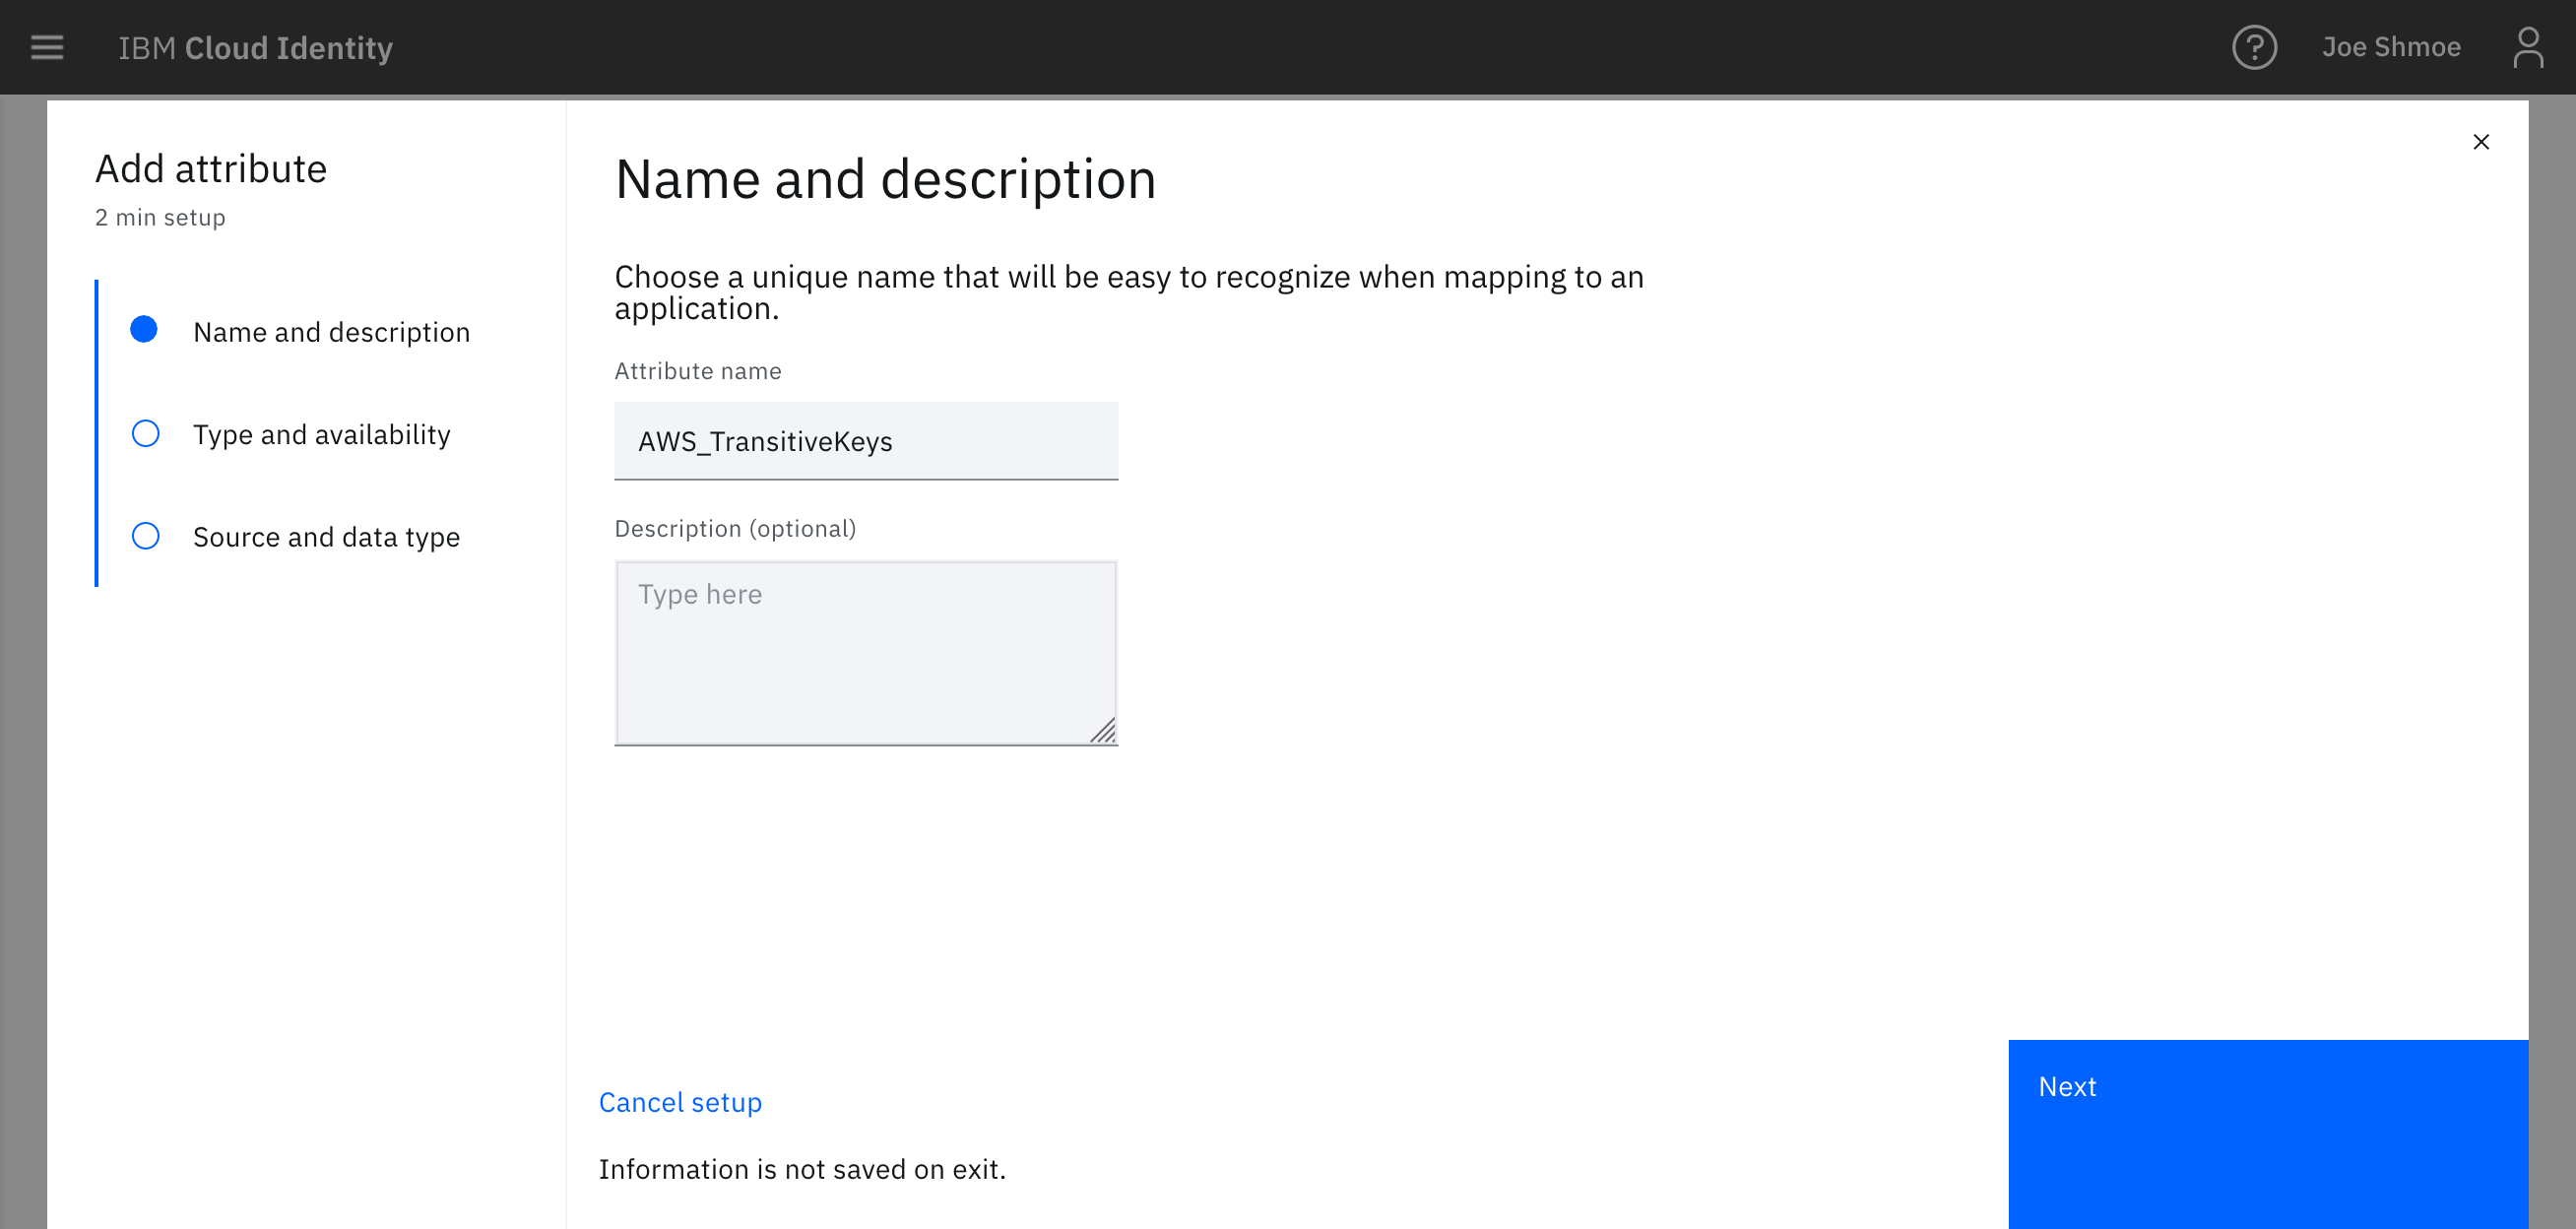
- Create a new attribute called
TransitiveTagKeys.
- Set the value of the attribute which should be the
{attribute} part of the PrincipalTag:{attribute}. (eg. If you are using team then the value of TransitiveTagKeys will be team.
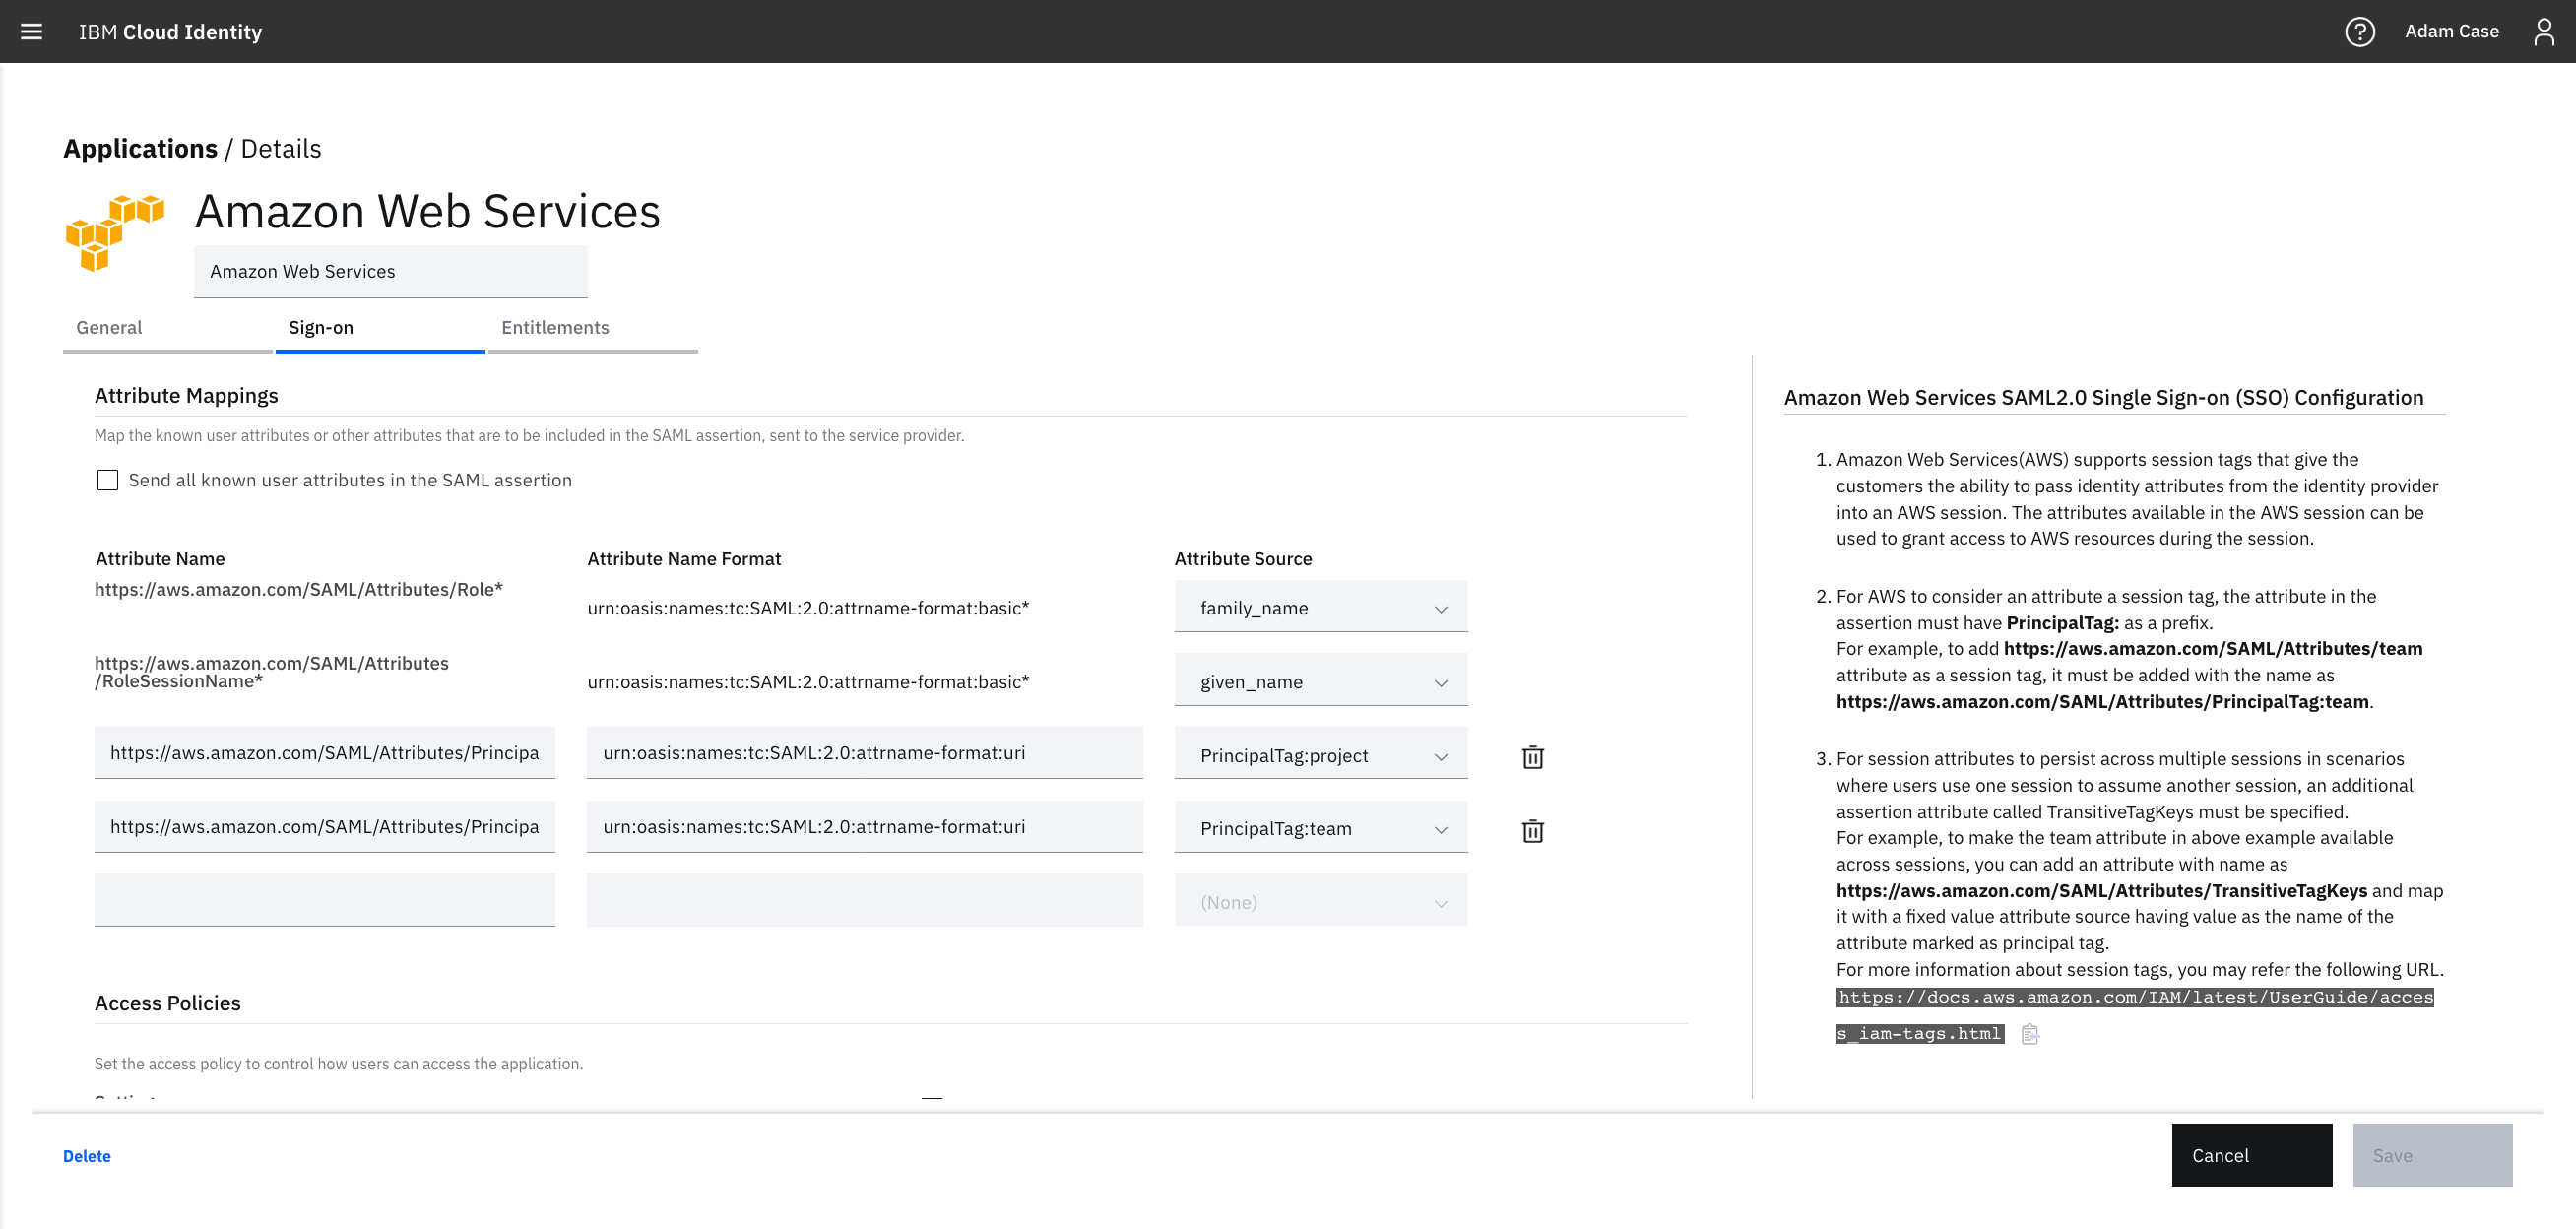
Step 4) Configure the AWS connector with the session tags
- Go back to the AWS connector that was configured earlier for SSO and edit the configuration.
- Scroll down until you find Attribute Mappings.
- Add the following attribute:
https://aws.amazon.com/SAML/Attributes/PrincipalTag:team with the attribute name format as urn:oasis:names:tc:SAML:2.0:attrname-format:uri and choose the AWS_team attribute from the drop down.
- Optionally, if you wish to persist the session attributes accross multiple sessions, then add the following attribute:
https://aws.amazon.com/SAML/Attributes/TransitiveTagKeys with the attribute name format as urn:oasis:names:tc:SAML:2.0:attrname-format:uri and choose the TransitiveTagKeys attribute from the drop down.
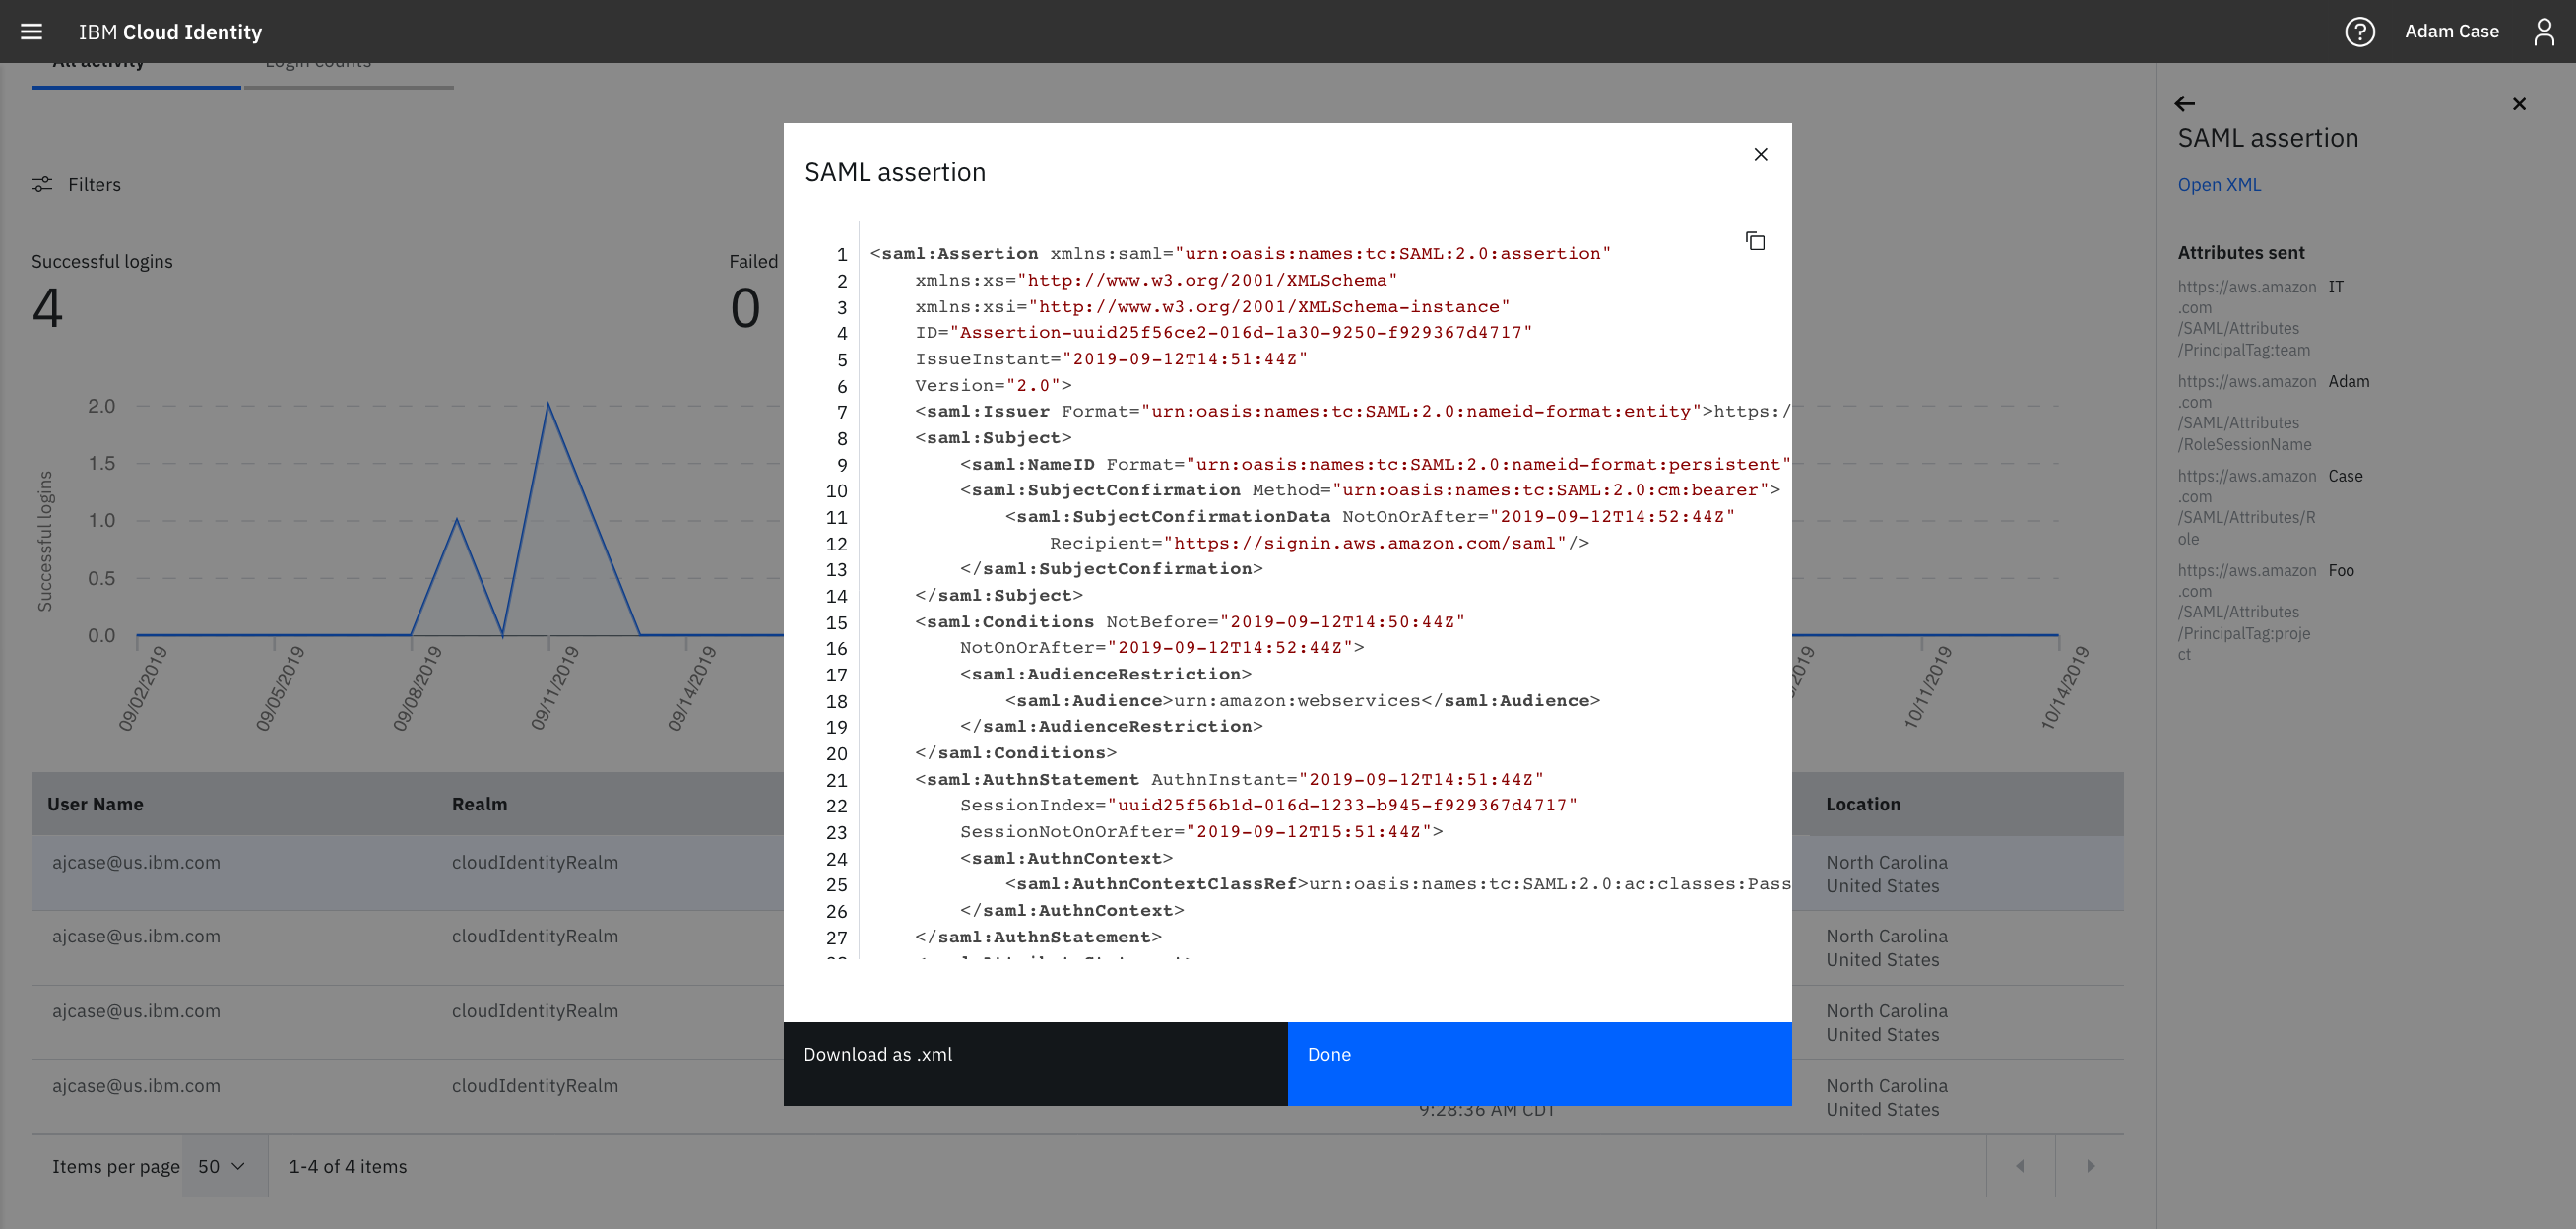
Try it out
After you have configured Cloud Identity to send the session tags, complete a single-sign on action. View the reports tab to see the SAML assertion to ensure the attributes are sending properly or to debug any other issues.
With these session tags, Amazon is providing you more fine-grained control over authorization to AWS services via your identity management source of truth. The AWS connector for IBM Cloud Identity is available now in all production tenants.