By: Rajni Kumari and Raghavendra R Venkata
IBM PowerVC Software Engineers
PowerVM Shared Storage Pools, as the name states, are used to share storage resources (SAN disks) across a group of IBM Virtual I/O Server instances. The storage pool is made up of physical volumes that can be accessed by every virtual I/O server that is a member of the shared storage pool. This storage is used to create virtual disks, also called logical units (LUs). This technology has many benefits, including reduced overall data center administrative workflow, simplified management of virtual servers and pre-provisioning of the storage pool for simplified storage management.
PowerVC supports deploying workloads that use shared storage pools, but PowerVM Shared Storage Pools must be configured before you can manage them with PowerVC. This article explains how to configure PowerVM Shared Storage Pools and how to use PowerVC to utilize the storage pools effectively.
In this article, I am using four VIOS instances hosted on two different physical systems to create a shared storage pool cluster. We will follow these basic steps to set up the shared storage pool:
- Create volumes or LUNs on SAN storage and map them to a host.
- Create a cluster and a shared storage pool.
After setting up the shared storage pool, you can do the following:
- View the Shared Storage Pool Cluster.
- Manage Shared Storage Pool in PowerVC
- Perform operations in the shared storage pool like LU creation.
- Remove a Shared Storage Pool cluster.
Requirements:
Before you start creating your shared storage pool, ensure that your system meets these requirements:
IBM PowerVM® VIOS version 2.2.2.0 or later is installed with the license activated on all virtual servers that you want to use in the shared storage pool.
There are at least two SAN-based physical volumes that are accessible to every VIOS virtual server that you want to use in the shared storage pool.Typically there are many disks in a shared storage pool but this is a simple example. One is for the repository and the other is for the data disk.
The repository disk is used to store the metadata about the shared storage pool. This disk must be at least 1 GB.
- The data disk is the physical volume that provides storage for the storage pool that is associated with the shared storage pool. The data disk must be at least 10 GB.
1. Create volumes in storage and map them to a host.
Create a repository disk at least 1GB on the storage device.
Example: I used the CLI command mkvdisk to create a volume in a V7000 device.

1. b) Create a data disk on the storage device.
2. Map both disks to all four VIOSs on the storage device.
Example: I used the mkvdiskhostmap CLI command to map the disk to the host in my V7000 device.
mkvdiskhostmap -host VIOSA 1 vdisk1
3. Log in to each VIOS and run cfgdev and check lspv -free to see your newly created disk.
4. Ensure that all the VIOSs can ping every other VIOS by using their host names. If the name sever is not configured on the VIOSs, add hostname with their IP address to "/etc/hosts".
2. Creating a Shared Storage Pool Cluster using HMC Console:-
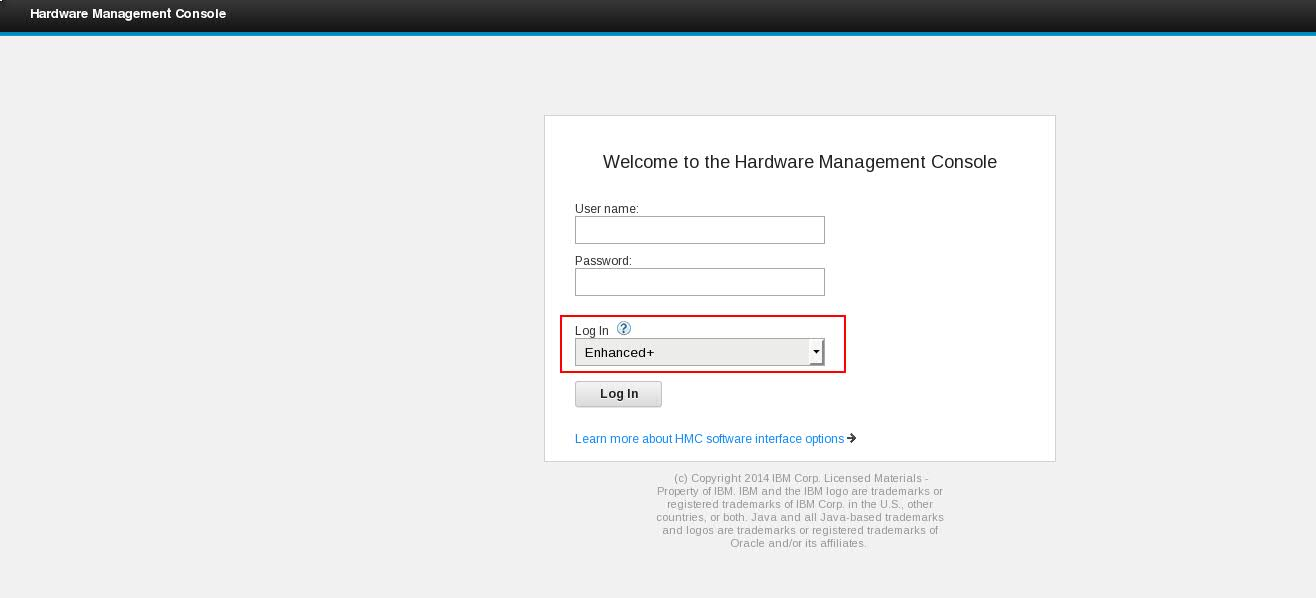
You can create a Shared Storage Pool (SSP) cluster by using Hardware Management Console (HMC) with 8.3 level and above. Choose HMC Enhanced+ interface options to login to Hardware Management Console (HMC).
2. In the navigation pane, click the “Resources” icon the icon represents the Resources function of the HMC.
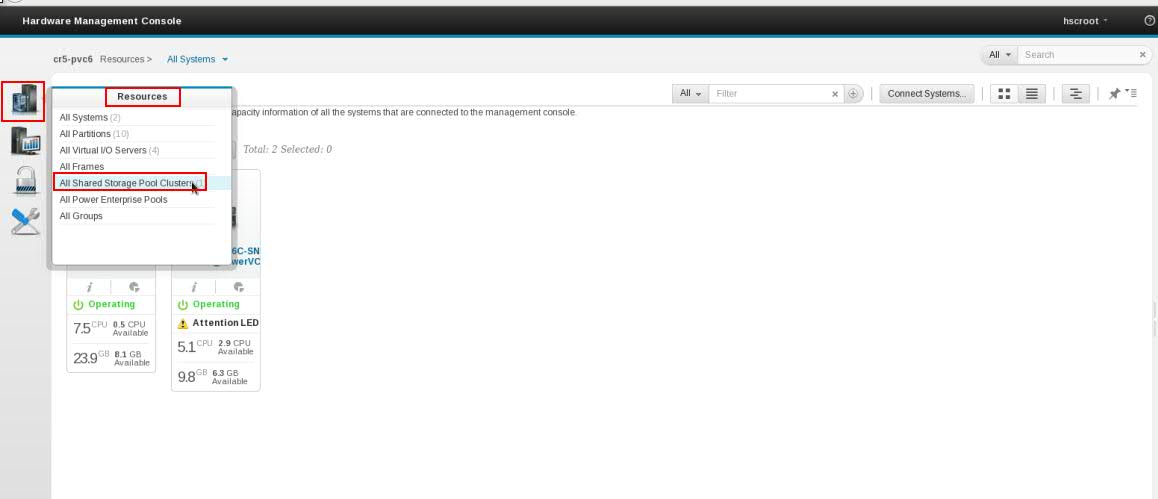
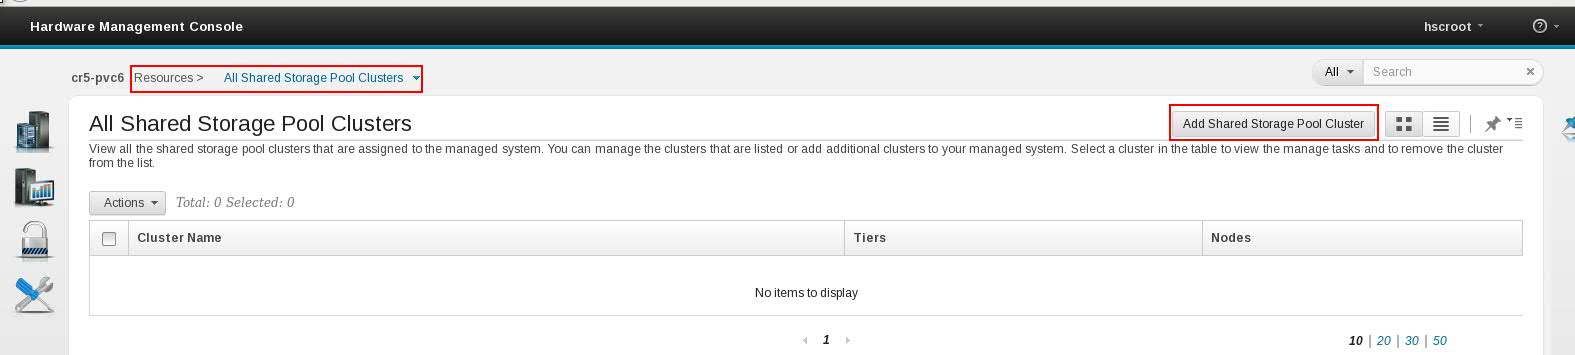
3. Click All Shared Storage Pool Clusters. The All Shared Storage Pool Clusters page is displayed. In the work pane, click on “Add Shared Storage Pool Clusters” as shown below:
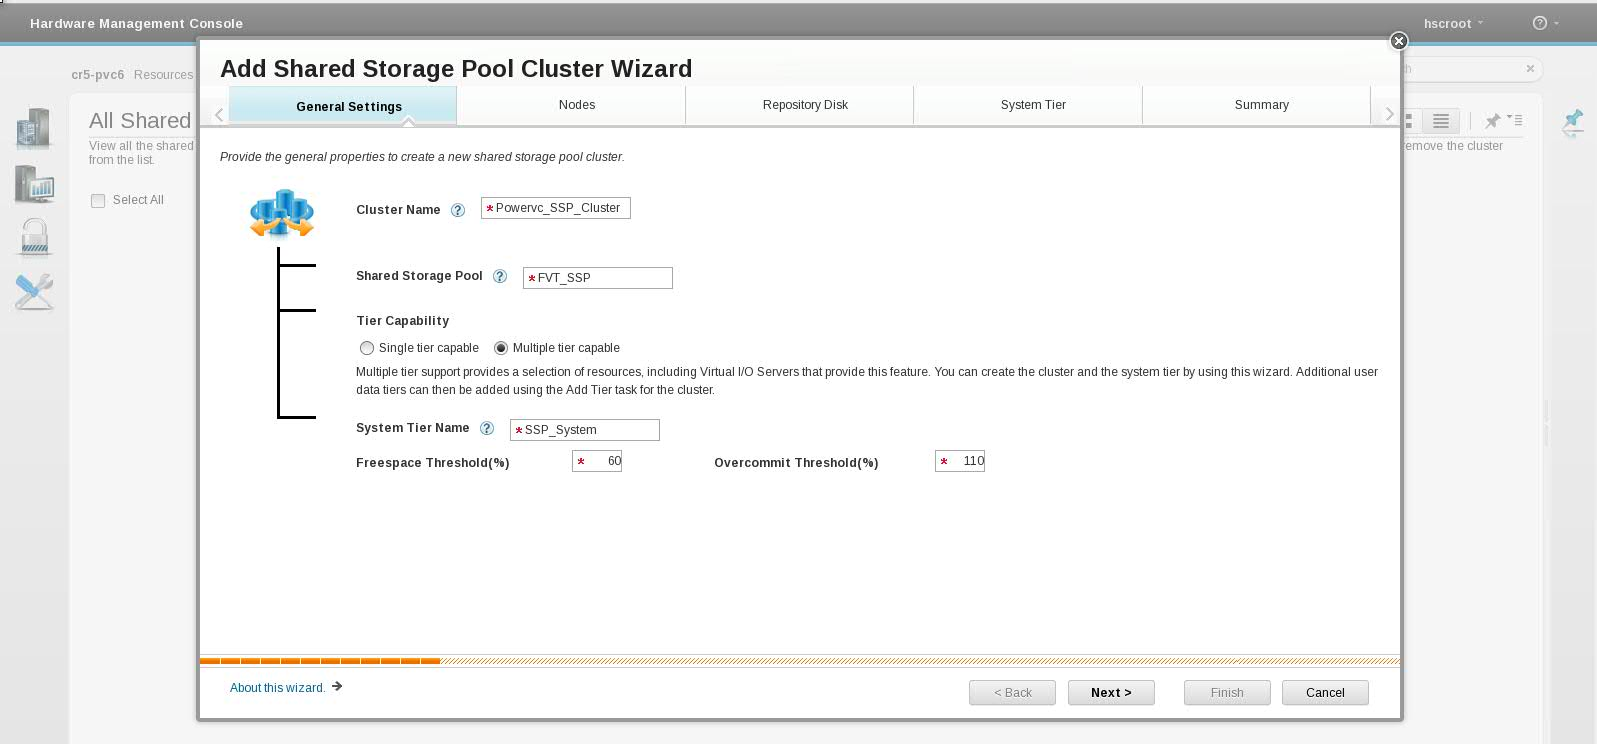
4. A new “Add Shared Storage Pool Cluster Wizard” gets displayed and provide required information and Click “Next” as shown below:
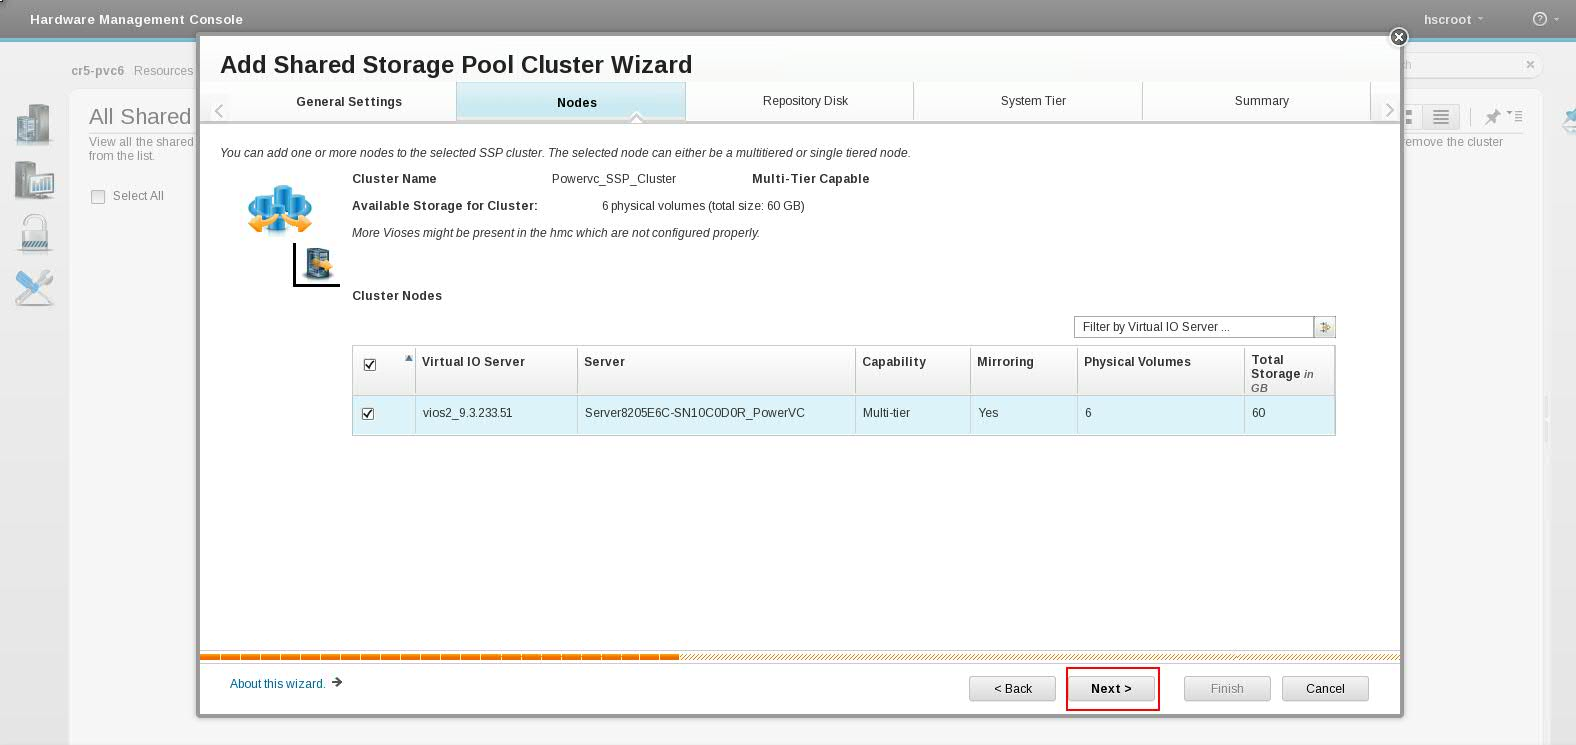
5. In this wizard add a Virtual I/O Server (VIOS) to a Shared Storage Pool (SSP) cluster and click “Next” as shown below:
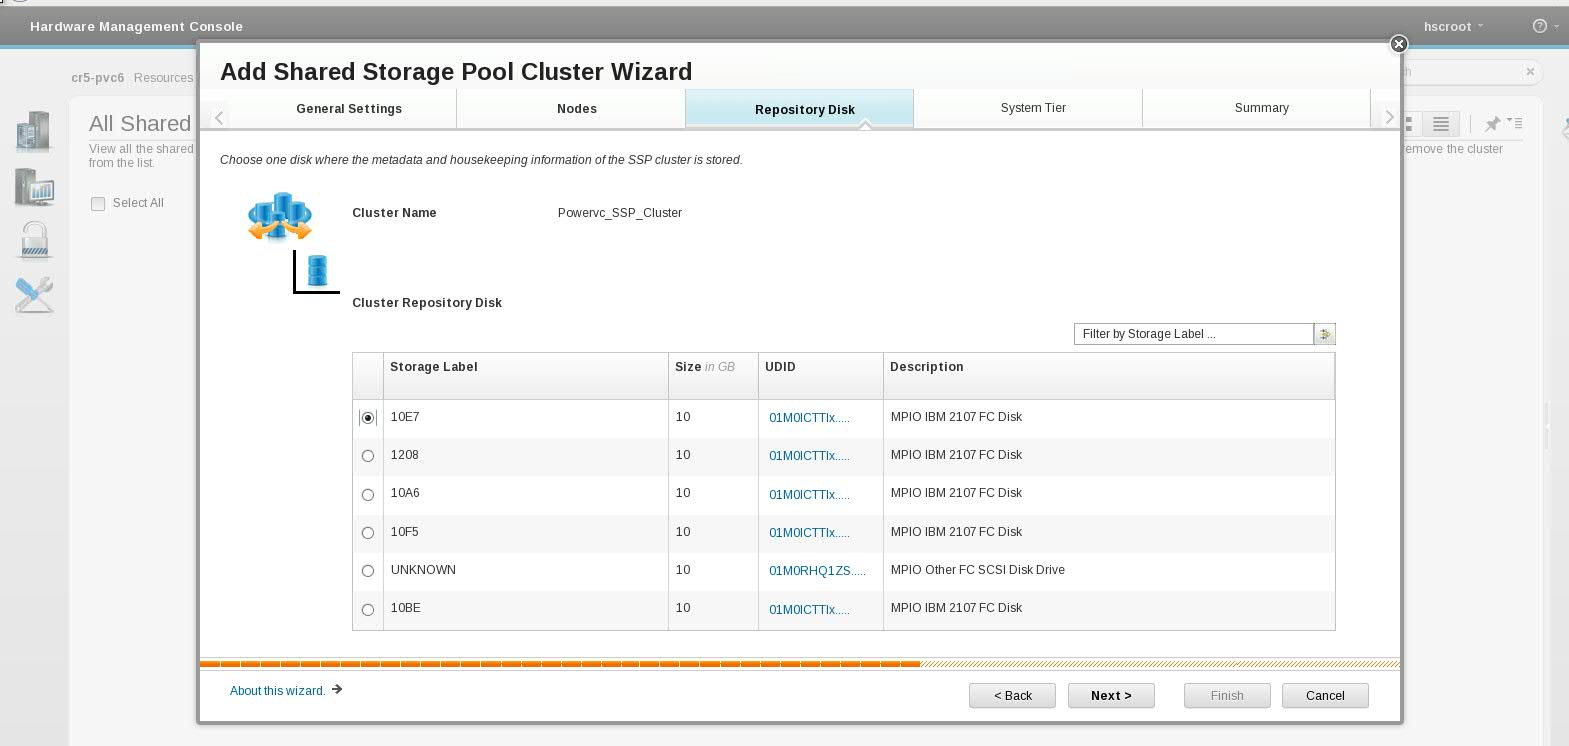
6. In this wizard select appropriate “Cluster Repository Disk” and then click on “Next” as shown below:
7. In this wizard select appropriate “Physical Volumes” (Data Volumes) to store your virtual machines volumes and click “Next” as shown below:

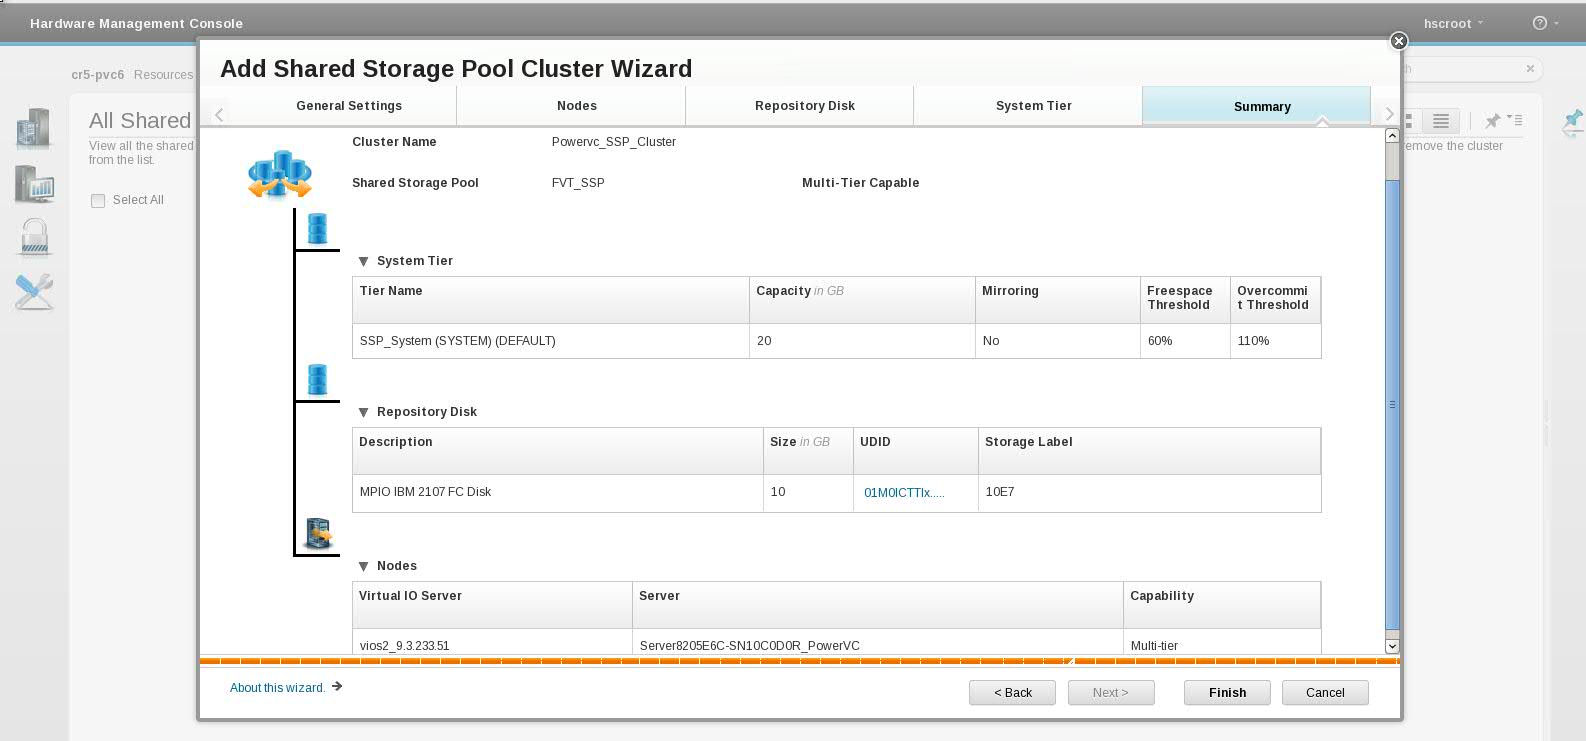
8. A “Summary” wizard is displayed. Verify all the information provide and click on “Finish” as shown below:
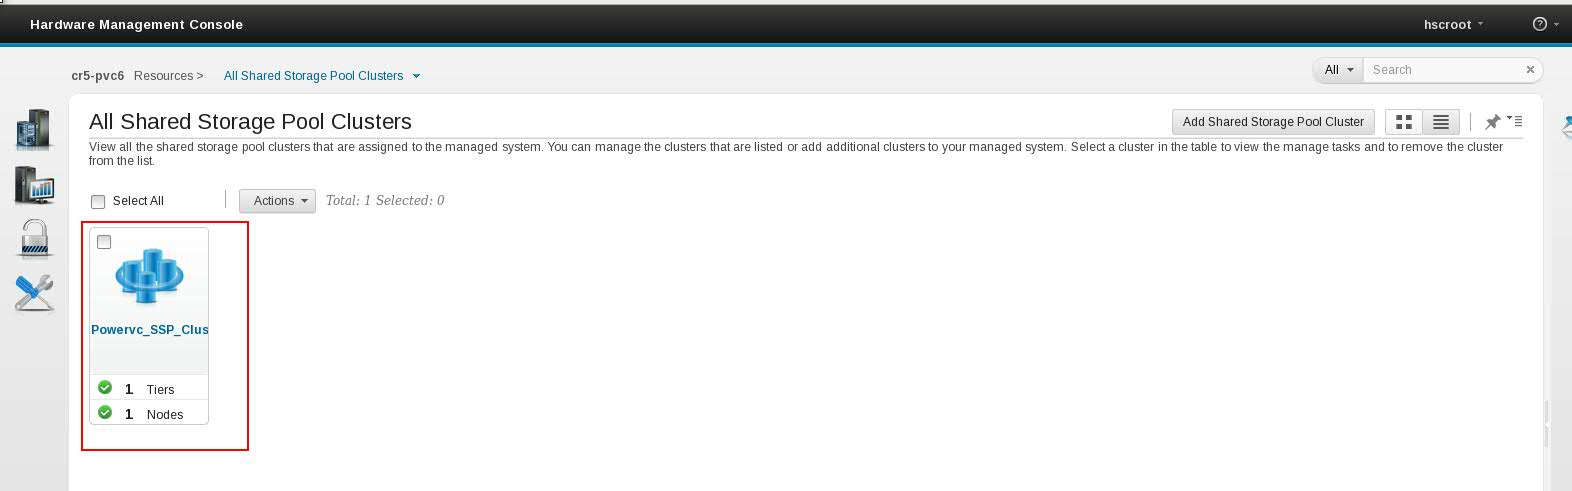
9. In the navigation pane, click the “Resources” icon and select “All Shared Storage Pool Clusters” and the newly created SSP cluster will get displayed as shown below:
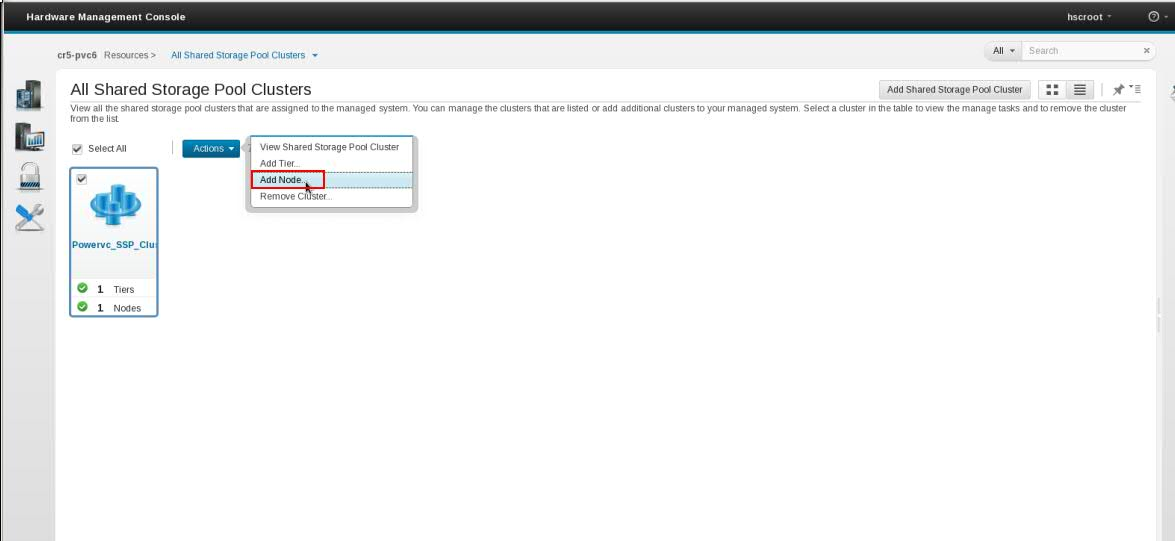
10. If you need to add another VIOS (node) to the SSP cluster then in the navigation pane, click the “Resources” icon and select “All Shared Storage Pool Clusters” and select the newly created SSP cluster and click on “Actions” and click on “Add Node” as shown below and follow this step to add more nodes.
Now that the SSP cluster has been created, you can work with it in these ways:
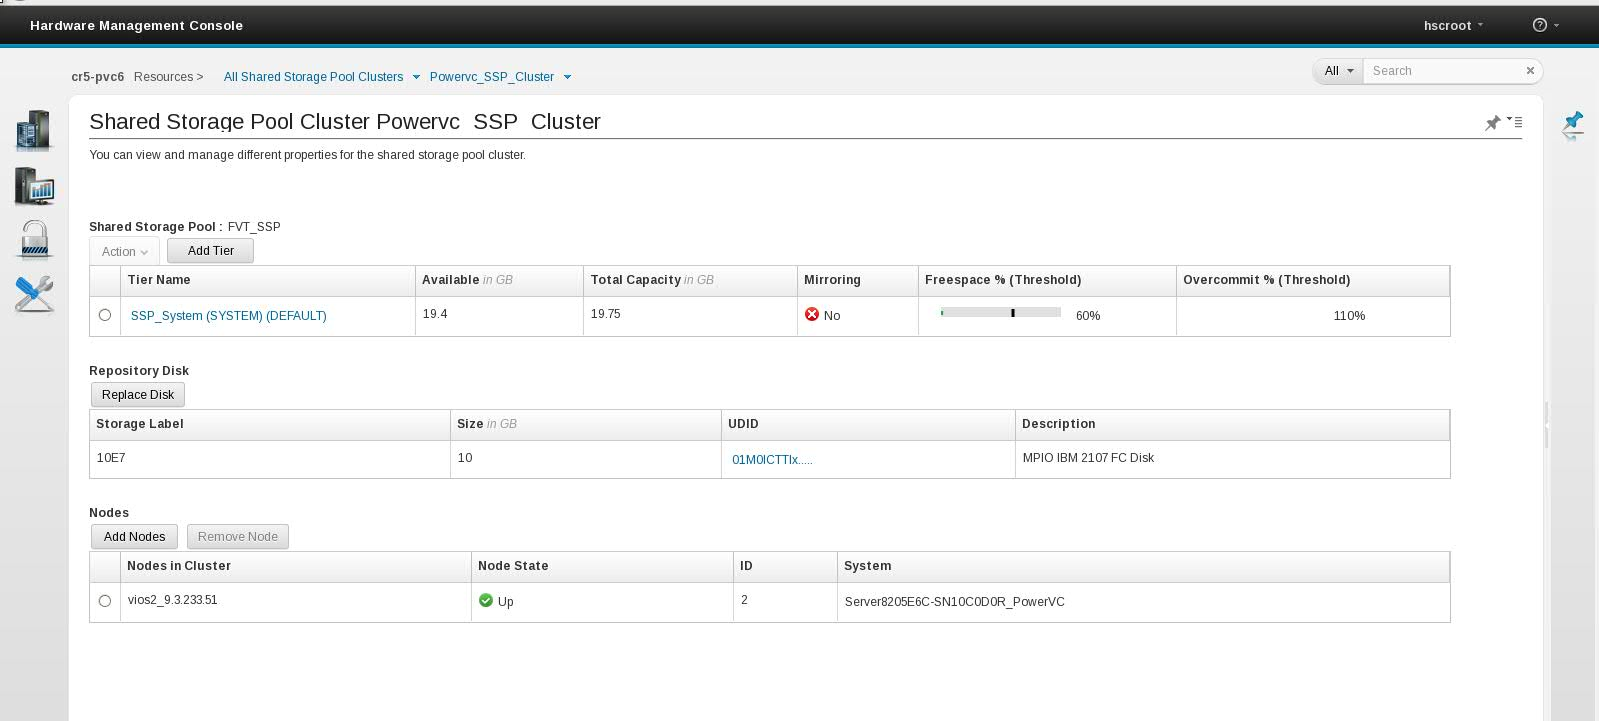
View the Shared Storage Pool Cluster
Manage shared storage pools in PowerVC
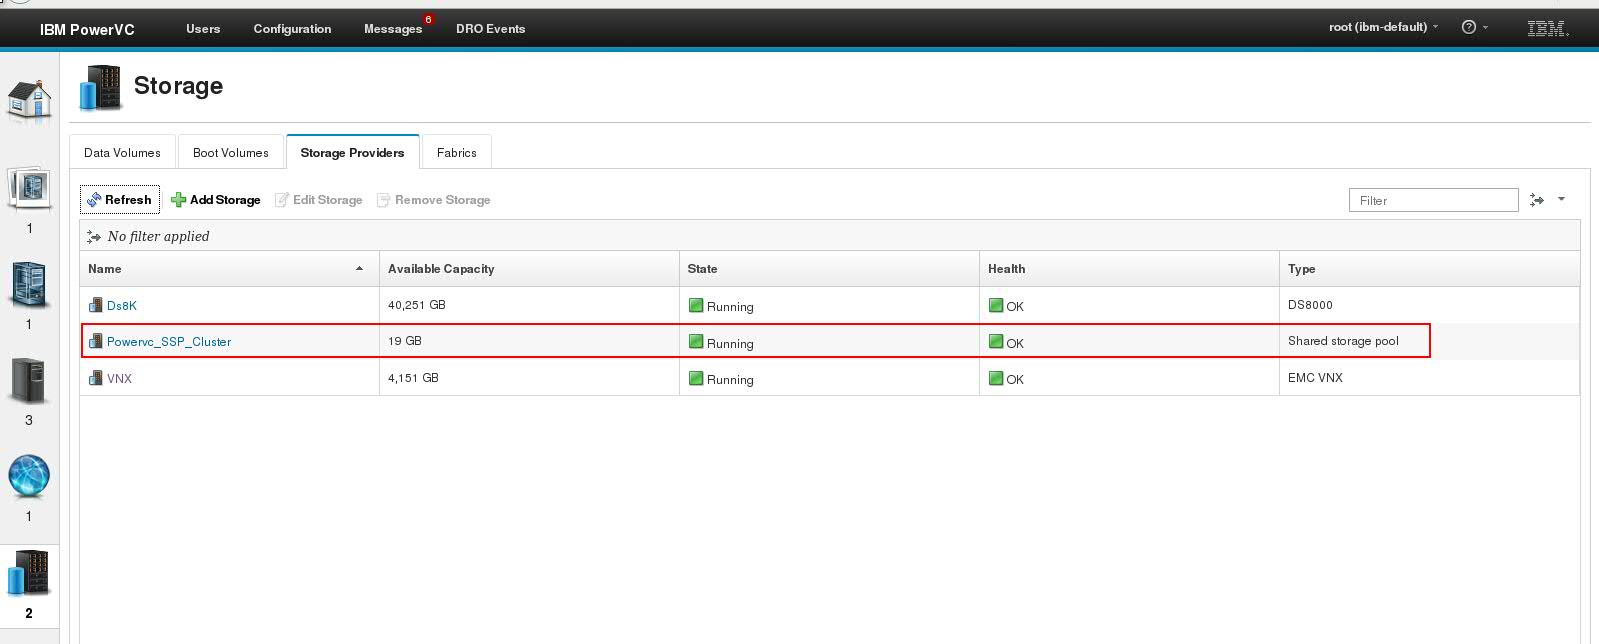
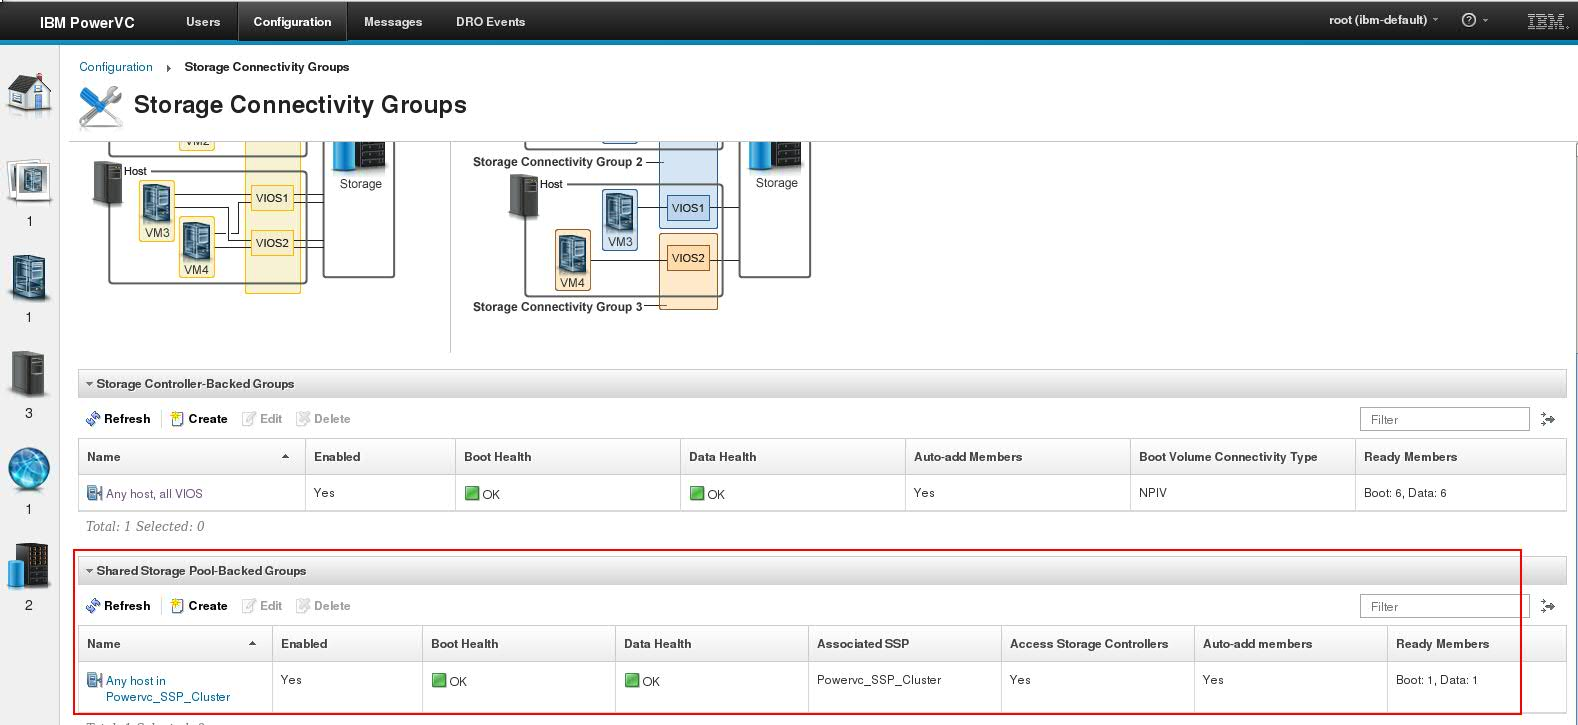
Managing SSP is very similar to managing the vSCSI classic configurations but to use shared storage pools with PowerVC, you must create them externally before registering the host. Then when the host is added to PowerVC, the shared storage pools are added automatically. This creates a default Storage Configuration Group (SCG) for SSP. You can remove the host from PowerVC and then re-add it, allowing PowerVC to automatically discover the SSP cluster as shown below:
Maintenance tasks, such as adding a physical volume, backup, and so on, must be done outside of PowerVC.But in case of vSCSI classic configuration you might need to create a Storage.
Configuration Group (SCG) explicitly with vSCSI as a boot disk and either vSCSI or NPIV as a data disk.
You can also verify the default SSP Storage Configuration Group (SCG) displayed in PowerVC as shown below:
Next, you can create an image on that shared storage pool. For further details, follow the steps in "Create an image volume on a shared storage pool volume" " in the PowerVC Knowledge Center.
Note
Extend volume size, either thick or thin provisioned, can be performed using PowerVC version 1.3.0 and higher. Shared storage pools must be attached by vSCSI
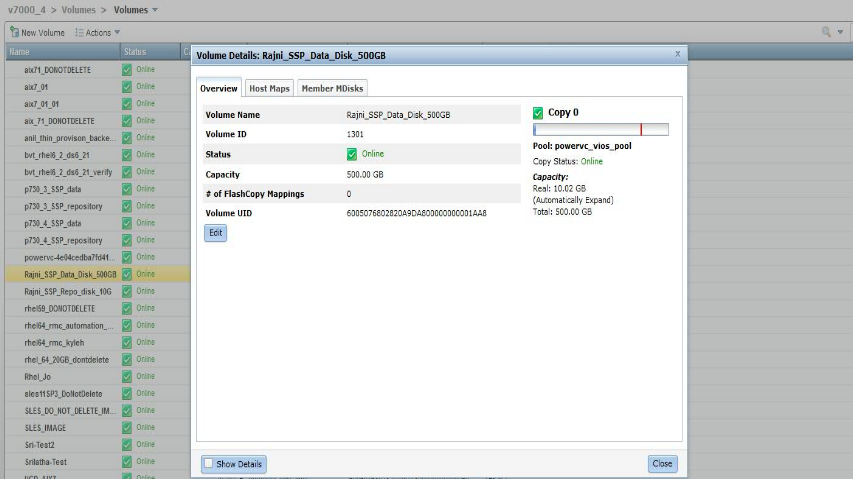
Operations in the shared storage pool like LU Creation
Create a logical unit or virtual disk in the shared storage pool using HMC and bring it under PowerVC management.
Steps to create a logical unit using HMC:
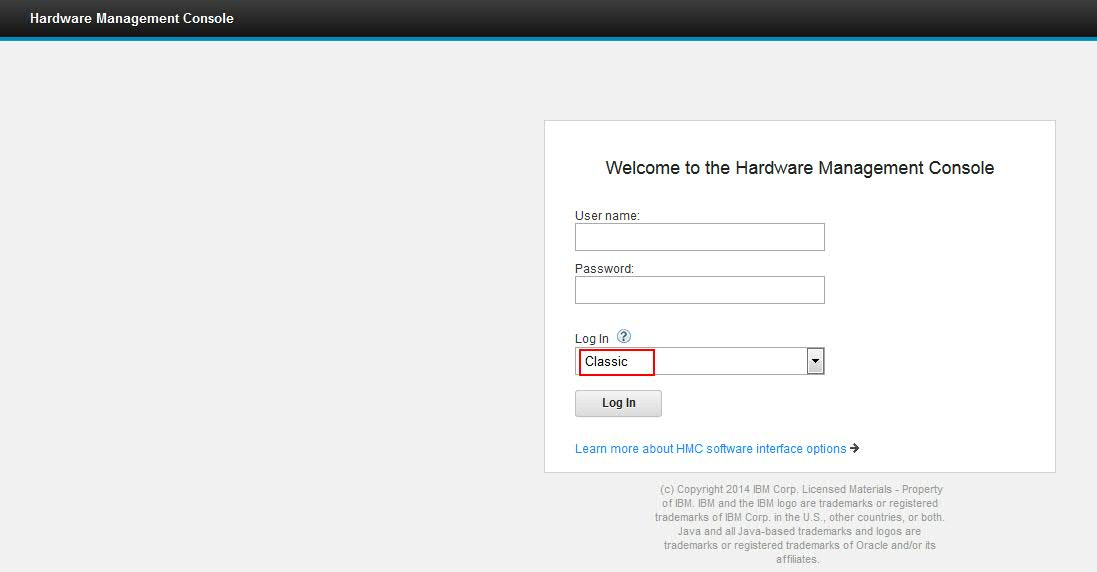
1. Login to the HMC console using Classic interface options as shown below:
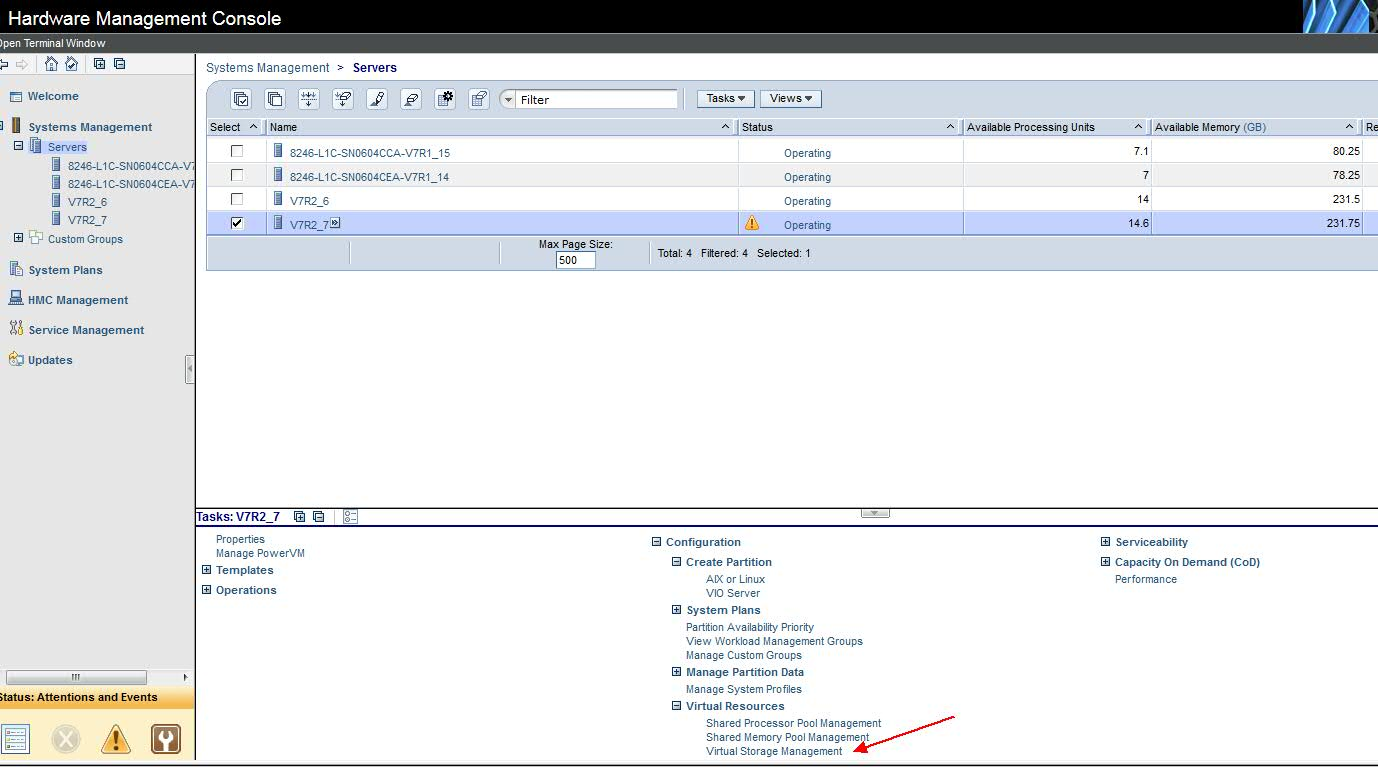
2. Click on the VIOS of the corresponding host that is a node of the shared storage pool. Expand “Virtual Resources” on the lower panel of the HMC console and click “Virtual Storage Management” as shown below:
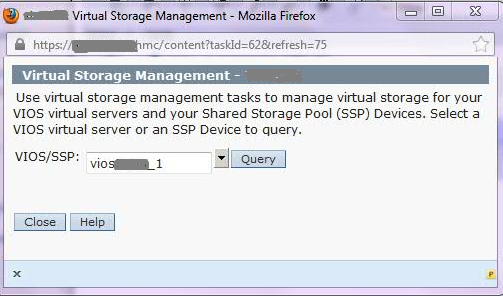
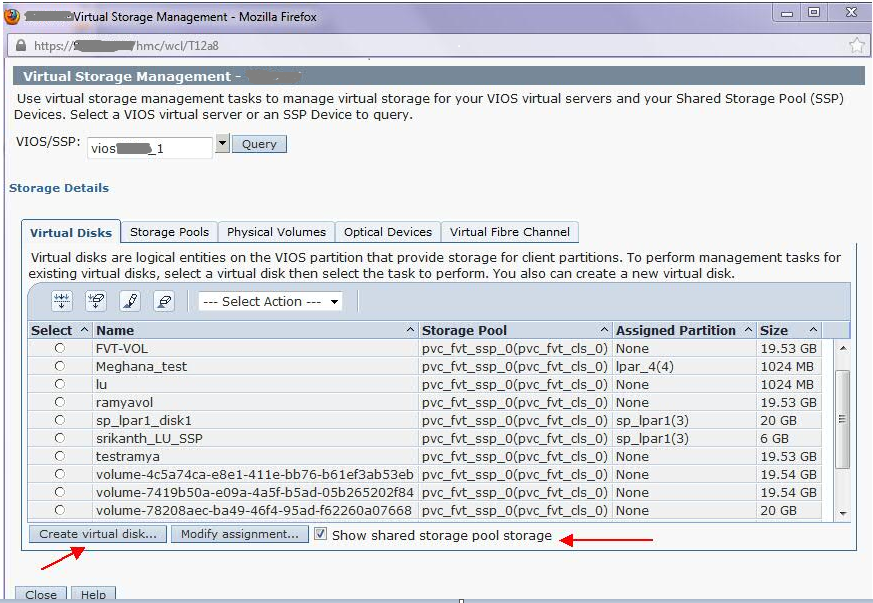
3. Select the appropriate VIOS and click “Query” to list all the existing LUs.
4. Select the check box at the bottom to get a list of the virtual disks associated with the shared storage pool configuration, then click “Create Virtual disk” as shown below.
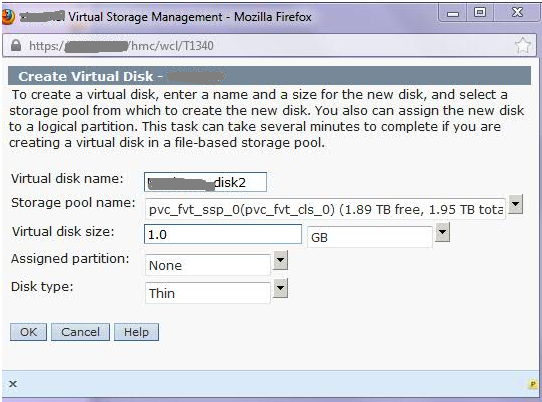
5. Create a logical unit by providing the information as shown below:
Remove a Shared Storage Pool cluster
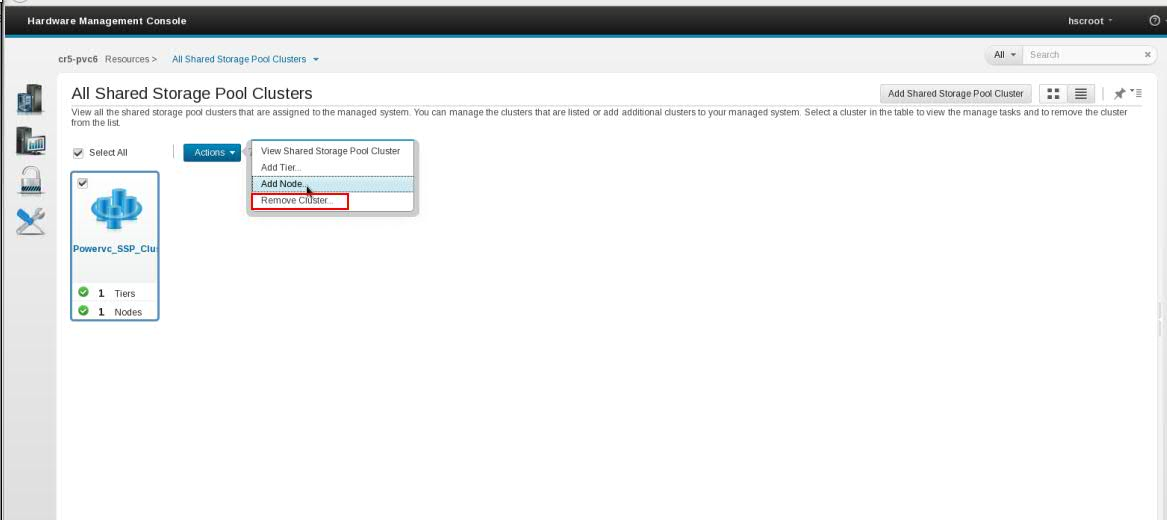
If you need to remove SSP cluster then in the navigation pane, click the “Resources” icon and select “All Shared Storage Pool Clusters” and select the newly created SSP cluster and click on “Actions” and click on “Remove Cluster” as shown below:
I hope that this information will help you on your way to using this powerful technology. If you have any questions, please add a comment, we'd love to hear from you! Don't forget to follow us on Facebook, LinkedIn, and Twitter!