Originally posted by: PriyaUnnikrishnan
Learn how to set up your IBM Cloud (previously SoftLayer) environment and provision compute hosts from IBM Cloud for running IBM Spectrum Symphony workload.
I BM Spectrum Symphony Version 7.2 introduced host factory, a framework that enables your on-premises cluster to dynamically include compute hosts from the cloud based on the resource demands of applications in your cluster. With host factory, you can leverage the on-demand capabilities of cloud infrastructure to provision as many resources as you need and pay only for what you use.
This blog focuses on how to set up your IBM Cloud environment and trigger cloud bursting to IBM Cloud in your cluster.
Step 1: Create an IBM Cloud account
Create an account on IBM Cloud and set up the account for IBMid authentication.
Step 2: Create a custom image in IBM Cloud for an IBM Spectrum Symphony compute host
You can choose between the following options to create an Image Template on IBM Cloud for an IBM Spectrum Symphony compute host. This Image Template will be used for launching computing instances on demand.
Option 1: Select a standard OS image that SoftLayer provides (for example, RedHat or Microsoft).
Option 2: Create a custom image with the standard OS and IBM Spectrum Symphony installed and configured.
For advantages and disadvantages of both options, refer to the Cloud host provisioning options topic in the IBM Knowledge Center.
To use option 1, follow these steps:
- Log in your IBM Cloud account at https://control.softlayer.com/.
- Go to Manage > Images and choose public images.
- Use the existing image name. Remember the image name for configuration in the host factory files.
Here, for demonstration purposes, we will use option 2. In general, option 2 involves two steps:
2.1 Manually order an IBM Cloud computing instance with a standard OS image.
2.2 Customize the instance by installing IBM Spectrum Symphony on it.
Step 2.1: Manually order an IBM Cloud computing instance with a standard OS image
- Log in to your account from the IBM Cloud Customer Portal (https://control.softlayer.com/).
- Click Devices in the Order section and order a Virtual Server (public node). Select the appropriate configuration for this cloud server (hourly Virtual Server (public node)), Data Center and System configuration (for example: 4 * 2.0 GHz Cores, 12 GB RAM, OS: CentOS 7.x - Minimal Install (64-bit), First Disk: 25GB. Leave the other options as default.
- In Advanced System Configuration, choose a Host and Domain Name (for example, symcompute.ibmcloud.com) for this cloud server.
- Submit the order. You will receive an email notification indicating that the Virtual Server is currently in the provisioning process. Standard delivery times are 20 minutes or lower.
- Check Devices > Device List in the customer portal to see whether the cloud server is provisioned. After the server is available, you can customize this compute instance.

Step 2.2: Customize the compute instance by installing IBM Spectrum Symphony on it
- To customize the IBM Cloud instance, log on using SSH (with the public IP as root user). Obtain the root password for this device from the customer portal by clicking the device name and selecting Show Password.
For example:
ssh 169.55.162.62 -l root
- Copy the IBM Spectrum Symphony package to this IBM Cloud instance. For example:
# scp sym-7.2.0.0_x86_64.bin root@169.55.162.62:/root/
- Install IBM Spectrum Symphony on the IBM Cloud compute instance. For details, refer to the Install Symphony Compute On Linux Host topic in the IBM Knowledge Center.
- For RHEL 7, install the net-tools package:
yum install net-tools
- Set the environment variables and run the installation package. For example:
# export BASEPORT=30600
# export CLUSTERADMIN=root
# export CLUSTERNAME=cloud
# export DERBY_DB_HOST=symcompute.softlayer.com
# export SIMPLIFIEDWEM=N
# export EGOCOMPUTEHOST=Y
./sym-7.2.0.0_x86_64.bin
- Update the /etc/hosts file on the IBM Cloud host to add the host names of the IBM Spectrum Symphony master and master candidate hosts. For example:
[root@symcompute conf]# cat /etc/hosts
127.0.0.1 localhost.localdomain localhost
169.55.162.62 symcompute.softlayer.com symcompute
169.55.162.60 symmaster.softlayer.com symmaster
- Join the host to the cluster and start IBM Spectrum Symphony on the IBM Cloud host. For example:
source $EGO_TOP/profile.platform
egoconfig join master_host
egosetrc.sh
egosh ego start
- Check that this SoftLayer host has joined the cluster. For example:
[root@symmaster conf]# egosh user logon -u Admin -x Admin
[root@symmaster conf]# egosh resource list -l
NAME                   status        mem    swp    tmp   ut    it    pg   r1m  r15s r15m  ls
symmaster.ibmcloud* ok         10200M  2047M    14G   2%     1   0.0   0.1   0.2   0.1   1
symcompute.ibmcloud.* ok              -      -      -    -     -     -     -     -     -   -
- Create the custom Image Template. Go to Device Details for this host at Devices > Device List > Device Details > Actions, choose an Image Name (for example, SLSymLinuxComputeImage)., and click Create Image Template.

- When image creation is successful, go to Devices > Manage > Images to view the image you created. Remember the Image Name for host factory configuration.
Step 3: Configure the IBM Cloud provider plug-in in IBM Spectrum Symphony
- For provisioning using host factory, you can use the default user for this IBM Cloud account. Alternatively, create a new IBM Cloud user within this account and designate this user for provisioning.
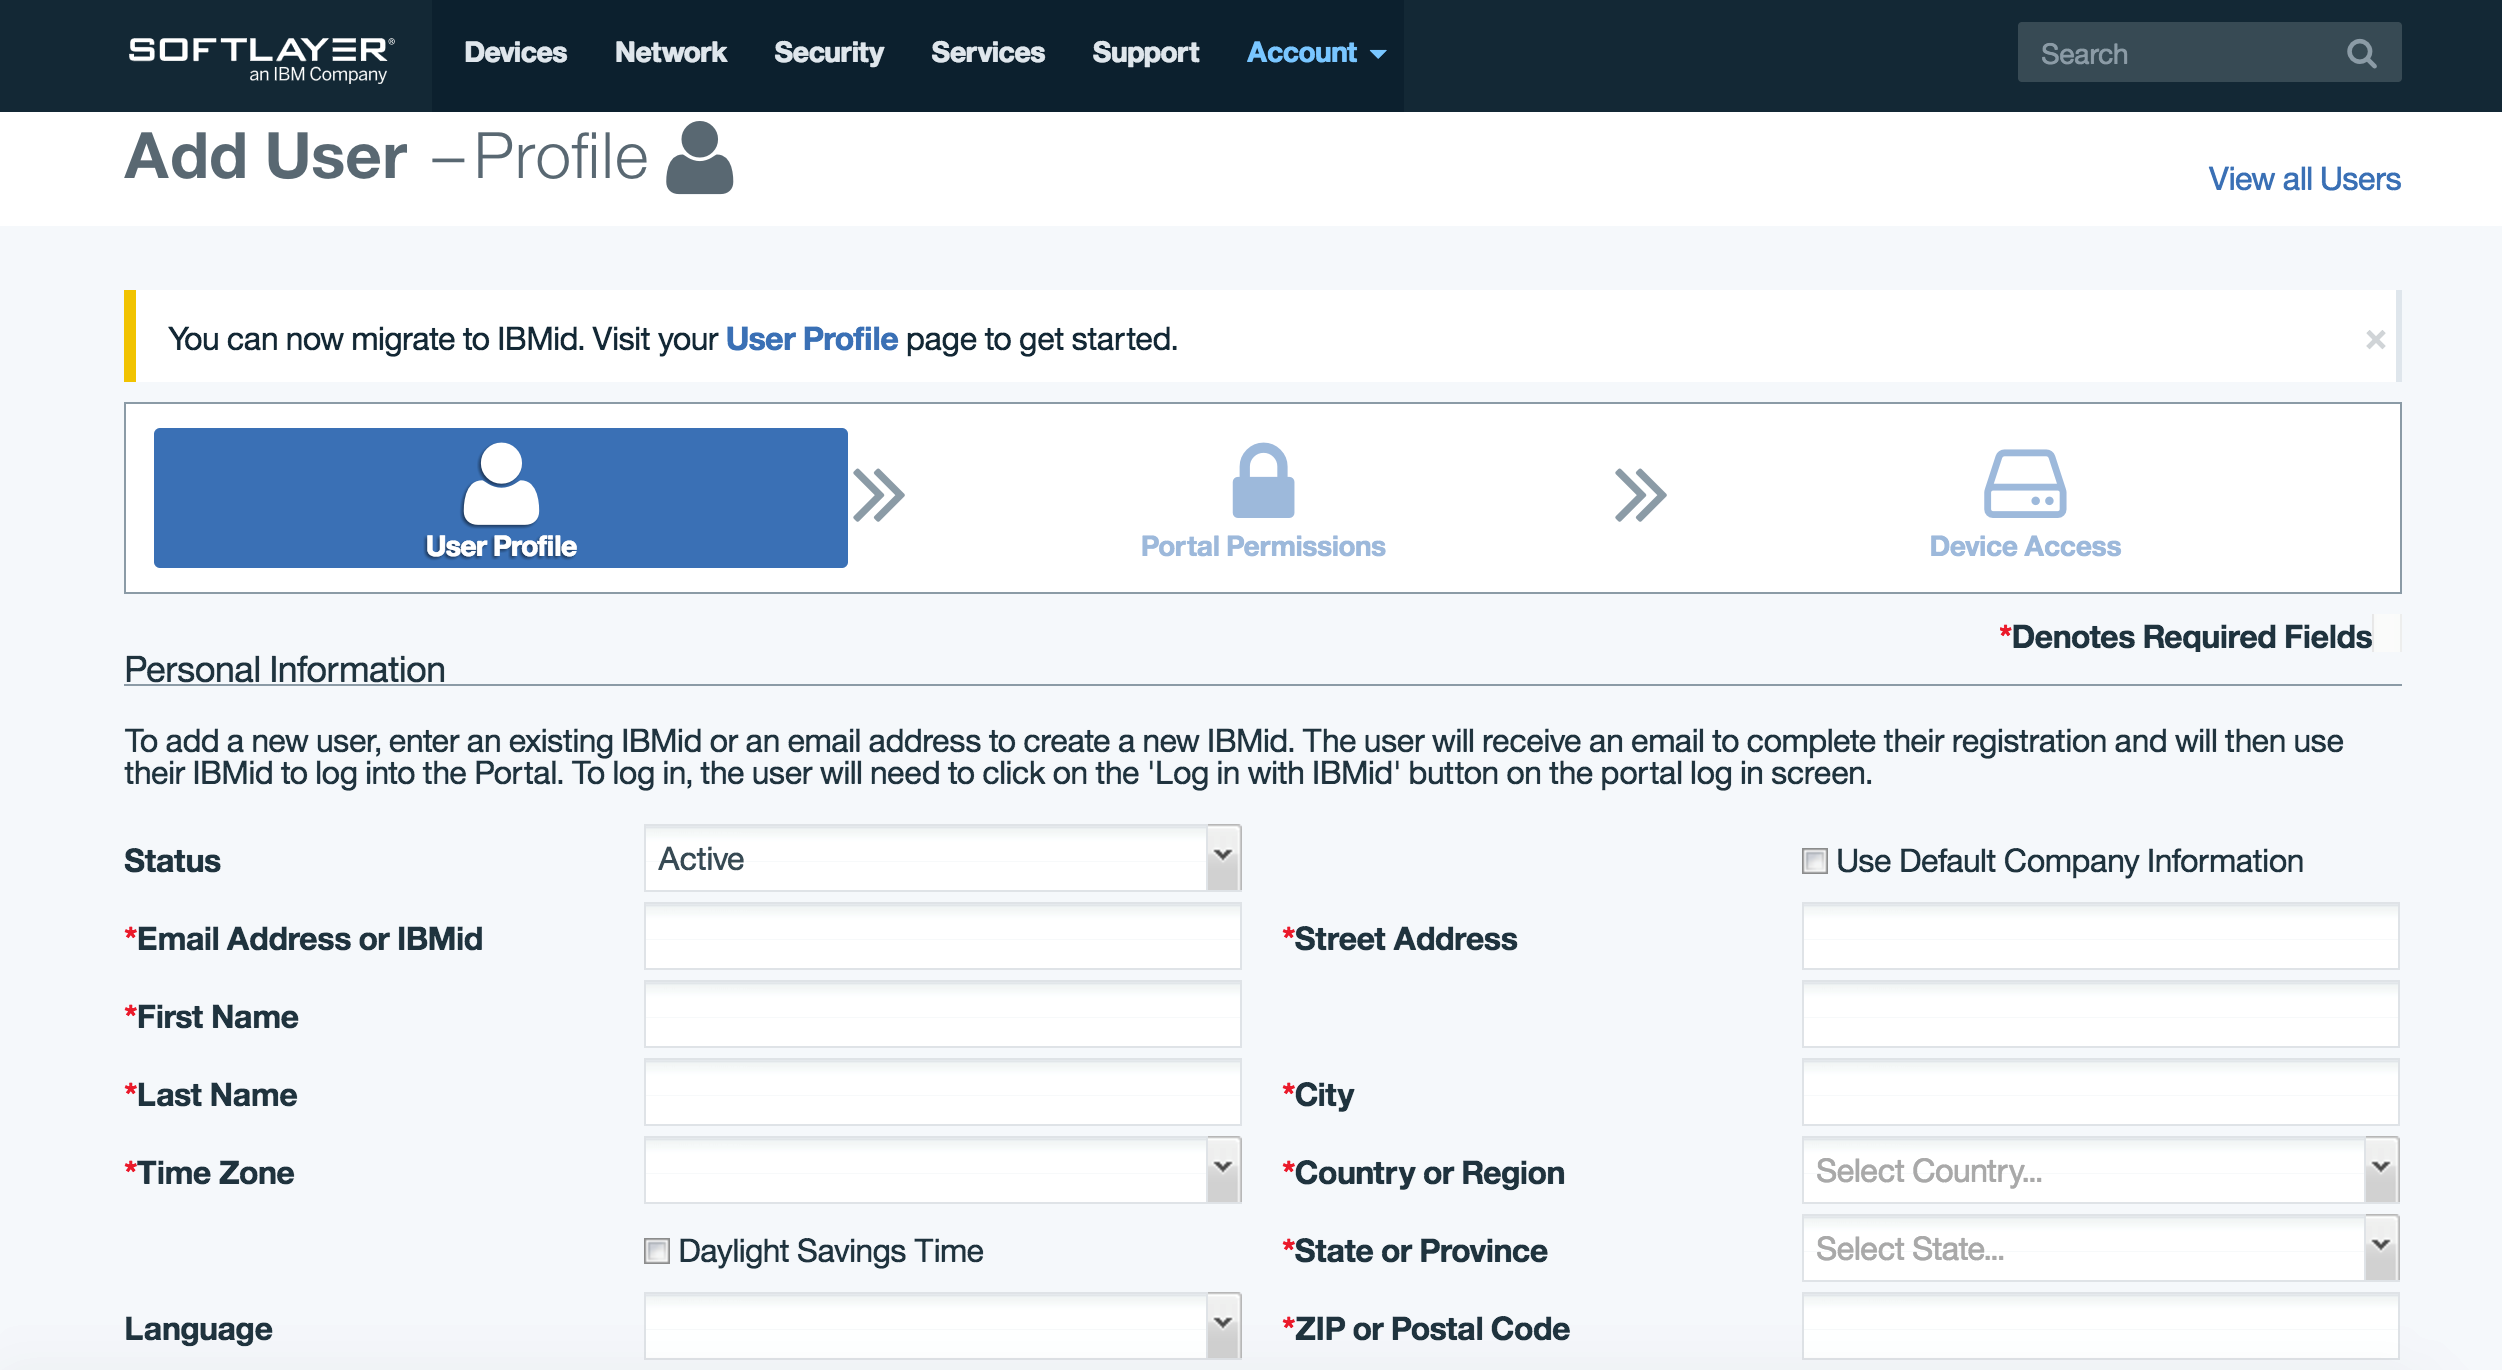
To create a new IBM Cloud user in the portal, go to Account > User and click Add New User. Ensure that the user has the permissions to generate and use the API key.
- Optionally enable Private VLAN Spanning in IBM Cloud.
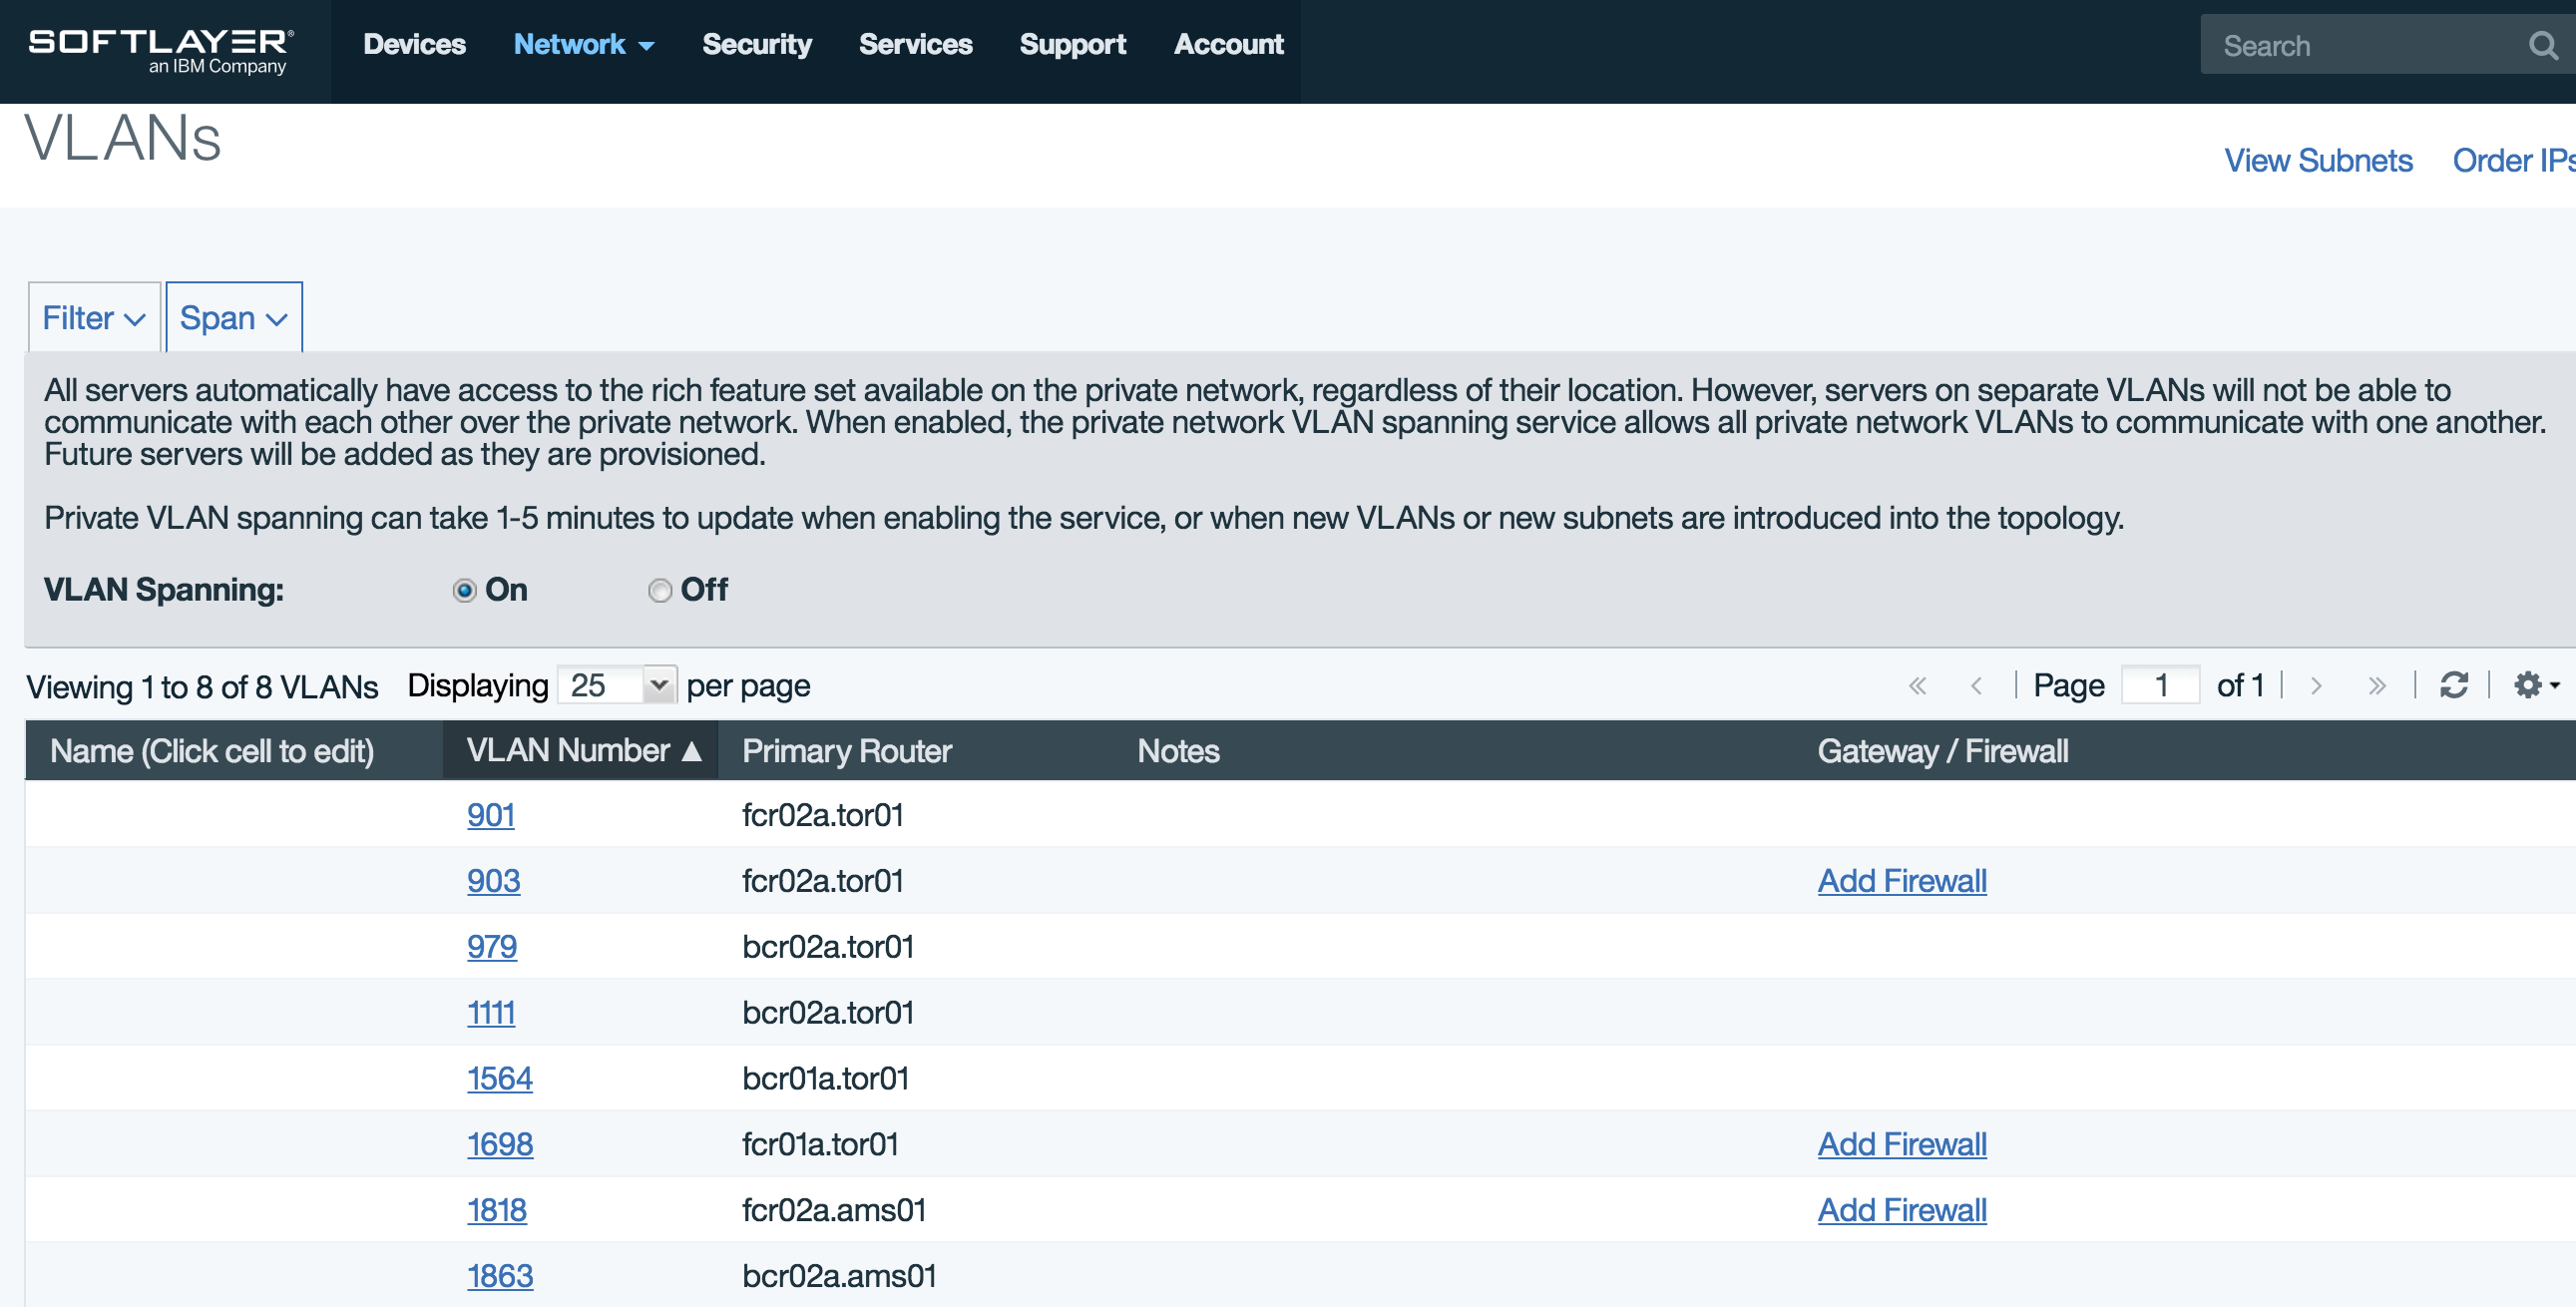
IBM Cloud assigns one or more VLANs to each account and does not allow servers on separate VLANs to communicate with each other by default. To turn on Private VLAN Spanning for the IBM Cloud account, go to Network > IP Managemnet > VLANs, then, the Span tab on the top right. In the Span tab, select the On radio button to enable Private Network Spanning.
- Go to Account >User and generate an API key for the user if one does not already exist.

- To view the API key, click the View link below API KEY.

- Copy the USERNAME and API KEY to a credentials file in a secure location on your master host. If the IBMid or USERNAME is an email ID, then the softlayer_access_user_name will be the username in the email ID; for example, if IBMID or USERNAME is johndoe@ca.ibm.com, the softlayer_access_user_name will be johndoe.
-
Ensure that the credentials file uses the following format:
# cat credentials
  softlayer_access_user_name = johndoe
  softlayer_secret_api_key = 357f9d87d4ed78b5fabcdc0b6b1ca50581920e8b5942dfa58
- Configure the softlayerprov_config.json at $HF_CONFDIR/providers/softlayer/conf/, where $HFCONFDIR is by default $EGO_ESRVDIR/hostfactory/conf/. Specify the absolute path to the credentials file; for example:
# cat softlayerprov_config.json
{
  "SOFTLAYER_CREDENTIAL_FILE": "/home/softlayer/credentials",
}
- Configure the post-provisioning script for IBM Cloud (for example, post_install.sh at $HF_TOP/providers/softlayer/scripts/, where $HF_TOP is by default $EGO_TOP/3.6/hostfactory/) and update the script for your cluster-specific information. For example:
#Fully qualified domain name of Master host
export master_host='symmaster.softlayer.com symlinuxmaster'
#IP address of Master host (Private IP or Public IP)
export master_host_ip='169.55.162.60'

#Default install location.
export EGO_TOP=/opt/ibm/spectrumcomputing

#If cluster admin is not root then change the user in CLUSTERADMIN.
export CLUSTERADMIN=root
- Set up a HTTPS repository to store the post-provisioning script (for example, post_install.sh) and copy the configured script to this repository, so that the script can be accessed and automatically run on provisioned IBM Cloud instances.
- Configure softlayerprov_templates.json at $HF_CONFDIR/providers/softlayer/conf/ as follows:
# cat softlayerprov_templates.json
{
    "templates": [
        {
            "templateId": "Template-VM-SYMA",
            "maxNumber": 10,
            "attributes": {
                "type": ["String", "X86_64"],
                "ncpus": ["Numeric", "4"],
                "ncores": ["Numeric", "1"],
                "nram": ["Numeric", "12288"]
            },
            "imageId": "SLSymLinuxComputeImage",
            "datacenter": "tor01",
            "vlanNumber": "1111",
            "useHourlyPricing": true,
            "localDiskFlag": false,
            "privateNetworkOnlyFlag": true,
            "dedicatedAccountHostOnlyFlag": false,
            "postProvisionURL": "https://10.105.224.203:8443/hfprovisionscripts/post_install.sh"
        }
    ]
}
For details of each configuration parameter, refer to the softlayerprov_templates.json reference in the IBM Knowledge Center.
- imageId is the IBM Cloud image name created in sub-step 3f in step 2.2 (for example, SLSymLinuxComputeImag).
- datacenter is the Data Center code from where compute instances must be provisioned. To obtain the Data Center codes, go to Order > Devices > Virtual Server (public node) Hourly. A popup window shows all the Data Centers and their codes (for example, ams01 for Amsterdam, tor01 for Toronto).
- vlanNumber is the number of a specific private VLAN within an IBM Cloud account for provisioned hosts. VLAN numbers can be found on the IBM Cloud portal at Network > IP Management > VLANs.
- postProvisionURL is the HTTPS URL of the post-provisioning script set up in step 9 in this section.
Step 4: Configure the symA requestor plug-in on the management host
The symA requestor plug-in monitors the workload of cloud-enabled applications in the cluster and triggers requests for cloud bursting based on demand. We can control the requestor plug-in’s configuration through the symAref_config.json and symAreq_policy_config.json files at $HF_CONFDIR/requestors/symA/conf. For details of each parameter, refer to the symAreq_config.json reference and symAreq_policy_config.json reference in the IBM Knowledge Center. In this blog, we will use the default configuration.
[root@symhost conf]# cat symAreq_config.json
{
    "scaling_policy": "throughput",
    "slot_mapping":
        {
            "ncores": 1,
            "nram": 256
        },
    "cloud_apps":[
        {
            "name": "symping7.2"
        }
    ],
    "host_return_policy": "lazy"
}

[root@symhost conf]# cat symAreq_policy_config.json
{
    "scaling_policy":[
        {
            "name": "throughput",
            "description": "Throughput is the number of tasks executed per minutes per slot",
            "warmup_time": 1,
            "history_expiry_time": 60,
            "desired_task_complete_duration": 1
        }
    ],
    "host_return_policy":[
        {
            "name": "lazy",
            "description": "Return cloud hosts closer to the end of billing interval",
            "billing_interval": 60,
            "return_interval": 10
        }
    ]
}
Step 5: Trigger cloud bursting with IBM Spectrum Symphony
- Optionally, configure the HostFactory service for detailed logging. The log level for the HostFactory service must be set to LOG_TRACE in hostfactoryconf.json to view detailed log messages. The default is LOG_INFO.
- Start the HostFactory service:
# egosh service start HostFactory
# egosh service list -s HostFactory
-
Submit the symping application for cloud bursting. Ensure that symping is enabled in the cluster. For example:
[root@symhost log]# symping -a symping7.2 -r 1000 -m 1000 > /dev/null &
[root@symhost log]# symping -a symping7.2 -r 1000 -m 1000 > /dev/null &
[root@symhost log]# symping -a symping7.2 -r 1000 -m 1000 > /dev/null &
[root@symhost log]# symping -a symping7.2 -r 1000 -m 1000 > /dev/null &
[root@symhost log]# symping -a symping7.2 -r 1000 -m 1000 > /dev/null &
[root@symhost log]# symping -a symping7.2 -r 1000 -m 1000 > /dev/null &
- Check the log at $EGO_TOP/eservice/hostfactory/log to view details of scale-out requests. Search for SCALE-OUT in the hostfactory.log.<master-host>
- From Devices > Device List in the customer portal, check for details of newly provisioned cloud hosts:
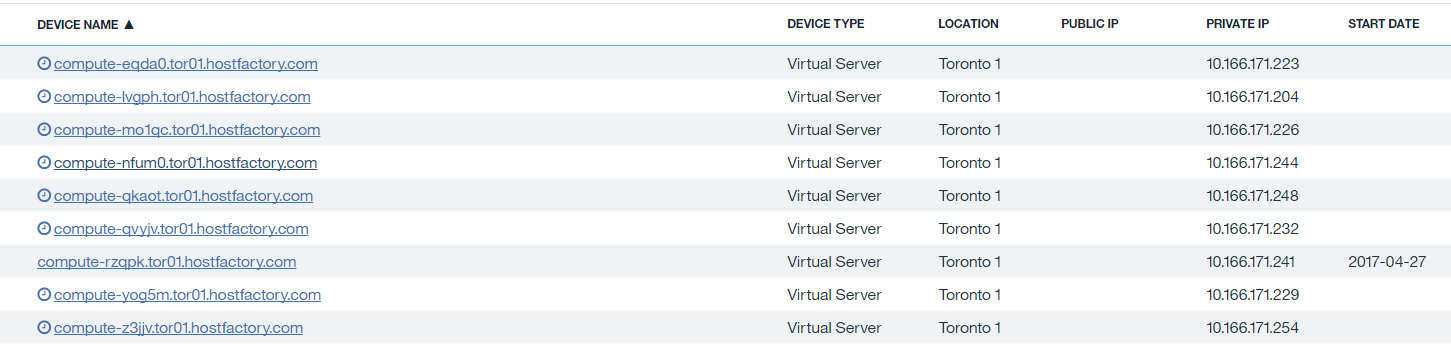
That’s it! You have successfully set up your IBM Cloud environment for cloud bursting and triggered the HostFactory service to provision compute hosts from IBM Cloud. For more details of host factory in IBM Spectrum Symphony, refer to the Working with host factory for cloud bursting section in the IBM Knowledge Center.
Next steps: Talk to us!
We’d love to hear from you. If you’ve got comments or questions, add a comment below. You can also post in our IBM Spectrum Symphony forum.
#SpectrumComputingGroup