PowerVC 1.4.3 provides integrated support for the Enterprise Hitachi Block Storage Driver (HBSD).
In this blog, we will see the procedure for Hitachi registration in PowerVC and the parameters required during registration. We will also focus on a couple of troubleshooting scenarios in case you come across any challenges during registration. This blog also focus on de-registration of Hitachi storage system from PowerVC.
Requirements and recommendations
The PowerVC management server instance where Cinder is running must be in the same geographic location as the storage controller to reduce effects of network latency on the management operations.
Requirements:
- The storage controllers must have the appropriate license, listed in the Hitachi Block Storage Driver for OpenStack Stein.
- For firmware level requirement, refer to the Hitachi Block Storage Driver for OpenStack Stein.
- For other hardware and software requirements, refer to the Hitachi Block Storage Driver for OpenStack v 8.0.0.0 Release Notes.
- Before registering Hitachi storage in PowerVC, make sure you have one of the following storage pool combinations:
-> HDT and HDP as Hitachi thin pool and storage pool respectively.
-> HTI and HDT as Hitachi thin pool and storage pool respectively.
Steps to register Hitachi storage system in PowerVC
Perform the following steps to register Hitachi storage system in PowerVC.
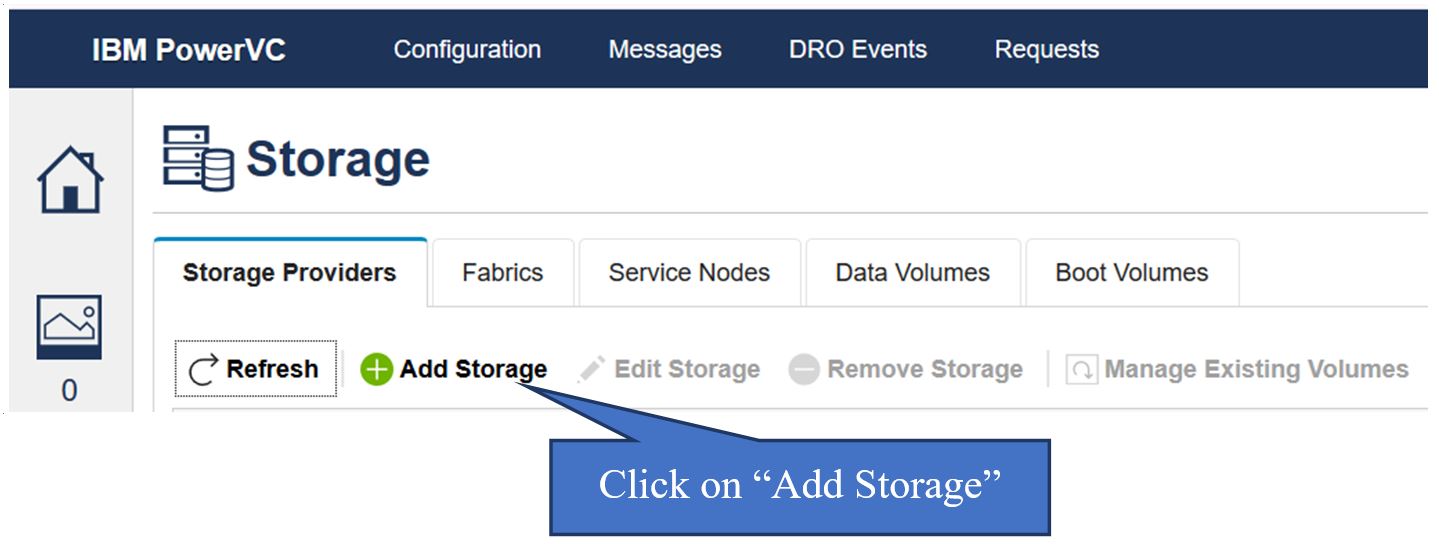
- Go to Storage -> Storage Providers and click ‘Add Storage’.
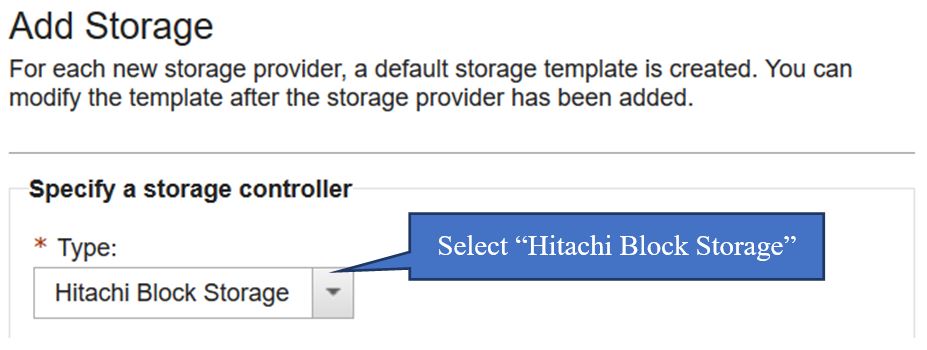
- Select ‘Hitachi Block Storage’ from the Type dropdown list.
- Specify respective parameters of Hitachi Storage and click ‘Connect’.
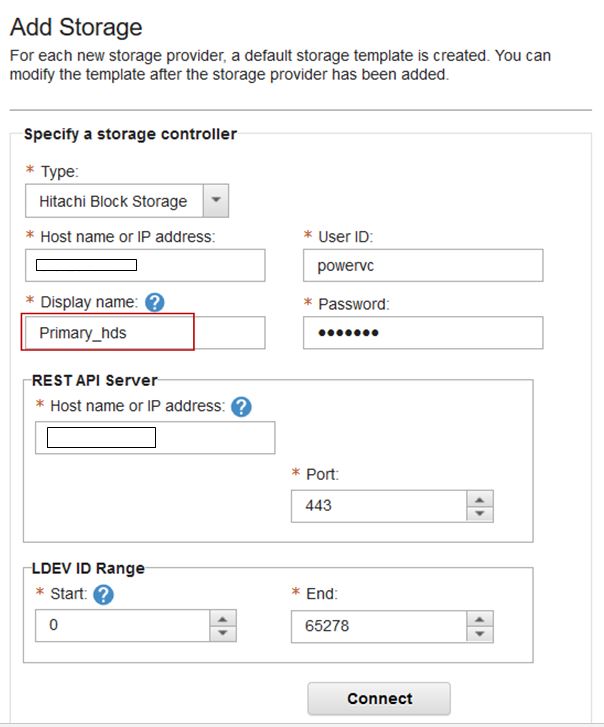
- Hostname or IP address
Hostname or IP address of Hitachi storage provider to be added to PowerVC as Primary Hitachi Storage.
- Display name
Name to be displayed in PowerVC Storage Provider page.
- User ID
User ID to access Hitachi Storage.
- Password
Password for login to Hitachi Storage.
- REST API IP or Hostname
IP or Hostname of REST API Server, which can be one of the following:
- Direct REST Server, which is Hitachi integrated REST Server.
- REST CM Server, separate machine where REST Configuration Manager server is installed. REST CM Server can be configured on either Linux or Windows. For details, see REST CM Server Installation and configuration.
- REST API Port
- REST API port which is 443 for direct REST server.
- For REST CM server the default port number is 23451 for SSL communications and 23450 for non-SSL communications.
- PowerVC only supports SSL communications, while using SSL port make sure have the necessary certificate registered on the Hitachi Storage system.
- For details, see creating SSL certificate for Hitachi storage system.
- LDEV ID Range
Range in decimal values used for volume creation in Hitachi storage system.
| Storage Model | Maximum number of volume per pool |
| VSP G130 | 2047 |
| VSP G350 and VSP F350 | 16383 |
| VSP G370 and VSP F370 | 32676 |
| VSP G700 and VSP F700 | 49151 |
| VSP G900, VSP F900 and VSP G1000/150 | 63232 |
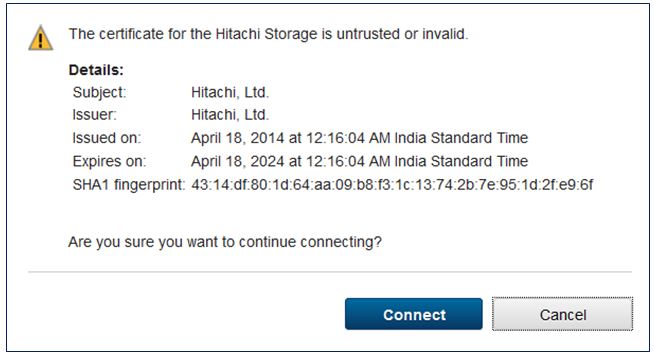
- Click ‘Connect’ to verify the certificate for REST Server.
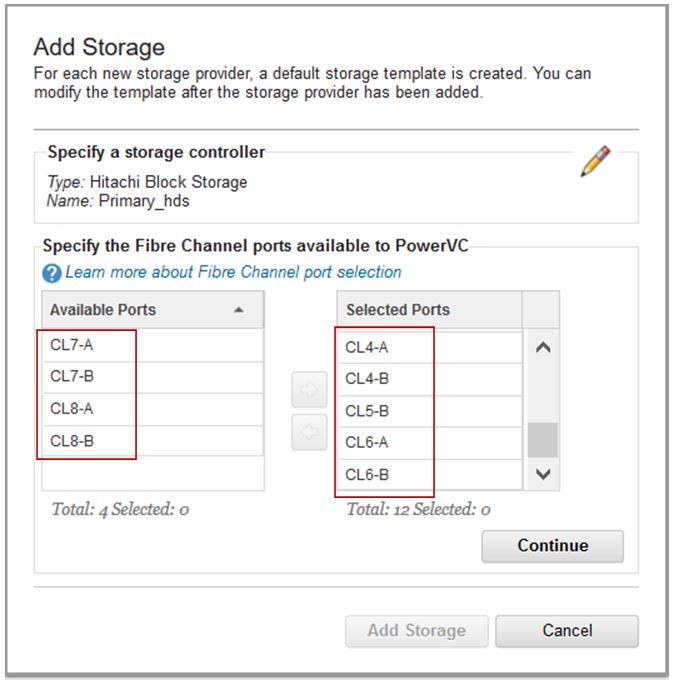
- Add storage - Fibre Channel port for PowerVC.
After successful validation of REST Server certificate, select the Fibre Channel ports available to PowerVC on the ‘Add Storage’ dialog. Move required Fibre Channel ports to ‘Selected Ports’ section and click ‘Continue’.
Note: You cannot add ports post Hitachi registration.
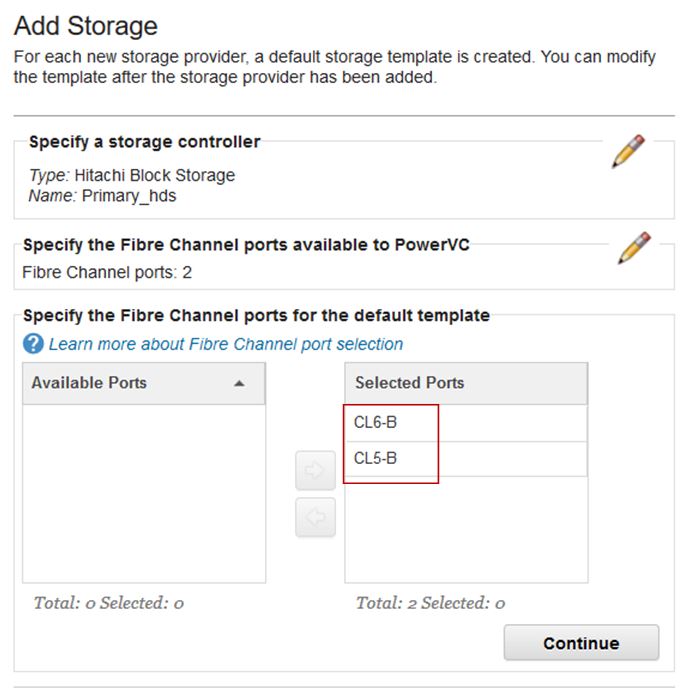
- Add storage - Fibre Channel port for default storage template.
Select the Fibre Channel ports which will be used in default storage template for the Hitachi storage provider in PowerVC. Have the required ports in ‘Selected Ports’ section which will be part of default storage template and move other ports to ‘Available Ports’ section. Click ‘Continue’.
Note: This is the subset of the ‘Selected Ports’ which should be used in the Storage template..
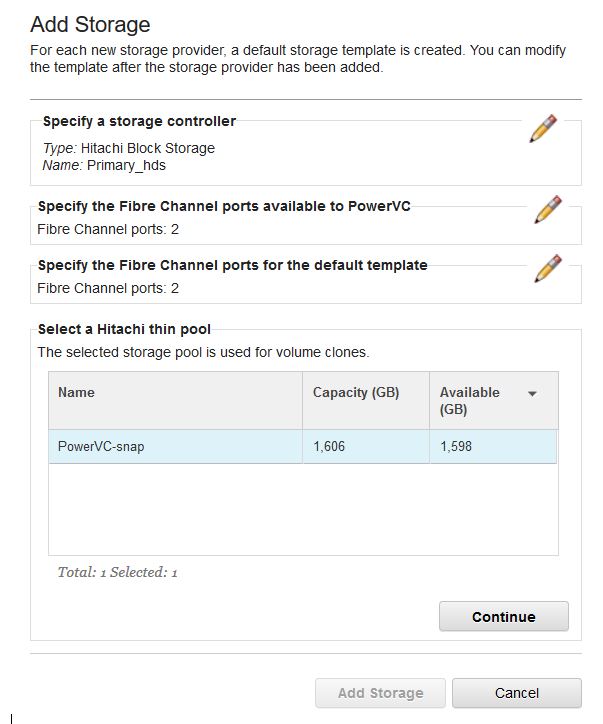
- Add storage - Hitachi thin pool.
Select a Hitachi thin pool which will be used for volume clones for Hitachi storage provider in PowerVC. Click ‘Continue’.
Note: Currently, only Hitachi Thin Image (HTI) pool is allowed for thin pool selection in PowerVC.
- Add storage - Hitachi Storage pool.
Select a Hitachi storage pool which will be used for default storage template in PowerVC. Click ‘Add Storage’.
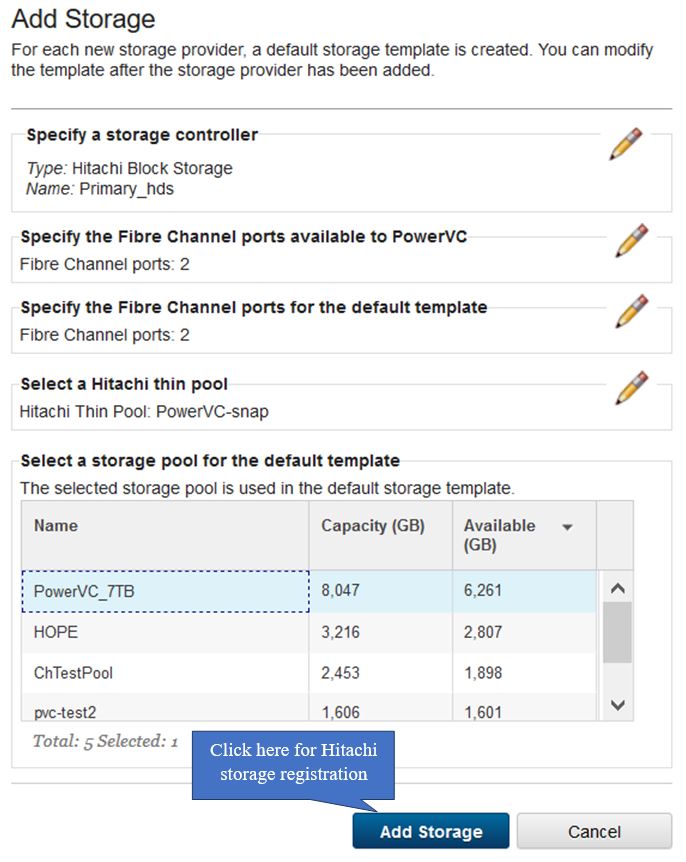
After successful registration of Hitachi Storage system in PowerVC, the new Hitachi storage provider will be visible in the Storage Providers tab.
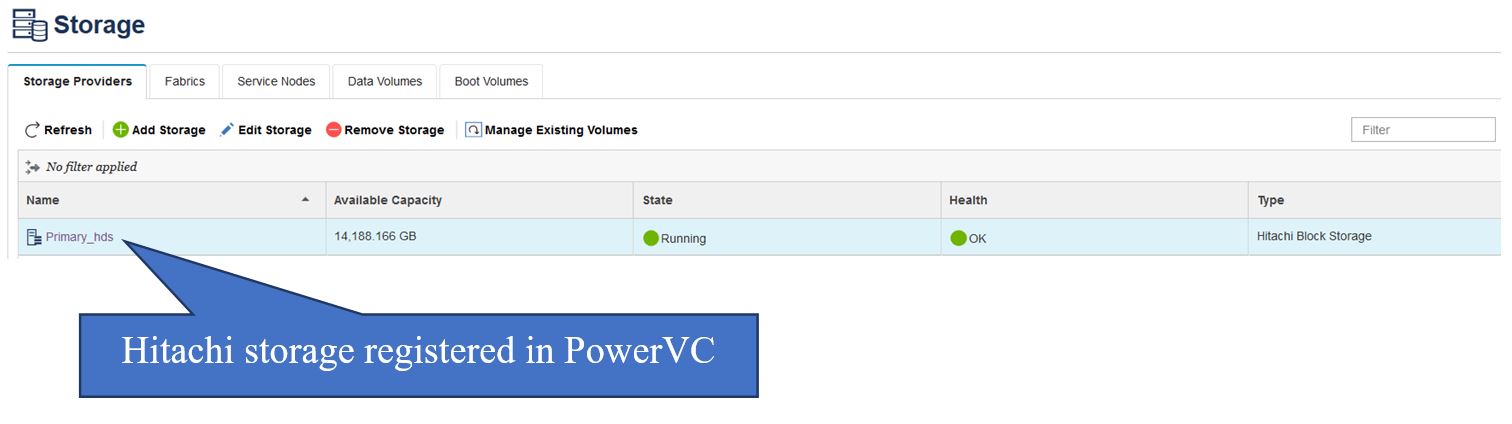
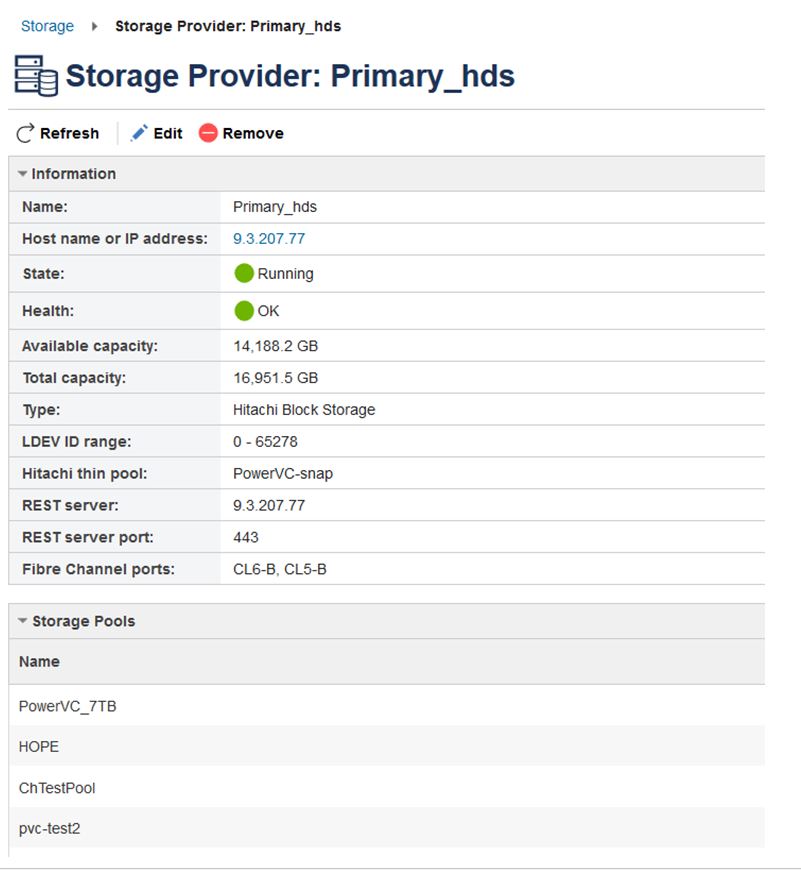
To view details of the registered Hitachi storage, go to Storage -> Storage Providers and click on the registered Hitachi storage system.
Note: Refer to the troubleshooting steps in the later part of this document, in case of storage registration failure.
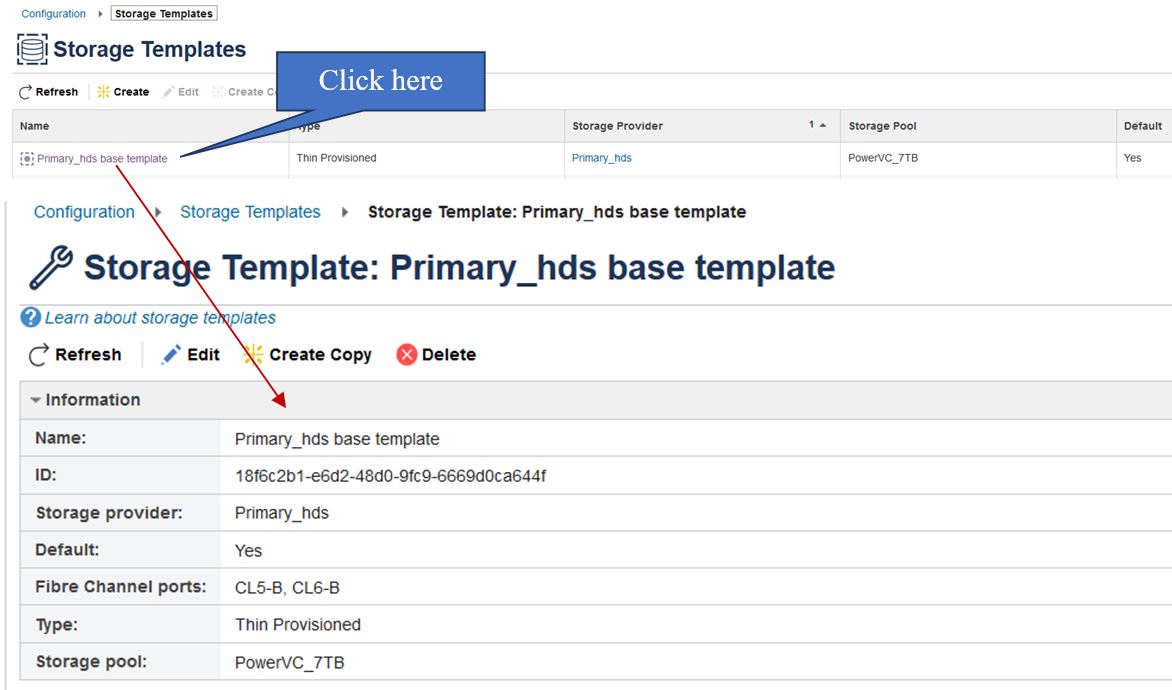
The default storage template will be created as part of Hitachi storage system registration. To get the detailed view, go to Configuration -> Storages -> Storage Templates, and click on the Hitachi storage template.
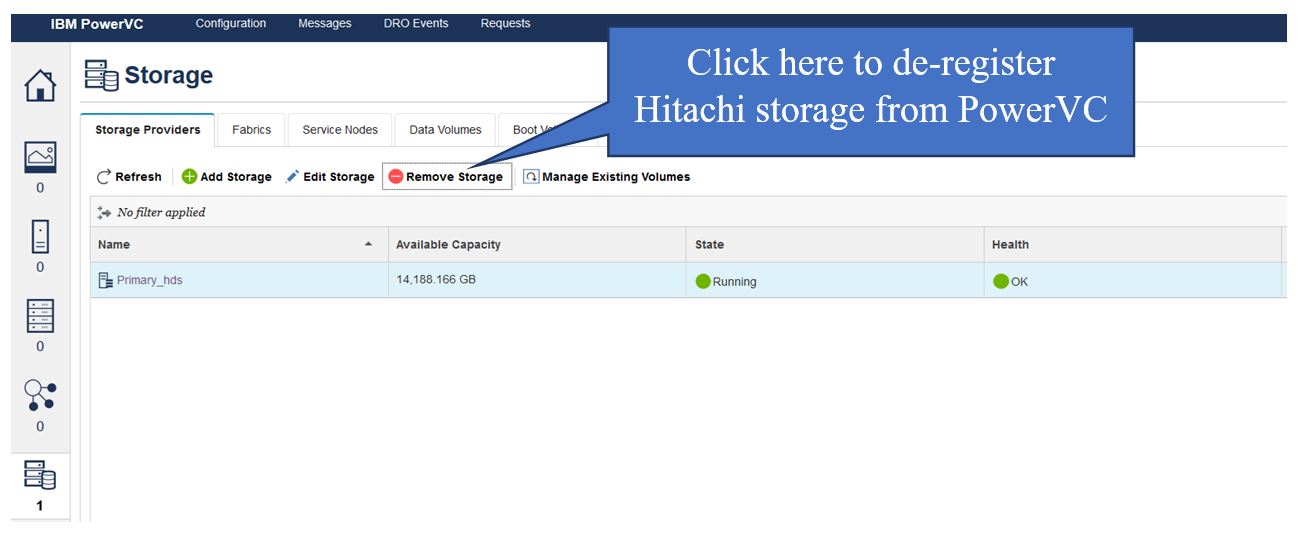
Steps to de-register Hitachi storage system from PowerVC
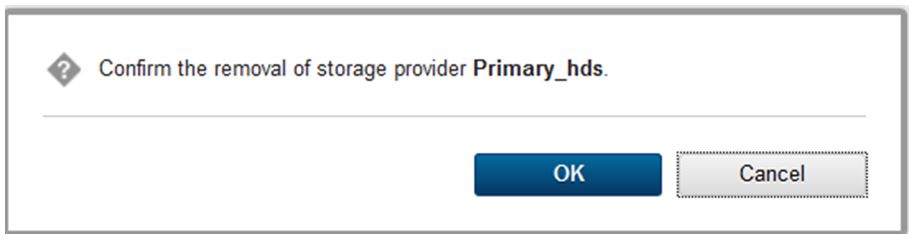
To de-register Hitachi storage system from PowerVC, select the Hitachi storage system from the table and click ‘Remove Storage’.
Below dialog appears if there is no volume managed by Hitachi Storage provider that needs to be de-registered. Click ‘OK’.
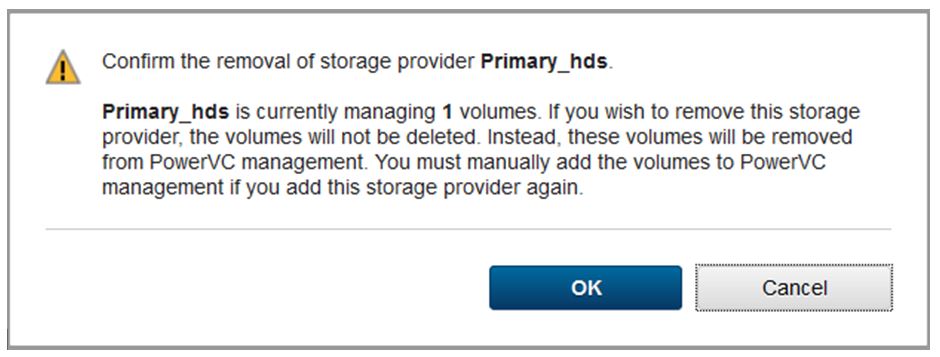
A warning dialog is displayed in case you attempt to de-register volumes that are managed by Hitachi storage system.
Troubleshooting steps on Hitachi storage registration in PowerVC
This section covers the troubleshooting steps in case Hitachi storage system registration fails in PowerVC. You can resolve the issues by analyzing the Cinder log files.
Following are the log files which need to be referred for distinct errors:
- /var/log/cinder/api.log
- /var/log/cinder/volume-<hostname of storage>.log
- /var/log/cinder/hbsd_debug.log
Troubleshooting scenario 1:
Problem Statement:
LDEV ID Range is not specified as per the storage model.
Errors:
volume-<hostname of storage>.log
oslo_messaging.rpc.server HBSDError: Bad or unexpected response from the storage volume backend API: The REST API failed. (source: /ConfigurationManager/v1/objects/storages/882000453175/ldevs, ID: KART40046-E, message: The format of the string or the content specified in the request body is invalid. (details = The specified value is not supported for the specified storage system. (parameter name = endLdevId, specified value = 65278, storage device ID = 882000453175)), cause: , solution: Check and, if necessary, revise the specified request body so that the format and content are correct., code: {}, method: POST, url: httpspvc://9.47.81.158:23451/ConfigurationManager/v1/objects/storages/882000453175/ldevs, params: None, body: {'startLdevId': 0, 'endLdevId': 65278, 'byteFormatCapacity': '3G', 'isParallelExecutionEnabled': True, 'poolId': 1})
/var/log/cinder/hbsd_debug.log
{u'errorSource': '/ConfigurationManager/v1/objects/storages/882000453175/ldevs', u'messageId': u'KART40046-E', u'detailCode': u'40046E-0', u'message': u'The format of the string or the content specified in the request body is invalid. (details = The specified value is not supported for the specified storage system. (parameter name = endLdevId, specified value = 65278, storage device ID = 882000453175))', u'solution': u'Check and, if necessary, revise the specified request body so that the format and content are correct.'}Solution:
Provide the correct LDEV ID Range for the specific storage model.
Troubleshooting scenario 2:
Problem Statement:
Port security is disabled for Fibre Channel ports as part of the port selection.
Errors:
volume-<hostname of storage>.log
ERROR cinder.volume.manager [req-3fa037d6-abe7-4e30-a2ed-73ee2d4b56ce - - - - -] Failed to initialize driver.: HBSDError: Bad or unexpected response from the storage volume backend API: The resource Compute target ports was not found.
WARNING cinder.volume.drivers.hitachi.hbsd.hbsd_utils [req-a4675a55-e392-4ab1-a8b6-48b3afc7d58c - - - - -] MSGID0339-W: Port CL1-A will not be used because its settings are invalid. (portType: FIBRE, lunSecuritySetting: False, fabricMode: True, portConnection: PtoP)
WARNING cinder.volume.drivers.hitachi.hbsd.hbsd_utils [req-a4675a55-e392-4ab1-a8b6-48b3afc7d58c - - - - -] MSGID0339-W: Port CL3-A will not be used because its settings are invalid. (portType: FIBRE, lunSecuritySetting: False, fabricMode: True, portConnection: PtoP)
ERROR cinder.volume.drivers.hitachi.hbsd.hbsd_utils [req-a4675a55-e392-4ab1-a8b6-48b3afc7d58c - - - - -] MSGID0650-E: The resource Compute target ports was not found.
Solution:
Enable port security for Fibre Channel ports which participate in Hitachi storage registration in PowerVC.
As you see, registration of Hitachi storage system in PowerVC is very easy. If you have any questions, feel free to add them below. We’d love to hear from you! And don’t forget to follow us on
Facebook,
LinkedIn, and
Twitter.