When you import a virtual machine, PowerVC will attempt to capture the boot and data volumes that are attached to it. To do this, PowerVC must know the correct boot and data connectivity, but PowerVC cannot always access this information. When that happens, the boot and data connectivity might be set up incorrectly. Starting with PowerVC
1.2.3 the operator can modify the boot and data connectivity on an imported virtual machine.
Modifying the boot and data connectivity
From within the PowerVC UI Virtual Machines page, click on the imported virtual machine to enter the virtual machine details page. On the details page click the “Edit Details” button to bring up the vitural machine Edit Details dialog. From here, you can edit the volume order and boot set designation.

In this example, the second volume in the list is actually the boot volume, but the first volume is marked as the boot volume. The operator needs to establish the correct boot disk prior to capturing the boot and data volumes of this virtual machine. To do that, move the second volume to the top of the list, change its “Boot Set” property to Yes, and change the “Boot set” property of the other volume to No.
PowerVC is all about saving time and doing as much work for you as possible. When it doesn't have enough information to do the work for you, PowerVC makes it easy for you to make the changes, and this is the perfect example. PowerVC 1.2.3 makes it even easier to quickly and accurately import virtual machines and their volumes
Modifying the IP Address
When a virtual machine is imported into PowerVC, PowerVC cannot detect its IP address. To prevent PowerVC from deploying other virtual machines with the same IP address, it is useful to inform PowerVC of the IP address of the imported virtual machines.
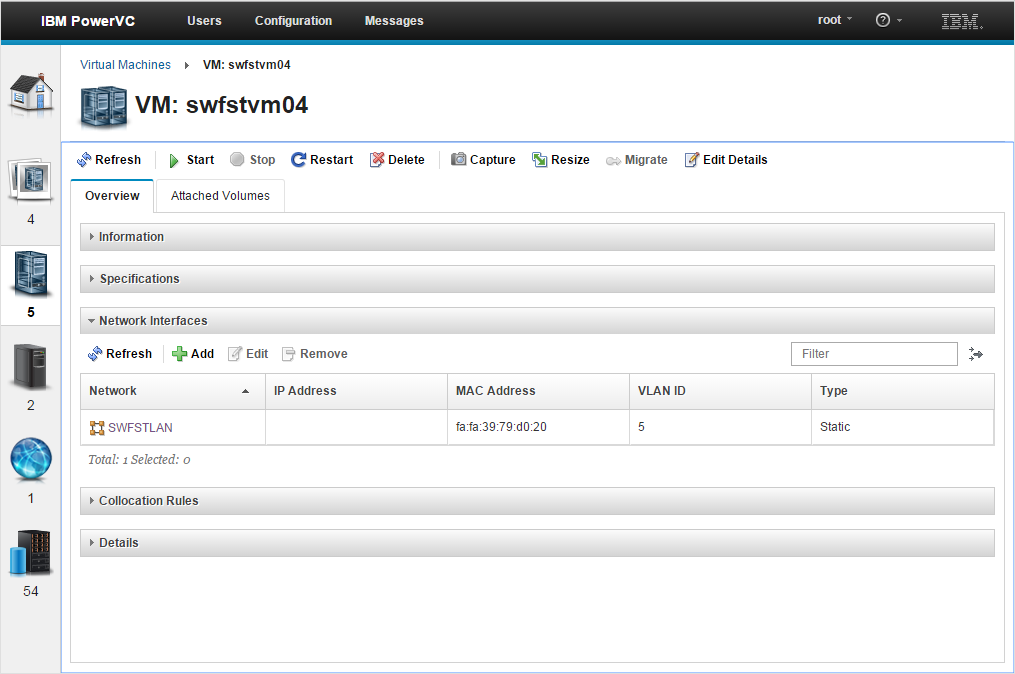
From within the PowerVC Virtual Machine page, click on the imported Virtual Machine to enter the virtual machine details page. Under the section "Network Interfaces", select the network interface to provide an IP address for and click "Edit":
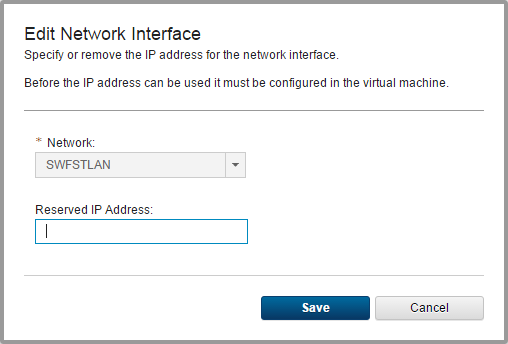
Type in the IP address and click "Save":
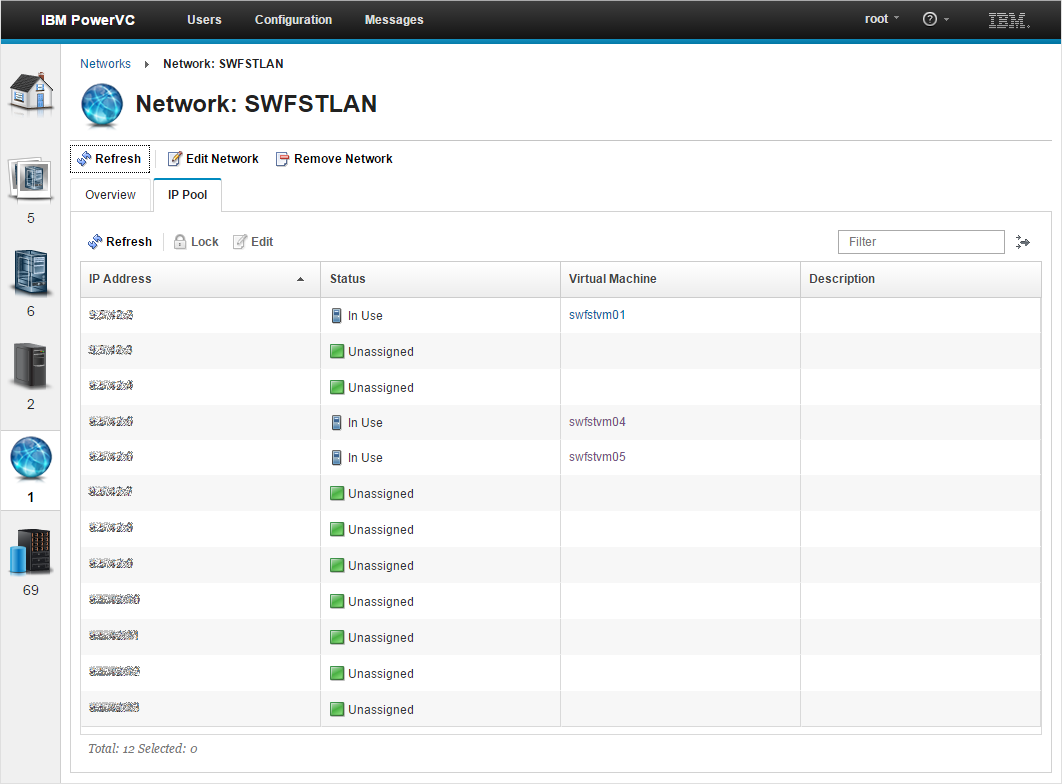
The IP address will show as "locked" on the network details page and PowerVC will not deploy other virtual machines with the same IP address:
We hope to hear from you in the comments, and don't forget to join our LinkedIn group and follow us on Twitter and Facebook!