Configuring Siebel Request Node of AppConnect Enterprise with Siebel EIS server
This Article covers in detail on how to Create and Retrieve the Account Business Object and EAI Siebel Adapter Business Service
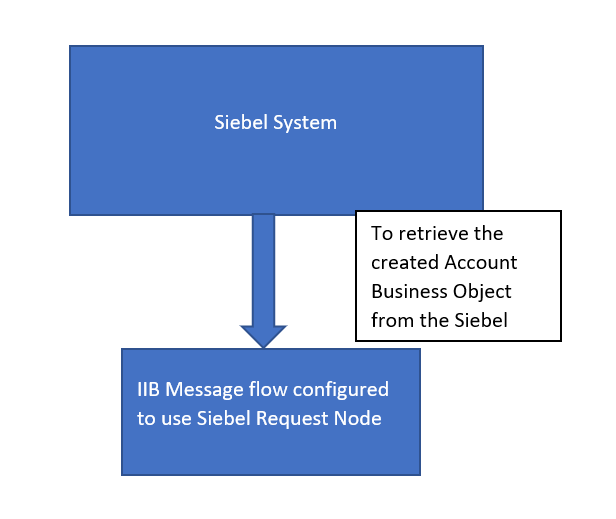
1) Develop a message flow to create an account using Siebel Business Object.
2) How to retrieve the created account for the Account Business Object
3) Develop a message flow to create an account using EAI Siebel Adapter Business Service
4) How to query the created account for the EAI Siebel Adapter Business Service
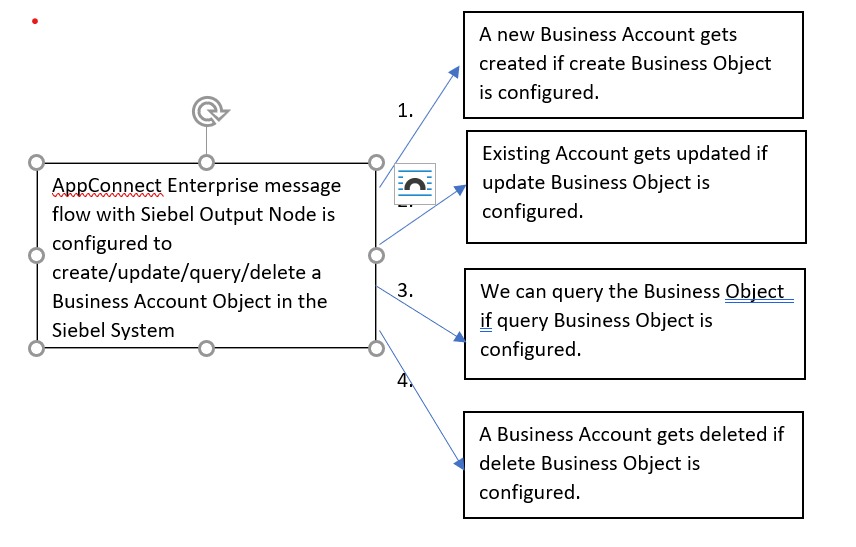
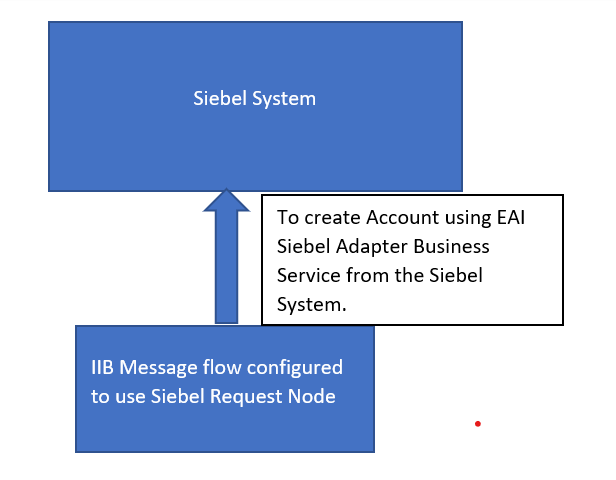
The IBM App Connect Enterprise Siebel Request Node can be used to connect to Siebel Server and perform the following operation.
- Outbound operations like create/update/retrieve/delete of Account Business Object in Siebel Server.
- Outbound operations like create/update/query/synchronize/delete methods provided by EAI Siebel Adapter Business Service of Siebel Server
Part 1: This part of the blog shows how to create a simple message flow to create an account using Siebel Business Object in Siebel System
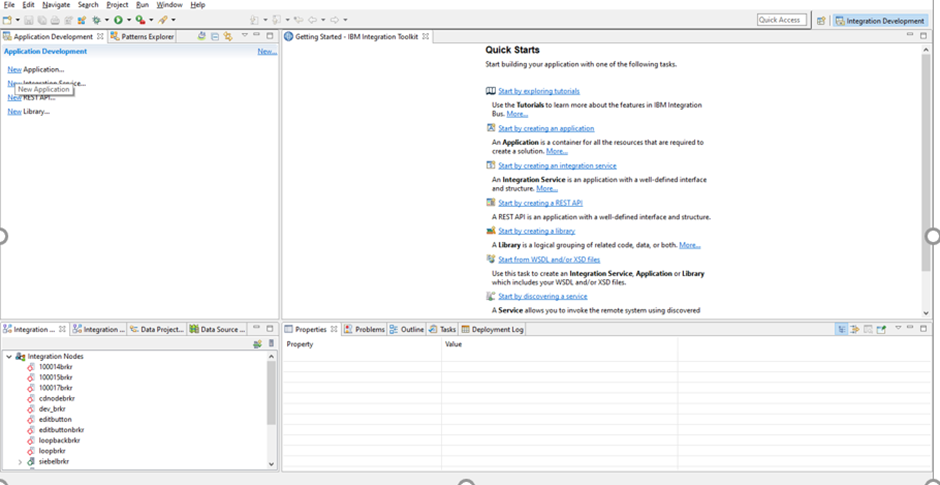
1)Open ACEv11 Toolkit to create an application having Siebel Out adapter and message flow having Siebel Output node.
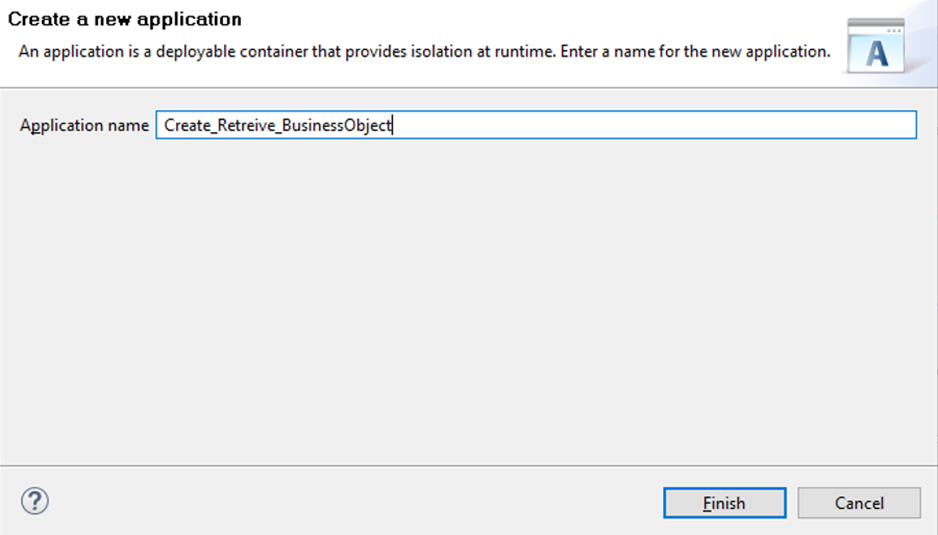
2)Click on “New” Application and provide a name and click on “Finish” button.
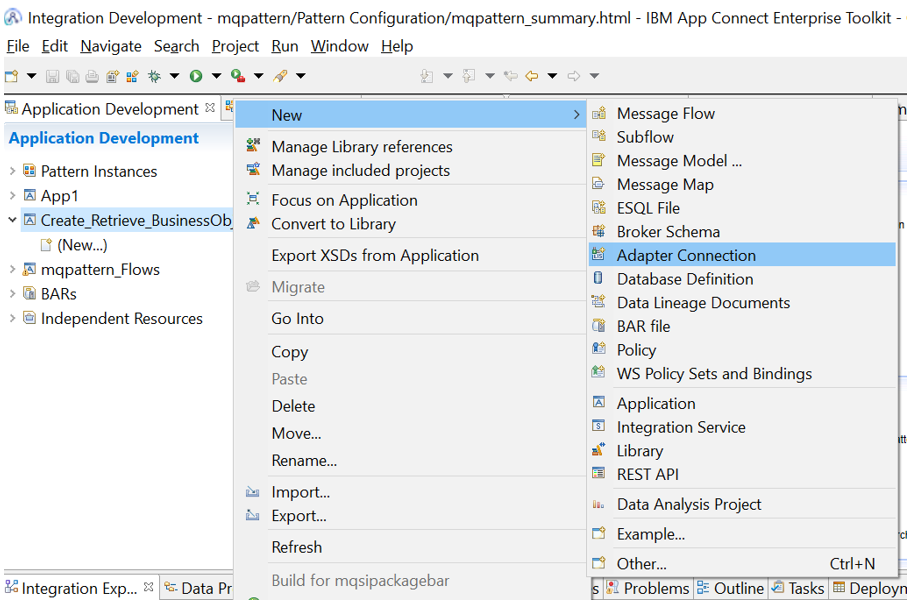
3) Create a new Adapter connection by right clicking the application created->New->Adapter Connection.
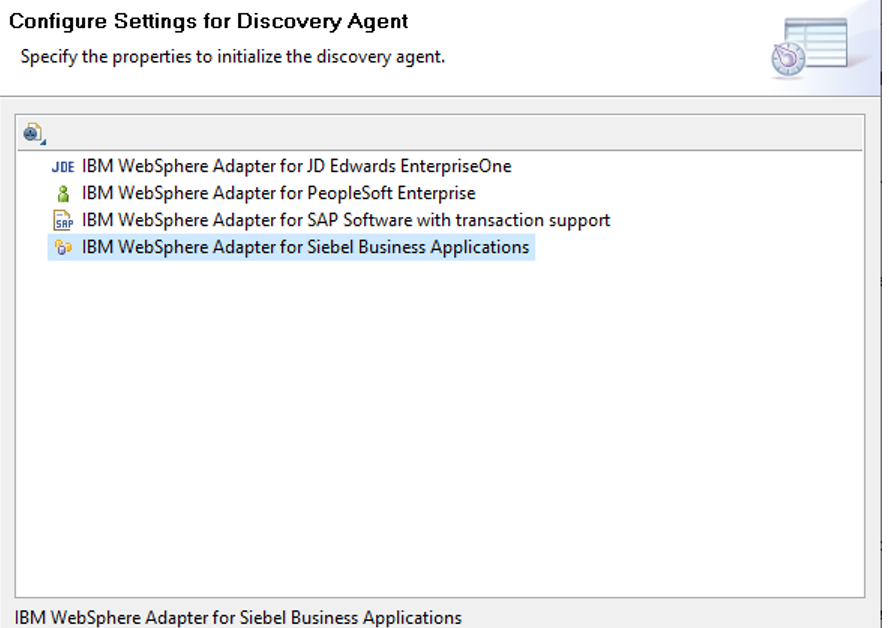
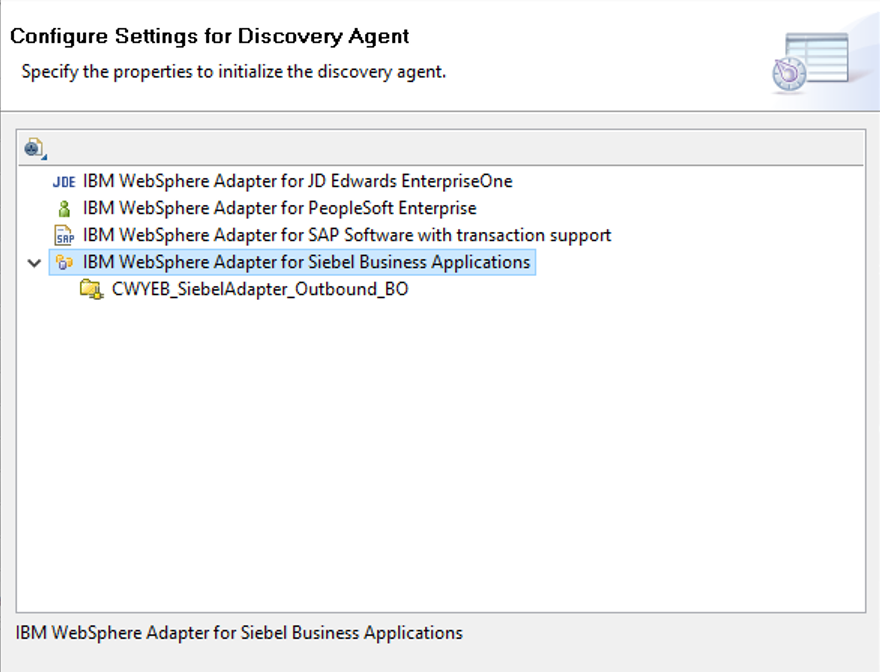
4) Select Siebel
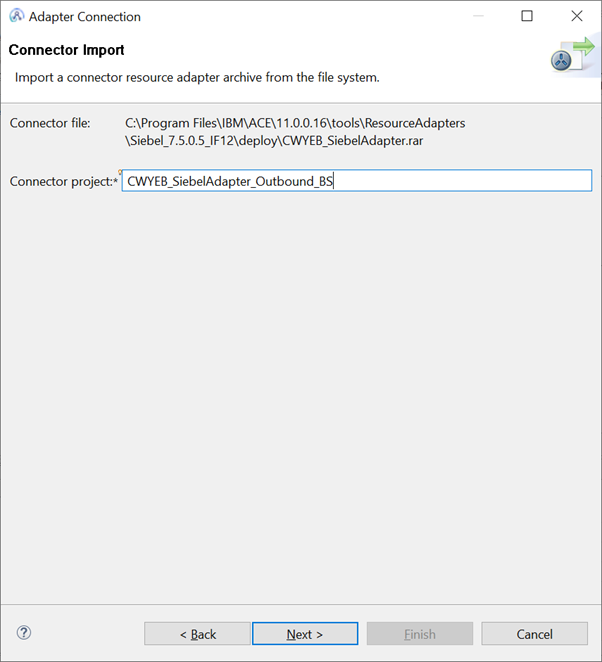
5)provide the connecter project name
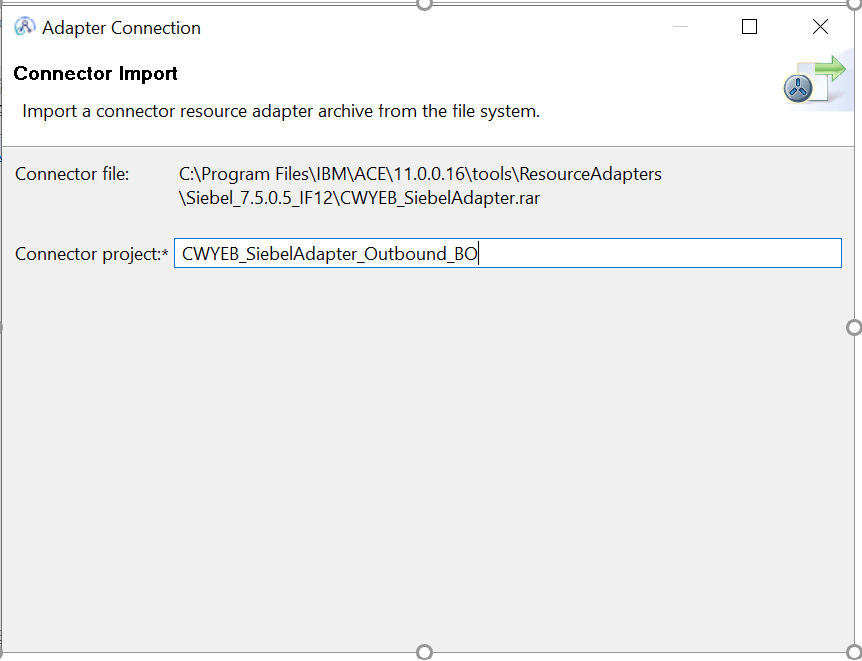
And click on Next Button.
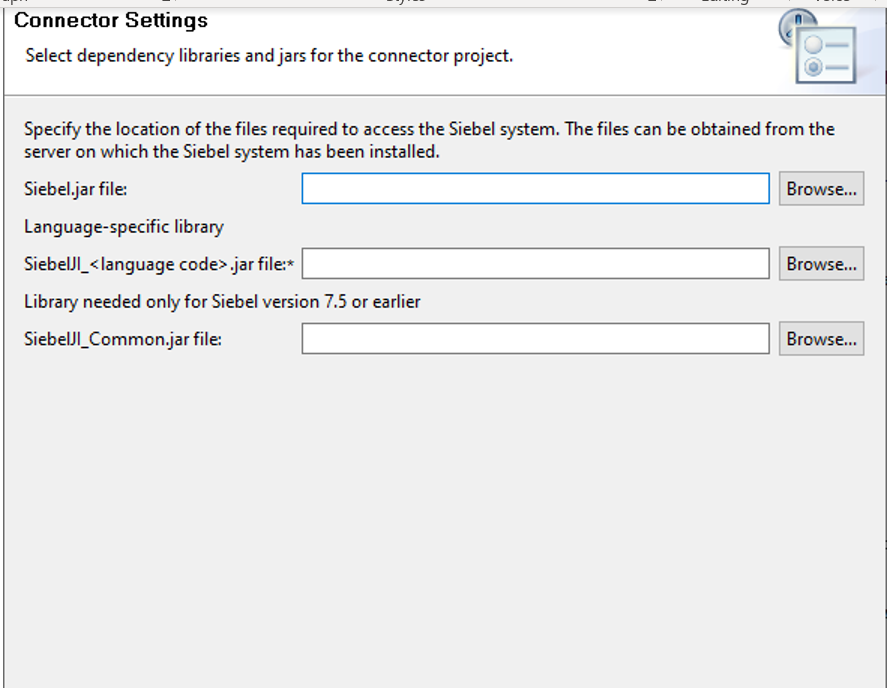
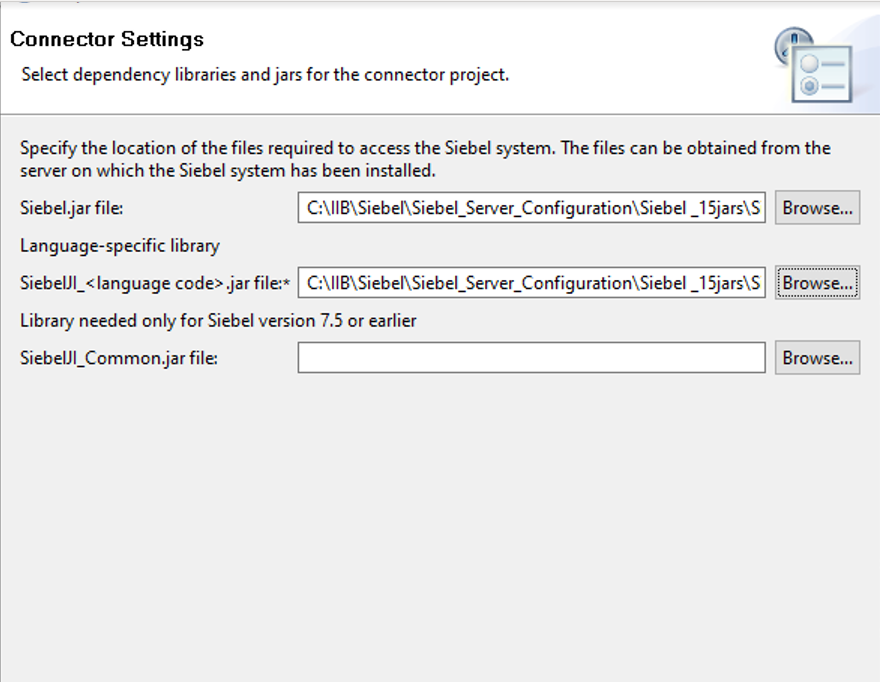
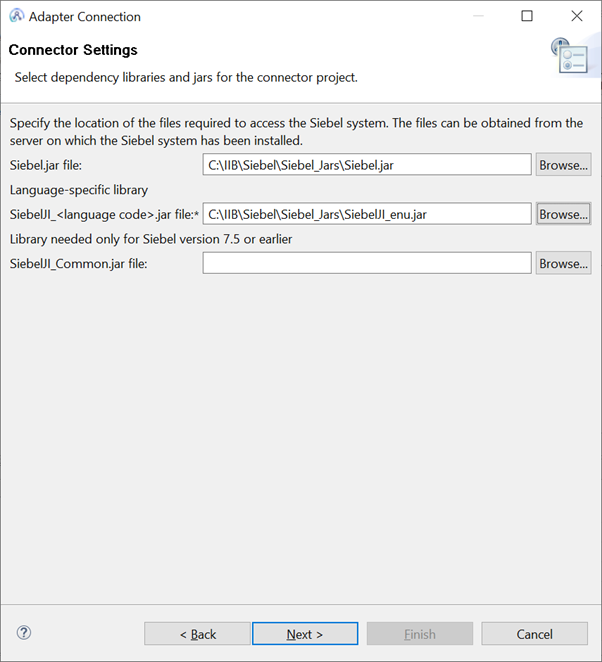
6) Browse for Siebel jar and siebel language jars which are availabe in the Siebel installation and point to the location.
Siebel jars required are : Siebel.jar and SiebelJI_enu.jar .
These jars are available in <Siebel Server installation>\ <Siebel server instance>\CLASSES directory.

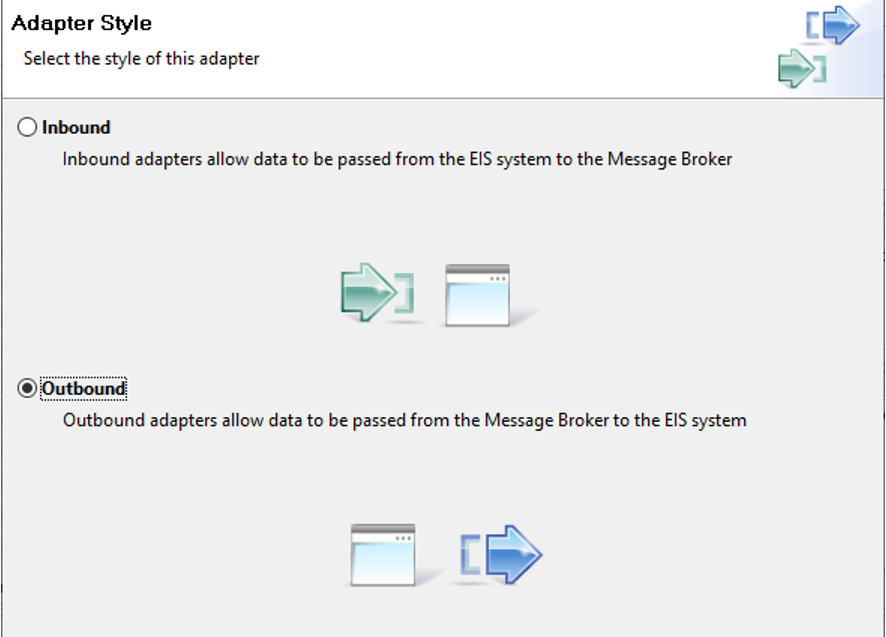
7)Select Outbound as shown below and click on Next

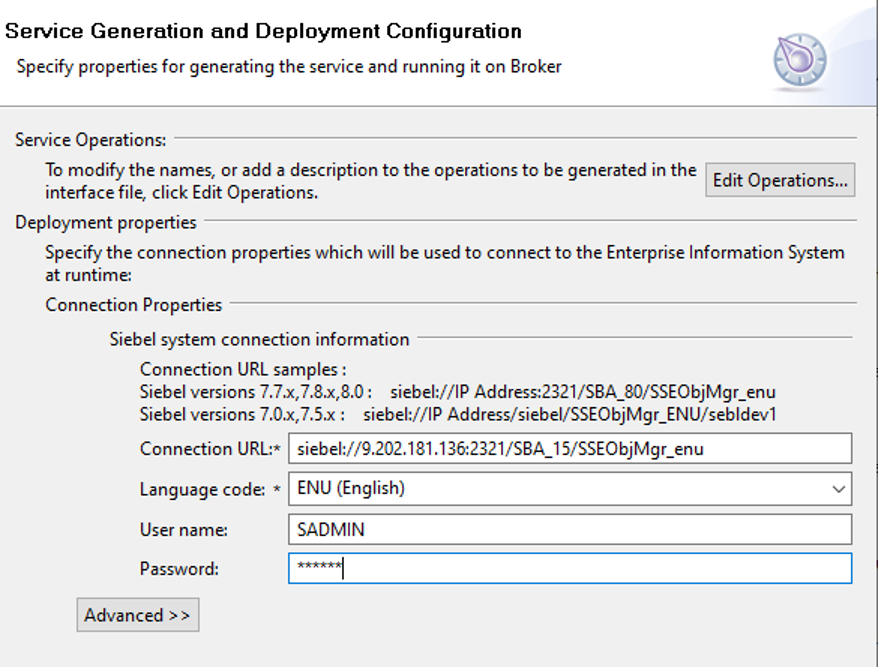
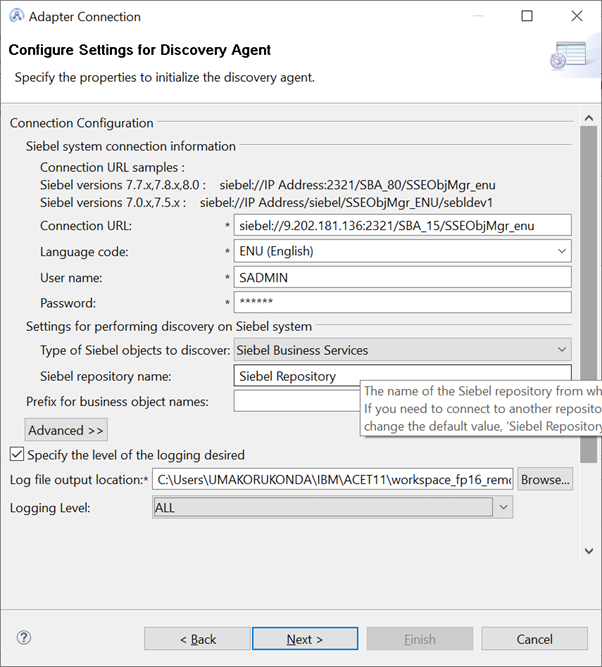
8) Provide connection url , userid , password , select “Business Object “
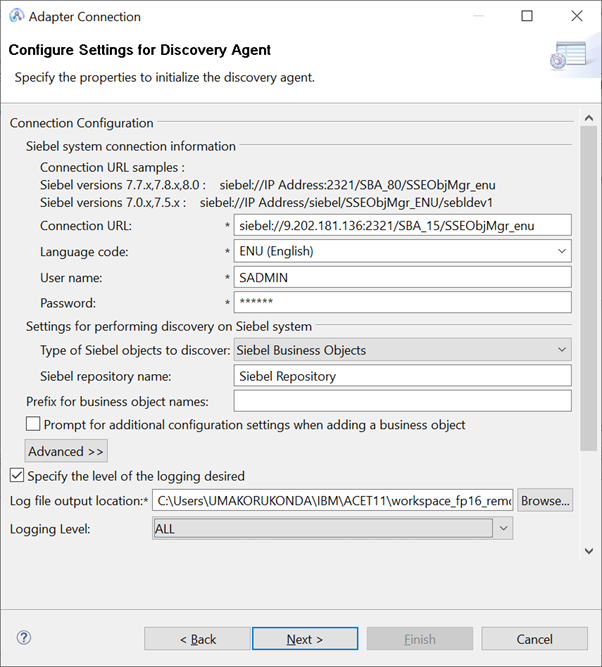
Click on Next button .
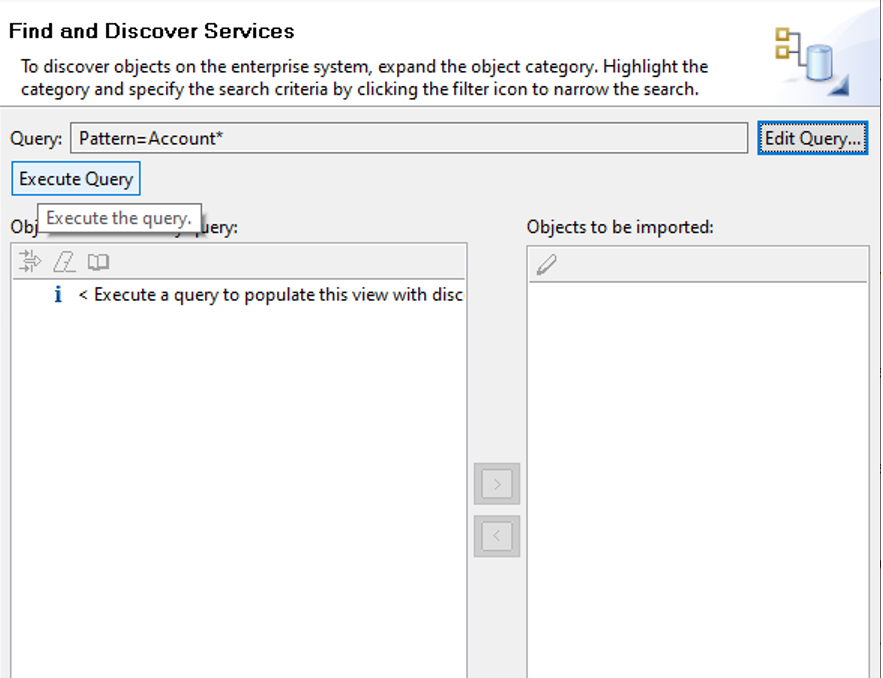
9)Adapter Discovery wizard opens
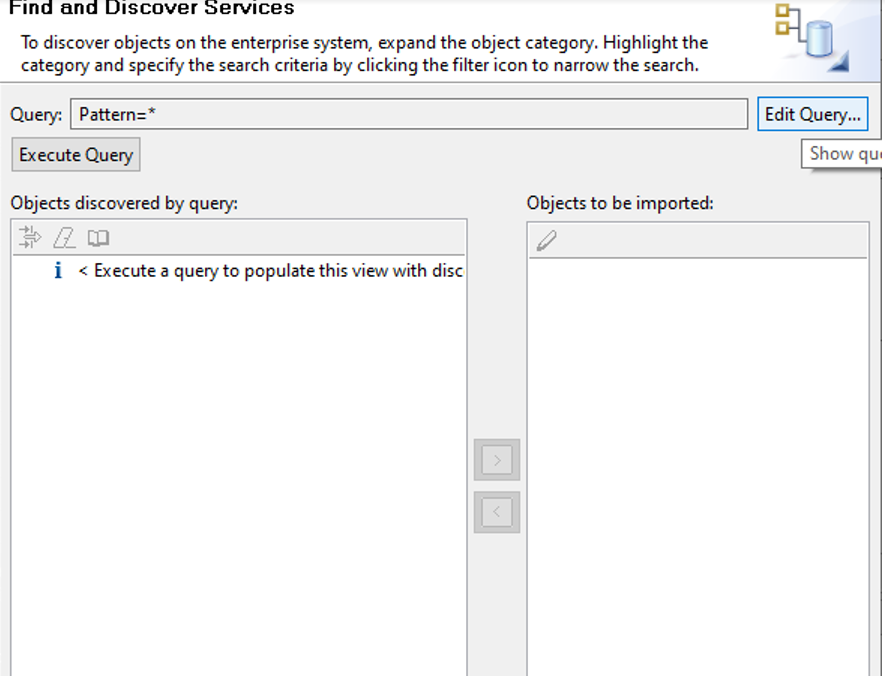
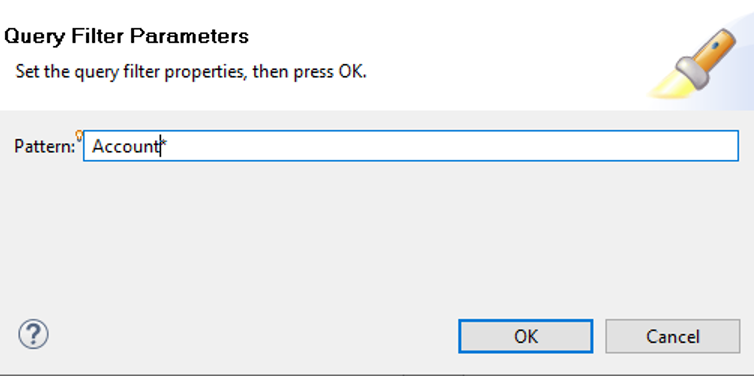
10)Click on ‘Edit Query’ button and Account* as Pattern and click on OK
11)Click on ‘ Execute Query’ button which will fetch the Business Objects from the Siebel Server.
12) Select ‘Account’ Business Object and click on the Right Arrow as shown below.
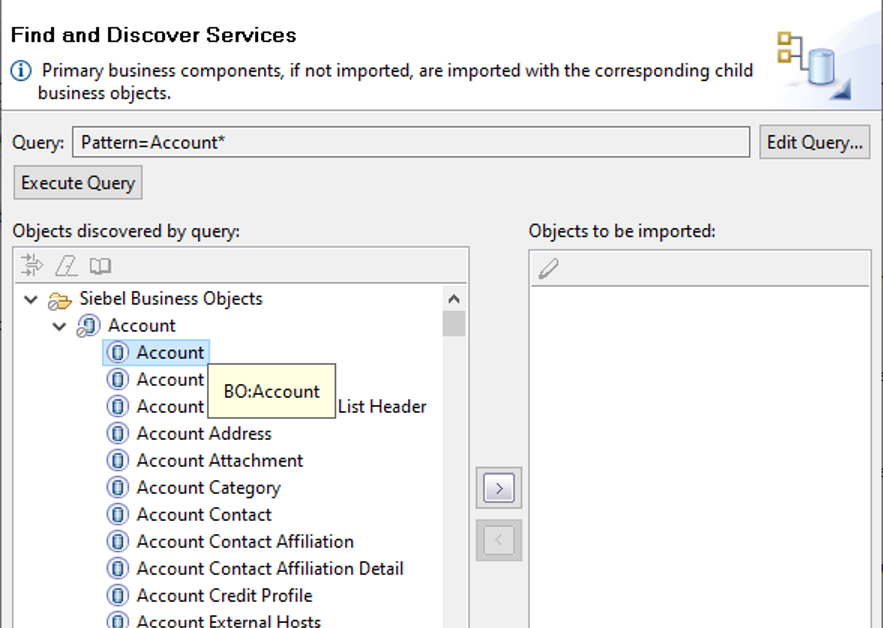
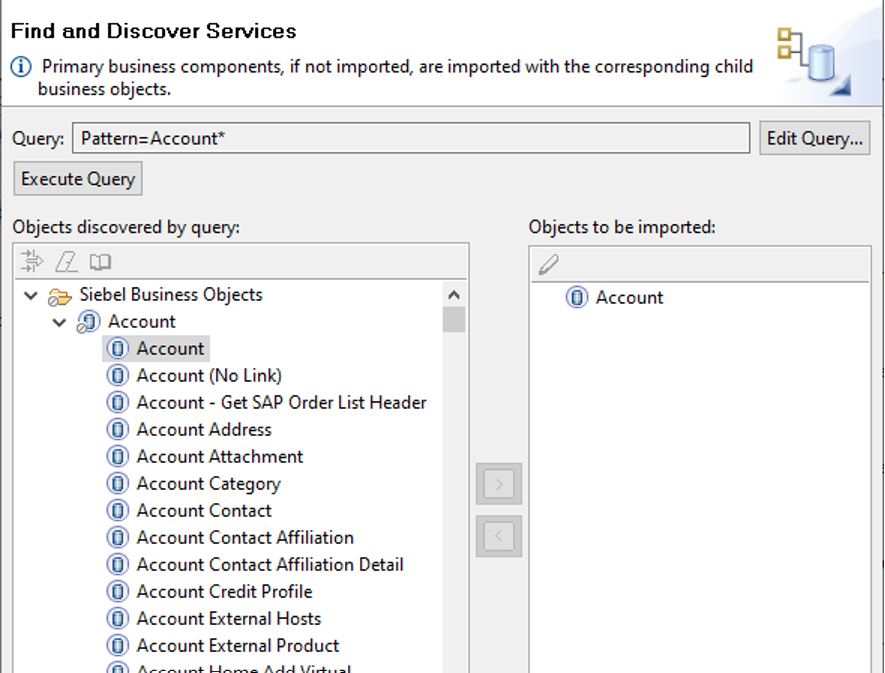
And click on Next.
13) This wizard shows all the functions which Business Object Provides
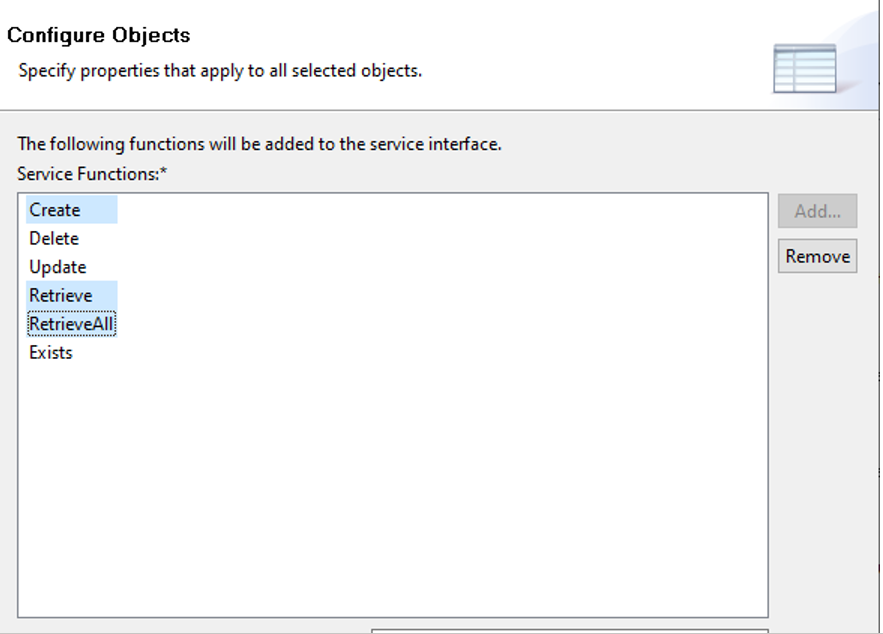
Select All the operations or can select the operations we intend to perform. Here we are selecting Create , Retrieve and RetrieveAll operations as intended in this article.
And click on ‘Next’.
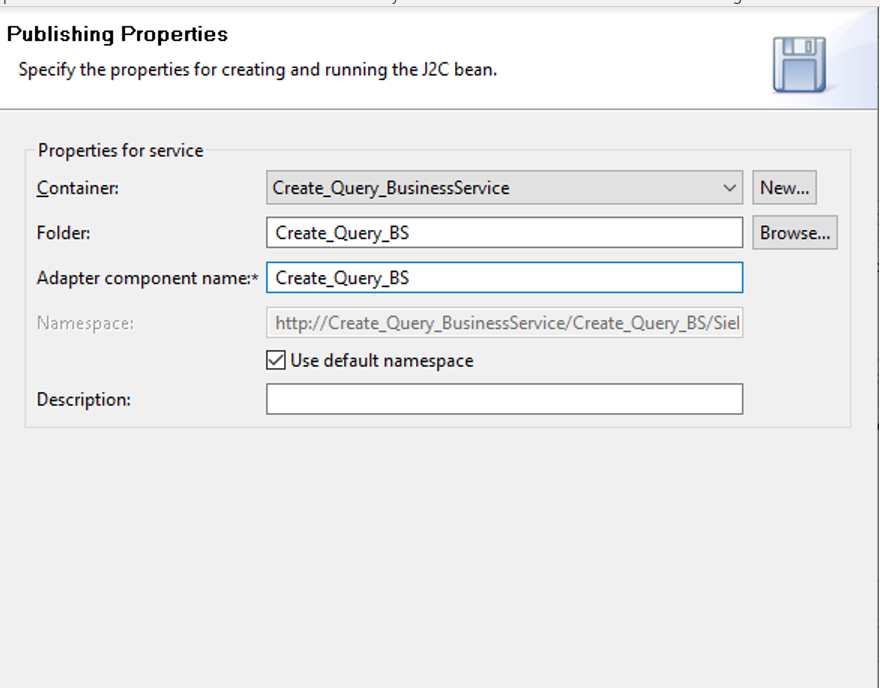
14) Provide the password again and click on Next.
- Select the container correctly and provide a folder name along with ‘Adapter Component Name ‘ as shown below.

And click on Finish.
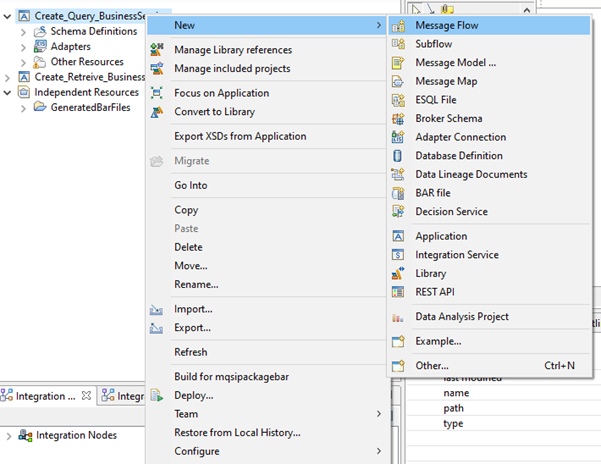
- Create a Message Flow by right click the Application created in step 2.
 And click on Finish.
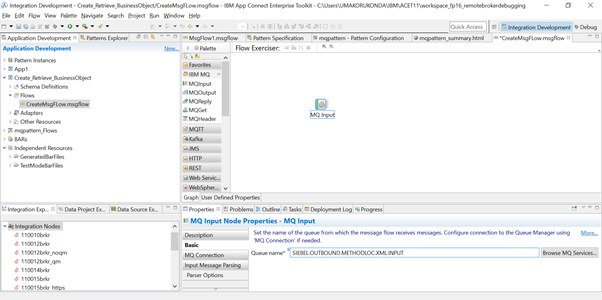
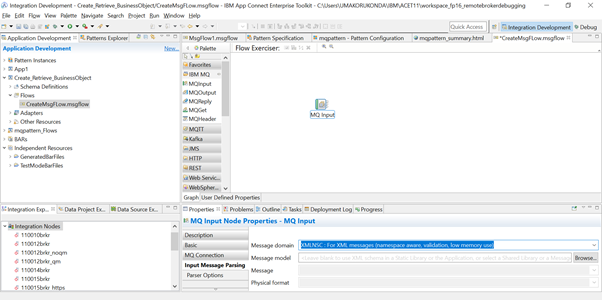
17.Select the message flow and drag MQInput and provide Queue name and input message parsing as XMLNSC parser.
18) Drag Siebel Request Node from WebSphere Adapters Palette And Wire output terminal of MQ Input node to In terminal of Siebel Request Node.
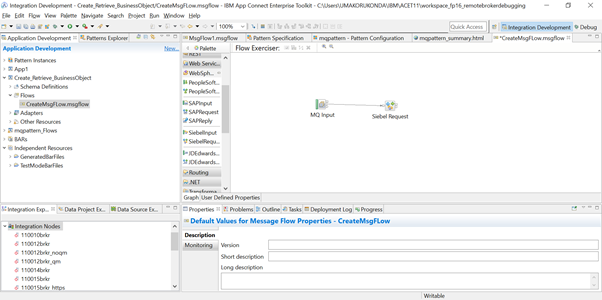
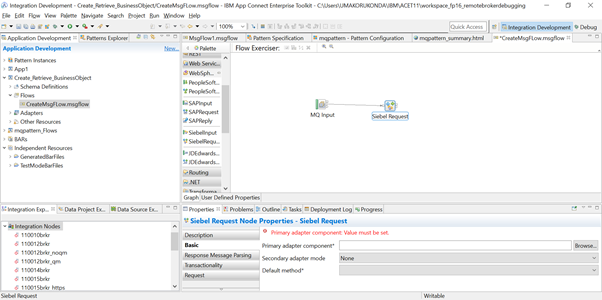
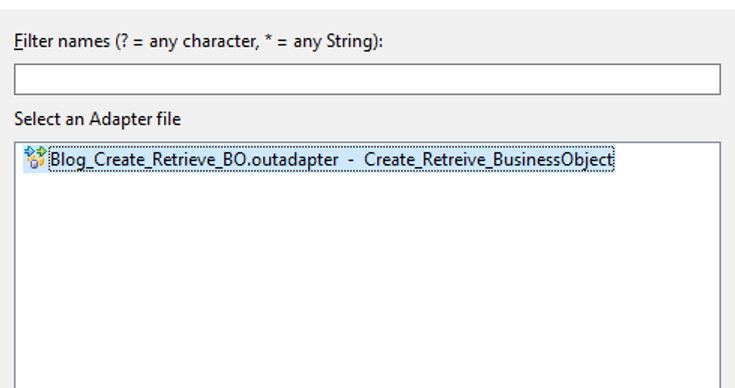
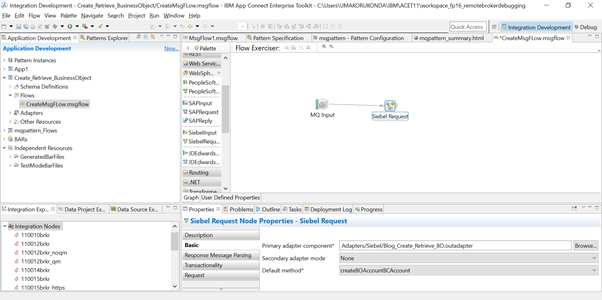
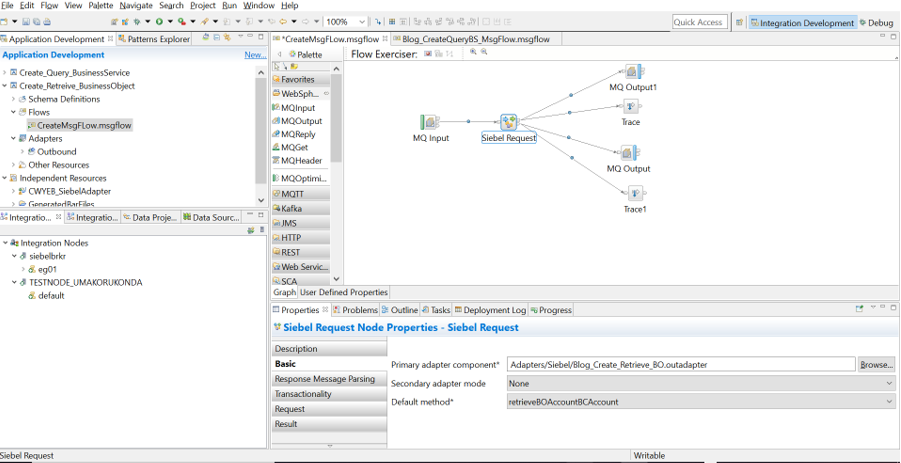
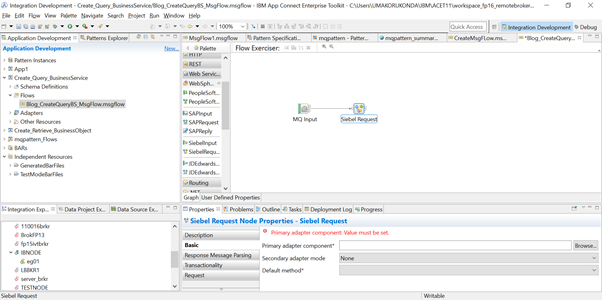
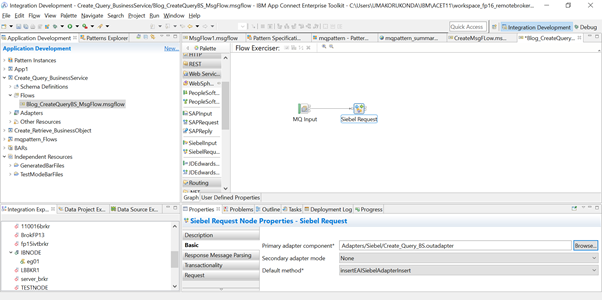
19) Browse for the adapter that was created in step15 in “Primary Adapter component” property in Siebel Request Node .
And select the “createBOAccountBCAccount” method from the drop down from “Default method” property.
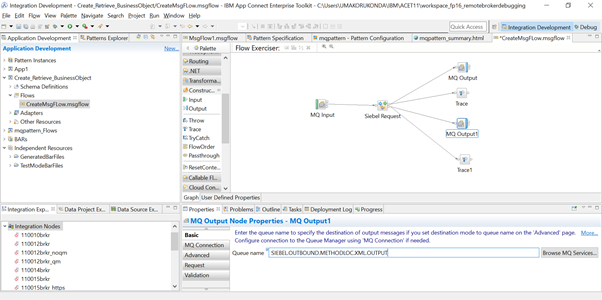
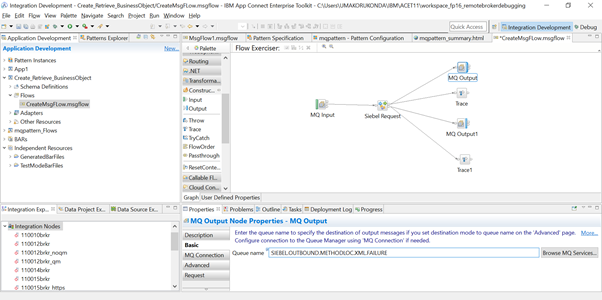
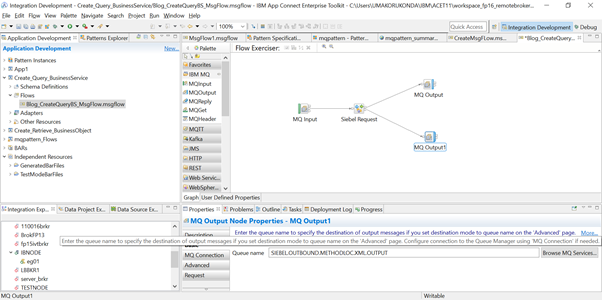
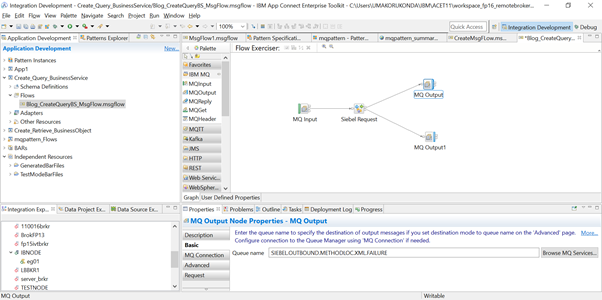
20) Then add two MQ Output nodes to the FAILURE and OUT terminals of the siebel request node respectively.

21) Provide the queue names for the both the MQ Output nodes.
22) Create a Broker with Qmgr. Start the broker and create EG .
23) Point the jarsURL and nativeLibs jar location to the Broker and restart the broker .
mqsireportproperties IBNODE -c AllTypes -o AllReportableEntityNames -r
mqsichangeproperties IBNODE -c EISProviders -o Siebel -n jarsURL -v C:\Siebel_LIB
mqsichangeproperties IBNODE -c EISProviders -o Siebel -n nativeLibs -v C:\Siebel_LIB
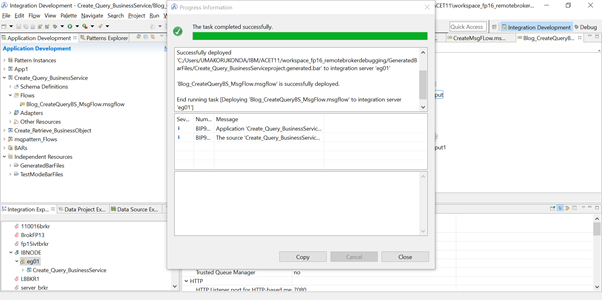
24)Now the Flow is ready to be deployed to the Integration Server Created.
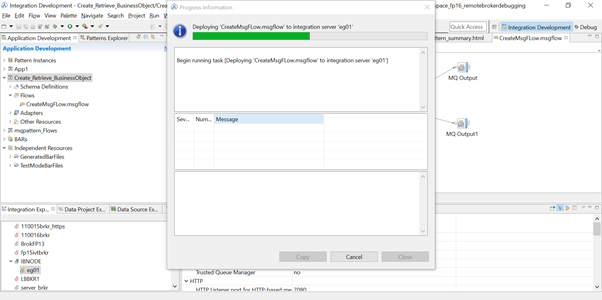
25) Make sure the application is successfully deployed and message flow is running
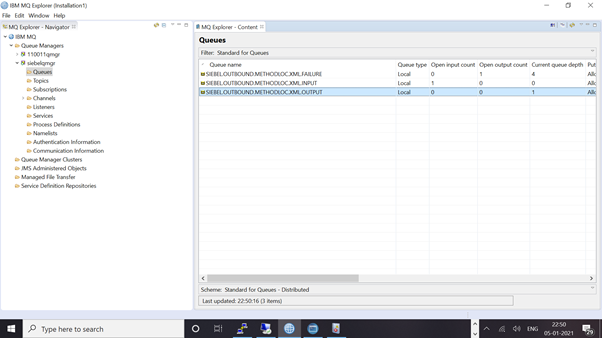
26) Now open the queue from the MQ explorer and send the following message to the from the Input Q configured in the MQ input node.
<BOAccountBCAccount><Name>Siebel_Account_BO_Blog</Name><Address>hyd</Address></BOAccountBCAccount>

27) Browse the SIEBEL.OUTBOUND.METHODLOC.XML.OUTPUT queue and check for the message
Read the data from the MQ output queue configured like as below

<NS1:BOAccountBCAccount xmlns:NS1="http://www.ibm.com/xmlns/prod/wbi/j2ca/siebel/boaccountbcaccount"><Id>1-1MURV</Id><ATMFlag>Y</ATMFlag><AccessLevel>Basic</AccessLevel><AccountCreated>01/06/2022 06:37:45</AccountCreated><AccountCreatedBy>SADMIN</AccountCreatedBy><AccountDisplayValue>Siebel_Account_BO_Blog</AccountDisplayValue><AccountFlag>Y</AccountFlag><AccountNumber>1-1MURV</AccountNumber><AccountStatus>Active</AccountStatus><AccountTypeCode>Customer</AccountTypeCode><AccountTypeCodeCalc>Customer</AccountTypeCodeCalc><AccountUpdated>01/06/2022 06:37:45</AccountUpdated><AccountUpdatedBy>SADMIN</AccountUpdatedBy><AssessmentStarValue>4#7#7668111106#The query expression on field 'Assessment Value' is not valid. Please revise and try again.(SBL-DAT-00399)7#766819153#CSSString doesn't support operator '/'(SBL-DAT-00479)</AssessmentStarValue><AssignmentDenormFlag>N</AssignmentDenormFlag><AssignmentExcluded>N</AssignmentExcluded><AssignmentManualFlag>Y</AssignmentMa
Account is created .
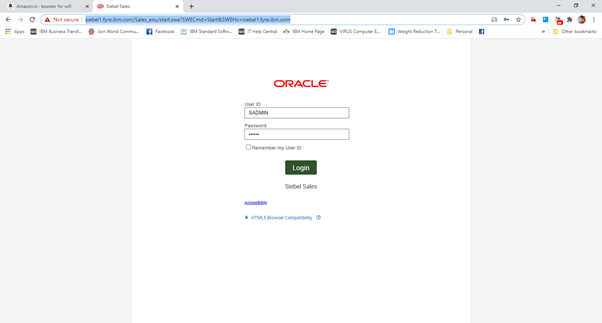
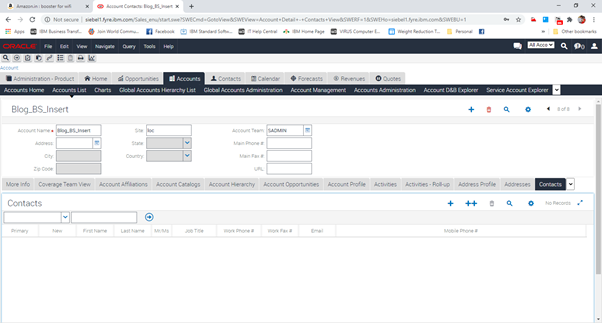
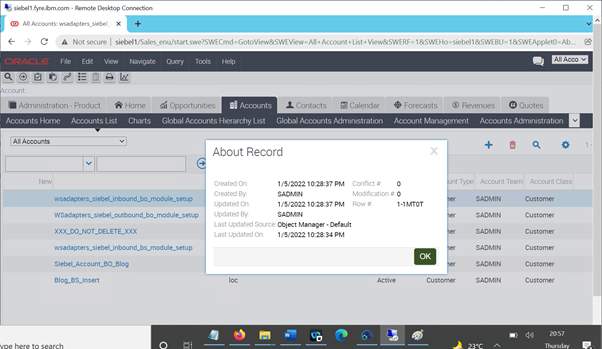
28) Open the Siebel Application and query for the Account with the Name which we created.
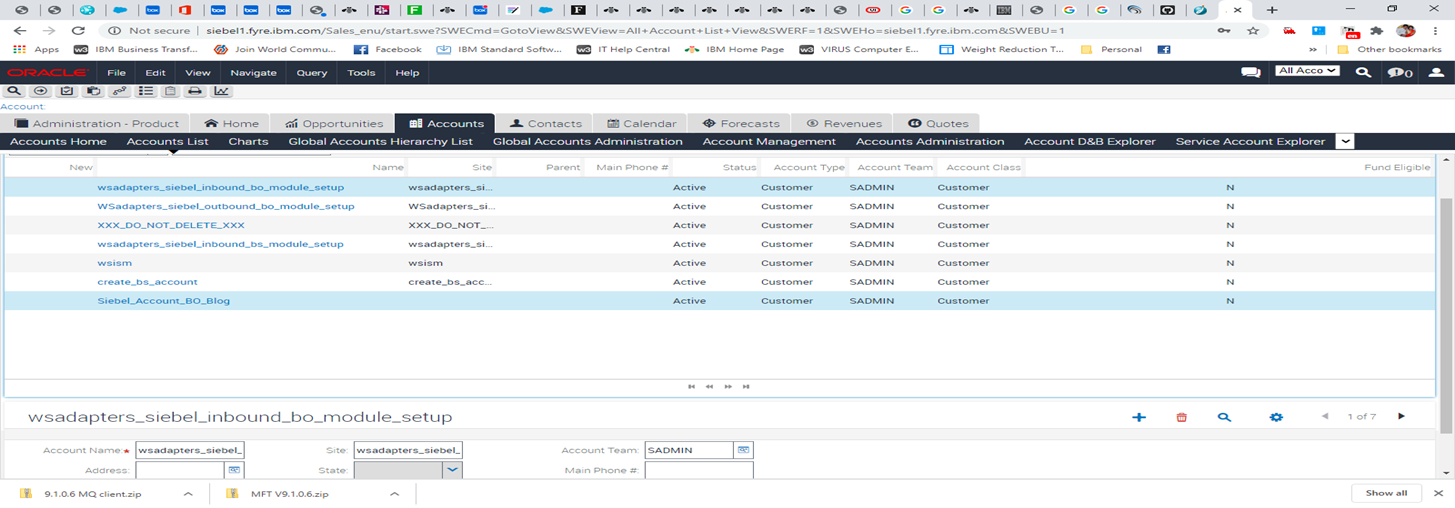
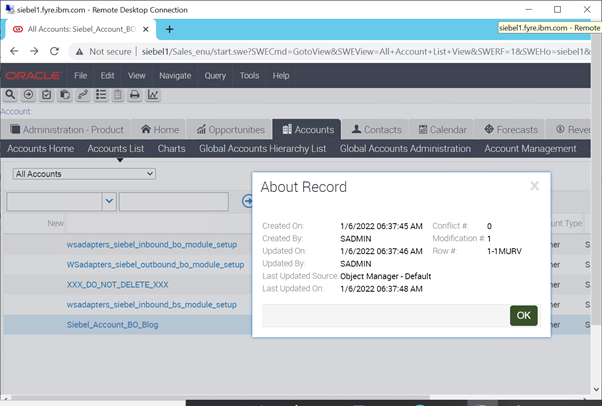
Account is successfully created.Use Ctrl+Alt+K key on the created account record and it will display the Row # which we can use in Retrieve operation as an Input value for ‘Id’ property.
For example :
Part 2): This part of the blog shows how to create a simple message flow to Retrieve the created Account by selecting “retrieveBOAccountBCAccount” from the Siebel Request Node.
 29) Change the Default method in the Siebel Request Node properties to retrieveBOAccountBCAccount as shown below
And Redeploy the message flow
30) Send the below input
<BOAccountBCAccount><Id>1-1MURV</Id></BOAccountBCAccount>
And check the data in mq output queue.
It should retrieve the account details

<NS1:BOAccountBCAccount xmlns:NS1="http://www.ibm.com/xmlns/prod/wbi/j2ca/siebel/boaccountbcaccount"><Id>1-1MURV</Id><ATMFlag>Y</ATMFlag><AccessLevel>Basic</AccessLevel><AccountCreated>01/06/2022 06:37:45</AccountCreated><AccountCreatedBy>SADMIN</AccountCreatedBy><AccountDisplayValue>Siebel_Account_BO_Blog</AccountDisplayValue><AccountFlag>Y</AccountFlag><AccountNumber>1-1MURV</AccountNumber><AccountStatus>Active</AccountStatus><AccountTypeCode>Customer</AccountTypeCode><AccountTypeCodeCalc>Customer</AccountTypeCodeCalc><AccountUpdated>01/06/2022 06:37:46</AccountUpdated><AccountUpdatedBy>SADMIN</AccountUpdatedBy><AssessmentStarValue>4#7#7668111106#The query expression on field 'Assessment Value' is not valid. Please revise and try again.(SBL-DAT-00399)7#766819153#CSSString doesn't support operator '/'(SBL-DAT-00479)</AssessmentStarValue><AssignmentDenormFlag>N</AssignmentDenormFlag><AssignmentExcluded>N</AssignmentExcluded><AssignmentManualFlag>Y</AssignmentMa
Part 3 : This part of the blog shows to create a simple message flow to create an account using EAI Siebel Adapter Business Service
31) Create a new Application and provide a name. Then click on ‘Finish’.

32)Create a new Adapter connection as shown below.

33) Select the Siebel Adapter
34) Give a name to the Connector Project .
35) Browse for Siebel jar and siebel language jars which are availabe in the Siebel installation and point to the location.
Siebel jars required are : Siebel.jar and SiebelJI_enu.jar .
These jars are available in <Siebel Server installation>\ <Siebel server instance>\CLASSES directory.
Siebel jars required are : Siebel.jar and SiebelJI_enu.jar .
These jars are available in <Siebel Server installation>\ <Siebel server instance>\CLASSES directory.
- Select “Outbound” and click on Next
- Provide connection url , userid , password .Select Siebel Business Service for “Type of Business Objects to Discover “
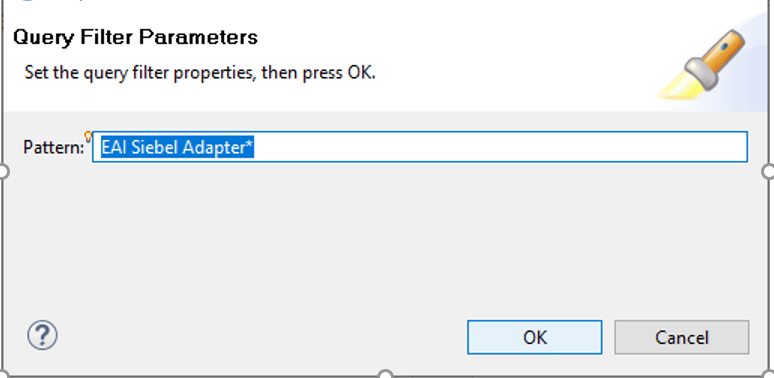
- Click on ‘Edit Query ‘ button and enter ‘EAI Siebel Adapter*’ . And then click on Execute Query.
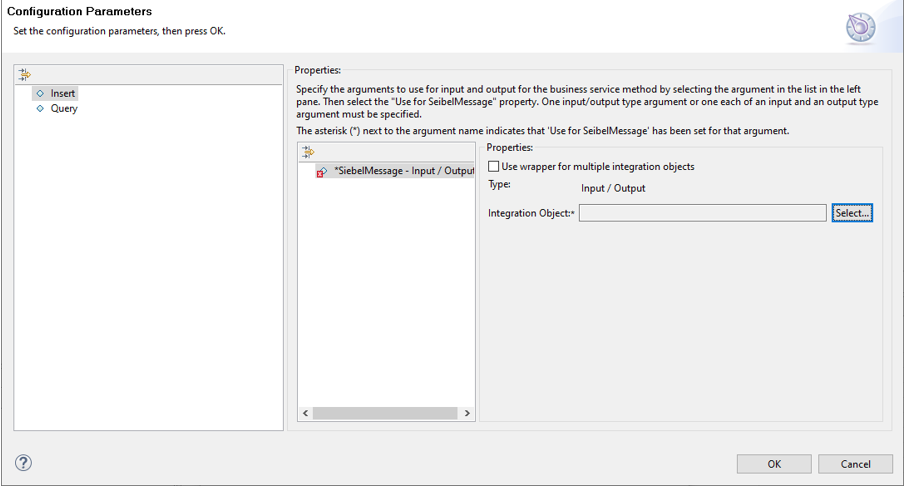
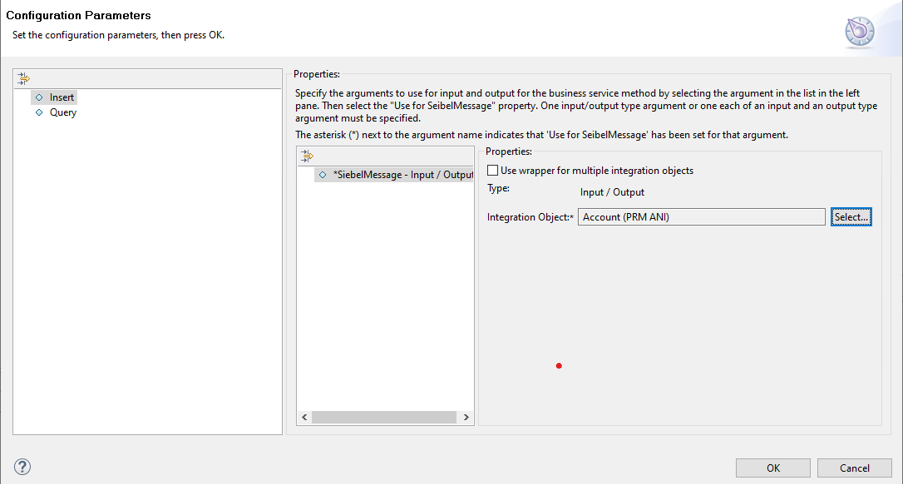
It displays all the ‘Business Services’ exposed by Siebel and methods in it. Select ‘Insert’ and ‘Query’ methods from ‘EAI Siebel Adapter’ Siebel business function. And click on the right arrow.
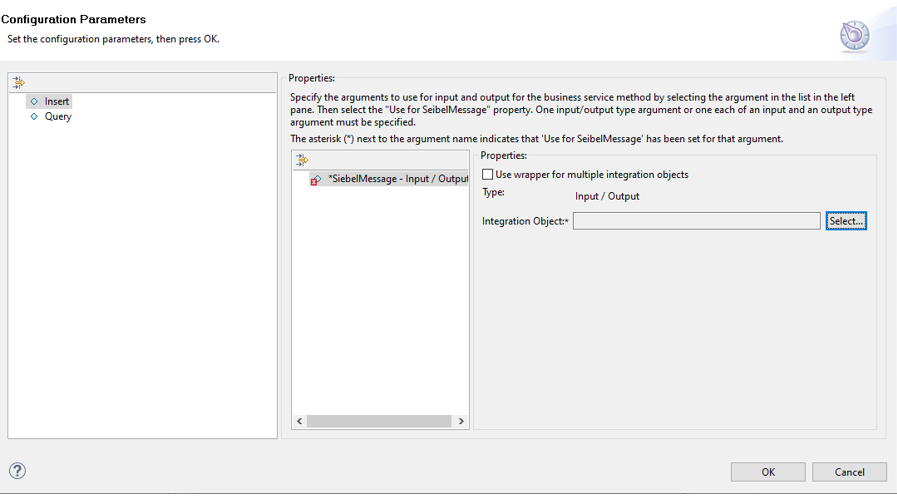
- Now for each method , we need to select the Integration Object Associated with the Business Service.
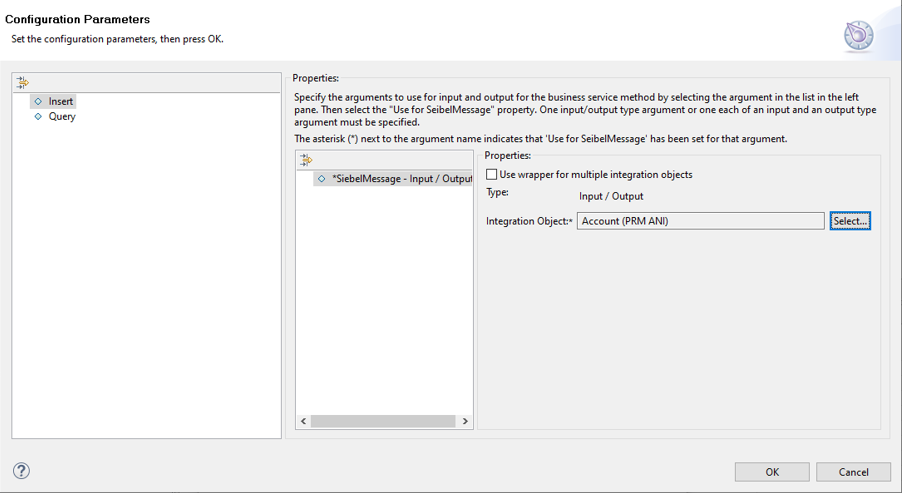
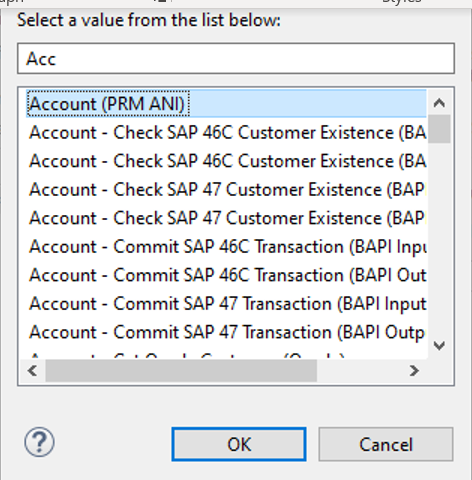
- Click on the select button which opens a pop up window and search and select for Account(PRM ANI).
Query :
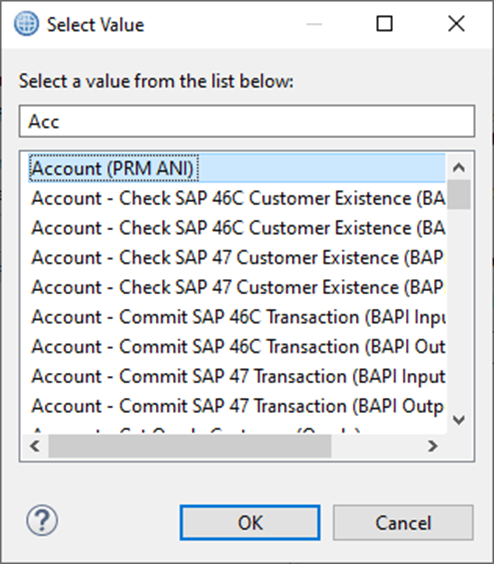
And click on ‘OK’.
Query:
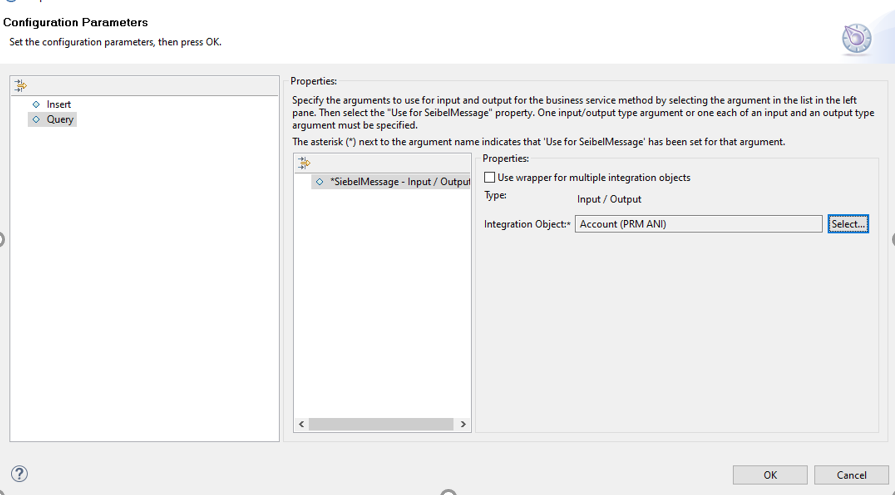
And click on ‘OK’.
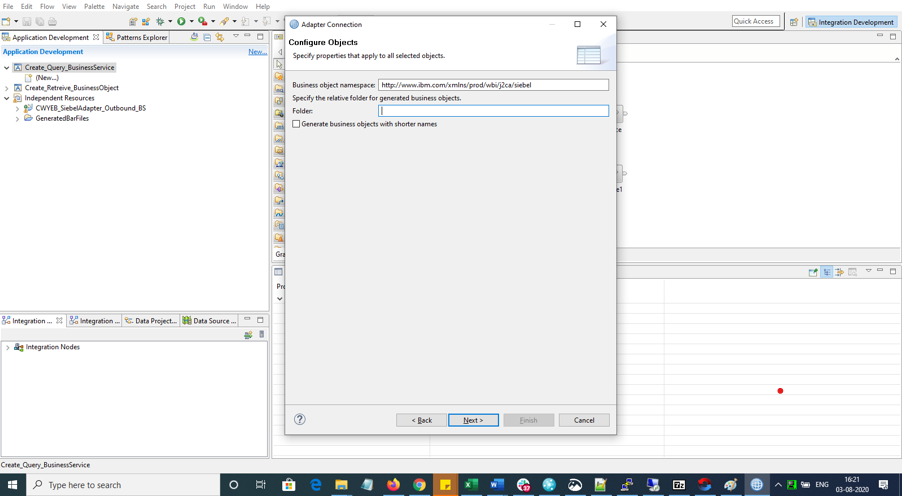
41) Now click in ‘Next’.
42)Go with defaults and click on ‘Next’.
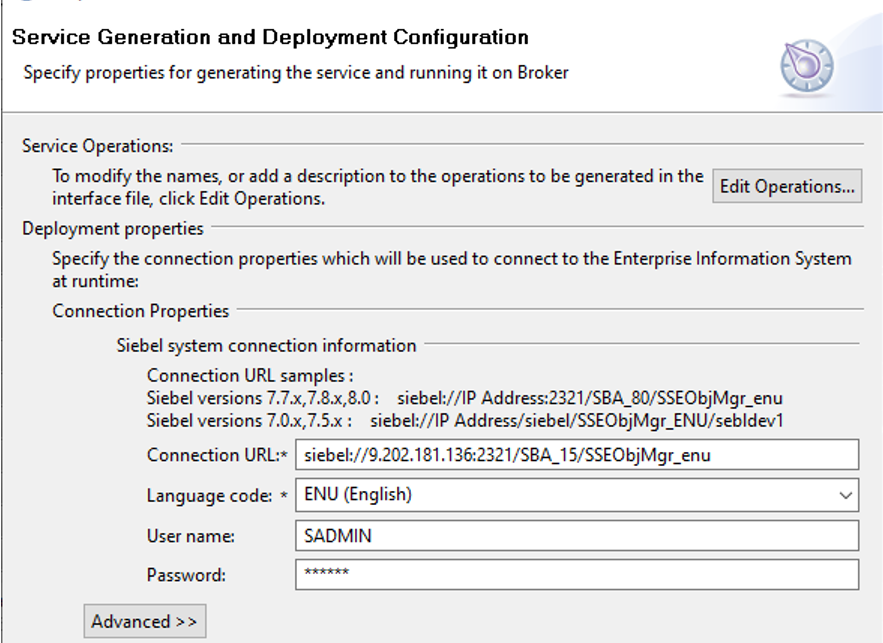
43) Provide Password again in ‘Service Generation and Deployment Configuration’ windows And click on ‘Next’.
44)Select the Application correctly in the container property. Then provide Folder and Adapter component name as seen in the below wizard.
And click on Finish.
This creates Adapter connection for you.
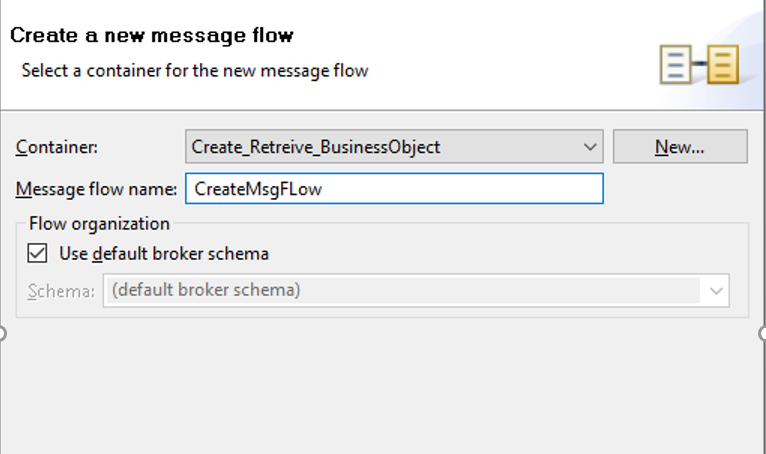
45)Now we will create a message flow . Right Click the Application created above. New -> Message Flow.
46)Provide a name for Message Flow.
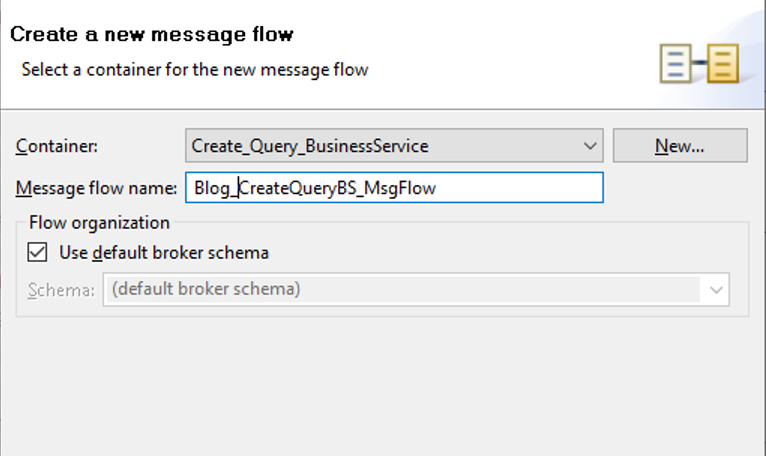
And click on Finish.
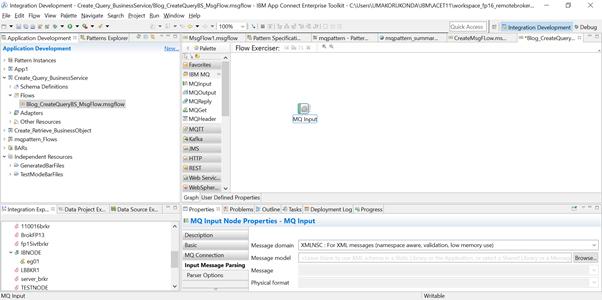
47) Draw MQ Input node from WebSphere MQ Palette .And Provide Queue name in ‘Basic’ properties of the node.

48) Select XMLNSC parser for Message Domain
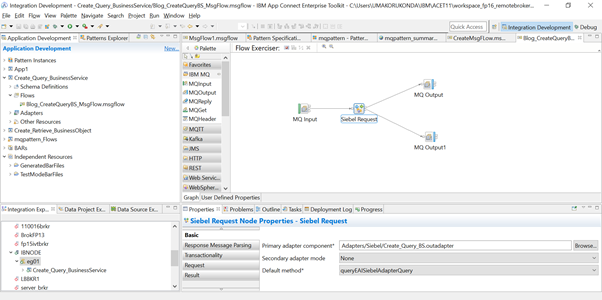
49)Drag the siebel request node from WebSphere Adapters and Wire the o/p terminal of mq input node to the input siebel request node.
50)Select the adapter connection created in primary adapter component and insertEAISiebelAdapter for default method.
51)Add MQ Output nodes terminals to the failure n out terminal of siebel request node.
And provide the queue names.
52)The message flow is ready to be deployed. Deploy the message flow to an EG where broker is configured with the siebel jars.
Siebel jars required are : Siebel.jar and SiebelJI_enu.jar .
These jars are available in <Siebel Server installation>\ <Siebel server instance>\CLASSES directory.
> Create a Broker with Qmgr. Start the broker and create EG .
> Point the jarsURL and nativeLibs jar location to the Broker.
mqsireportproperties IBNODE -c AllTypes -o AllReportableEntityNames -r
mqsichangeproperties IBNODE -c EISProviders -o Siebel -n jarsURL -v C:\Siebel_LIB
mqsichangeproperties IBNODE -c EISProviders -o Siebel -n nativeLibs -v C:\Siebel_LIB
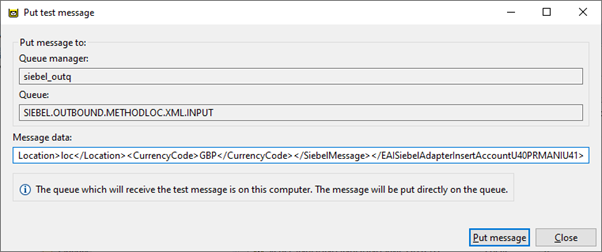
53) Once the message flow is successfully deployed and started. Send the below message to MQ Input Queue.
<EAISiebelAdapterInsertAccountU40PRMANIU41><SiebelMessage><Name>Blog_BS_Insert</Name><Location>loc</Location><CurrencyCode>GBP</CurrencyCode></SiebelMessage></EAISiebelAdapterInsertAccountU40PRMANIU41>
54)Browse for the message in the MQ output queue.
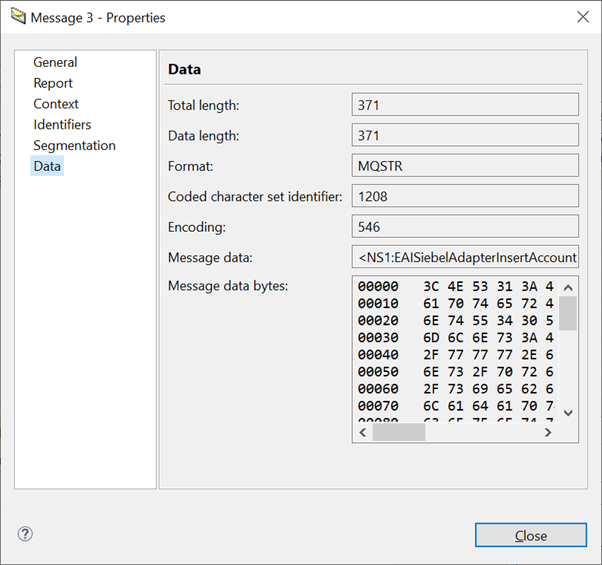
<NS1:EAISiebelAdapterInsertAccountU40PRMANIU41 xmlns:NS1="http://www.ibm.com/xmlns/prod/wbi/j2ca/siebel/eaisiebeladapterinsertaccountu40prmaniu41"><ErrorCode>0x0</ErrorCode><PrimaryRowId>1-1MV1B</PrimaryRowId><SiebelMessage><CurrencyCode>GBP</CurrencyCode><Location>loc</Location><Name>Blog_BS_Insert</Name></SiebelMessage></NS1:EAISiebelAdapterInsertAccountU40PRMANIU41>
Similarly we will check in the Siebel Sales Application.
And the Row Id is
Part 4 : This part of the blog shows how to create a message flow to use “Query operation” to query the Account EAI Business Service .

Change the Default method to queryEAISiebelAdapterQuery’ in the Siebel Request Node in the message flow created in Part 3.
56) Save and Deploy the flow to the Integration Server.
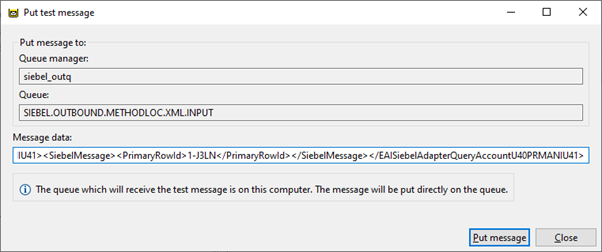
57) Send the below input to the queue configured in the siebel request node
<EAISiebelAdapterQueryAccountU40PRMANIU41><SiebelMessage><PrimaryRowId>1-1MV1B </PrimaryRowId></SiebelMessage></EAISiebelAdapterQueryAccountU40PRMANIU41>
58)Check the output in MQ output node configured in the message flow
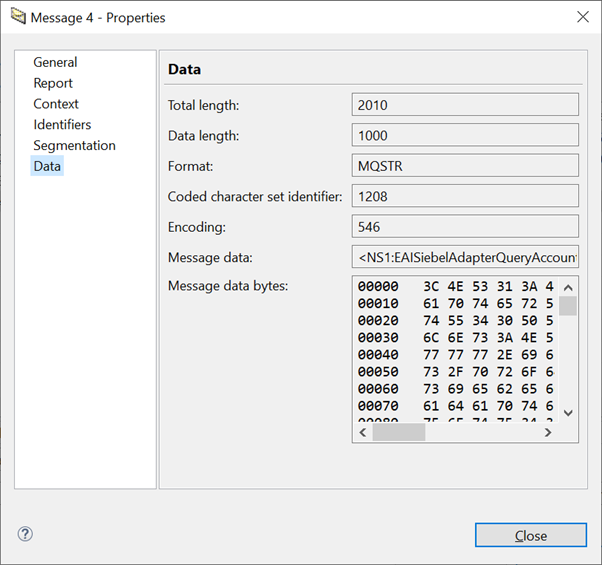
Troubleshooting Tips:
1)Make sure these Siebel gateway and Siebel Server is running

2) Test connection to the Datasource created for the Siebel Server works.

Click on configure for the System DSN used for Siebel and then click on Test connection Button as shown below.
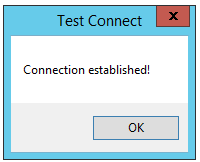
3)If Test connection doesn’t work , then login to the oracle machine and start the listener.
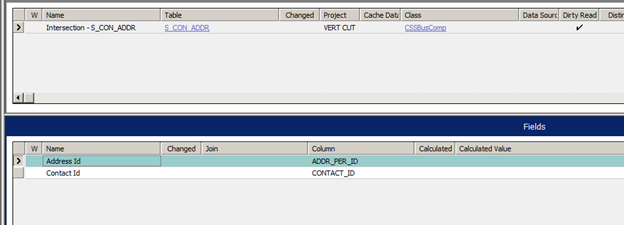
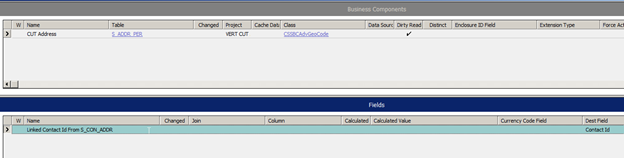
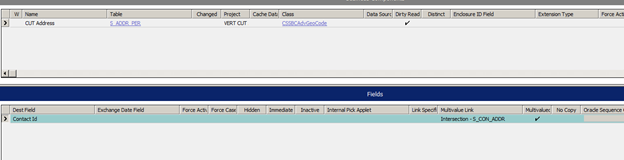
4) ) Siebel Setup for Query method of a Business Service.
4a) Create BC
4b)Create Link
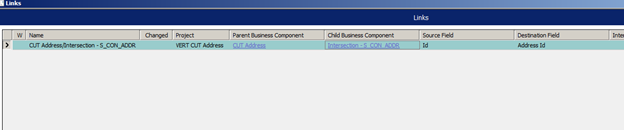
4c)Under CUT Address BC, create Multi value link
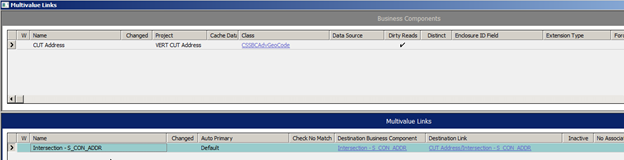
4d)Create Field
4e) Compile every modified object and then the project.
4f) Unlock the project later.
Reference Links:
Siebel Request node:
https://www.ibm.com/support/knowledgecenter/SSMKHH_10.0.0/com.ibm.etools.mft.doc/ac37320_.html
WebSphere Configuration properties for Siebel
https://www.ibm.com/support/knowledgecenter/SSMKHH_10.0.0/com.ibm.etools.mft.doc/ac37440_.html