Configuring Siebel Input Node of AppConnect Enterprise with Siebel EIS server
This article covers in detail
1) On how to configure Event table used for Siebel Input Node to interact with the Siebel Server.
2) To create a simple message flow to poll the events that are triggered due to create/update/delete of Account Business Object in Siebel Server using ‘Account’ Business object.
3) To create a simple message flow to poll the events that are triggered due to create/update/delete of Account Business Object in Siebel Server using ‘EAI Siebel Adapter ‘Business Service.
We will use “IBM App Connect Enterprise Siebel Input Node” that connects to Siebel Server and poll events that are triggered due to create/update/delete of Account Business Object in Siebel Server.
Part1: Event table configuration:
1a) Locate the Scripts folder at Install_dir/tools/ResourceAdapters/Siebel_version/Scripts.
The Scripts folder contains two folders: Siebel7.x.x and Siebel8.0. Each version has an Event_pkg folder, which contains a .sif file and a number of .js scripts. You use the .sif file to create the event components; it can add business objects, views, and all other Siebel objects to the Siebel repository. The .js scripts help you to create Siebel triggers.
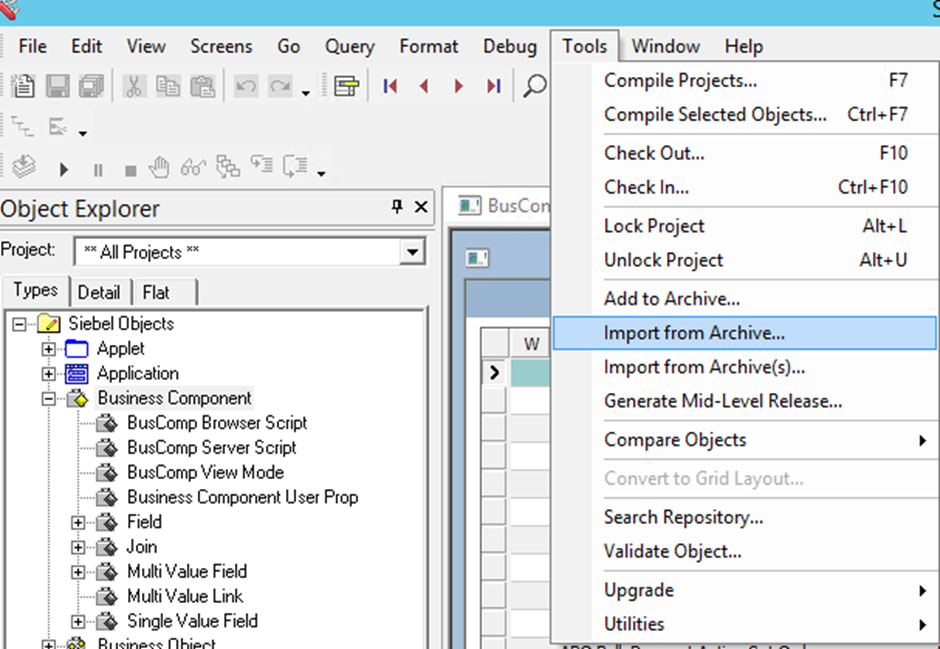
1b) To use the .sif file:
Open Siebel tools and click Tools > Import.
Import the .sif file.
Browse for the IBM_EVENT_V8.sif file that is located under install_dir/tools/ResourceAdapters/Siebel_version/Scripts
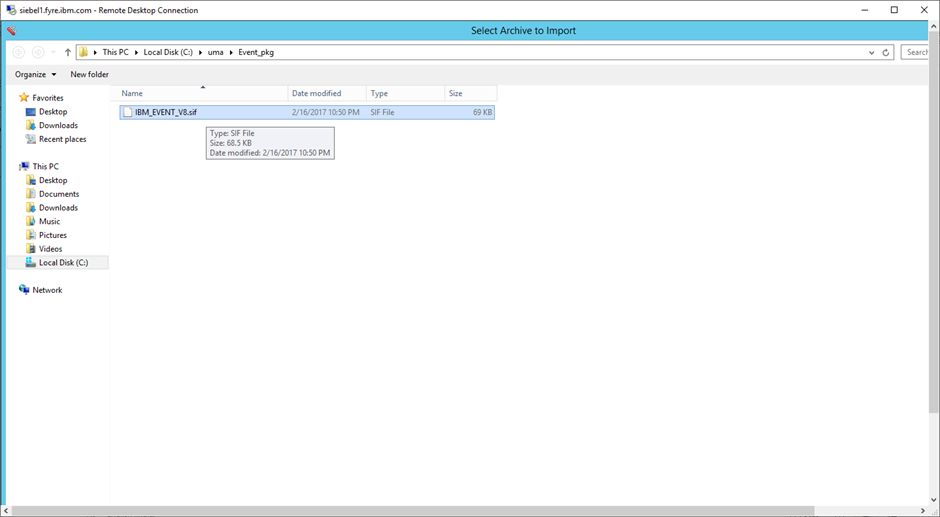
Choose the merge option while Importing the sif to the “IBM” project created to merge the differences between the .sif file and the Siebel repository.
Recompile the repository into a Siebel repository file (.srf file).
1c) Use the .js scripts to create Siebel triggers.
The provided samples show how to create entries in the inbound table when new Account objects are created.
> Open the Siebel Tools, Open the project twistie. Select for project IBM* and lock the project using ctrl +Q
>Open the Business Object.
>Search for IBM* project ( Ctrl+Q) . IBM Event Object will be displayed.
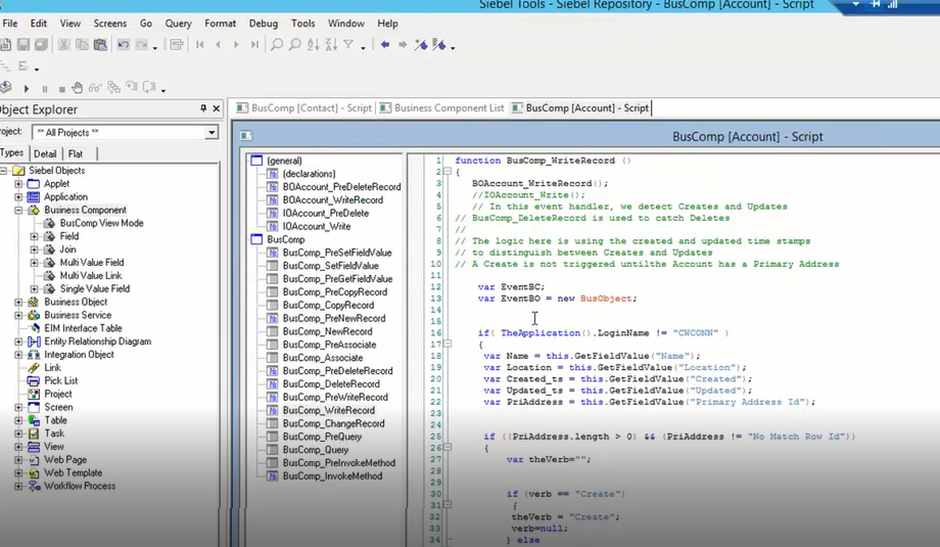
> Right click the Business Component and Select Edit Server Scripts.
>Copy the contents of the java script in the script files.
In general section , add four functions naming as shown in the below picture.
For example , Create a function in general section named BOAccount_WriteRecord and copy the contents of function contents (BusComp_WriteRecord )from BOAccount.js into this.
Similarly do for the other functions PreDeleteRecord of BOAccount and IOAccount.
Then call these function calls in the respective functions available in the BusComp.
>Compile the selected objects and then compile the Locked project.
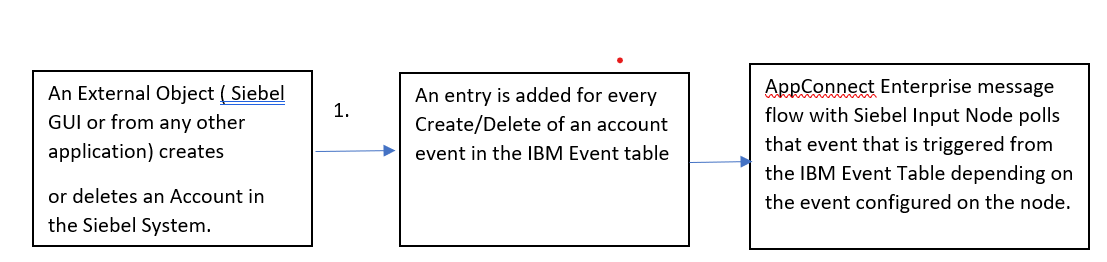
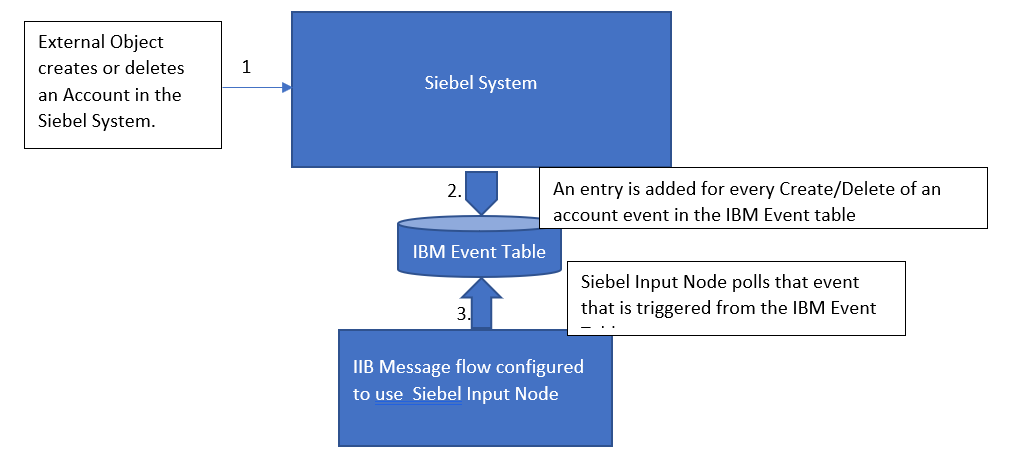
Part 2:This part of the article shows you how to create a message flow to poll the created account business objects from Siebel Server.
Below picture illustrates how the Siebel input Node polls the events when an event is generated
1)Create New Application from toolkit and provide a name


Click on Finish.
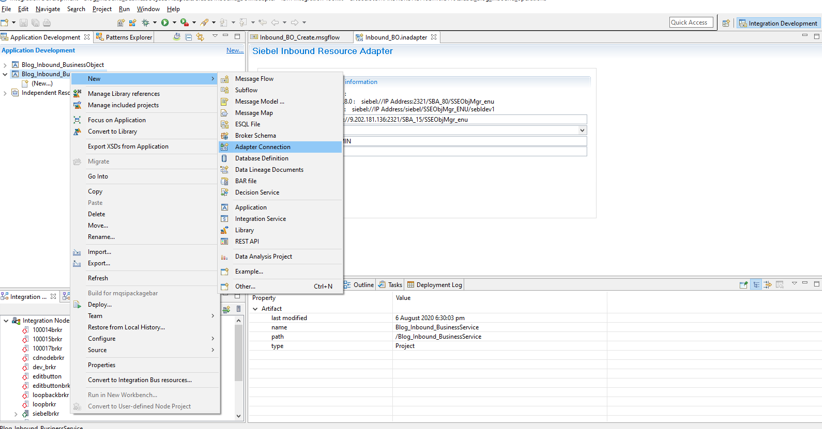
2)Create an Inbound Adapter Connection by right clicking the Application created and select the Adapter Connection from new.
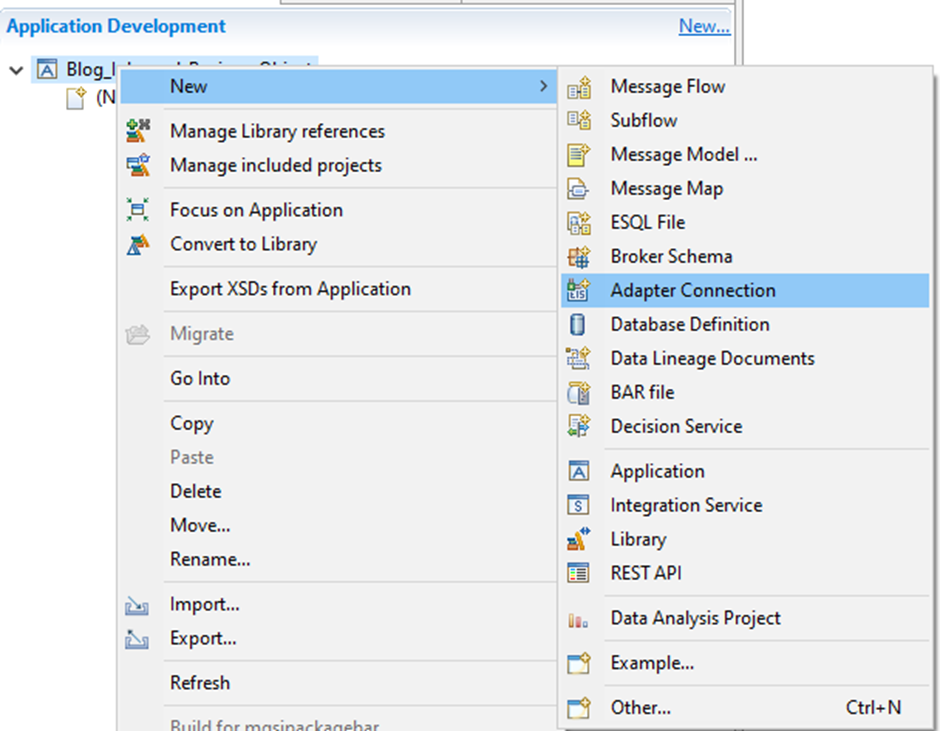
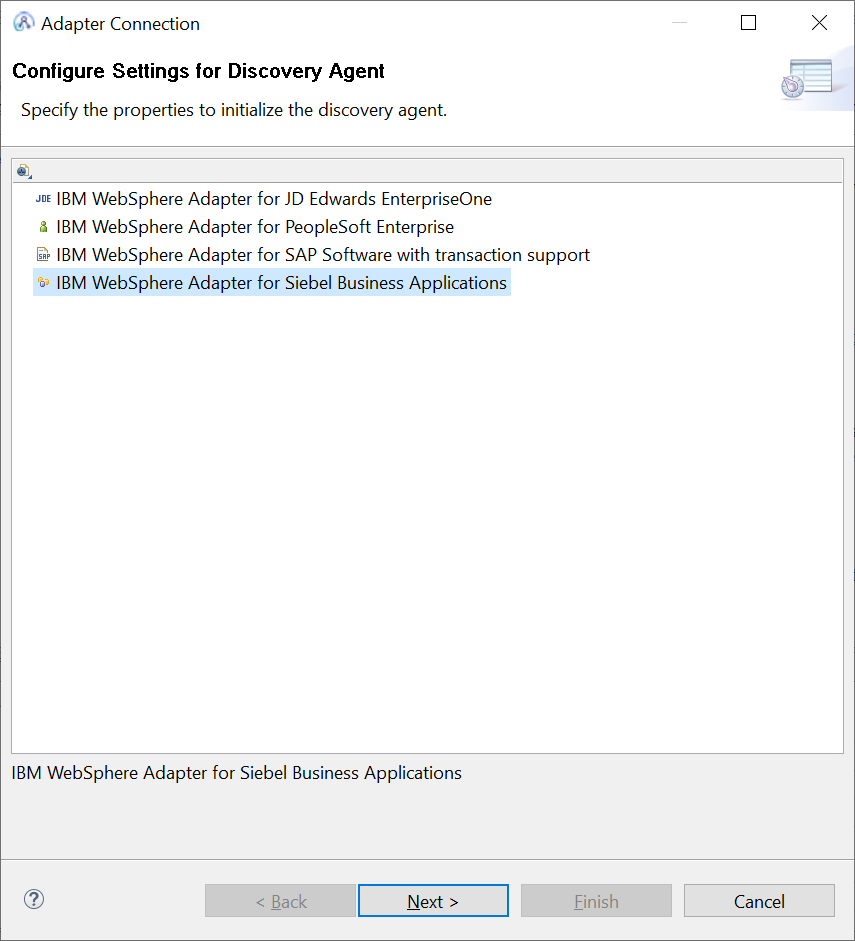
3) Select “IBM WebSphere Adapters for Siebel Business Applications “ in Discovery Wizard.
4)Provide Connector project name :
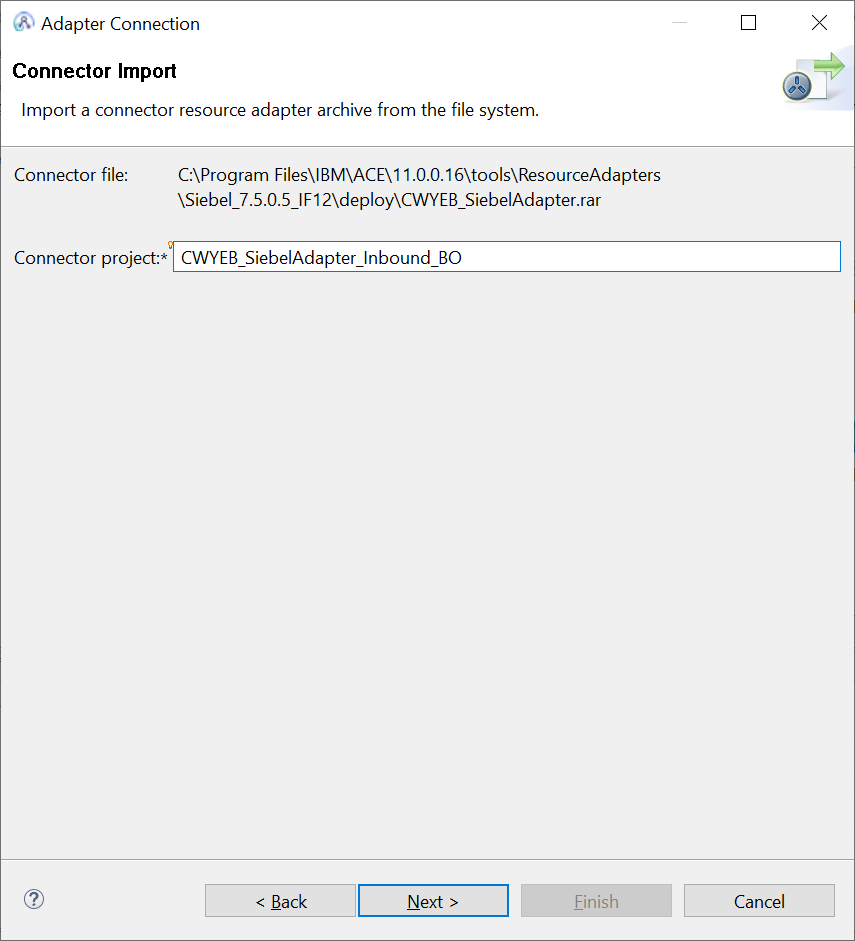
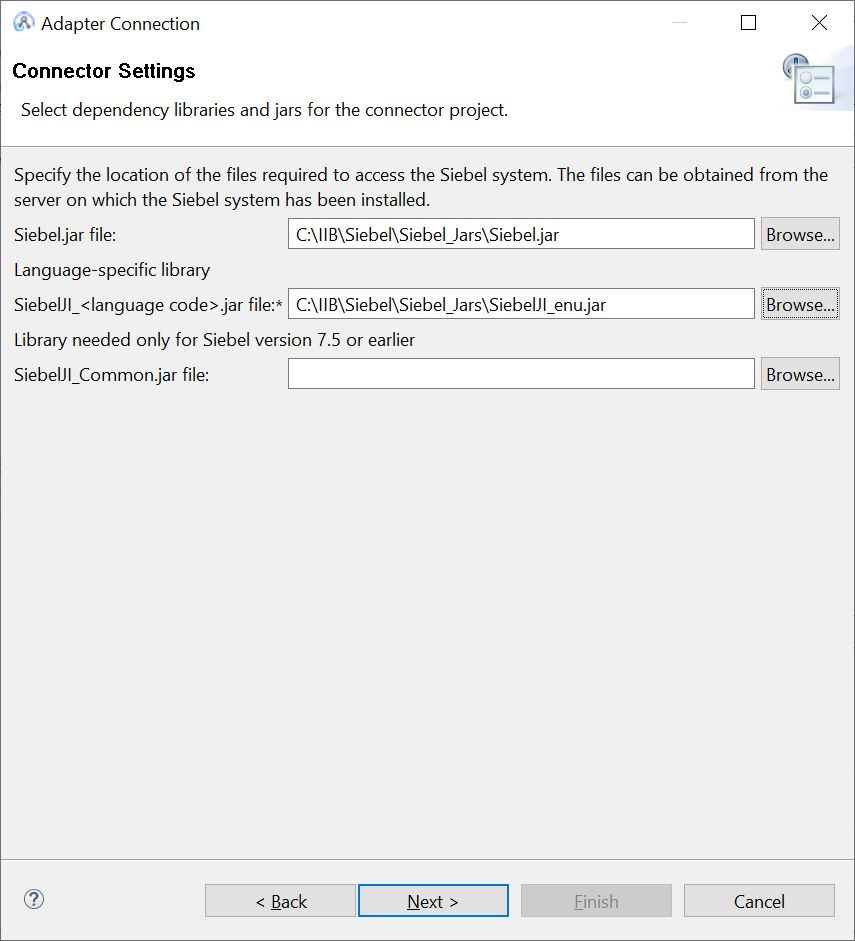
5) Browse for Siebel jar and siebel language jars which are availabe in the Siebel installation and point to the location.
Siebel jars required are : Siebel.jar and SiebelJI_enu.jar .
These jars are available in <Siebel Server installation>\ <Siebel server instance>\CLASSES directory.

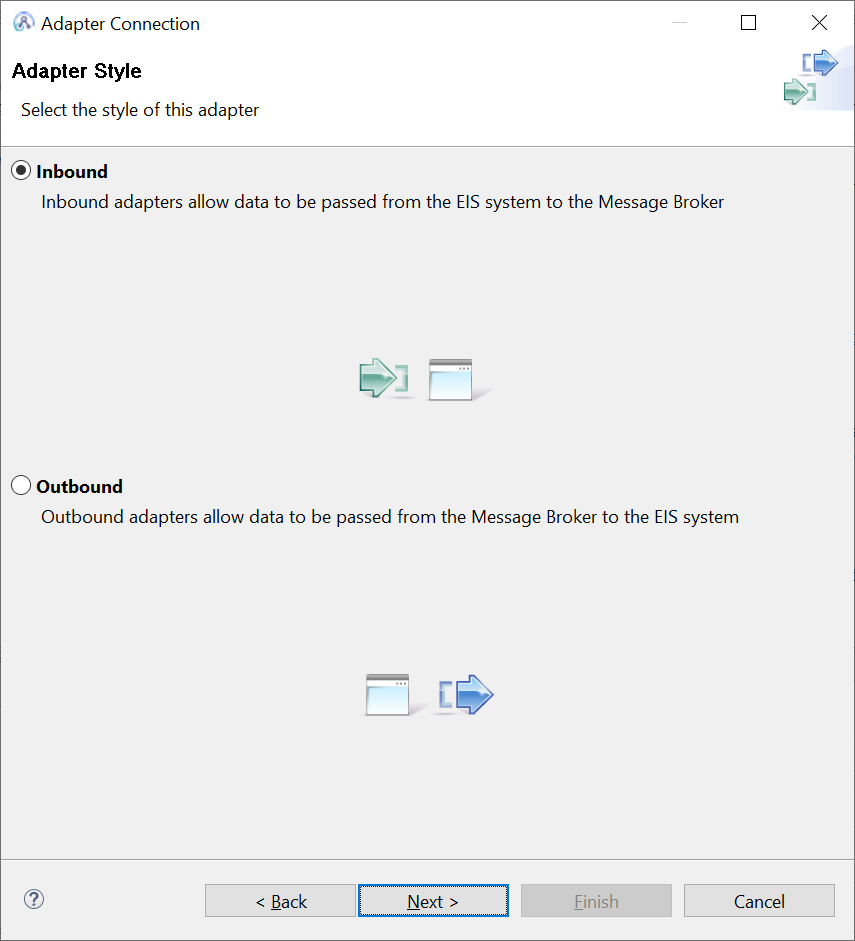
6)Select ‘Inbound’
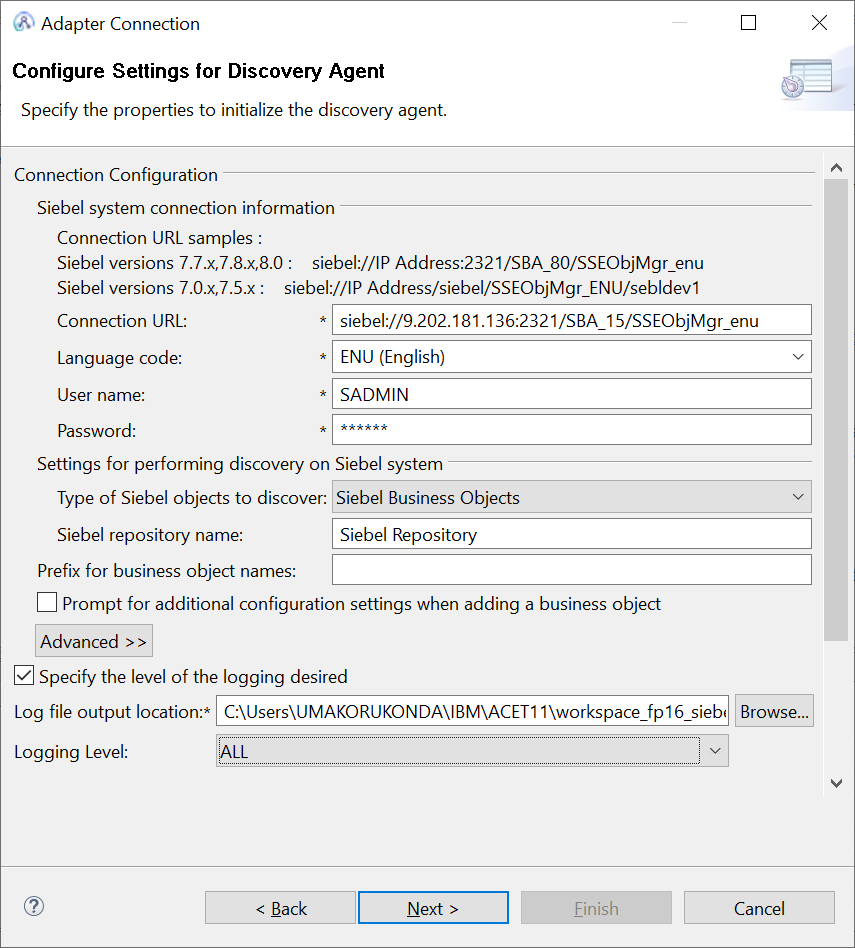
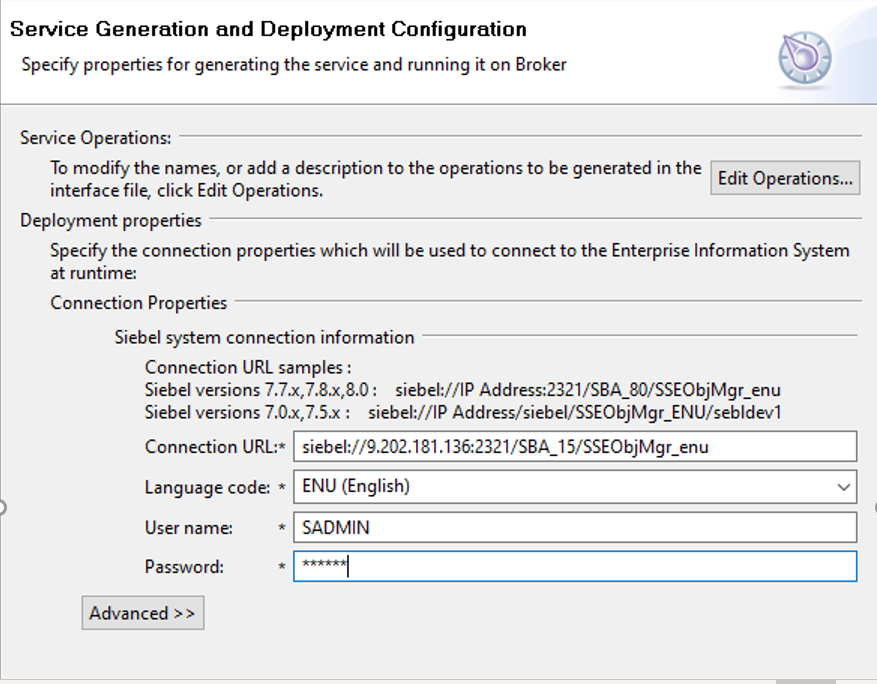
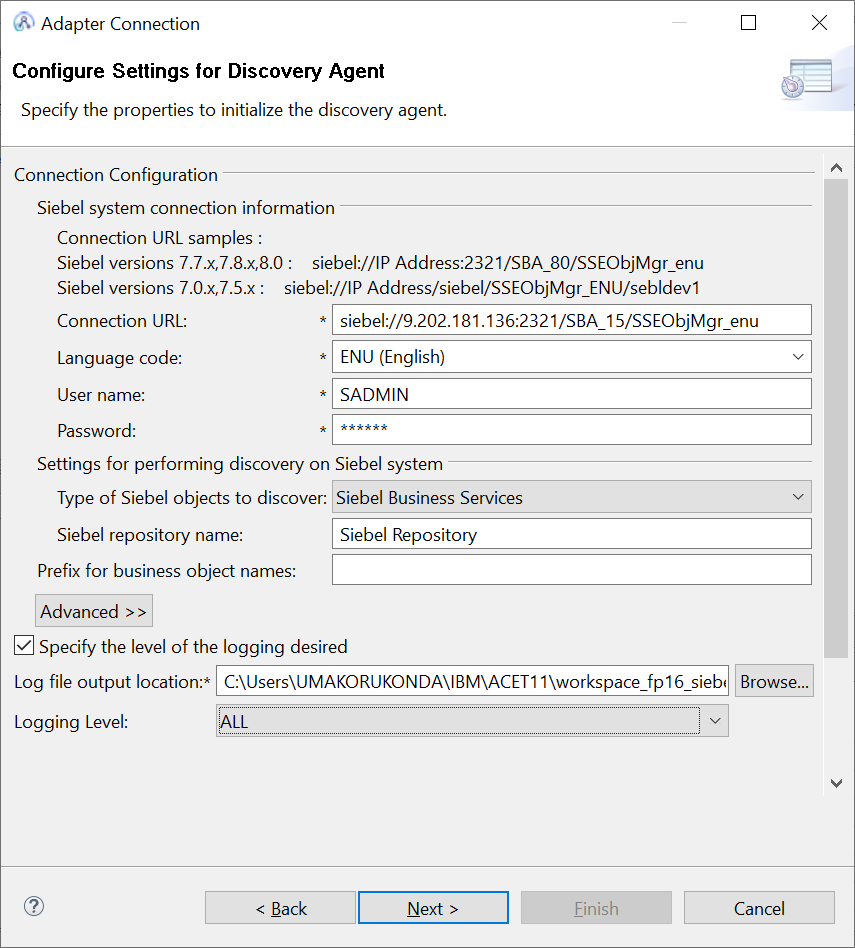
7)Provide connection url ,UserName , password of the siebel EIS. Then Select “Siebel Business Objects” from “Type of Siebel Object to Discover “ dropdown property .
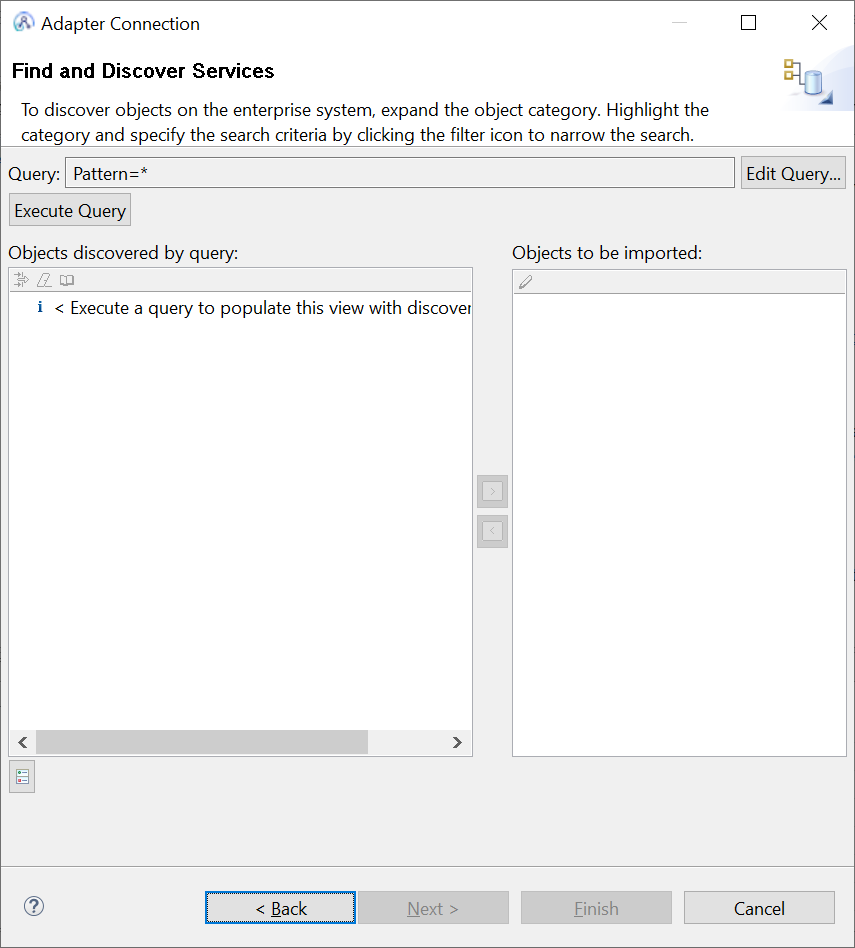
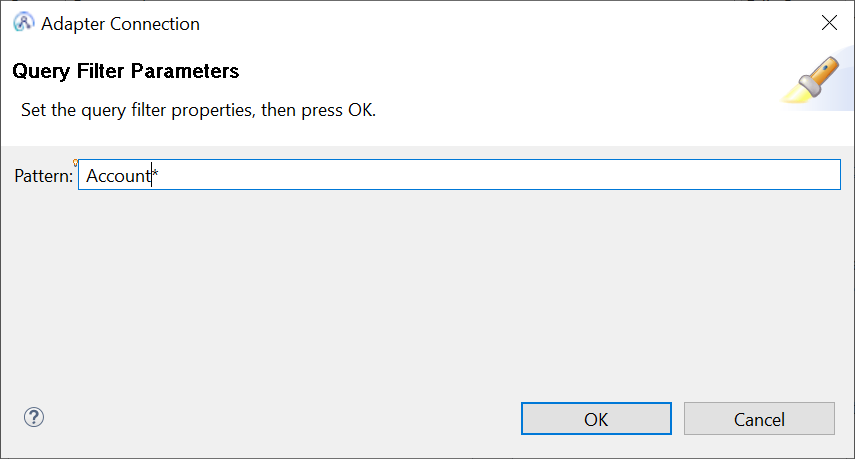
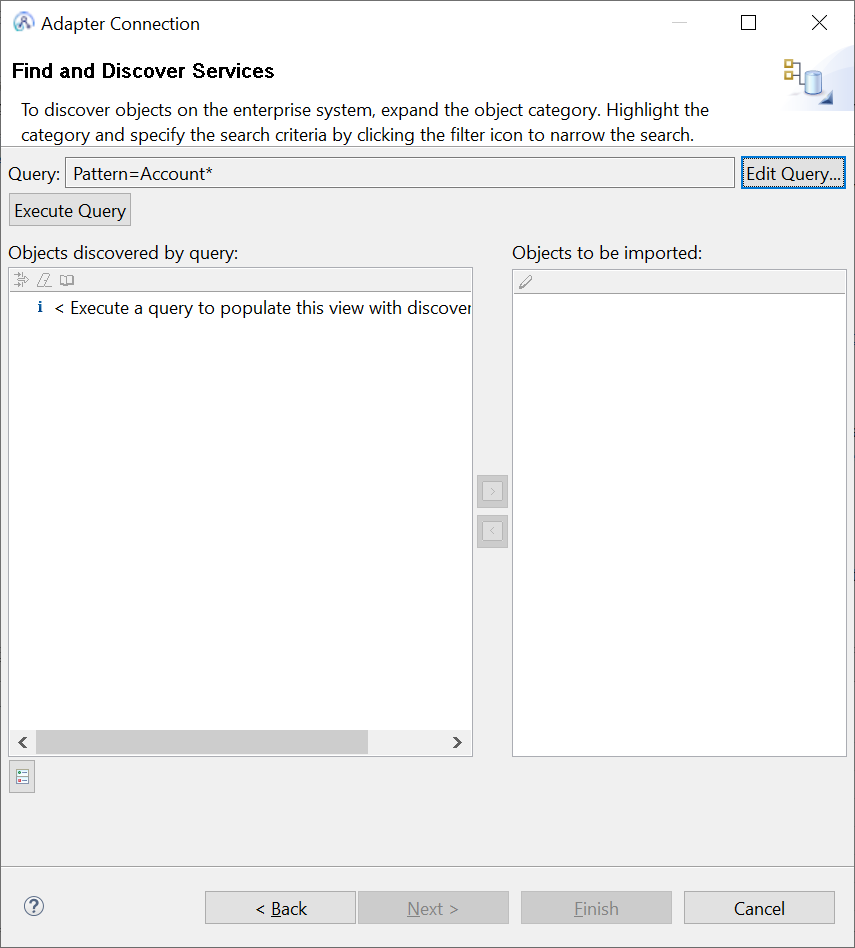
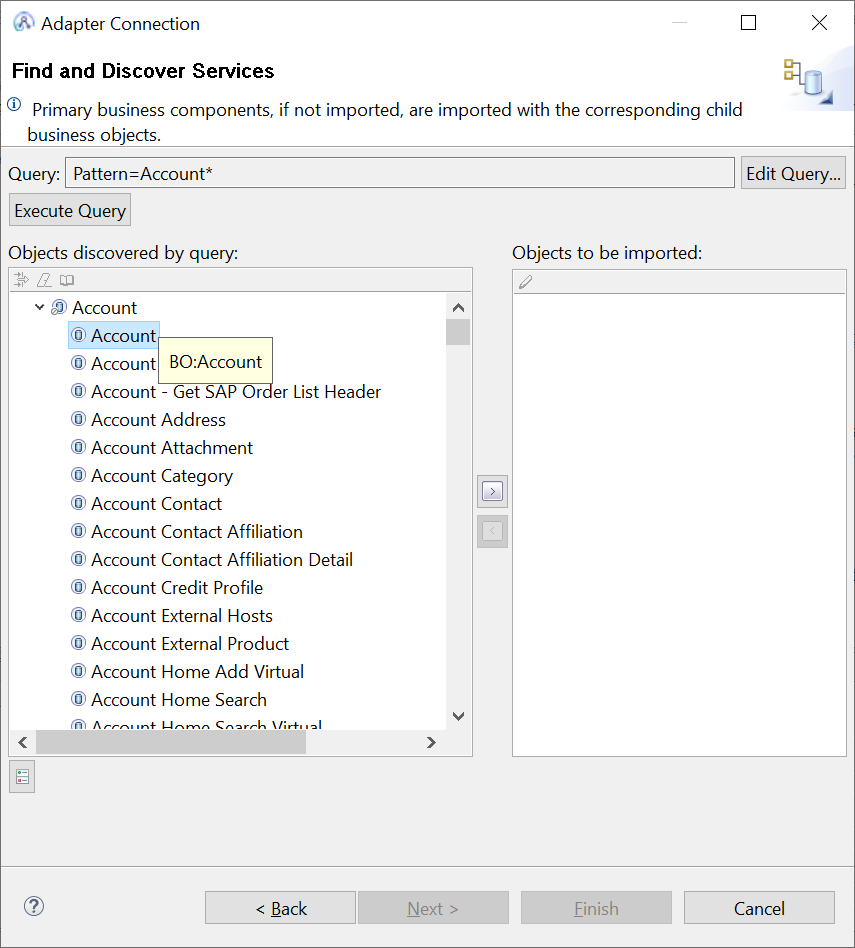
7)Search for Account type
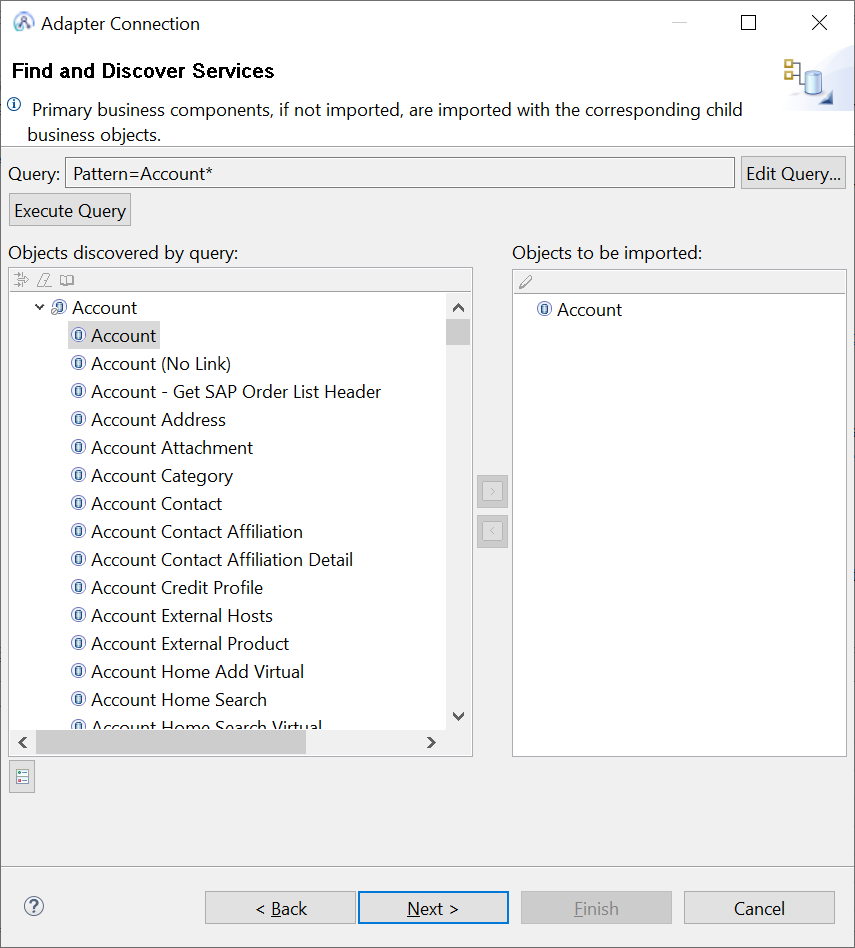
9)Select Create function.
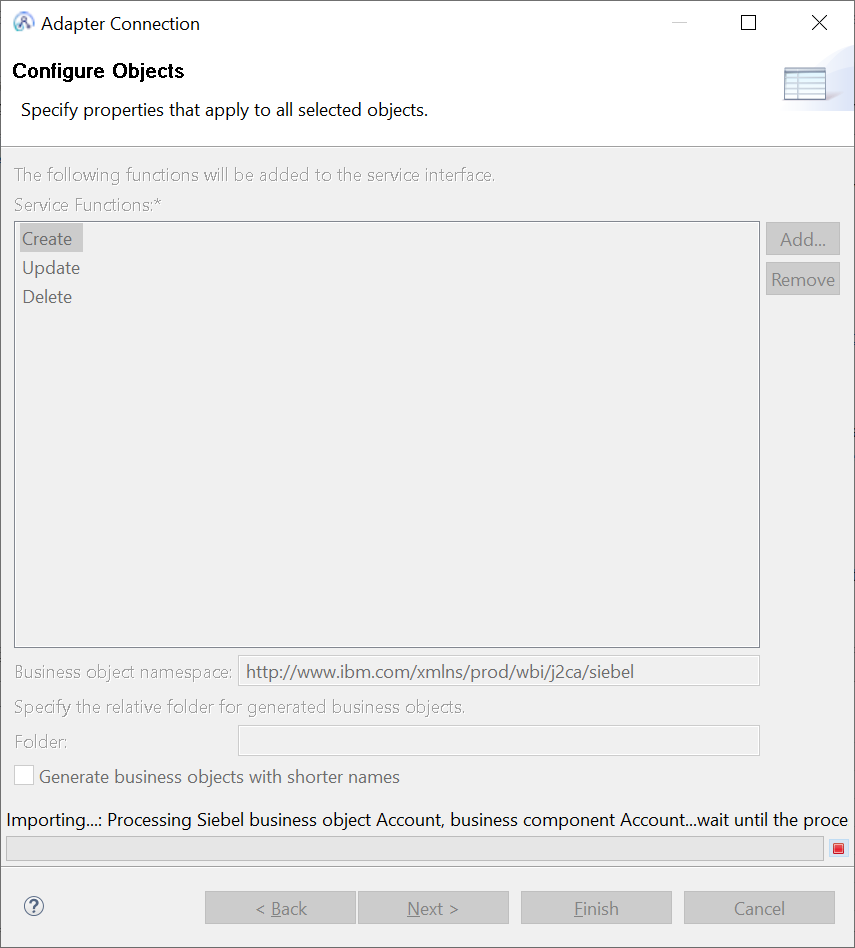
10) Verify the operations and enter the password.
11)Select the container/application from the dropdown, then enter a foldername and adapter component name.
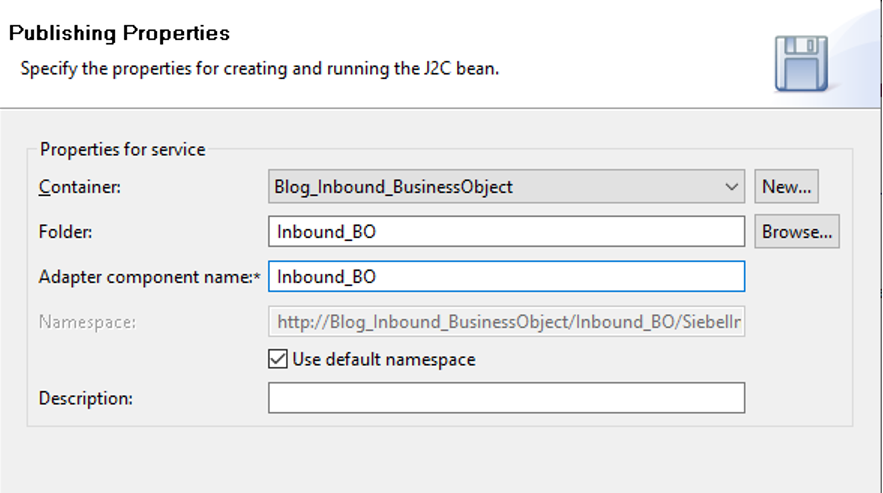
And clicking on Finish Button creates a inbound adapter for siebel.
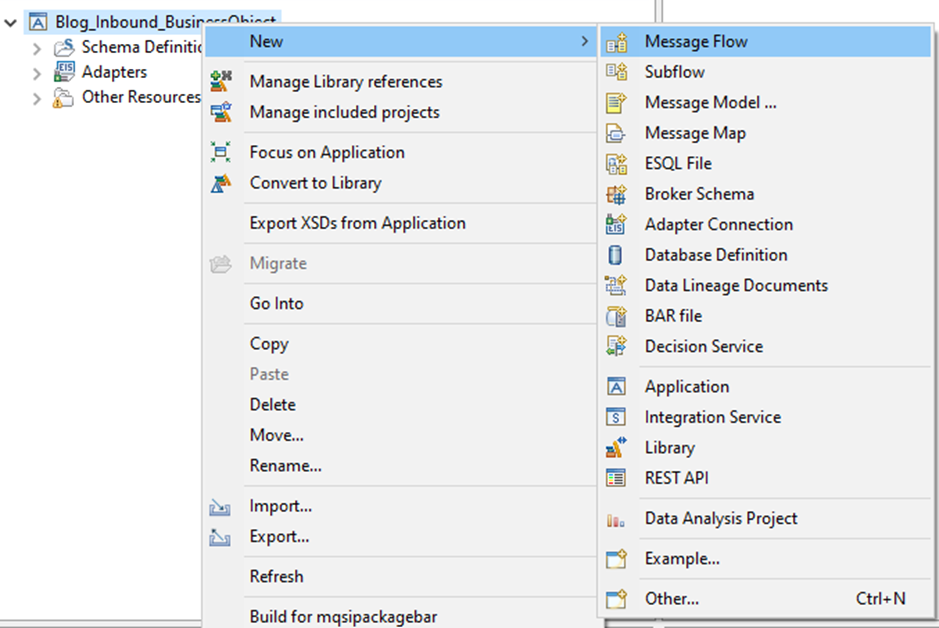
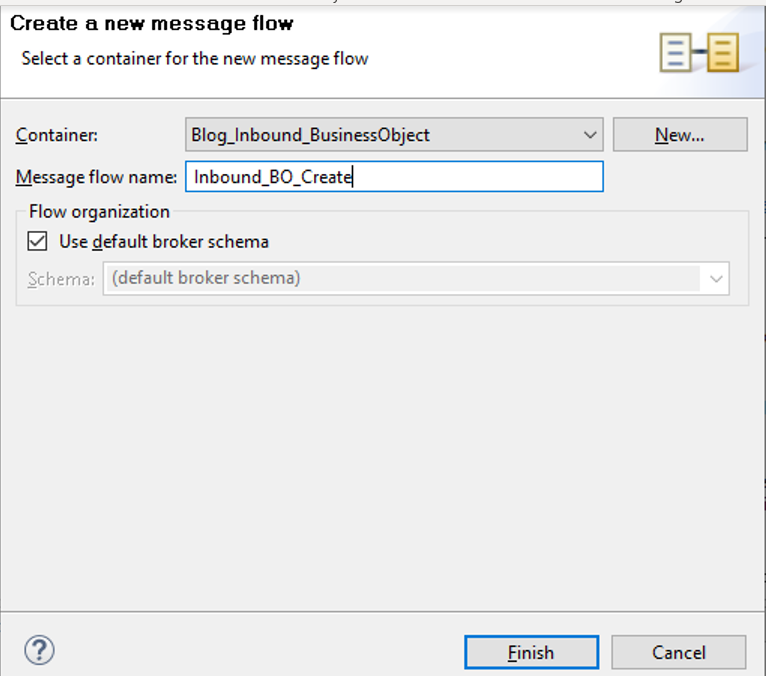
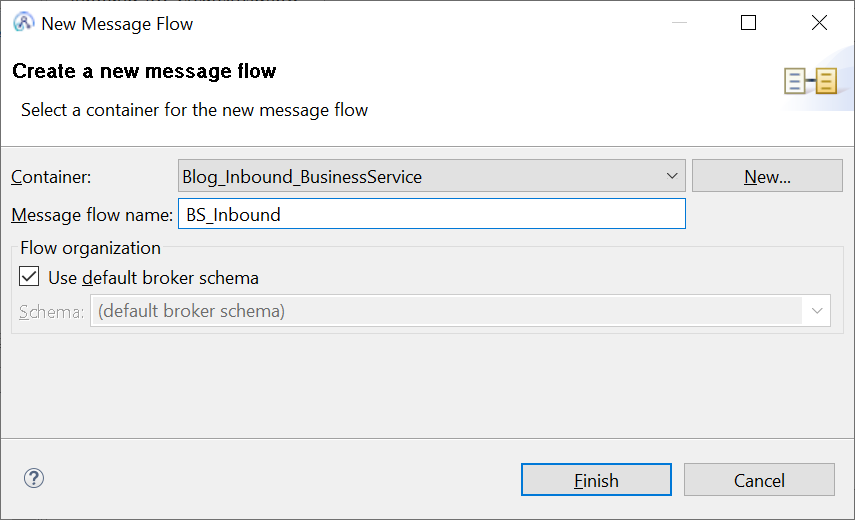
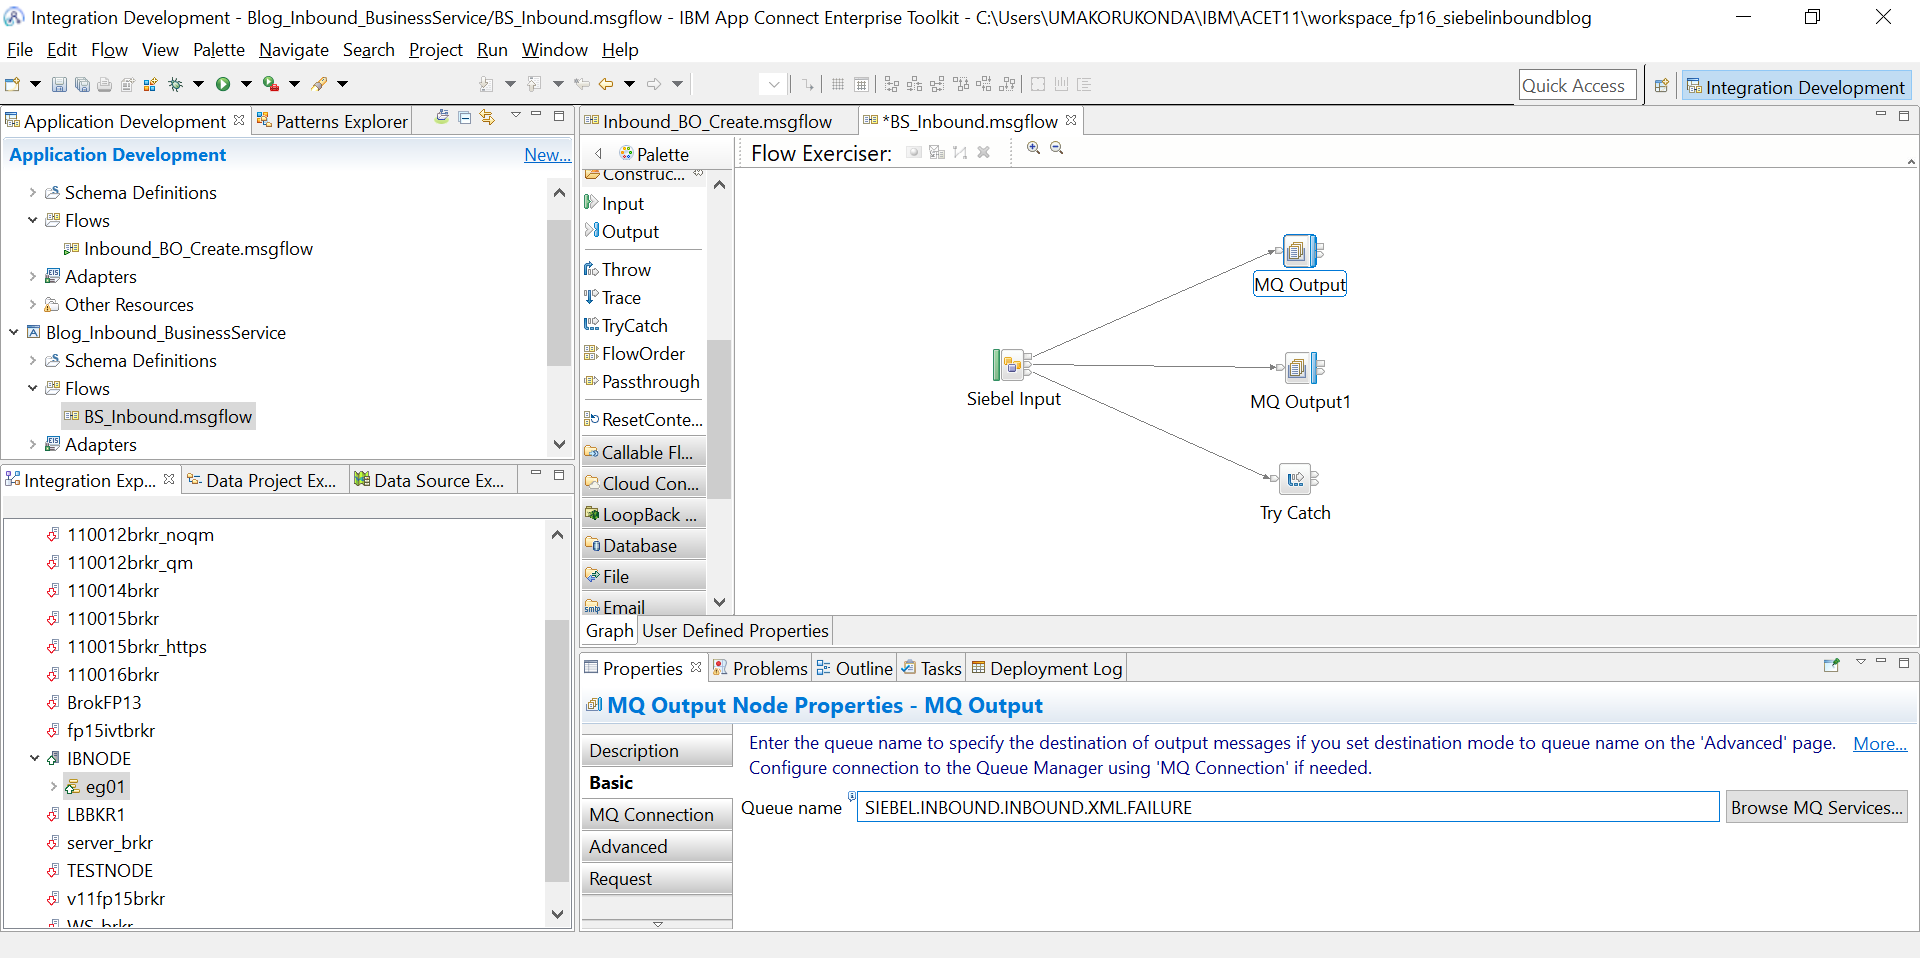
12) Create a message flow and provide a name .
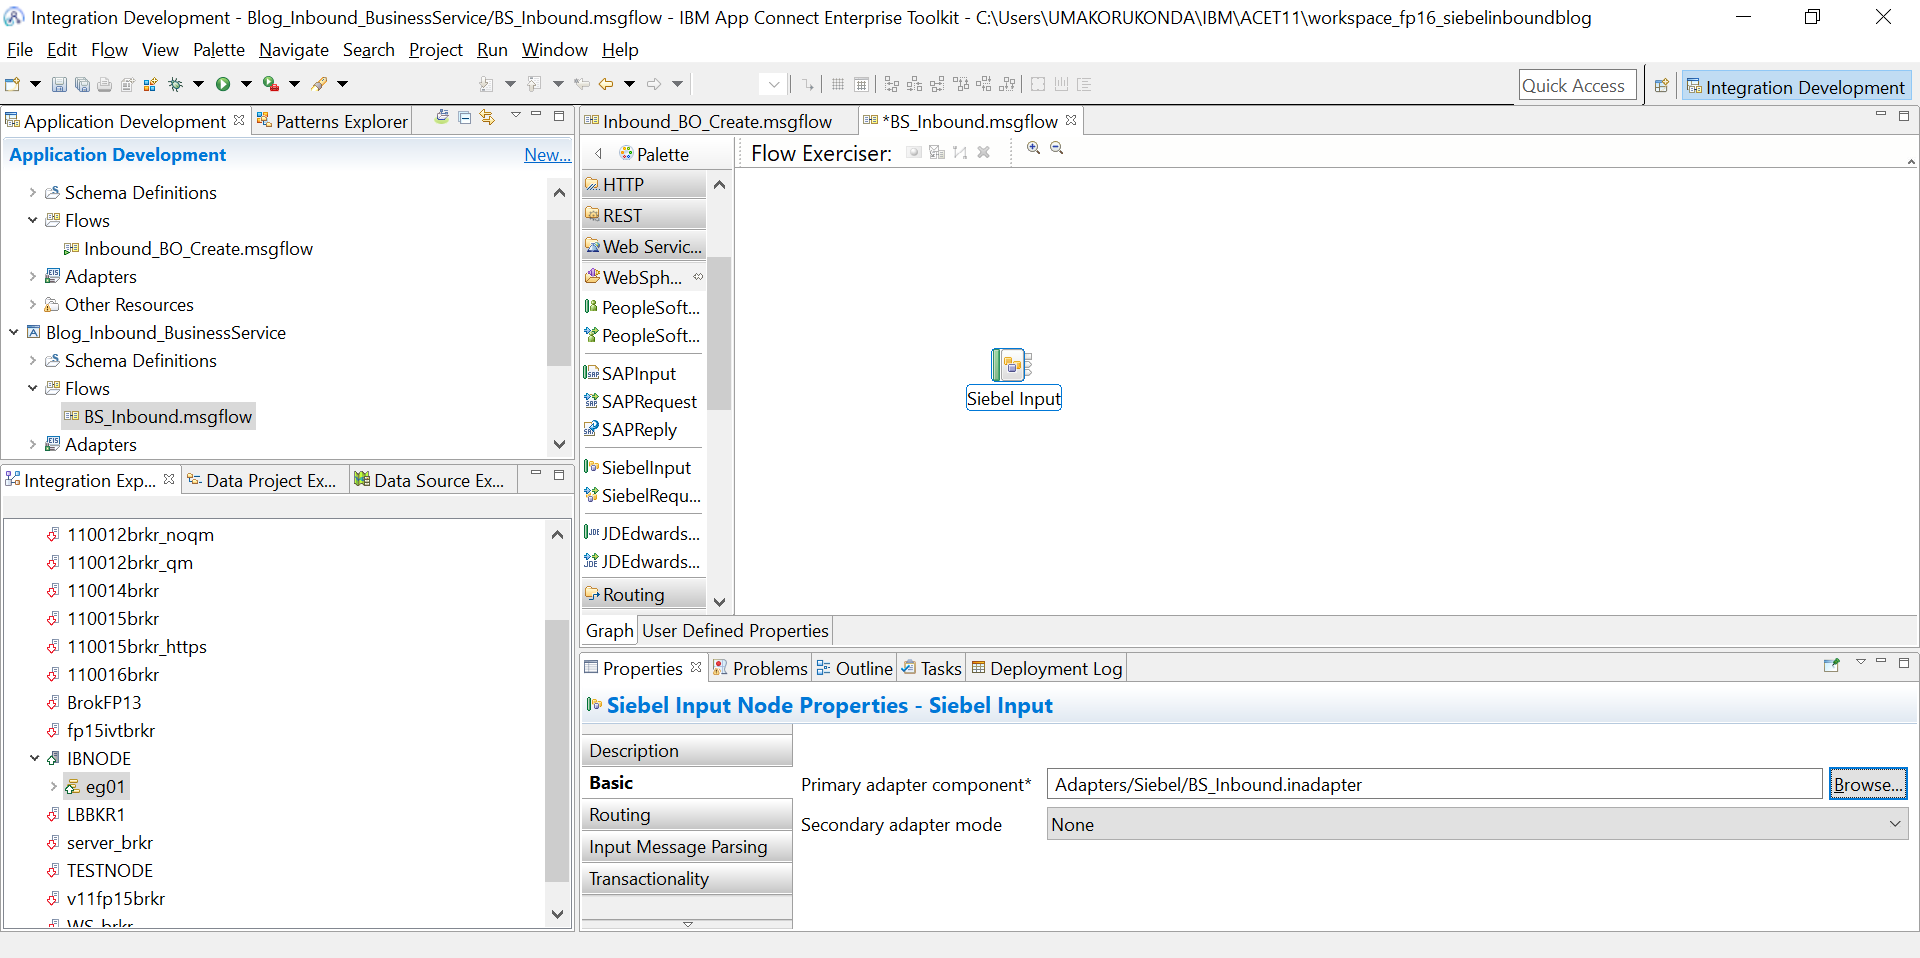
13) Drag the Siebel Input Node from the WebSphere Adapters palette to the message flow
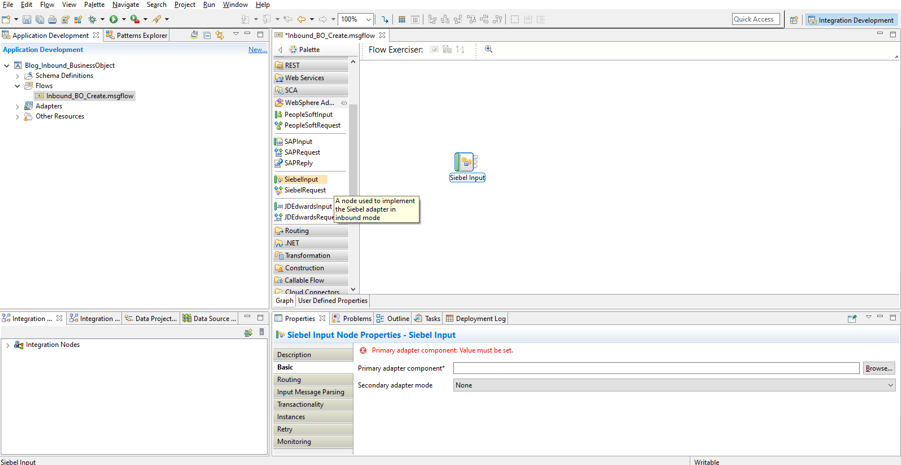
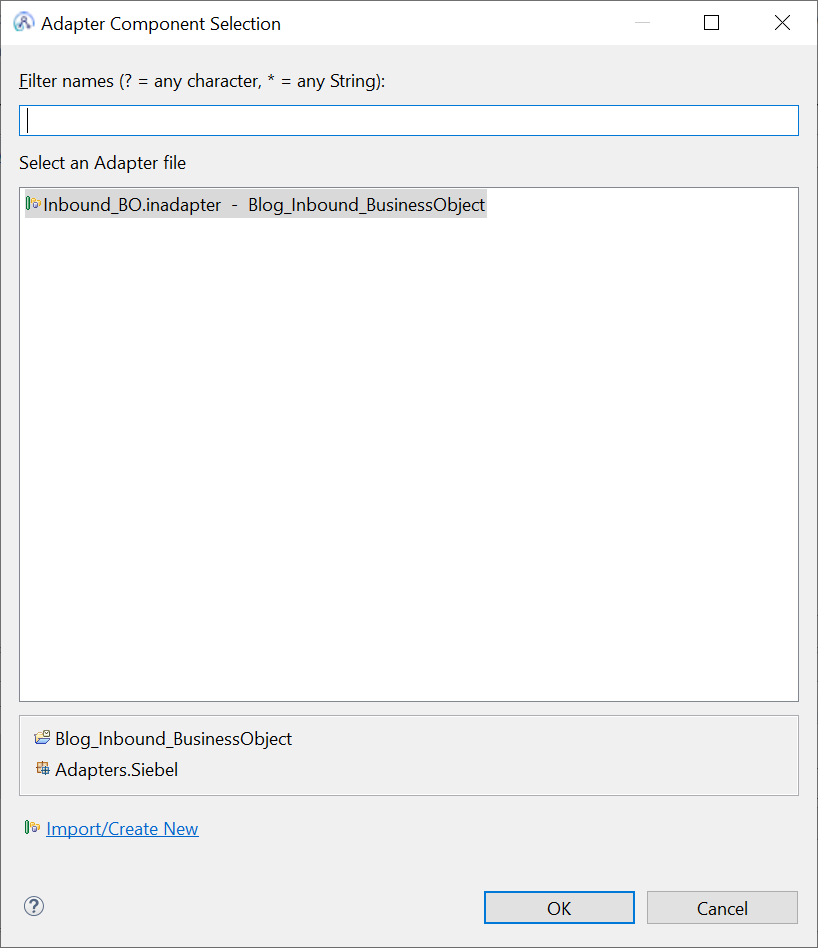
14) Browse for the inbound adapter created in the above in the primary adapter component.
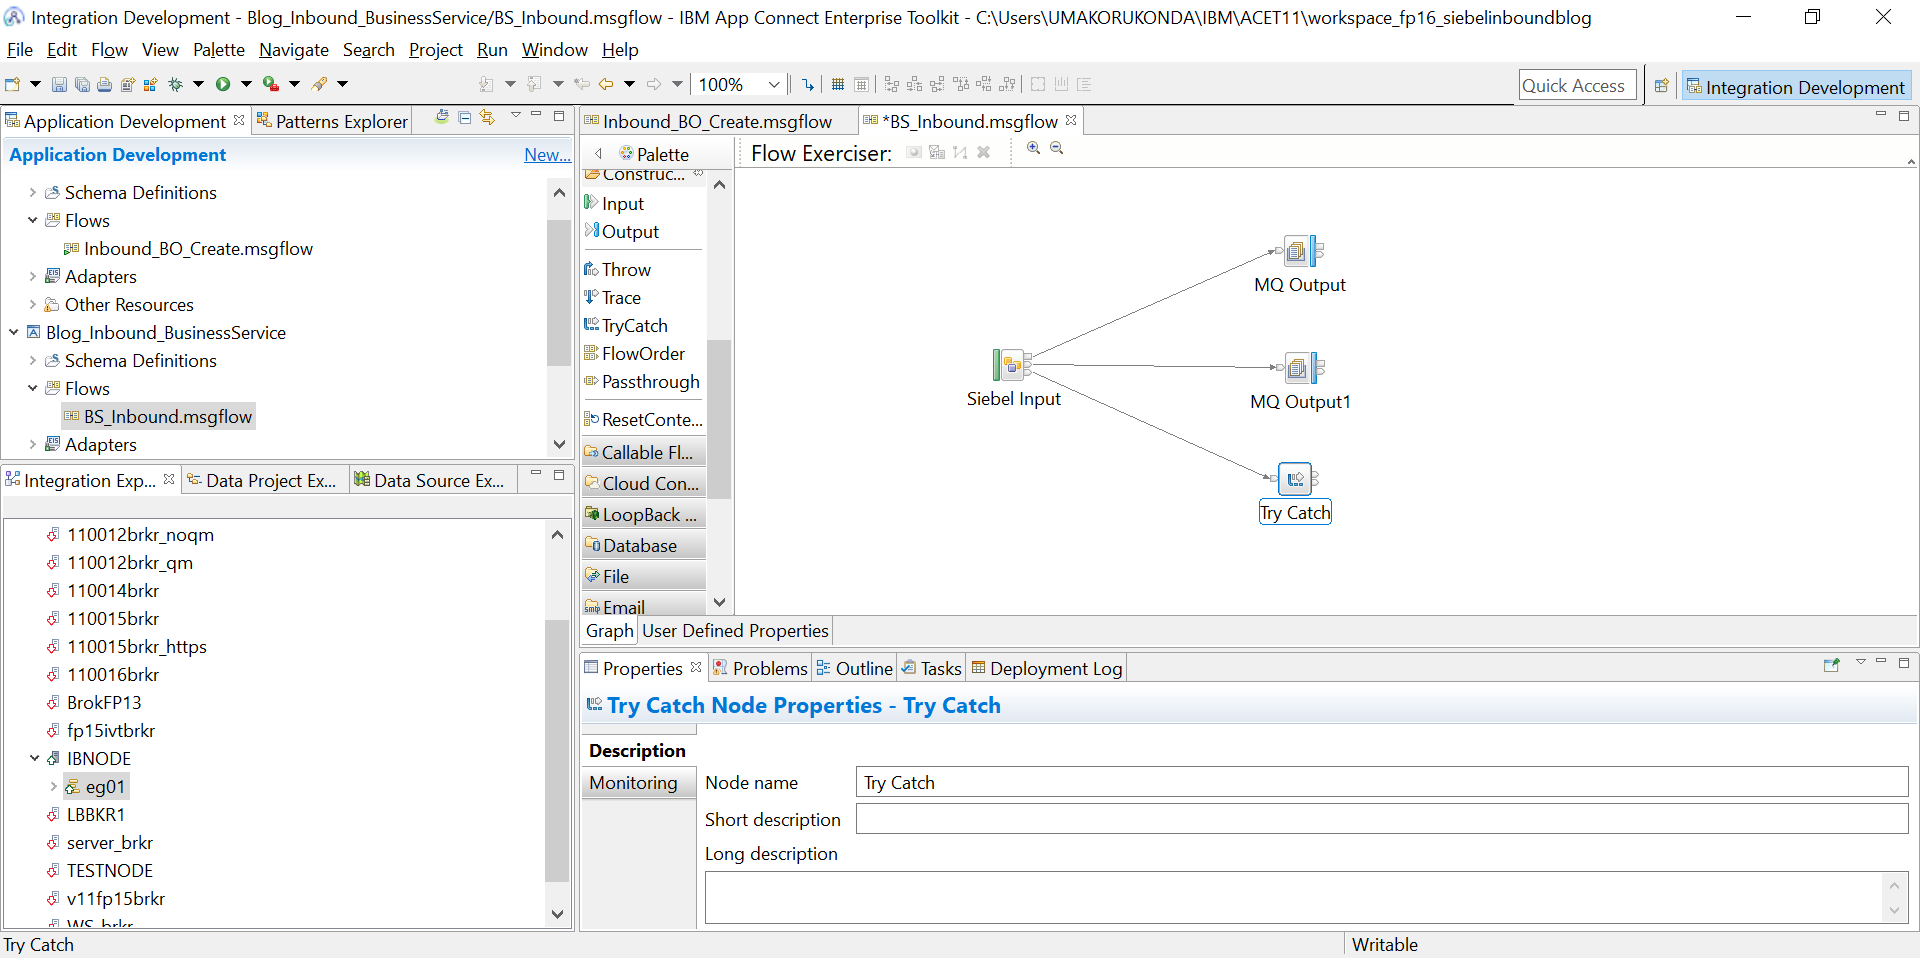
15) Wire the Output and Failure terminals of the Siebel Input Nodes to MQ Output nodes respectively.
And a trycatch node to the catch terminal of the Siebel Input Node.
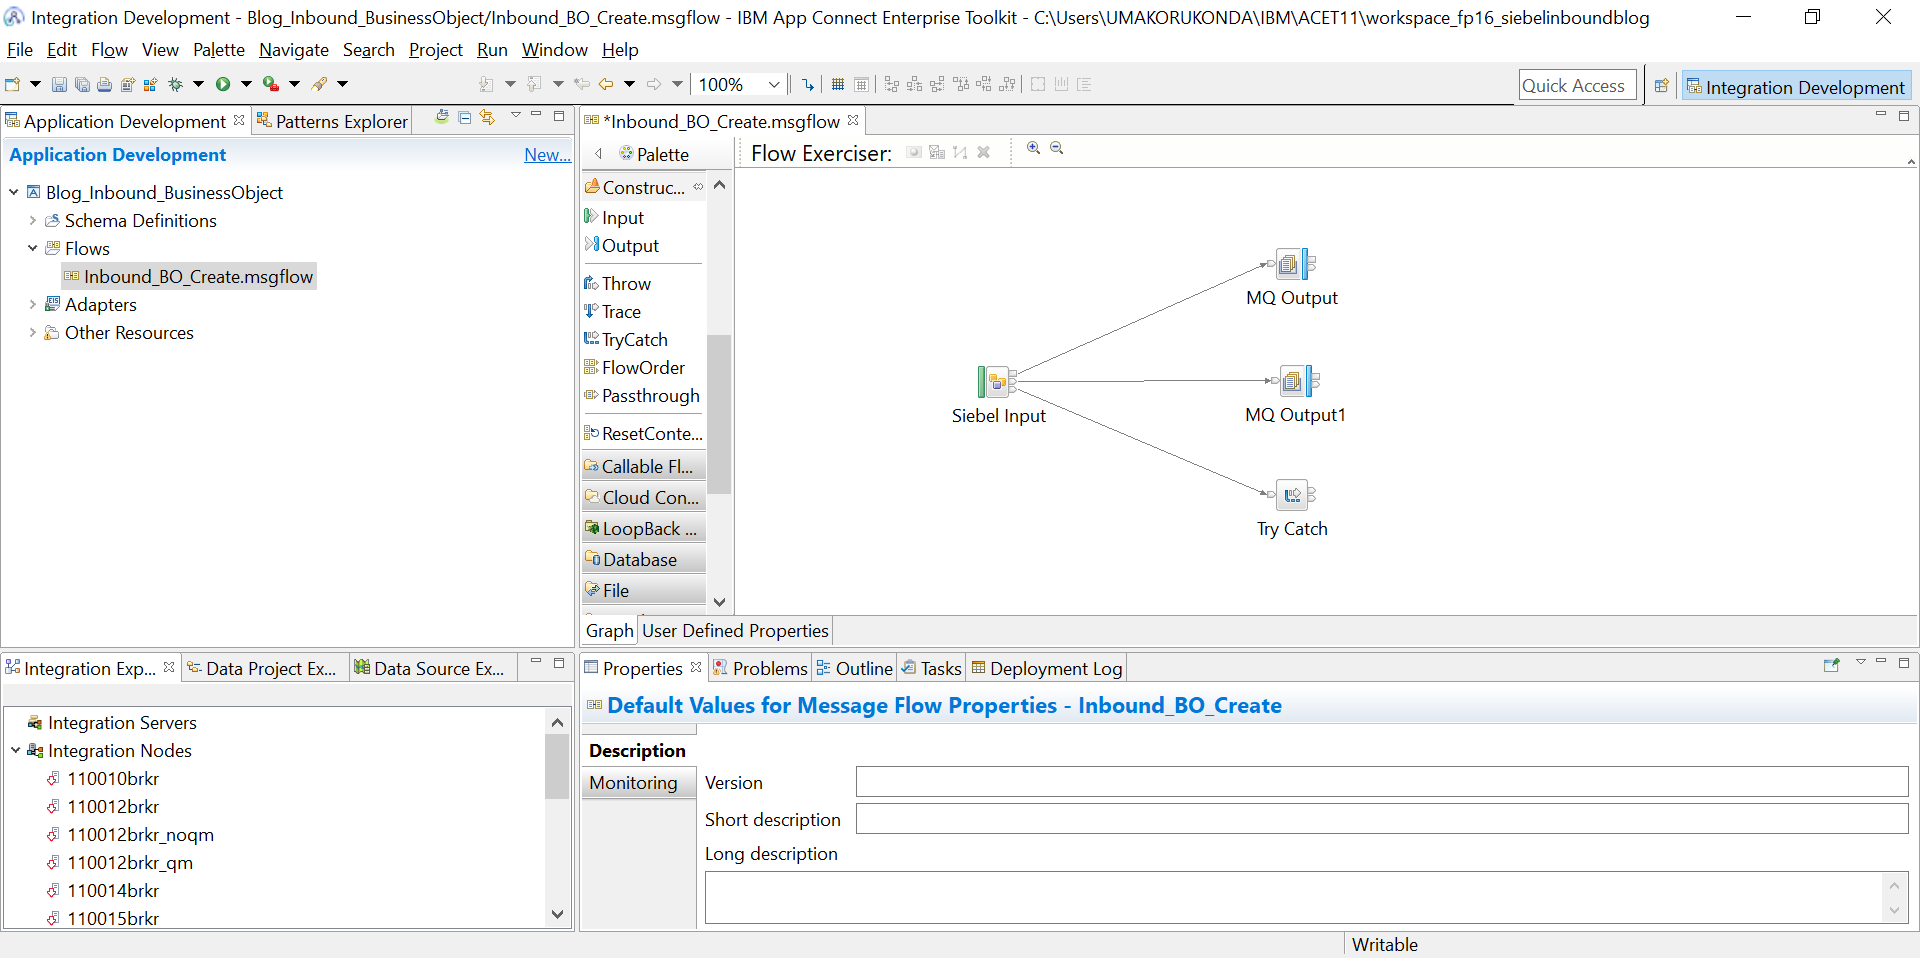
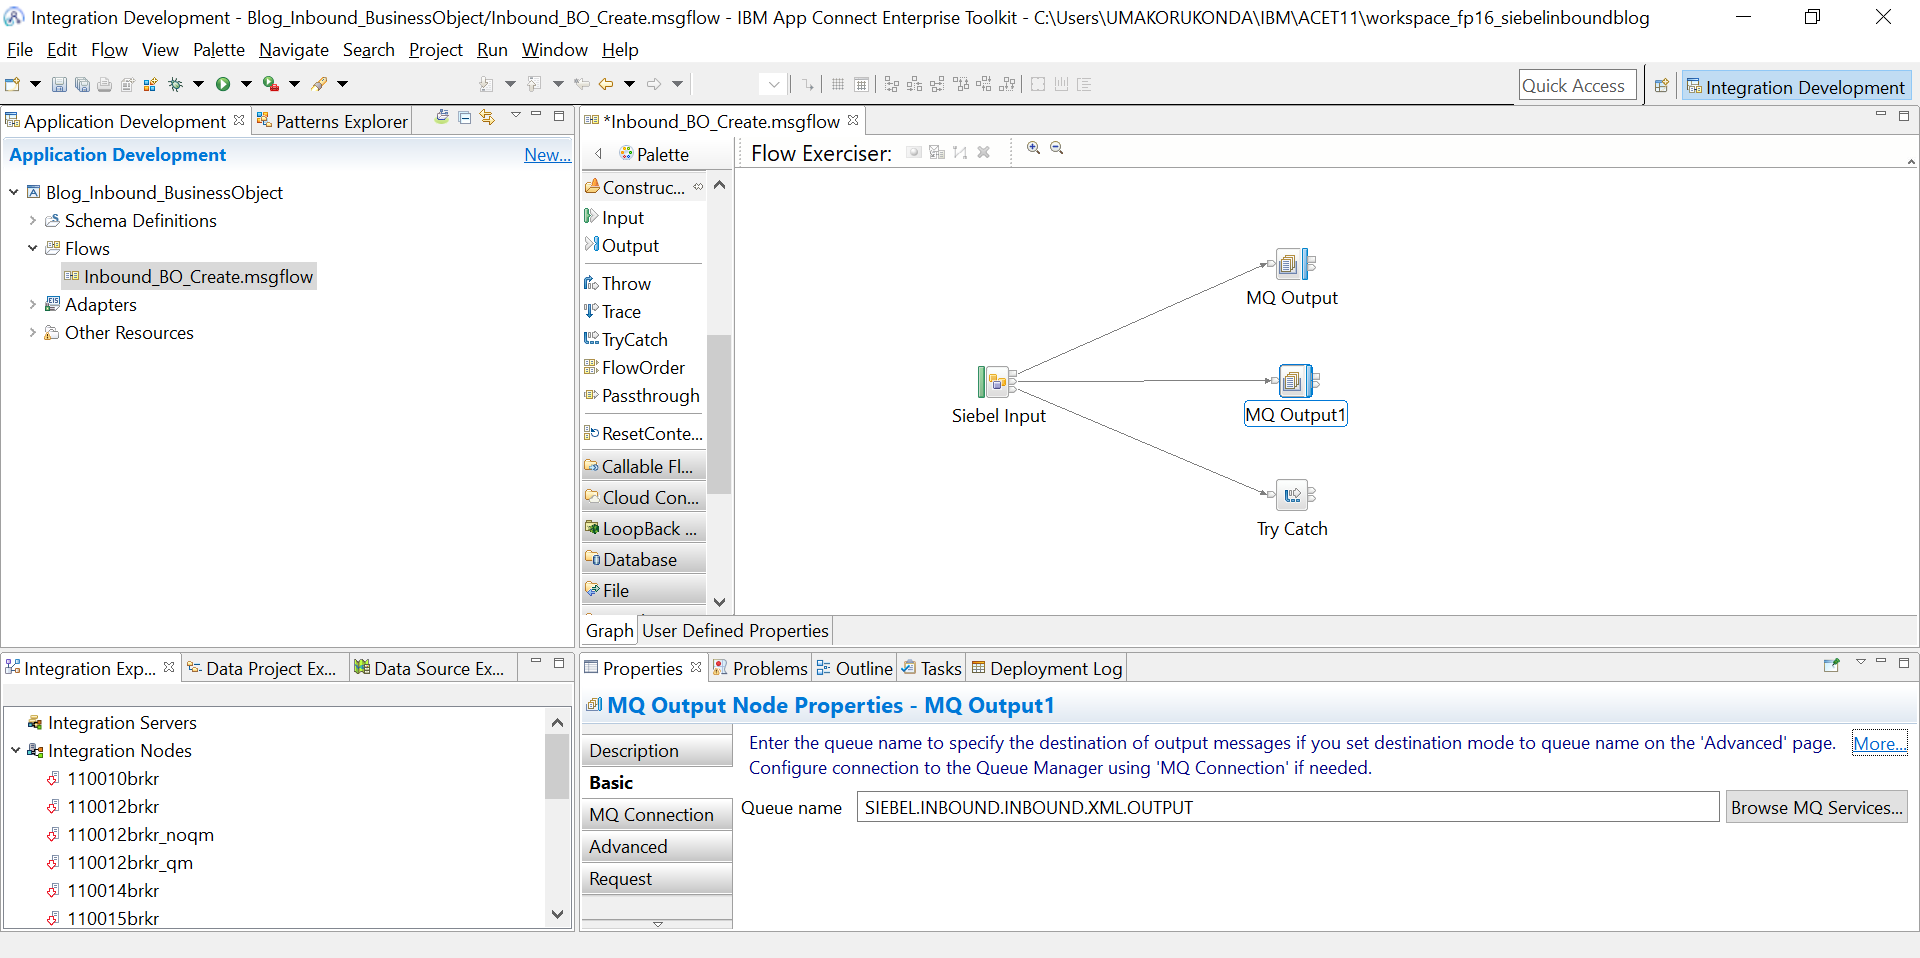
16) Provide appropriate queue names for the mq output nodes.

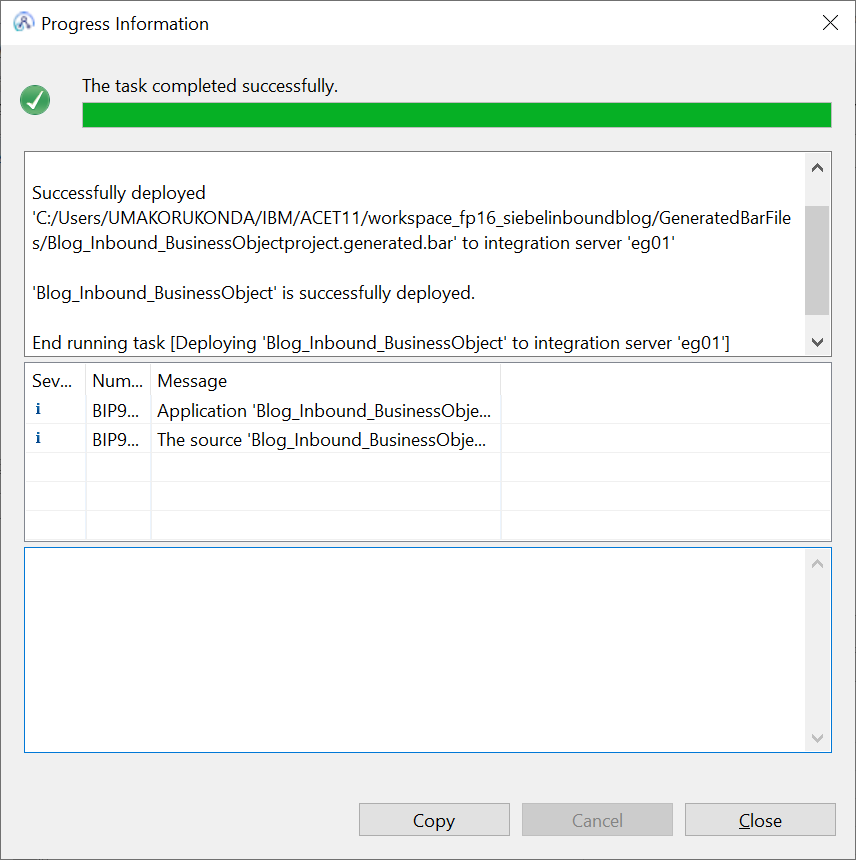
17) The message flow is complete and we can deploy to the EG where the Broker is configured pointing to the Siebel jars.
> Create a Broker with Qmgr. Start the broker and create EG .
> Point the jarsURL and nativeLibs jar location to the Broker and restart the Broker.
mqsireportproperties IBNODE -c AllTypes -o AllReportableEntityNames -r
mqsichangeproperties IBNODE -c EISProviders -o Siebel -n jarsURL -v C:\Siebel_LIB
mqsichangeproperties IBNODE -c EISProviders -o Siebel -n nativeLibs -v C:\Siebel_LIB
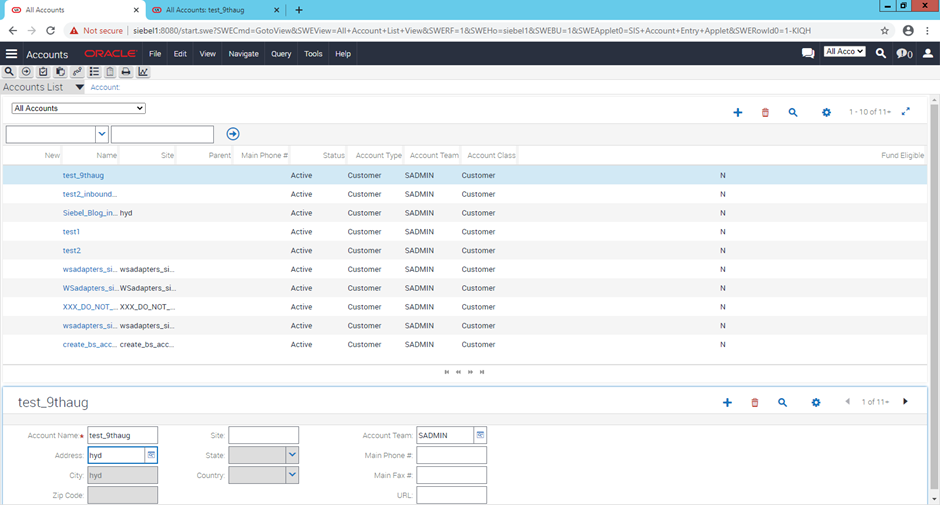
18)Create an account in the Siebel Application.Login to the application and create a new account.
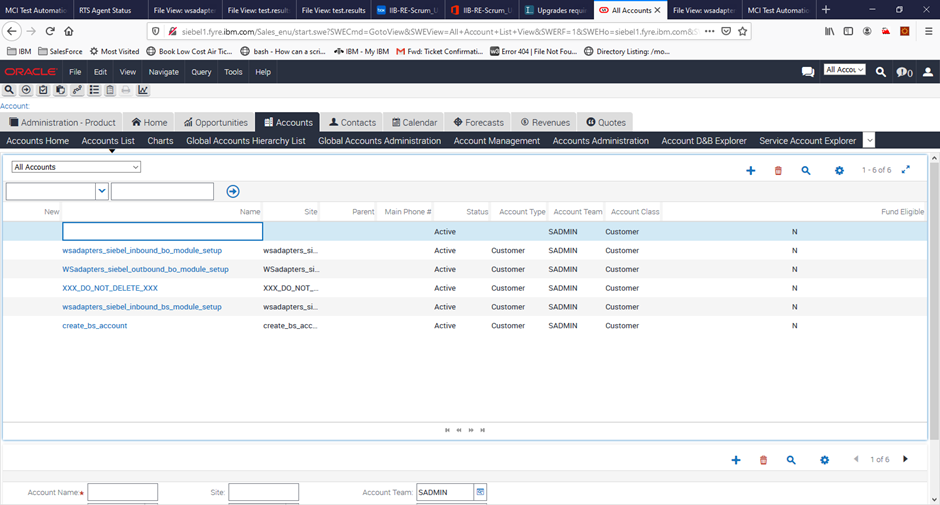
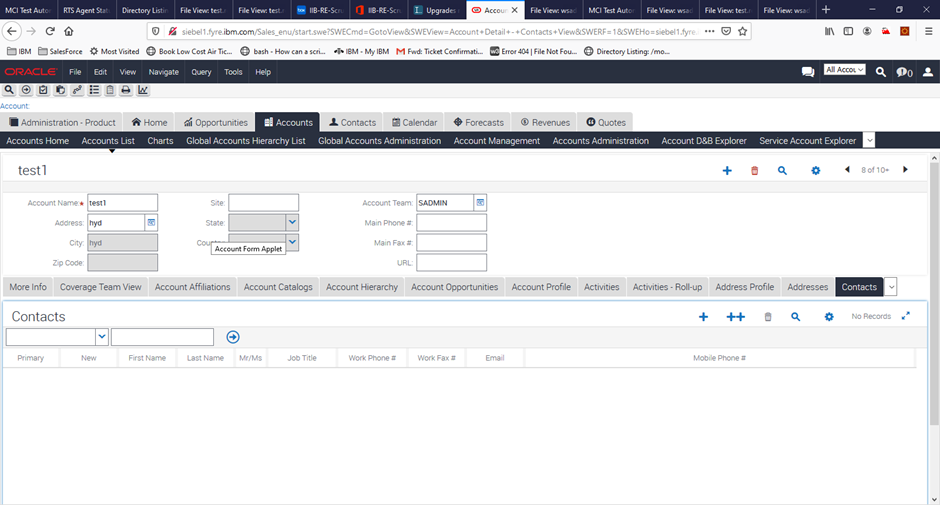
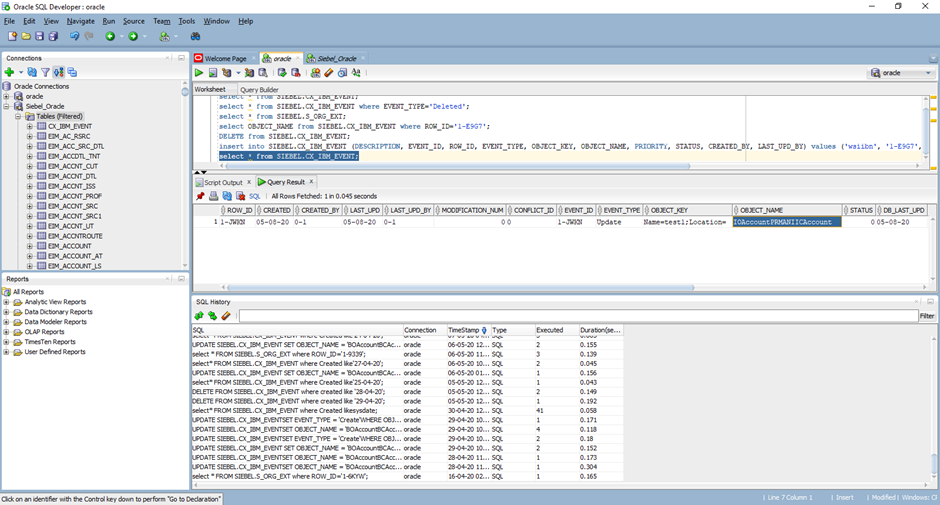
19) Check the event table configured
select * from SIEBEL.CX_IBM_EVENT;
And the EVENT_TYPE with Create and OBJECT_NAME with BOAccountBCAccount would be deleted and trace file pointed in the trace node would have been updated.
Browse for the message in 'SIEBEL.INBOUND.INBOUND.XML.OUTPUT’ o/p queue configured
<NS1:BOAccountBCAccount xmlns:NS1="http://www.ibm.com/xmlns/prod/wbi/j2ca/siebel/boaccountbcaccount"<font< a="" style="font-size: 8pt;"> class='blacktext'>><Id>1-JQ88</Id></NS1:BOAccountBCAccount>'</font<>
Part 3 : Developing a message flow to poll the created Account Business Service from Siebel Server.
Below picture illustrates how the Siebel input Node polls the events when an event is generated
1)Create New Application from toolkit and provide a name


Click on Finish.
2)Create an Inbound Adapter Connection by right clicking the Application created and select the Adapter Connection from new.
3) Select “IBM WebSphere Adapters for Siebel Business Applications “ in Discovery Wizard.
And provide connector project name :

4) Browse for Siebel jar and siebel language jars which are availabe in the Siebel installation and point to the location.
Siebel jars required are : Siebel.jar and SiebelJI_enu.jar .
These jars are available in <Siebel Server installation>\ <Siebel server instance>\CLASSES directory.
5) Select ‘Inbound’

6) Provide connection url ,UserName , password of the siebel EIS. Then Select “Siebel Business Objects” from “Type of Siebel Object to Discover “ dropdown property .
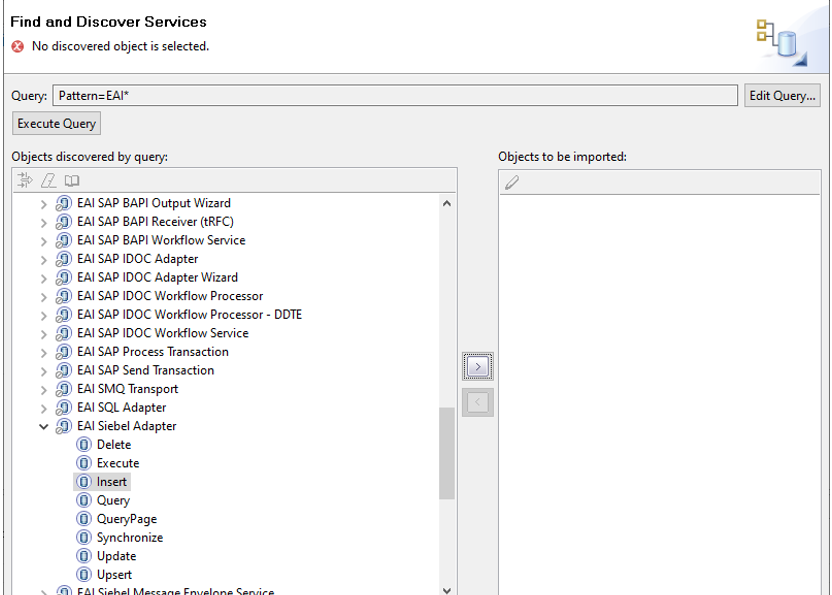
7)Search for ‘EIA Siebel Adapter’ and select Insert operation.
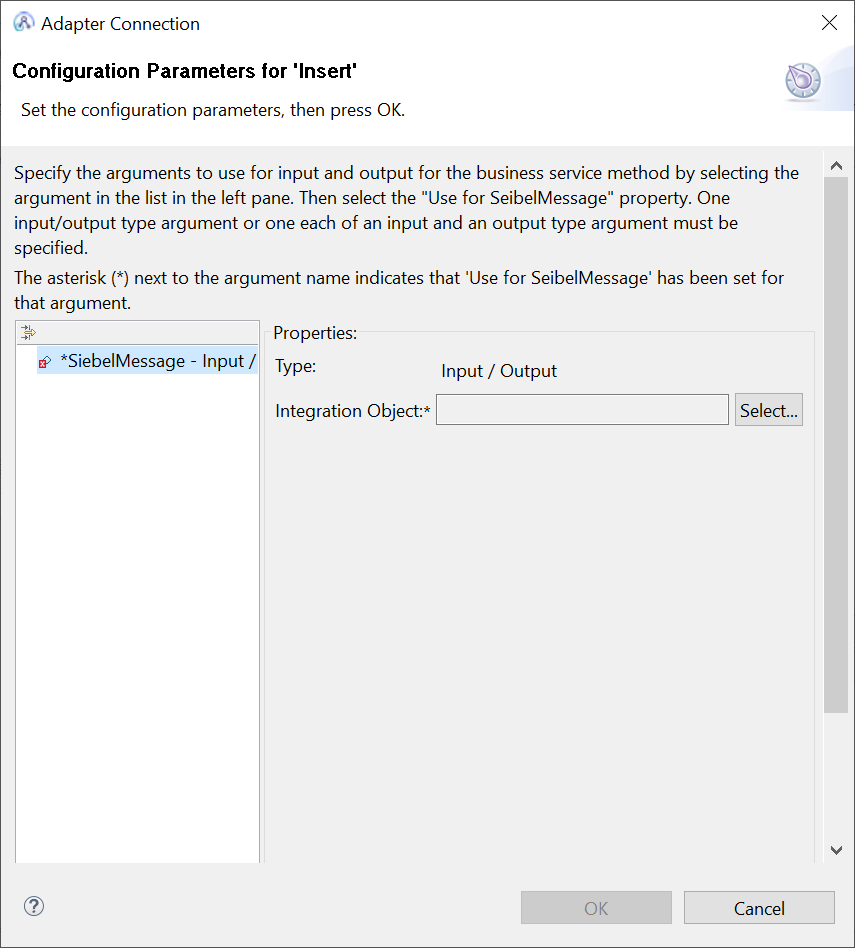
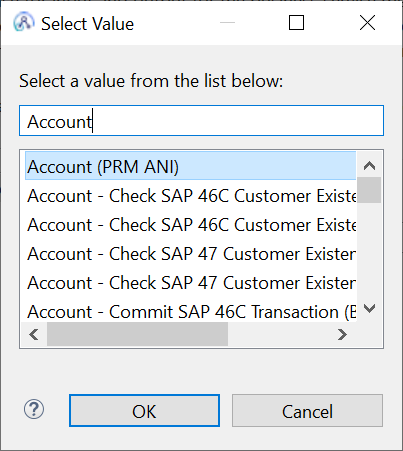
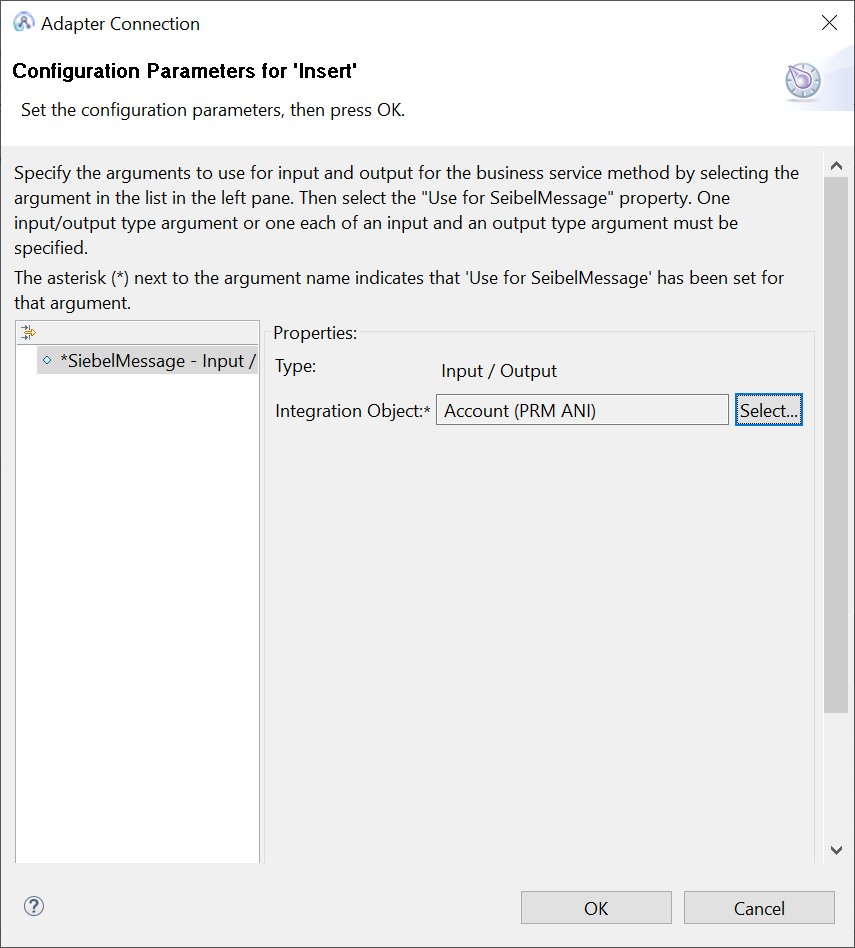
8) Select the ‘Account PRM(ANI) Integration Object for the Insert Operation.
9) Verify the operations and enter the password.

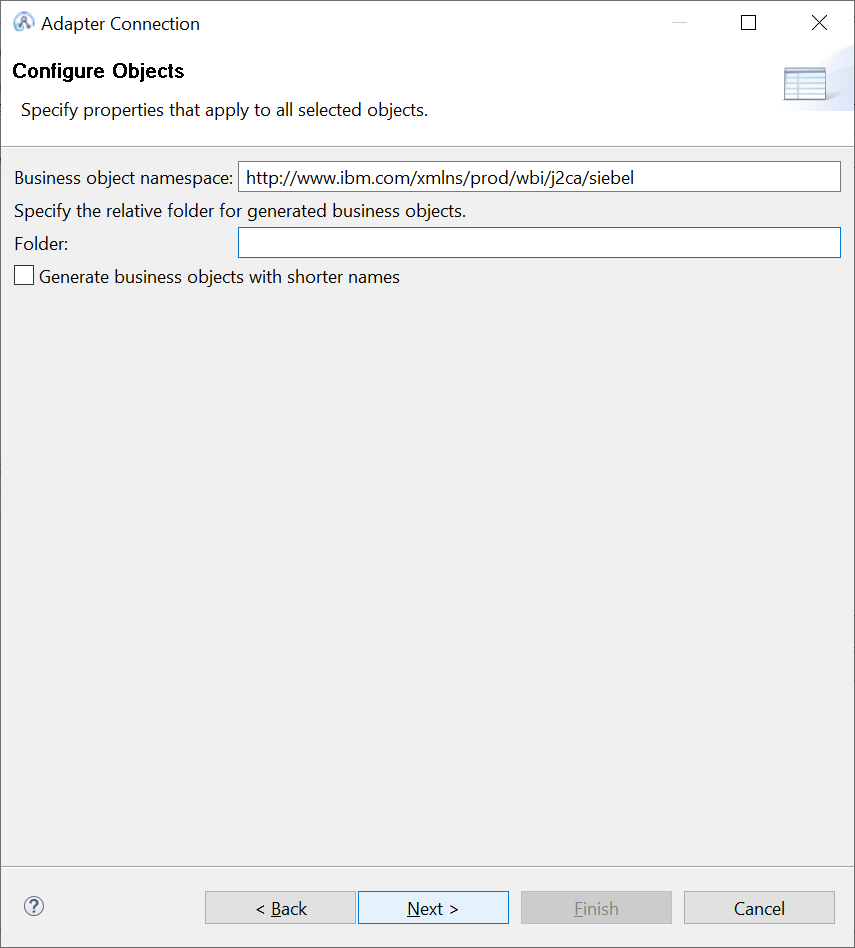
10) Select the container/application from the dropdown, then enter a foldername and adapter component name.
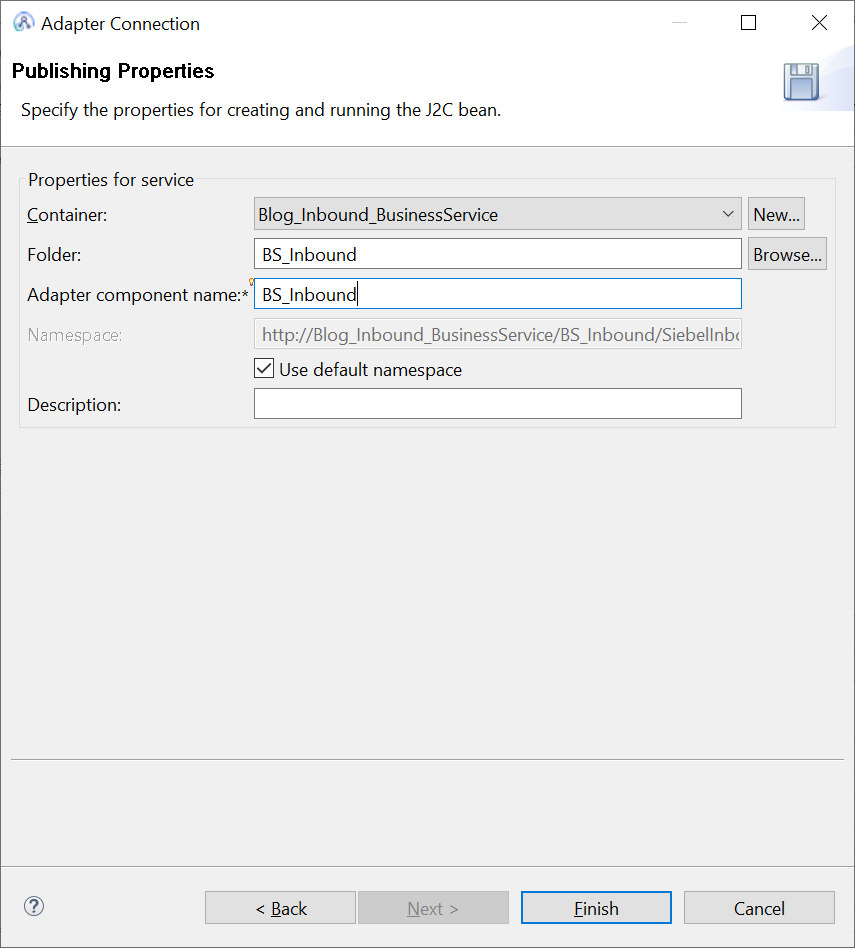
And clicking on Finish Button creates a inbound adapter for siebel.
11) Create a message flow and provide a name .
12) Drag the Siebel Input Node from the WebSphere Adapters palette to the message flow
And Browse for the inbound adapter created in the above in the primary adapter component.
13) Wire the Output and Failure terminals of the Siebel Input Nodes to MQ Output nodes .
And a trycatch node to the catch terminal of the Siebel Input Node.
14)Provide appropriate queue names for the mq output nodes and provide the file location for trace nodes.

15) The message flow creation is complete and we can deploy to the EG where the Broker is configured pointing to the Siebel jars.
> Create a Broker with Qmgr. Start the broker and create EG .
> Point the jarsURL and nativeLibs jar location to the Broker and restart the broker.
mqsireportproperties IBNODE -c AllTypes -o AllReportableEntityNames -r
mqsichangeproperties IBNODE -c EISProviders -o Siebel -n jarsURL -v C:\Siebel_LIB
mqsichangeproperties IBNODE -c EISProviders -o Siebel -n nativeLibs -v C:\Siebel_LIB
16)Create a Account in the Siebel Application
17) Check the event table configured
select * from SIEBEL.CX_IBM_EVENT;

18)Siebel Input node will poll this event and after polling this event entry is deleted from CX_IBM_EVENT .
Browse for the message in 'SIEBEL.INBOUND.INBOUND.XML.OUTPUT’ o/p queue configured
o/p message :
<NS1:IOAccountU40PRMANIU41ICAccount xmlns:NS1="http://www.ibm.com/xmlns/prod/wbi/j2ca/siebel/ioaccountu40prmaniu41icaccount"<font< a="" style="font-size: 8pt;"> class='blacktext'>><CurrencyCode>USD</CurrencyCode><CustomerAccountGroup>Sold-To Party</CustomerAccountGroup><GroupTypeCode>Organization</GroupTypeCode><Name>Siebel_Account_BO_Blog</Name><PartyTypeCode>Organization</PartyTypeCode><CurrencyCode>USD</CurrencyCode><CustomerAccountGroup>Sold-To Party</CustomerAccountGroup><GroupTypeCode>Organization</GroupTypeCode><Location>XXX_DO_NOT_DELETE_XXX</Location><Name>XXX_DO_NOT_DELETE_XXX</Name><PartyTypeCode>Organization</PartyTypeCode><CurrencyCode>USD</CurrencyCode><CustomerAccountGroup>Sold-To Party</CustomerAccountGroup><GroupTypeCode>Organization</GroupTypeCode><Location>wsadapters_siebel_inbound_bs_module_setup</Location><Name>wsadapters_siebel_inbound_bs_module_setup</Name><PartyTypeCode>Organization</PartyTypeCode><CurrencyCode>USD</CurrencyCode><CustomerAccountGroup>Sold-To Party</CustomerAccountGroup><GroupTypeCode>Organization</GroupTypeCode><Location>wsism</Location><Name>wsism</Name><PartyTypeCode>Organization</PartyTypeCode><CurrencyCode>USD</CurrencyCode><CustomerAccountGroup>Sold-To Party</CustomerAccountGroup><GroupTypeCode>Organization</GroupTypeCode><Location>wsadapters_siebel_inbound_bo_module_setup</Location><Name>wsadapters_siebel_inbound_bo_module_setup</Name><PartyTypeCode>Organization</PartyTypeCode><CurrencyCode>USD</CurrencyCode><CustomerAccountGroup>Sold-To Party</CustomerAccountGroup><GroupTypeCode>Organization</GroupTypeCode><Location>WSadapters_siebel_outbound_bo_module_setup</Location><Name>WSadapters_siebel_outbound_bo_module_setup</Name><PartyTypeCode>Organization</PartyTypeCode><CurrencyCode>USD</CurrencyCode><CustomerAccountGroup>Sold-To Party</CustomerAccountGroup><GroupTypeCode>Organization</GroupTypeCode><Location>create_bs_account</Location><Name>create_bs_account</Name><PartyTypeCode>Organization</PartyTypeCode></NS1:IOAccountU40PRMANIU41ICAccount>'</font<>
Trouble shooting :
a) Make sure these Siebel gateway and Siebel Server is running

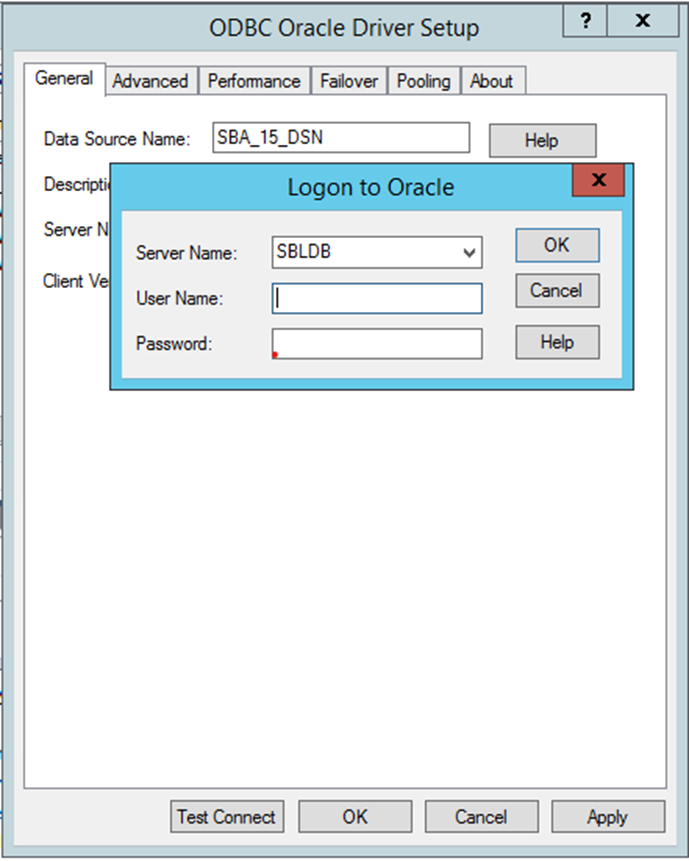
b)Test connection to the Datasource created for the Siebel Server works.
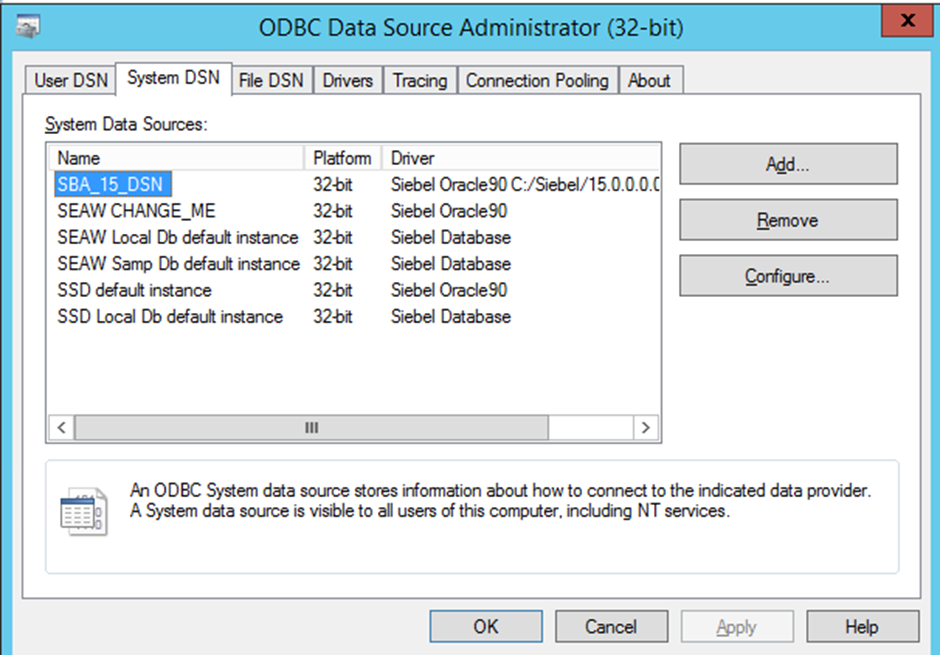
Click on configure for the System DSN used for Siebel and then click on Test connection Button as shown below.
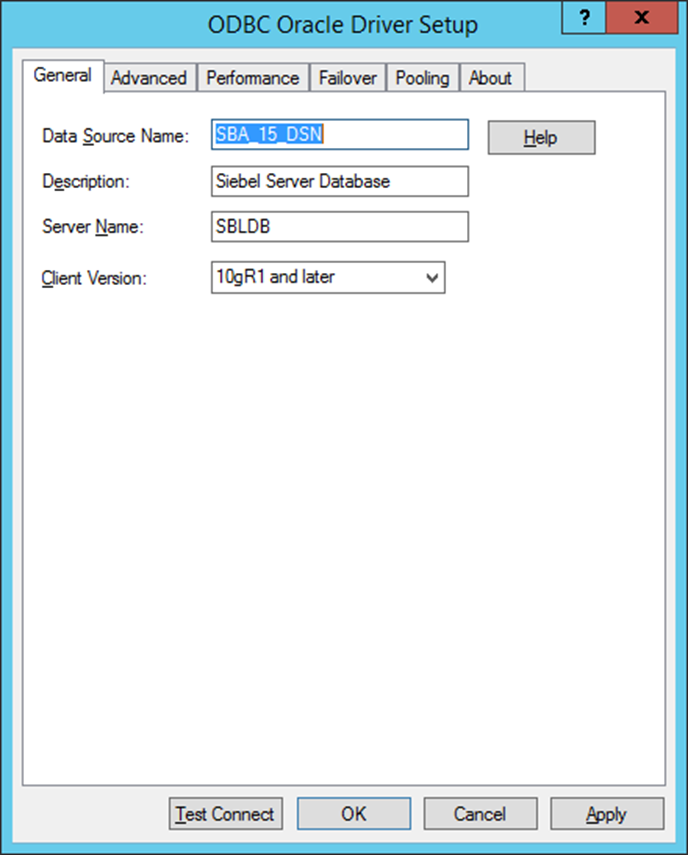
Provide the login credentails as in the screen that pops up.And click OK.
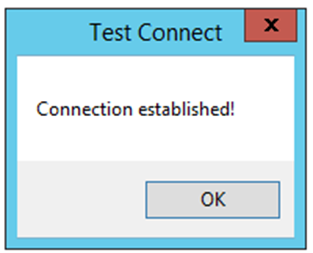
3)If Test connection doesn’t work , then login to the oracle machine and start the listener.
oracle listener startup and connecting to Databases :
=====================
sudo su - oracle
Log into sqlplus (without login prompt):
sqlplus /nolog
Run
connect / as sysdba
startup
exit
Exit sqlplus
Remember to start the listener (from the command line)...
lsnrctl start
##Stopping
Output for following commands :
$ sudo su - oracle
$ sqlplus /nolog
SQL*Plus: Release 11.2.0.1.0 Production on Sun Mar 10 14:43:19 2019
Copyright (c) 1982, 2009, Oracle. All rights reserved.
SQL> Run
SP2-0103: Nothing in SQL buffer to run.
SQL> connect / as sysdba
Connected.
SQL> startup
ORA-01081: cannot start already-running ORACLE - shut it down first
SQL> shutdown immediate
Database closed.
Database dismounted.
ORACLE instance shut down.
SQL> startup
ORACLE instance started.
Total System Global Area 1720328192 bytes
Fixed Size 2207488 bytes
Variable Size 1308623104 bytes
Database Buffers 402653184 bytes
Redo Buffers 6844416 bytes
Database mounted.
Database opened.
SQL> exit
Disconnected from Oracle Database 11g Enterprise Edition Release 11.2.0.1.0 - 64bit Production
With the Partitioning, OLAP, Data Mining and Real Application Testing options
$ Exit sqlplus
ksh: Exit: not found.
$ lsnrctl start
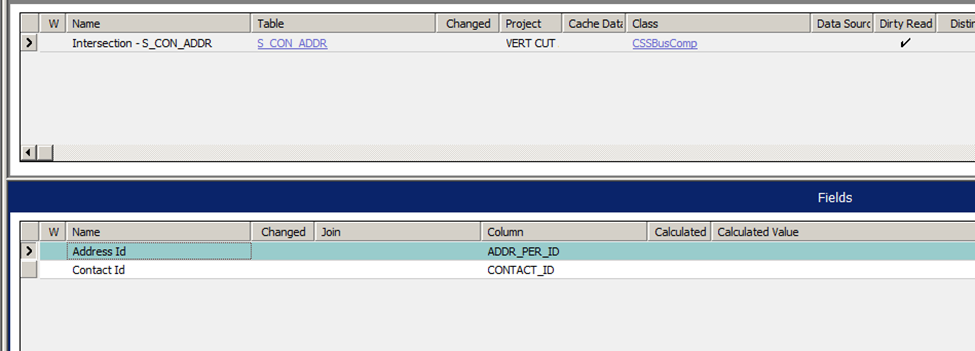
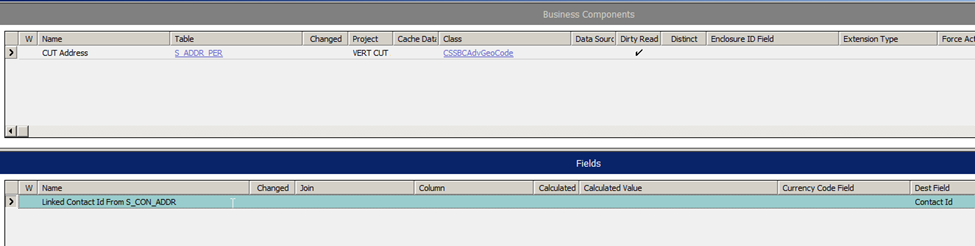
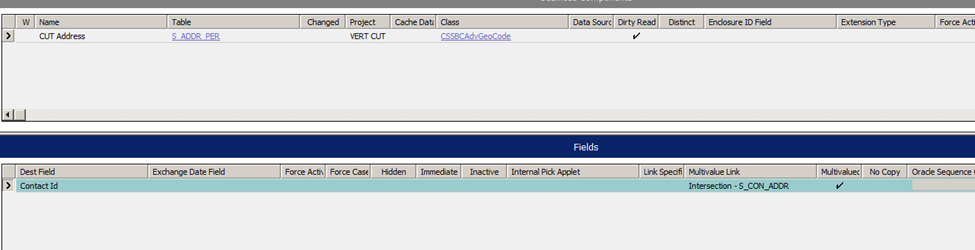
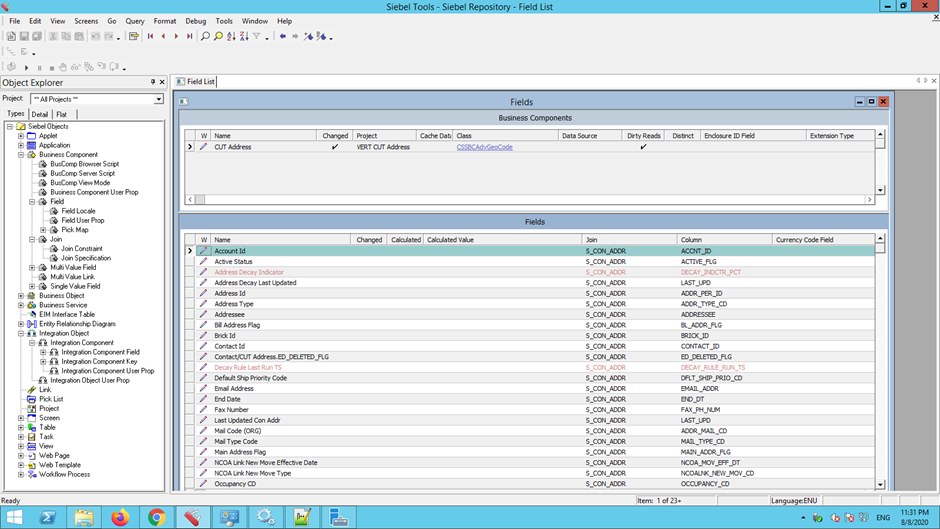
4)Query for Business Service setup :
Create BC:
Create Link
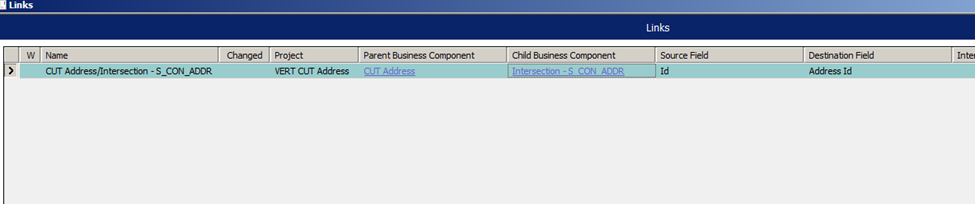
Under CUT Address BC, create Multi value link:
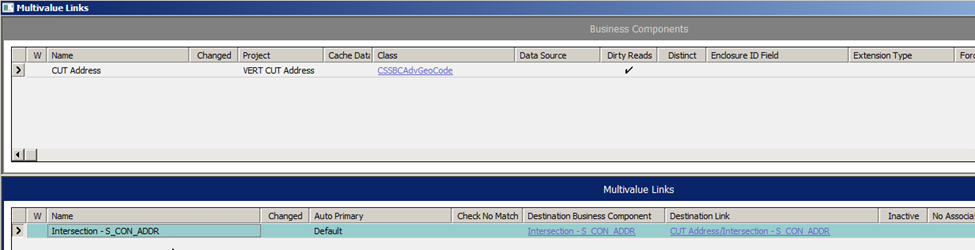
Create Field
Compile every modified object and then the project.
Unlock the project later.
Reference Links:
a)Configuring the Siebel application to work with the adapter
https://www.ibm.com/support/knowledgecenter/SSMKHH_10.0.0/com.ibm.etools.mft.doc/ac66110_.html
b)Siebel InputNode :
https://www.ibm.com/support/knowledgecenter/SSMKHH_10.0.0/com.ibm.etools.mft.doc/ac37310_.html
c)Working with Siebel data :
https://www.ibm.com/support/knowledgecenter/SSMKHH_10.0.0/com.ibm.etools.mft.doc/bd22990_.html