IBM MQ supports the exchange of information between applications, systems, services, and files by sending and receiving message data via messaging queues. This simplifies the creation and maintenance of business applications. IBM MQ works with a broad range of computing platforms and can be deployed across a range of different environments including on-premises, in the cloud, and hybrid cloud deployments. IBM App Connect provides an IBM MQ connector that enables you to connect to a number of supported
Using IBM MQ with IBM App Connect
You can use App Connect with IBM MQ to perform the following operations:
- Trigger a flow when a New message is received on the configured queue.
- Get message from a configured queue as part of a flow.
- Put message to a particular queue with a payload and MQMD headers.
- Publish message to a particular topic using the topic string.
To use App Connect to integrate IBM MQ with other connectors in the App Connect catalog, you need to connect App Connect to your IBM MQ queue manager. App Connect supports connection to the following IBM MQ queue managers
- Queue managers running on the IBM managed cloud service.
- Queue managers running on a local CP4i cluster.
- Queue managers running on customer premises.
Connecting to IBM MQTo connect to a queue manager from the App Connect Designer Catalog page for the first time, expand IBM MQand click Connect to display the connection fields as shown below.
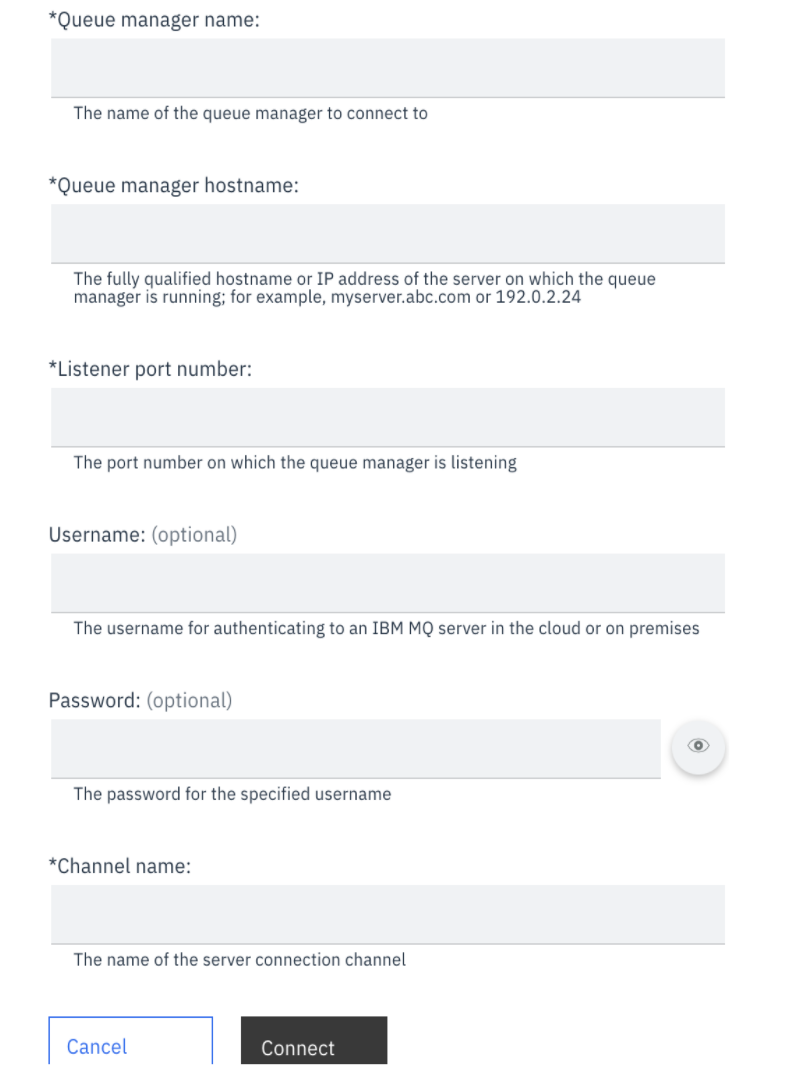
Figure 1: Image to show Account creation fields
Enter the required queue manager details and then click Connect.
Queue manager name
Specify the name of the queue manager to connect to.
Queue manager hostname
Specify the fully qualified hostname or IP address of the server on which the queue manager is running; for example, myserver.abc.com or 192.0.2.24.
Listener port number
Specify the port number on which the queue manager is listening.
Username
Specify the username for authenticating to the queue manager.
Password
Specify the password for the specified username.
Channel name
Specify the name of the server connection channel.
Tip: Before you use the account, rename the account to something meaningful that helps you to identify it. To rename the account on the “Catalog” page, select the account, open its options menu (⋮), then click Rename Account.
Interacting with an IBM MQ queue manager
The following examples demonstrate how you can interact with queue managers in IBM App Connect:
- New message on queue
To trigger a flow whenever a new message is received on the configured queue you need to use a New message on queue event node. The following steps describe the process for creating an event-driven flow:
-
- In the IBM App Connect Designer, click New > Event-driven flow to open the flow editor.
- Enter a name that identifies the purpose of your flow.
- In the Applications tab, select IBM MQ.
- Select the IBM MQ account and then click New message on queue. The event node is added to the flow and you are prompted to select the name of the queue that you are listening for messages on.
- Provide the name of the queue for which you want to listen for messages.
- Use the Browse only dropdown field to select whether you want to leave the original message on the queue or not after reading it. The default setting is No, which will delete the message once read.
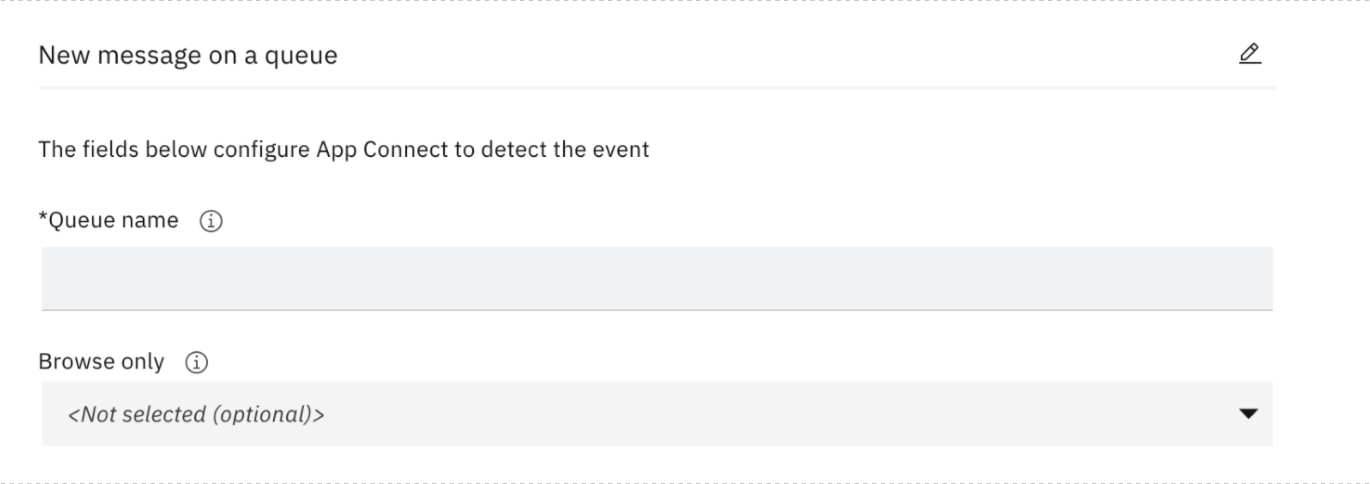
figure 2: Image to show IBM MQ New IMAGE Node
- Get message From a queue
To retrieve messages from a specific queue, you need to use the Get message from a queue action node. The following steps describe how to retrieve a message from a queue.
-
- In the IBM App Connect Designer, click New > Flows for an API.
- Enter a name that identifies the purpose of your flow.
- Provide a name for your first model and then configure properties and operations for that model.
- For the action node, select the IBM MQ connector, and then select IBM MQ > Get message from a queue.
- Provide the name of the queue on which you want to listen for messages.
- (Optional) Provide a Message ID and/or Correlation ID for retrieving specific messages.
- Use the Browse only dropdown field to select whether you want to leave the original message on the queue or not after reading it. The default setting is No, which will delete the message once read.

figure 3: Image to show IBM MQ GET node
- Put message on a queue
To send a message to a configured queue with a payload and MQMD headers, you need to use a Put message on a queue action node. The following steps describe how to send messages on a queue.
-
- In the IBM App Connect Designer, click New > Flows for an API.
- Enter a name that identifies the purpose of your flow.
- Provide a name for your first model and then configure properties and operations for that model.
- For the action node, select the IBM MQ connector, and then select IBM MQ > Put message on a queue.
- Provide the name of the queue where you want the message to be sent.
- The Message type field accepts one of the two values Text and Binary. Ensure that you use BASE64 if the message is of binary type.
- The Message payload field is where your actual payload goes.
- If required, define one or more MQMD headers. These can be specified as data properties with a name and value.
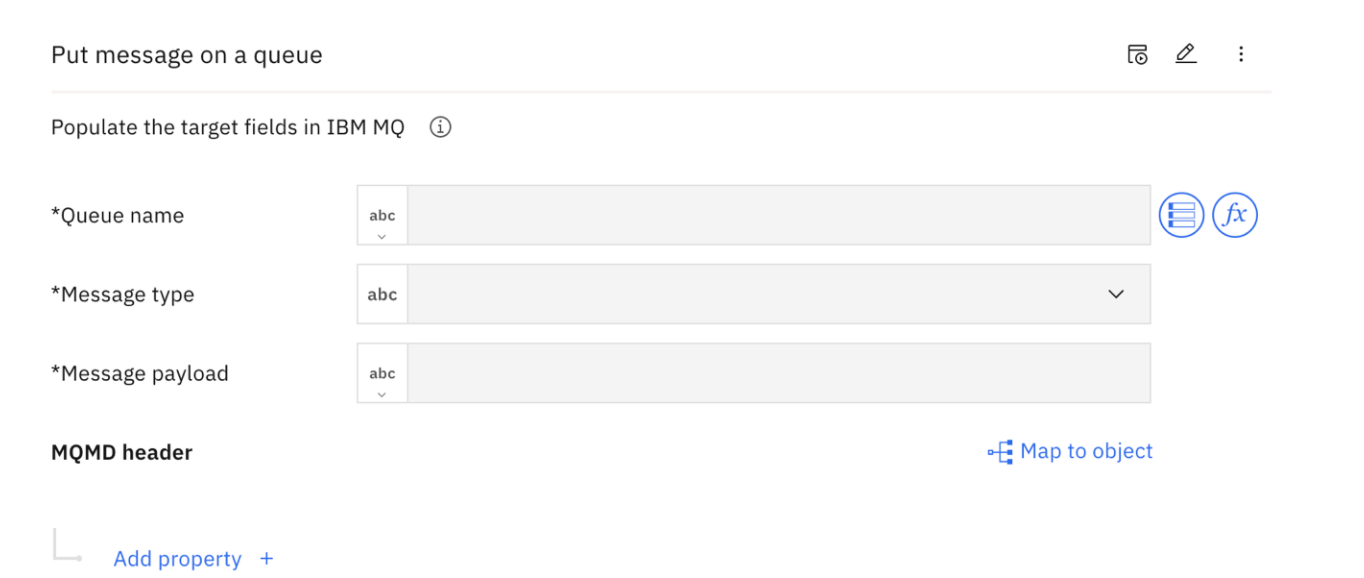
figure 4: Image to show IBM MQ PUT message node
- Publish Message to a topic
To publish a message to a particular topic you need to use the Publish message to a topic action node. The following steps describe how to publish a message on a specific topic
-
-
- In the IBM App Connect Designer, click New > Flows for an API.
- Enter a name that identifies the purpose of your flow.
- Provide a name for your first model and then configure properties and operations for that model.
- For the action node, select the IBM MQ connector, and then select IBM MQ > Publish message to a topic.
- Provide the Topic string for the topic you want to publish message to.
- The Message payload field is for your actual payload.
- If required, define one or more MQMD headers. These can be specified as data properties with a name and value.
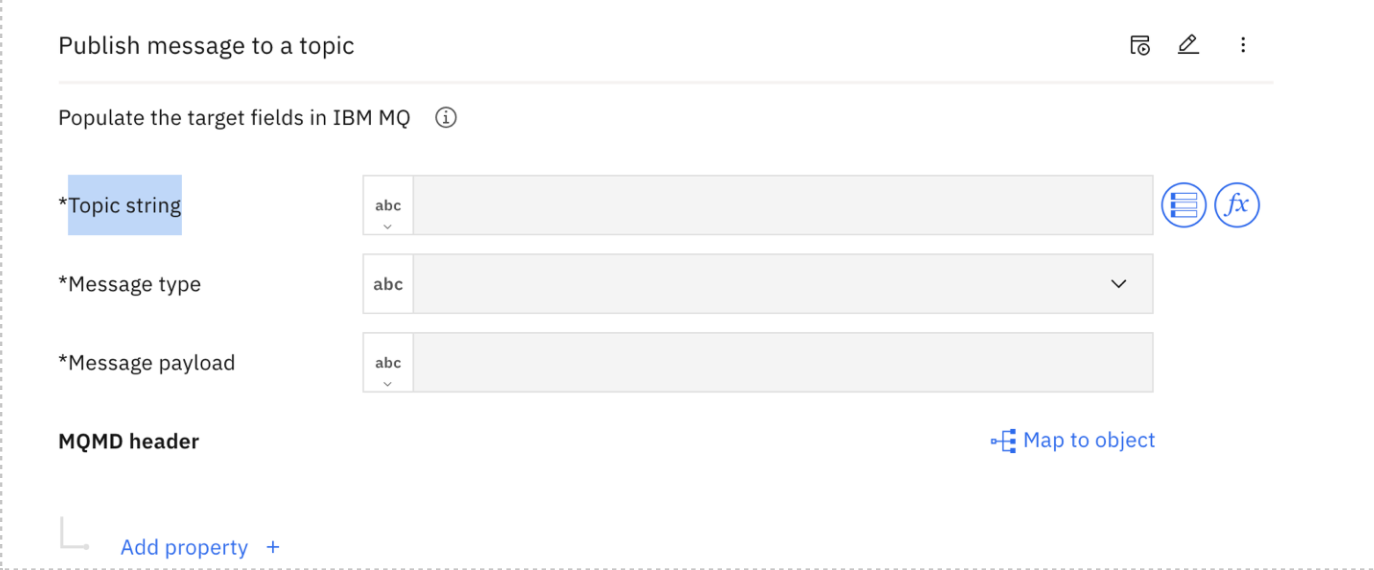
figure 5: Image to show IBM MQ Publish Message node
User scenario
In enterprises, business data is recorded for sales and stored in multiple databases. Say for example, a company named Acme Corp, a supplier of computer accessories, receives orders from their e-commerce website and these orders need to be added to a database table after they have been processed.
Acme Corp. can use the IBM MQ connector in App Connect to build an API to interact with an IBM MQ instance. It needs to have an API to accept purchase order XML and process the items inside of a purchase order. We use two flows to demonstrate the capabilities of the IBM MQ connector. The first flow accepts the purchase order and pushes the items in XML format into a configured queue. The second flow is an event driven flow which retrieves the items from the configured queue, parses the items XML and inserts each item in a database table. The integration flow can be exposed as an API that can be invoked by other applications, such as their e-commerce website widgets or mobile applications. The API will insert purchased items into the ITEMS table.
In this scenario the following details have been inserted in XML format to a configured queue.
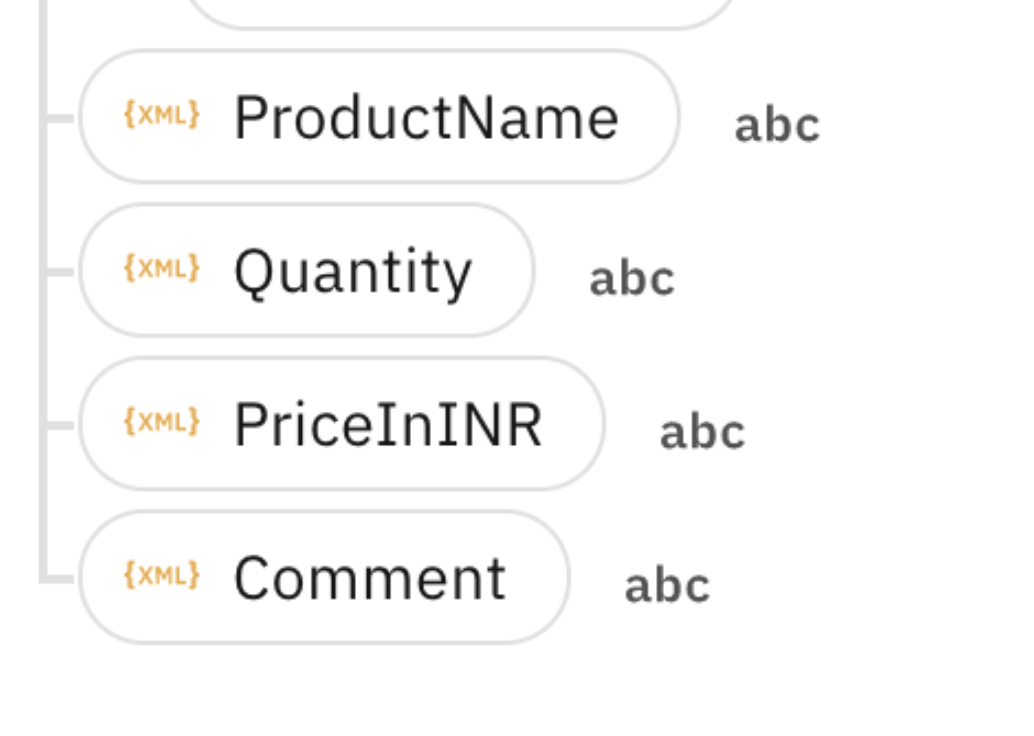
Figure 6: Image to show XML inserted to a queue
The following figure displays the flow for a POST API that we created in App Connect with the IBM MQ connector in the first flow. An XML parser node from the App Connect toolbox is used to parse the invoice XML received from the POST API call. The parsed items are then pushed into the configured queue using an IBM MQ Put message on a queue node.
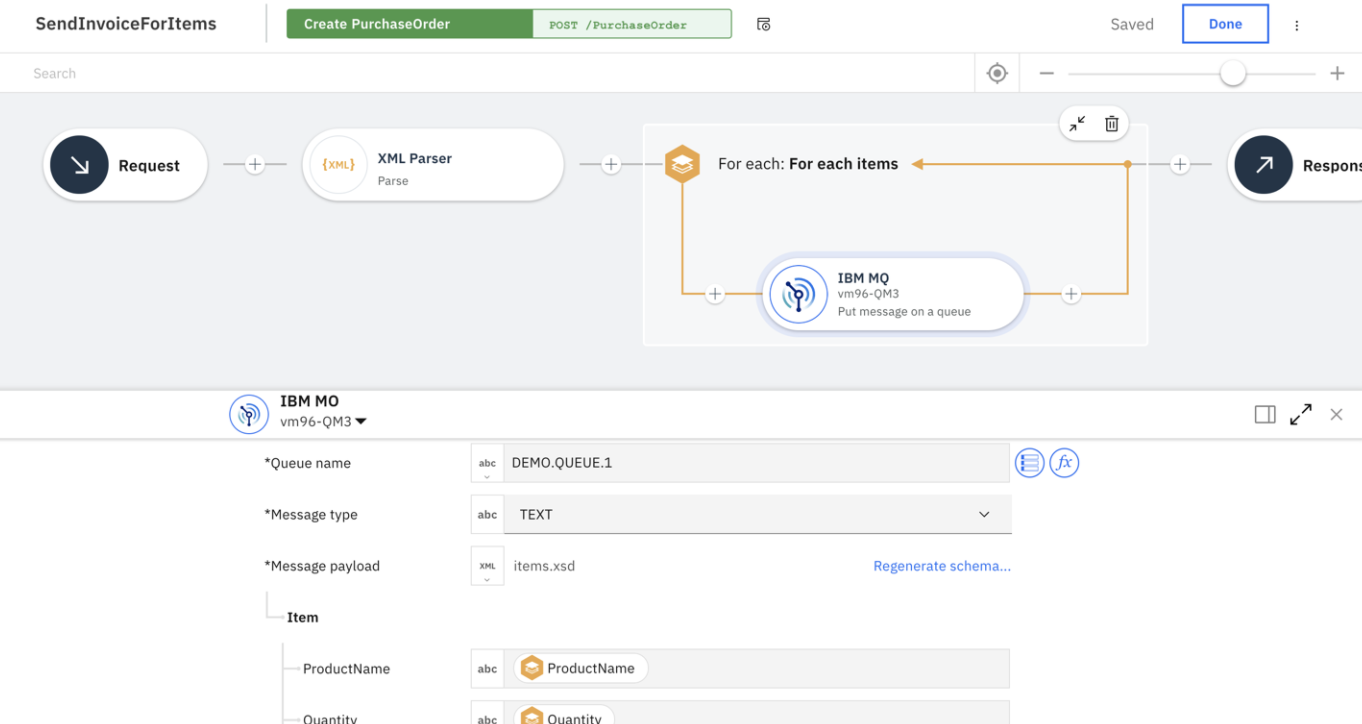
Figure 7: Image to show action flow
The following figures displays the second flow which was an event-driven flow. This flow has an IBM MQ New message on a queue trigger node and a JDBC Custom Query action node and an XML parser node. When a new message is received on the configured queue, the XML parser node parses item XML to extract item details like part number, quantity and price. Parsed individual XML fields are passed to the JDBC custom query action which executes an insert query to store these items into a database table.

figure 8:Image to show event-driven flow
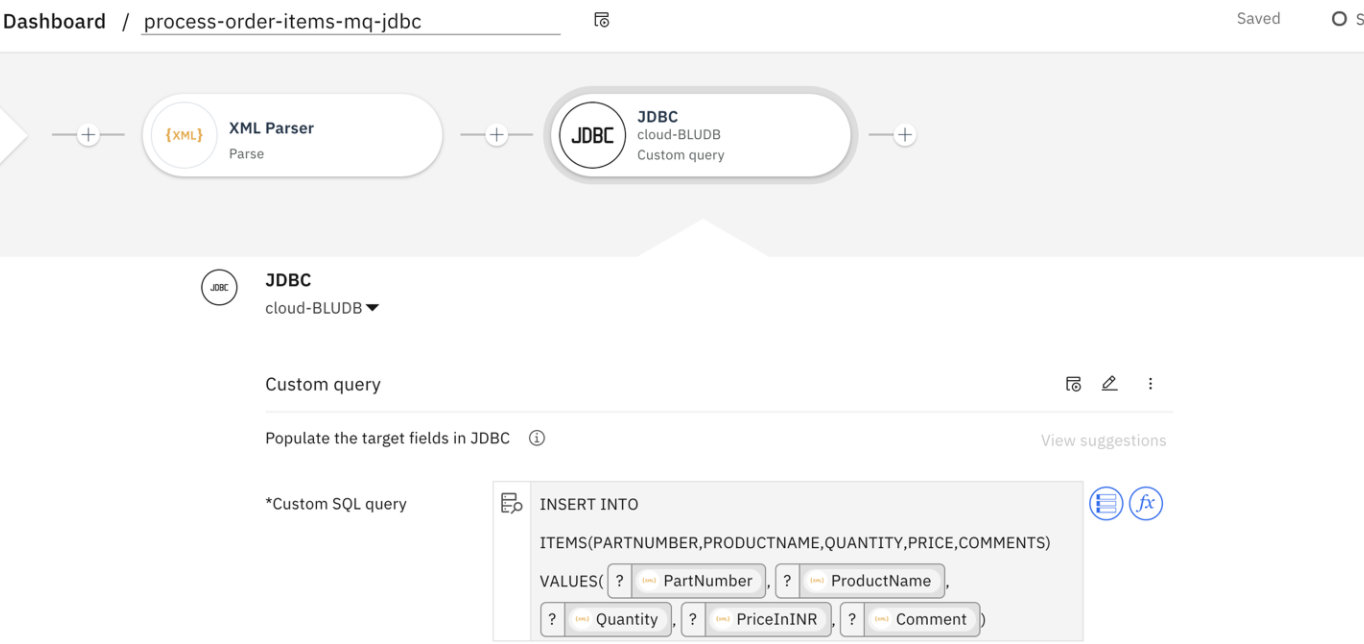
figure 9: Image to show JDBC node
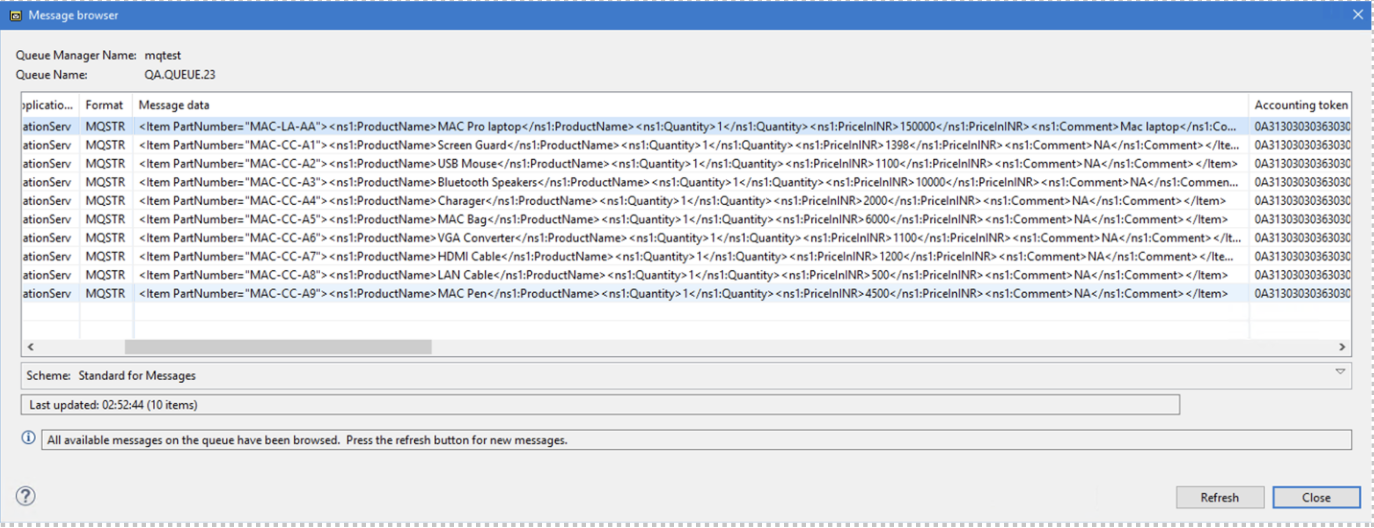
figure 10: Image to show the parsed XML pushed in the configure queue.
Check out the following video to see how we implemented this flow in App Connect.
#AppConnect#bestpractices#CP4I#IBMCloudPakforIntegration(ICP4I)#IBMMQ#MQ