IBM Cloud Satellite enables businesses to run OpenShift as a managed service on their own infrastructure, in other cloud providers such as AWS or Azure or edge environments. Adding the Cloud Paks to a Satellite location allows businesses to bring a secured unifying layer of services, such as MQ manager and App Connect integration servers, close to where the business applications reside and the data is stored, ensuring the same security and controls are used no matter where data is being collected, processed or shared.
This blog series walks you through the process to install a Cloud Pak at a Satellite location. As described above, customers would use Cloud Paks to build models where their data resides without privacy concerns
At a high level, you can use the following steps to install a Cloud Pak on a Satellite location:
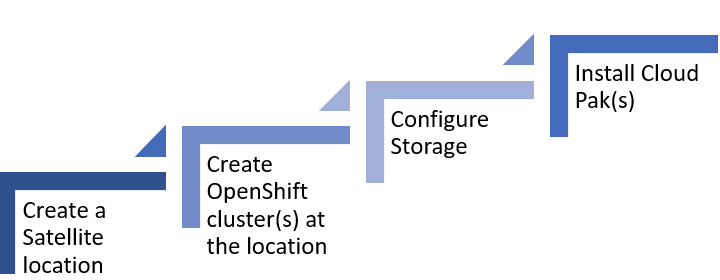
Create a Satellite location
Before you begin this process, you will need the following information:
- AWS Access key and secret
- Size of nodes to provision (CPU and RAM)
- Number of nodes required
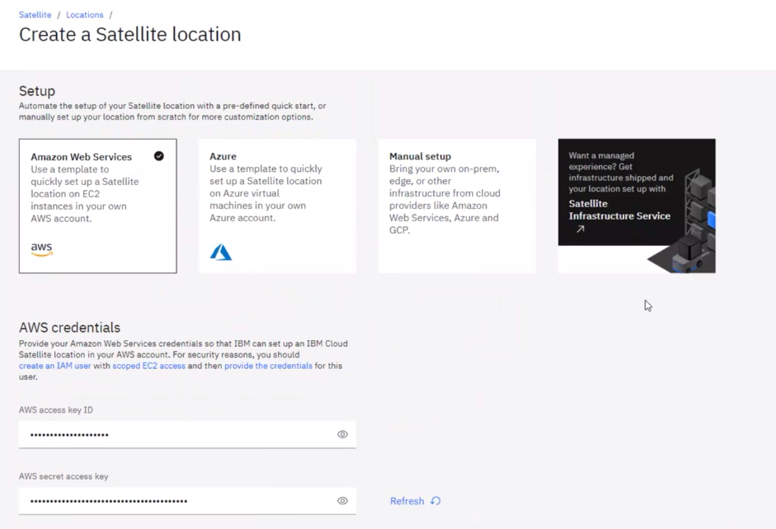
AWS Access key and secret
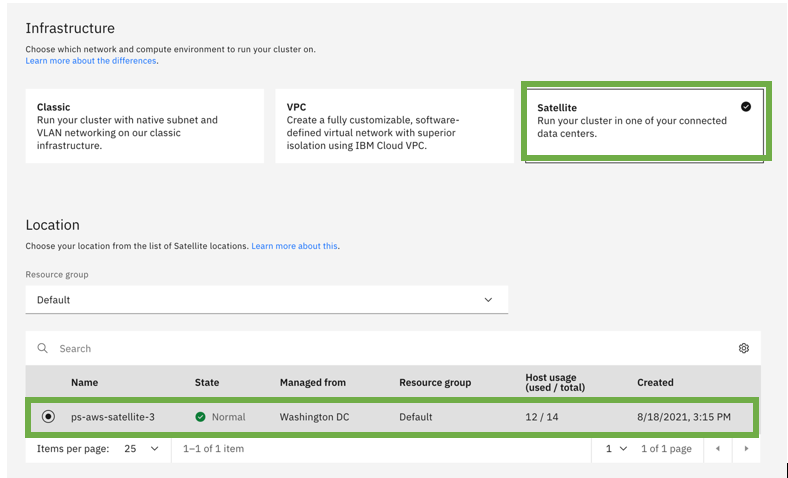
We begin by creating a new Satellite Location in IBM Cloud using AWS infrastructure. In the left navigation menu, select Satellite > Locations > Create location. When you select the Amazon Web Services template you will need to provide your AWS access key ID and secret access key.
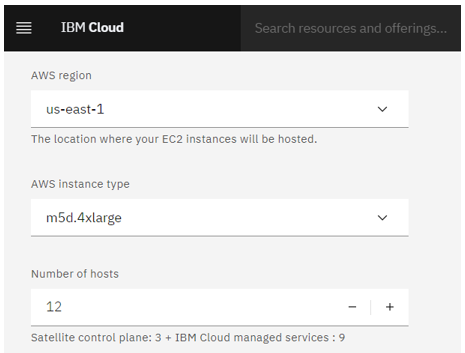
Size of nodes to provision (CPU and RAM)
Then you specify the size of the EC2 instance nodes (for example m5d.4xlarge 16 cpu x 64GB).
Number of nodes required
Plan for a minimum of three control plane nodes plus the number of worker nodes required by the Cloud Pak. Be aware that regardless of what region you choose for your nodes, AWS will automatically distribute the nodes across three zones in that region by default. If you provision six nodes across three zones, one node per zone is automatically assigned to the control plane. This pattern ensures high availability and reliability for Cloud Paks that take advantage of this setup (for example, Cloud Pak for Integration).
Tip: A single IBM Cloud Satellite location can support multiple OpenShift clusters. See the topic [Adding capacity to your Satellite location control plane]( https://cloud.ibm.com/docs/satellite?topic=satellite-locations#control-plane-scale) to determine if additional control plane nodes are required when you add more clusters to your location. For planning purposes, adding the extra nodes when you create the satellite location makes it easier later when you want to add another cluster.
You do not need to create Object storage as we will configure storage in the next blog.
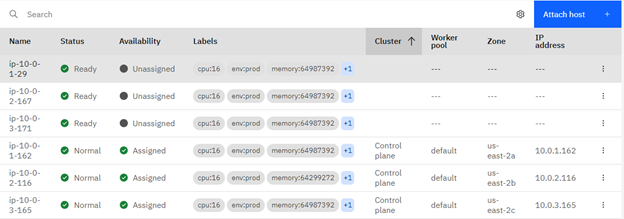
After you click Create, the EC2 Instances are provisioned for you on AWS. This can take a while and you’ll know the hosts are ready when the Satellite Location status is Normal:

And the status of the associated Hosts is also Normal or Ready.
For more details on this overall process see Getting started with IBM Cloud Satellite.
Create an OpenShift cluster at the location 
Let’s walk through the steps to deploy a cluster on your Satellite Location.
Deploy the cluster
If you have created an OpenShift cluster on IBM Cloud before, the process is largely the same. The major difference is you need to select Satellite as your infrastructure and then select your Satellite Location.
In the Satellite > Locations page of your location, click Getting Started > Create Cluster at the bottom of the page.
Under Worker Pools, you also need to select the size of the nodes for your cluster and which zone they reside in. Some Cloud Paks (like Cloud Pak for Integration) support multizone clusters.
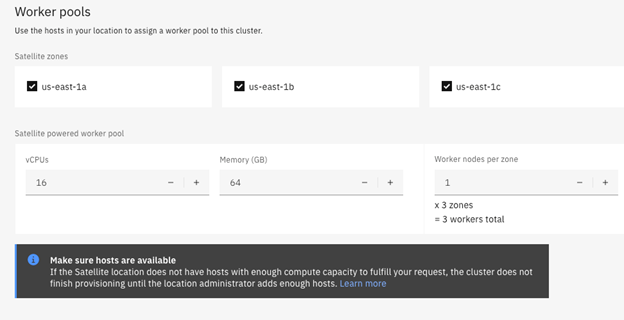
When the cluster is provisioned, it will use the number of nodes you specified from each selected zone as worker nodes. As the note suggests, ensure you have adequate compute available before creating the cluster.
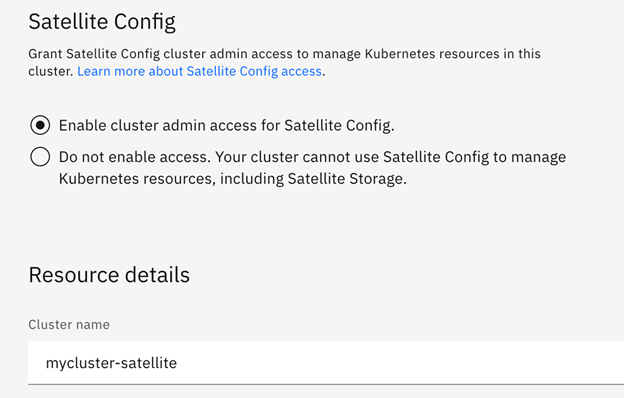
Finally, click Enable cluster admin access for Satellite Config which ensures that all of the Satellite Config components will work, and then give your cluster a name.
The cluster is ready when it shows as Normal in the Kubernetes Clusters page.
Configure the cluster for public log in
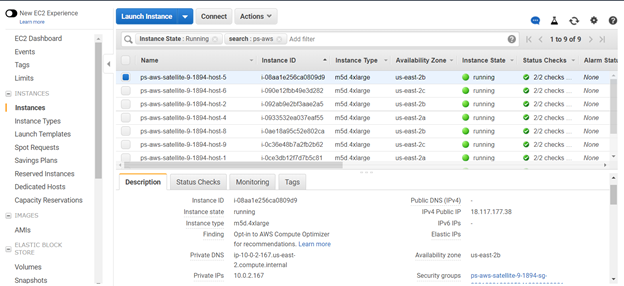
After the cluster is provisioned, in order to log in to the openshift web console, you need to update the DNS and cluster subdomain. In AWS, open your EC2 instances and record the public and private IP addresses for each of the control plane and worker nodes.
Then using those IP addresses, you will use the IBM Cloud CLI to run a series of commands:
- Register the public IP addresses of the control plane nodes with your Satellite location DNS.
- Add the public IP addresses of worker nodes to your cluster's subdomain.
- Remove the private IP addresses of worker nodes from your cluster's subdomain.
Refer to the IBM Cloud Satellite documentation for the detailed commands or watch this video:
After completing these steps, browse to your cluster in IBM Cloud, click on it, and then click OpenShift web console.
You’ve now successfully configured a Satellite Location in IBM Cloud using AWS infrastructure and deployed an OpenShift cluster. Before you can install a Cloud Pak, you need to configure storage for your cluster, as described in the next blog.
#Featured-area-1#Featured-area-1-home#ibm-cloud-satellite#cloudpaks#Openshift