This blog post explores how to containerize a .NET 6.0 Web App and deploy the application to the IBM Cloud Kubernetes Service.
Prerequisites
The following items are required, but installation and configuration instructions will be included in this post.
- .NET 6.0 SDK
- Text editor, such as Visual Studio Code
- Container runtime, such as Docker or Podman
- IBM Cloud Account (Free tier is sufficient)
- IBM Cloud Container Registry
- IBM Cloud Kubernetes Service
- IBM Cloud CLI
- Kubernetes CLI
Creating a Web App
.NET, previously .NET Framework and .NET Core, is a development framework and runtime from Microsoft, which allows developers to create Web, Desktop and Mobile applications, typically using C# or F# and historically also Visual Basic and C++. ASP.NET Core is the successor of ASP.NET, a web development framework which runs on top of the .NET runtime.
Before creating the application, it is required that you download install the .NET 6.0 SDK. At the time of writing .NET SDK 6.0.300 is the latest version.
The .NET 6.0 is a cross-platform framework and supported on Windows, Linux and macOS. You can download it here, or use your favourite package manager to install.
After installation, you can run the following command from your favourite command line tool to display the current version. I am using PowerShell 7.2, which is the latest cross-platform version supported on Windows, Linux and macOS.
dotnet --version
Now let's create a new Web App using the new command. The -o parameter specifies the output directory and will determine the name of your application.
dotnet new webapp -o SampleApp
Navigate to your newly created application and issue the run command. This will build the application and launch it from the command line.
cd ./SampleApp
dotnet run
You should see logs printed to the command line, including the URL where your application can be accessed.
You can access the Sample App by opening the URL in your favourite web browser.
You have successfully created and launched a .NET 6.0 Web App. You can learn more about building Web apps with ASP.NET Core by clicking on the link.
You can stop the application by pressing Ctrl+C on the command line.
Containerize the app
Containerization is the process of packaging an application and its dependencies into an isolated, executable container. Unlike virtualization, this does not include a full operating system, making containers much more light-weight. The concept of immutable delivery is applied, which means that there is no difference between the application environment used during development, testing and production, since the application is always delivered and executed as a container, eliminating the impact of variations and configuration drift on the hosting system.
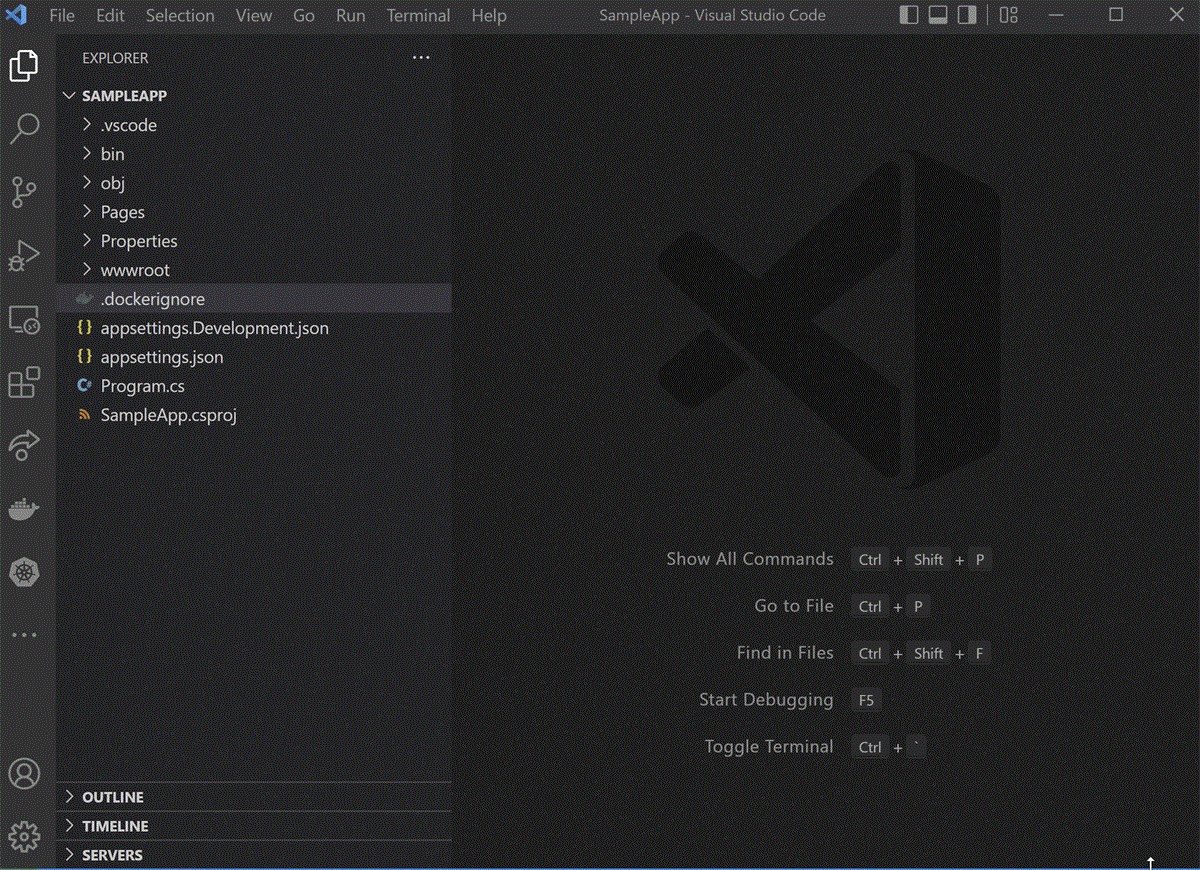
Open SampleApp folder in your favourite text editor. I will be using Visual Studio Code, the free open-source code editor from Microsoft, which is also cross-platform and supported on Windows, Linux and macOS. Here is an example to do it from the command line, assuming you are in the root directory of SampleApp.
code .
Option 1 (Docker Extension)
From the Extensions menu (Ctrl+Shift+X) search for "Docker" and install the Docker extension.
Afterwards, open the Command Palette (Ctrl+Shift+P) and search for "Add Docker Files To Workspace".
- When prompted "Select Application Platform", select the ".NET: ASP.NET Core" option
- Next, on "Select Operating System", choose "Linux"
- Enter 7111 as the port number
- When asked "Include optional Docker Compose file?" select "No".

Option 2 (Manual)
If you are not using Visual Studio Code, or you prefer to do this step manually, add a new file to the project and name it Dockerfile. This file contains all the instructions on how to build and run the application. Add the following content to the file:
FROM mcr.microsoft.com/dotnet/aspnet:6.0-focal AS base
WORKDIR /app
EXPOSE 7111

ENV ASPNETCORE_URLS=http://+:7111

# Creates a non-root user with an explicit UID and adds permission to access the /app folder
# For more info, please refer to https://aka.ms/vscode-docker-dotnet-configure-containers
RUN adduser -u 5678 --disabled-password --gecos "" appuser && chown -R appuser /app
USER appuser

FROM mcr.microsoft.com/dotnet/sdk:6.0-focal AS build
WORKDIR /src
COPY ["SampleApp.csproj", "./"]
RUN dotnet restore "SampleApp.csproj"
COPY . .
WORKDIR "/src/."
RUN dotnet build "SampleApp.csproj" -c Release -o /app/build

FROM build AS publish
RUN dotnet publish "SampleApp.csproj" -c Release -o /app/publish /p:UseAppHost=false

FROM base AS final
WORKDIR /app
COPY --from=publish /app/publish .
ENTRYPOINT ["dotnet", "SampleApp.dll"]
The application can now be containerized, but requires a container runtime such as Docker or Podman.
Please note that Docker Desktop requires a paid subscription in larger enterprises since January 2022. Podman can be installed on Windows by following this guide, or you can install Podman or Docker manually on WSL2, following this simple guide.
Regardless of which option you choose the following steps will remain the same, simply replace podman with docker, the rest of the syntax is the same for both tools.
A container image is the package that contains your application and all the dependencies you need to run it. Multiple instances of your application can be created from this image.
From the command line issue the build command to create the container image from the Dockerfile. You must be in the application root directory, the same folder as the Dockerfile. The -t instruction allows us to name and tag a container by providing a repository name, as well as an optional tag.
podman build -t sampleapp:v1-alpha .
You have now successfully created a container from SampleApp. You can see your container image, along with the base images you used to create your images, by running the images command.
podman images
Finally, we can run the container with the following instruction. For more on Docker commands, refer to the official documentation.
podman run -it -p 7111:7111 sampleapp:v1-alpha
You can now access the application on port 7111 in your favourite browser.
You can stop the container by pressing Ctrl+C in the command line.
For this section you will need an IBM Cloud account - sign up for free if you don't have one already.
1. Create a Container Registry
A container registry is used store and share container images, essentially a container image repository. The IBM Cloud Container Registry is a cloud-hosted, private, multi-tenant container registry for storing container images.
In the IBM Cloud console, select "Catalog" on the menu, then choose "Containers" in the Category filter. You are going to create a container registry, which is used to store the container images. Click on the "Container Registry" tile, then click on the blue "Get Started" button.
The Quick start page display the steps on how to create your own registry:
- First, download and install the IBM Cloud CLI locally, by following the instructions as per Installing the stand-alone IBM Cloud CLI. After installation you can verify that the CLI is successfully installed by running the following from the command line.
ibmcloud version
- Next, add the Container Registry plugin.
ibmcloud plugin install container-registry -r 'IBM Cloud'
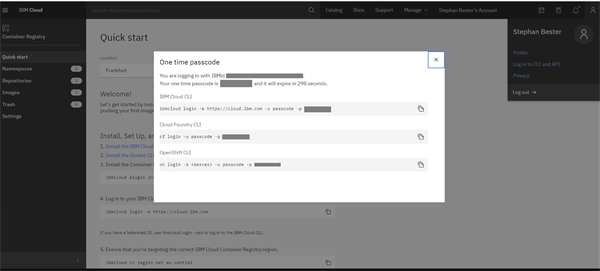
- Login to your IBM Cloud account by selecting the user icon in the top-right corner and clicking on the Log in to CLI and API option. A one time passcode is displayed.

ibmcloud login -a https://cloud.ibm.com -u passcode -p <xxxxxxxxx>
- You will be prompted to select a region. You may also use the following command to set your region.
ibmcloud cr region-set eu-central
- Create a container registry by creating your own namespace.
ibmcloud cr namespace-add ibm4free
You have successfully created a Container Registry on IBM Cloud.
2. Push container image to registry
- Login to the container registry from the command line. Note this is different from the logging into your IBM Cloud account.
ibmcloud cr login
- Tag the SampleApp container image again, but this time with a reference to the IBM Cloud Container Registry.
podman tag sampleapp:v1-alpha de.icr.io/ibm4free/sampleapp:v1-alpha
- Push the image to upload it.
podman push de.icr.io/ibm4free/sampleapp:v1-alpha
- Verify that your SampleApp container image was successfully uploaded to the registry.
ibmcloud cr image-list
You have successfully pushed a container image to IBM Cloud!
3. Create the Kubernetes Service
Navigate back to the "Catalog", filter for "Containers", and select the "Kubernetes Service" tile. In the Plan details section, select the "Free" pricing plan. Give your cluster a name and click on the blue "Create" button.
It will take some time for your cluster to be created.
Containerization is the process of packaging application code into isolated containers, which is then executed by a container runtime, like Podman or Docker. Running a large number of containers at scale, requires orchestration. Kubernetes is the leading container orchestration tool.
Back in the command line we will use this file to deploy our container to the IBM Cloud Kubernetes Service we created earlier.
- First, install the IBM Cloud Container Service plugin
ibmcloud plugin install container-service
- Run the list cluster command to make sure you can see your free Kubernetes Service cluster.
ibmcloud ks cluster ls
- Set the cluster as the context in your command line session.
ibmcloud ks cluster config --cluster ibm4free
- Verify that the Kubernetes CLI, kubectl, can connect to your cluster.
kubectl config current-context
- Create a new deployment using our container image.
kubectl create deployment sampleapp --image=de.icr.io/ibm4free/sampleapp:v1-alpha
- View your deployment in the command line.
kubectl get deployment sampleapp
- The application is now deployed and running in the cluster, but it is not accessible from outside the cluster. To expose it externally, we need to create a service. In Kubernetes we can expose our service with different port configurations, but for our free cluster we will use NodePort. You can read more about it here: Explained: Kubernetes Service Ports - Nigel Poulton
kubectl expose deployment sampleapp --type="NodePort" --port=7111
kubectl get service sampleapp
- The response shows the service, as well as the NodePort assigned to our service. Make a note of the highlighted value.
- Fetch the public IP for your Kubernetes cluster.
ibmcloud ks workers --cluster ibm4free
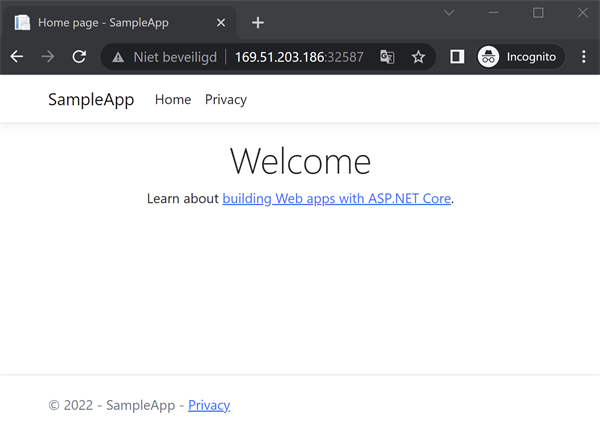
- Combine the public IP and the NodePort from the previous two steps to access SampeApp in your browser.

You have successfully deployed and exposed your application. Open your IBM Cloud console and search for your cluster name in the search bar.
Once found, click on your service and on the landing page you will see a blue button to navigate to the Kubernetes dashboard. Click on it to view details about your cluster and the deployment.

In this blog post we created a sample .NET 6.0 Web Application from the command line using the dotnet CLI. In Visual Studio Code with the Docker extension we generated a Dockerfile, which we then used to create a containerized version of our sample application, using Podman. We signed up from an IBM Cloud account, created a container registry and a Kubernetes cluster. Then we used a combination of the IBM Cloud CLI and the Kubernetes CLI to connect, deploy and expose our containerized application on our Kubernetes cluster.
In future blog posts, I hope to explore each of these steps, and the entire lifecycle of this application, in more detail.