- Pam Andrejko, Sundari Voruganti
IBM Cloud Satellite enables businesses to run OpenShift as a managed service on their own infrastructure on-premises, or in other cloud providers such as AWS or Azure. Adding the Cloud Paks to a Satellite location allows businesses to bring a secured unifying layer of services, such as MQ manager and App Connect integration servers, close to where the business applications reside and the data is stored, ensuring the same security and controls are used no matter where data is being collected, processed or shared.
Whereas our previous blogs described how to deploy IBM Cloud Satellite on AWS or Azure, this blog tackles building a Satellite Location with on-premises infrastructure, specifically IBM infrastructure. The existing IBM Satellite on-premises documentation is recommended, but the intent of this blog is to highlight additional considerations when using on-premises VMs from the IBM network, such as Fyre, or VMware in IBM Cloud.
Overall, the process is actually simpler than using AWS or Azure, in terms of requiring fewer steps.
TIP: For an end-to-end video of the following steps, watch our Bringup Lab playback recording.
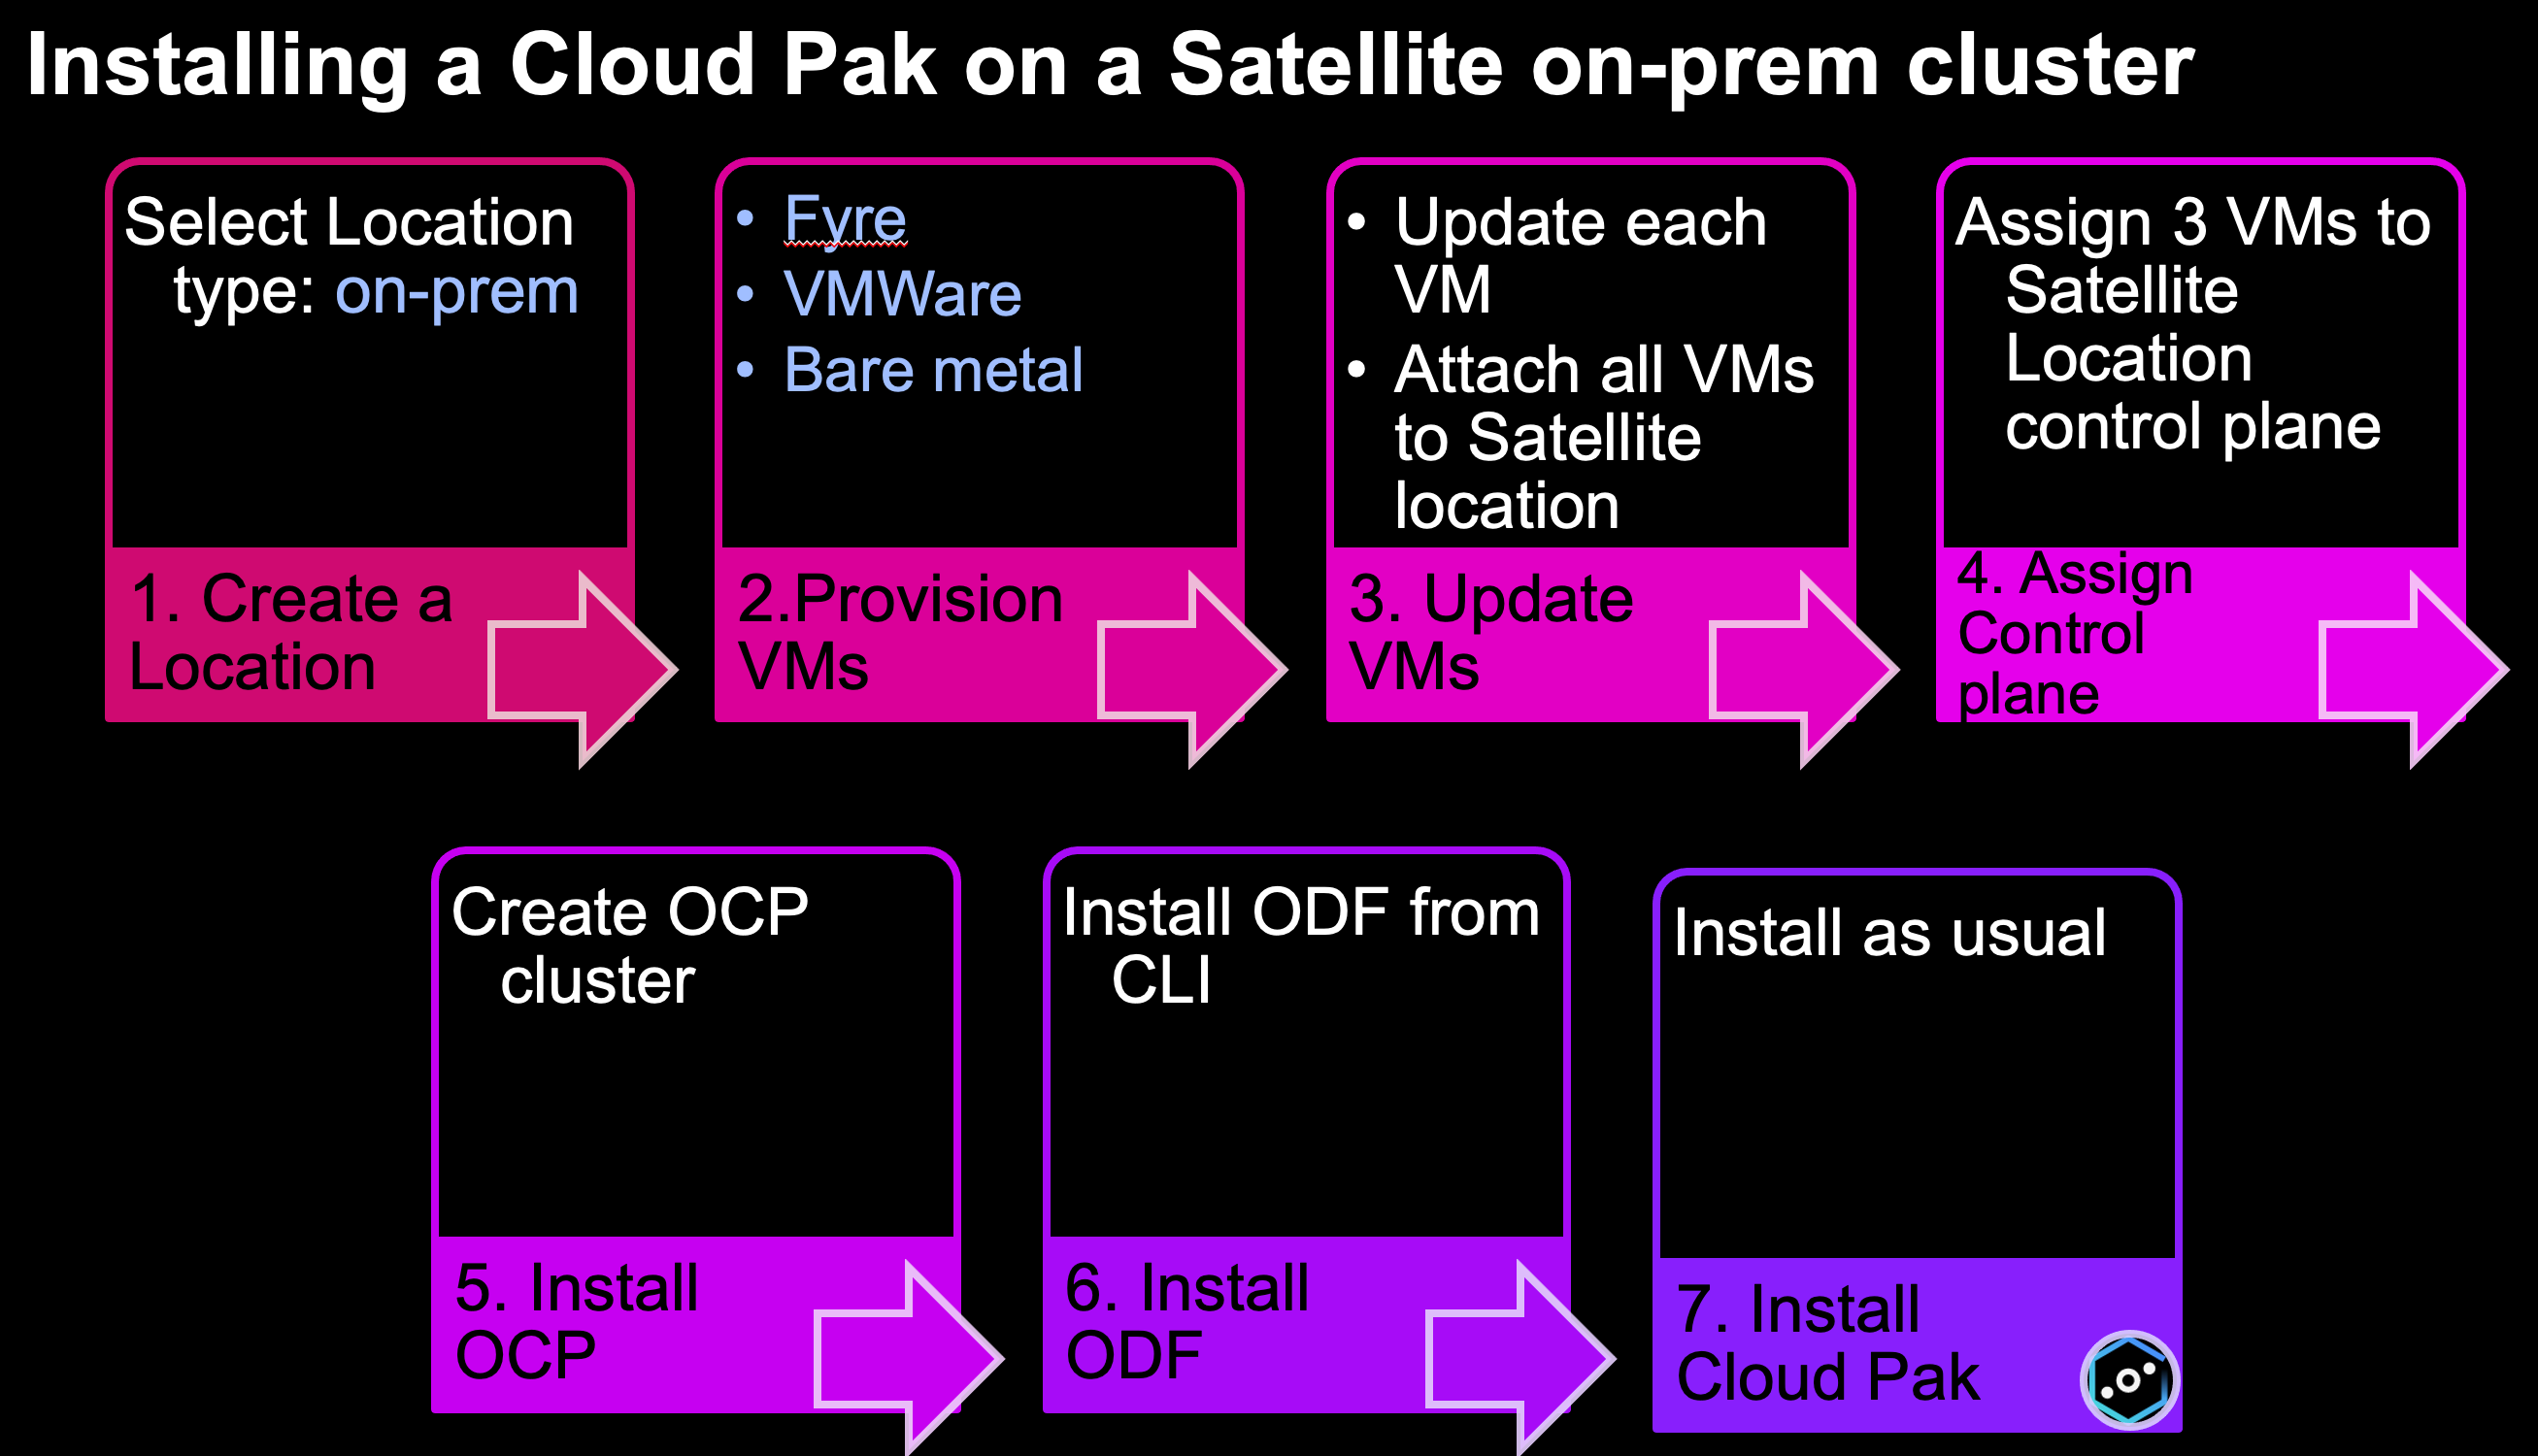
Let's delve into each tile in the diagram above.
1. Create a Location
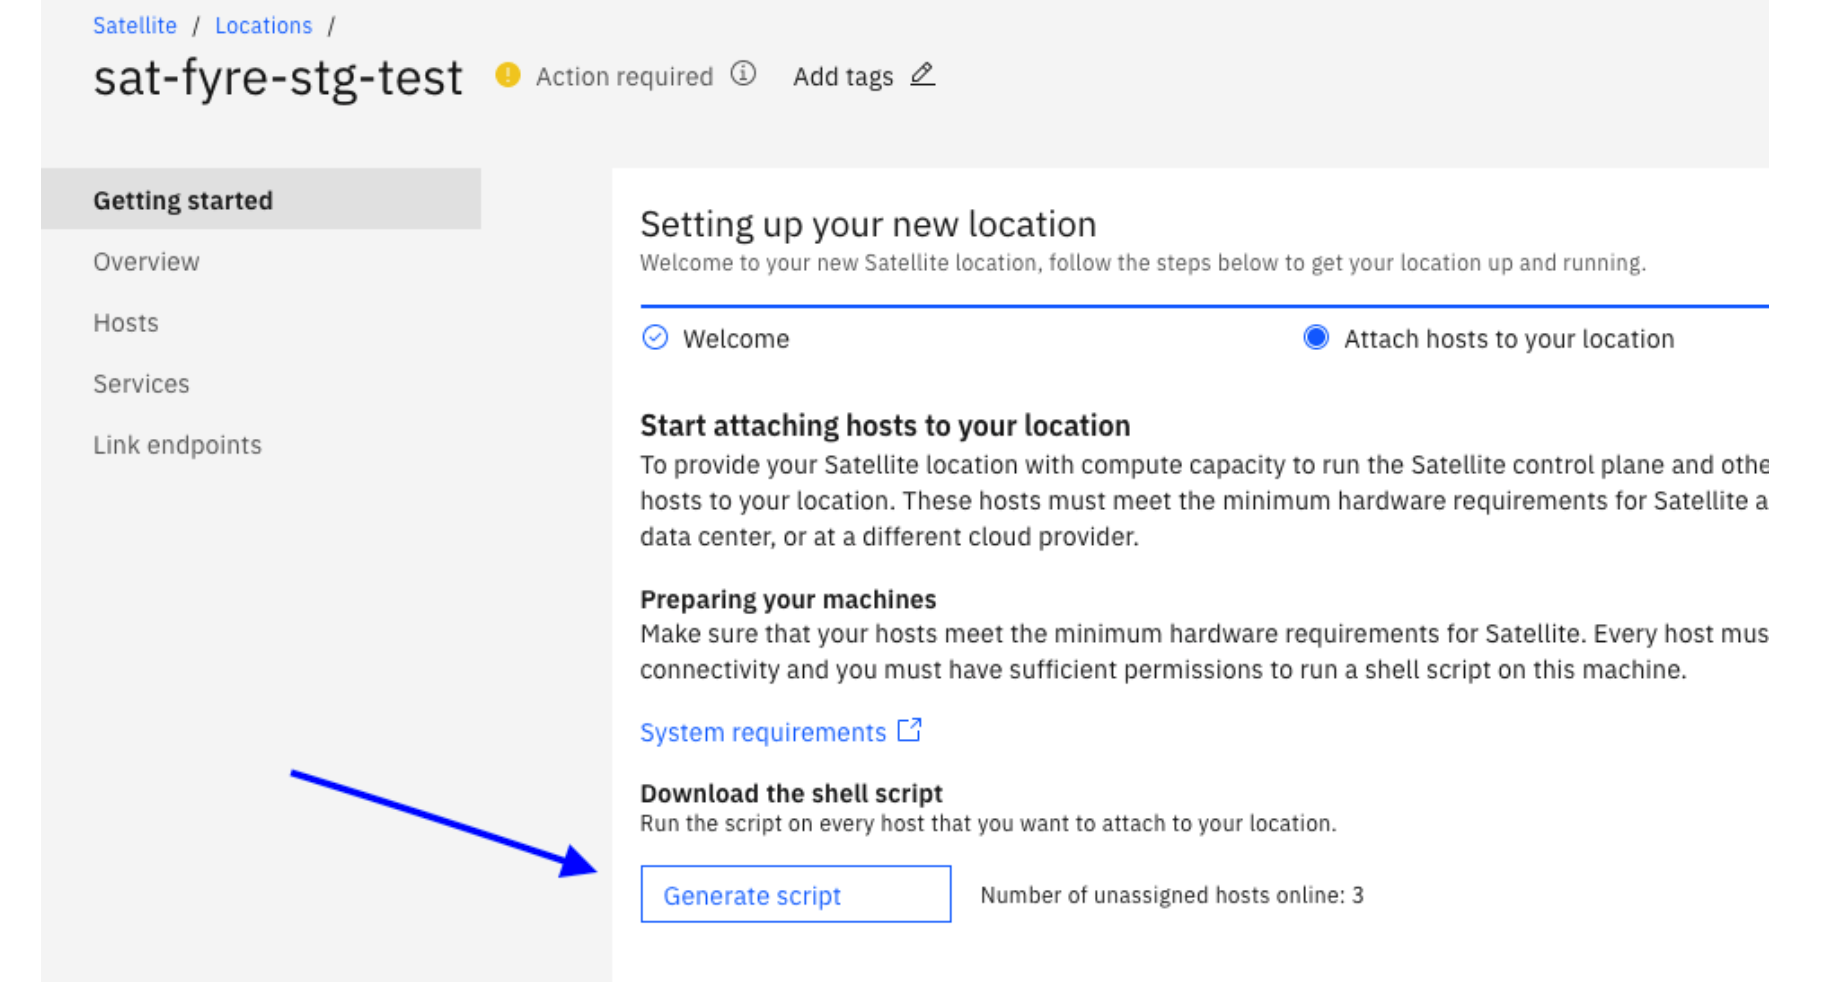
Navigate to https://cloud.ibm.com/satellite/locations and click Create Location. Select On-premises & edge.
Generate and download the attach script, to be run later on the on-premises VMs:
2. Provision VMs
This is where the IBM network-specific instructions become important.
Operating System
The VMs in the IBM network must be provisioned with RHEL 7.x. Check the Host system requirements for the latest requirements.
VMs
If you are using Fyre, you need to ensure that you have adequate quota in your Fyre account to provision the VMS. The maximum memory you can assign to a compute node is 32Gi. Normally we use a minimum of 64Gi for worker nodes when we install Cloud Paks. This means you may require more (or double) worker nodes than you normally provision for adequate compute. We also configured the VMs with public and private VLAN which saves many steps later because you don't have to configure the OpenShift cluster for public log in after it is created.
A Fyre API is available to provision a set of embers (or VMs) with the required parameters to work with Satellite. We ran the following curl command to call the Fyre API.
You need to provide your <fyre-user> and <fyre-api-key> and specify a unique name <fyre-cluster-name>. Specify the total number of nodes required (control plane + workers) in the "count" parameter.
curl -X POST -k -u <fyre-user>:<fyre-api-key> 'https://api.fyre.ibm.com/rest/v1/?operation=build' --data '
{
"fyre": {
"creds": {
"username": "<fyre-user>",
"api_key":"<fyre-api-key>"
}
},
"cluster_prefix":"<fyre-cluster-name>",
"clusterconfig" : {
"instance_type" : "virtual_server",
"platform" : "x",
"user_comment" : "Testing satellite on-prem using Fyre."
},
"<fyre-cluster-name>" : [
{
"name" : "data",
"count" : 9,
"cpu" : 16,
"memory" : 32,
"os" : "Redhat 7.9",
"publicvlan" :"y",
"privatevlan" : "y",
"additional_disks" : [{
"size" : 100
},{
"size" : 500
}]
}
]
}'
TIP: Ensure the value of <fyre-cluster-name> is all lower-case.
Storage
We used OpenShift Data Foundation storage (ODF) which means that each VM that is included in the ODF storage cluster must have at least two raw unformatted unmounted disks attached. For both Fyre and VMware, you need to pay attention to your available disk quota to avoid a failure. Notice for Fyre, the curl command above includes these two "additional_disks".
TIP: If you have the available quota, it can be useful to provision an extra VM or two to have in case you need to add additional worker nodes to your cluster or if one of the nodes fail.
3. Update VMs
In addition, because the VMs are provisioned in IBM, you need to update them to work with IBM Cloud Satellite:
yum -y  update
yum -y install ftp
yum -y install bind-utils
Register the VMs with Red Hat subscription manager:
ftp ftp3.linux.ibm.com
cd redhat
get ibm-rhsm.sh
bye
chmod +x ibm-rhsm.sh
./ibm-rhsm.sh --register (enter your ibm intranet userid  and FTP password)
Note: For access to the ftp3.linux.ibm.com server, see https://ftp3.linux.ibm.com/ to request access through your manager.
Enable SELINUX on the VMs:
Finally, regardless of whether the VMs reside inside the IBM network or not, you need to refresh the subscription manager. See the Satellite documentation for the full list of subscription-manager commands that you must run.
Run the following set of command to enable SELINUX on each VM:
grep -E "^SELINUX=" /etc/selinux/config
grep -E "^SELINUX=" /etc/sysconfig/selinux
sed -i 's/SELINUX=disabled/SELINUX=permissive/g' /etc/selinux/config
sed -i 's/SELINUX=disabled/SELINUX=permissive/g' /etc/sysconfig/selinux
grep -E "^SELINUX=" /etc/selinux/config
grep -E "^SELINUX=" /etc/sysconfig/selinux
Now reboot each VM before proceeding.
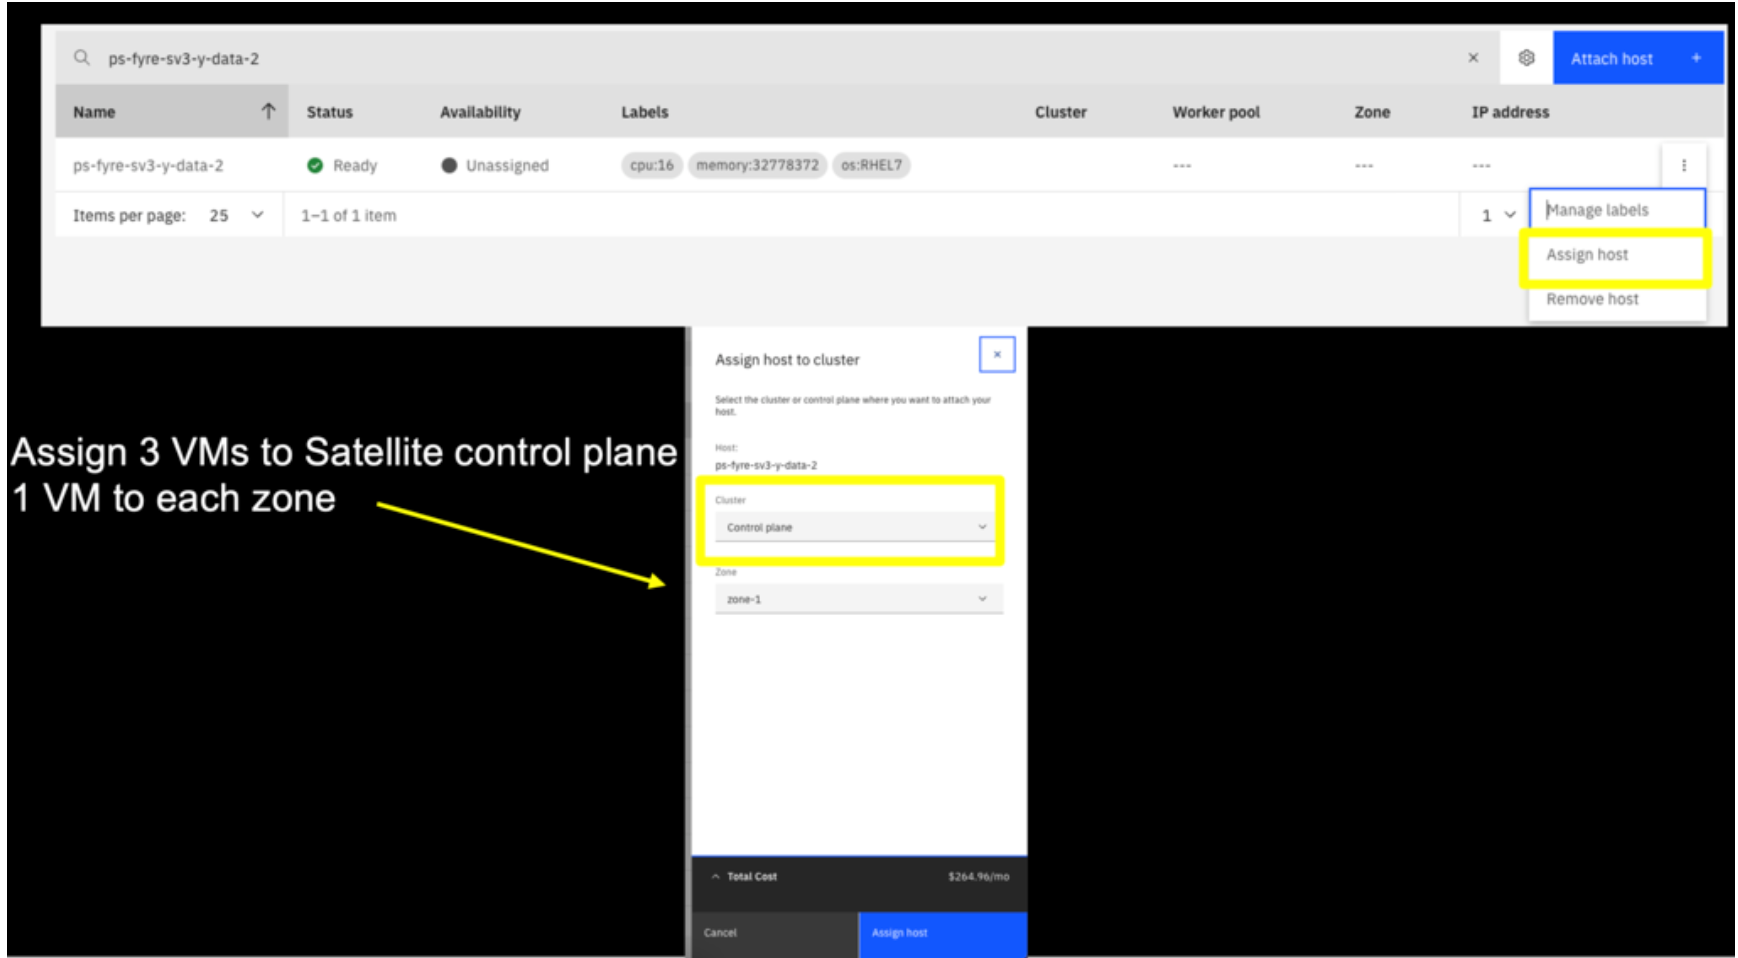
4. Assign control plane
Copy the attach script that you downloaded in step one from the Satellite location to each VM , make it executable, and run it.
Then in the satellite location "Hosts" tab, use the action menu for three of the Hosts to assign the node to the control plane, each in a separate "zone".
5. Create OpenShift cluster
Important: Wait until the Satellite Location state becomes: before you create the OpenShift cluster.
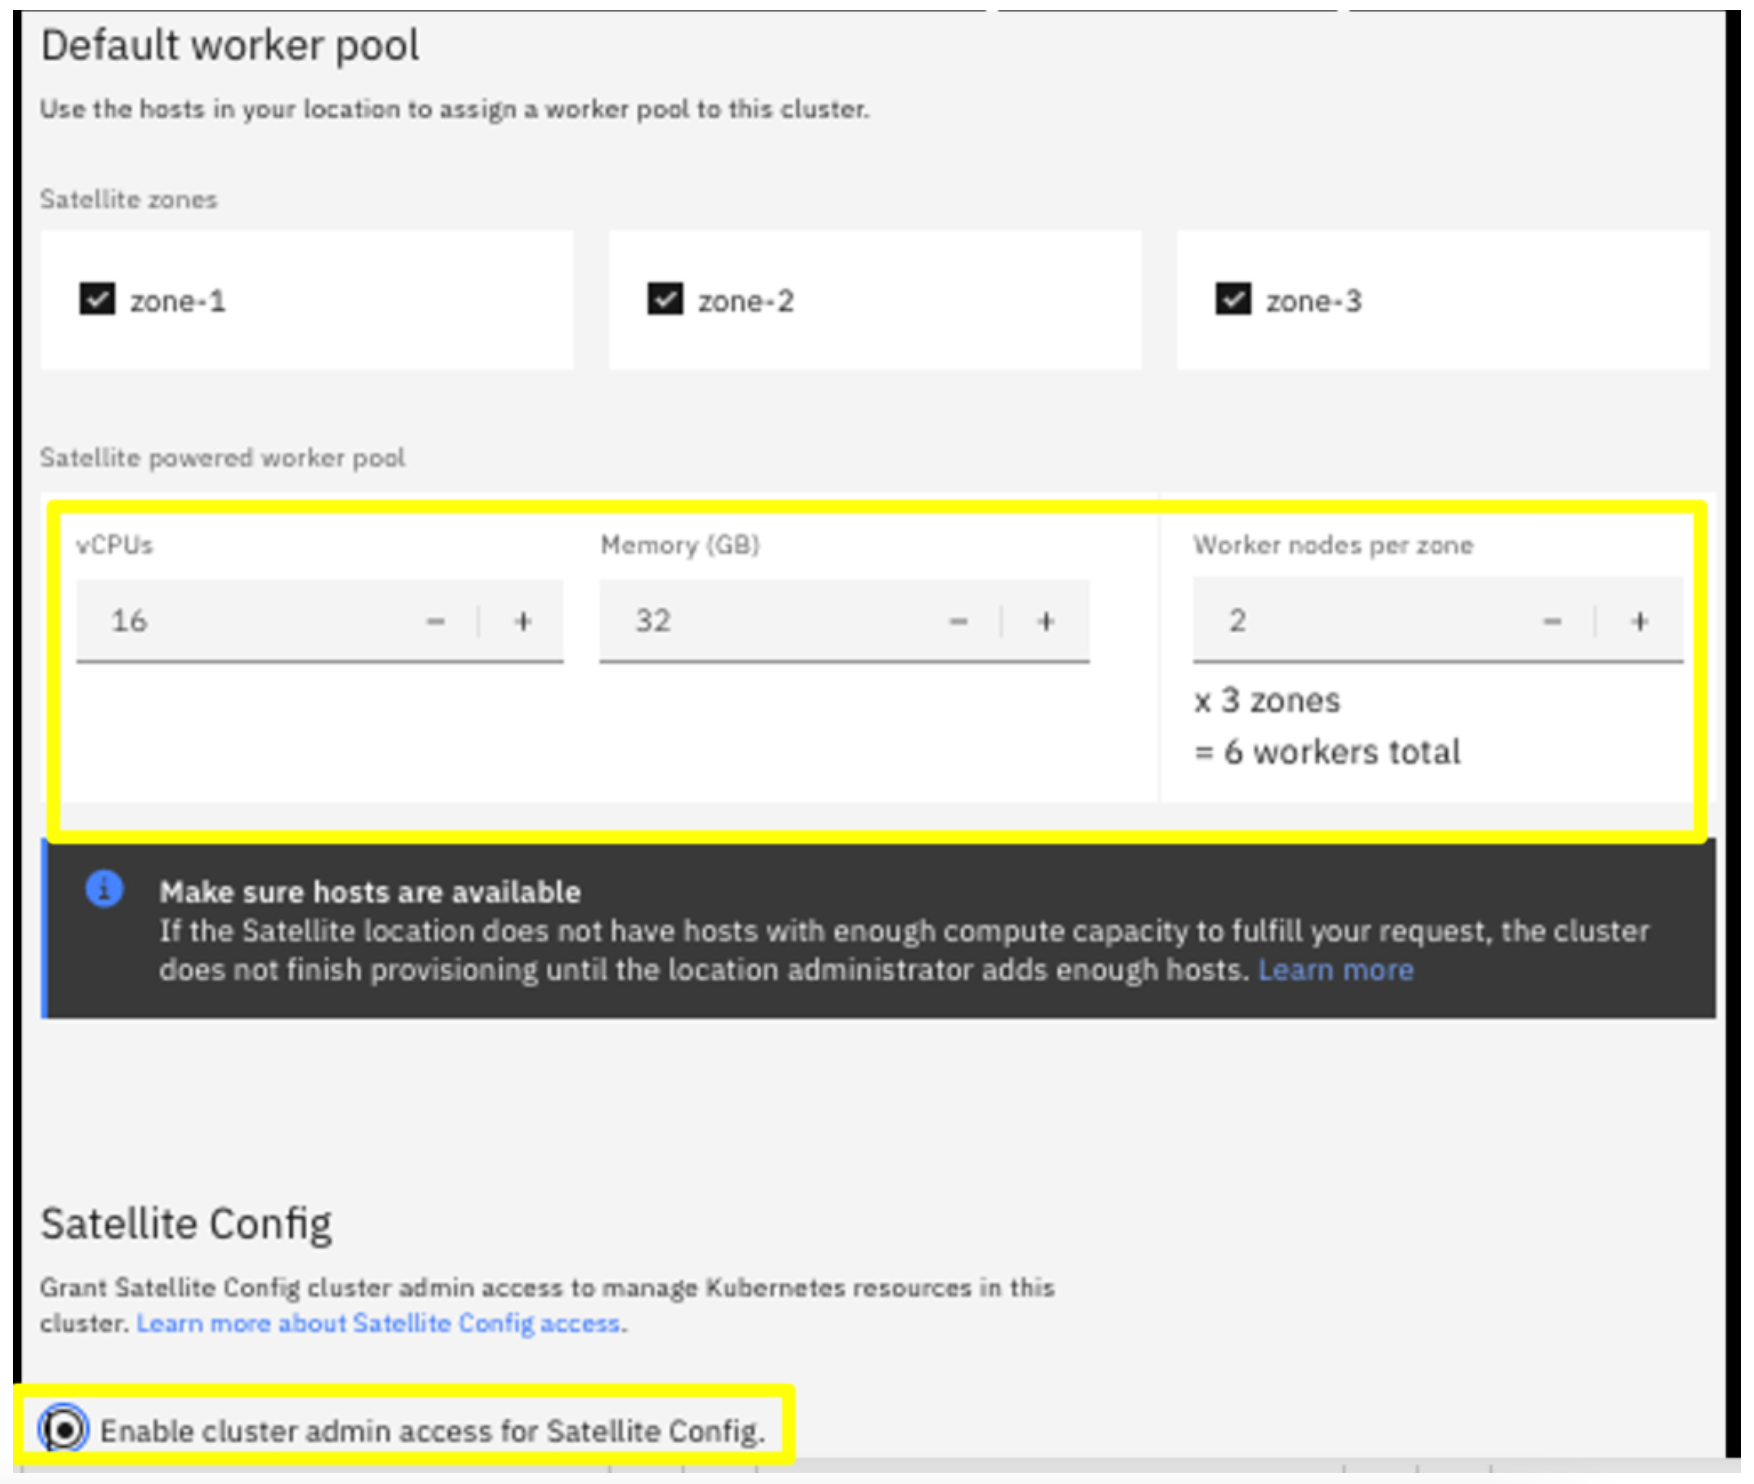
Click Satellite > Locations > Getting started > Create cluster to create the OpenShift cluster, selecting Satellite as the Infrastructure, and selecting your Location.
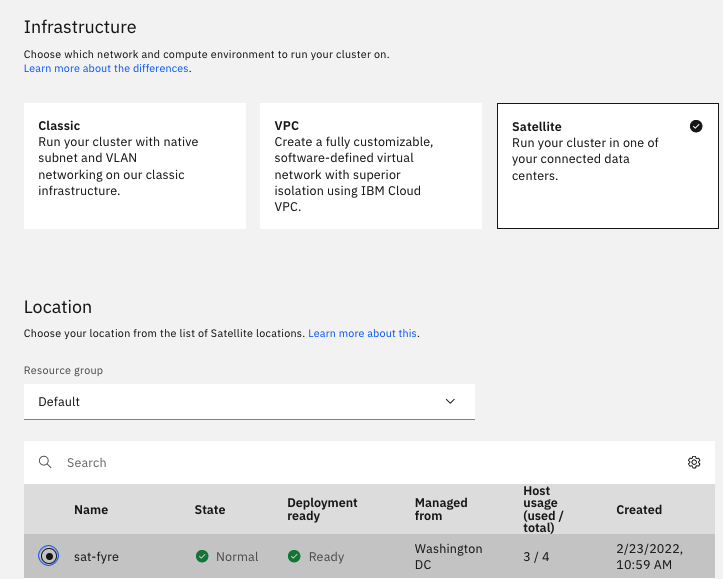
In the Default work pool, select the CPU and Memory sizes that are less than or equal to the VMs you provisioned (i.e. don't select sizes that are bigger than the nodes available). Select the number of VMs to include as worker nodes in your cluster and select to Enable cluster admin access.
Note: After the nodes are assigned to the Location, either as a control plane or worker node, you can no longer ssh into them from your Terminal window. You can however access them the OpenShift console under Compute > Nodes > <node> > Terminal or log into the IBM Cloud CLI and use the oc debug node/<node-name> command.
6. Install OpenShift Data Foundation (ODF) storage.
Every Cloud Pak requires storage, and for our OpenShift cluster on Satellite Locations, we use OpenShift Data Foundation with local disks. In step two above, you configured your VMs with two additional raw unformatted disks that will be used by ODF.
Follow instructions in the Satellite documentation .
- The two optional steps titled Setting up an IBM Cloud Object Storage backing store and Getting the device details for your ODF configuration are not required.
- We performed the steps under Creating an OpenShift Data Foundation configuration in the command line and Assigning your ODF storage configuration to a cluster.
Essentially you will create an ODF storage configuration using the following command syntax:
ibmcloud sat storage config create --name odf-local-auto --template-name odf-local --template-version 4.8 --location odf-sat-stage-location -p "ocs-cluster-name=ocscluster-auto" -p "auto-discover-devices=true" -p "iam-api-key=<api-key>"
We recommend that you set -p "auto-discover-devices=true", because it does not require that you discover the paths to the storage nodes and provide them in the "osd-device-path" parameter.
It takes about 20 minutes for the storage cluster to be provisioned. Confirm your storage configuration is ready by running the command oc get pods -n openshift-storage
You can also run oc get sc to view the available storage classes.
7. Install Cloud Pak
Congratulations. You are now
are ready to install a Cloud Pak on your OpenShift cluster that is running in your on-premises satellite location. You can follow the normal installation steps from the Cloud Pak documentation.
#cloudpak #Featured-area-1
#Featured-area-1-home #edge-computing