The purpose of this blog is to demonstrate the capabilities of connecting an on premise instance of Cognos Analytics to a cloud-based database service instance hosted on IBM Cloud. This is a great environment for testing purposes and provides insight into Cognos Analytics full capabilities against IBM DB2 Warehouse on Cloud for Analytics.
The following are the actual steps taken to get this working using your free IBM Cloud account. To setup a free account go to
https://console.eu-gb.bluemix.net and sign up.
Environment: Cognos Analytics Server 11
Video:Steps:Create a Test DashDB instance:
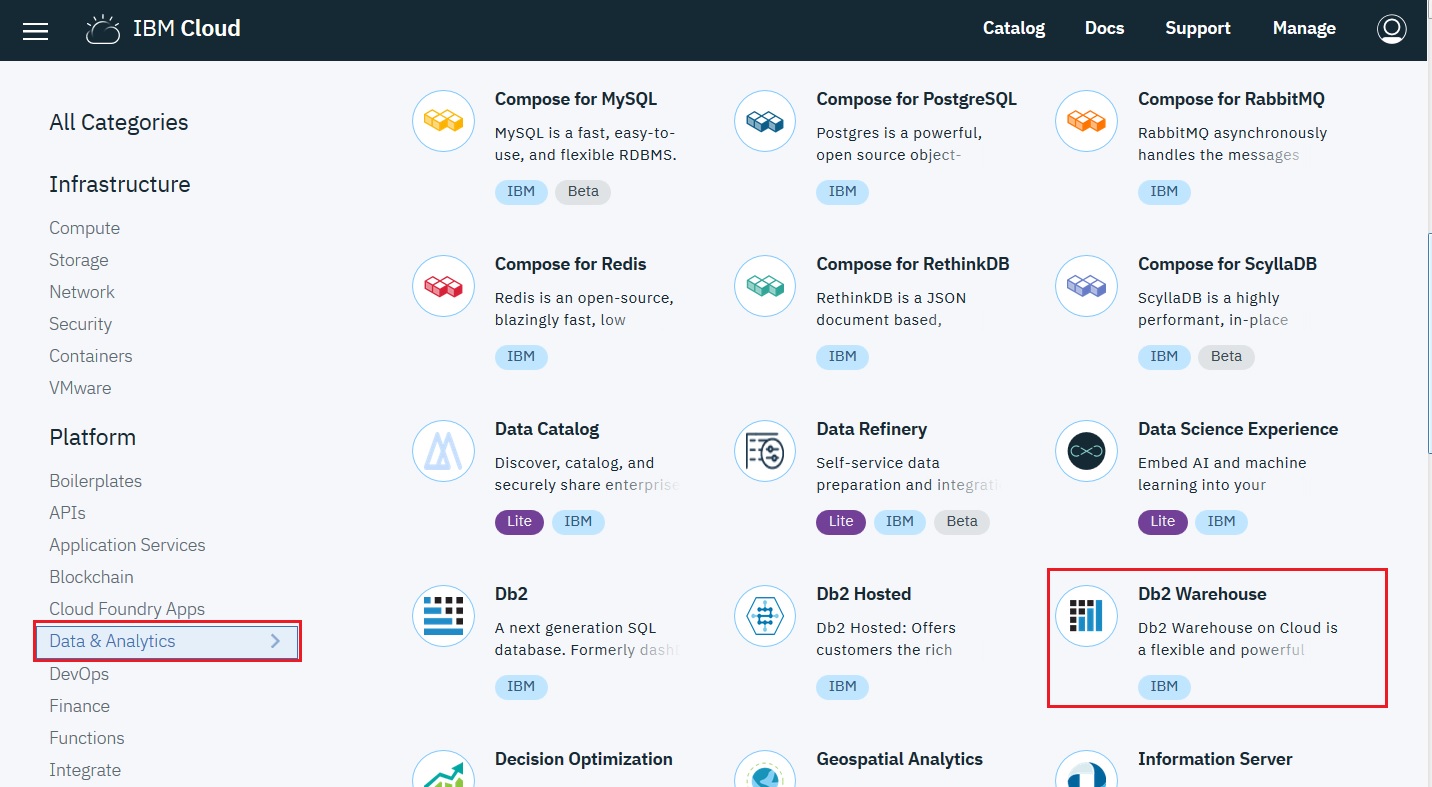
- Create a IBM Cloud account and log in, then select "Services" and click on "Db2 Warehouse".
2. Then give the Service a unique name and click on the "
Create" button.
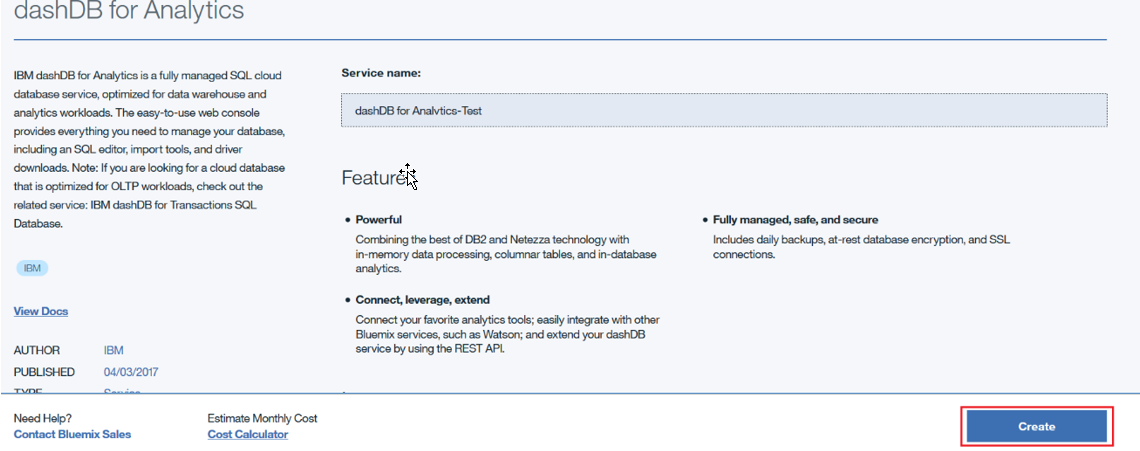
3. Once the service has been created the following page will be displayed:
 Create the credentials:
4. Next, click the service that has been created and click on
“Service credentials” then
“New credential”.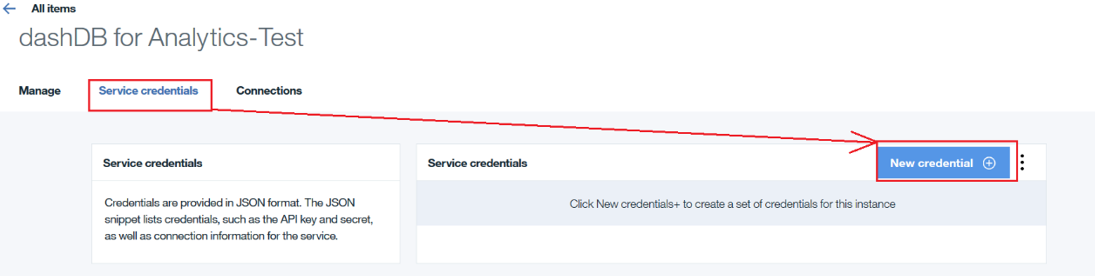
5. Next, give the credential label a name and click
“Add”.
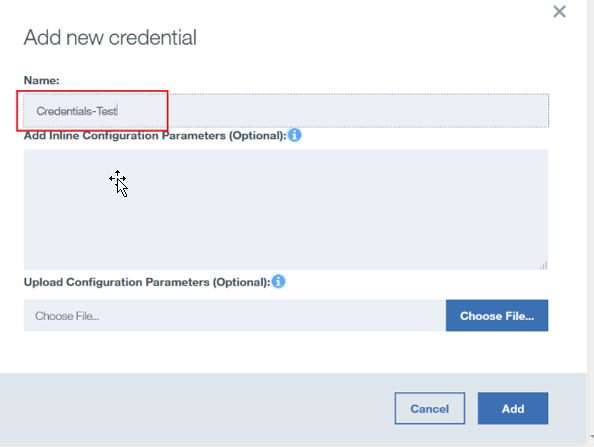
6. This will generate a json document with all the connection and signon details.
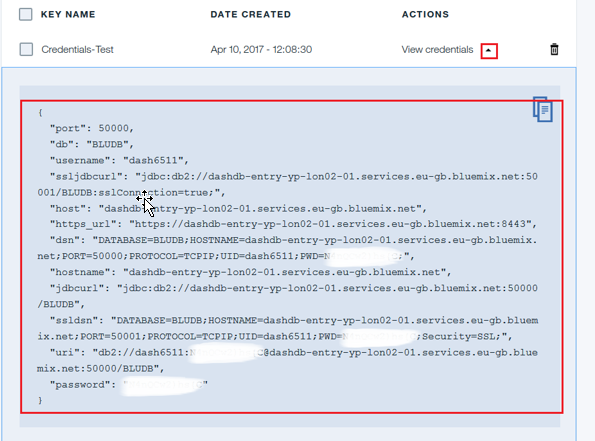
You can see entries for an SSL connection string
"ssljdbcurl" and a non SSL connection string
"jdbcurl" as well as Port and password information.
Download and Install the JDBC driver:7. The next stage is to download/install the drivers. From the console click on
“Manage” and then click on
“Open”.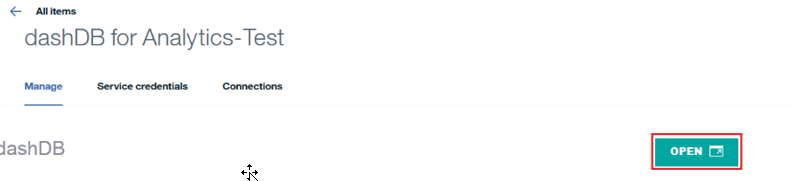
8. Click on the
“Download” section and download the drivers based on the OS platform.
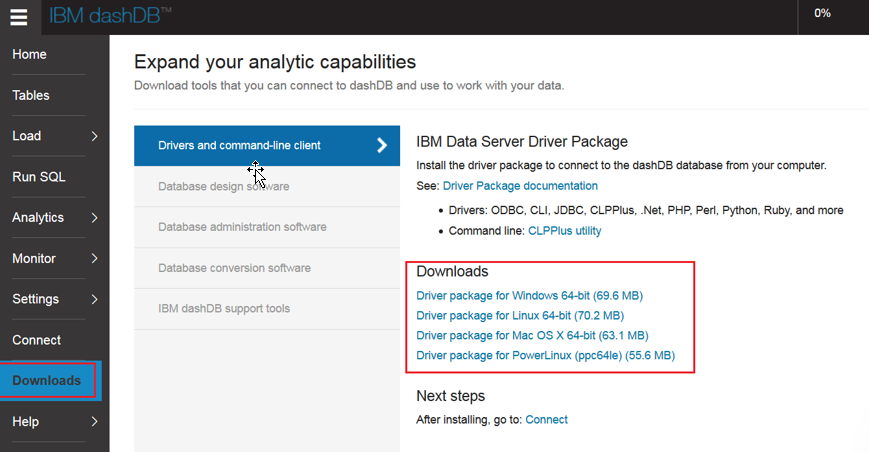
9. In this case, since CA 11 is on Windows 2016, download the
“Driver Package for Windows 64-bit” and install on the CA 11 Server.
The next section is specific to setting up the CA 11 Datasource Connection to IBM DB2 Warehouse on Cloud
- From the Driver Package installation locate the JDBC Driver (<installation>\IBM DATA SERVER DRIVER\java\db2jdbc4.jar)
- Copy this over to the CA 11 R6 /drivers directory (<installation>\ibm\cognos\analytics\drivers)
- Restart the Cognos Analytics service.
Creating the Dynamic Datasource using the JDBC Driver Information In Cognos Analytics:10. Login to Cognos Analytics and select
“Manage” –
“Administration Console” –
“Configuration” –
“Datasources”.11. Create a new JDBC Type Datasource Connection.
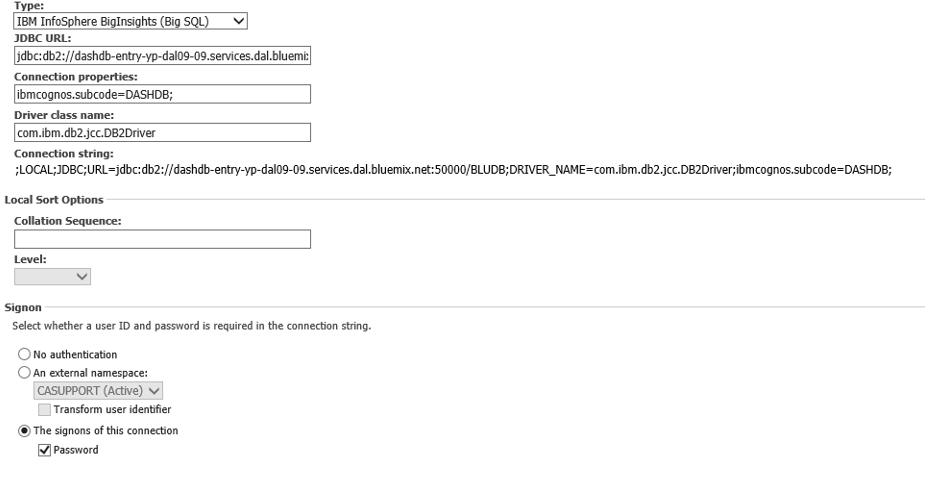
12. With regards to the signon, use the credentials as generated in the JSON document above.
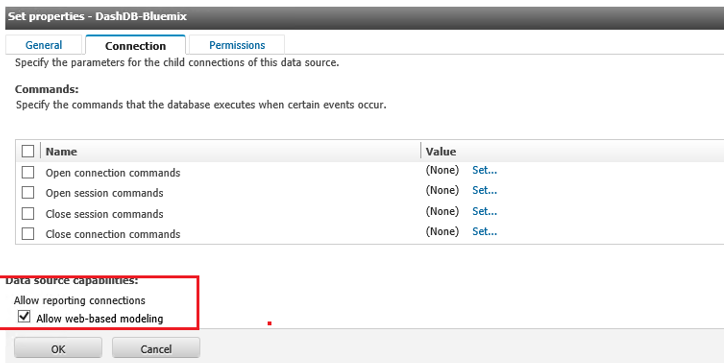
13. Test the connection, then go to the properties of the datasource and enable the
“Allow web-based modeling” option so it’s visible in CA11.
14. You can now create a new Framework Manager Model, import the datasource and the table(s) and publish a package.
Please visit the IBM Cognos Analytics channel on
YouTube.
#11.0.6#administration#Administration#CognosAnalytics#CognosAnalyticswithWatson#cognosanalyticssupport#configuration#datasources#home#LearnCognosAnalytics#on-prem#Resources#Tips#youtube