
Make the changes for x11 to the sshd file
nano /etc/ssh/sshd_config
Change the following lines:
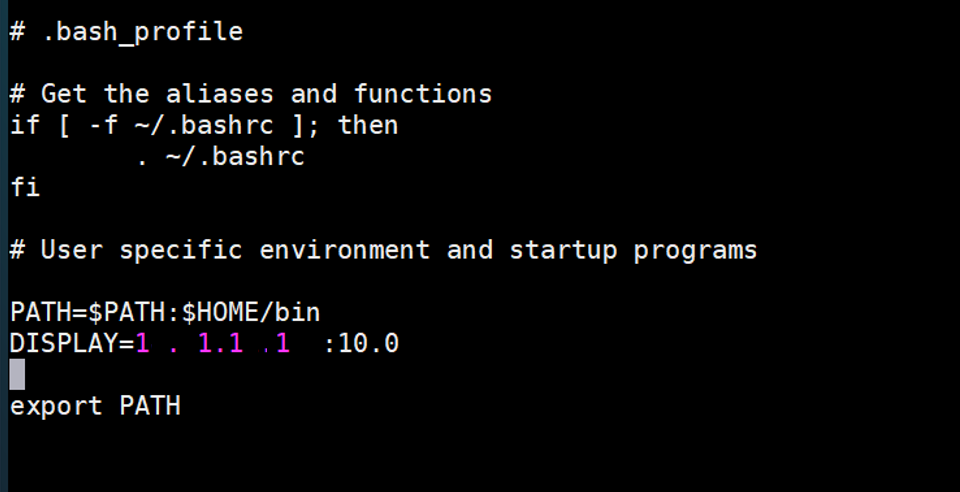
X11Forwarding yes
X11DisplayOffset 10
X11UseLocalhost no
Then restart the service
service sshd restart
One may have to exit the session and restart the session for this to take effect.
On your local machine download an xwindows client.
You can test this is set up correctly at your own discretion with a non-IBM tool such as:
xclock
If this is not correctly set up. Please work with your system administrator to make sure your xwindows is working.
Step 2: Install Docker (CENT OS – CE)
More information can be found on the docker website listed below. I have included the relevant Cognos steps below.
(**Please note, mixing CENT OS Docker CE and RHEL is unsupported. This is given as an example of steps. You can try similar steps with your licensed Docker for RHEL EE)
Get Docker Engine - Community for CentOS
Remove old versions of docker:
yum remove docker \
docker-client \
docker-client-latest \
docker-common \
docker-latest \
docker-latest-logrotate \
docker-logrotate \
docker-engine
Install required packages. yum-utils provides the yum-config-manager utility, and device-mapper-persistent-data and lvm2 are required by the devicemapper storage driver. (these should be installed by default so you might already have them)
yum install -y yum-utils device-mapper-persistent-data lvm2
Remove any old docker repos:
rm /etc/yum.repos.d/docker*.repo
Set up the stable repository
yum-config-manager \
--add-repo \
https://download.docker.com/linux/centos/docker-ce.repo
Install the docker engine
yum install docker-ce docker-ce-cli containerd.io
List and sort the versions available on the repo
yum list docker-ce --showduplicates | sort -r
Run the following command to install a specific version:
yum install docker-ce-<VERSION_STRING> docker-ce-cli-<VERSION_STRING> containerd.io
I used the most recent at the time
sudo yum install docker-ce-18.06.3.ce-3.el7 docker-ce-cli-18.06.3.ce-3.el7 containerd.io
start docker
systemctl start docker
Check that you have the most recent/supported version of docker:
docker version
Now you can start docker:
systemctl start docker
Potential error:
Permission denied while trying to connect to the Docker daemon socket at unix:///var/run/docker.sock
Go to the docker.sock file and change the permissions (according to your company’s standards). In house this was resolved by:
cd /var/run/
chmod 666 docker.sock
Step 2(Windows 10) : Install Docker
Download and install your favorite supported version of docker. I got mine from the Docker website.
Click on “Download From Docker Hub”
Click on “Get Docker”
Run the executable.
Let it download.
Let it finish installing.
Launch Docker and make sure it is installed correctly. You should see a little white Docker whale on the bottom corner. If it is red, engage your system admin to help deduce what is wrong.
Note: Some pitfalls here include the fact that nested virtualization may be needed.
You need to make sure that under Task Manager > Performance tab that it indicates Virtualization is Enabled.
In order to assure this, before I started and connected to the VM on the machine hosting the VM, I ran the following commands in powershell:
- Enable-WindowsOptionalFeature -Online -FeatureName Microsoft-Hyper-V -All -Verbose
- Enable-WindowsOptionalFeature -Online -FeatureName Containers -All -Verbose
- bcdedit /set hypervisorlaunchtype Auto
- Set-VMProcessor -VMName <Enter-VM-Name> -ExposeVirtualizationExtensions $true -Verbose
- net stop vmms
- net start vmms
Step 3: Install Jupyter
Navigate to the installers
cd /tmp/installers
Run the installer
./ ca_instl_lnxi38664_2.0.191205.bin
Select the /zip repository in the installers directory recently created:
Please note, if you receive the following error, you likely do not have enough disk space on the server:
Error processing tar file(exit status 1): write /opt/*****: no space left on device
Around 35 GB of available space is needed for the images once completed, this does not include the intermediate/temporary space that docker requires for various layers during the install. Verify and allocate a minimum of 60 GB of space to the /var/lib/docker/ directory to run the install with no issues.
Step 4(RHEL): Configure Jupyter
CD to the scripts directory of the install. Because we are on Linux, we will go to the UNIX directory.
cd /opt/ibm/cognos/jupyter/dist/scripts/unix
If you execute an LS here you will see a few scrips and configuration files
|
build.sh
|
A script that builds/rebuilds the Jupyter Hub, Jupyter Viewer, and Server Instance docker images
|
|
config.conf
|
A configuration file that is used when building the images. Here is where you may need to define the hostname, port, and certificate locations.
|
|
install.sh
|
A script that installs the Jupyter Hub and Jupyter Viewer containers. This calls the build and startup scripts.
|
|
prune.sh
|
A script that removes unnecessary/older images
|
|
startup.sh
|
A script that starts the containers.
|
|
stop.sh
|
A script that stops the containers.
|
|
uninstall.sh
|
A script that uninstalls the Jupyter Hub and Jupyter Viewer
|
Before anything, open the config.conf file and confirm the accuracy of the information presented. For our purposes we can imagine this having 2 important parts. The first part related to the SSL component and the second part related to the Configuration component. While other sections are important, they are note covered in this demonstration.
The SSL component will be discussed in greater detail in the following technote:
How to secure Jupyter for Cognos Analytics 11.1.2 + with 3rd party certificates
The configuration section on RHEL will be comprised of the hostname and port.
1. The hostname should refer to the Jupyter server and the port should be open and accessible.
By default RHEL instances will define the hostname as $(hostname) and this will cause Jupyter to start up using the hostname specified by the machine hosting the install. You can define this yourself or on RHEL you can check what this will resolve to by running:
echo $HOSTNAME

2. The port number is the port with which the Jupyter server will start on and be reachable externally. By default this is 8000.
You will need to be sure that the Cognos Analytics Server and the browser can reach the hostname:port. A simple test would be to go to the Cognos Analytics server (where the dispatcher/application tier is installed) and telnet to the Jupyter server $HOSTNAME and port number you are defining in the config.conf file.
Example: Go to the cognos server and type in the following
Edit the config.conf file making the HOST_NAME variable set as either the fully qualified hostname or the IP address of the Jupyter server. This should be reachable by the cognos server.
Step 5(RHEL) : Run the installer script
Navigate to the unix directory and run the ./installer.
cd /opt/ibm/cognos/jupyter/dist/scripts/unix
./install.sh
When this has started up correctly you should see the following entry within the install.sh start up:
Check the containers are running
docker ps

If you paste this in the browser, you should be able to see the following message, which indicates your browser can successfully communicate with the Jupyter server. This is not an error code, this is expected.
http://servername:8000
Common installer issues (RHEL)
RHEL (11.1.4 and lower)
|
ERROR:
groupadd: invalid group ID 'docker'
The command '/bin/sh -c groupadd --gid $DOCKER_GROUP_UID docker && usermod -aG docker $NB_USER && gpasswd -a $NB_USER docker' returned a non-zero code: 3
|
cd to the build script
cd /opt/ibm/cognos/jupyter/dist/scripts/unix/
edit the build file
nano build.sh
Resolve this by changing the docker group to dockerroot in the group id section like this:
Old versions of Docker
|
ERROR:
chown=ca_user:users pip.conf $HOME/.config/pip/.
Unknown flag: chown"
|
The chown flag used by Jupyter, is only supported as of Docker version 17.09 and up. Upgrade your version of Docker using the steps outlined above. One can consult the Docker documentation .
Offline Installs
|
ERROR:
Collecting pixiedust (from -r additional_packages.txt (line 4))
Retrying (Retry(total=4, connect=None, read=None, redirect=None, status=None)) after connection broken by 'ConnectTimeoutError(<pip._vendor.urllib3.connection.VerifiedHTTPSConnection object at 0x7fd55b28bd90>, 'Connection to pypi.org timed out. (connect timeout=15)')': /simple/pixiedust/
|
Change directory to the tmp folder:
cd /tmp
Now Download Pixiedust using a wget
wget https://files.pythonhosted.org/packages/16/ba/7488f06b48238205562f9d63aaae2303c060c5dfd63b1ddd3bd9d4656eb1/pixiedust-1.1.18.tar.gz
Then extract it
tar -xvf pixiedust-1.1.18.tar.gz
Navigate to the following directory
/ibm/cognos/jupyter/dist/scripts/
Edit the file
nano additional_packages.txt
Comment out all the lines with #
Add the following line:
--no-index --find-links=/tmp/pixiedust-1.1.18 pixiedust.
Step 5 (Windows) : Run the installer script
Execute the install script as an administrator:
Step 7: Configure the Cognos administration portal
Please access the dispatcher URI in your browser:
http://servername.domain.com:9300/bi/v1/disp
Click on the Manage Button
Navigate to Configuration > System > Environment (tab)
For the Jupyter service location place the URL that was specified on start-up during step 7.
http://jupyter1.fyre.ibm.com:8000
Be sure not to include a trailing slash here.