IBM Spectrum LSF Suite and Spectrum LSF Application Center now provide the ability to produce 2D/3D plots for workload output. Often it's important, while workload is running to be able to check on the output being produced, to check for trends such as convergence. Due to the fact that output from workloads can greatly vary depending upon the application, Spectrum LSF uses an administrator defined filter script to prepare the data for plotting.
In this example, we will configure a filter script for OpenFOAM, an open-source CFD application to plot output (log.simpleFoam) that is produced. There is an example filter script for OpenFOAM that is part of the OpenFOAM template that is available on the IBM Spectrum Computing Public GitHub Repository. The IBM Spectrum Computing GitHub Repository can be accessed
here. The OpenFOAM example template, which includes the
convertData script can be accessed
here.
Before a new data graph can be created for OpenFOAM, we need to:
- Install and successfully deploy the OpenFOAM template (see above)
- Copy the convertData script (from the OpenFOAM template) to a directory which is accessible via the Spectrum LSF user interface, as a user that has administrative privilege (ability to edit templates)
- A sample log.simpleFoam output file from OpenFOAM is required. For this, we ran an instance of the motorBike simulation from the OpenFOAM tutorials, which generated the logfile
Now, we'll go through the steps to configure a new Data Graph in the Spectrum LSF user interface. Note that the following assumes that the administrator has installed and successfully deployed the OpenFOAM template.
A. Login as a user with administrative privilege to the Spectrum LSF user interface.
B. Navigate to Workload > Definitions -> Templates, locate the OpenFOAM template (assumed to be installed) and unpublish.
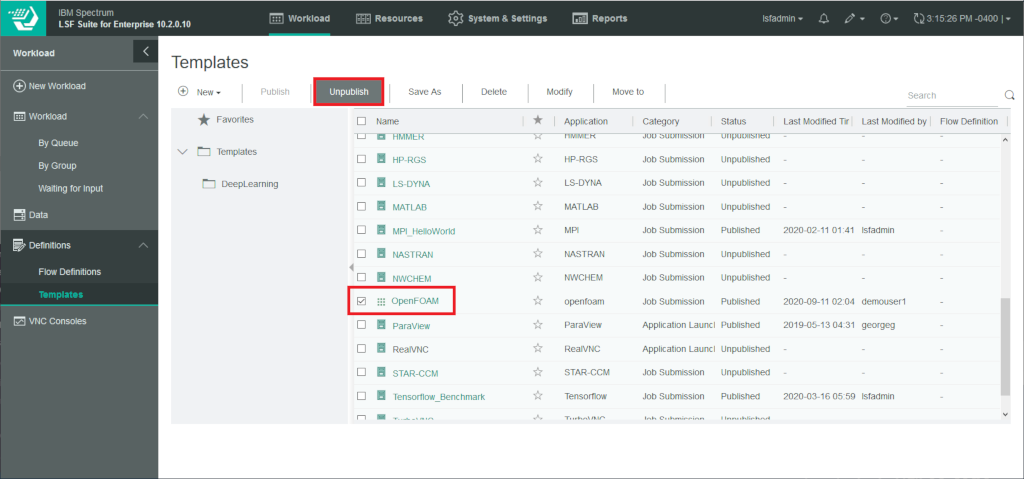
C. Click Modify to make changes to the OpenFOAM template (now unpublished)
D. Click on the Data Graphs tab in the OpenFOAM template editor and select Add a graph
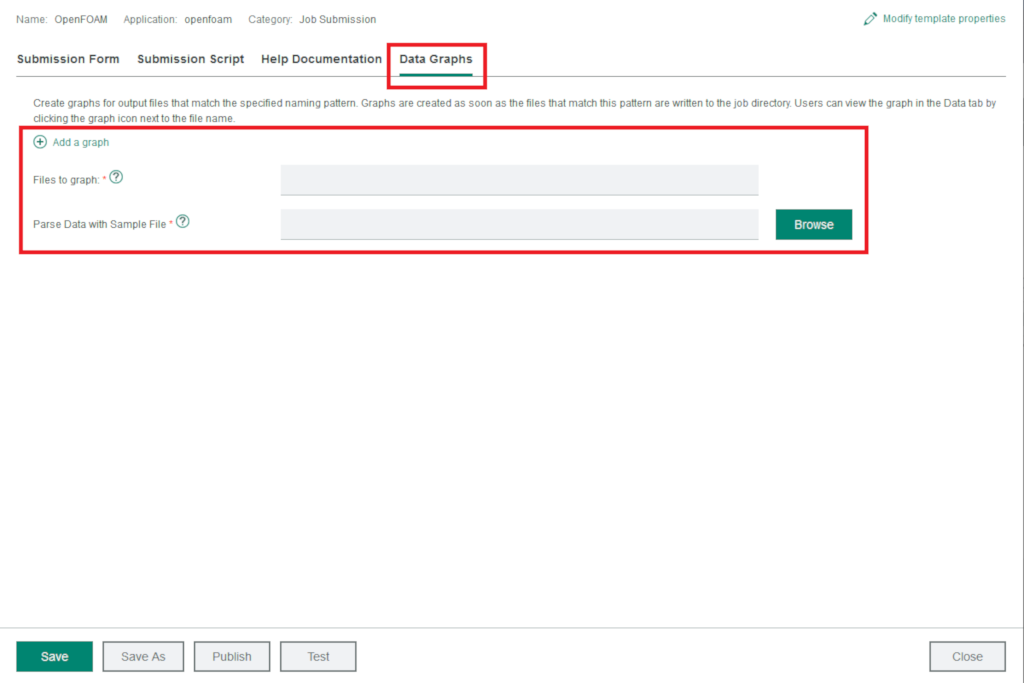
E. Under Add a Graph, specify the following parameters:
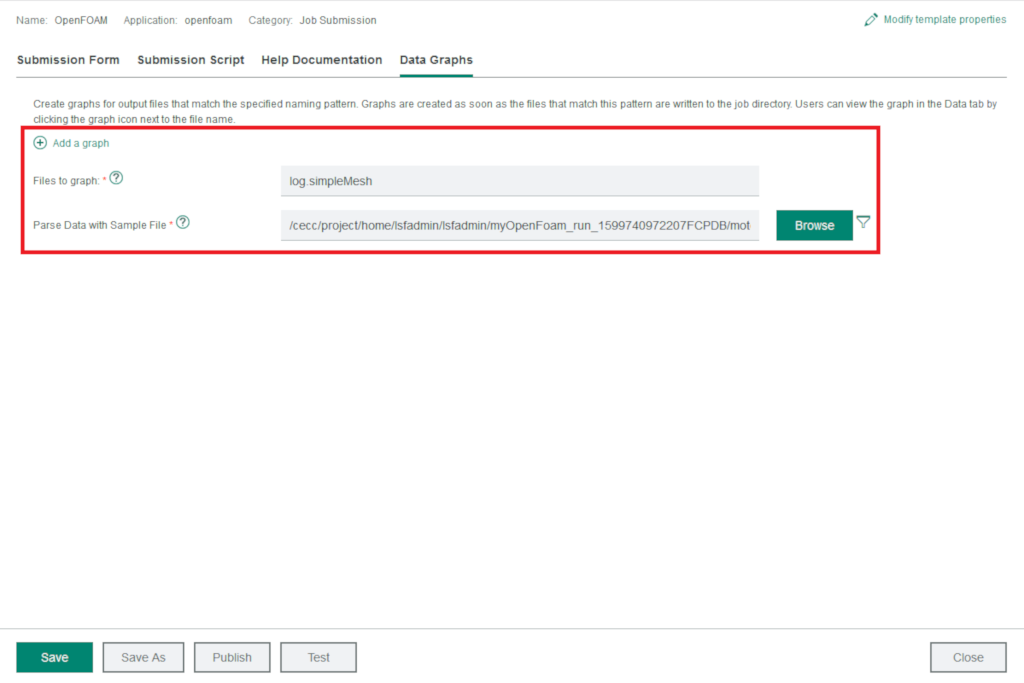
Files to graph: log.simpleMesh
Parse Data with Sample File: <here we must browse to a log.simpleMesh file that has been created by OpenFOAM by a successful run>
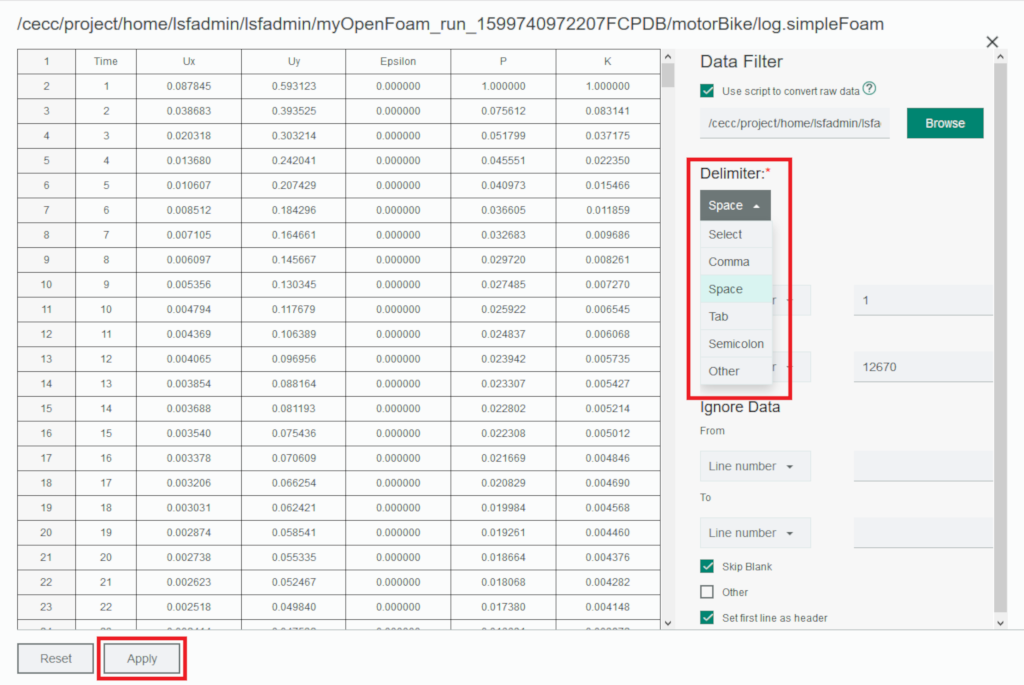
F. Click on the Filter icon next to the Browse button. This will display a new screen where the Data Filter (script) can be specified. Here we must specify the convertData script from the OpenFOAM template. Click on Use script to convert raw data and select Browse. Locate and select the convertData script and click OK.
G. With the Data Filter script specified, we must now select the delimiter used in the file. In the case of the OpenFOAM log.simpleMesh file the delimiter is the space character. Specify Space from the delimiter dropdown and click Apply.
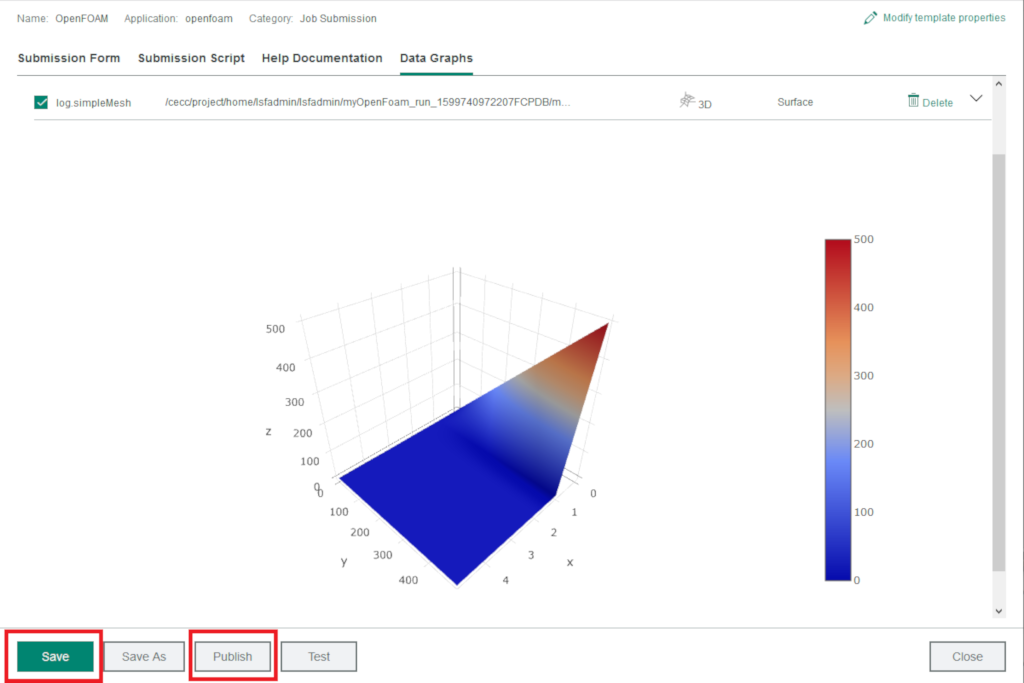
H. Next, we must specify the type of graph type and the X-axis value. For Graph Type select 3D with type Surface. For X / Y axis, select Set natural row as X, column as Y. Finally click the Graph button to test the creation of a new plot based on the specified configuration. You should see a Graph similar to the one in the screenshot below (depending up on the data in the log.simpleFoam file). Click the Save button to save the Data Graph and finally Publish to re-publish the OpenFOAM template with the newly defined Data Graph.
Using Data Graphs
Now that we’ve configured a Data Graph for the OpenFOAM template, let’s put it in to action. For this, we must submit an OpenFOAM job which will produce a log.simpleFoam output file. We do this in the steps below:
- As a normal user, navigate to Workload > New Workload and select the OpenFOAM tile to submit a new OpenFOAM job. This will open the OpenFOAM submission form.
- Step 1 – Job Identification (optional) Specify Job Name and Description
- Step 2 – Application Input. Here we browse to the OpenFOAM tutorials and select the incompressible/simpleFoam/motorBike example
- Step 3 – Notification (optional) Enable notifications as needed
- Step 4 – Review and Submit the OpenFOAM job
- During the job runtime, if a simpleFoam is detected in the job working directory, Spectrum LSF will display an icon indicating that it is possible to plot the data. Simply click on the icon to display the plot.
 To close, the following short video demonstrates plotting of OpenFOAM output and visualization of OpenFOAM results with ParaView, highlighting ease of use capabilities provided by Spectrum LSF.
#LSF#SpectrumComputingGroup#Spectrum-LSF