The purpose of this blog is to provide a step-by-step guide to setting up a Ping Federate OpenID Namespace by configuring Ping Federate first and then create a Ping Namespace.
It will be assumed that Ping Federate 9.2.2 is installed first and can log into the administration console.
NB: A warning that every changes that are made you must make sure those changes are saved which means making sure the "Save" button is clicked at the end of each section.
Lab Environment:
Windows 2016
CA 11.1 (also applies to CA 11.0.8+)
Active Directory Domain: CASUPPORT.SUPPORT2016.AD.HURSLEY.IBM.COM
Configure Ping Federate
1. Once logged into the administration console(default port is 9999):
https://iacssuk16srv2.casupport.support2016.ad.hursley.ibm.com:9991/pingfederate/app
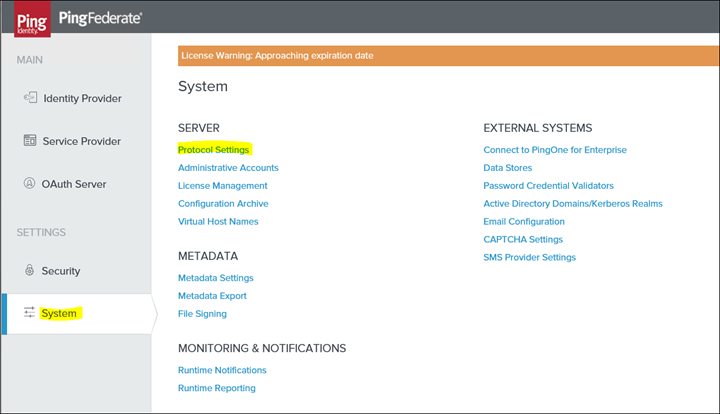
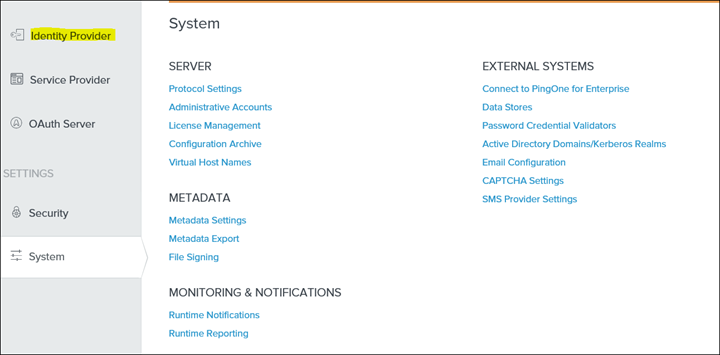
Click on System - Protocol Settings
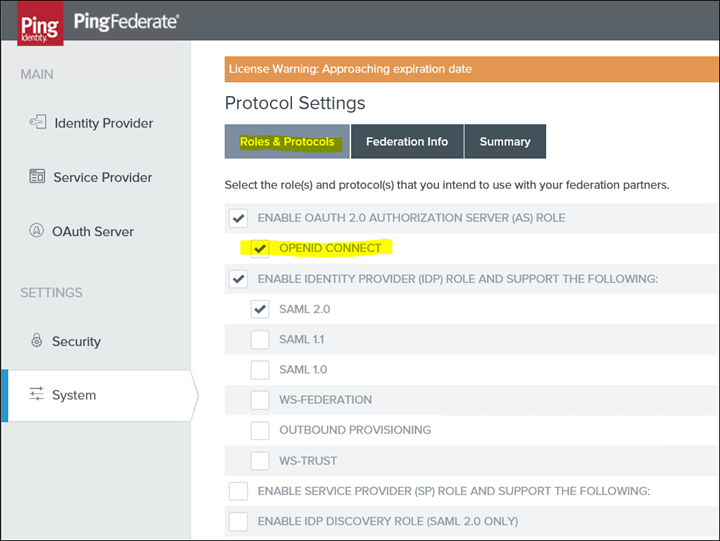
2. Click on Roles & Protocols and only select the following role(s) and protocol(s)
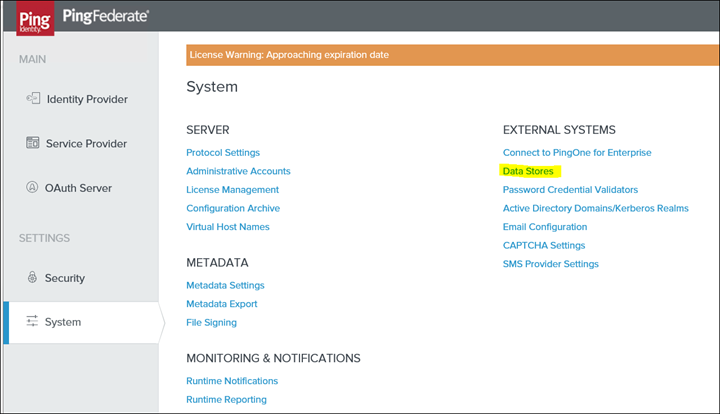
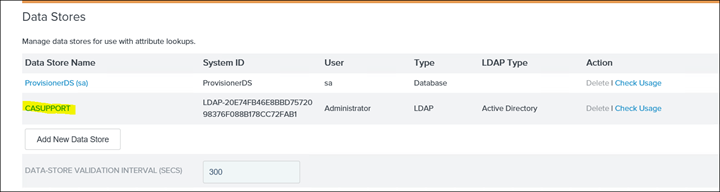
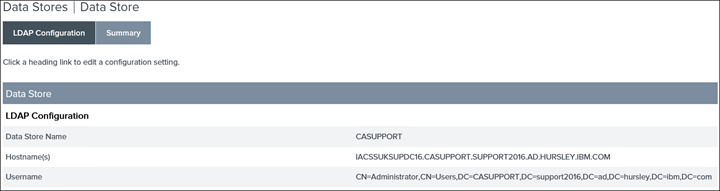
3. Make sure the Datastore i.e. connection to the on-prem AD is created:
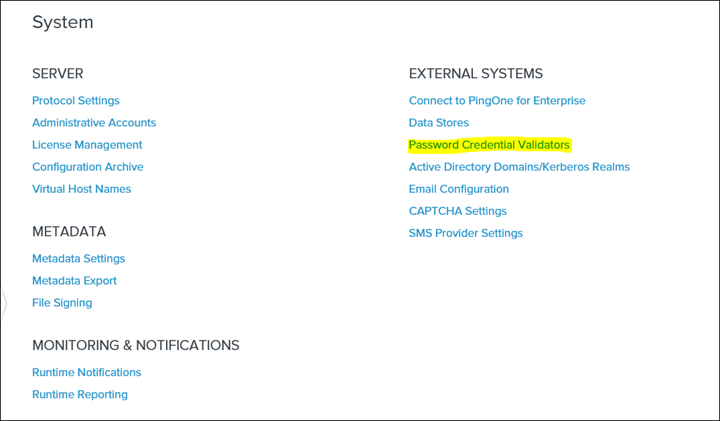
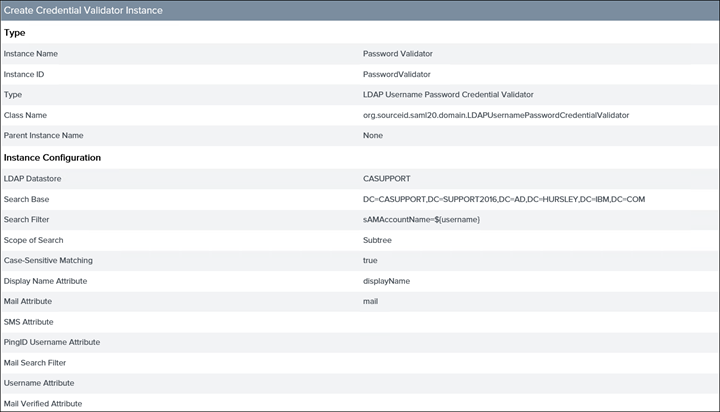
4. Click on Password Credentials Validators
5. During the initial installation a Password Validator would be pre-configured. However, below is what it should look like

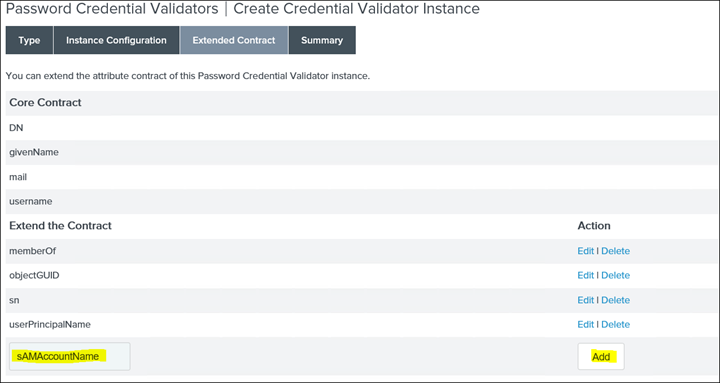
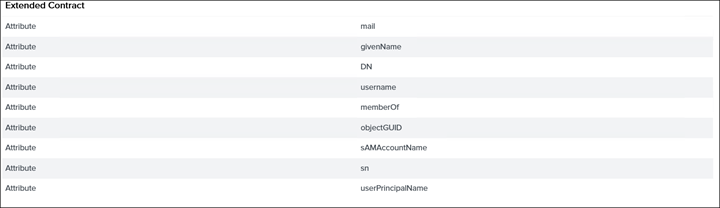
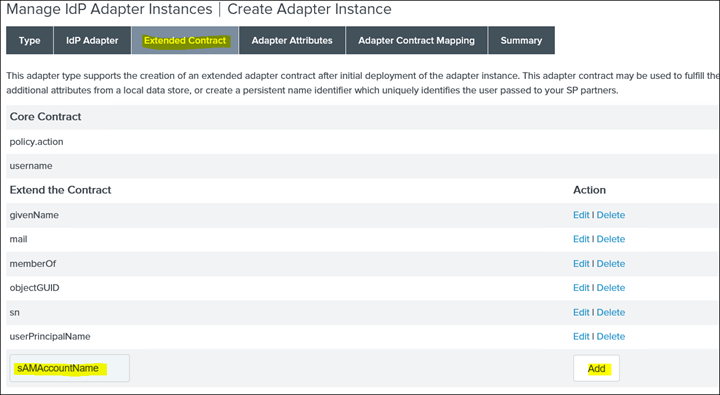
6. Click on Extended Contract and add the sAMAccountName attribute
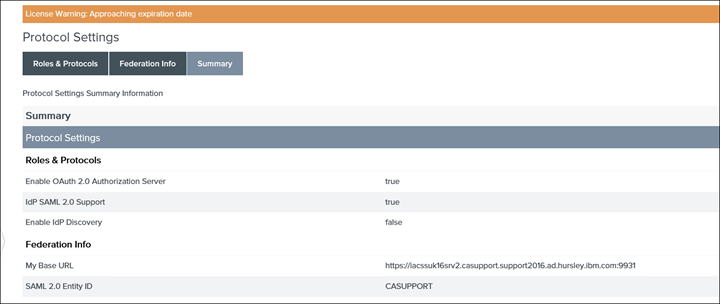
Summary
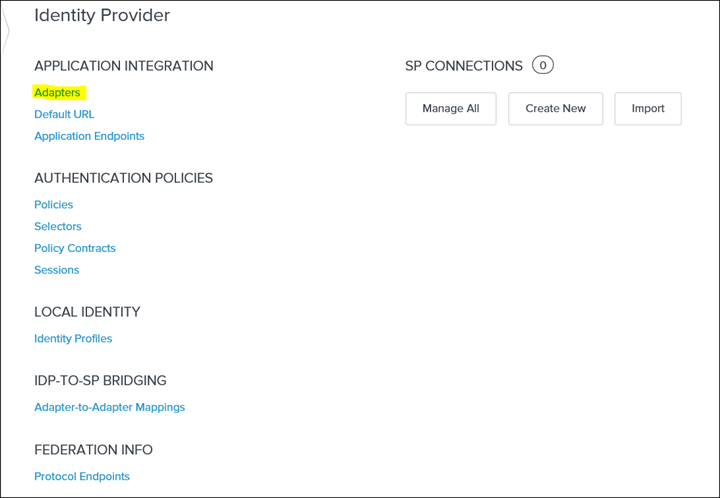
7. Move to Identity Provider
8. Click Adaptors

9. Click on Extended Contract and add sAMAccountName
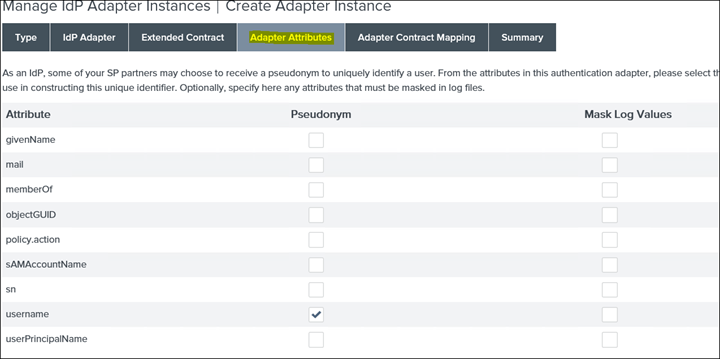
10. Click on Adaptor Attributes and make sure username is selected
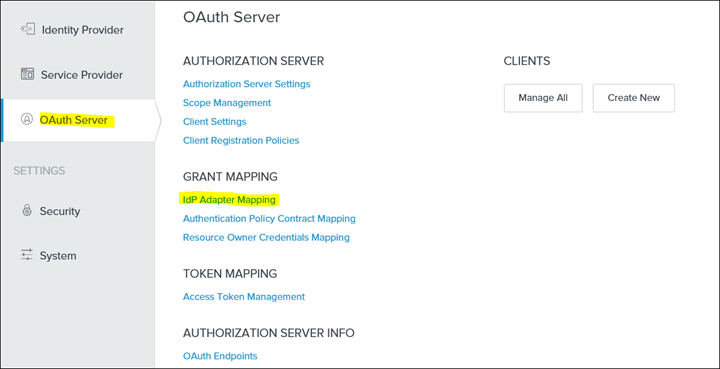
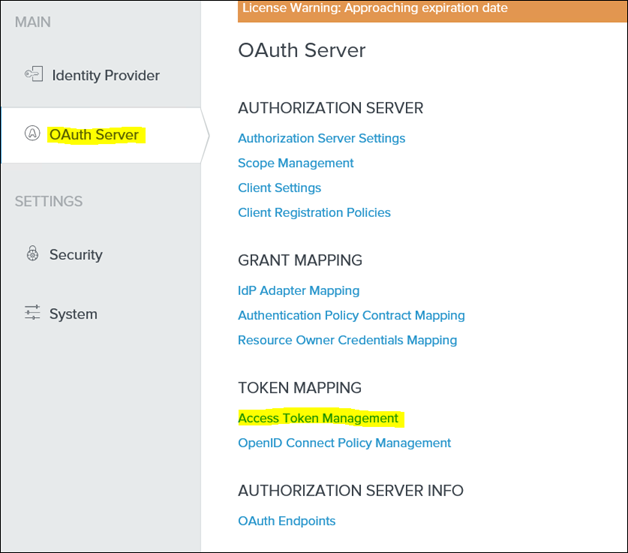
11. Save and switch to OAuth Server and select Authorization Server Settings

12. Make sure the following are selected


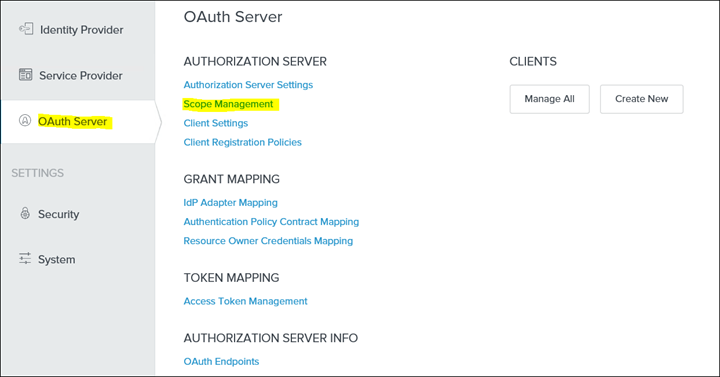
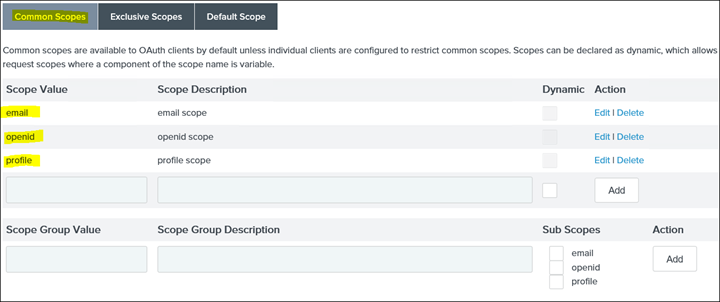
13. Save and click Scope Management
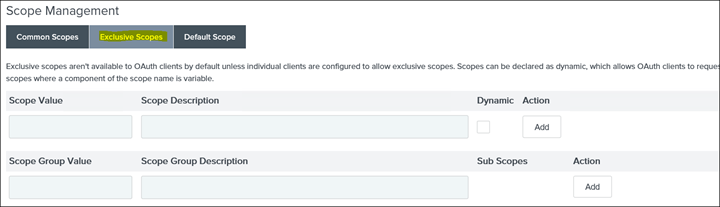
14. Add openid email profile scopes
15. Save and click on IdP Adaptor Mappings
16. Under SOURCE ADAPTOR INSTANCE select "HTML Form Adaptor"
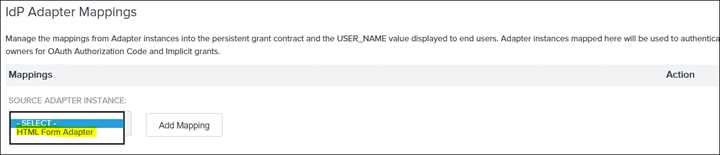
17. Click on Add Mapping

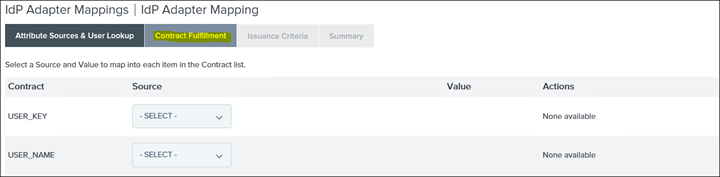
18. Map each Contract to Source
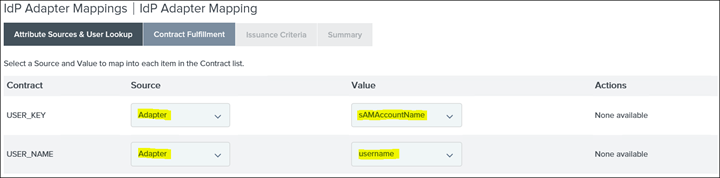
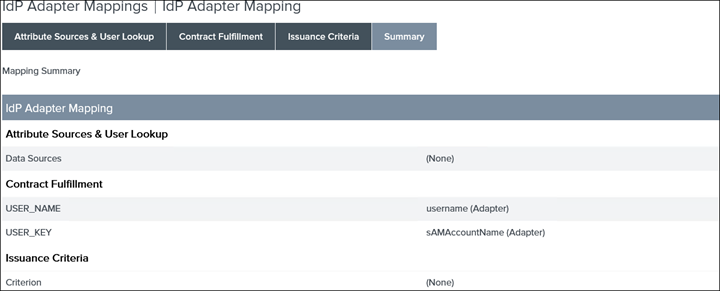
Summary
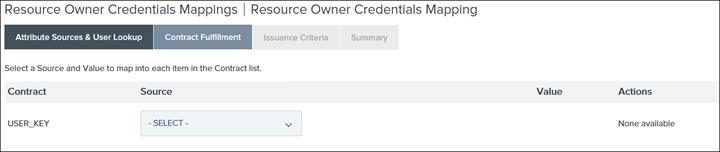
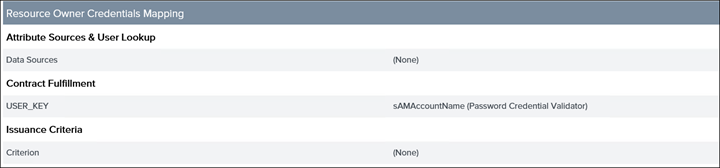
19. Save and click on Resource Owner Credentials Mapping

20. Drop down SOURCE PASSWORD VALIDATION INSTANCE and select Password Validator
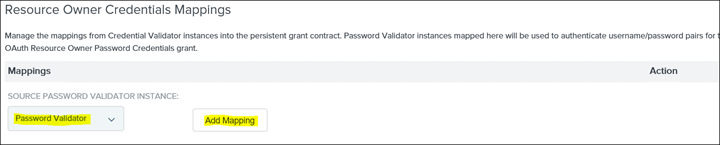
21. Select Add Mapping
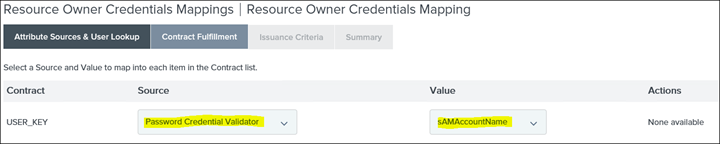
Summary
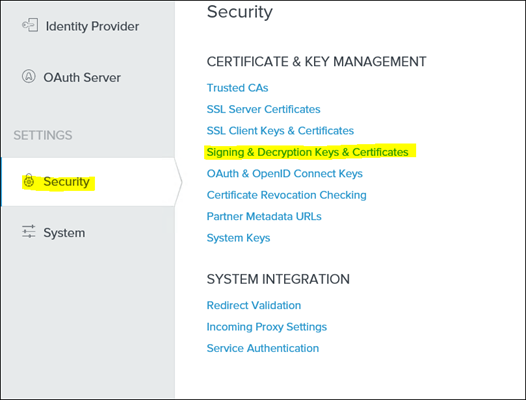
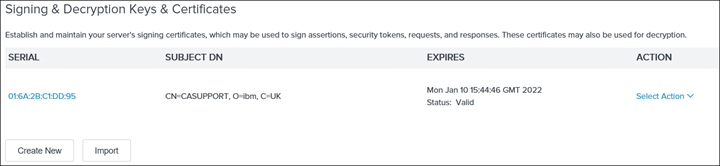
22. Save and switch to CERTIFICATE & KEY MANAGEMENT and select Signing & Decryption Keys & Certificates
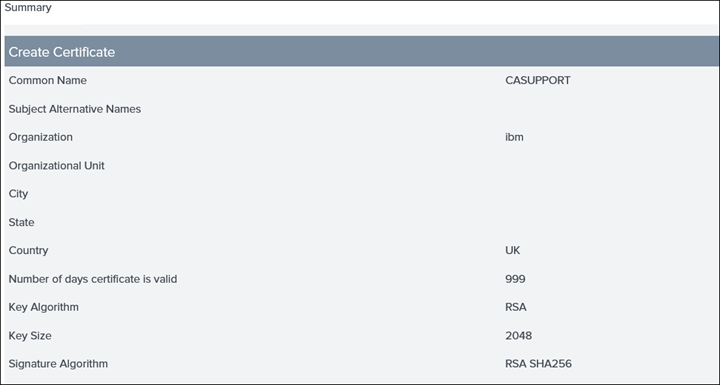
23. Create a new certificate by clicking on Create New and only populate the highlighted fields

NB: COMMON NAME, ORGANISATION and COUNTRY can be anything
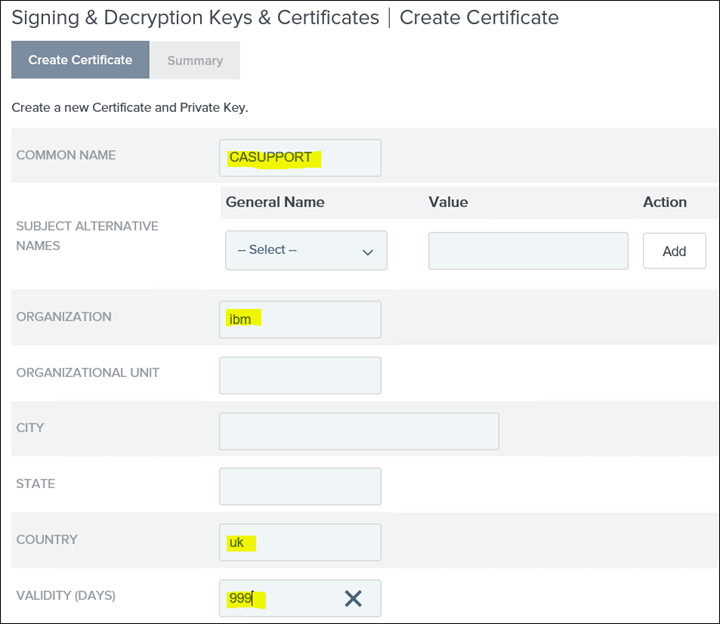

Summary
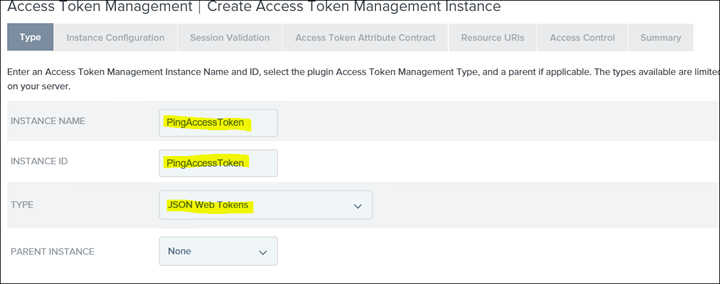
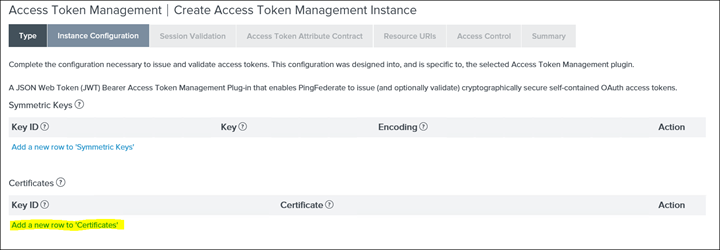
24. Switch to TOKEN MANAGEMENT and click on Access Token Management and create a new instance

INSTANCE NAME & INSTANCE ID can be anything
25. Click on Instance Configuration and click Add a new row to 'Certifications'


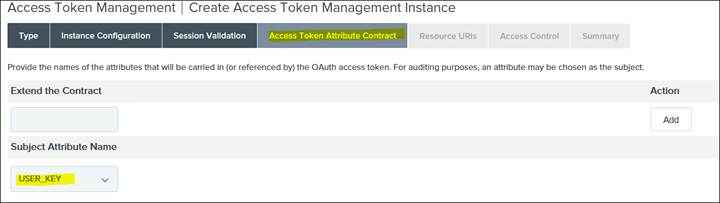
26. Click on Access Token Attribute Contract
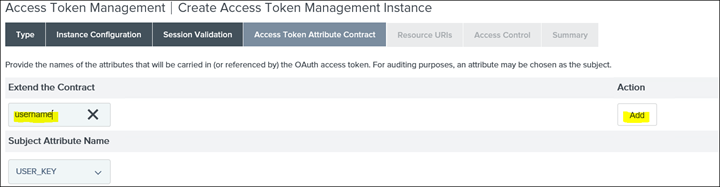
27. Add username and click Add
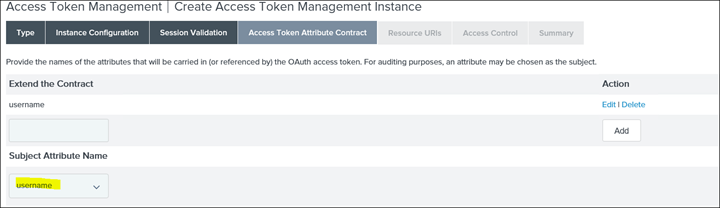
28. Drop down the USER_KEY and select the newly created username
IMPORTANT: After these changes have been saved the "ACCESS TOKEN MAPPING" link will become available in the main admin page.
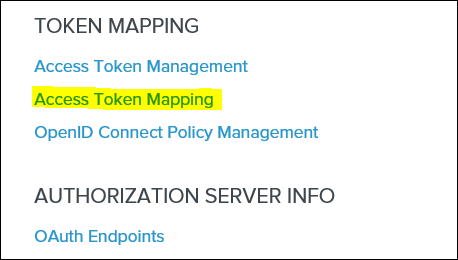
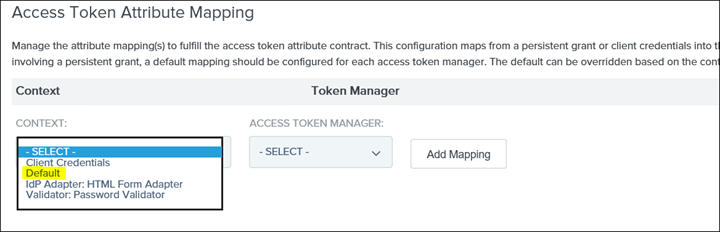
29. Click on Access Token Mapping and drop down the CONTEXT: and select Default
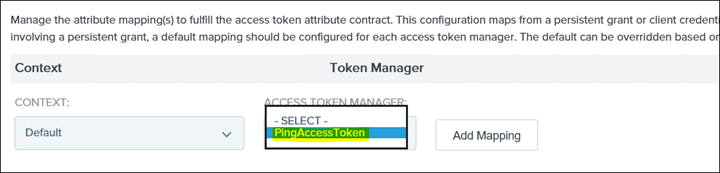
30. Click on Add Mapping
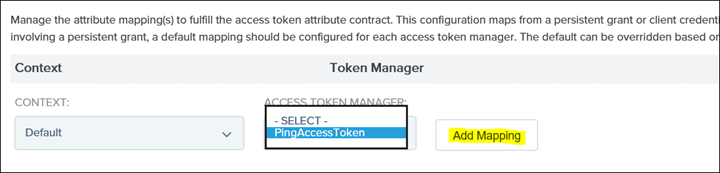
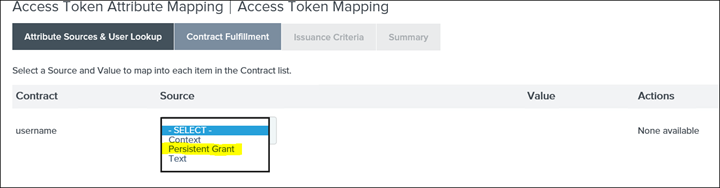
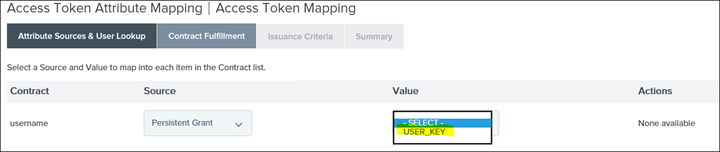
31. For username select Persistent Grant and the next drop-down select USER_KEY
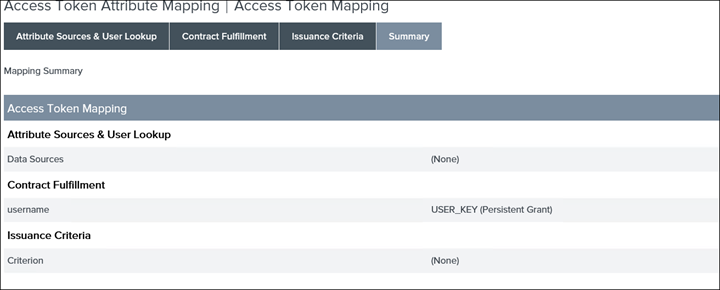
Summary
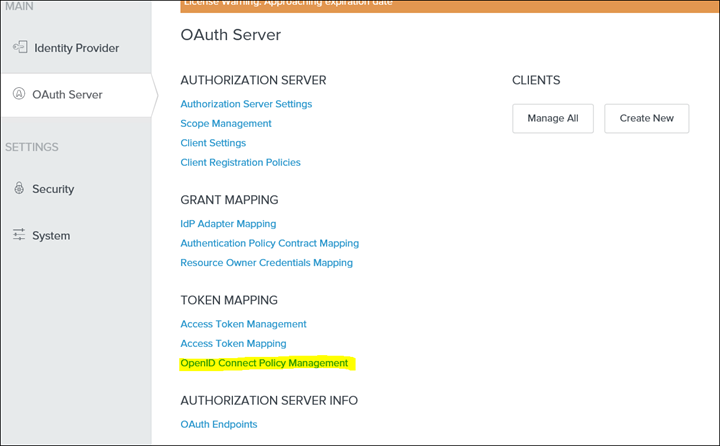
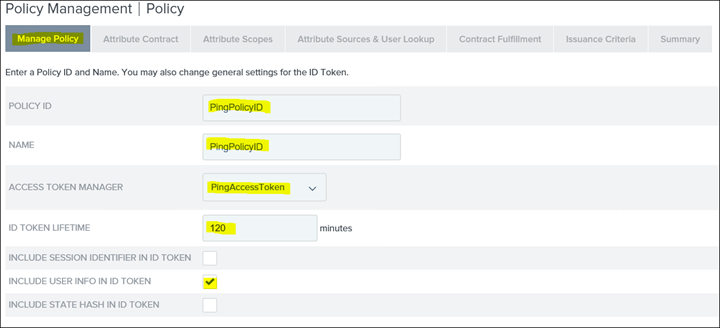
32. Save and then select OpenID Connect Policy Management and then Add Policy

33. For the Policy that was previously created select the following options:
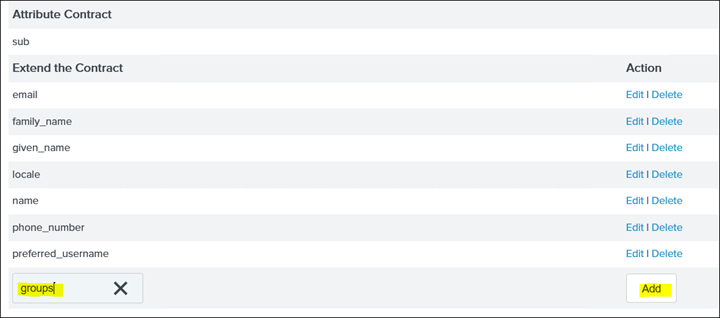
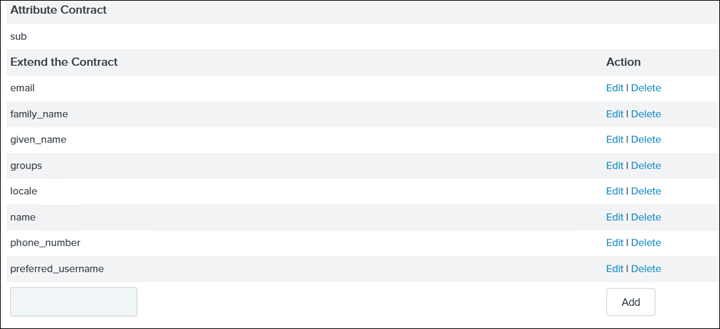
34. Click Next to Attribute Contract and delete all attributes that are not required and/or are not associated with AD so what is left is the following and also add the groups attribute:
35. Click Next to Attribute Sources & User Lookup
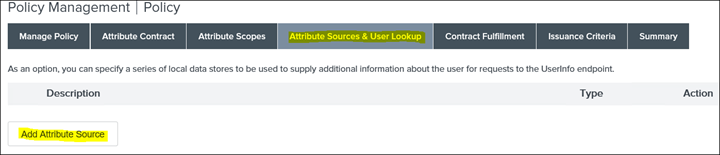

36. Click on LDAP Directory Search
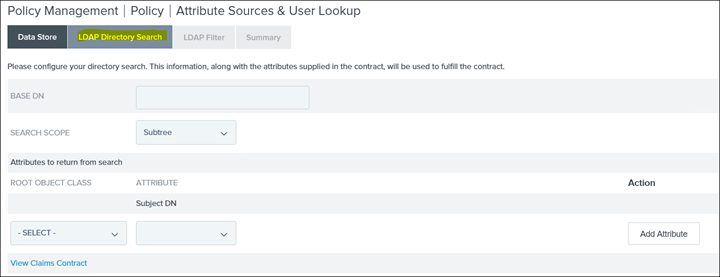
37. Add the BaseDN and then map the AD attribute to its ObjectClass
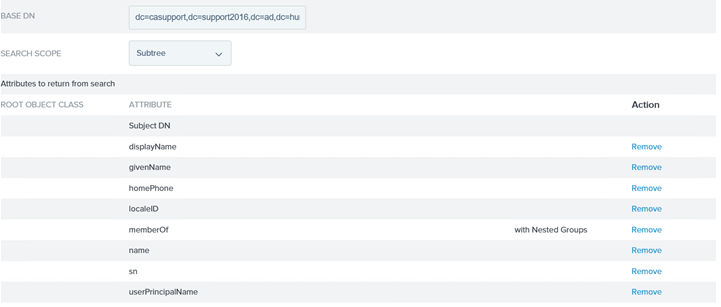
Under "Attributes to return from search" drop down the ROOT OBJECT CLASS "-SELECT-" and select the objectClass and on the right select the attribute from the above list.
Here is the list of ObjectClass mapping to each Attribute:
InetOrgPerson - displayName, givenName, HomePhone
user - LocalID, upn (userPrincipalName)
top - memberOf, name
person - sn
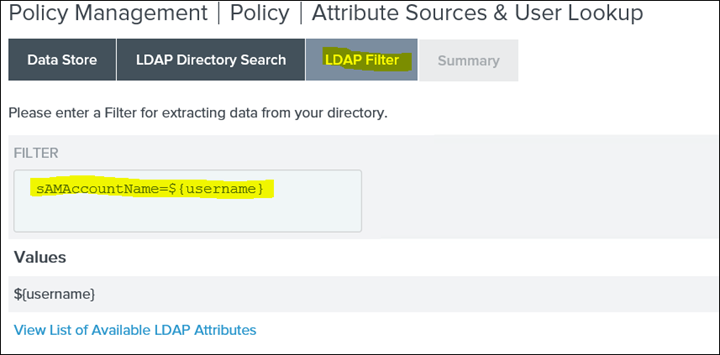
38. Click on LDAP Filter and type in the filter expression : sAMAccountName=${username}
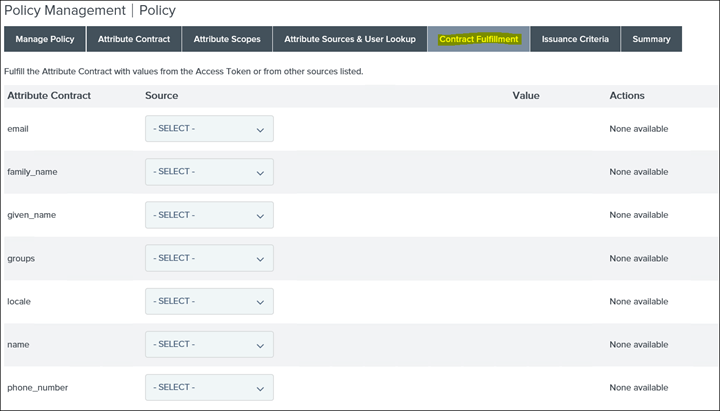
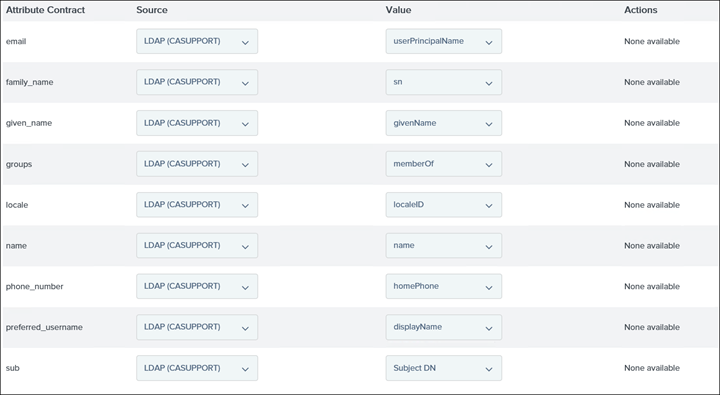
39. Click Save and then click on Contract Fulfillment and here each attribute contract needs to be mapped to the source (LDAP)

40. Click Save and go back to Policy Management and from the Action select "Set as Default"

NB: If the above section is not found, click back to OAuth Server - OpenID Connect Policy Management
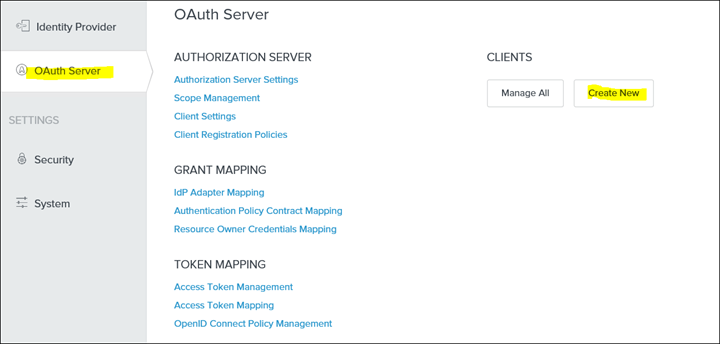
Create the Client
41. Click on OAuth Server - Clients - Create New
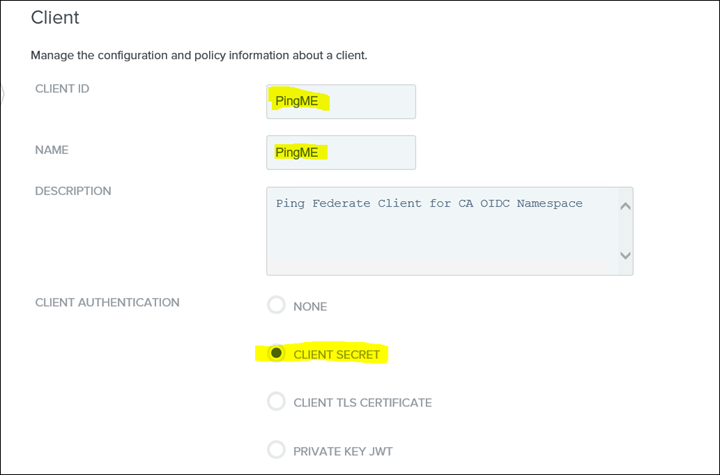
42. Type in the ClientID and for Client Authentication select CLIENT SECRET
43. Generate a new Client Secret by selecting CHANGE SECRET and click "Generate Secret"
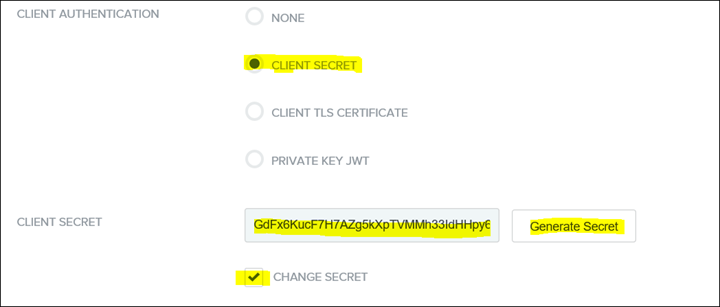
NB: The client secret is visible only once so copy the value in a safe place as it will be needed as part of the Cognos Analytics OIDC Namespace Settings. If the secret is lost then the process to generate the value will need to be repeated.
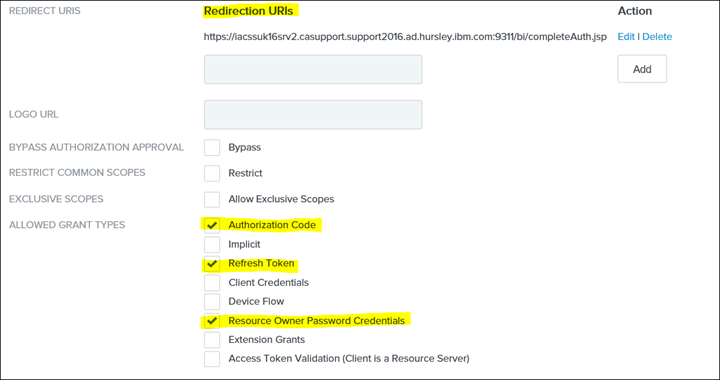
44. Add the Cognos Analytics Redirect URL and select the following GRANT TYPES:
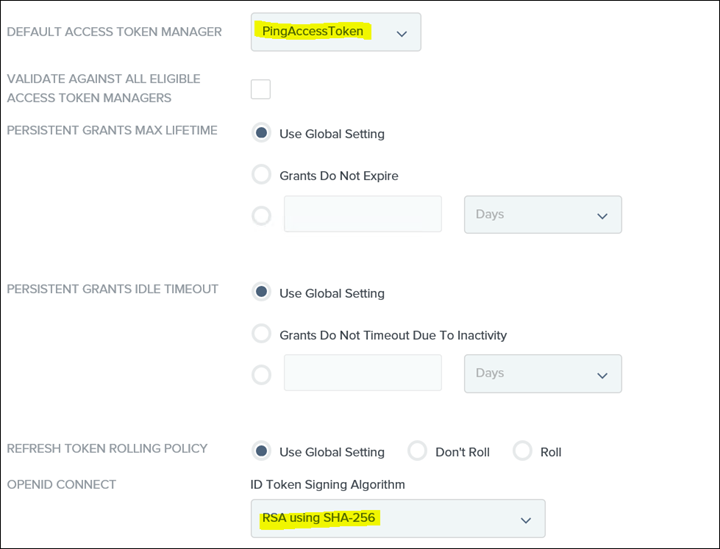
Then select the DEFAULT ACCESS TOKEN MANAGER and ID Token Signing Algorithm
45. Save

Setup Cognos Analytics Generic OpenID Namespace
46. Download the certificate to the <installation>/bin directory using Firefox
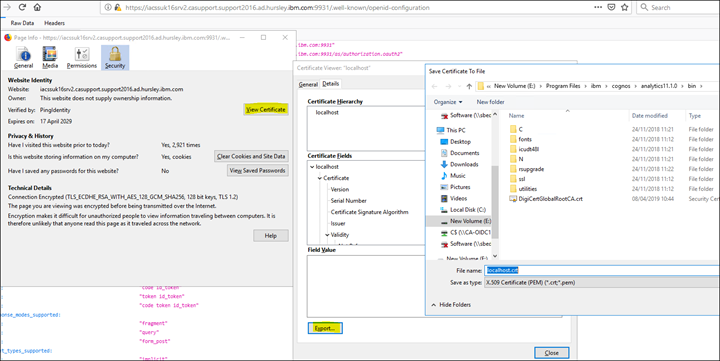
47. Open a command prompt and import the certificate to the CA Keystore

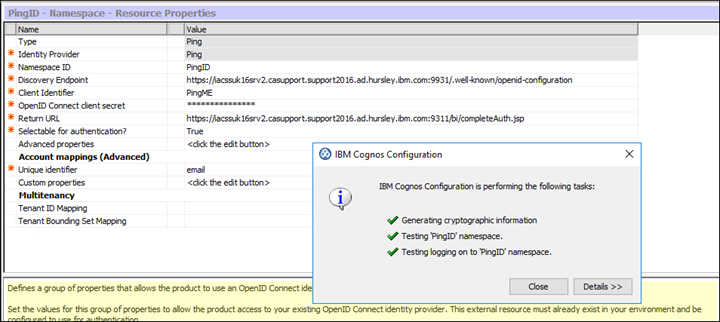
48. Create a new Namespace for OpenID Connect and select 'PING'. Then populate the required fields:
Discovery Endpoint : https://iacssuk16srv2.casupport.support2016.ad.hursley.ibm.com:9931/.well-known/openid-configuration
Client ID: PingME
Client Secret: {secret}
49. Test the namespace and if all validations are green then its successful
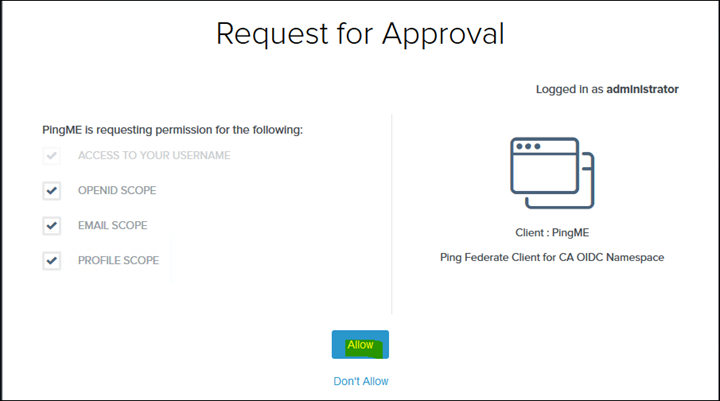
Finally launch the CA URL and log in

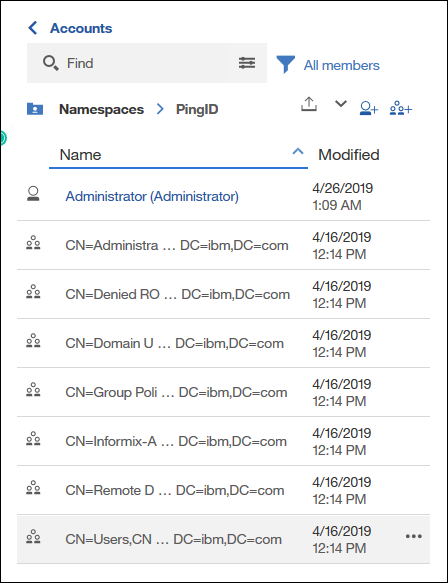
Groups should also be included in the users identity and to confirm this go to:
Manage - People - Accounts - <PingNamespace>
 Additional Information:
In 11.1.4+ there are 4 new advanced configuration items:
Additional Information:
In 11.1.4+ there are 4 new advanced configuration items:
name
authorizeEPAddParms (authorize redirect)
pgTokenEPAddParms (on password grant flow to the token endpoint)
rtTokenEPAddParms (on refresh token flow to the token endpoint)
codeTokenEPAddParms (on authorization code flow to the token endpoint)
This allows you to control exactly what addition parameters are added and specifically to which endpoints. Given the "resource" parameter could be represented using the new advanced configuration items, the value let's you put whatever you want in the URL... as a consequence, the value must include the &, the parameter name, and the parameter value which MUST be url encode e.g.
name value
authorizeEPAddParms &resource=HTTPS%3A%2F%2FADFS_SERVER#Administration#CognosAnalyticswithWatson#home#LearnCognosAnalytics