The purpose of this article is to provide "step-by-step" guide to provisioning an OpenID AppID service hosted on IBM Cloud used to allow authorization/authentication with Cognos Analytics.
IBM Cloud AppID is used to allow web platforms to authenticate using this service.
Further details are found here : https://www.ibm.com/cloud/app-id
With regards to this article, the following is assumed:
1. A IBM Cloud Account has been created
2. On-Prem/Cloud IBM Cognos Analytics 11.1.x is available
Steps are as follows:
1. From the Dashboard create a new resource : https://console.bluemix.net/dashboard/apps

2. Select "Security and Identity" and select "Appid" Service
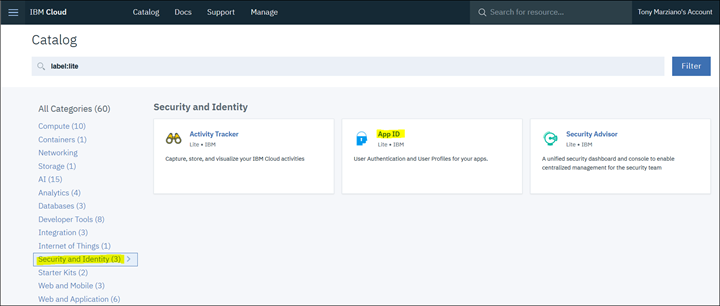
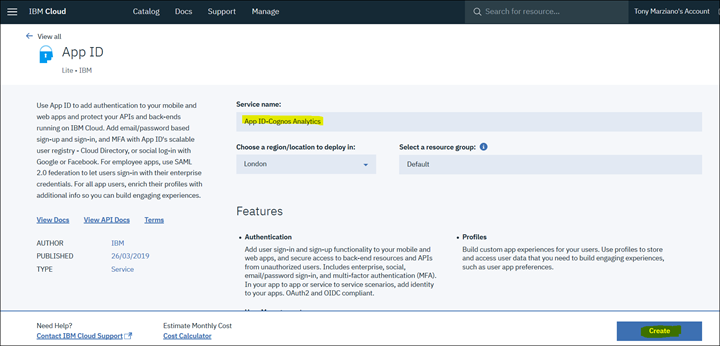
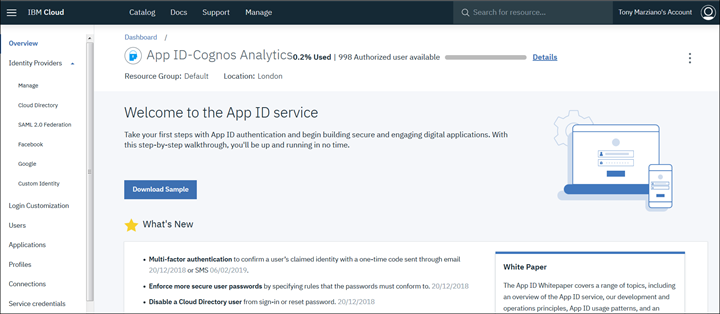
3. Click on "Manage" and for "Identity Providers" leave as default
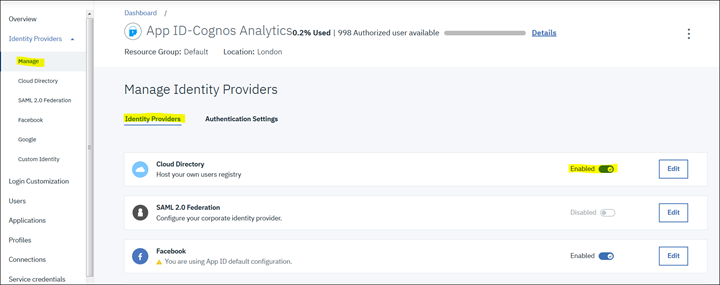
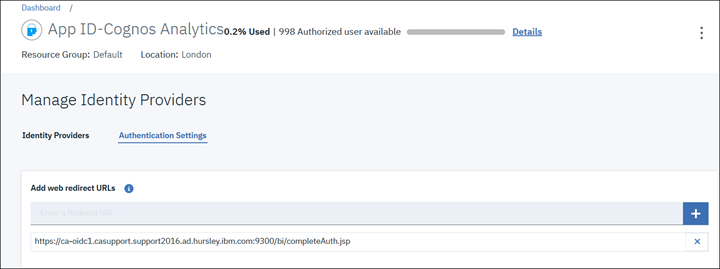
4. Click on "Authentication Settings" and add the redirect URL or callback URL to Cognos Analytics


Click the "+" button
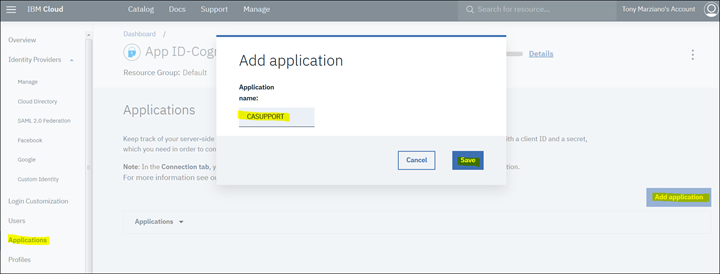
4. Create a new Application by clicking on "Applications"
5. Click on "View Credentials" to see the required clientID/secret and Discovery Endpoint

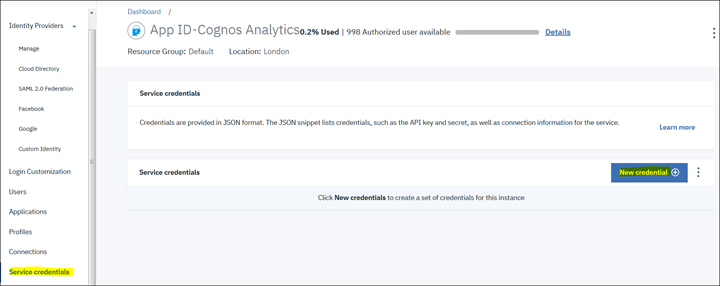
6. Create a Service Credentials by clicking on "Service Credentials" - "New credential" button
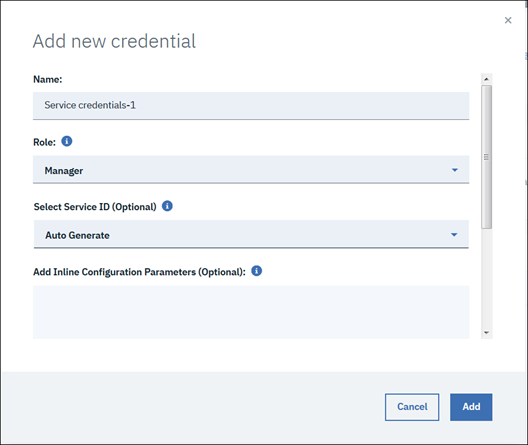
7. Role should be either "Write" or "Manager" and then click "Add" button
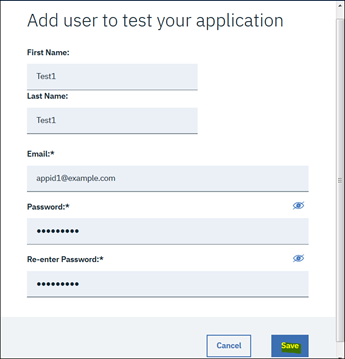
8. Create users by clicking on "Users" and then "Add User" button

9. Provide the user information. Note: These are just a sample of test users.

10. Now we need to gather the important information in order to create the Generic OpenID Namespace. Here we need the following:
11. Launch the Discovery Endpoint URL and download the CA Root Certificate which you can do using Firefox
https://eu-gb.appid.cloud.ibm.com/oauth/v3/3a54280d-f436-4b79-af4e-9bb9e67f7ef9/.well-known/openid-configuration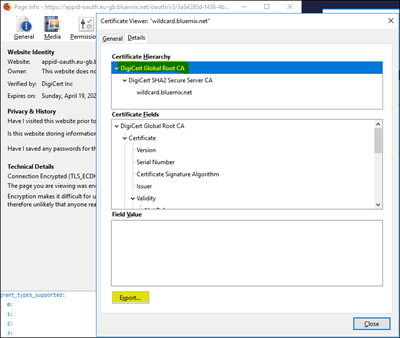
12. Save the certificate into the /bin directory of the IBM Cognos Analytics Installation and run the following command line:
<installation>\bin>ThirdPartyCertificateTool.bat -i -T -r DigiCertGlobalRootCA.crt -p NoPassWordSet
This is to add the Issuer certificate to the installation's keystore.
13. Launch Cognos Configuration (from the Content Manager Instance if its a distributed/multi-server installation)
14. Create a new Namespace and select OpenID Connect / Generic
15. Add the following entries
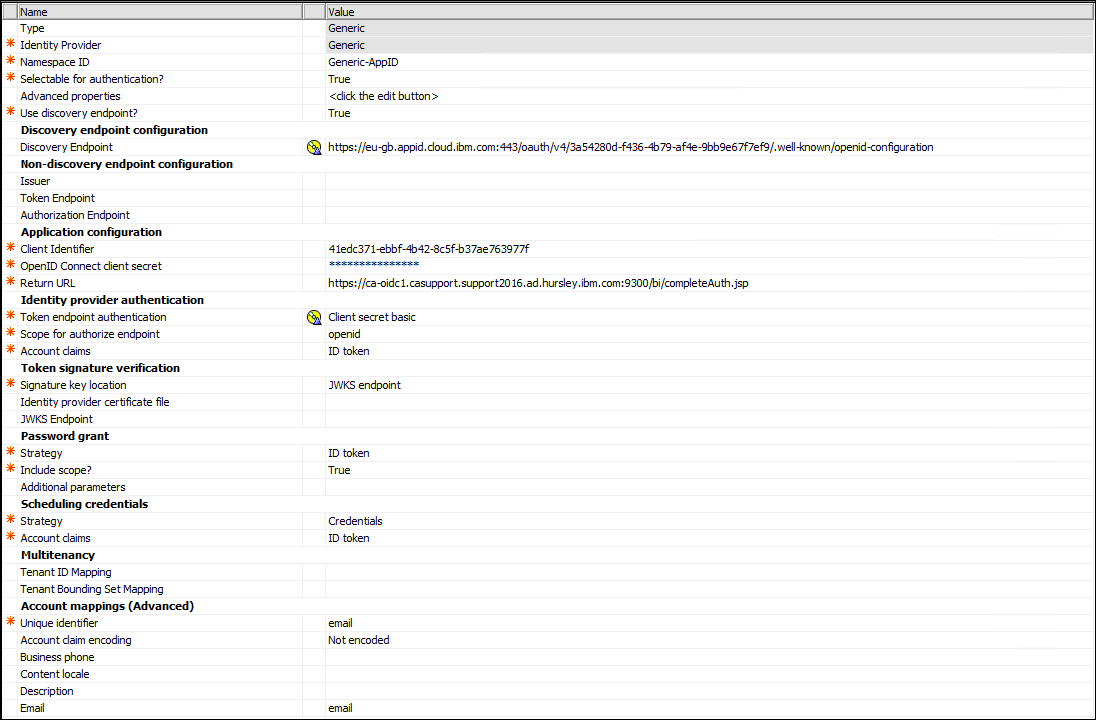

Note the following entries:
Clientid/secret values
scope : openid
discovery endpoint: https://eu-gb.appid.cloud.ibm.com/oauth/v3/3a54280d-f436-4b79-af4e-9bb9e67f7ef9/.well-known/openid-configuration
Token Endpoint Authentication: Client secret basic
Account Claim (Mappings)
given name: given_name
name: name
The remaining are default.
16. Save and make sure the validation succeeds (green ticks). Then start/restart
17. Log in
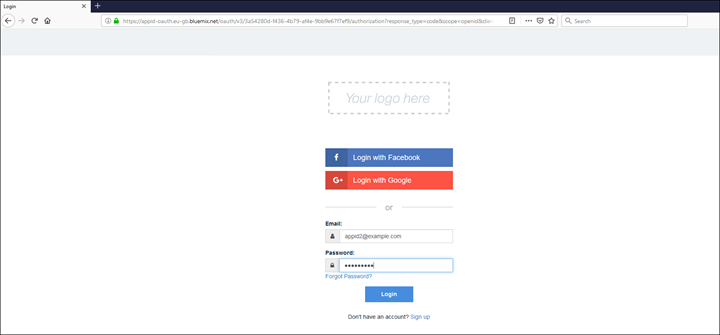

Since users/groups are not browsible as they are for AD/LDAP Namespace(s) it will be necessary to import users/groups if there is a need to secure the environment using the cognos security model. To do this its necessary first to create the users in AppID and then use the Import UI feature in IBM Cognos Analytics. Here are the steps:
1. Create a *.csv file where the first row is the header information and each subsequent row would be matched by the actual users in AppID. Example below:
email,defaultName
appid3@example.com,Appid User
2. Log into Cognos Analytics and click on "Manage" - "People" - "Accounts" - Drill down the namespace (AppID). Then click on the "Import" icon
3. Select "Import Users"
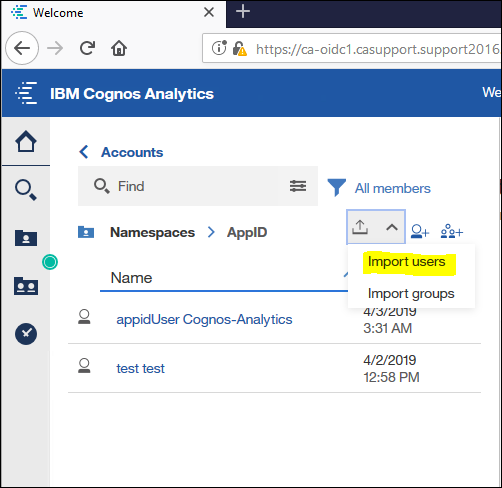
4. Navigate to the saved *.csv file and import
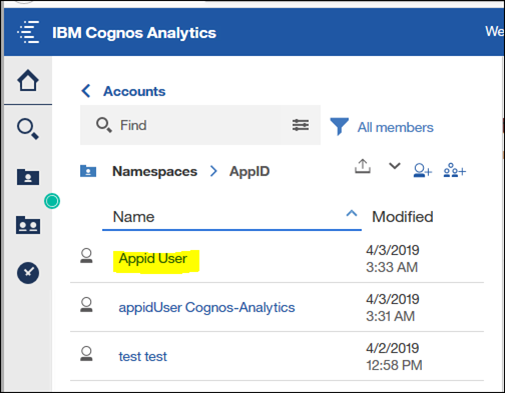
Further information can be found here : https://www.ibm.com/support/knowledgecenter/en/SSEP7J_11.0.0/com.ibm.swg.ba.cognos.ag_manage.doc/c_ca_openid_csv_file.html
#Administration#CognosAnalyticswithWatson#home#LearnCognosAnalytics