The purpose of this article is to show "step by step" on how to populate the employeeID attribute (or any attributes) as an id_token claim and then using this claim to create a session parameter in Cognos Analytics Reporting to expose the data for reporting.
It will be assumed that AD On-Prem to AzureAD synchronisation is configured using the Azure AD Connect and that an Azure Application is already configured.
Environment:
Windows 2016 AD on-premise : CASUPPORT.SUPPORT2016.AD.HURSLEY.IBM.COM
AzureAD Domain : AZURECOGNOSLAB.onmicrosoft.com
OpenID Web Application : AZURECASUPPORT
Steps are as follows:
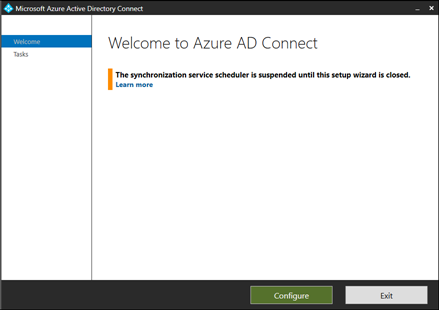
1. Launch Azure AD Connect
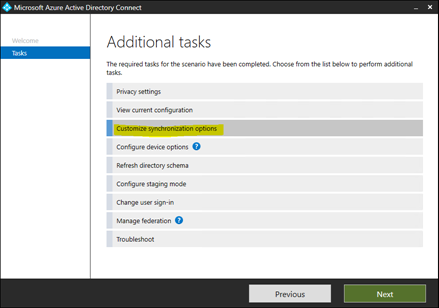
2. Click on "Configure" and then "Customize synchronization options"
3. Click "Next" and provide Azure Credentials and continue clicking "Next" until you get to this screen
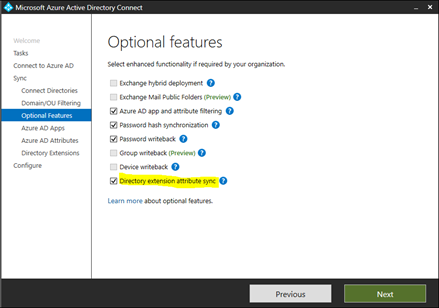
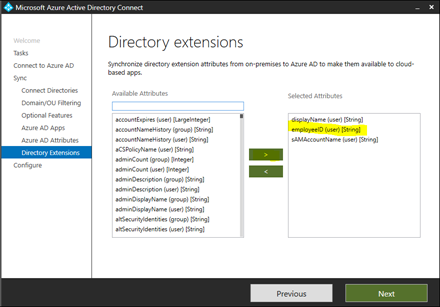
Select "Directory extension attribute sync" and click "Next" a couple of times until you get to this screen. Then scroll down the "Available Attributes" until you find "employeeID" and click across to select it.
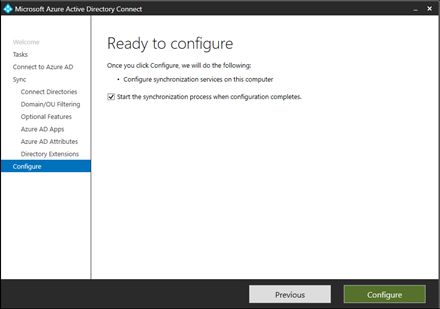
4. Click "Next" and then "Configure"
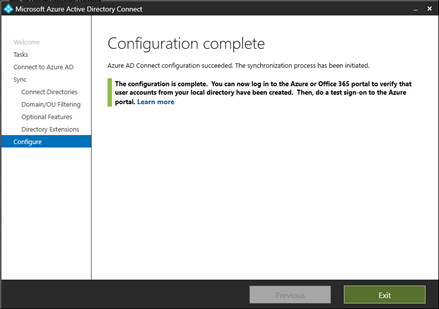
5. Synchronisation has been completed
 How to map the employeeid attribute as a claim to the id_token
1. Install PowerShell Modules for Azure :
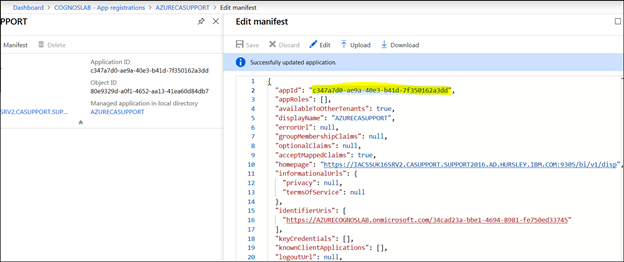
https://www.microsoft.com/web/handlers/webpi.ashx/getinstaller/WindowsAzurePowershellGet.3f.3f.3fnew.appids2. Enable the parameter ‘AcceptMappedClaims” from “null” to “true” by editing the manifest of the Azure Application
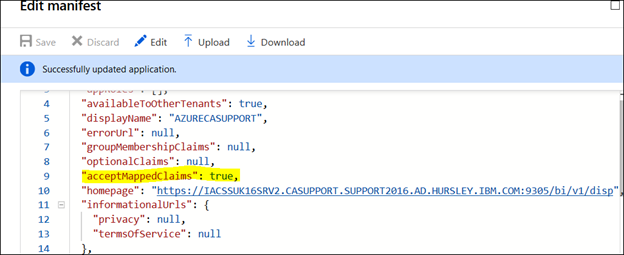
3. Click "Save" and then locate the appID and make a note of it.
4. Create a powershell script with the following code:
$claimsMappingPolicy = [ordered]@{
"ClaimsMappingPolicy" = [ordered]@{
"Version" = 1
"IncludeBasicClaimSet" = $true
"ClaimsSchema" = @(
[ordered]@{
"Source" = "user"
"ID" = "employeeid"
"JwtClaimType" = "employeeid"
}
)
}
}
$appID =
"<applicationID>" $policyName = "Add employeeid to JWT claims"
$sp = Get-AzureADServicePrincipal -Filter "servicePrincipalNames/any(n: n eq '$appID')"
$existingPolicies = Get-AzureADServicePrincipalPolicy -Id $sp.ObjectId `
| Where-Object { $_.Type -eq "ClaimsMappingPolicy" }
if ($existingPolicies) {
$existingPolicies | Remove-AzureADPolicy
}
$policyDefinition = $claimsMappingPolicy | ConvertTo-Json -Depth 99 -Compress
$policy = New-AzureADPolicy -Type "ClaimsMappingPolicy" -DisplayName $policyName -Definition $policyDefinition
Add-AzureADServicePrincipalPolicy -Id $sp.ObjectId -RefObjectId $policy.Id
Write-Output ("New claims mapping policy '{0}' set for app '{1}'." -f $policy.DisplayName, $sp.DisplayName)
5. Replace the variable value '$appID = "<applicationID>"' with the value captured from your manifest file. Example below:
$claimsMappingPolicy = [ordered]@{
"ClaimsMappingPolicy" = [ordered]@{
"Version" = 1
"IncludeBasicClaimSet" = $true
"ClaimsSchema" = @(
[ordered]@{
"Source" = "user"
"ID" = "employeeid"
"JwtClaimType" = "employeeid"
}
)
}
}
$appID = "
c347a7d0-ae9a-40e3-b41d-7f350162a3dd"
$policyName = "Add employeeid to JWT claims"
$sp = Get-AzureADServicePrincipal -Filter "servicePrincipalNames/any(n: n eq '$appID')"
$existingPolicies = Get-AzureADServicePrincipalPolicy -Id $sp.ObjectId `
| Where-Object { $_.Type -eq "ClaimsMappingPolicy" }
if ($existingPolicies) {
$existingPolicies | Remove-AzureADPolicy
}
$policyDefinition = $claimsMappingPolicy | ConvertTo-Json -Depth 99 -Compress
$policy = New-AzureADPolicy -Type "ClaimsMappingPolicy" -DisplayName $policyName -Definition $policyDefinition
Add-AzureADServicePrincipalPolicy -Id $sp.ObjectId -RefObjectId $policy.Id
Write-Output ("New claims mapping policy '{0}' set for app '{1}'." -f $policy.DisplayName, $sp.DisplayName)
6. Save it to the server running the Azure AD Connect as "AddEmployeeIDToJWTClaims.ps1"
7. Connect to the Azure Platform:

8. Then run the above powershell script 'AddEmployeeIDToJWTClaims.ps1'

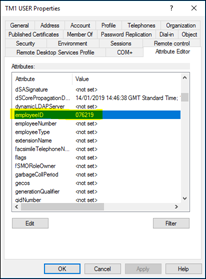
9. Now Check the AD user(s) employeeID attribute contains a value. See example below:
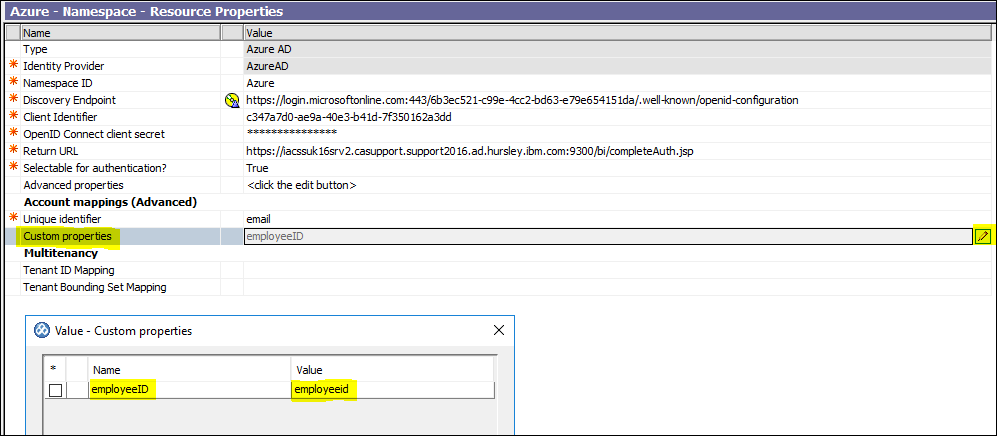
10. Open Cognos Analytics Configuration Manager and create a custom property name/value pair. See below:
11. Save and restart
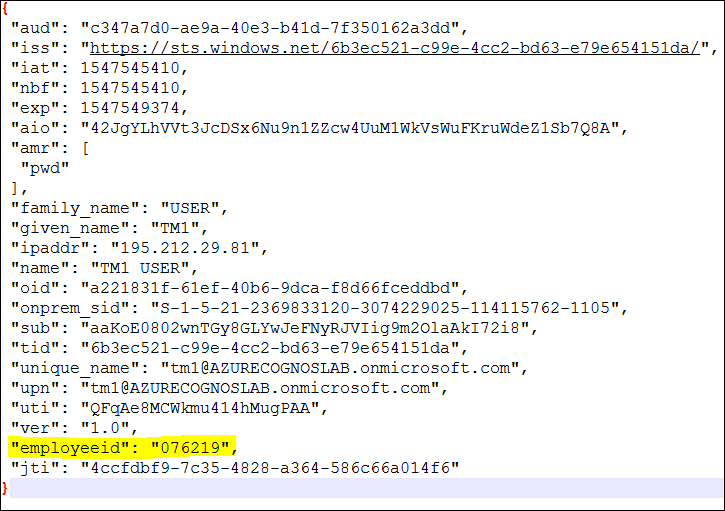
12. With OIDC Tracing enabled log into CA with the Azure Namespace as an AD user i.e. user called "TM1". Check the OIDC trace for an id_token value and decode it. You will see the employeeid attribute has been passed in the token:
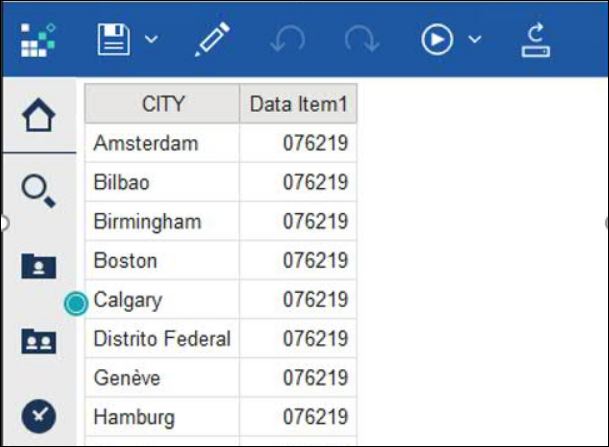
13. Launch Cognos Analytics and create a new report and then insert a new dataitem with the following session parameter expression: #sq($account.parameters.employeeID)#
Save and execute the report. Here the data is pulled from the employeeid attribute:
References:
https://community.ibm.com/community/user/businessanalytics/blogs/antonio-marziano/2018/09/05/administration-how-to-setup-azure-oidc-with-cognos#Administration#CognosAnalyticswithWatson#home#LearnCognosAnalytics