The purpose of this document is to walk through step-by-step in setting up OpenID Authentication Proxy Federation with Active Directory and with LDAP over Active Directory Namespaces. The following is an actual lab setup:
Environment:Active Directory: Windows 2016
Domain: CASUPPORT
Cognos Analytics 11 R10+
OS: Windows 2016
Identity Provider: OKTA
Before we start, it’s important to assume that users can successfully authentication independently with OKTA, AD or LDAP over AD configured with their Cognos Analytics environment (See Appendix A) via SSO (if enabled)
Below is a list of the preconfigured namespaces that will be federated using OpenID Authentication Proxy:
Environment: Gateway URL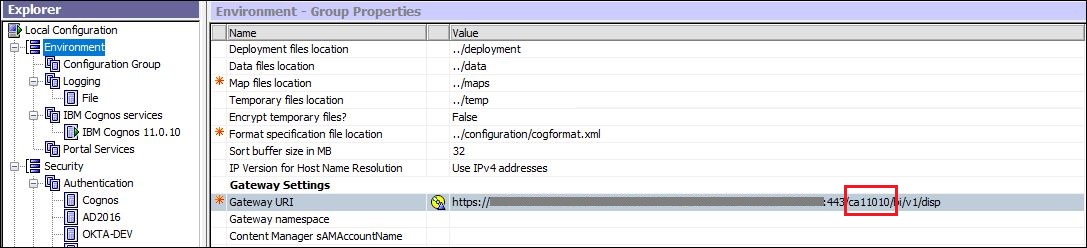
NB: Gateway Configuration in this scenario must be setup successfully.
OKTA: OKTA-DEV AD: AD2016
 LDAP: ADLDAP
 Configuration for OpenID Authentication Proxy and LDAP over AD Namespace
Steps are as follows:
Open Cognos Configuration and Create a new Namespace
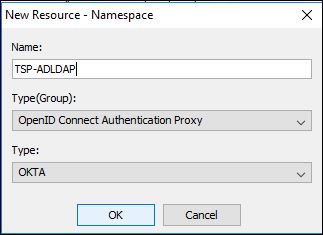
Fill in the same details as for the OKTA Namespace i.e. Discovery Endpoint, ClientID, Client Secret and Return URL.
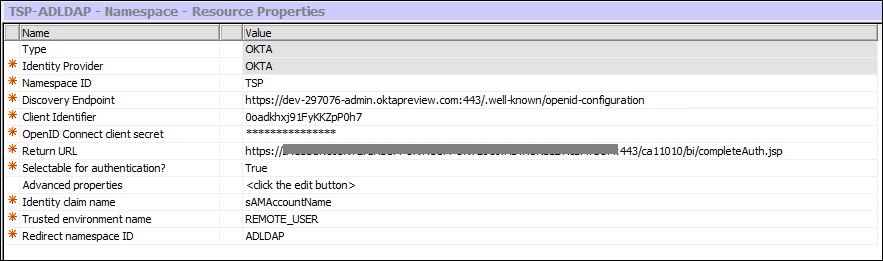
The important parts are:
Identity claim name
Trusted environment name: REMOTE_USER (Default)
Redirect namespace ID: <Federating to the LDAP over AD Namespace>
So here are how those 3 fields are mapped:
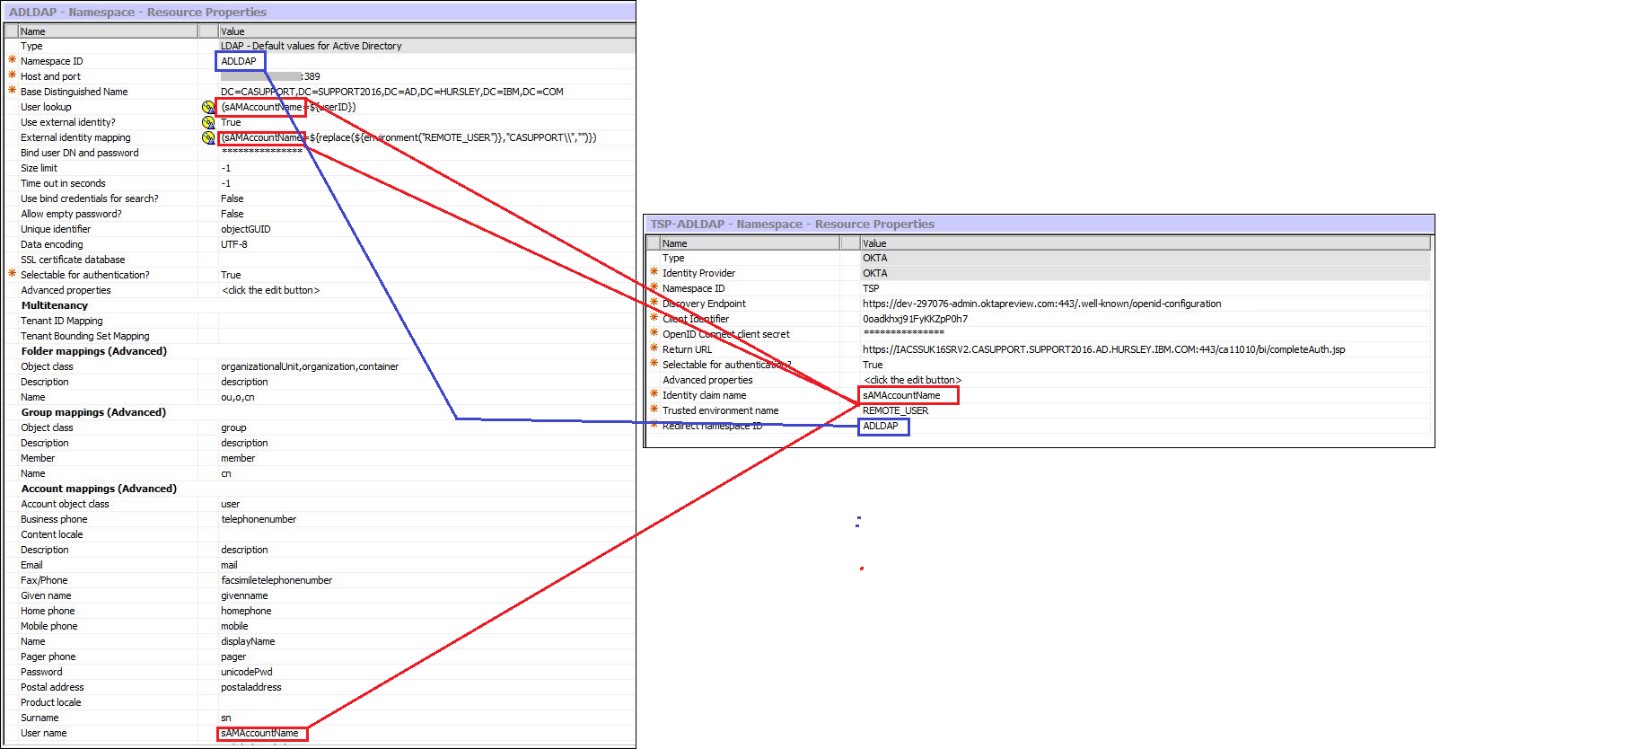
Identity claim name:
sAMAccountNameTrusted environment name:
REMOTE_USERRedirect namespace ID:
ADLDAPREMOTE_USER variable is required for SSO via Gateway
Configuration for OpenID Authentication Proxy and AD Namespace1.Open Cognos Configuration and Create a new Namespace
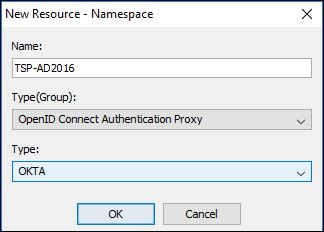
2. Fill in the same details as for the OKTA Namespace i.e. Discovery Endpoint, ClientID, Client Secret and Return URL.
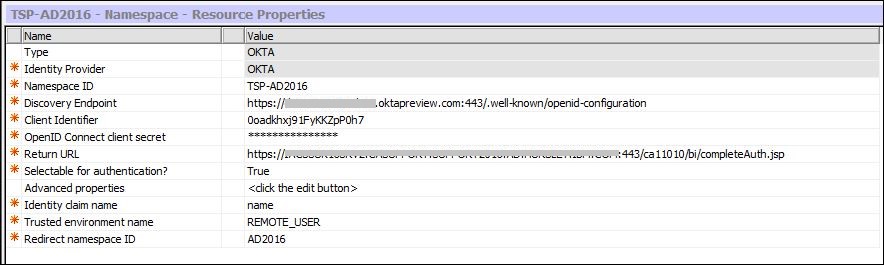
With regards to the Identity claim name field for AD it’s important that the correct “common” attribute (claim) is found that contains the user name.
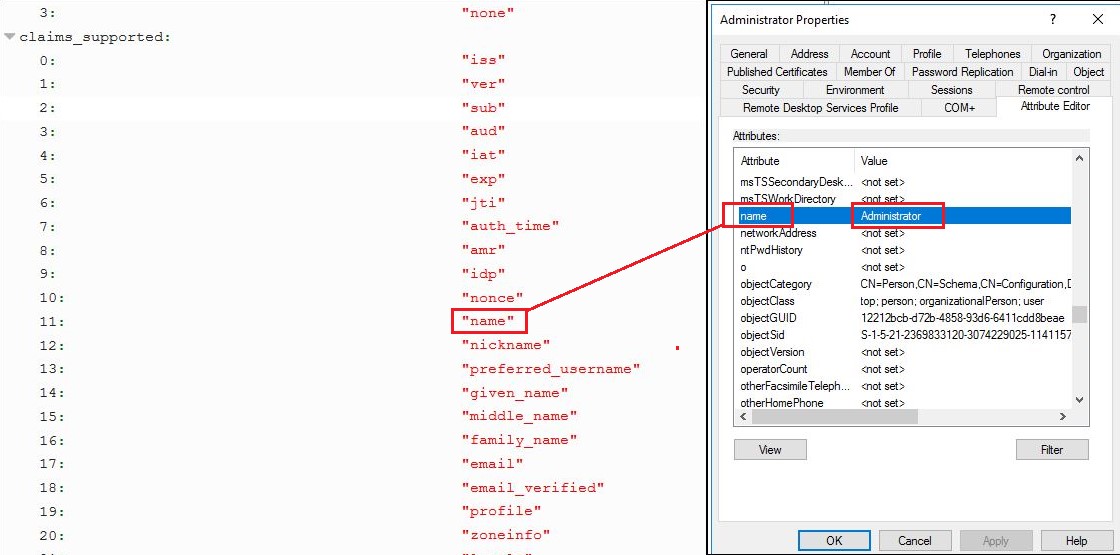
So, if you review the Discovery Endpoint Document list of “Claims Supported”:
https://dev-297076-admin.oktapreview.com:443/.well-known/openid-configurationyou will see the “name” claim. Then review the list of attributes for any authenticating user in AD and locate the “
name” attribute.
See below:
 Identity claim name
: Specifies the name of the claim that will be provided to the target namespace.
A string that represents the name of the claim from the id_token that will be provided to the target namespace. So here it’s the “
name” claim from the
id_token that will be passed to the “target namespace” (
AD2016) which also has a “
name” attribute which exists for all users.
3.Save and restart
Switch on OIDC Tracing via the Custom Topics you will see the decoded id_token you will see the “name” claim:
 Additional Information
Appendix A:
#activedirectory#Administration#CognosAnalyticswithWatson#cognosanalyticssupport#GettingStarted#home#ldap#LearnCognosAnalytics#oidc#openid#Resources#Support#Tips#Tutorials