KVM-Based Single Node OpenShift (SNO) Cluster with Guardium Data Security Center (GQS)
Introduction
This guide outlines the end-to-end process of deploying a Single Node OpenShift (SNO) cluster using KVM on a RHEL 8/Fedora 39 host environment. OpenShift 4.18 will be installed and configured using libvirt virtualization and baremetal-installation tools. Following the OpenShift deployment, IBM Guardium Data Security Center (GQS) will be installed to provide data security monitoring and compliance within the cluster.
Prerequisites
- KVM based on OpenShift Container Platform (OCP) version 4.17.14.
KVM minimum requirements
-
- CPUs: 4
- RAM: 10.5 GB
- Disk space: 35 GB
Guardium Data Security Center v3.6.2 system requirements
- CPUs: Minimum of 48
- RAM: 400 GB
- HDD: 3.2 TB
The deployment of Guardium Data Security Center v3.6.2 involves the installation of Guardium Quantum Safe, which consists of three components. The detailed deployment process for Guardium Quantum Safe is similar to the Guardium Data Security Center deployment. For details beyond the scope of this tutorial, see the following resources:
1. Install Libvirt Virtualization Tools
Install the necessary packages to enable the system to be a KVM host.
yum groupinstall "Virtualization Host" -y
yum install virt-install libvirt-client -y
systemctl enable --now libvirtd.service
Restart the service for the libvirtd daemon, then log out and log in again.
# systemctl restart libvirtd
2. Configure VLAN-based Networking
Configure your host to allow VLAN routing.
Create a bridge for VMs using subnet: 10.221.192.x
3. Prepare OpenShift Installation
mkdir -p /opt/openshift
cd /opt/openshift

wget <openshift-install.tar.gz>
wget <openshift-client-linux.tar.gz>
tar -xvf openshift-install.tar.gz
tar -xvf openshift-client-linux.tar.gz
Downloading coreos-installer
wget https://mirror.openshift.com/pub/openshift-v4/clients/coreos-installer/v0.21.0-3/coreos-installer
cp ./coreos-installer /usr/local/bin
chmod +x /usr/local/bin/coreos-installer

# Downloading rhcos live media

wget -v https://rhcos.mirror.openshift.com/.../rhcos-410.84...-live.x86_64.iso
4. Create install-config.yaml
Getting the secret at the following link:
https://console.redhat.com/openshift/create/local
click on “Copy pull secret” button in the Pull Secret section.
mkdir -p /opt/openshift/ignition
vi deploy/install-config.yaml
5. Create the install-config.yaml file with the following template:
CLUSTER NAME: soclab.com
BASE DOMAIN:sno
MACHINE CIDR: 10.221.192.0/24
vi deploy/install-config.yaml
apiVersion: v1

baseDomain: lab

metadata:

 name: sno

networking:

 networkType: OVNKubernetes

 machineCIDR: 10.221.192.0/24

 clusterNetwork:

 - cidr: 10.128.0.0/14

 hostPrefix: 23

 serviceNetwork:

 - 172.30.0.0/16

compute:

- name: worker

 replicas: 0

controlPlane:

 name: master

 replicas: 1

platform:

 none: {}

BootstrapInPlace:

 InstallationDisk: /dev/sda

pullSecret: "PASTE THE SECRET CONTENT HERE"

sshKey: "PASTE THE SSH PUBLIC KEY HERE"
6. Generate Single Node Ignition Media
./openshift-install --dir=ignition create single-node-ignition-config
coreos-installer iso ignition embed -fi ignition/bootstrap-in-place-for-live-iso.ign rhcos-410.84.iso
cp rhcos-410.84.iso /var/lib/libvirt/images/rhcos-sno.iso
Networking: The server must have access to the internet or access to a local registry if it is not connected to a routable network. The server must have a DHCP reservation or a static IP address for the Kubernetes API, ingress route, and cluster node domain names. You must configure the DNS to resolve the IP address to each of the following fully qualified domain names (FQDN):
Required DNS records
| Usage |
FQDN |
Description |
|
Kubernetes API
|
api.<cluster_name>.<base_domain>
|
Add a DNS A/AAAA or CNAME record. This record must be resolvable by clients external to the cluster.
|
|
Internal API
|
api-int.<cluster_name>.<base_domain>
|
Add a DNS A/AAAA or CNAME record when creating the ISO manually. This record must be resolvable by nodes within the cluster.
|
|
Ingress route
|
*.apps.<cluster_name>.<base_domain>
|
Add a wildcard DNS A/AAAA or CNAME record that targets the node. This record must be resolvable by clients external to the cluster.
|
Example windows based dns records:

6. Configure DHCP Server
Example:
subnet 10.221.192.0 netmask 255.255.255.0 {
    range 10.221.192.92 10.221.192.9;
    option subnet-mask 255.255.255.0;
    option routers 10.221.192.x;
    option domain-name-servers 10.221.192.x;
    option domain-name "soclab.com";

    host master01 {
        hardware ethernet 52:54:00:0f:ac:c9;
        fixed-address 10.221.192.92;
    }
}
7. Install OpenShift SNO on Virtual Machine
virt-install \
  --name=openshift-sno \
  --vcpus=42 \
  --ram=225280 \
  --disk path=/var/lib/libvirt/images/master-snp.qcow2,bus=sata,size=1500 \
  --network bridge=sno,model=virtio \
  --cdrom /var/lib/libvirt/images/rhcos-sno.iso \
  --boot menu=on \
  --graphics vnc \
  --cpu host-passthrough \
  --console pty,target_type=serial \
  --noautoconsole \
  --osinfo detect=on,name=linux2024
Verify the OCP cluster Ready status :
Example:
[root@sno kvm]# openshift-install wait-for install-complete --dir ignition
INFO Waiting up to 40m0s (until 12:16AM CDT) for the cluster at https://api.sno.lab:6443 to initialize...
INFO Waiting up to 30m0s (until 12:29AM CDT) to ensure each cluster operator has finished progressing...
INFO All cluster operators have completed progressing
INFO Checking to see if there is a route at openshift-console/console...
INFO Install complete!
INFO To access the cluster as the system:admin user when using 'oc', run
INFO export KUBECONFIG=/tamil/kvm/ignition/auth/kubeconfig
INFO Access the OpenShift web-console here: https://console-openshift-console.apps.sno.lab
INFO Login to the console with user: "kubeadmin", and password: "xdKFn-uQKWe-tKJtk-XXXX"
INFO Time elapsed: 23m22s
8. Post-Installation Verification
export KUBECONFIG=/opt/openshift/deploy/auth/kubeconfig

oc get nodes
oc get co
oc get clusterversion
oc patch clusterversion version -p '{"spec":{"upstream":""}}' --type=merge

./openshift-install wait-for install-complete --dir ignition
Verify the vm running status.
Example:


The single node status and clusterOperator available status

9. Access OpenShift Console
To access the web UI for Red Hat OpenShift, you use the kubeadmin login ID. To get the password for kubeadmin, complete the following steps.
- Log on to your respective Bastion guest VM.
-
List the content of the kubeadmin-password from your ocp-deploy directory.
Example:
export KUBECONFIG=/opt/openshift/ignition/auth/kubeconfig
Access: https://console-openshift-console.apps.sno.lab
User: kubeadmin
Password: xdKFn-uQKWe-xxxxx-xxxxx
To access the Red Hat OpenShift web UI, open a browser on your laptop or workstation and go to the web console.
On Linux/MacOS: Edit the /etc/hosts file.
<kvm vm IP> console-openshift-console.apps.sno.soclab.com
<kvm vm IP> oauth-openshift.apps.sno.soclab.com
<kvm vm IP> api.sno.soclab.com
On Windows OS: Edit the C:\Windows\System32\drivers\etc\hosts file.
<kvm vm IP> console-openshift-console.apps.sno.soclab.com
<kvm vm IP> oauth-openshift.apps.sno.soclab.com
<kvm vm IP> api.sno.soclab.com
OpenShift Container Platform web console

Create and manage local persistent volumes with KVM VM
A persistent volume is a common way to preserve data in case a container is accidentally lost in Kubernetes or Red Hat OpenShift. This step shows you how to manage persistent volumes with the NFS Provisioner Operator that the author developed.
The NFS Provisioner Operator is open source and available on OperatorHub.io, which means that it can be easily installed using OpenShift's OperatorHub menu. The Operator uses the Kubernetes NFS subdir external provisioner from kubernetes-sigs internally.
To install NFS Provisioner Operator:
- Log in to OpenShift:
oc login -u kubeadmin -p kubeadmin <https://api.crc.testing:6443>
- Create a new namespace:
oc new-project nfsprovisioner-operator
-
Deploy NFS Provisioner Operator:
 cat << EOF | oc apply -f -
 apiVersion: operators.coreos.com/v1alpha1
 kind: Subscription
 metadata:
   name: nfs-provisioner-operator
   namespace: openshift-operators
 spec:
   channel: alpha
   installPlanApproval: Automatic
   name: nfs-provisioner-operator
   source: community-operators
   sourceNamespace: openshift-marketplace
 EOF
-
Label the target node:
 export target_node=$(oc get node --no-headers -o name | cut -d'/' -f2)
 oc label node/${target_node} app=nfs-provisioner
-
Set up an NFS server:
 oc debug node/${target_node}
 chroot /host
 mkdir -p /home/core/nfs
 chcon -Rvt svirt_sandbox_file_t /home/core/nfs
 exit; exit
-
You need to deploy an NFS server using the created folder on a HostPath volume. Note: You can also use an existing persistent volume claim for the NFS server. To deploy NFS Provisioner, run the following:
 cat << EOF | oc apply -f -
 apiVersion: cache.jhouse.com/v1alpha1
 kind: NFSProvisioner
 metadata:
   name: nfsprovisioner-sample
   namespace: nfsprovisioner-operator
 spec:
   nodeSelector:
     app: nfs-provisioner
   hostPathDir: "/home/core/nfs"
 EOF
-
Verify that NFS Provisioner is running:
 oc get pod

 NAME                               READY   STATUS    RESTARTS   AGE
 nfs-provisioner-77bc99bd9c-57jf2   1/1     Running   0          2m32s
-
Set NFS StorageClass as the default:
oc patch storageclass nfs -p '{"metadata": {"annotations":{"storageclass.kubernetes.io/is-default-class":"true"}}}'
-
Verify the NFS StorageClass has been set: oc get sc Expected output:
 NAME            PROVISIONER       RECLAIMPOLICY   VOLUMEBINDINGMODE   ALLOWVOLUMEEXPANSION   AGE
 nfs (default)   example.com/nfs   Delete          Immediate           false                  4m29s

The output shown here indicates that the NFS server, NFS provisioner, and NFS StorageClass are all working as expected. You can use the NFS StorageClass for any test scenarios that need the persistent volume claim.
Step 7: Deploy IBM Guardium Data Security Center
Next , you will create and verify a Guardium Data Security Center instance using a Custom Resource (CR).
Notes:
- Refer to the tutorial prerequisites for Guardium Data Security Center requirements and installation instructions.
- See the Guardium Data Security Center CR suite YAML file.
To create the Guardium Data Security instance, complete the following steps:
- Apply the example custom resource YAML file to create the instance:
oc apply -f <guardium-data-security-center-custom-resource-example.yaml>
Example output
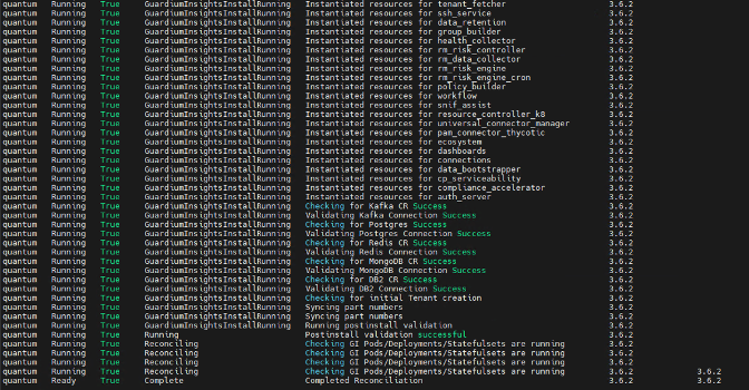
- Verify the status of the deployed instance:
oc get guardiumdatasecuritycenter
Example

Guardium Data Security Center login page
You can now navigate to the exposed route for the Guardium Data Security Center UI. You should see the following login screen:

Step 8: Configure LDAP authentication
To configure LDAP authentication, see this guide to setting up LDAP authentication in Guardium Data Security Center.
Guardium Data Security Center Dashboard
When you have successfully logged in to Guardium Data Security Center, you’ll see the main dashboard. This is your control center for data activity monitoring, policy management, and compliance reporting

Summary and next steps
In this tutorial, you have completed the steps to deploy IBM Guardium Data Security Center on a Red Hat OpenShift Single Node environment running on Linux. You have learned how to simplify the deployment process and enable efficient security management and development testing in a controlled environment.
Your environment is now ready to begin data security operations using Guardium. You can use the Guardium Data Security Center dashboard to:
- Monitor data access and behavior
- Define policies for sensitive data protection
- Trigger alerts and generate compliance reports