Introduction
This guide describes how to configure App Connect with Keycloak for identity and access management on AKS. In my previous post I described how to install App Connect 13 on Azure Kubernetes Service - https://community.ibm.com/community/user/blogs/jean-paul-tabja/2025/04/07/app-connect-installation-on-azure-aks . This guide extends the initial configuration to implement identity and access management for App Connect resources using Keycloak. The first part of this guide describes how to install Keycloak and the second part explains how to configure Keycloak to secure App Connect resources on AKS.
Keycloak installation
In this section we will explain how to install Keycloak IAM to enable authentication to the App Connect Enterprise resources (Dashboard, Designer) with the following steps:
#create namespace
Execute the following command to create a namespace for keycloak
kubectl create namespace keycloak
Set the context to the new namespace executing the following command.
kubectl config set-context --current --namespace=keycloak
Install Postgresql database
We need to install Postgresql for the Keycloak database. Copy the following text and create the file postgresql.yml
apiVersion: apps/v1
kind: StatefulSet
metadata:
name: postgresql-db
spec:
serviceName: postgresql-db-service
selector:
matchLabels:
app: postgresql-db
replicas: 1
template:
metadata:
labels:
app: postgresql-db
spec:
containers:
- name: postgresql-db
image: postgres:15
volumeMounts:
- mountPath: /data
name: cache-volume
env:
- name: POSTGRES_USER
value: testuser
- name: POSTGRES_PASSWORD
value: testpassword
- name: PGDATA
value: /data/pgdata
- name: POSTGRES_DB
value: keycloak
volumes:
- name: cache-volume
emptyDir: {}
---
apiVersion: v1
kind: Service
metadata:
name: postgres-db
spec:
selector:
app: postgresql-db
type: LoadBalancer
ports:
- port: 5432
targetPort: 5432
Execute the following command to install the database.
kubectl apply -f postgresql.yml
Verify the installation the database with the following commands.
You should get the postgres-db service like in the following picture.

You could also test the connection to the database by executing the following.
kubectl exec -it postgresql-db-0 -- psql -h postgres-db -U testuser --password -p 5432 keycloak
#Create the secret for the database access
Execute the following command to create the secret for the database access
kubectl create secret generic keycloak-db-secret --namespace=keycloak --from-literal=db-username='testuser' --from-literal=db-password='testpassword' --from-literal=db-name='keycloak' --from-literal=db-host='postgres-db'
Install Keycloak IAM
We will insall Keycloak with a Deployment and Service.
#Create the Keycloak Deployment
Copy the following text and create the keycloakdeployment.yml file
apiVersion: apps/v1
kind: Deployment
metadata:
name: keycloak
namespace: keycloak
labels:
app: keycloak
spec:
replicas: 1
selector:
matchLabels:
app: keycloak
template:
metadata:
labels:
app: keycloak
spec:
containers:
- name: keycloak
image: quay.io/keycloak/keycloak:23.0.0
args: ["start-dev"]
env:
- name: KEYCLOAK_ADMIN
value: "admin"
- name: KEYCLOAK_ADMIN_PASSWORD
value: "Welc0me"
- name: DB_VENDOR
value: postgres
- name: DB_ADDR
valueFrom:
secretKeyRef:
name: keycloak-db-secret
key: db-host
- name: DB_USERNAME
valueFrom:
secretKeyRef:
name: keycloak-db-secret
key: db-username
- name: DB_PASSWORD
valueFrom:
secretKeyRef:
name: keycloak-db-secret
key: db-password
- name: DB_DATABASE
valueFrom:
secretKeyRef:
name: keycloak-db-secret
key: db-name
- name: DB_PORT
value: "5432"
- name: KC_PROXY
value: "edge"
- name: KC_HTTP_ENABLED
value: "true"
ports:
- name: http
containerPort: 8080
- name: https
containerPort: 8443
readinessProbe:
httpGet:
path: /realms/master
port: 8080
initialDelaySeconds: 5
periodSeconds: 3
Create the deployment with the following command.
kubectl apply -f keycloakdeployment.yml
#Create the Keycloak Service
Copy the following text and create the keycloakservice.yml file
apiVersion: v1
kind: Service
metadata:
name: keycloak
namespace: keycloak
labels:
app: keycloak
spec:
ports:
- name: http
port: 80
targetPort: 8080
- name: https
port: 443
targetPort: 8443
selector:
app: keycloak
type: LoadBalancer
Create the service executing the following command.
kubectl apply -f keycloakservice.yml
Obtain the loadbalancer IP address executing the following command.
Kubectl get svc -n keycloak

Take note of the External IP address.
#Access Keynote console
Open your browser and go to the following address:
http://ExternalIP
You will arrive to the Keycloak landing page.
#Login to Keycloak Administration console
Click on Administration Console. The Sign In dialog will be displayed. Enter your credentials (user:admin, password:Welc0me).

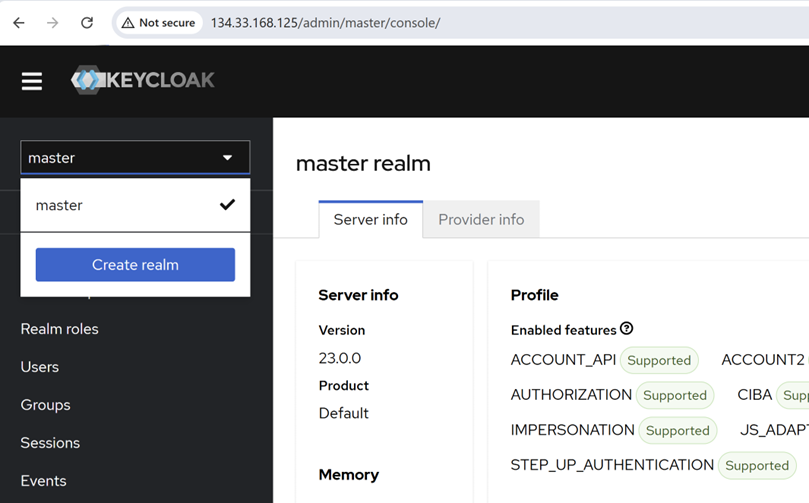
If everything has been properly configured the main of the administration console will be displayed.

You have completed the Keycloak configuration for AppConnect IAM.
App Connect and Keycloak integration
In this section we will describe how to integrate Keycloak for authentication and authorization with App Connect Dashboard. The steps to configure the integration are.
1. Configure the Keycloak realm for the AppConnect Dashboard
2. Create the Keycloak client
3. Create secrets
4. Create the AppConnect dashboard
5. Configure the Keycloak client redirection uri.
6. Create AppConnect users in Keycloak IAM
7. Test the AppConnect – Keycloak IAM integration
Configure the realm for the AppConnect Dashboard
The first step is to create a Keycloak realm. A realm is a security policy domain defined for a web or application server. A realm contains a collection of users, who may or may not be assigned to a group. To configure the realm open the Keycloak console. Open the realms drop down and click on Create realm.
Enter appconnectdashboard1 for the name of the realm

Click on Create.
Create the Keycloak client
In this section we will configure the Keycloak client for the App Connect Dashboard resource that we will create later. On the navigation pane click on Clients and then click on Create client.

For the client ID name enter dash-acedev-acedashboardiam1-55555 and click next

In the next screen toggle Client authentication and Authorization On and click on Next.

In the next screen click on Save to create the client. We will come back to this screen to update the AppConnect Dahboard URL in the Valid redirect URIs field.

The next step is to configure the client with the required roles and client scope for App Connect Dashboard. On the navigation pane, select Clients. Click the client ID you have created from the Client ID column.

The Client details window is opened.

#Create roles
To create roles, click Roles, then click Create role. There are two roles available for App Connect Dashboard, which are dashboard-viewer and dashboard-admin. The former gives you a view-only access to the Dashboard, which means you can only view resources. The latter enables you to perform administrative tasks, such as creating an IntegrationRuntime and uploading a BAR file. We will create both roles for the Keycloak client. To create a viewer role, enter dashboard-viewer in Role name and click Save. Next, repeat this step to create a dashboard-admin role.

Now you will add a required mapper to the Keycloak client. Click Client scopes, then click Add client scope. Next, click the client scope named dash-acedev-acedashboardiam1-55555-dedicated.

Click Add mapper and select By configuration.

A table of predefined mappings is displayed. From the table, scroll down and click to select User Client Role.

From the Add mapper editing window for the User Client Role mapper type:
· Set Name to a name of your choice. In this tutorial, we set it to effective-client-role.
· From the Client ID drop-down list, select your Keycloak client.
· Set Token Claim Name to effective-roles, which is a required value for the App Connect Dashboard and Designer Authoring to validate user roles.
· Toggle to enable Multivalued, Add to ID token, Add to access token, Add to userinfo and Add to token introspection.

Finally, click Save to complete this mapper.
The Keycloak client is configured now. Next step is to create the Keycloak related secrets
Create Keycloak secrets
To enable Transport Layer Security (TLS) between Keycloak and App Connect resources (Dashboard and Designer Authoring), you need to install a set of credentials in your Kubernetes cluster. The credentials should be stored as a Kubernetes Secret resource, and in a namespace that is accessible by your App Connect resources.
Create a namespace for the artifacts related to the AppConnect resources and Keycloak resources integration. In this example we are using the namespace acedev. Execute the following command.
kubectl create namespace acedev
#Create Secret 1 – Keycloak Client Secret
This secret must contain two key-value pairs. The keys must be named CLIENT_ID and CLIENT_SECRET. Copy the following YAML template into a file named kcClientSecret.yaml.
Copy the following text and create the kcClientSecret.yml file
kind: Secret
apiVersion: v1
metadata:
name: dash-acedev-acedashboardiam1-55555
namespace: acedev
labels:
app: keycloak
data:
CLIENT_ID: modify-this-value
CLIENT_SECRET: modify-this-value
type: Opaque
The value of CLIENT_ID is the encoded 64 value of the resource name -> dash-acedev-acedashboardiam1-55555
Execute the following command to obtain the encoded value for CLIENT_ID
echo -n "dash-acedev-acedashboardiam1-55555" | base64
The encoded value is in this example -> ZGFzaC1hY2VkZXYtYWNlZGFzaGJvYXJkaWFtMS01NTU1NQ==
The value for the CLIENT_SECRET field is the encoded 64 value from the Client Secret of the Keycloak client. Open the Client in the Keycloak admin console. Click on the Credentials tab and copy the Client Secret value.

Execute the following command to obtain the encoded value for CLIENT_ID. Replace “yourClientSecretValue” with the value from the Keycloak Client Secret
echo -n "yourClientSecretValue" | base64
The encoded value is in this example -> VVJnMGRkQlNka25wZVFWdk1idjFnS2JoM1hlUVVxZFc=
The updated kcClientSecret.yml is the following.
kind: Secret
apiVersion: v1
metadata:
name: dash-acedev-acedashboardiam1-55555
namespace: acedev
labels:
app: keycloak
data:
CLIENT_ID: ZGFzaC1hY2VkZXYtYWNlZGFzaGJvYXJkaWFtMS01NTU1NQ==
CLIENT_SECRET: VVJnMGRkQlNka25wZVFWdk1idjFnS2JoM1hlUVVxZFc=
type: Opaque
Execute the following command to create the secret.
kubectl apply -f kcClientSecret.yml -n acedev
#Create Secret -2 - CA certificate Secret - Create a secret to store the CA certificate from Keycloak
In this example we will use a self signed certificate. To obtain the certificate execute the following command.
openssl req -subj '/CN=test.keycloak.org/O=Test Keycloak./C=US' -newkey rsa:2048 -nodes -keyout key.pem -x509 -days 365 -out certificate.pem
To create the secret using this certificate execute the following command in the directory you have downloaded the certificate files.
kubectl create secret tls keycloak-tls-secret --cert certificate.pem --key key.pem -n acedev
#Create Secret -3 – IBM Entitlement key.
We need to create the IBM Entitlement key secret to be able to deploy App Connect resources in the acedev namespace.
You need to obtain the Entitlement Key from the IBM Container Software library - https://myibm.ibm.com/products-services/containerlibrary . Create a new entitlement key or copy an existing entitlement key to create the image pull secret in the following step. Execute the following command to create the image pull secret.
kubectl create secret docker-registry ibm-entitlement-key --docker-server="cp.icr.io" --docker-username=cp --docker-password="myEntitlementKey" -n acedev
Create Dashboard with Authentication and Authorization requirements
In this section we will create a new App Connect dashboard with authentication and authorization enabled. The previous dashboard we configured in this document has the authentication and authorization disabled. The following snippet shows the section that we need to configure to integrate Keycloak IAM with App Connect.
authentication:
integrationKeycloak:
auth:
clientSecretName: keycloak-client-secret
enabled: true
endpoint: Keycloak Url
realm: KeycloakRealm
tls:
secretName: keycloak-tls-secret
ingressHost: ace-dashboard-ingress-host-address
authorization:
integrationKeycloak:
auth:
clientSecretName: keycloak-client-secret
enabled: true
endpoint: Keycloak URL
realm: Keycloak realm
tls:
secretName: keycloak-tls-secret
ingressHost: ace-dashboard-ingress-host-address
You need to configure this section with the following:
· clientSecretName -> is the Keycloak Client Secret.
· endpoint -> Is the endpoint URL for Keycloak.
· realm -> Keycloak realm which contains the Client for App Connect resource integration.
· secretName -> Is the CA Certificate secret for Keycloak
· ingressHost -> Is the host address of the ingress resource for the App Connect dashboard
#Create the App Connect Dashboard resource
Copy the following text and create the appconnectdashboardiam1.yml
apiVersion: appconnect.ibm.com/v1beta1
kind: Dashboard
metadata:
name: acedashboardiam1
labels:
namespace: acedev
spec:
license:
accept: true
license: L-KPRV-AUG9NC
use: AppConnectEnterpriseNonProductionFREE
pod:
containers:
content-server:
resources:
limits:
memory: 1024Mi
requests:
cpu: 200m
memory: 100Mi
control-ui:
resources:
limits:
memory: 1024Mi
requests:
cpu: 200m
memory: 500Mi
authentication:
integrationKeycloak:
auth:
clientSecretName: dash-acedev-acedashboardiam1-55555
enabled: true
endpoint: http://134.33.168.125
realm: appconnectdashboard1
tls:
caCertificate: tls.crt
secretName: keycloak-tls-secret
ingressHost: acedashboardiam1-ui-acedev.51.8.194.97.nip.io
authorization:
integrationKeycloak:
auth:
clientSecretName: dash-acedev-acedashboardiam1-55555
enabled: true
endpoint: http://134.33.168.125
realm: appconnectdashboard1
tls:
caCertificate: tls.crt
secretName: keycloak-tls-secret
ingressHost: acedashboardiam1-ui-acedev.51.8.194.97.nip.io
ingress:
domain: 51.8.194.97.nip.io
api:
enabled: true
storage:
size: 5Gi
type: persistent-claim
class: my-azurefile-csi-premium
displayMode: IntegrationServers
replicas: 1
version: '13.0'
Note the following values:
· clientSecretName -> dash-acedev-acedashboardiam1-55555 -> Name of the Keycloak client secret
· endpoint -> Is the endpoint URL for Keycloak. In this case is the External IP address from the Keycloak service. Replace this address with your Keycloak external IP address
· realm -> appconnectdashboard1 -> Is the name of the Keycloak realm we configured in this example
· secretName -> Is the CA Certificate secret name in this example -> keycloak-tls-secret
· ingressHost -> Is the host address of the ingress resource for the App Connect dashboard. This value is built using "dashboardname" + "-ui-" + "namespace" + "." + "cluster external ip address" + ".nip.io" . In this example is acedashboardiam1-ui-acedev.51.8.194.97.nip.io. Replace this value with your host name value.
Note: The cluster external ip address was obtained in part 1 of the App Connect installation here -> https://community.ibm.com/community/user/blogs/jean-paul-tabja/2025/04/07/app-connect-installation-on-azure-aks
Create the dashboard with the following command.
kubectl apply -f appconnectdashboardiam1.yml -n acedev
Verify the dashboard has been created and the status is Ready. You may need to wait for 30 seconds or so. Execute the following command.
kubectl get dashboard -n acedev

Verify the dashboard has a status of Ready before proceeding to the next step.
#Create the ingress for the dashboard
Copy the following text to create the acedashboardiam1ingress.yml file.
apiVersion: networking.k8s.io/v1
kind: Ingress
metadata:
annotations:
nginx.ingress.kubernetes.io/backend-protocol: HTTPS
nginx.ingress.kubernetes.io/proxy-buffer-size: 16k
creationTimestamp: "2025-03-14T13:00:16Z"
generation: 4
labels:
app.kubernetes.io/component: control-ui
app.kubernetes.io/instance: acedashboardiam1
app.kubernetes.io/managed-by: ibm-appconnect
app.kubernetes.io/name: acedashboardiam1
appconnect.ibm.com/kind: Dashboard
release: acedashboardiam1
name: acedashboardiam1-ui
namespace: acedev
spec:
ingressClassName: nginx
rules:
- host: acedashboardiam1-ui-acedev.51.8.194.97.nip.io
http:
paths:
- backend:
service:
name: acedashboardiam1-dash
port:
number: 8300
path: /
pathType: Prefix
status:
loadBalancer:
ingress:
- ip: 51.8.194.97.nip.io
Create the ingress executing the following command.
kubectl apply -f acedashboardiam1ingress.yml
Verify the creation of the ingress and its status with the following command.
kubectl get ingress -n acedev
You should get something similar to the following.

Configure client redirection Uri in Keycloak
Now that we have configured the Dashboard and its ingress host address we need to configure the Keycloak client with the redirection Uri. Open the client in the Keycloak console and on the Settings tab update the Valid redirect URIs field with the following value -> https:// + ingress host address + /oauth/callback. In this example the value is https://acedashboardiam1-ui-acedev.51.8.194.97.nip.io/oauth/callback.

Click Save to finish the configuration.
Create App Connect users in Keycloak IAM
Before we can test the integration with App Connect we need to configure a user to access the App Connect dashboard. Execute the following steps to create the user.
#Create user
To create a user to access App Connect resources click on Users on the left navigation pane. On the users page click Add User.

The Create user page opens. Enter the Username, Email, First Name and Last Name and click on Create

On the user details page click on the credential tab to set the credentials (password) of the new user.

Click Save.
Click on the Role Mappings tab and click on Assign role

On the Assign roles to user (acedeveloper) dialog click on Filter by Clients and check -> Client Id – dashboard admin and dashboard-viewer (you need to go to second page for the second role).


Click on Assign
The user has been configured and it is ready to access the AppConnect Dashboard resource.
Access to the AppConnect dashboard with Keycloak user and credentials
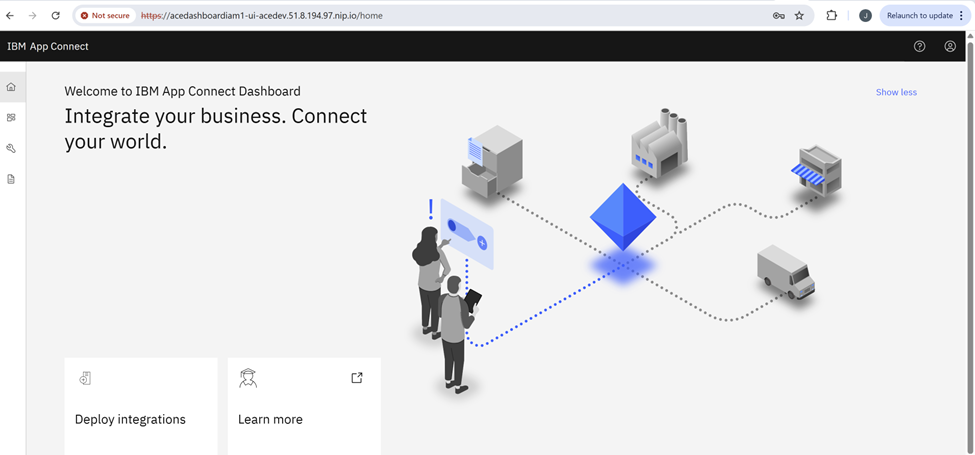
Navigate to the dashboard Url. Ensure you put the entire url including https:// . In this example -> https://acedashboardiam1-ui-acedev.51.8.194.97.nip.io . You should get the Keycloak realm login page. Enter the credentials for the created user (acedeveloper) and click Sign In.

If the configuration was successful you should see the App Connect Dashboard main screen with the user acedeveloper signed in.
This completes the IAM configuration for the App Connect dashboard.