Authors: Larissa Auberger, Benjamin Wende
Reviewers: Jürgen Neth, Georg Sander, Jens Engelke
Introduction
This document is intended to guide you through the deployment of the User Management Services (UMS) in IBM Cloud Pak for Automation 20.0.3.
The User Management Services are an integral part of the IBM Cloud Pak for Automation. They ensure single sign on across various components, provide access to user and group information in a consistent way and support authorization decisions. Obviously, the value of the User Management Services becomes evident in combination with other IBM Cloud Pak for Automation components, such as Workflow, Operational Decision Management or Automation Document Processing.
There still might be valid reasons for a stand-alone UMS deployment:
- You are new to OCP and/or IBM Cloud Pak for Automation and want to master your very first steps
- You want to understand the basics of IBM Cloud Pak for Automation deployment. Starting with UMS only is a good idea in that case, as it has no dependencies on other components. You can subsequently add more Cloud Pak for Automation components to your deployment.
- You want to learn how to leverage and use User Management Services and their APIs.
In this Part 1 you will deploy the IBM Cloud Pak for Automation operator.
In Part 2 you will deploy the User Management Services.
Prerequisite
You need to have a running OpenShift Container Platform (OCP) environment (4.4. or higher).
Install the OCP command line interface corresponding to your OCP version, e.g. for OCP 4.6:
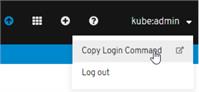
Navigate to your OCP Administration Console and obtain the Login Command for the command line:
- In the upper right corner click on kube:admin
- Click on “Copy Login Command”
-
Click on “Display Token”
-
Copy the “oc login… “ command in “Log in with this token”
-
Open a command prompt on your desktop
-
Paste the “oc login … “ command
-
You are logged in to the OCP console.
Prepare for deployment
Create a project
Create a project where you will deploy the User Management Services
oc new-project first-steps
Create image pull secrets
To pull the operator and UMS images from the IBM Cloud Entitled Registry, you need to create secrets that will be used to access this registry [1].
- Log in to MyIBM Container Software Library with the IBMid and password that is associated with the entitled software.
- In the Container software library tile verify the entitlement and retrieve the key from Get entitlement key.
- Copy the key
Create image pull secrets for the cp.icr.io registry:
 oc create secret docker-registry admin.registrykey
--docker-server=cp.icr.io --docker-username=<username> --docker-password=<api-key> --docker-email=firstname.lastname@domain.com
In the above command
- provide the API Key that you retrieved in the previous step for the --docker-password=
- replace the email address with the email address associated with the entitlement
- replace the username with the username associated with the entitlement
- if you want, change the name of the secrets (in bold), but be sure to specify the same secret when you configure the operator and UMS for deployment
- do not change the --docker-server= setting
For details and other options to get access to container images refer to Getting access to the container images on your cloud platform in the IBM Cloud Pak for Automation Knowledge Center.
Create persistent volume and persistent volume claim for operator and UMS logs
A persistent volume (PV) is is a storage resource in an OCP cluster. Storage resource can be requested by using a persistent volume claim (PVC).
Create a configuration yaml file, for instance my-pv.yaml. Add two PV definitions - one for the operator and one for the logs, for example:
apiVersion: v1
kind: PersistentVolume
metadata:
  name: operator-shared-pv
spec:
  accessModes:
  - ReadWriteMany
  capacity:
    storage: 1Gi
  nfs:
    path: /shared/operator
    server: <NFS Server>
  persistentVolumeReclaimPolicy: Retain
---
apiVersion: v1
kind: PersistentVolume
metadata:
  labels:
    type: local
  name: cp4a-shared-log-pv
spec:
  capacity:
    storage: 100Gi
  accessModes:
    - ReadWriteMany
  nfs:
    path: /shared/logs
    server: <NFS Server>
  persistentVolumeReclaimPolicy: Delete
In the above example adapt the configuration to your cluster by replacing nfs.server and nfs.path settings.
Create the PVs:
oc create -f my-pv.yaml
Provide group write permissions to the persistent volumes. For the directory you specified in nfs.path run
chown -R :root   /shared/operator    /shared/logs
chmod -R g+rw    /shared/operator    /shared/logs
Create a configuration yaml file, for instance my-pvc.yaml. Add two PVC definitions bound to the previously created PVs, for example:
apiVersion: v1
kind: PersistentVolumeClaim
metadata:
  name: operator-shared-pvc
spec:
  accessModes:
    - ReadWriteMany
  resources:
    requests:
      storage: 1Gi
  volumeName: operator-shared-pv
---
apiVersion: v1
kind: PersistentVolumeClaim
metadata:
  name: cp4a-shared-log-pvc
spec:
  accessModes:
    - ReadWriteMany
  resources:
    requests:
      storage: 100Gi
  volumeName: cp4a-shared-log-pv
Create the PVCs
oc create -f my-pvc.yaml
Use these commands to verify PVs and PVCs are correctly created and bound or to analyze issues:
oc get pv <pv-name> -o yaml
oc describe pv <pv-name>
oc get pvc <pvc-name> -o yaml
oc describe pvc <pvc-name>
Deploy and run the operator
An operator in OCP controls the deployment and upgrades of applications.
It is a piece of software running in a pod on the OCP cluster. To deploy the IBM Cloud Pak for Automation operator, the Customer Resource Definition and associated controllers need to be added to the cluster.
Operator resources are available from this repository: https://github.com/icp4a/cert-kubernetes/tree/master/descriptors. Make sure you download the correct branch for the version 20.0.3.
1. Obtain the repository from github
git clone https://github.com/icp4a/cert-kubernetes.git
2. From the directory cert-kubernetes/descriptors copy ibm_cp4a_crd.yaml, service_account.yaml, role.yaml, role_binding.yaml and operator.yaml.
3. Create the Custom Resource Definition that defines IBM Cloud Pak for Automation resources:
oc create -f ibm_cp4a_crd.yaml
Note: the Custom Resource Definition is only applied once on the Kubernetes cluster. If there are other Custom Resources deployed already, the Custom Resource Definition will exist already and you will see:
Error from server (AlreadyExists): error when creating "ibm_cp4a_crd.yaml": customresourcedefinitions.apiextensions.k8s.io "icp4aclusters.icp4a.ibm.com" already exists
Just ignore this message. If you remove the CDR, all ICP4A resources will be removed.
4. Create a service account with a role that has permissions to manage the IBM Cloud Pak for Automation resources:
oc create -f service_account.yaml
5. Create roles to define permissions on IBM Cloud Pak for Automation resources:
oc create -f role.yaml
6. Create role bindings to grant permissions defined in a role to a set of users:
oc create -f role_binding.yaml
7. Edit operator.yaml
a. Verify the image registry:
      containers:
        - name: operator
          # Replace this with the built image name
          image: "cp.icr.io/cp/cp4a/icp4a-operator:20.0.3"
b.
Verify the imagePullSecrets has the name of the secret you created previously
      imagePullSecrets:
      - name: "admin.registrykey"
c.
Accept the DBA license
       # MUST exist, used to accept dba license, valid value only can be "accept"
       - name: dba_license
         value: "accept"
d. Verify the claim names
      volumes:
        - name: logs-backup
          persistentVolumeClaim:
            claimName: "cp4a-shared-log-pvc"
        - name: "operator-shared-folder"
          persistentVolumeClaim:
            claimName: "operator-shared-pvc"
        - name: runner
          emptyDir: {}
8. Deploy the operator
oc create -f operator.yaml
9. Wait for the operator pod to come up.
oc get pods
You successfully deployed the operator!
What to do next?
If you experience issues with the operator deployment - check out this
Troubleshooting documentation to learn how to get and analyze operator logs.