IBM recently closed the acquisition of
Turbonomic which is an
AI-powered Application Resource Management software to optimize performance, compliance, and cost in real time. In this blog, we will understand the:
- Deployment options for Turbonomic,
- How-to deploy Turbonomic on Openshift,
- Understanding Targets in Turbonomic and their configuration
- Understanding Policies
Turbonomic Deployment Options
Turbonomic deploys with the following options:
Refer
https://github.com/turbonomic/t8c-install/wiki for details on deployment options available for Turbonomic
Refer
https://github.com/turbonomic/t8c-install/wiki/2.-Sizing-your-Deployment for sizing guidance on Turbonomic.
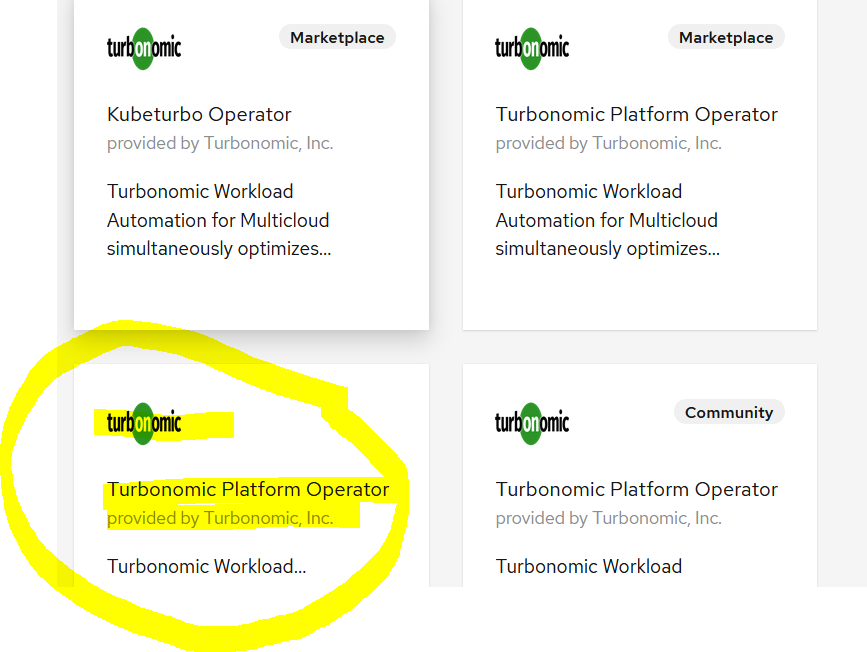
Deployment on OpenshiftTurbonomic operator is available through the IBM Red Hat
Operator Hub and can be installed in the Openshift environment. There are 3 distributions available by default in Operator hub based on Provider types:
1. Certified
2. Community
3. Marketplace
Choose one of them as per your requirement and purchase model. I chose the Certified Operator for my Openshift cluster on IBM Cloud.
You can install Turbonomic Operator via
1. Openshift console as described
https://developer.ibm.com/depmodels/microservices/tutorials/improve-performance-efficiency-openshift-deployments-turbonomic-instana/ OR
2. Through CLI as described
https://github.com/turbonomic/t8c-install/blob/master/DEPLOY.md After the Operator is installed. Next step is to deploy the Xl (Custom resource)
step 4 and 5 Note that while configuring the Xl, ensure that you enable the Targets which you want to configure and work with after Turbonomic is installed. Although this can be changed (enabled/disabled) later as well.
Once the Xl is created and deployed, access the Turbonomic via the route created as described in
step 6 Set up your admin username and password and once logged in upload your license.
NOTE: License file can be obtained from the Turbonomic installer archive available in IBM internal software catalog (XL) for IBMers and Software access catalog for Partners.
Once the license file is uploaded, you are good to proceed with configuring the Targets in Turbonomic.
Understanding Targets
Turbonomic uses targets to monitor workload and to execute actions in your environment. Refer
docs for technologies supported as Targets. Go to
Settings > Target configurations > New Target and you should see the Targets that you enabled while configuring the Turbonomic CR (Xl) e.g. if you enabled KubeTurbo, Instana, MySql you should see them here under respective category.
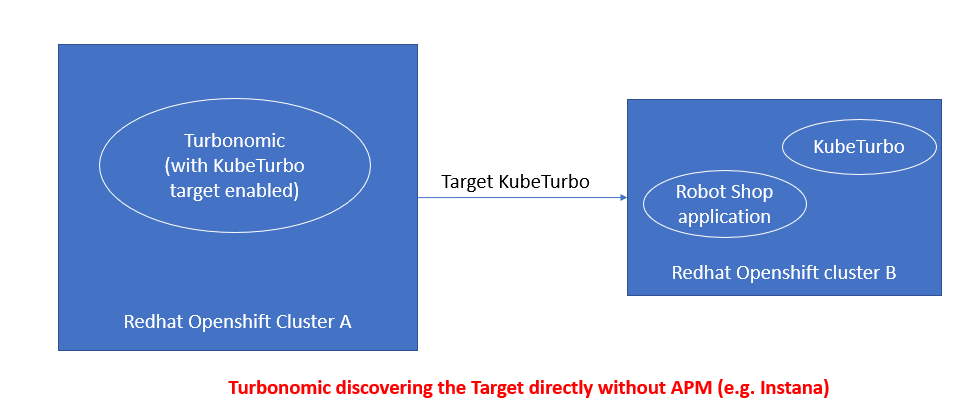
KubeTurboWhen KubeTurbo is enabled it automatically discovers the local cluster where Turbonomic is deployed. However you can add more Kubernetes Target by installing KubeTurbo operator. Though Turbonomic is agentless, but for k8 clusters as targets, you need to setup KubeTurbo in the target cluster which communicates with the remote Turbonomic server as shown below.
Refer
https://github.com/turbonomic/kubeturbo/wiki/Prerequisites#deploy-with-an-operator on Pre-requisites for KubeTurbo setup.
Refer
https://github.com/turbonomic/kubeturbo/wiki/Operator-Details for steps to deploy KubeTurbo Operator on K8/Openshift
NOTE: Kubeturbo communicates with the Turbo Server, supply topology-processor service route as the
Turbonomic Server endpoint while configuring kubeturbo. This is already created as part of the Turbonomic deployment as shown below:

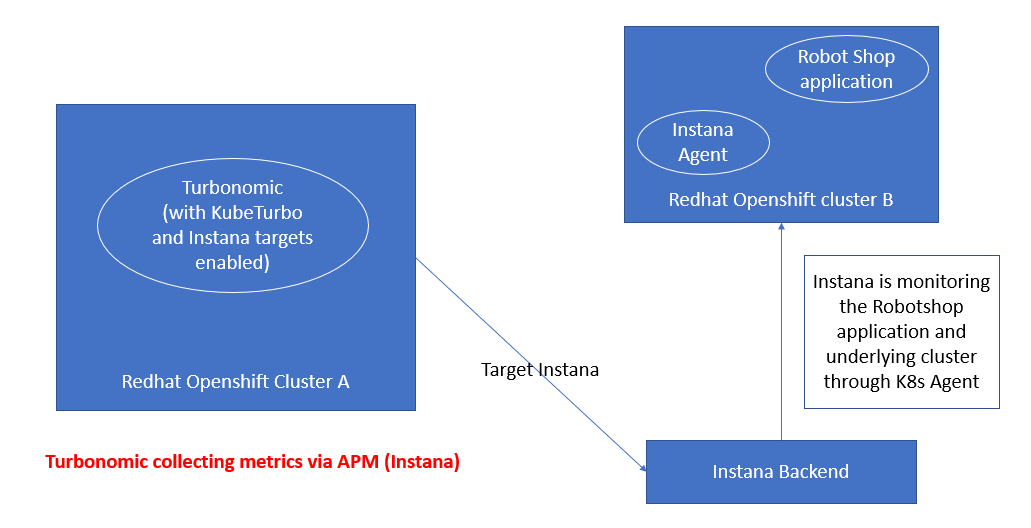
Instana
When Instana is enabled as Target in Turbonomic, you can configure it with the Instana instance, to allow Turbonomic to pull metrics from Instana. Follow
Step 7 for configuring Instana target into Turbonomic. Below figure depicts this integration.
Likewise, you can enable the
supported Targets and configure them, for Turbonomic to discover and collect the metrics from them.
Below is a snapshot where 3 targets are configured:
1.
Kubernetes-Turbonomic: Local k8 cluster (Openshift) where Turbonomic is deployed
2.
Kubernetes-ocp-fyre-cluster: Another Openshift cluster
3.
Instana
It may take sometime for Turbonomic to fully discover the targets, collect data and generate the supply chain. As shown below, Turbonomic has discovered the entire supply chain from Business Application, Business Transaction to virtual machine and storage. It also shows how different entities in the supply chain are connected to each other.
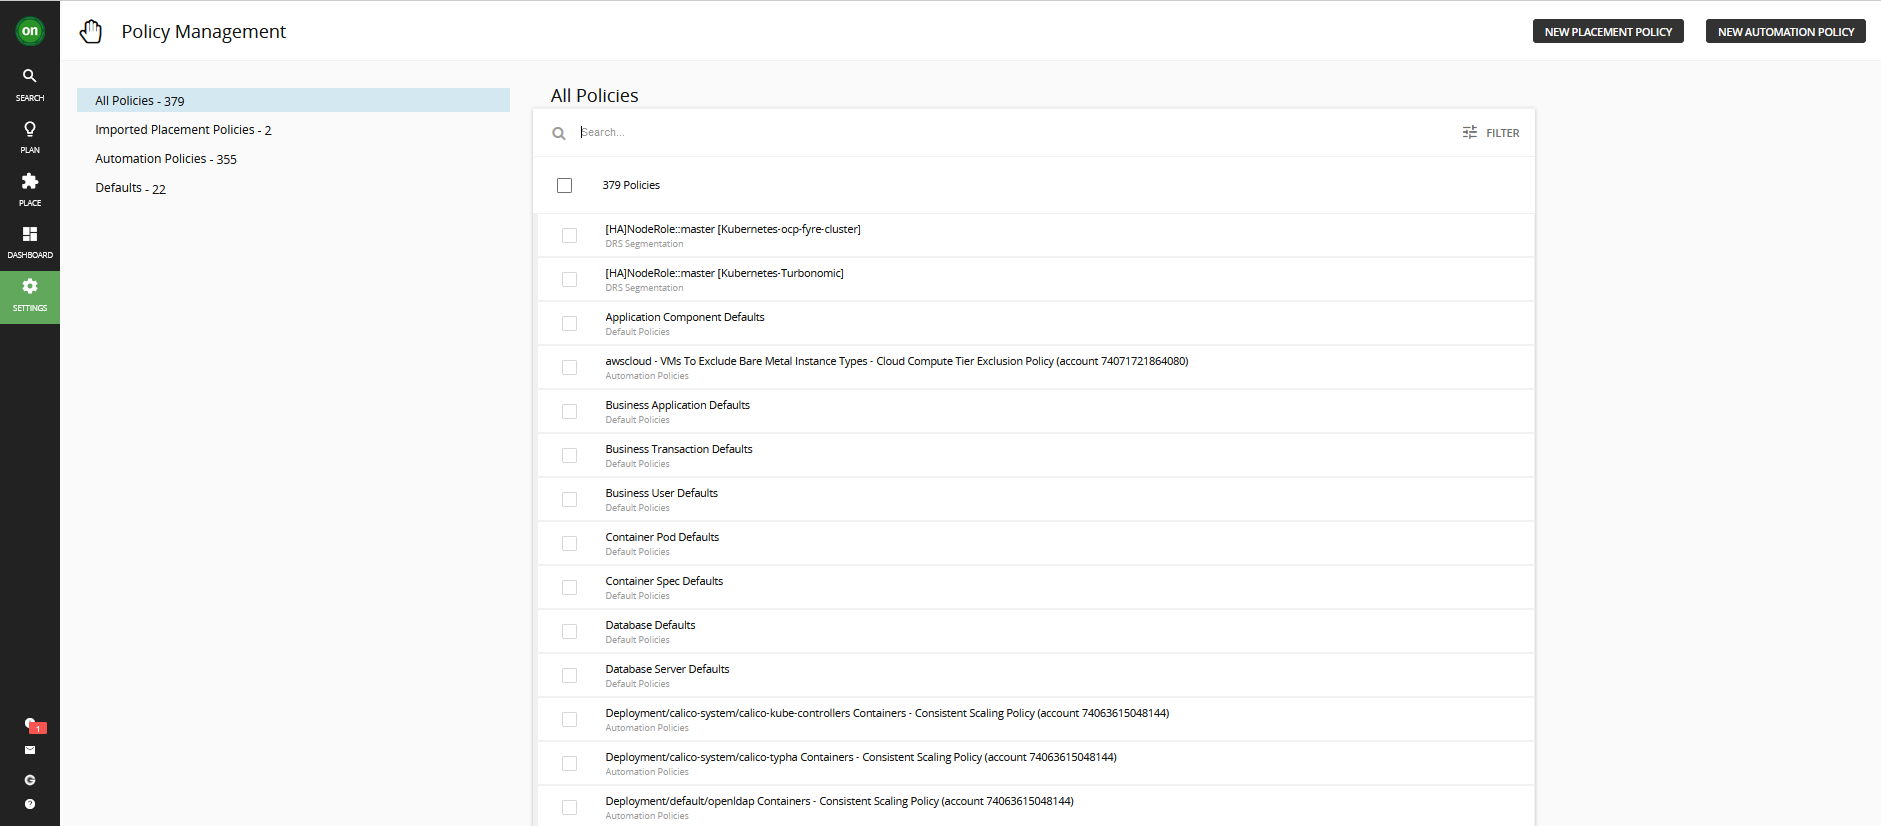
 Understanding Policies
Turbonomic defines a set of default
policies for each entity type however users can define their own policies for each entity in supply chain based on business requirements. Policies define business rules to control how analyzes resource allocation, how it displays resource status, and how it recommends or executes actions. Policies can be accessed from
Settings -> Policies as shown below:
This
code pattern talks about creating custom policy for business application entity to track application response time SLO. Scope and schedule can be defined for custom policies to only impact specific group of resources, not all.
Summary and ConclusionIn this blog we have covered how to deploy turbonomic on openshift, other deployment options for turbonomic, understanding targets and how to enable and configure them, how to define policies to control Turbonomic resource assessment.
#turbonomic#Openshift#how-to#configure#Policy