♦ Applies to: TBM Studio 12.2.2 and later
Symptom
You have deleted data in TBM Studio and now wish to restore it.
What's going on
The following sections will explore solutions that can restore data in TBM Studio. Depending on the type and amount of data you would like to retrieve, these procedures may not be sufficient. If you are unsure of the best method for your situation, consult your Customer Success Manager or Customer Support before proceeding.
Using the Rollback function
If nothing else has been checked in since you deleted your data, you can use the Rollback function to return your entire Apptio project configuration to a previous state. See Roll back a configuration for more information.
Restoring a custom model object
If the item you deleted was a custom model in TBM Studio, identify the source table for that model object. If it still exists, then you simply need to add the allocation for the model object.
- Look to the Project Explorer, identify the source table for the model object you deleted, and see if the data still exists. If so, this means that your data was not deleted, only its model object.
- You can recreate the model object by clicking Add Allocation after checking out the model.
- The new allocation can then be re-connected to its source table.
NOTE: This process will not work if you delete default, out-of-the-box (OOTB) model objects, because they have specific system settings that cannot be recreated.
Restoring data from a previous project build
A Branch is a point-in-time copy of a complete project (a Trunk) that can be worked on independently, and then later deleted or merged back into the trunk. For more information, see Best practices: Branching projects .
It is possible to create a branch using an older build or version of your project. Through this branch, you could then obtain a copy of your data and merge it back into your current project.
WARNING: There is inherent risk with merging branches into your current project build. We highly recommend working with your Customer Success Manager or Customer Support to ensure successful data recovery using this method.
Creating a branch of an older project build:
- In TBM Studio, find the Environment menu and click Stage.
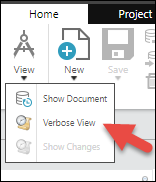
- Find the Home tab, click View, then Verbose View.
- You should now see a detailed Check In History of builds, which includes deployment dates and tags. Use this information to locate a build from before your data was deleted.
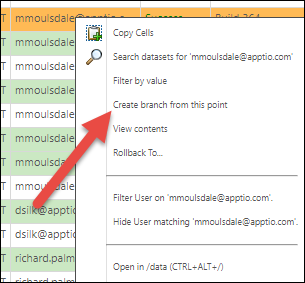
- Once you have identified a suitable build, right-click on the build entry and click Create branch from this point.
Identifying and modifying branch data
Now that the branch has been created, you can access the Branch menu to switch environments between Trunk (your current project version) and any active branches you have access to. Since the goal is to recover data from the past, ensure that you have selected the newly created branch before making modifications to data.

- Use Project Explorer to find the documents you wish to recover.
- Check Out the documents.
- Verify the documents and make modifications to prevent import issues when merging your branch data into trunk. A change must be detected to validate a merge.
- If your data does not need modification, you must still make a small change. One trick is adding a benign Formula column to each document (i.e. ="Temporary")
- Check In the documents.
- Go to the Home tab, click View, and then click Verbose View.
- Confirm that the branch Check In History shows all of your recent changes.
Merging branch data into the current project
WARNING: Ensure the following before merging branch files to trunk
- None of the documents to be merged can be checked out in trunk.
- The user executing the merge cannot have any document checked out in trunk.
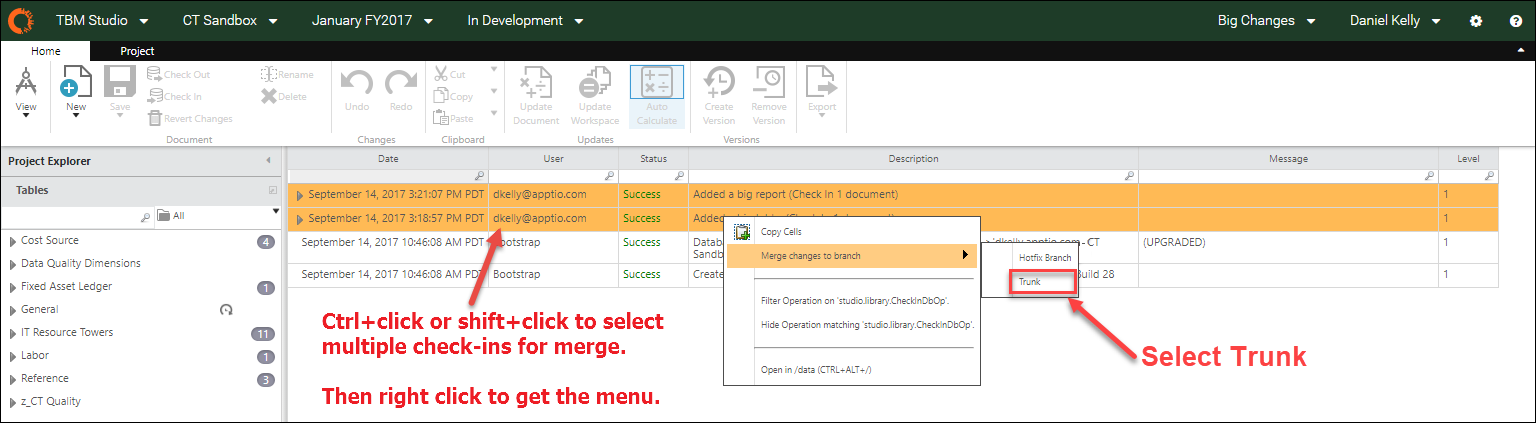
- From the branch Check In History page, select all of the changes you made. Use Ctrl+click or Shift+click to select multiple entries.
- Right-click on the selected records, click Merge changes to branch, then click Trunk.
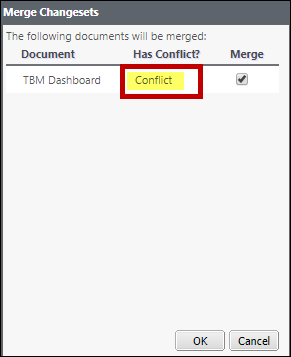
| Conflicts occur when the trunk has the same or similar document version that has been modified since the time the branch was created. When a merge could cause conflict, you will see a Merge Changesets window. If you proceed to merge the document in conflict, then check it in on trunk, the branch document would overwrite the trunk document. You must either: - Manually integrate the trunk document formatting or changes into the copy of the branch document before importing.
- Allow the branch document to completely overwrite the trunk document.
|
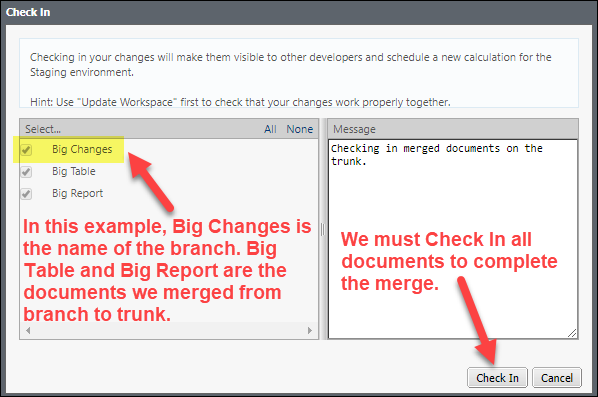
- After you have merged the documents, they will be checked out in trunk. To complete the process, you must navigate back to trunk and check in the new documents, which will save them to your original project. There is a document with the name of the branch itself, which must also be checked in.
NOTE: For more information and best practices about branches in TBM Studio, refer to the following resources:
Looking for more? Check the . Still can't find an answer? Post your question to the Apptio Community.
This topic is open for your feedback. At the bottom of this screen click Add a Comment.