Here we have a real lab example of configuring a Generic OpenID against Auth0:
Environment:
Windows 2016
Single Installation
Cognos Analytics 11.0.11+
Identity Provider: Auth0
Section 1: Steps to creating and configuring an Auth0 application:
1. Create an Auth0 Application by clicking on “CREATE APPLICATION” button

2. Give the application a name e.g. IBMSUPPORT in this case


3. Click on the “Settings” where the ClientID, Client Secret are shown:

4. Scroll down to “Allowed Callback URLs” and add the Cognos Analytics URL

5. Click Save
6. Access the https://manage.auth0.com/#/tenant
7. Set the “Default Directory” to “Username-Password-Authentication” and click “Save”

Section 2: Collect all the information required and create a Generic Namespace
The following information is required:
ClientID
Client Secret
Redirect URL
8. Download the Issuer Certificate by accessing http://auth0.com

9. Save and transfer over to the Cognos Analytics <install>/bin64 directory
10. Import the certificate using the following command line:
<install>\bin>ThirdPartyCertificateTool.bat -i -T -r <certificate> -p NoPassWordSet
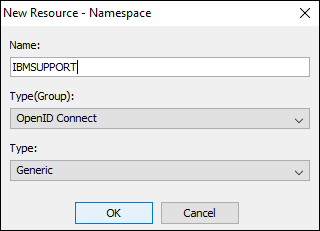
11. Launch Cognos Configuration and create a new Generic Namespace:
12. Update only the following details


Customize from default values and the following are only required in this case:
Discovery Endpoint URL
Scope for Authorized Endpoints (default is openid): openid profile email name given_name family_name offline_access
Password Grant – Strategy: UserInfo endpoint
Username: nickname
NB: The settings required for a Generic Template may vary depending on the IdP (Id Provider) and the supported Grant Types and Claims. Also ensuring all URI’s are SSL enabled i.e. switch from http to httpS including the redirect url.
13. Test the Connection

When the “Testing ‘IBMSUPPORT’ namespace” is successful then the imported certificate is trusted.
However, the userID/password to test the connection may fail with Status 403 error.
To resolve this, disable the “OIDC Conformant” setting as follows:
14. Application – <Application> – Advanced Settings – Oath and Disable the “OIDC Conformant”

15. From that same page select “Grant Types” and unselect “Client Credentials” and select “Passwords”

16. Now, test the connection again and it should succeed

17. Save and start the CA Service
18. Select the Generic Namespace which redirects to the Auth0 Log-In Page:
19. Log in using your email address and then it will redirect back to CA and login seamlessly:

Optional: Check the Namespace is active (IBMSUPPORT) from Manage – Administration – Security

Additional Information
Create Additional Users:
From the Dashboard Select “Users” and then “CREATE USER” button

Populate the Email, Password and Repeat Password fields.

References:
Other OpenID Blogs