IBM Z and LinuxONE - LinuxONE - Group home

How to backup and restore virtual machines deployed in IBM Cloud Infrastructure Center


Author: Mariah Sarica, Mariah.Sarica@ibm.com

Abstract

IBM® Cloud Infrastructure Center is an industry-proven turn-key Infrastructure-as-a-Service (IaaS) solution that provides an industry-standard user experience to manage the lifecycle of virtual infrastructure. IBM Cloud Infrastructure Center supports IBM Storage Scale for the persistent storage via the IBM Storage Scale cinder driver, which manages block storage provisioning as a collection of image files inside the IBM Storage Scale file system. IBM Storage Scale is a flexible software-defined storage that can be deployed as high-performance file storage, or a cost optimized large-scale content repository.

Virtual machines that are booted from an IBM Storage Scale volume on a Red Hat KVM host offer the capability to have a backup taken of them, allowing for the data written to the disk at the specific moment to be captured in a snapshot. Subsequently, you have the option to initiate a restore action on the virtual machine using the previously taken backup, effectively restoring it to the captured state.

This document outlines three examples of how to backup and restore virtual machines that are booted from an IBM Storage Scale volume on a Red Hat® KVM host using IBM Cloud Infrastructure Center. The examples include backing up and restoring a single virtual machine (VM), backing up and restoring a VM with an attached data volume, and backing up and restoring multiple VMs together. All examples demonstrate the end to end process of deploying a VM booted from IBM Storage Scale storage provider, writing files to the disk, taking a backup of the VM(s), modifying the contents of the disk, and then restoring the VM back to the state it was in when the backup was created.

Objective

Backup and restore virtual machines that are booted from an IBM Storage Scale volume on a Red Hat KVM host using IBM Cloud Infrastructure Center.

Environment
  • IBM Cloud Infrastructure Center version 1.1.6.0 or above with Red Hat KVM compute host
  • IBM Storage Scale 5.1.1 Fixpack 1 or above
Steps

Prerequisite Steps:

1.   Add KVM compute node to your environment using shared storage path.

2.   Ensure that the management node and KVM compute node are both part of the same IBM Storage Scale cluster.

3.   Configure and add IBM Storage Scale Storage provider to your environment. For details, you can refer to: https://www.ibm.com/docs/en/cic/1.2.0?topic=storage-working-scale-block

4.   Configure a backup path and quota for virtual machine backup with icic-config storage cli tool. For the details, you can refer to Introduction of icic-config storage backup-service posix command tool

5.   Specify the image file store directory with the icic-config image cli tool. For details, you can refer to: https://www.ibm.com/docs/en/cic/1.2.0?topic=ciccd-command-tool-introduction-icic-config-image-file-store-datadir

 6.  Upload KVM Image for virtual machine booted from IBM Storage Scale volume.

See the following documentation for assistance related to setting up and configuring IBM Storage Scale for use with IBM Cloud Infrastructure Center: https://www.ibm.com/docs/en/cic/1.2.0?topic=storage-planning-scale-system

Backup & Restore Examples:
Example 1: Backup & Restore a single VM

The following example will demonstrate the end-to-end process of deploying a VM booted from IBM Storage Scale storage provider, writing files to the VM disk, taking a backup of the VM, writing additional files to the disk, and restoring the backup.

1. Deploy a VM booted from IBM Storage Scale storage provider.

a.  In the deploy VM form, select the IBM Storage Scale storage provider in the Storage template field.

Deploy VM form, showing the IBM Storage Scale storage provider selected in the Storage template field

VM details for the newly deployed VM, vm1

b.  Check the new instance consistency group created by the VM deployment. To view the instance consistency groups, navigate to the Storage page, select the Consistency Groups tab, select the checkbox “Show instance consistency group (IBM Storage Scale only)”, and click the Refresh button. All volumes added into this consistency group will be backed up together with the virtual machine.

Instance consistency groups page showing the instance consistency group, vm1_group, created for vm1

c.  Log in to the VM and write some files to the disk.

2.   Create backup.

a.  From the VM details page for vm1, navigate to the Backups tab, and select Create Backup. Name the backup and click Create.

Creating a backup named backup1

backup1 is created and its status is 'Available'

b.  Log back in to the VM and modify and create new files written to the disk.

3.   Restore backup.

a.  Power off the VM.

vm1 in the Shutoff state after being stopped

b.  Restore the backup that was previously taken by navigating to the Backups tab, selecting backup1, and clicking Restore.

Backups page showing the location of the Restore button

Once the Restore is completed, the backup status will update to Restored.

backup1 showing a status of Restored, indicating that is has restored successfully

c.  Power on the VM and log back in.

m1 showing state of Active after being started

d. Check that the files are the same, as when the backup was created:

Example 2: Backup & Restore a VM with an attached data volume

The following example will demonstrate the end-to-end process of how to take a backup of a VM booted from IBM Storage Scale storage provider with an attached volume.

1. Deploy a VM booted from IBM Storage Scale storage provider.

Overview page for vm1

Attached Volumes page for vm1 showing the boot volume

Consistency Groups page showing the instance consistency group, vm1_group, for vm1

2. Create a data volume in the same IBM Storage Scale cluster and add it to the instance consistency group of the VM.

a.  From the Data Volumes tab in the Storage page, select Create. In the Create Volume dialog, create a volume using the Storage template of the same GPFS cluster from which the VM was booted.

Note: Be sure not to check the “Enable Sharing” box in the Create Volume dialog as this functionality does not support boot from volume for KVM.

Create Volume dialog showing the creation of volume-1 in the same GPFS cluster as vm1

b.  Add the volume into the instance consistency group of the VM. This can be done at the time of volume creation by checking the box next to “Consistency Group” and selecting the instance consistency group in the list.

Create Volume dialog showing the available instance consistency groups that the volume can be added to

Alternatively, if the volume has already been created, it can be added into the instance consistency group from the Consistency Groups tab. Once in the tab, select the checkbox to Show instance consistency group and click Refresh. Next, select the instance consistency group for the VM and click Add Volumes. Select the volume you wish to add from the list. (Note: The volume state must be Available and cannot be attached to a VM while being added to a consistency group.)

Consistency groups page showing the Add Volumes dialog for the vm1_group. volume-1 is available to be added to the group

Consistency Group details for vm1_group showing both volume-1 and the bootable volume, vm1-boot-1

3. Attach volume to the VM.

From the Attached Volumes tab of the VM details page for vm1, click Attach Volume and select the volume you wish to attach.

Attach Volumes dialog showing volume-1 selected to be attached

Attached Volumes tab for vm1 showing volume-1 successfully attached

4.   Log in to the VM and write some data to the volume and the VM disk.

a.  Create a filesystem on volume-1 since it is a newly created volume, and then mount it.

b. Write files to the volume.

c. Write files to the VM disk.

5.   Create backup.

a.  From the VM details page for vm1, navigate to the Backups tab, and select Create Backup. Name the backup and click Create.

Creating a backup named ex2-backup

ex2-backup is created and its status is Available.

6.   Log back in to the VM and modify and create new files written to the volume and the VM disk.

a.  Modify and create files on the mounted volume.

b.  Modify and create files on the VM disk.

7.   Restore backup.

a.  Power off the VM.

vm1 in the Shutoff state after being stopped

b.  Restore the backup, which had been created, by navigating to the Backups tab, selecting ex2-backup, and clicking Restore.

Backups page showing restore action for ex2-backup

Once the Restore is complete, the backup status will update to Restored.

ex2-backup showing a status of Restored, indicating that is has restored successfully.

c.  Power on the VM and log back in.

vm1 shows ‘State: Active’ after it was started

d.  Log back in to the VM and check if the files are the same, as when the backup was created.

Example 3: Backup & Restore multiple VMs together

The following example will demonstrate the end-to-end process of how to take a backup of multiple virtual machines booted from IBM Storage Scale storage provider.

1.   Create a consistency group.

From the Consistency Groups tab on the Storage page, click Create to open the dialog to add a consistency group. Fill out the required fields and select the GPFS cluster under the Storage provider heading.
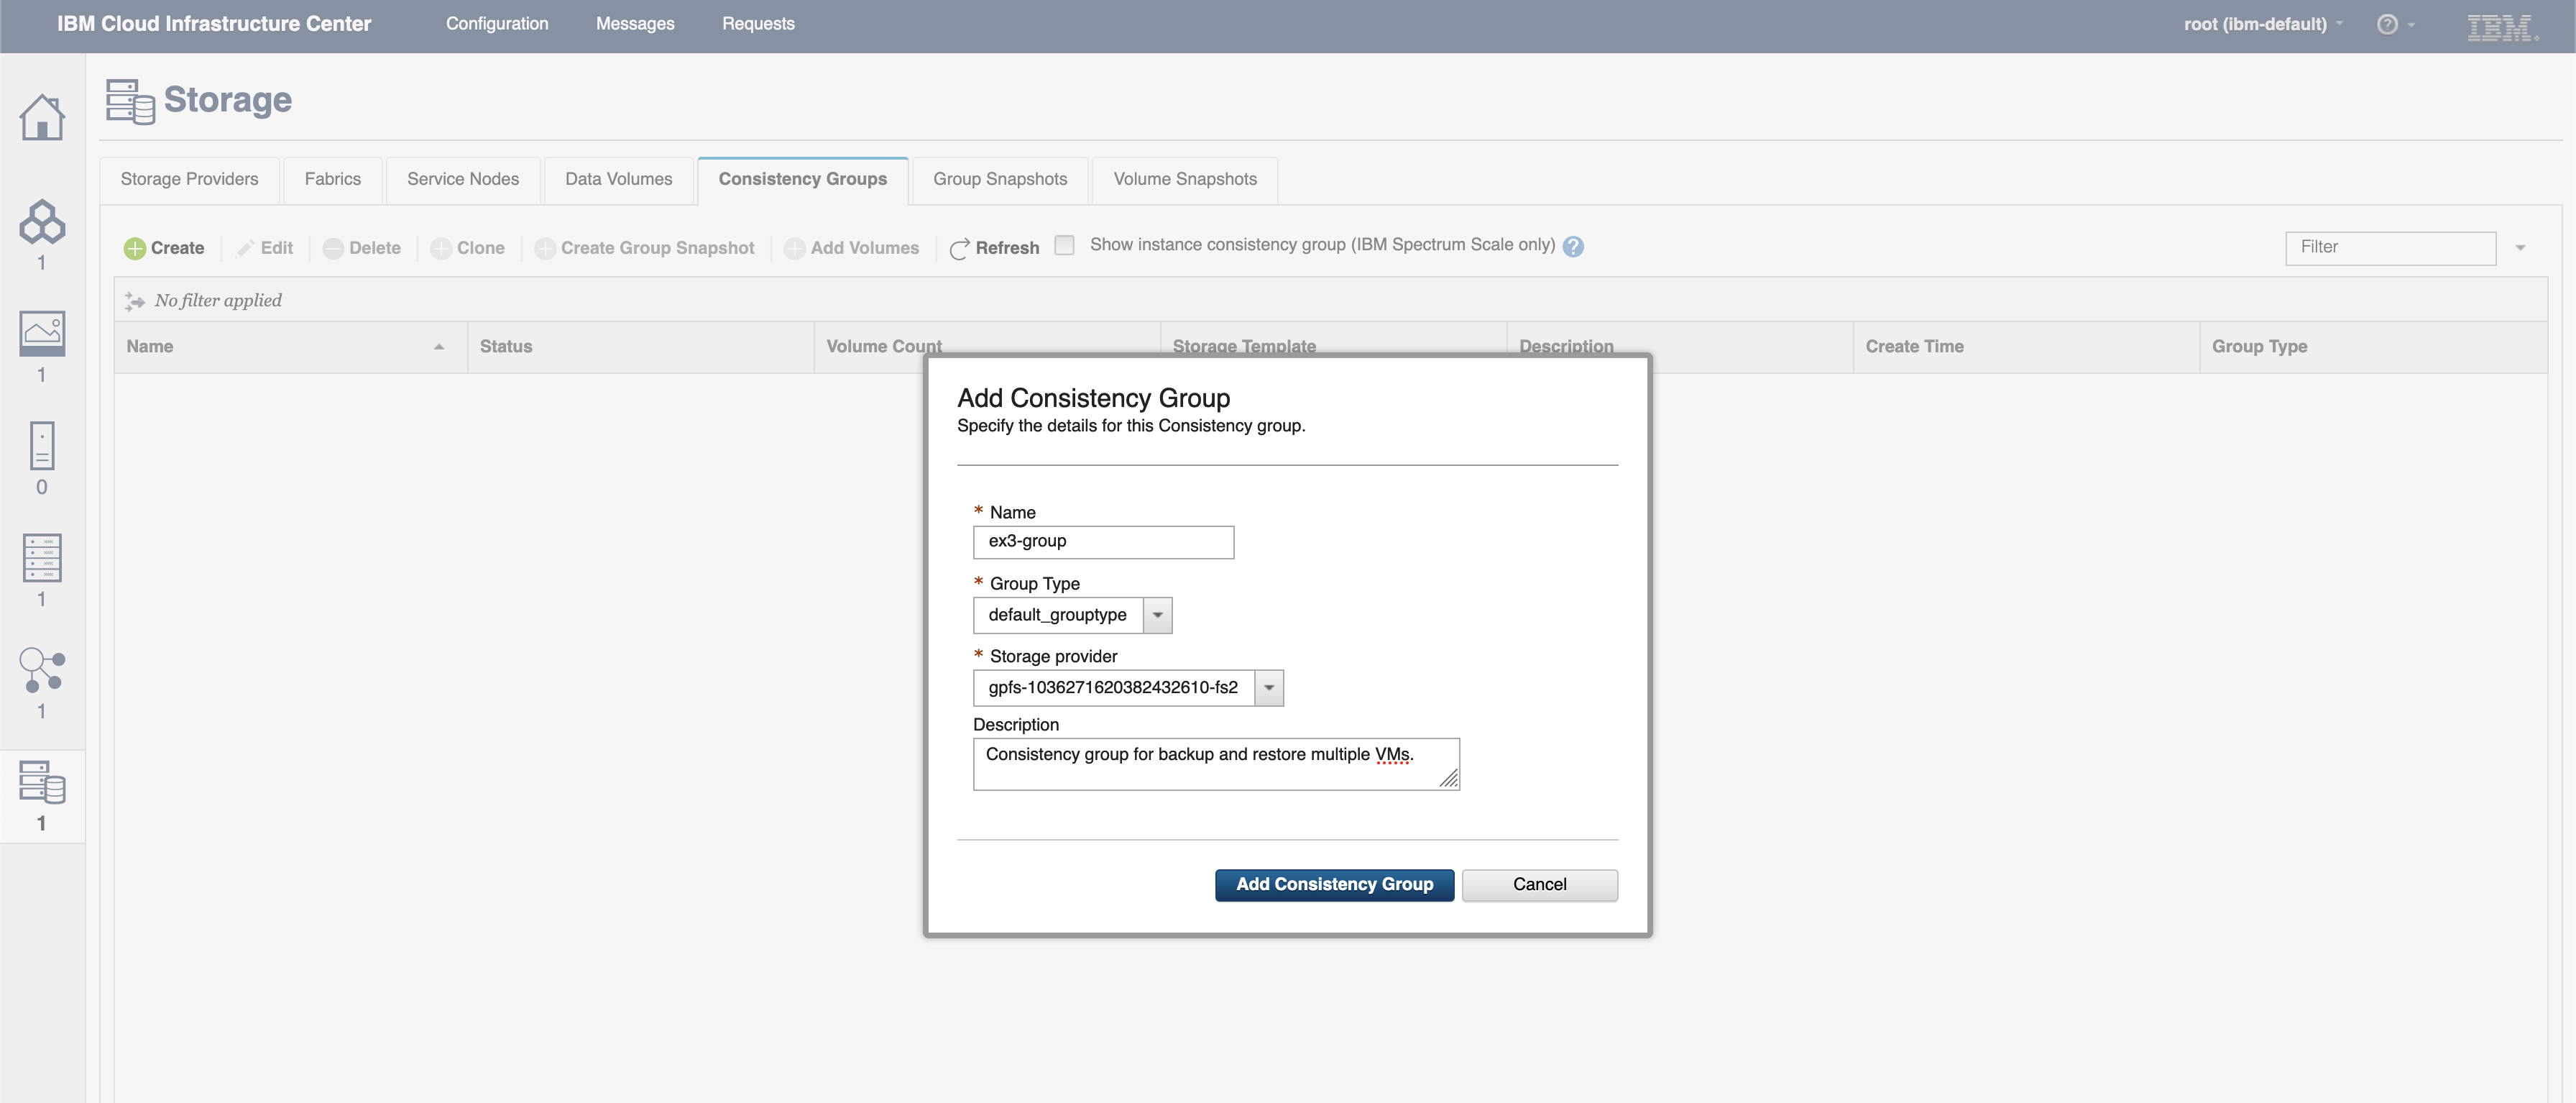
Add Consistency Group dialog
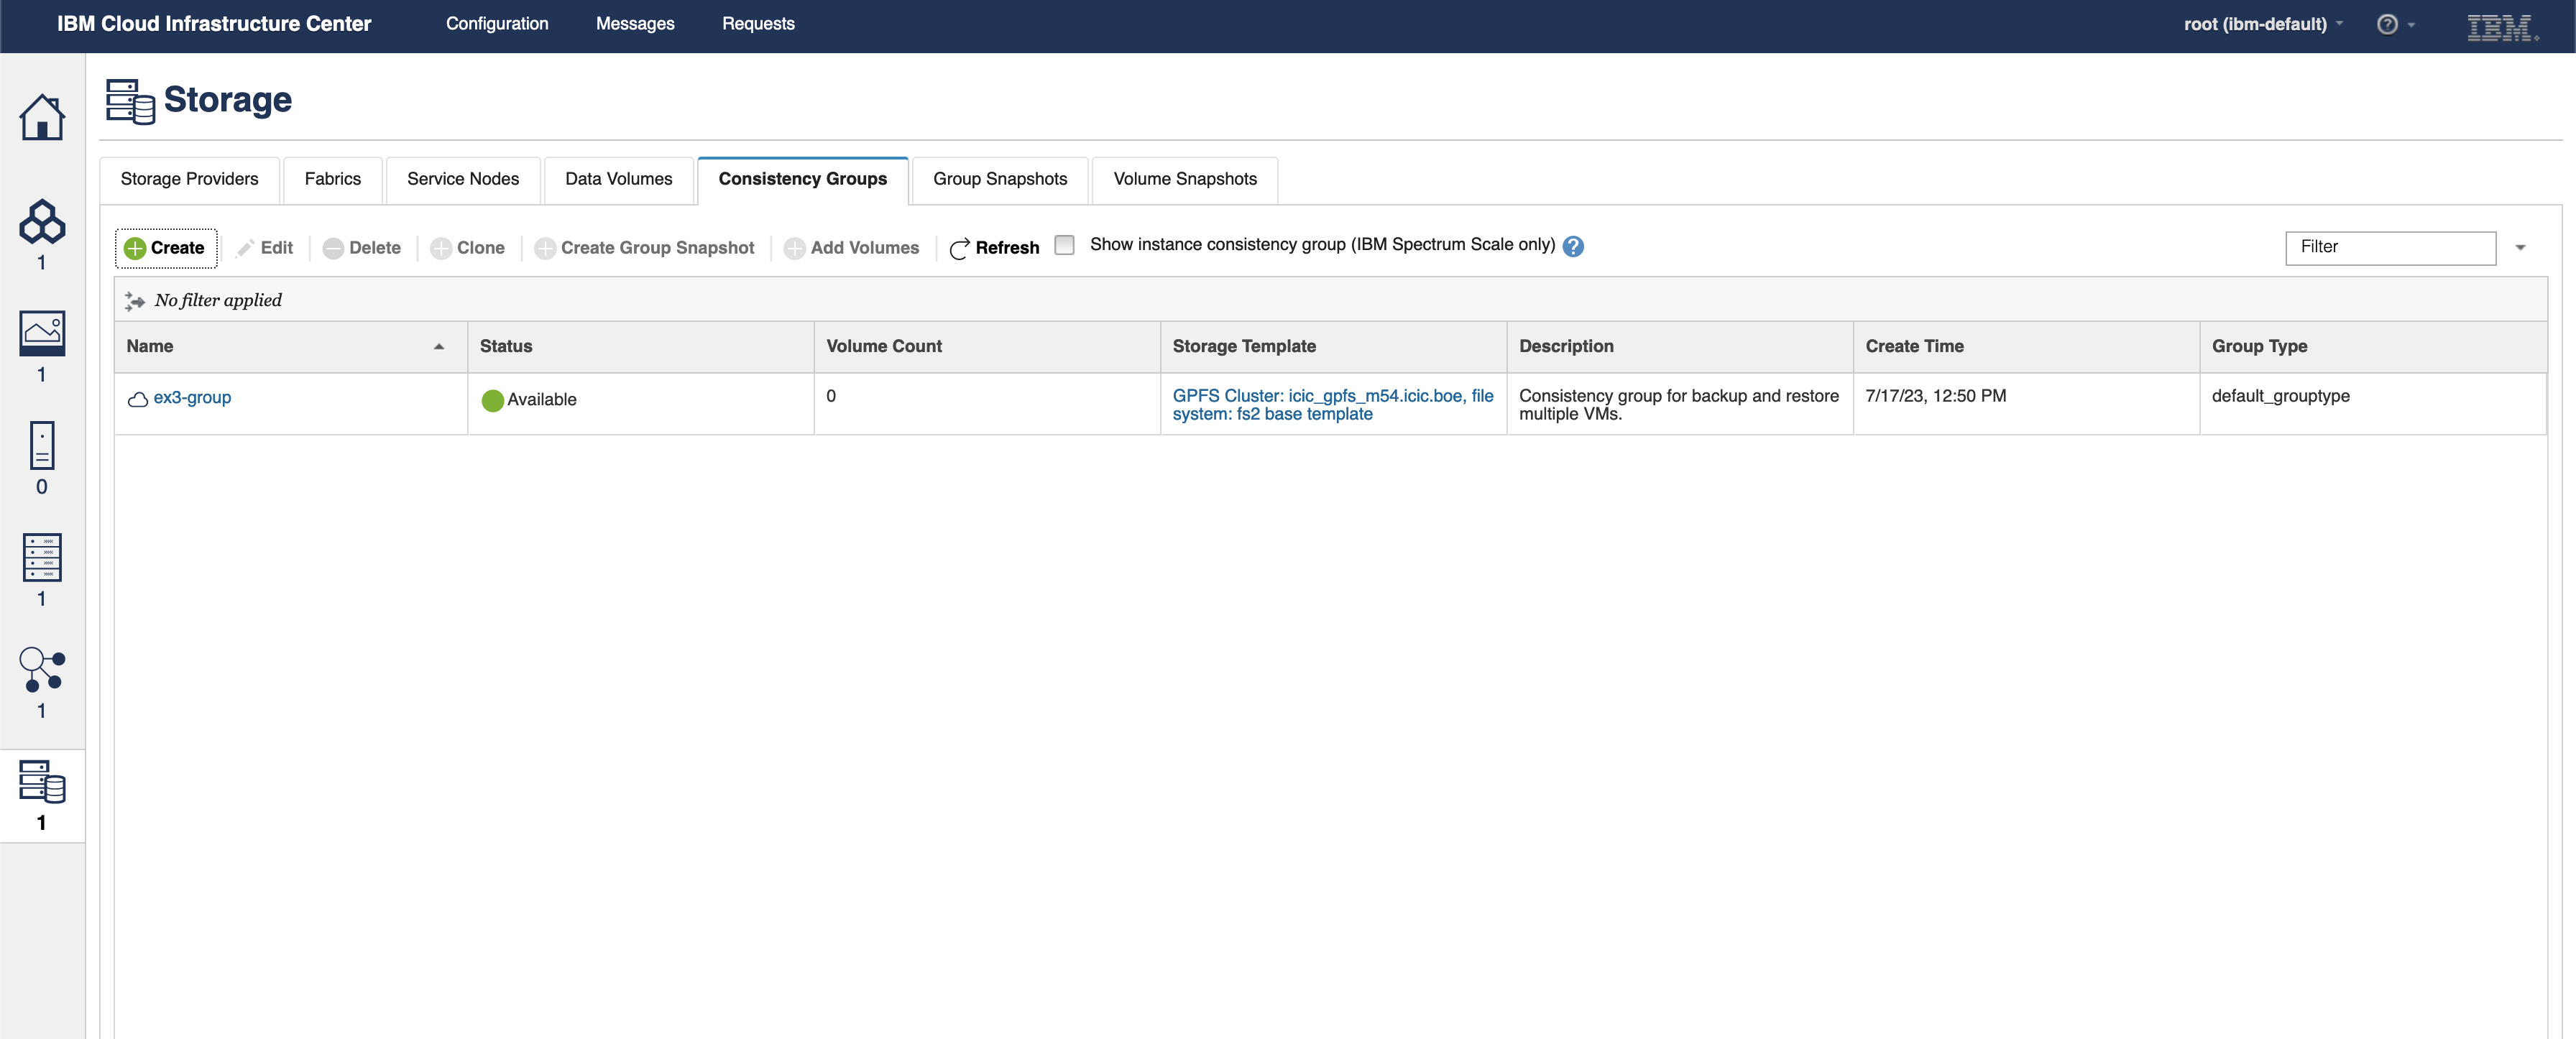
Consistency Group page showing the newly created ex3-group

2.   Create an image using a bootable volume that has been added to the existing consistency group.

a.  Create a bootable volume and add it to the existing consistency group.
From the Data Volumes tab in the Storage page, select Create. In the Create Volume dialog, create a volume using the Storage template of the same GPFS cluster from which the consistency group above was created. Select the checkbox next to 'Bootable volume', then select the image you wish to use to deploy VMs. Select the checkbox next to “Consistency Group” and select the consistency group ex3-group in the list. Click Create Volume.
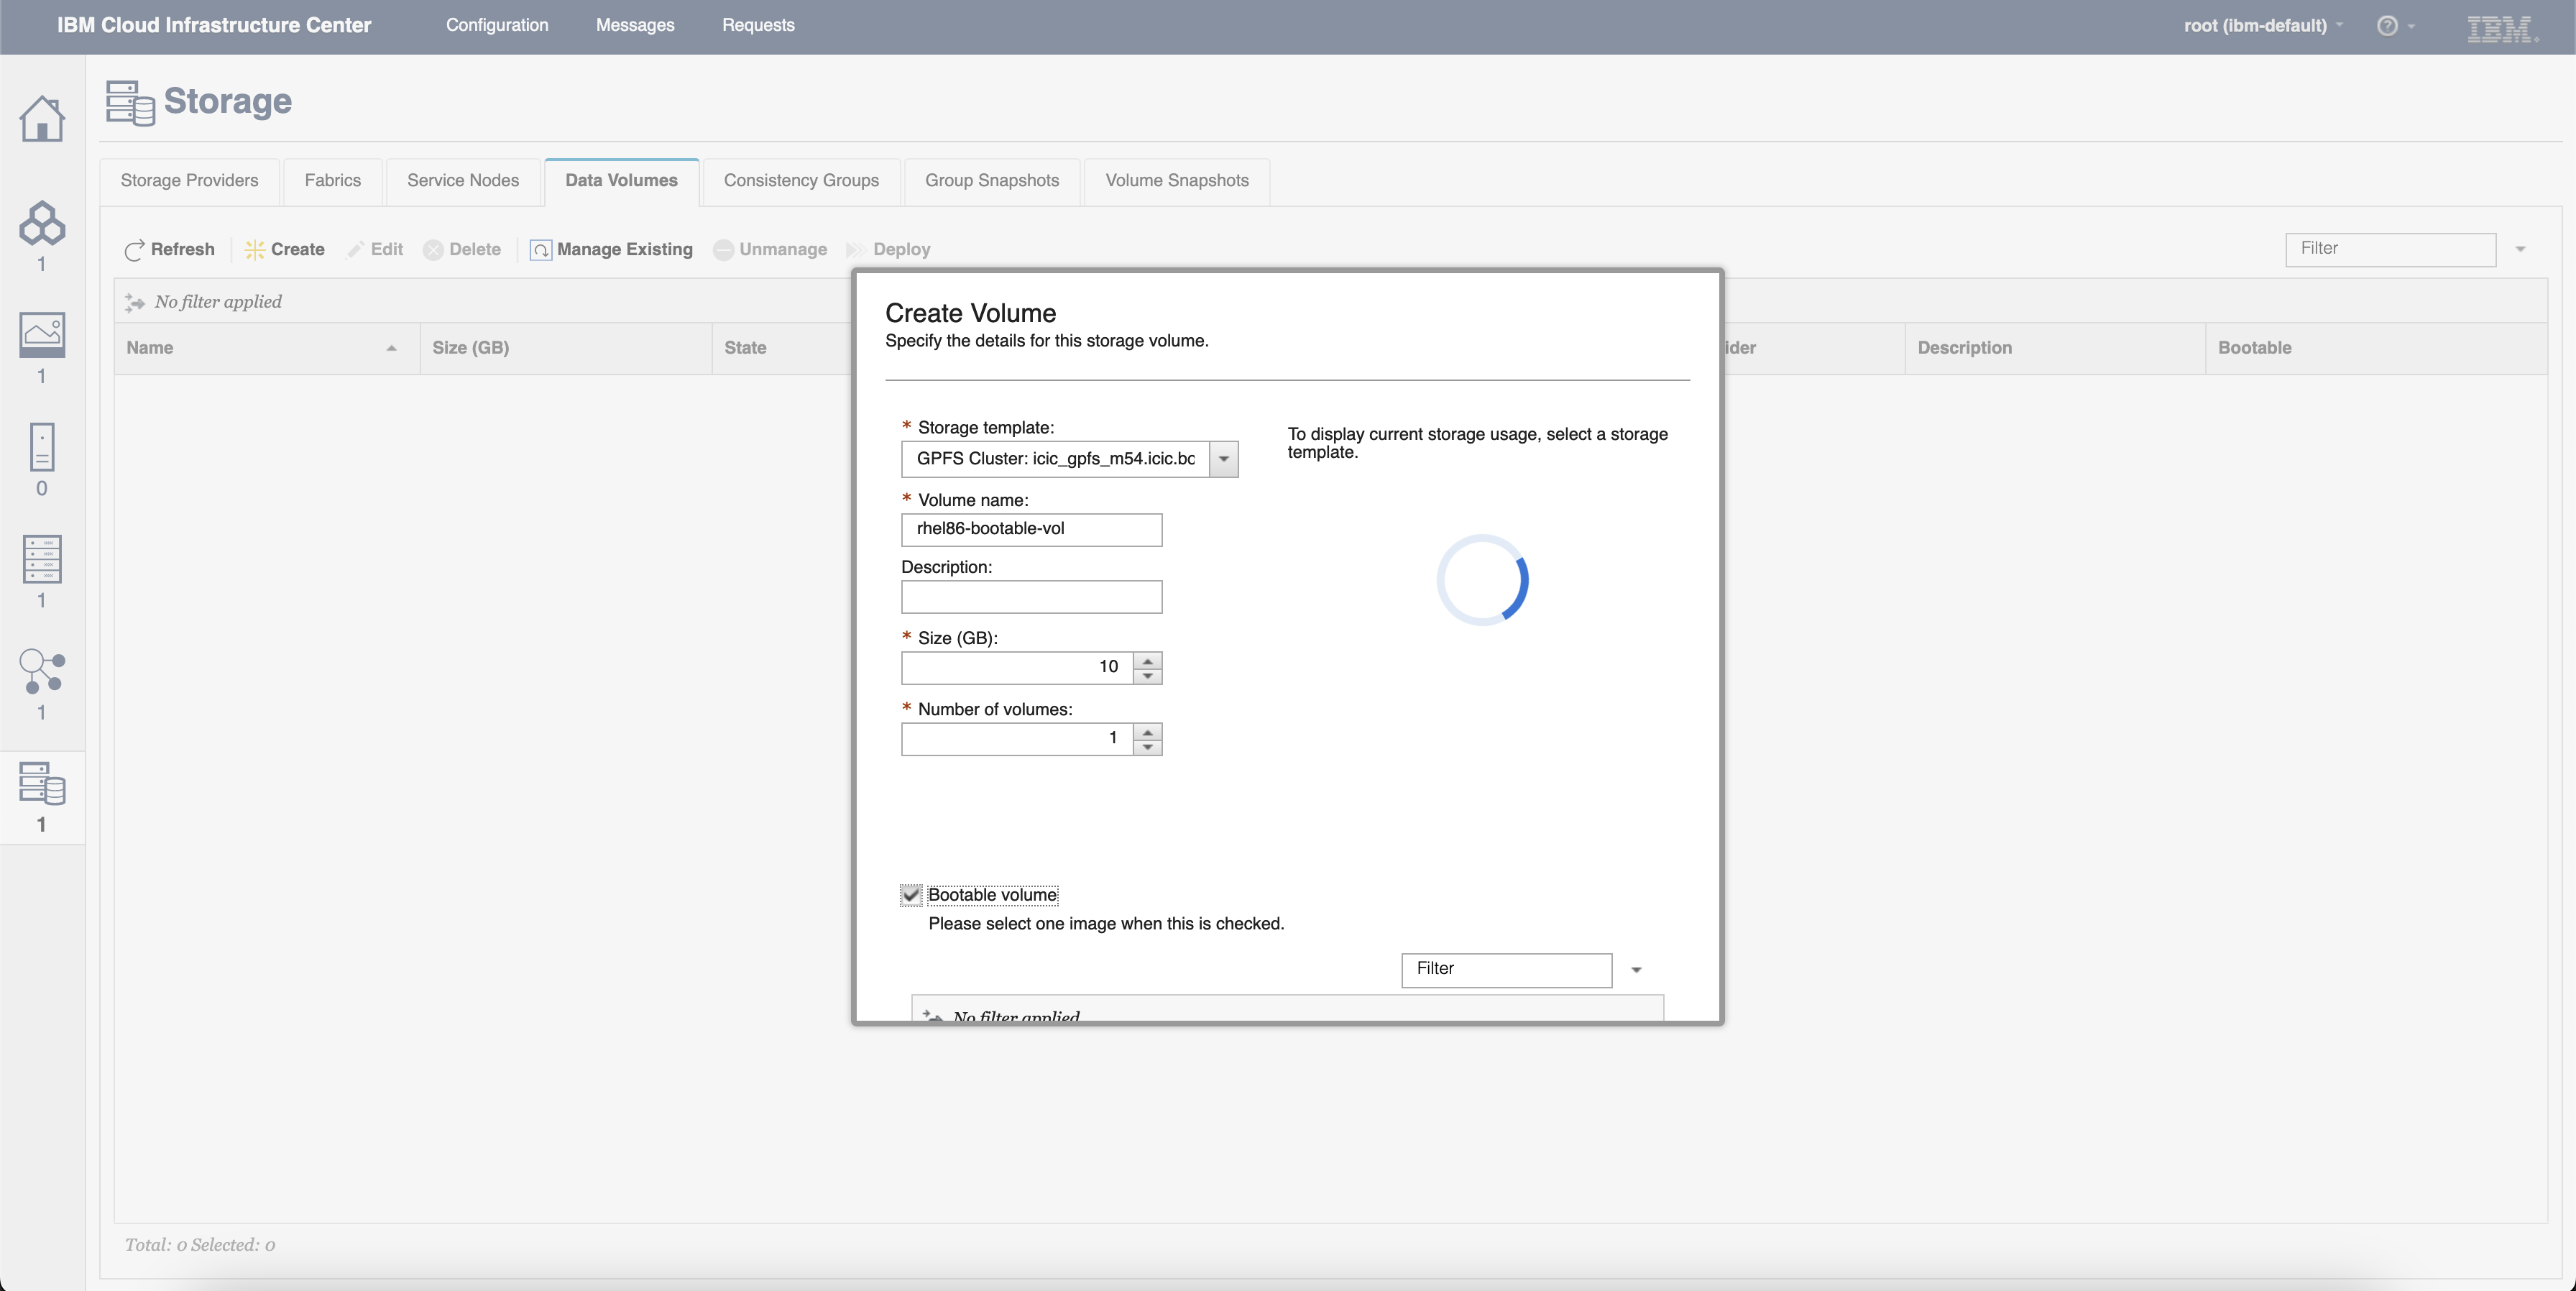
Create Volumes dialog in the Data Volumes tab of the Storage page
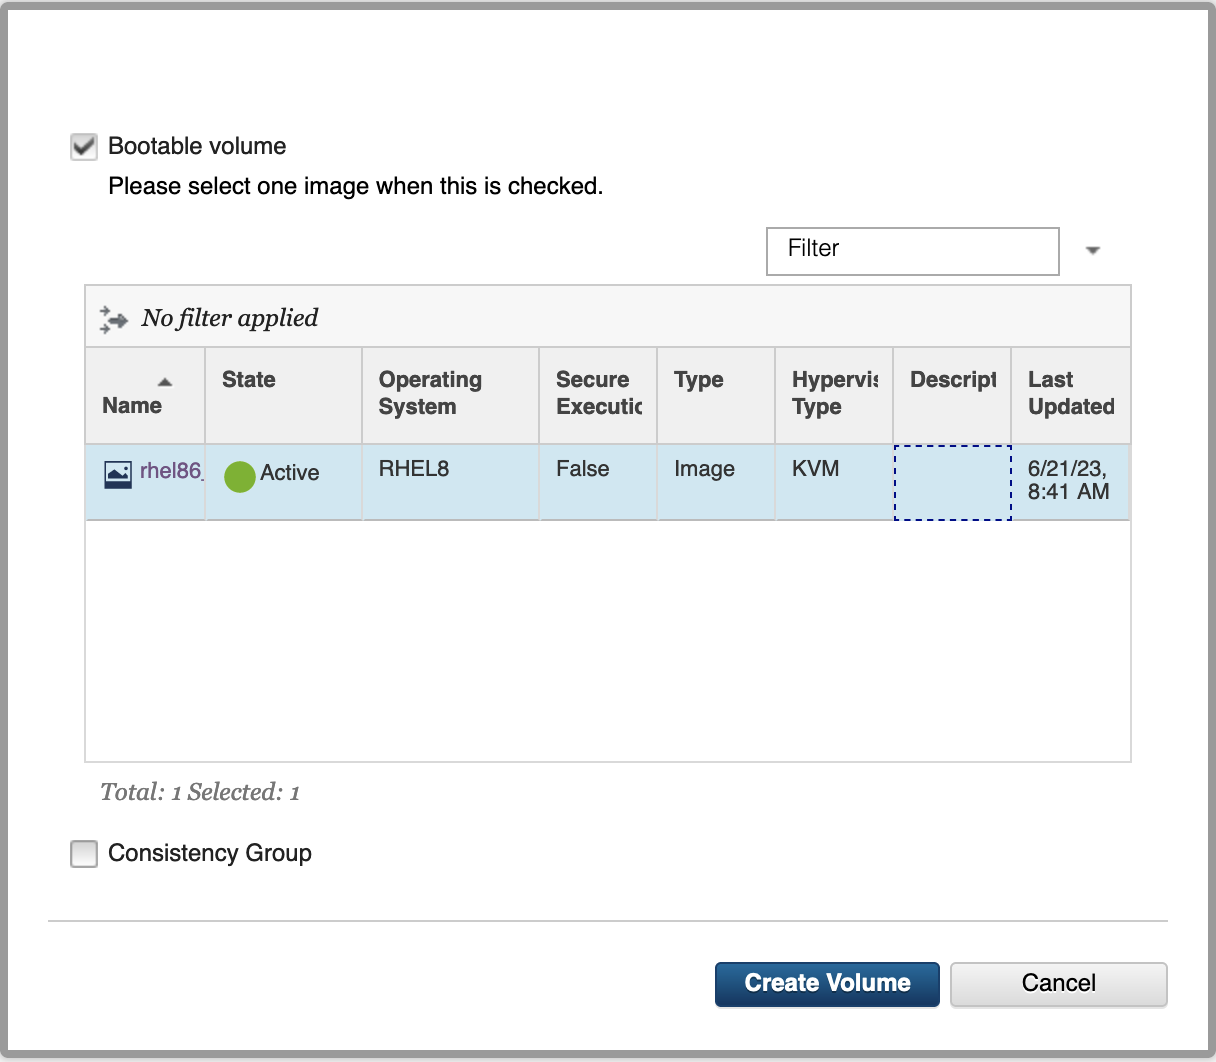
Create Volumes dialog showing the image selection for the bootable volume
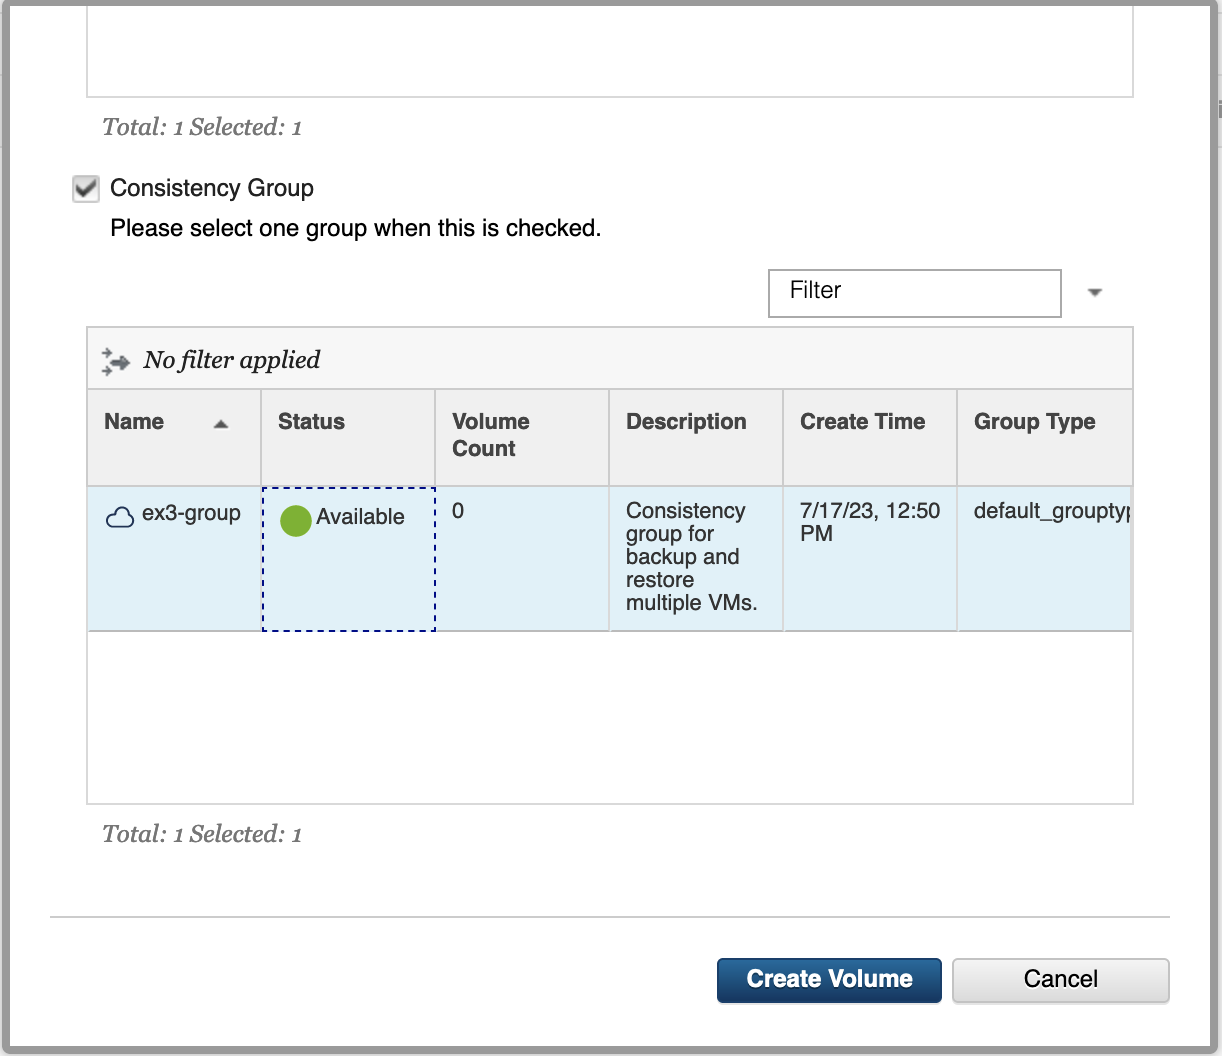
Create Volume dialog showing the available consistency groups that the volume can be added to.

c.   Create a volume backend image.

From the Images page, click Create. In the Create Image dialog, fill out the required fields with the appropriate data, and be sure to select the Image Source as Volume. From the list of volumes, select the bootable volume that was just created above. Click Upload.
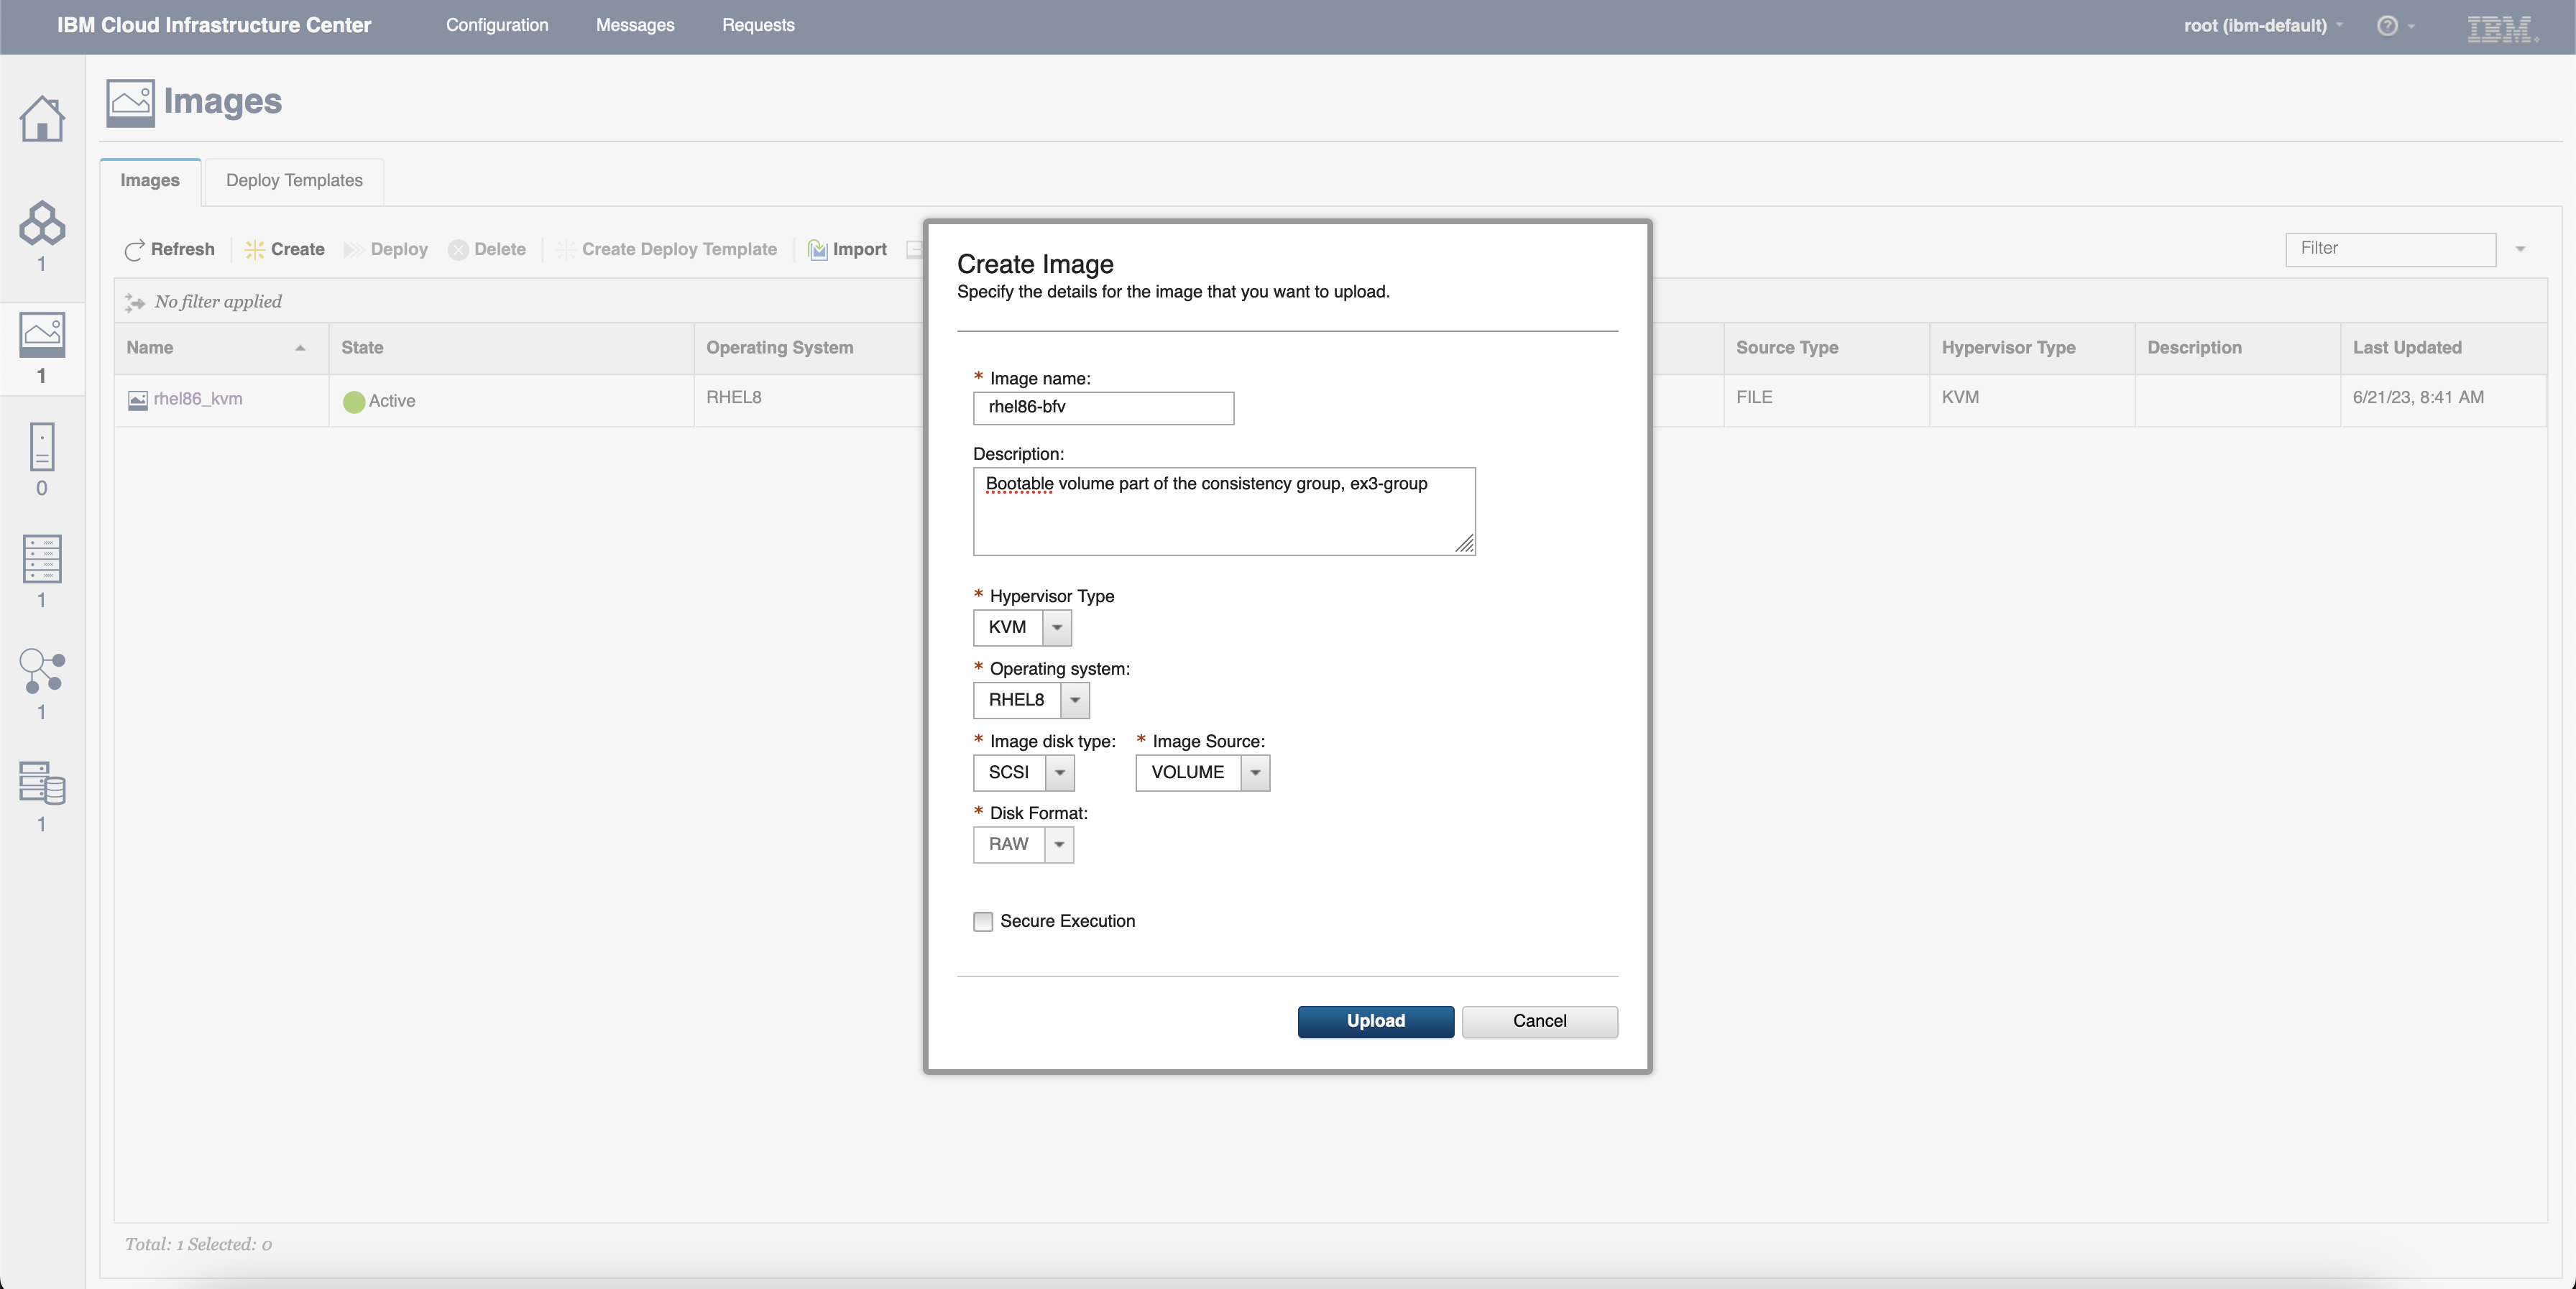
Images Page showing the Create Image dialog
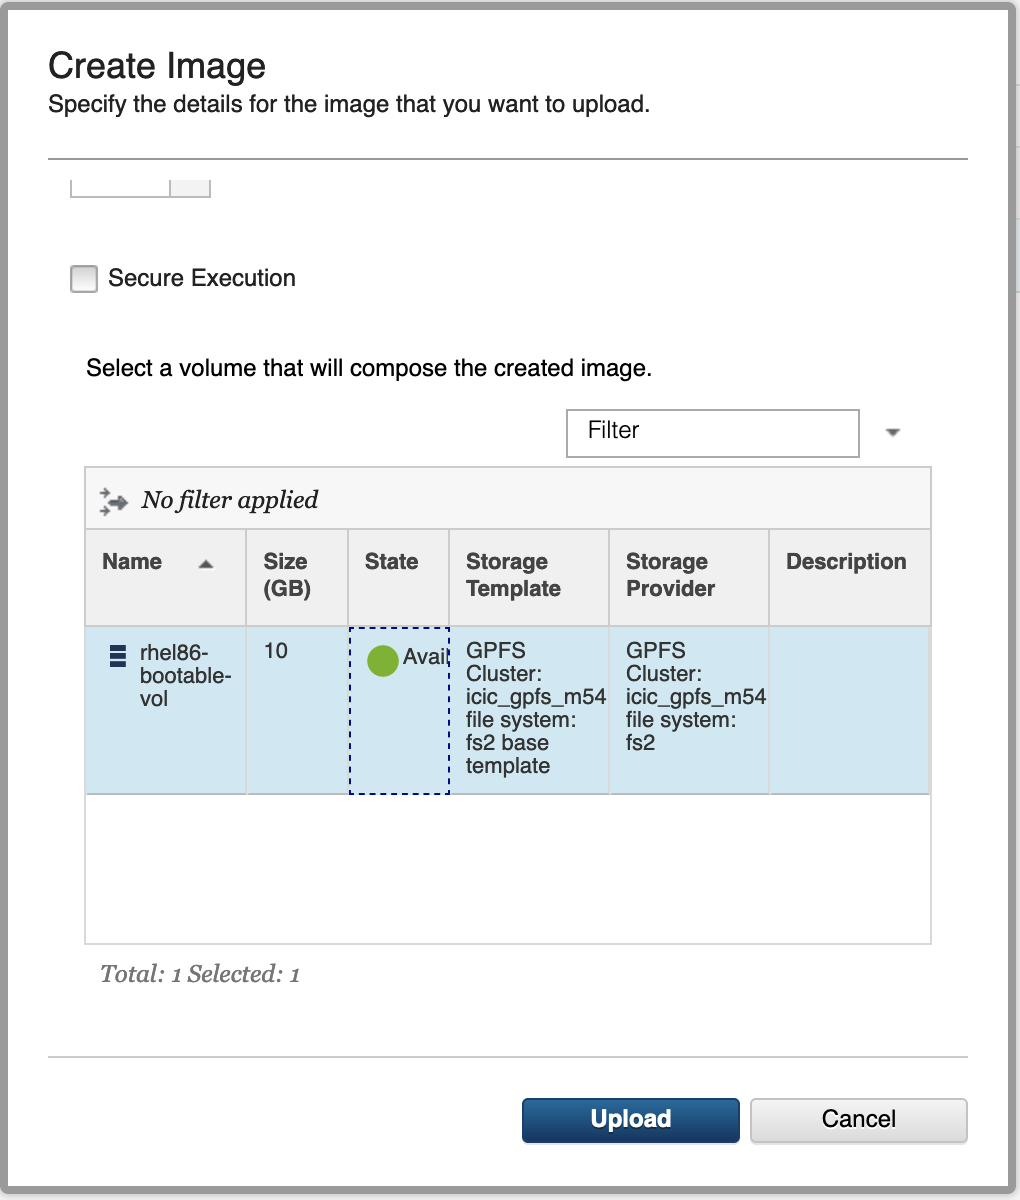
Create Image dialog showing the bootable volume selected
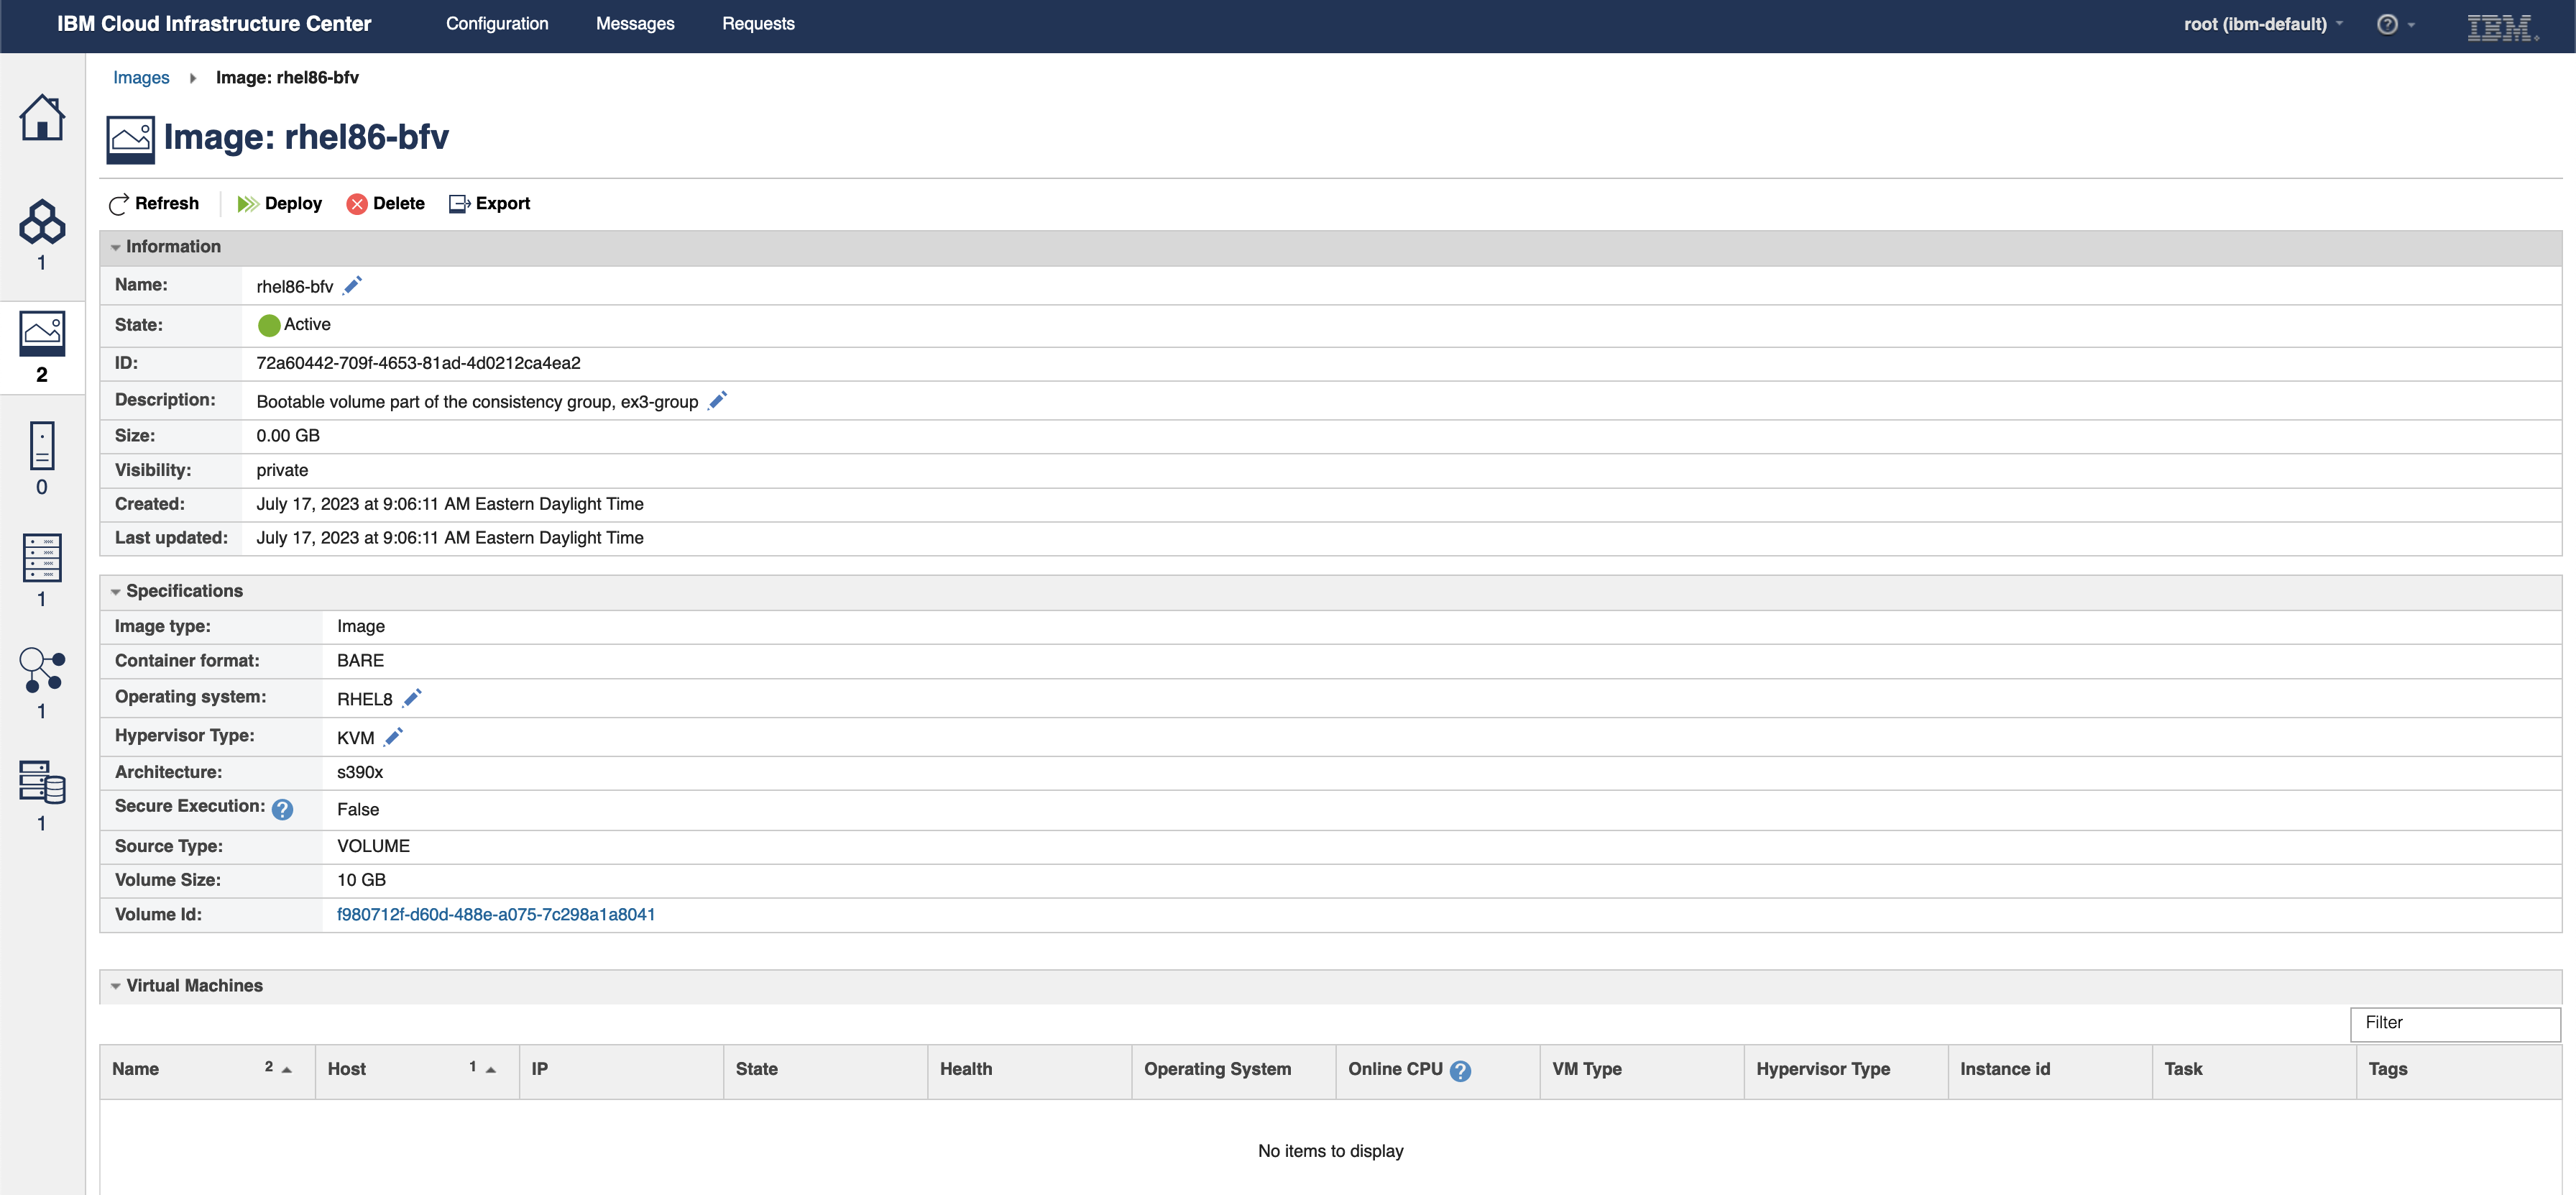
Image details for the newly created BFV image

3.   Deploy VMs using the newly created volume backend image.
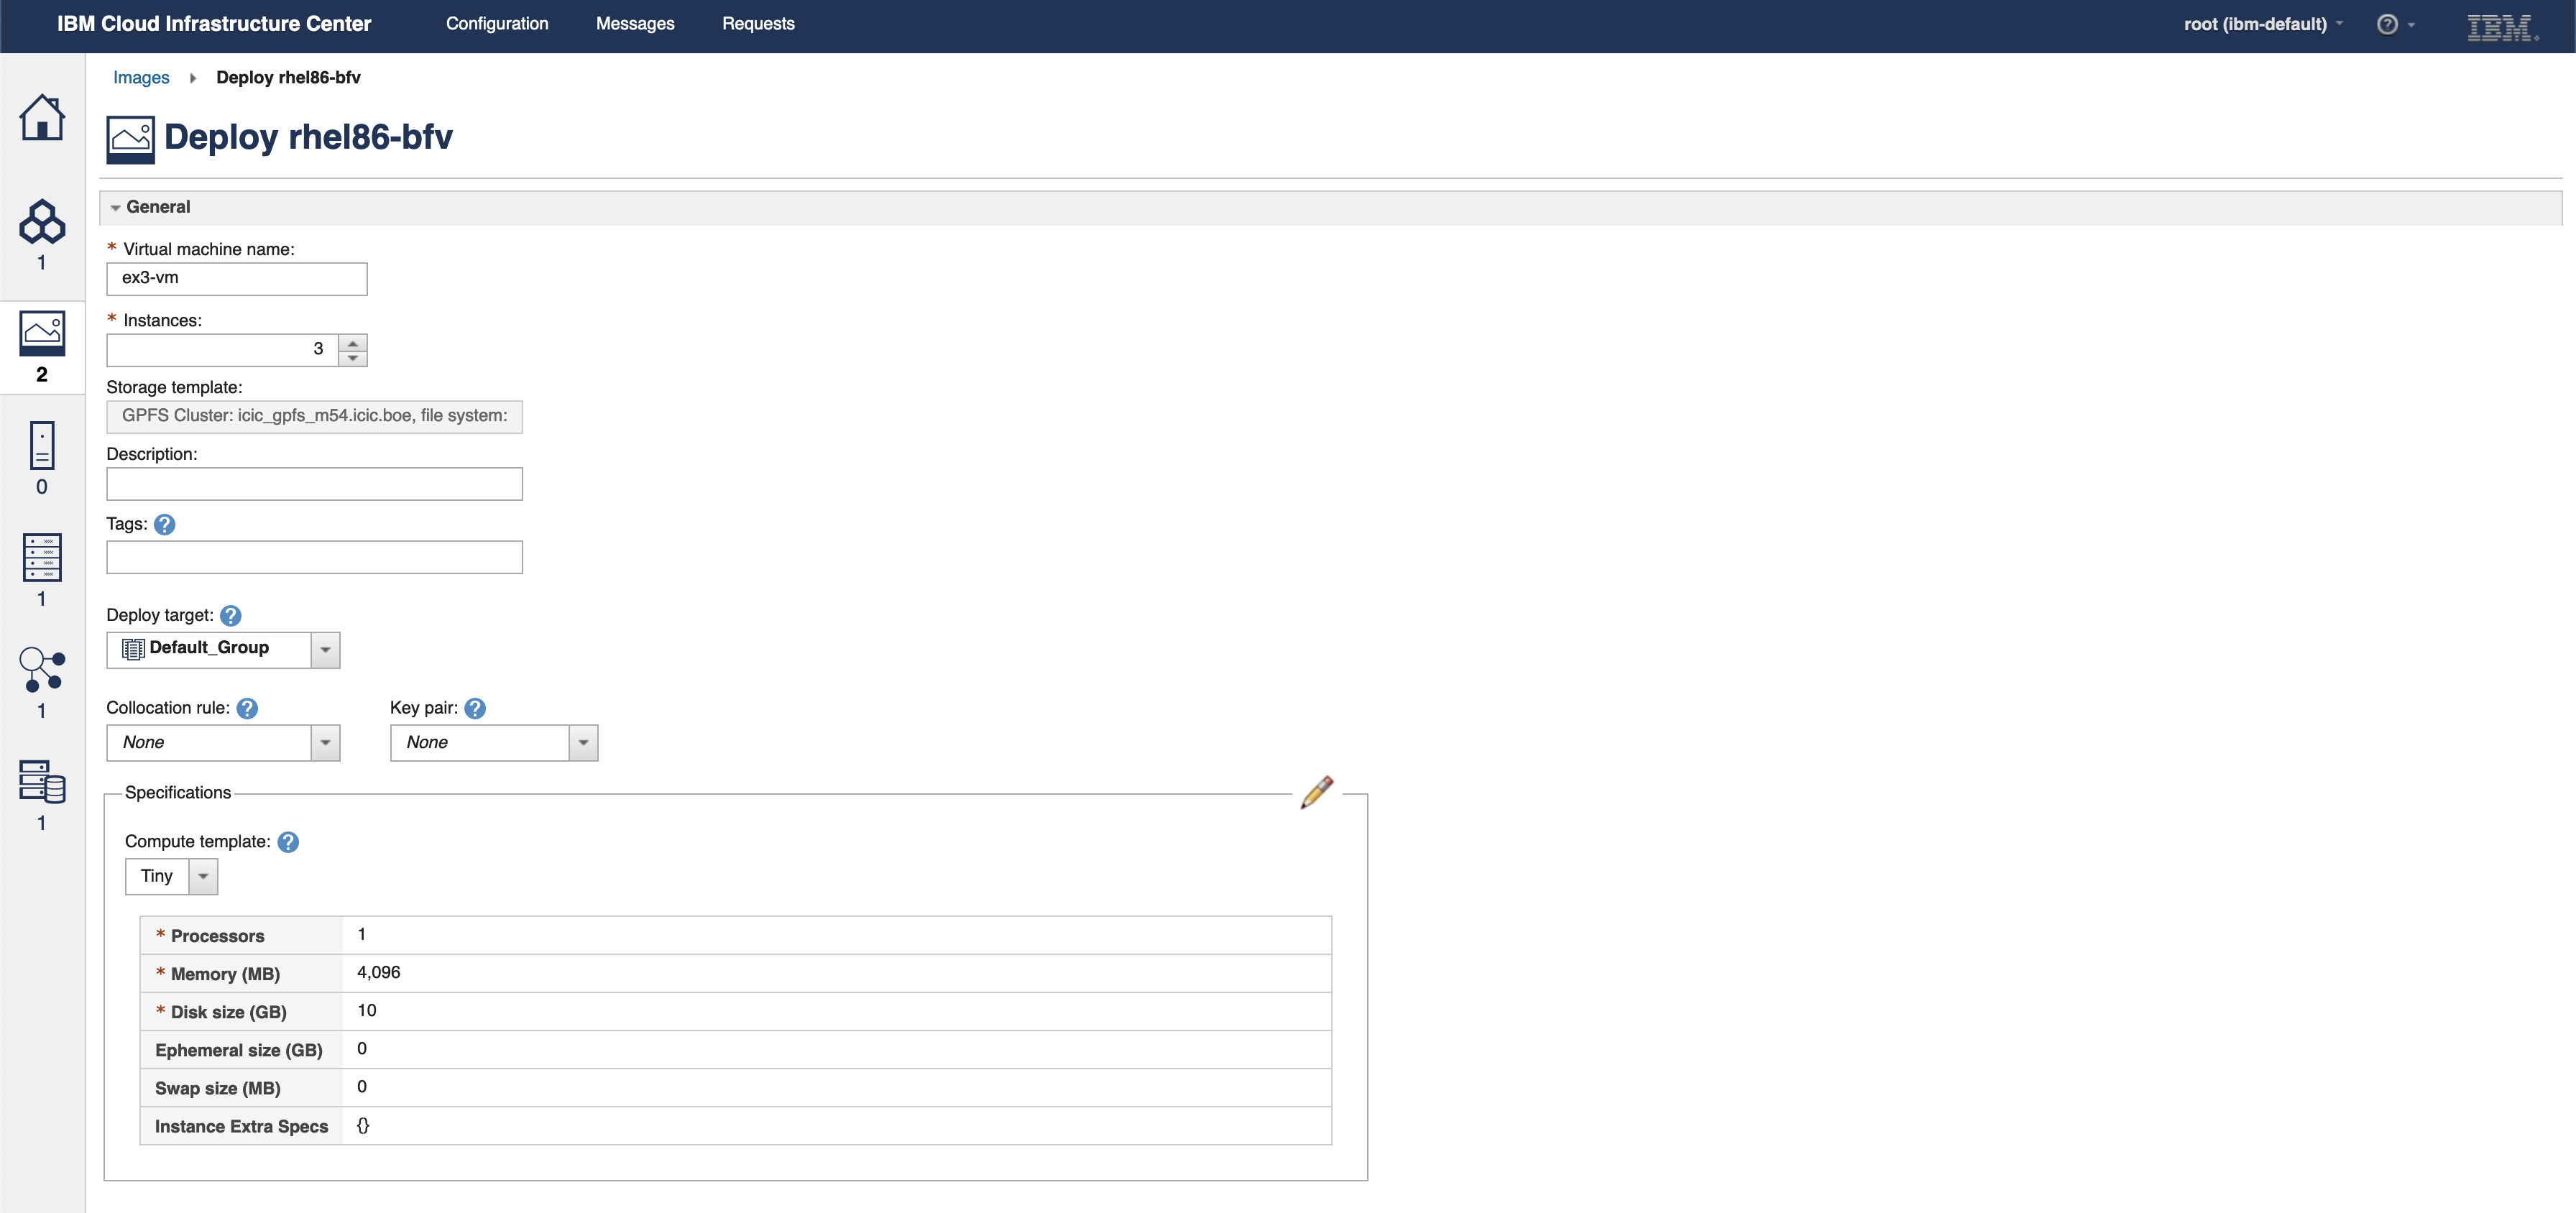
Deploy Image page for rhel86-bfv image showing 3 instances to be deployed
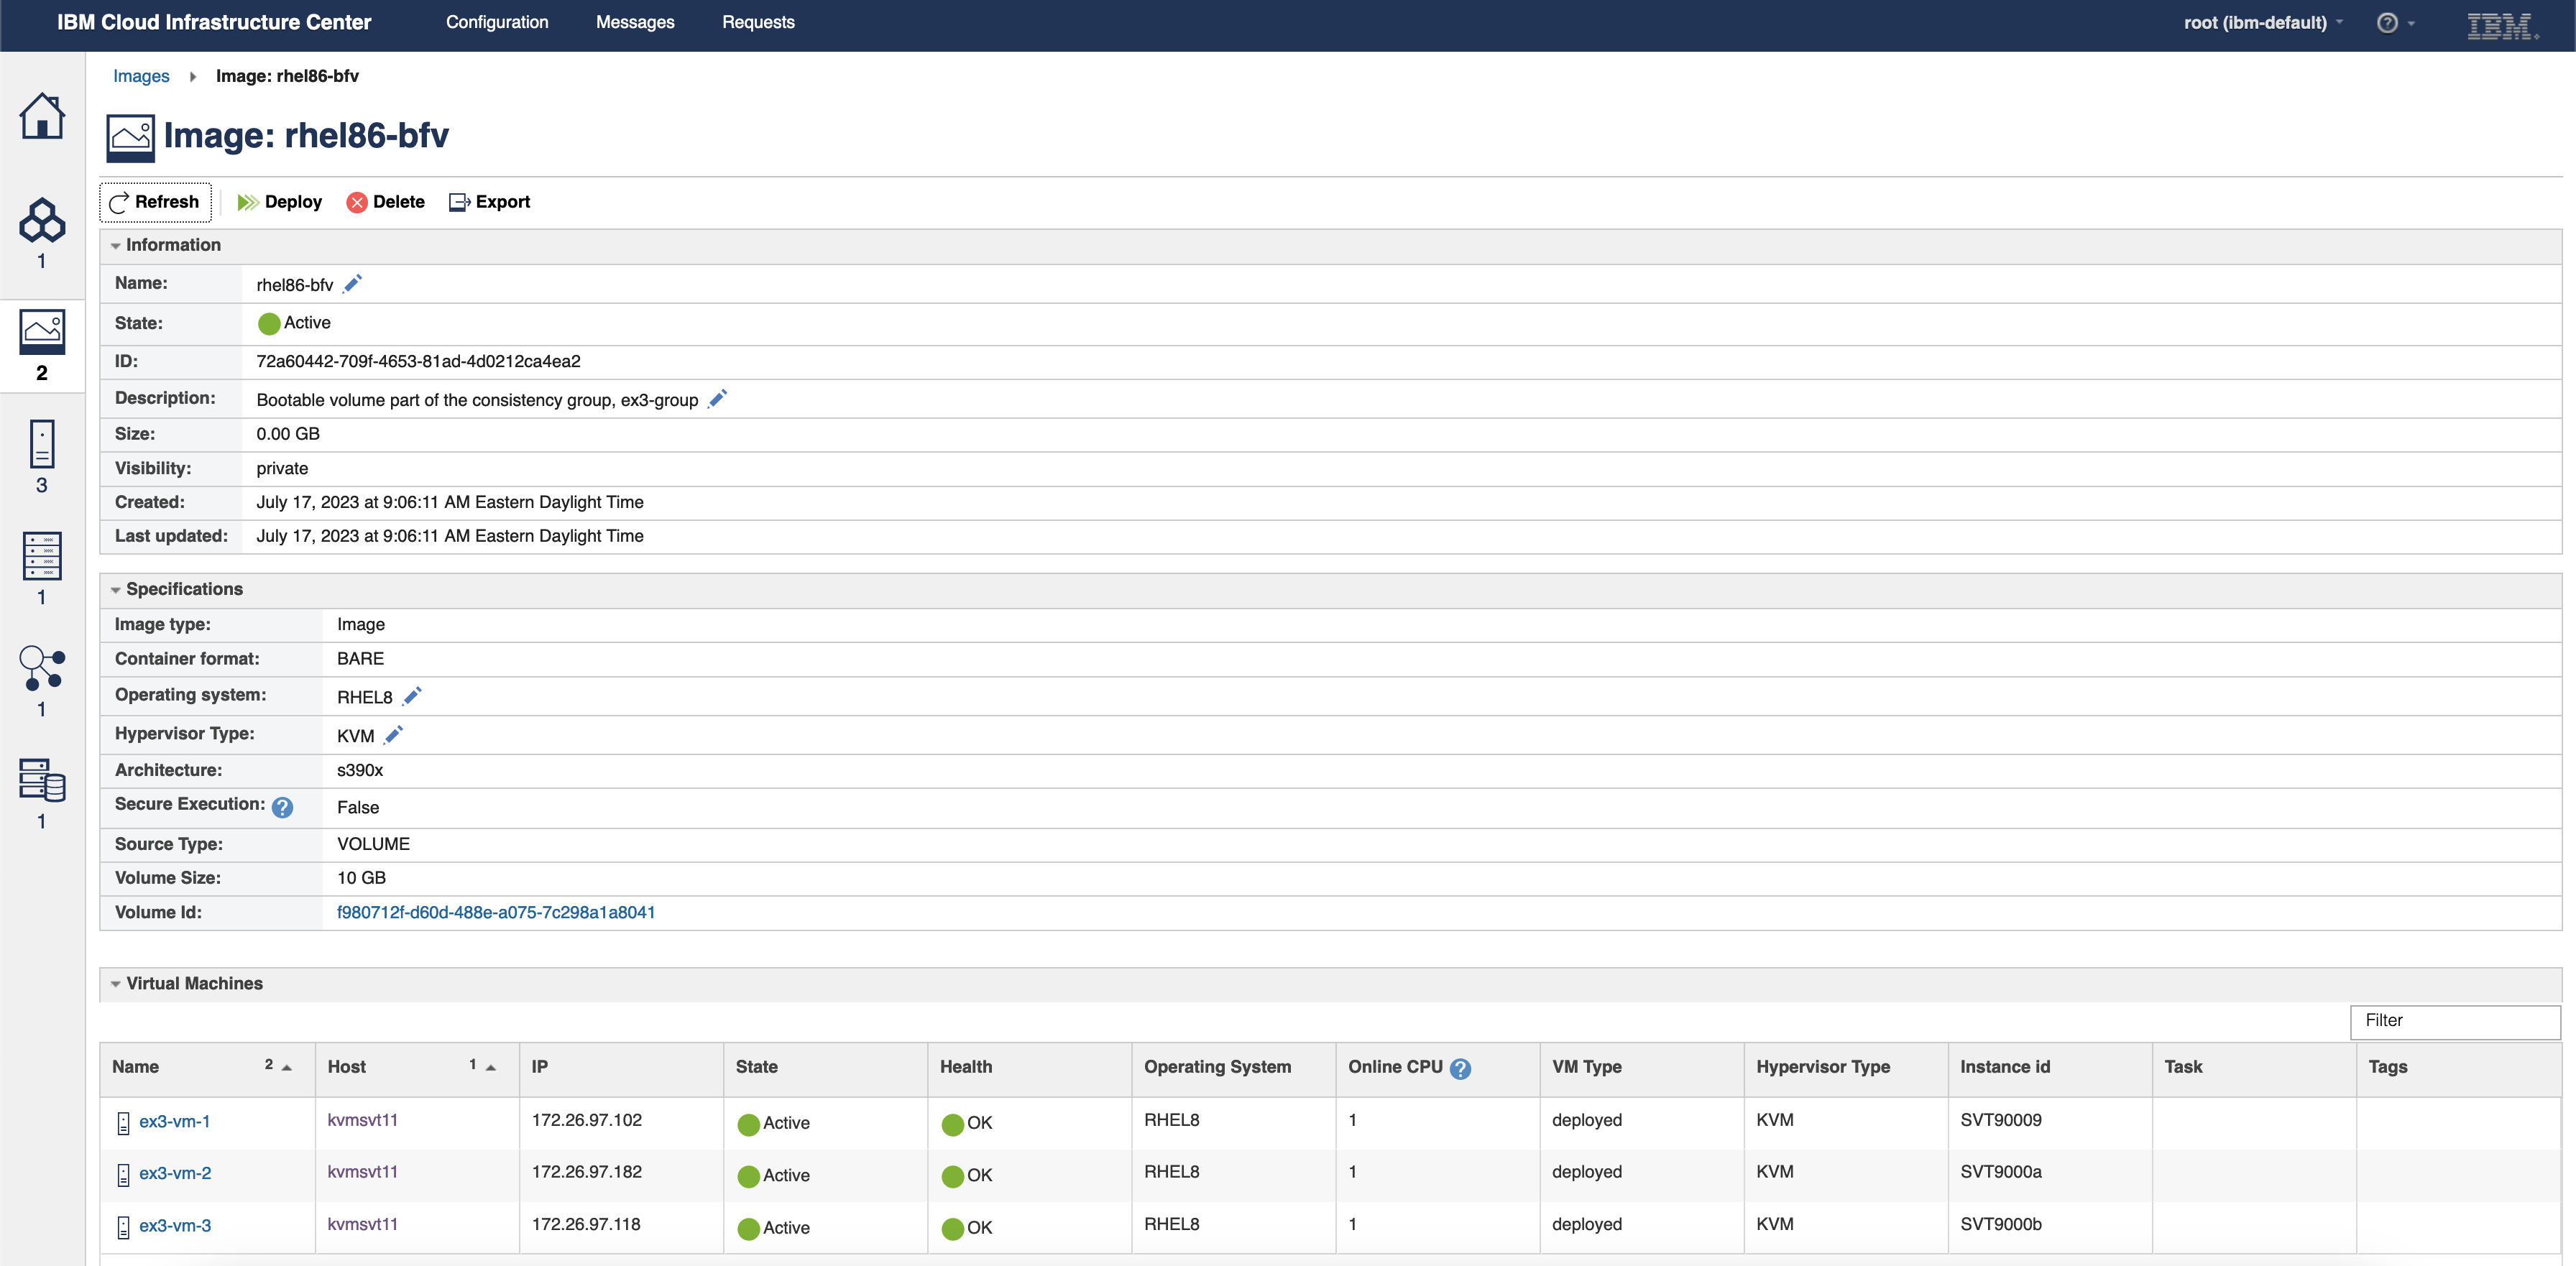
Image details page showing three VMs deployed using the BFV image.


a.  Check that the VMs are part of the consistency group created above.
From the Storage Page, navigate to the Consistency Groups tab, and select the consistency group that was created in Step 1, ex3-group. Here we can see that the boot volumes for all three VMs are part of this group.
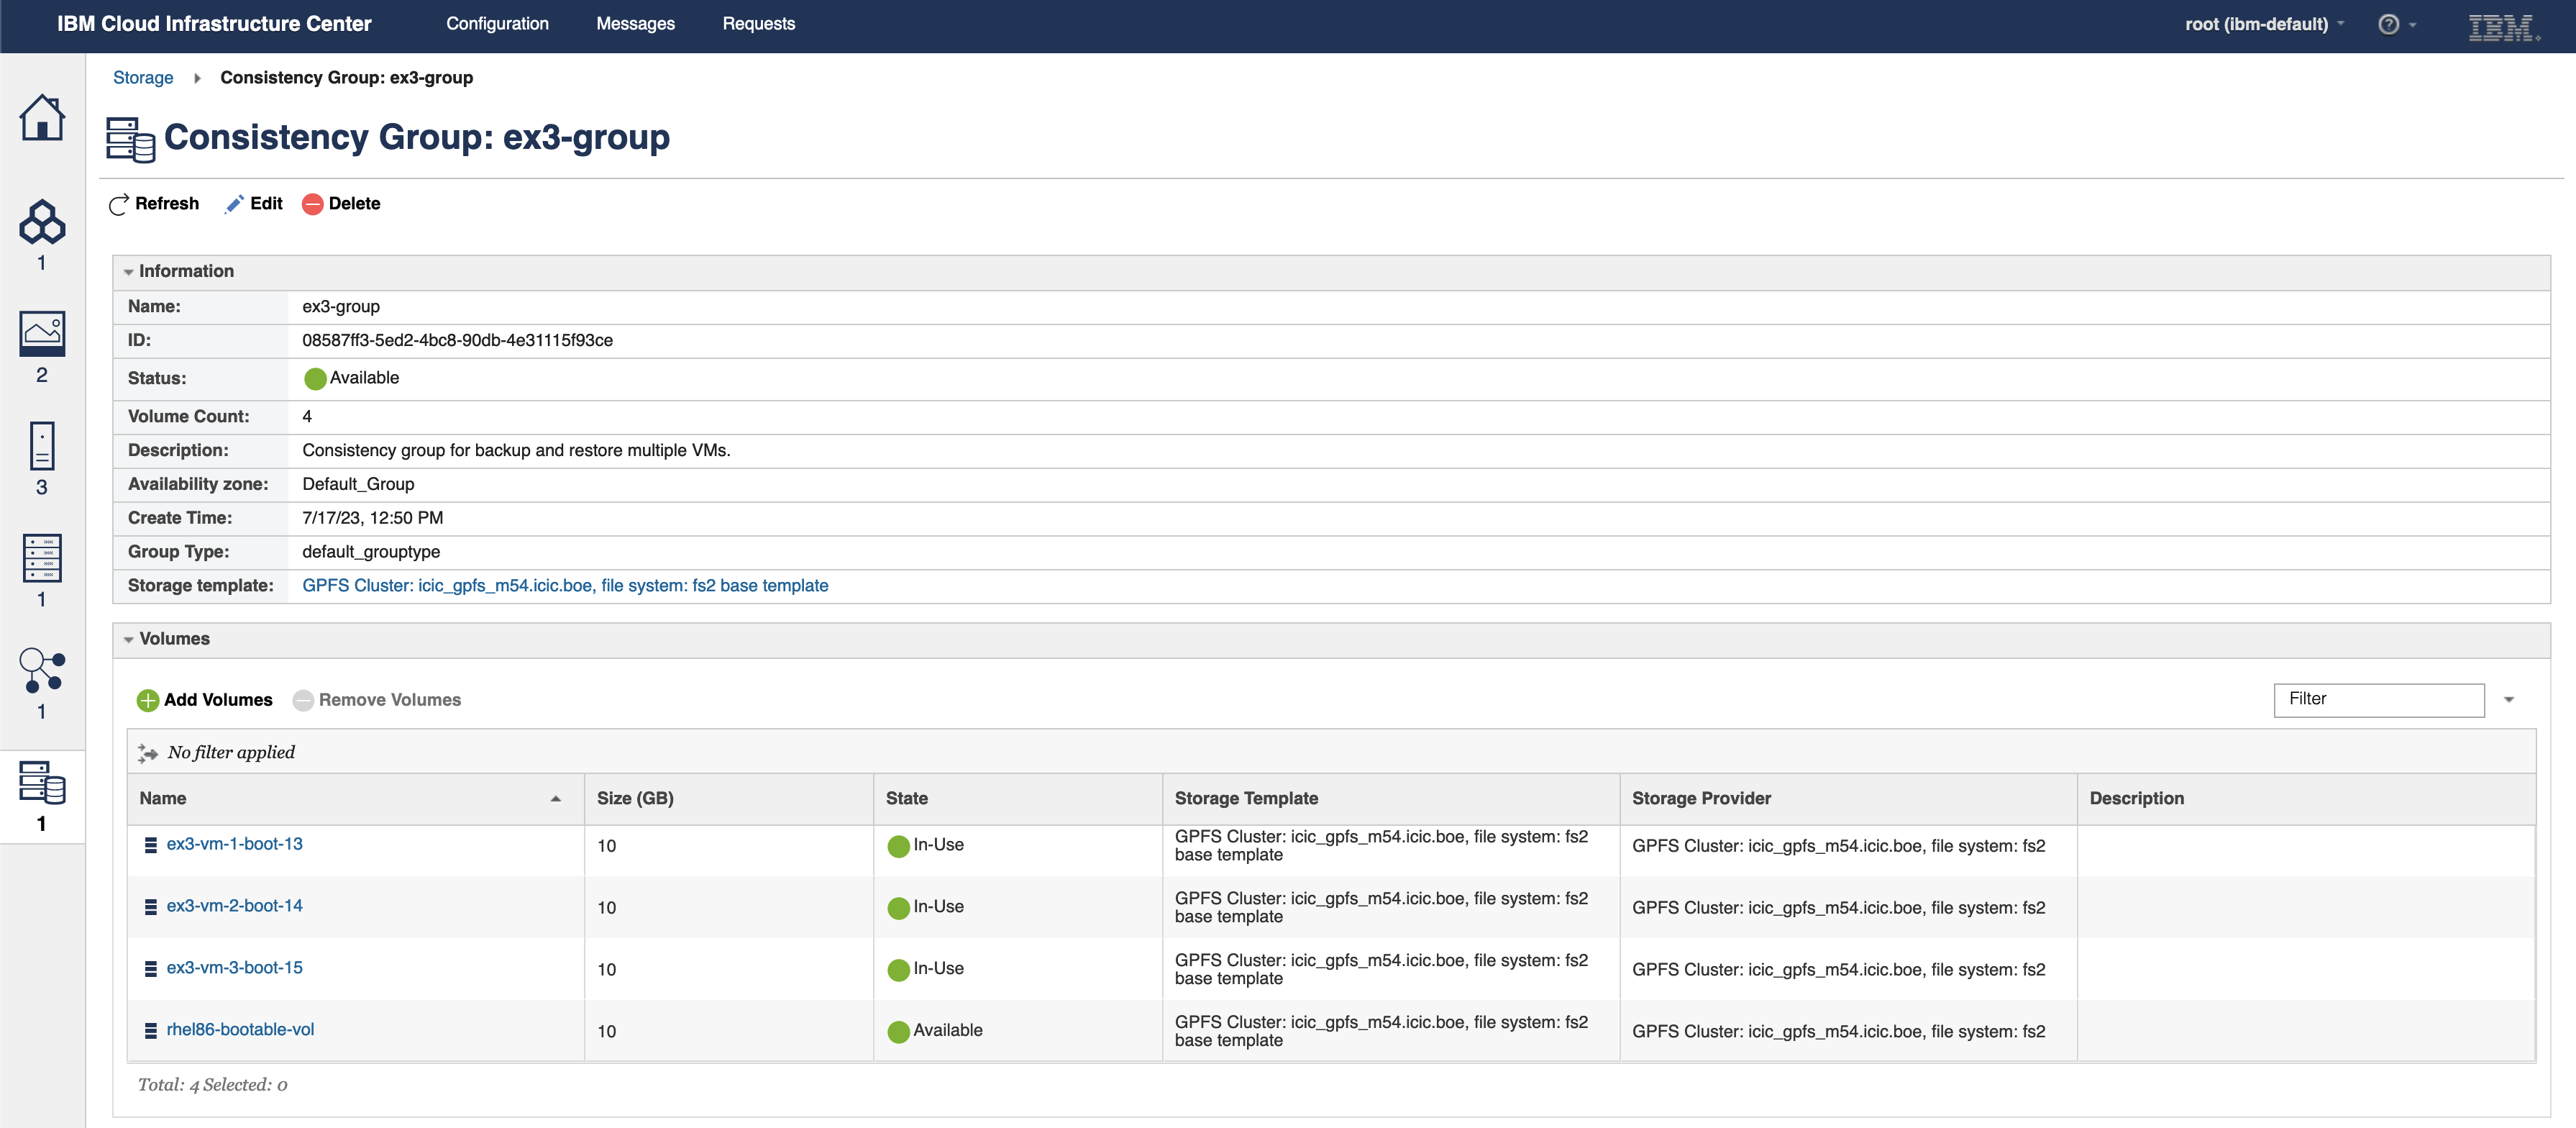
Consistency Group details page for ex3-group

4.  Log in to the VMs and write files to the disk.

5.   Create a backup.

a.  Select one of the VMs and create a backup.
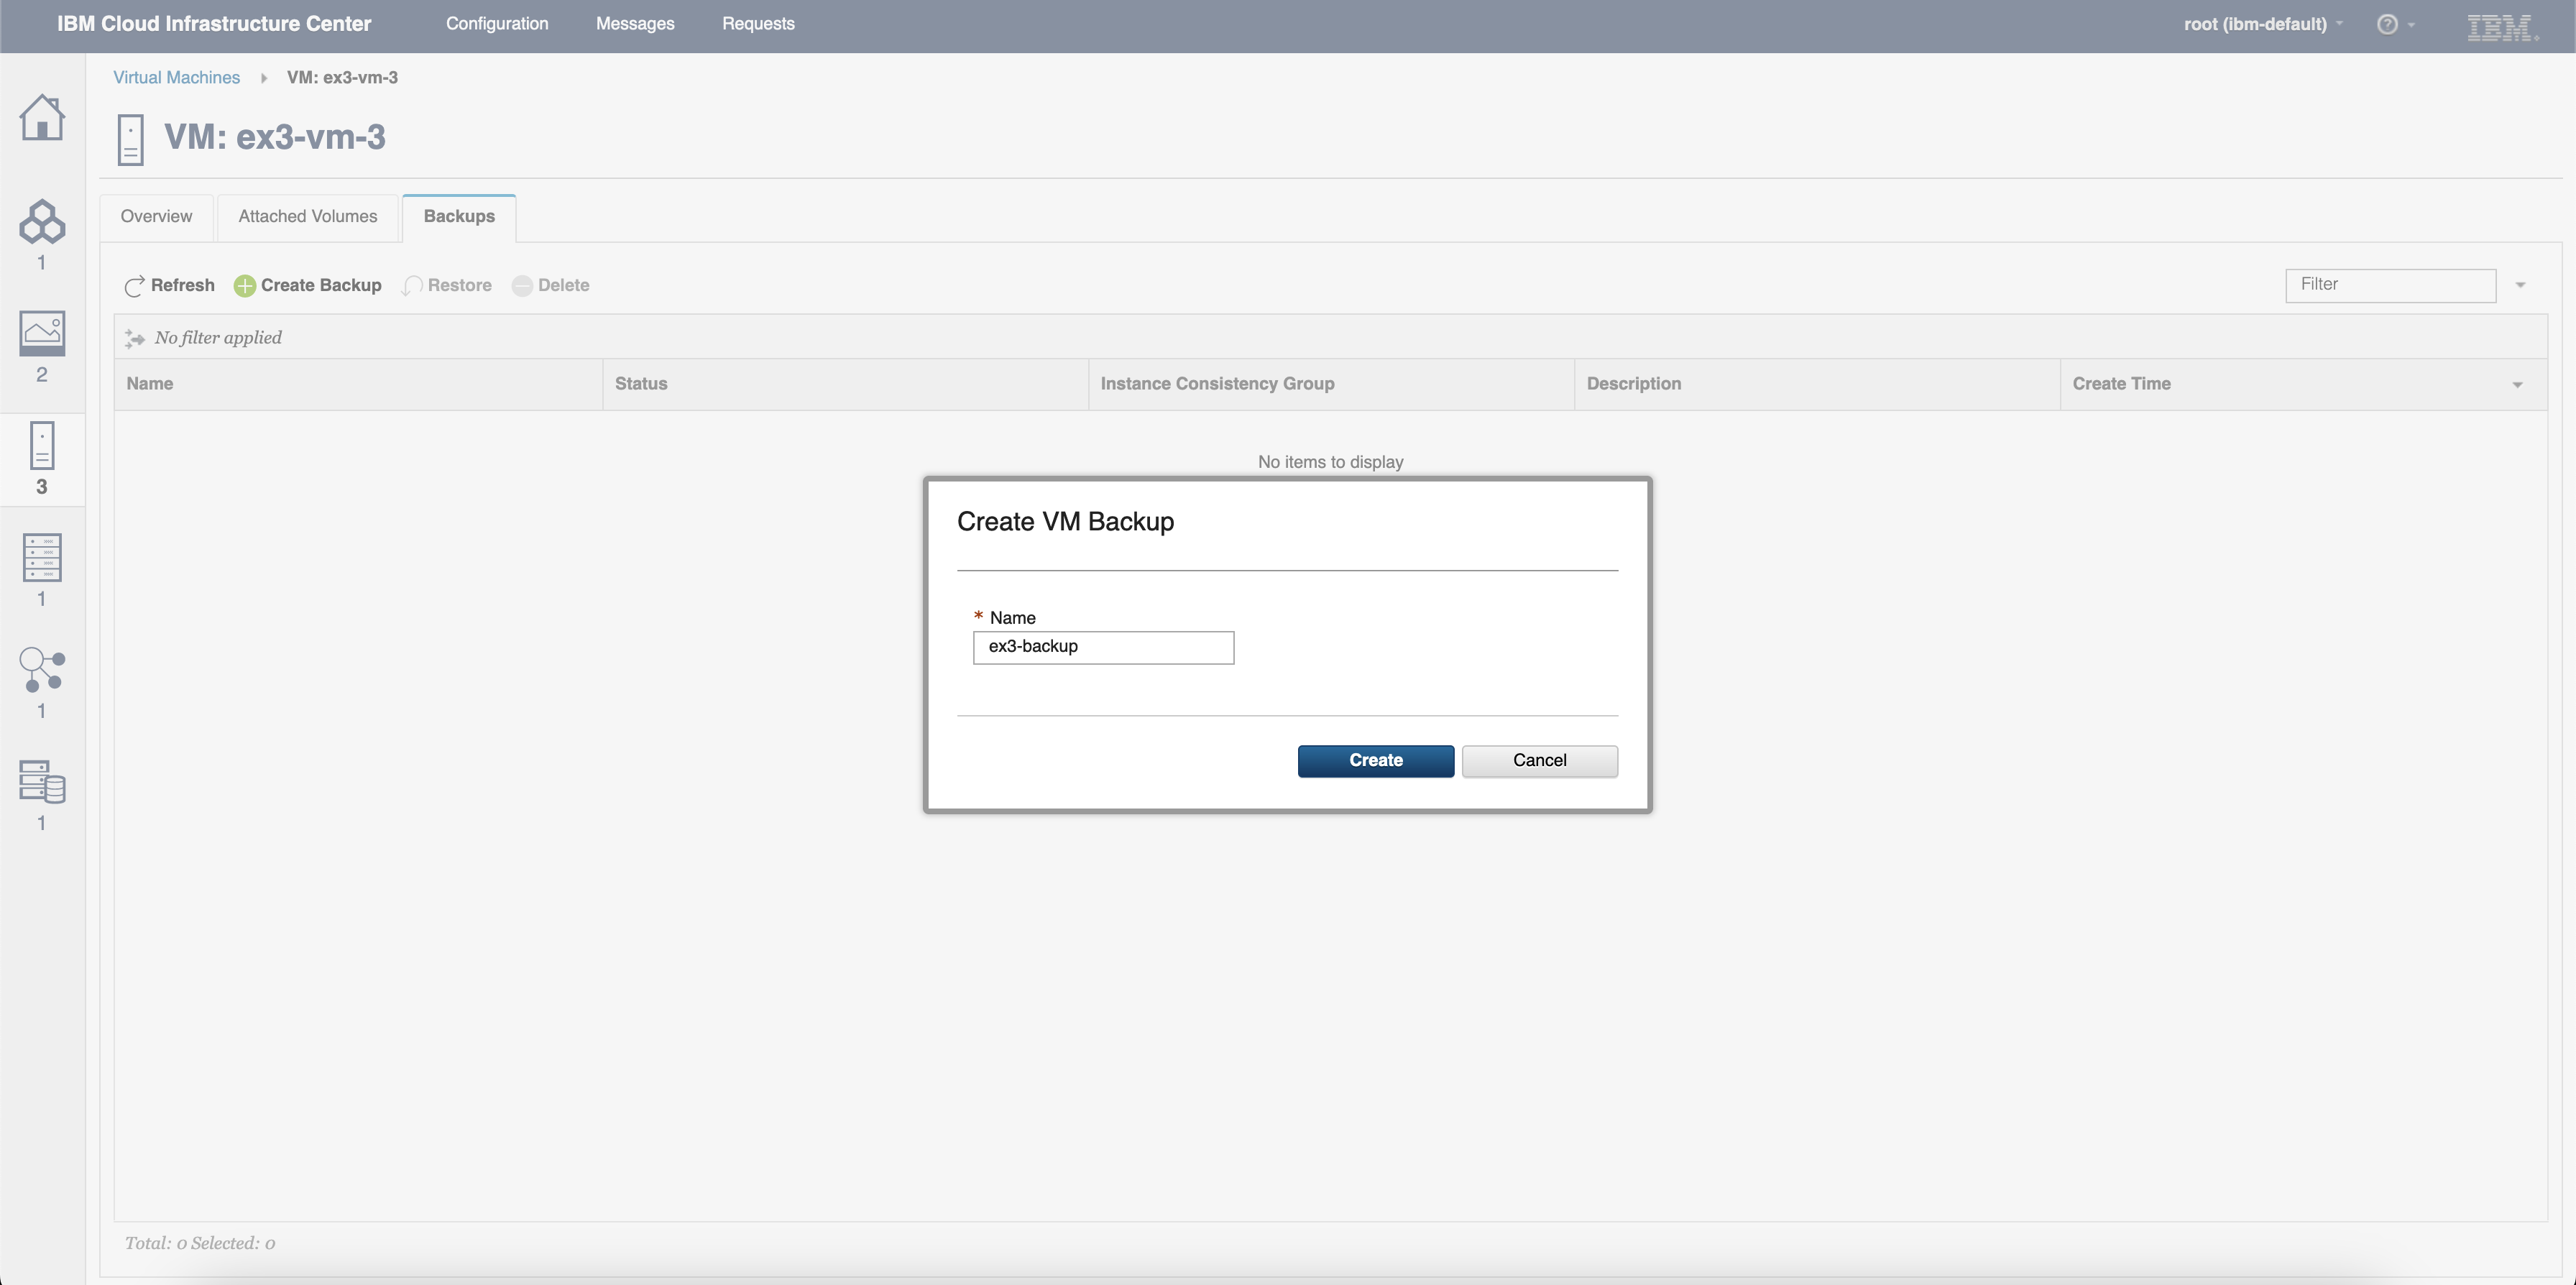
Creating a backup called ex3-backup from the Backups tab of ex3-vm-3

a.  Check that all VMs have the same backup taken.
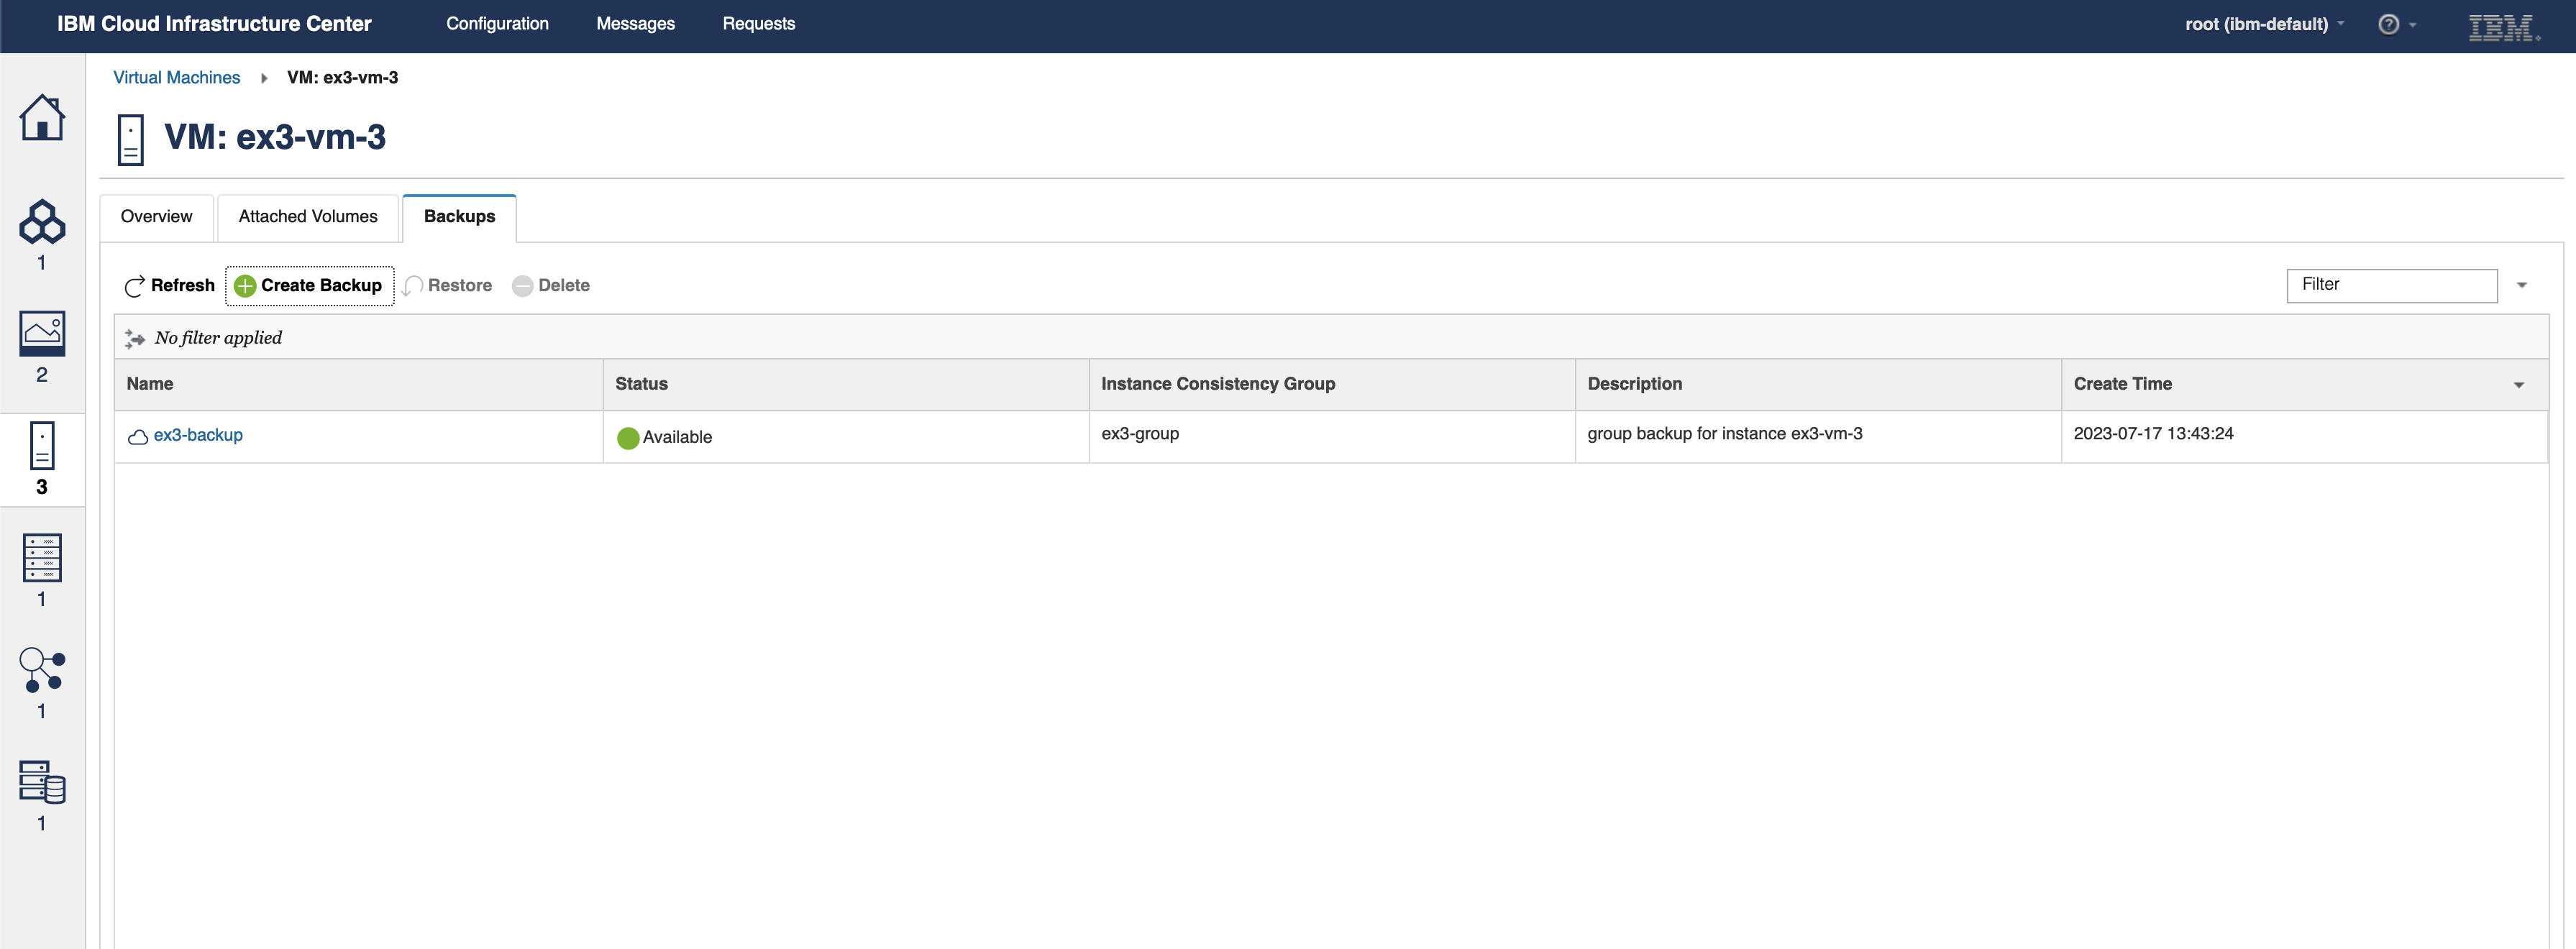
ex3-vm-3 showing ex3-backup
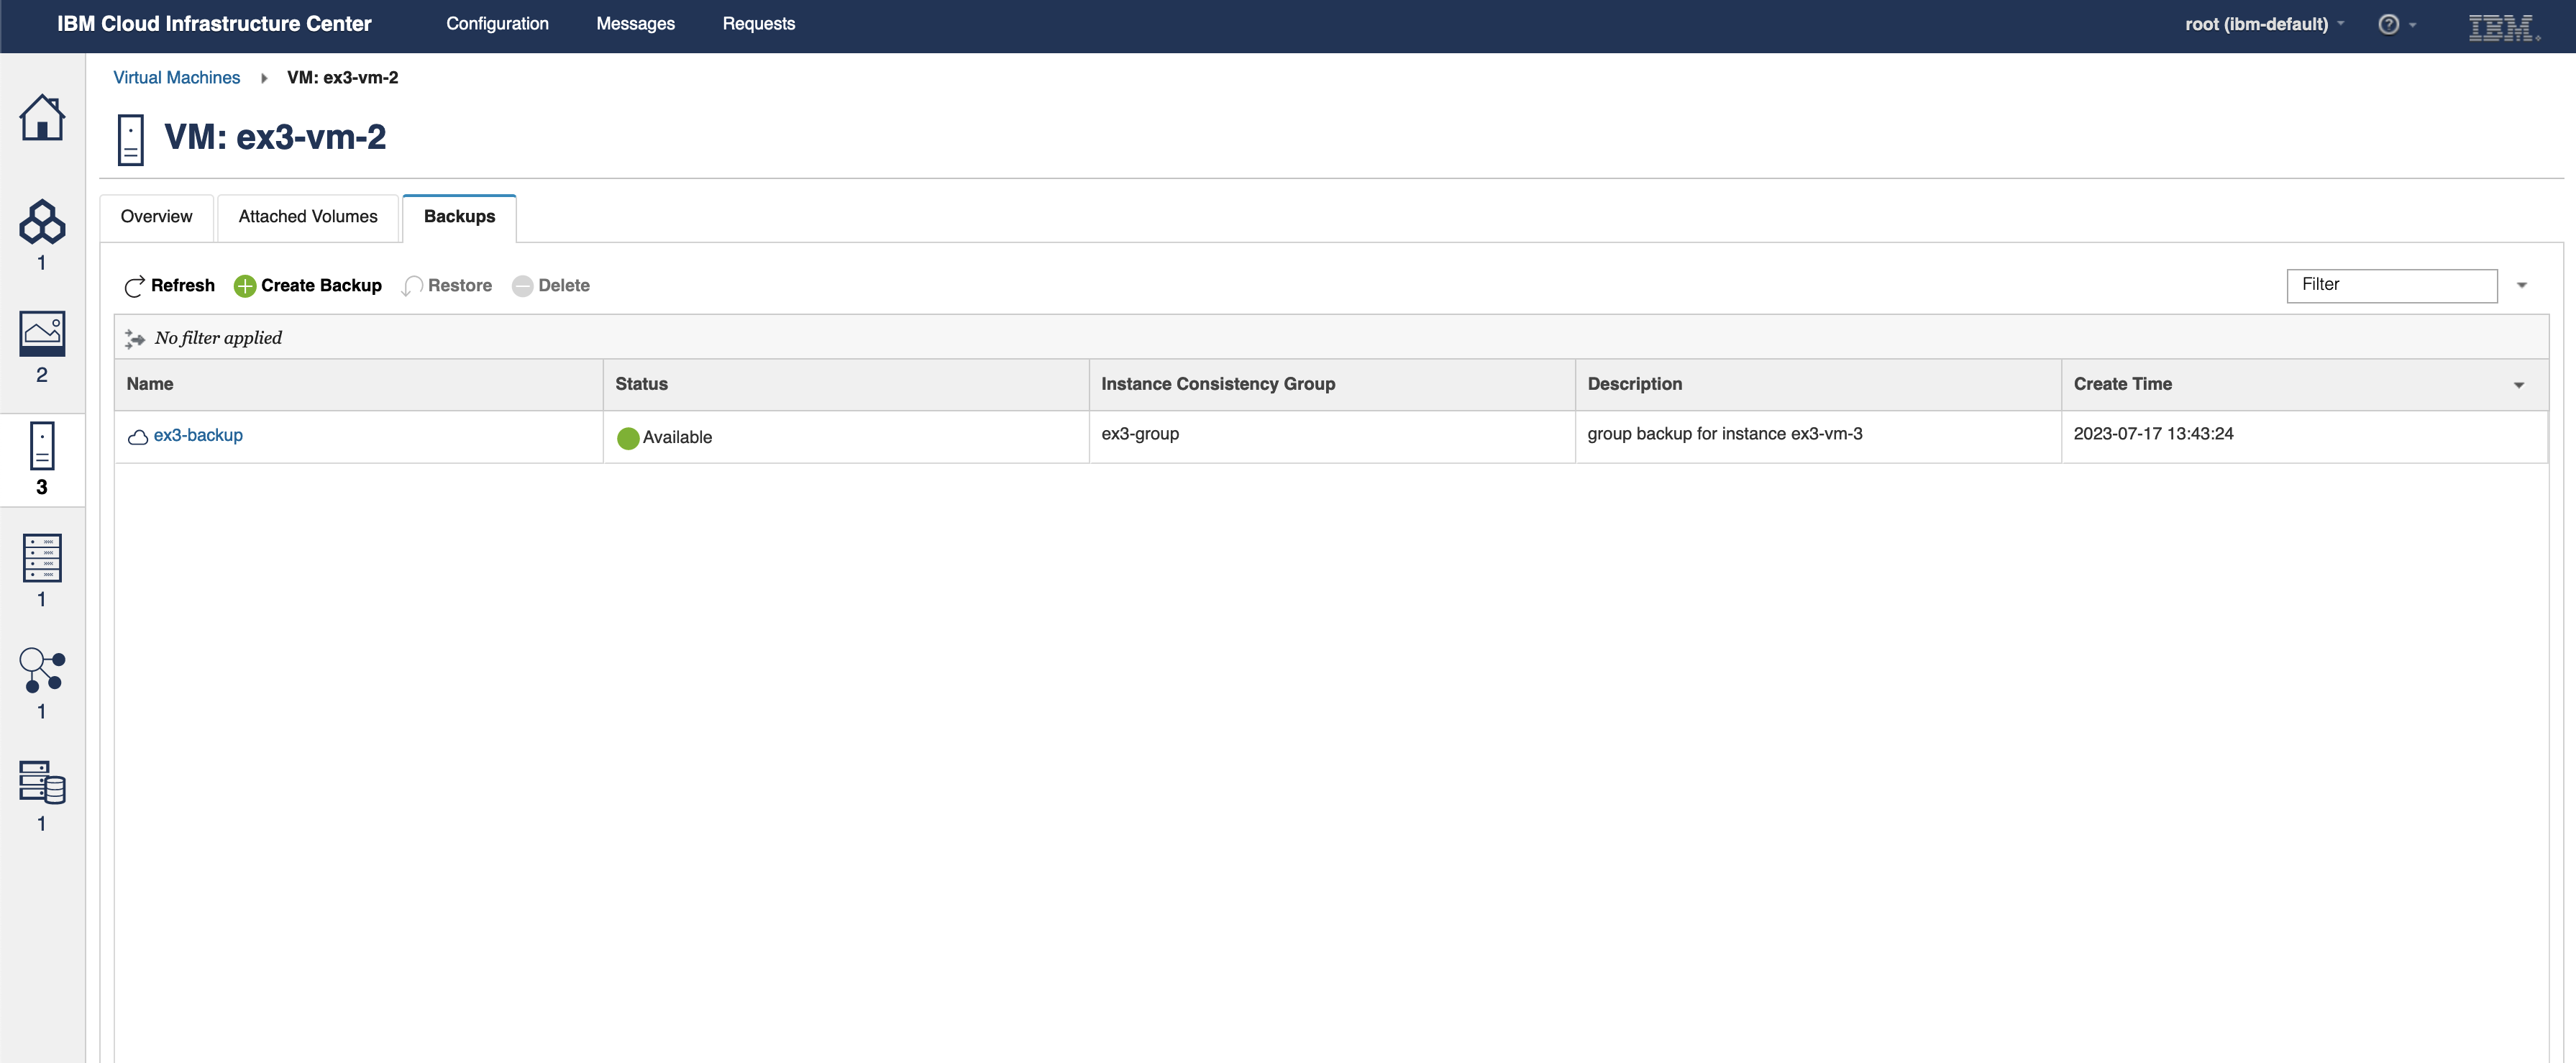
ex3-vm-2 showing ex3-backup
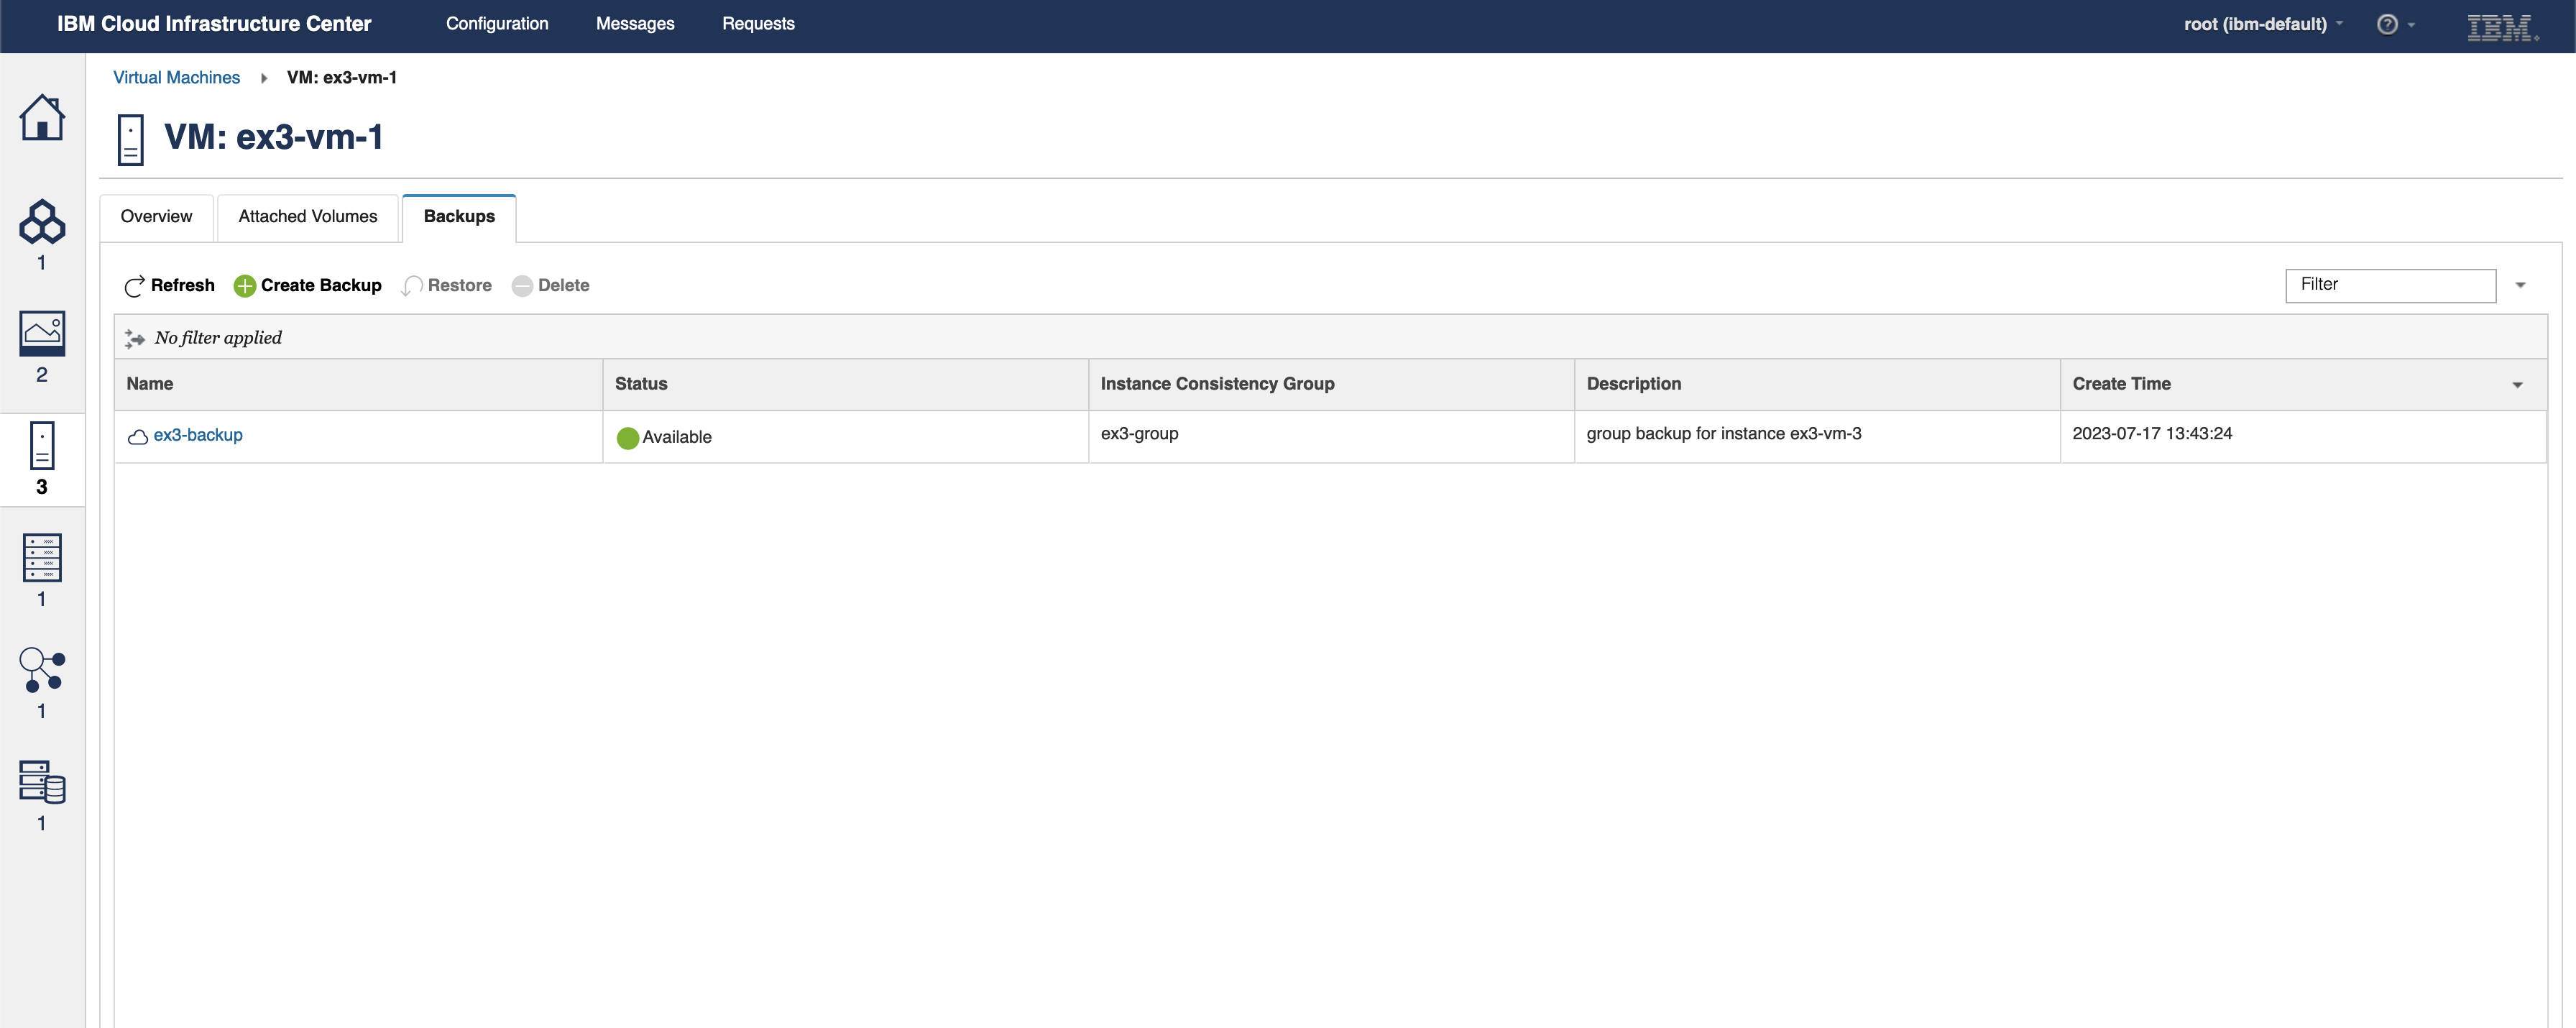
ex3-vm-1 showing ex3-backup

5.   Log back in to the VMs and modify and create new files written to the disk.

6.   Restore backup

a.  Power off all VMs in the group.
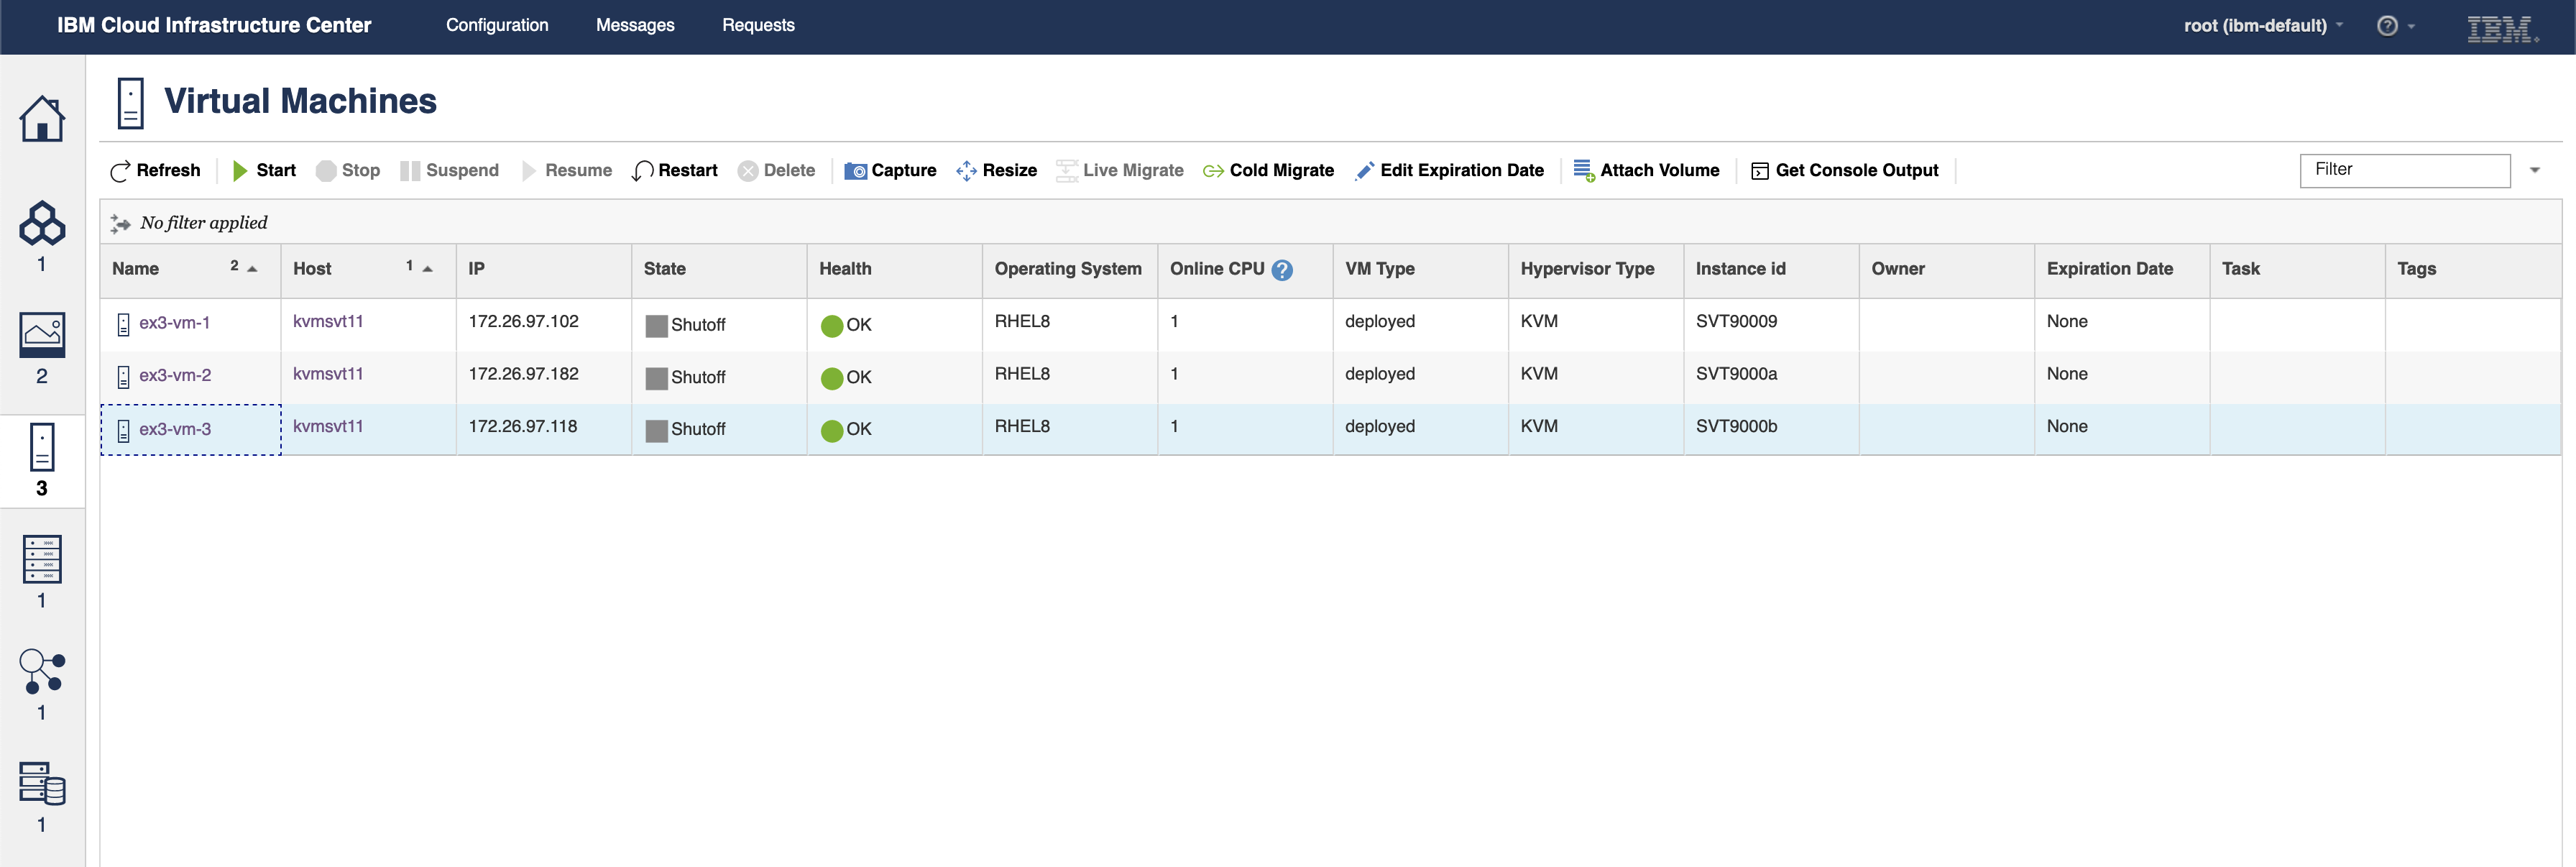
Virtual Machines page showing all 3 VMs in the Shutoff state

b.  Restore the backup that was previously taken by navigating to the Backups tab on one of the VMs, selecting ex3-backup, and clicking Restore.
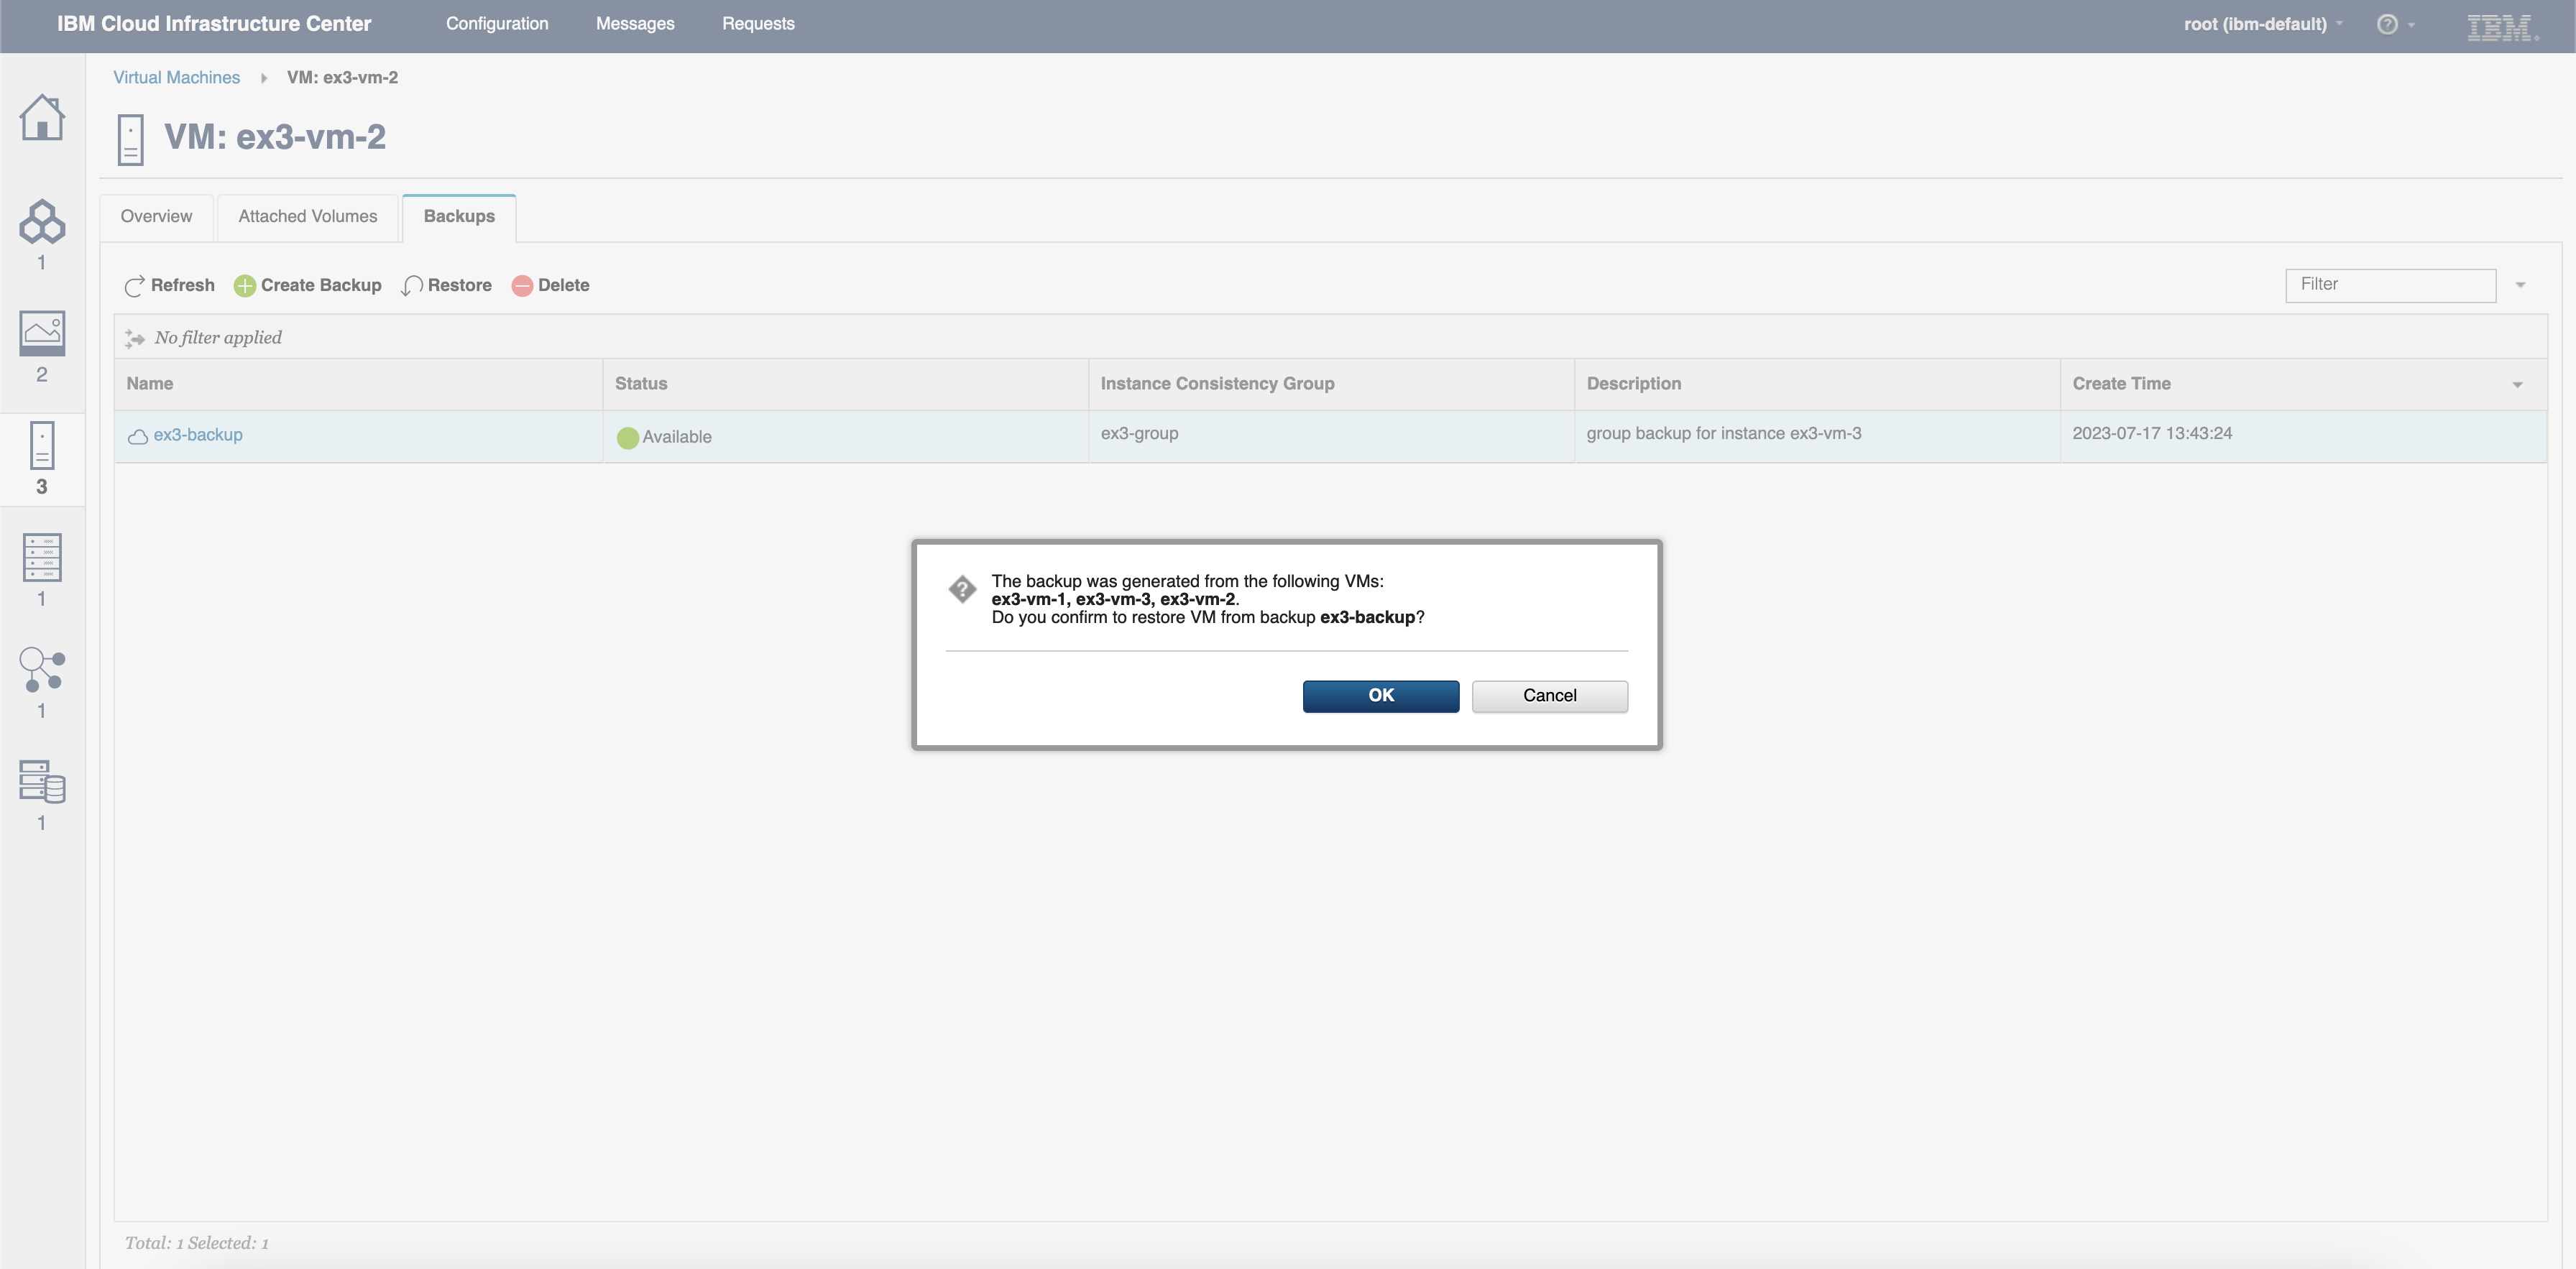
Confirmation dialog for the restore of ex3-backup, initiated from the ex3-vm-2 Backups tab
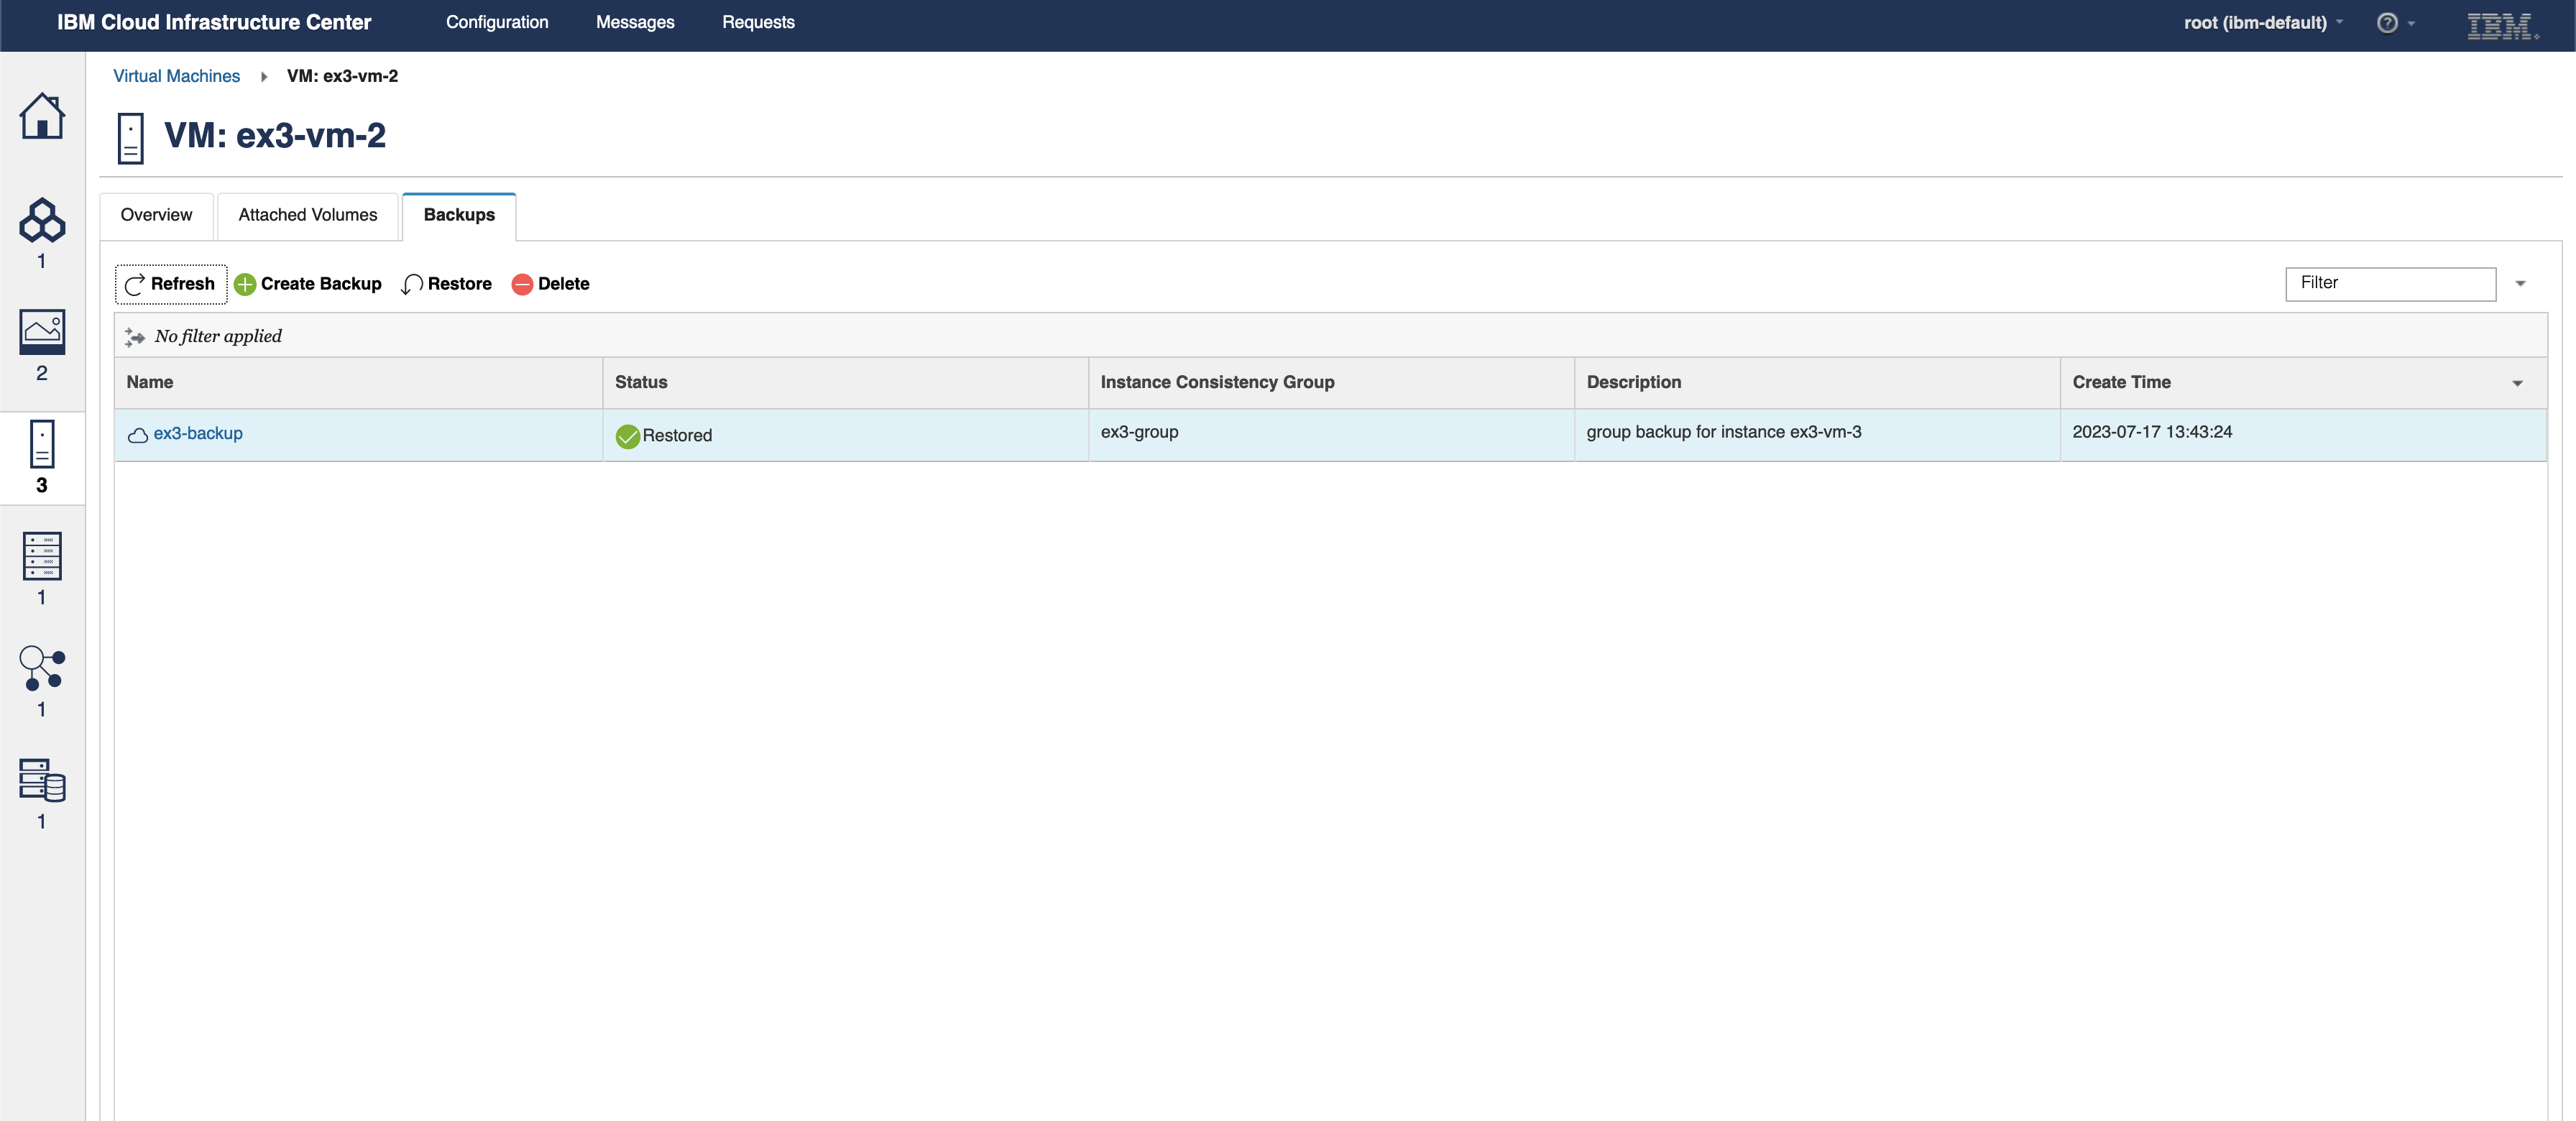
ex3-backup showing a status of Restored

c.  Power on VMs.
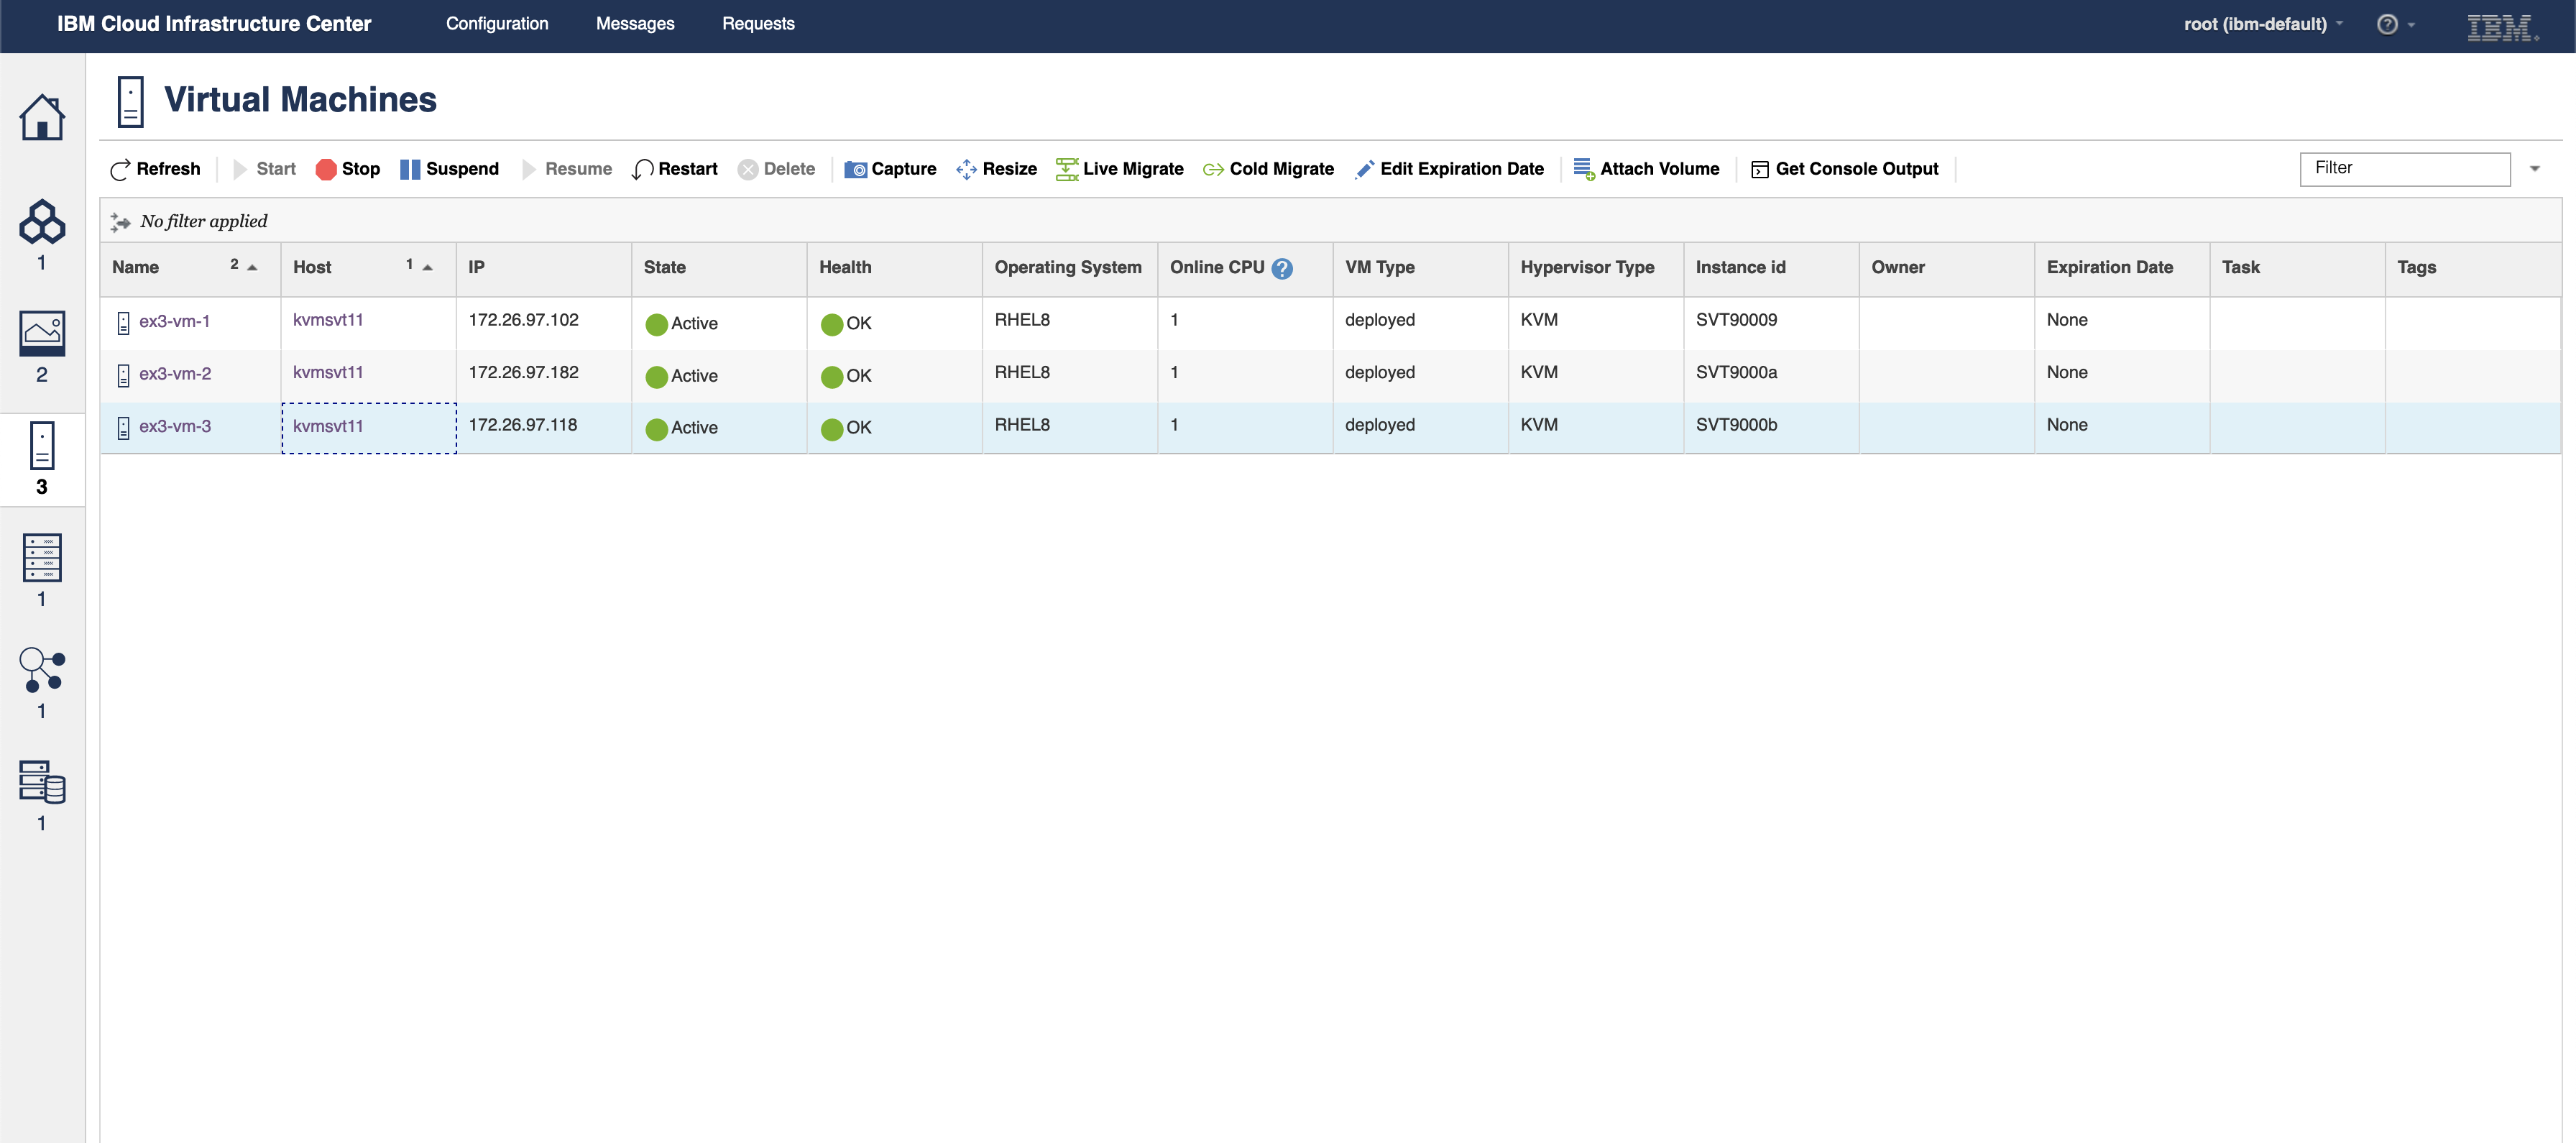
All three VMs showing a status of Active after being powered back on

d.  Log back in to the VMs and check that the files are the same, as when the backup was created.

Summary

This blog is intended to help you to backup and restore the virtual machines in your environment. Leverage the 3 examples of how to backup and restore virtual machines that are booted from an IBM Storage Scale volume on a Red Hat KVM host using IBM Cloud Infrastructure Center.