 Maistra, Kiali and Red Hat Distributed Tracing Platform (based on Jaeger) comprise the Red Hat OpenShift Service Mesh on IBM Systems Z/LinuxONE
PART I: INSTALL SERVICE MESH
Preliminaries
Audience
This set of blog posts are intended for people who have deployed OpenShift on IBM System Z/LinuxONE, and who now wish to install and test OpenShift Service Mesh (OSSM) on it with the bookinfo example microservice suite. It is split up into three parts:
Part I: Install Service Mesh covers an installation and configuration of OSSM 2.0.3 on OCP 4.7 suited specifically for bringing up the bookinfo example. Covered here is how to get your first installation of OSSM running with the intention of validating your installation with the bookinfo example. This is an illustrated “Quick-Start” to the official Red Hat official documentation.
Part II: Build Bookinfo from source provides detailed instructions to build the bookinfo example images for platforms for which public images are not available. You can skip this part if you are running OpenShift on an x86 platform, for which the bookinfo images are publicly provided.
Part III: Much Ado About Bookinfo provides things you might want to do with microservices deployments. This is intended to help customers and clients learn about how to deploy and enhance microservices in OSSM using the bookinfo example application.
Overview
With OCP version 4.6 and up, the Red Hat OpenShift Service Mesh — OSSM — is available on IBM System Z/LinuxOne and Power Systems. OSSM allows you to deploy a suite of containerized microservices with nimble on-the-fly control over their observability and security through declarative yaml files without changing any code inside your microservice containers.
For example, you can:
- Add mTLS encryption between your microservices with Maistra
- Map the communications between them in the Kiali UI
- Trace packets between them and measure the traffic with Red Hat Distributed Tracing Platform based on Jaeger.
This magic of creating agility, observability and security for microservices is done through the application of Envoy sidecar proxies . While links to the components of OSSM are provided here for background, all are installed, as illustrated in this blog, as Operators from Operator Hub, updated and managed by the Operator Lifecycle Manager (OLM).
While there are a number of technical differences between OpenShift Service Mesh versus Istio on Kubernetes, perhaps the most significant for readers of this blog post is that OSSM is fully tested on OpenShift on Z, and supported by Red Hat for our customers and clients. Red Hat addresses security issues (CVEs) with extreme alacrity and discretion.
Note that in OSSM 1.x the Jaeger Operator is known as Red Hat OpenShift Jaeger Operator, but in OSSM 2.x and going forward, it is labeled Red Hat Distributed Tracing Platform (based on Jaeger).
Prerequisites
To install Red Hat OpenShift Service Mesh on an IBM System Z/LinuxONE cluster, you will need access to one such cluster with admin privileges. Please check that your cluster has all the documented prerequisites.
Installing OpenShift Service Mesh
This part is very much as documented . We’ll cover the same ground with a few screenshots as well, and just the things you’ll need to do to get the bookinfo example microservices for test, validation and educational purposes; we’re not going to install elasticsearch, for example.
- Log in to the OpenShift Container Platform web console as a user with the
cluster-admin role and make sure you’re in the Administrator dashboard. (cyan or light-blue circles)
2. Navigate to Operators → OperatorHub. (orange circle)
3. Filter the Operators by Provider: RedHat. (red circle)
4. Find Red Hat Openshift Service Mesh, Red Hat OpenShift Red Hat Distributed Tracing Platform (based on Jaeger) and Kiali Operator, all with the annotation provided by Red Hat under the Operator title. These are the supported versions. Use those. (the three dark blue circles)
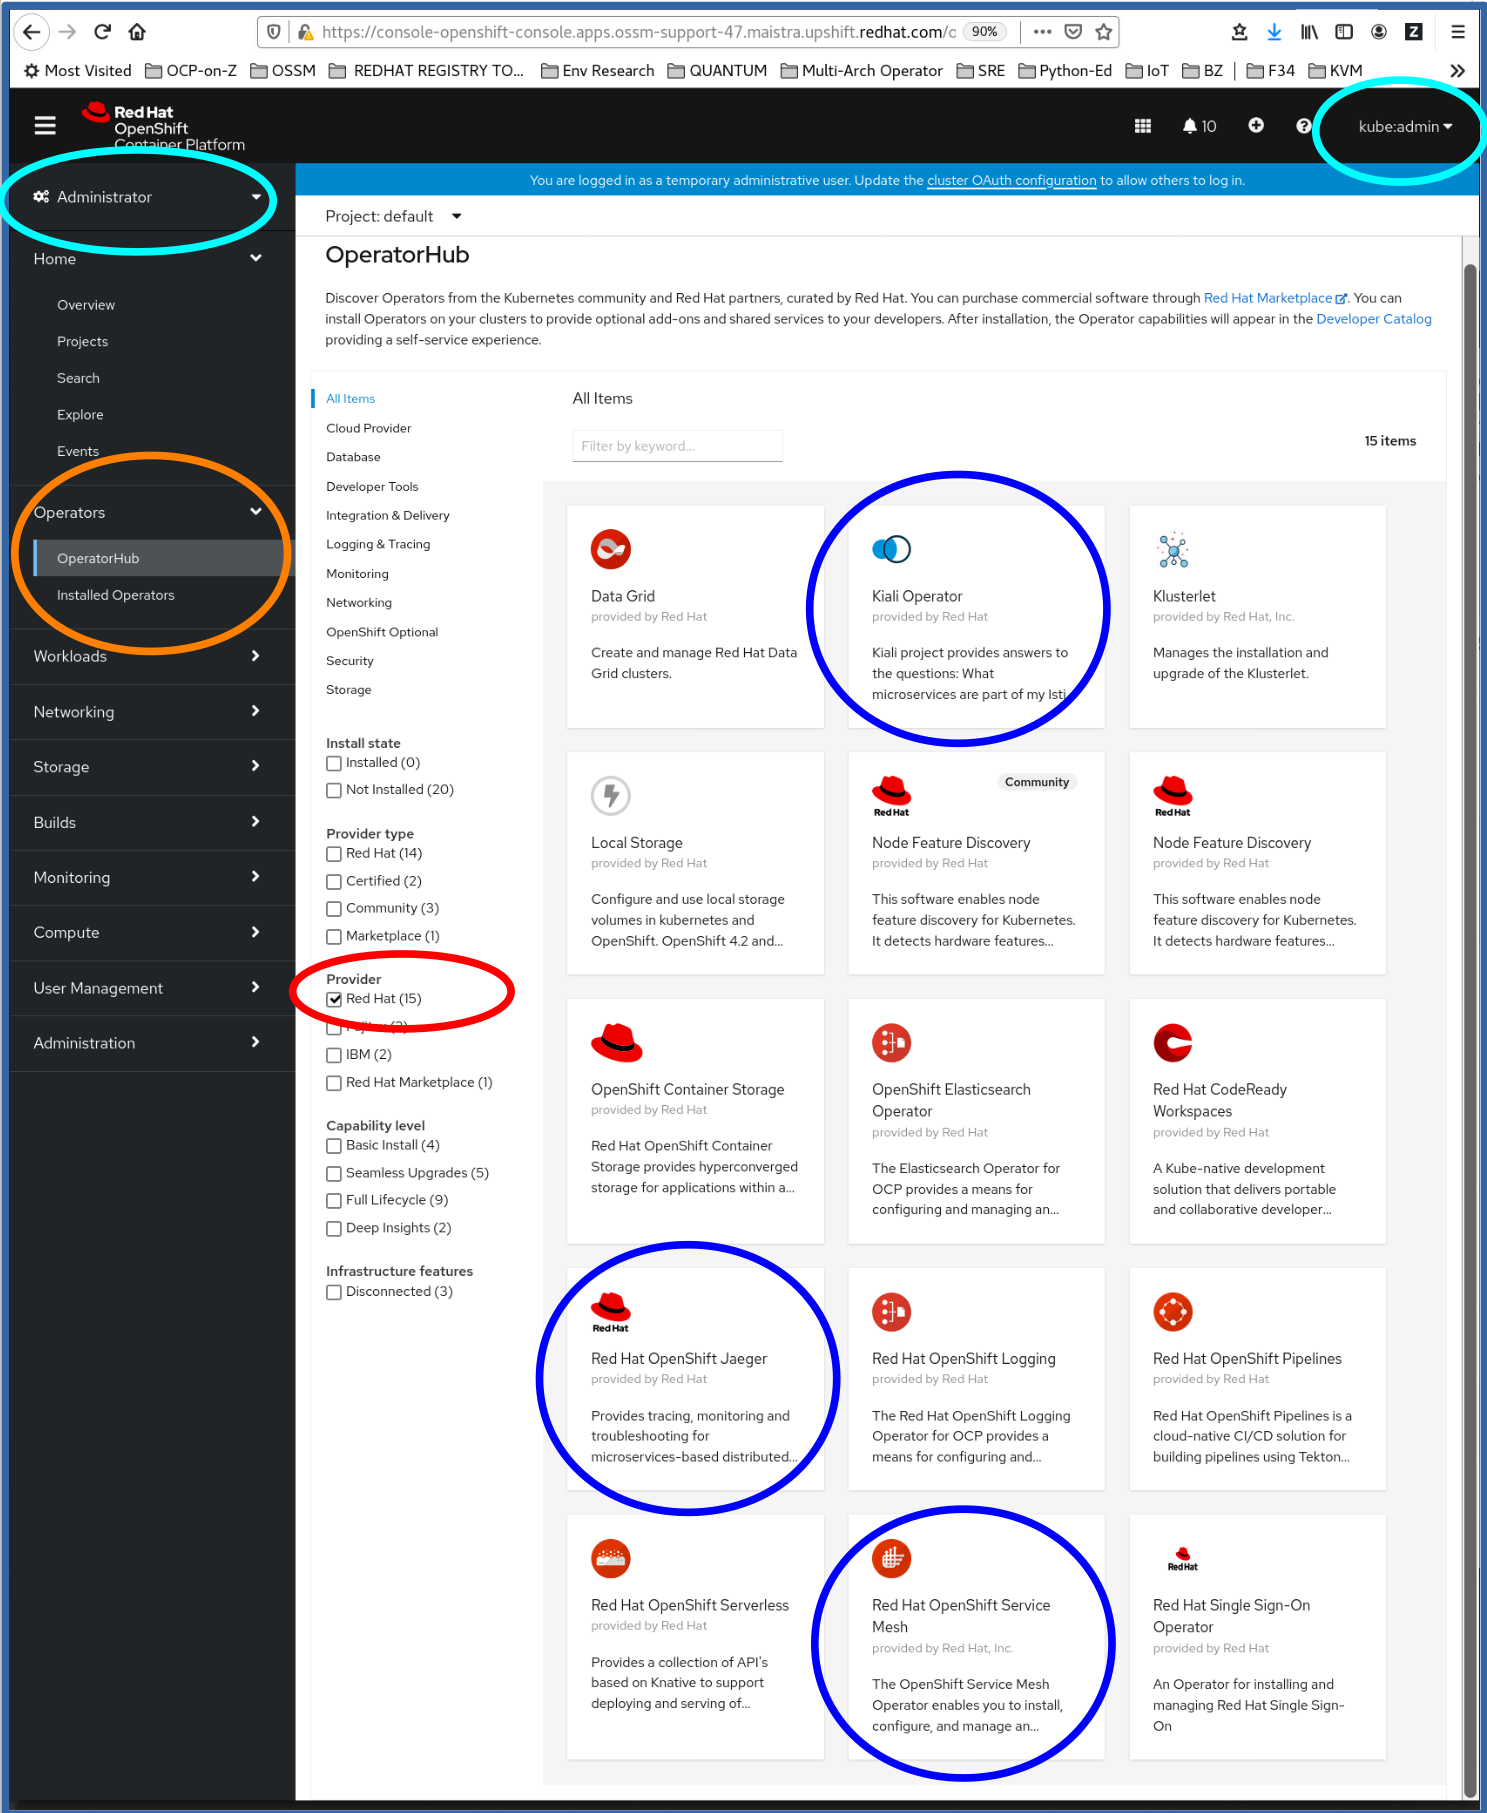
We’re going to install them in this order:
- Red Hat Distributed Tracing Platform (based on Jaeger)
- Kiali
- Service Mesh
This is because Service Mesh is dependent on both Red Hat Distributed Tracing Platform (based on Jaeger) and Kiali.
Install Red Hat Distributed Tracing Platform (based on Jaeger)
For this step, we’ll follow the official documentation which has a wealth of other information. Here, I’m cherry-picking only what you need to get started, and annotate the official documentation with screen shots. The steps in italics are quoted directly from the documentation for OCP v4.7.
- Log in to the OpenShift Container Platform web console as a user with the
cluster-admin role.
2. Navigate to Operators → OperatorHub.
3. Type Red Hat Distributed Tracing Platform (based on Jaeger) into the filter to locate the Jaeger Operator. (You can also filter by Provider: Red Hat to make sure you get the supported version here.)
4. Click the Red Hat Distributed Tracing Platform (based on Jaeger) Operator provided by Red Hat to display information about the Operator.
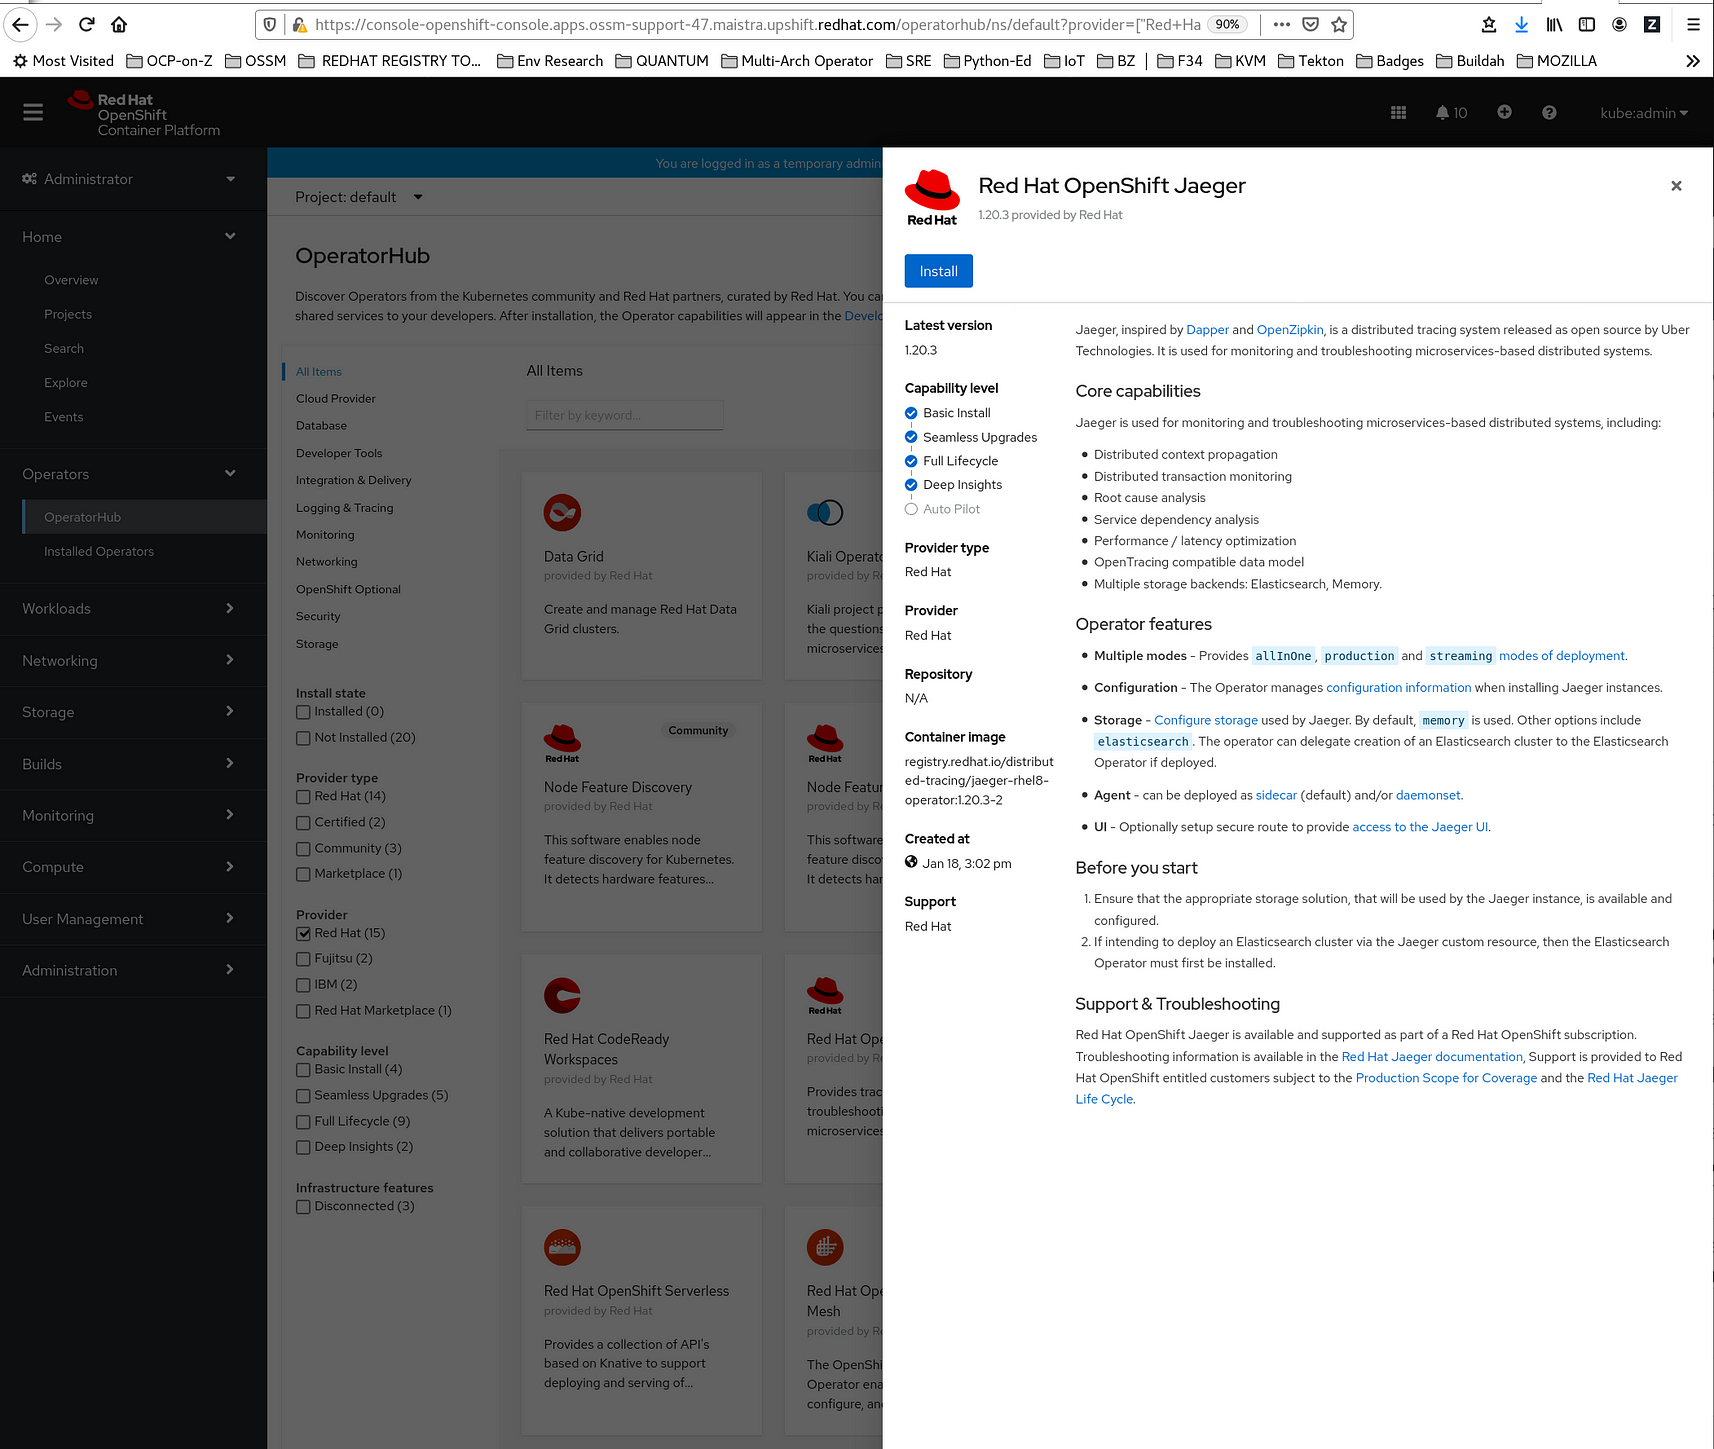
5. Click Install.
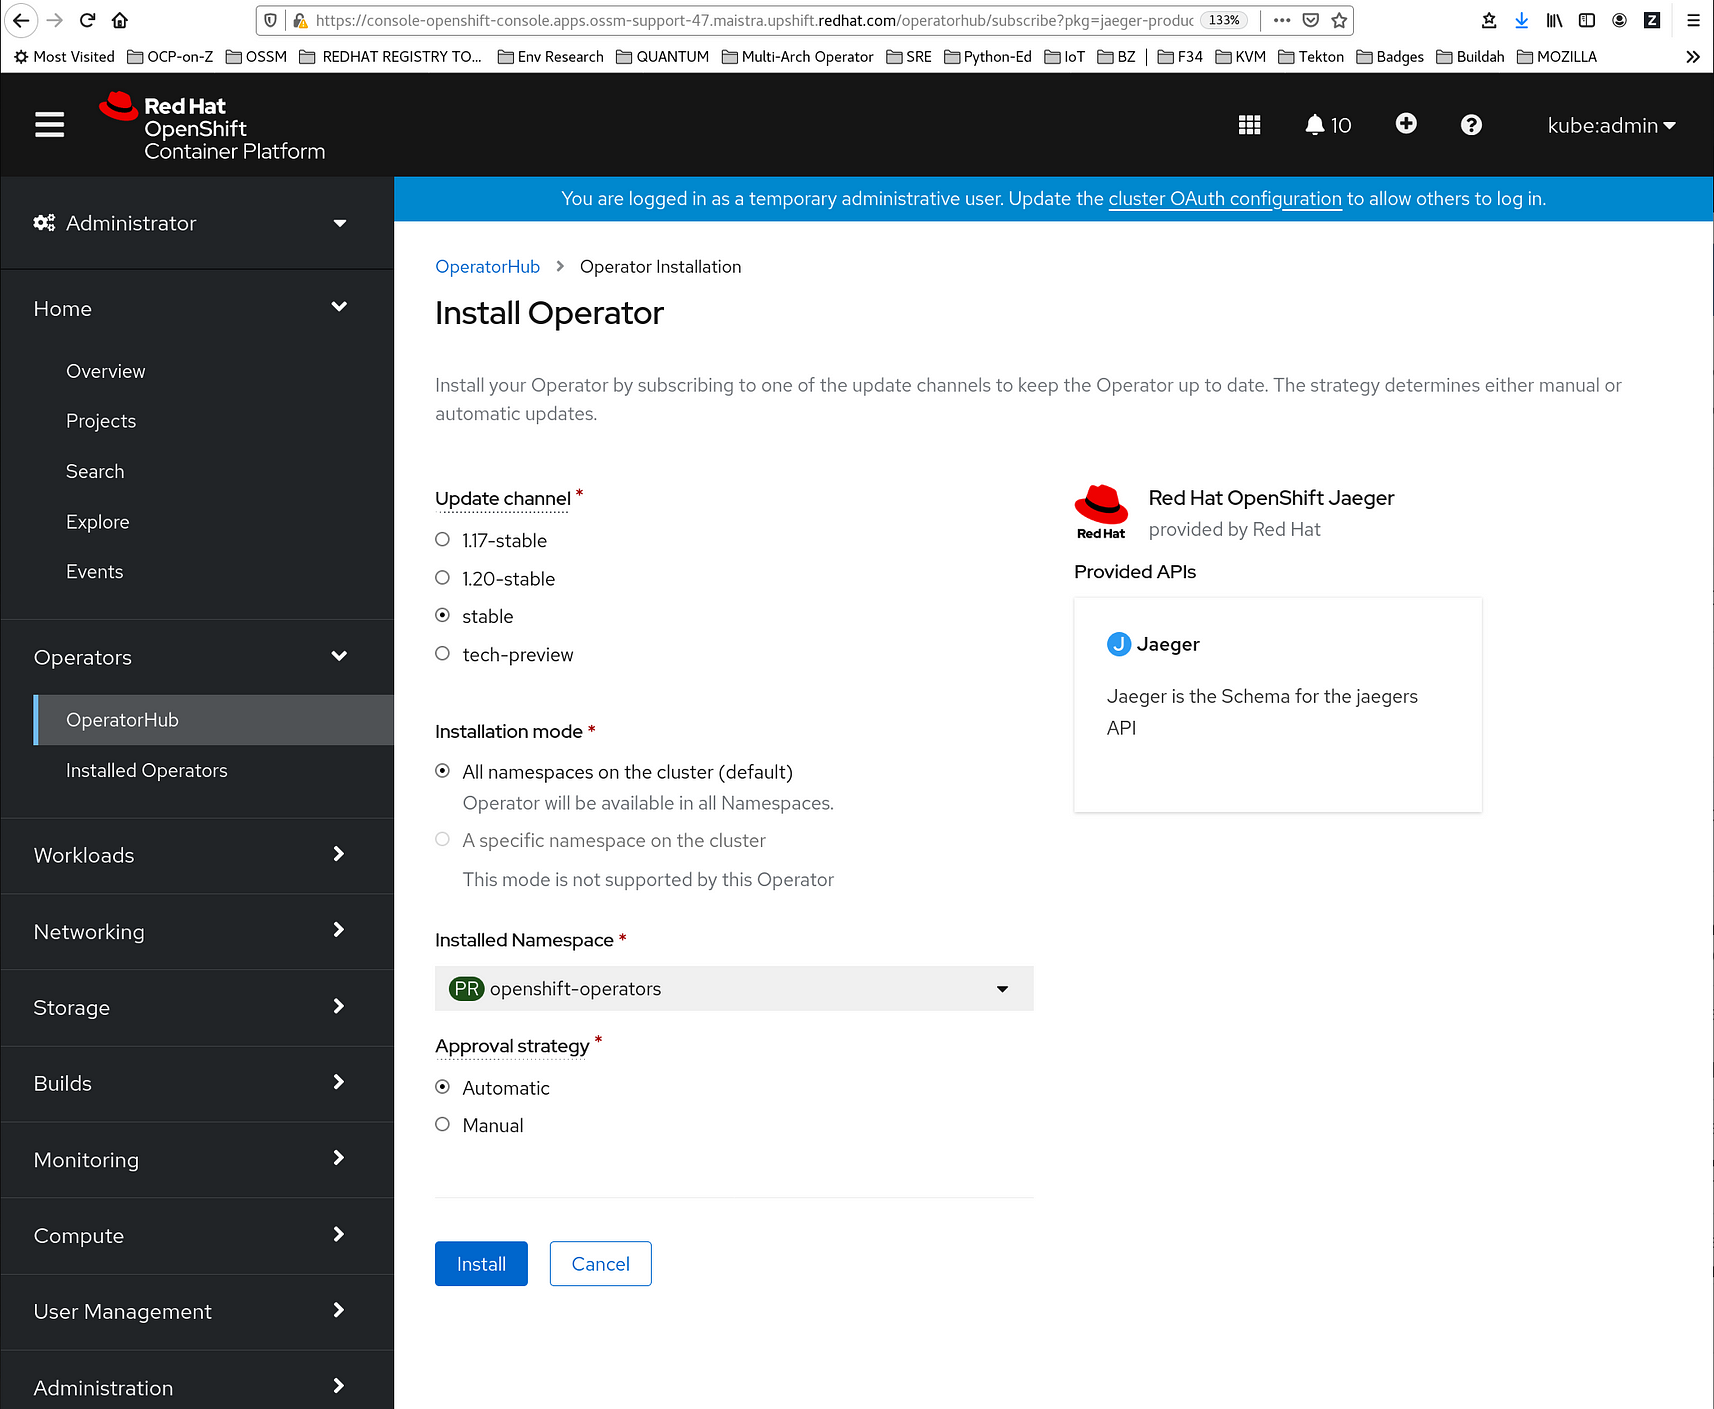
6. On the Install Operator page, select the stable Update Channel. This will automatically update Red Hat Distributed Tracing Platform (based on Jaeger) as new versions are released. If you select a maintenance channel, for example, 1.17-stable, you will receive bug fixes and security patches for the length of the support cycle for that version.
7. Select All namespaces on the cluster (default). This installs the Operator in the default openshift-operators project and makes the Operator available to all projects in the cluster.
- Select an Approval Strategy. You can select Automatic or Manual updates. If you choose Automatic updates for an installed Operator, when a new version of that Operator is available, the Operator Lifecycle Manager (OLM) automatically upgrades the running instance of your Operator without human intervention. If you select Manual updates, when a newer version of an Operator is available, the OLM creates an update request. As a cluster administrator, you must then manually approve that update request to have the Operator updated to the new version.
If you’re going to be using this installation primarily for demonstration and educational purposes, choose Manual updates. This is so things don’t change out from under you. If you’re going to be using this installation in production and want to make sure to, for example, get CVE updates from Red Hat as soon as they’re available, you might prefer Automatic updates. In test, we use Automatic, because we want to see the effects of any updates right away.
8. Click Install.
This will bring up a page like this:
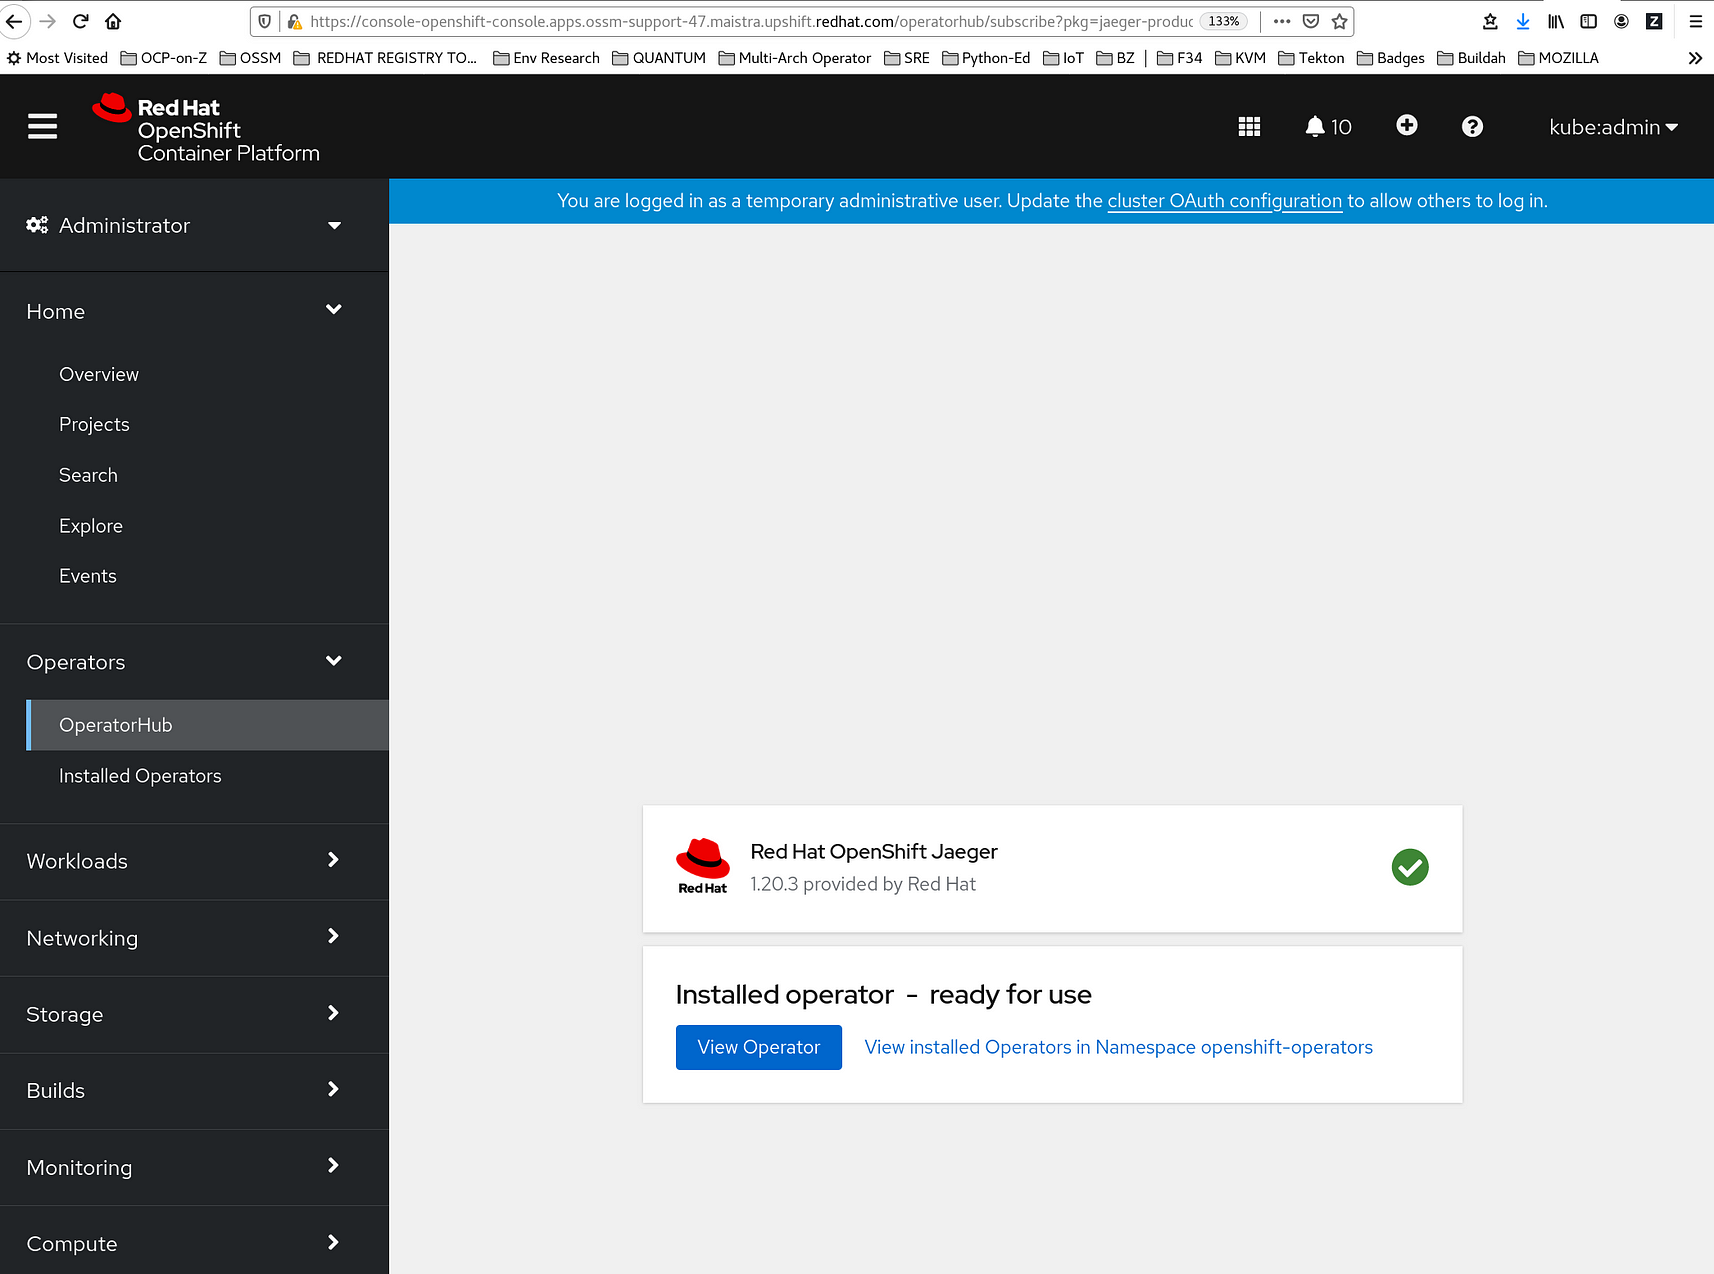
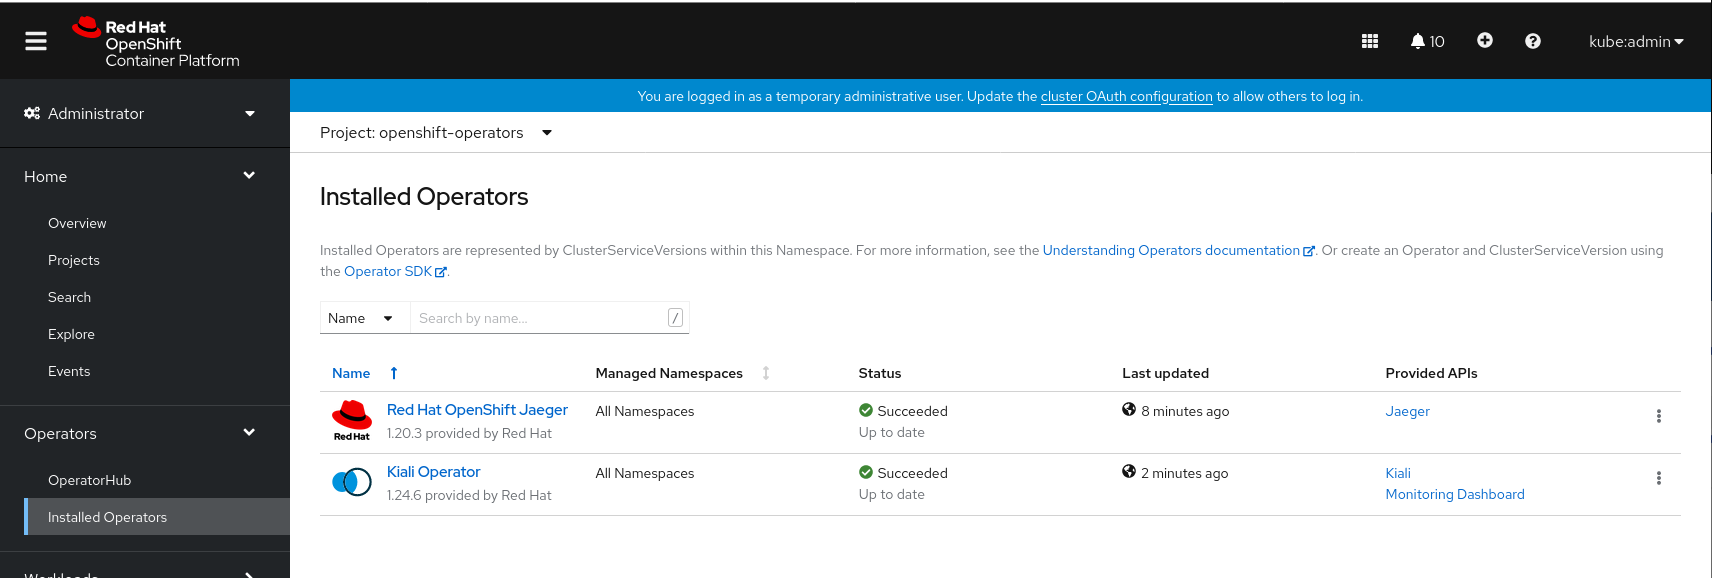
9. On the Subscription Overview page, select the openshift-operators project. Wait until you see that the Red Hat Distributed Tracing Platform (based on Jaeger) Operator shows a status of "InstallSucceeded" before continuing.
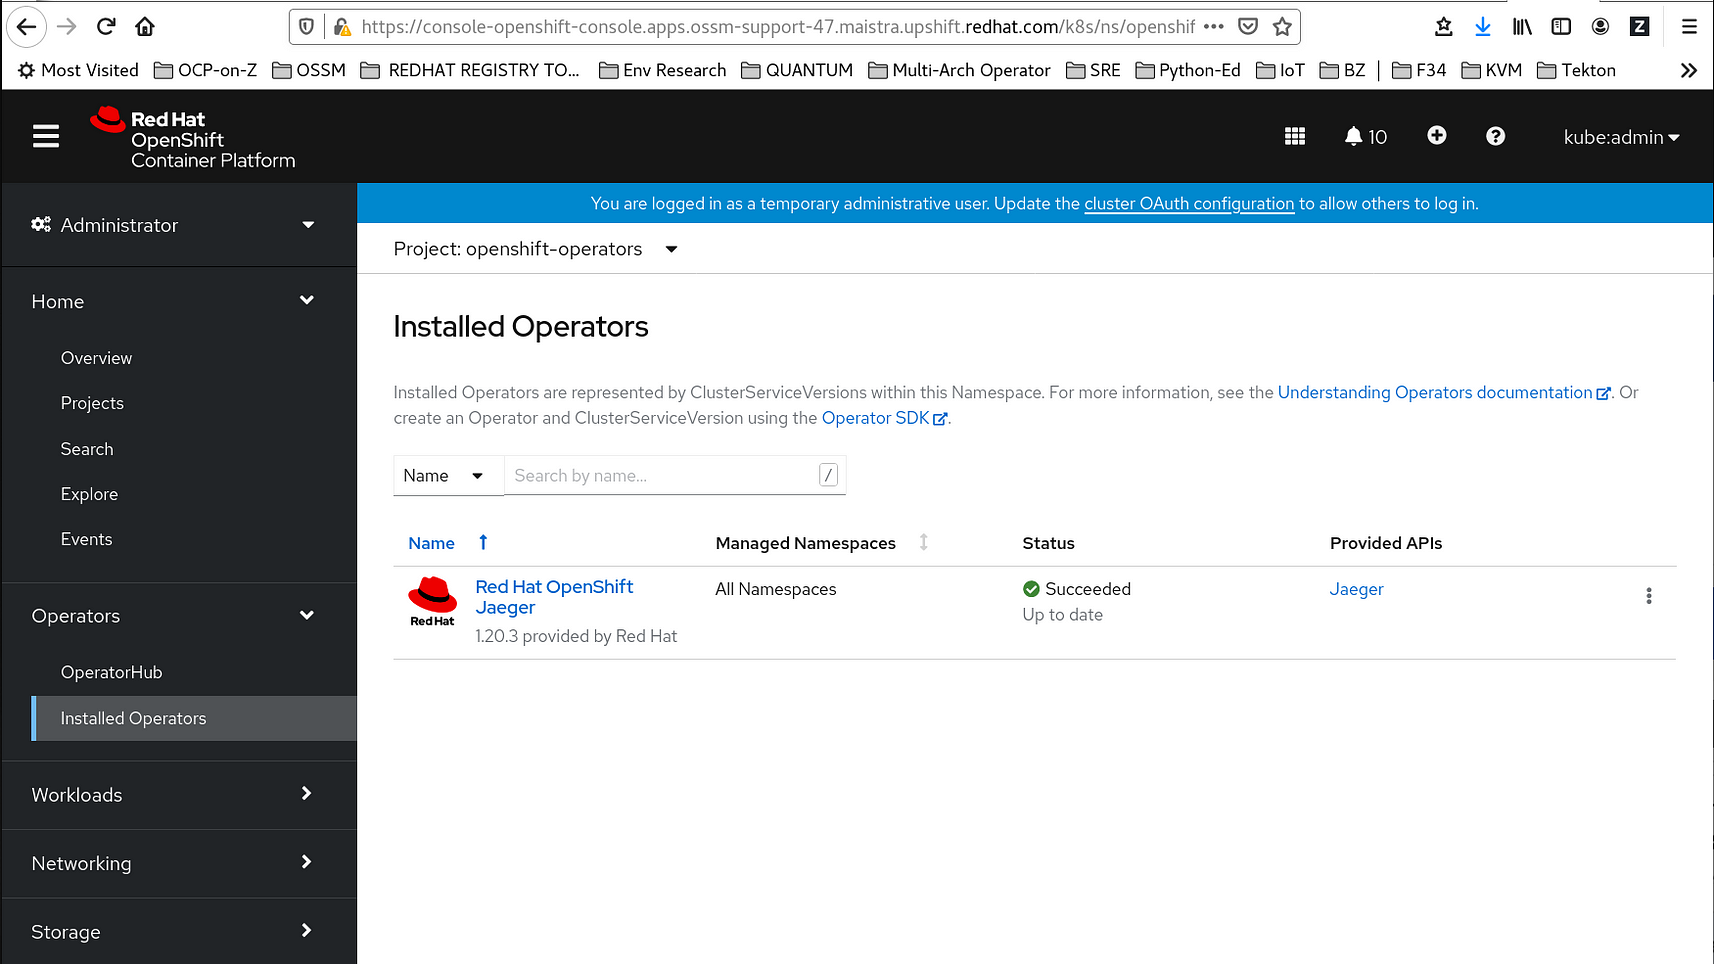
Et Voilà! The Red Hat Distributed Tracing Platform (based on Jaeger) Operator she is installed!
Install the Kiali Operator
Again, we’re going to use and quote the official documentation here in italics, annotated with screen shots.
- Log in to the OpenShift Container Platform web console.
2. Navigate to Operators → OperatorHub.
3. Type Kiali into the filter box to find the Kiali Operator. (You can also filter by Provider: Red Hat to make sure you get the supported version here.)
4. Click the Kiali Operator provided by Red Hat to display information about the Operator.
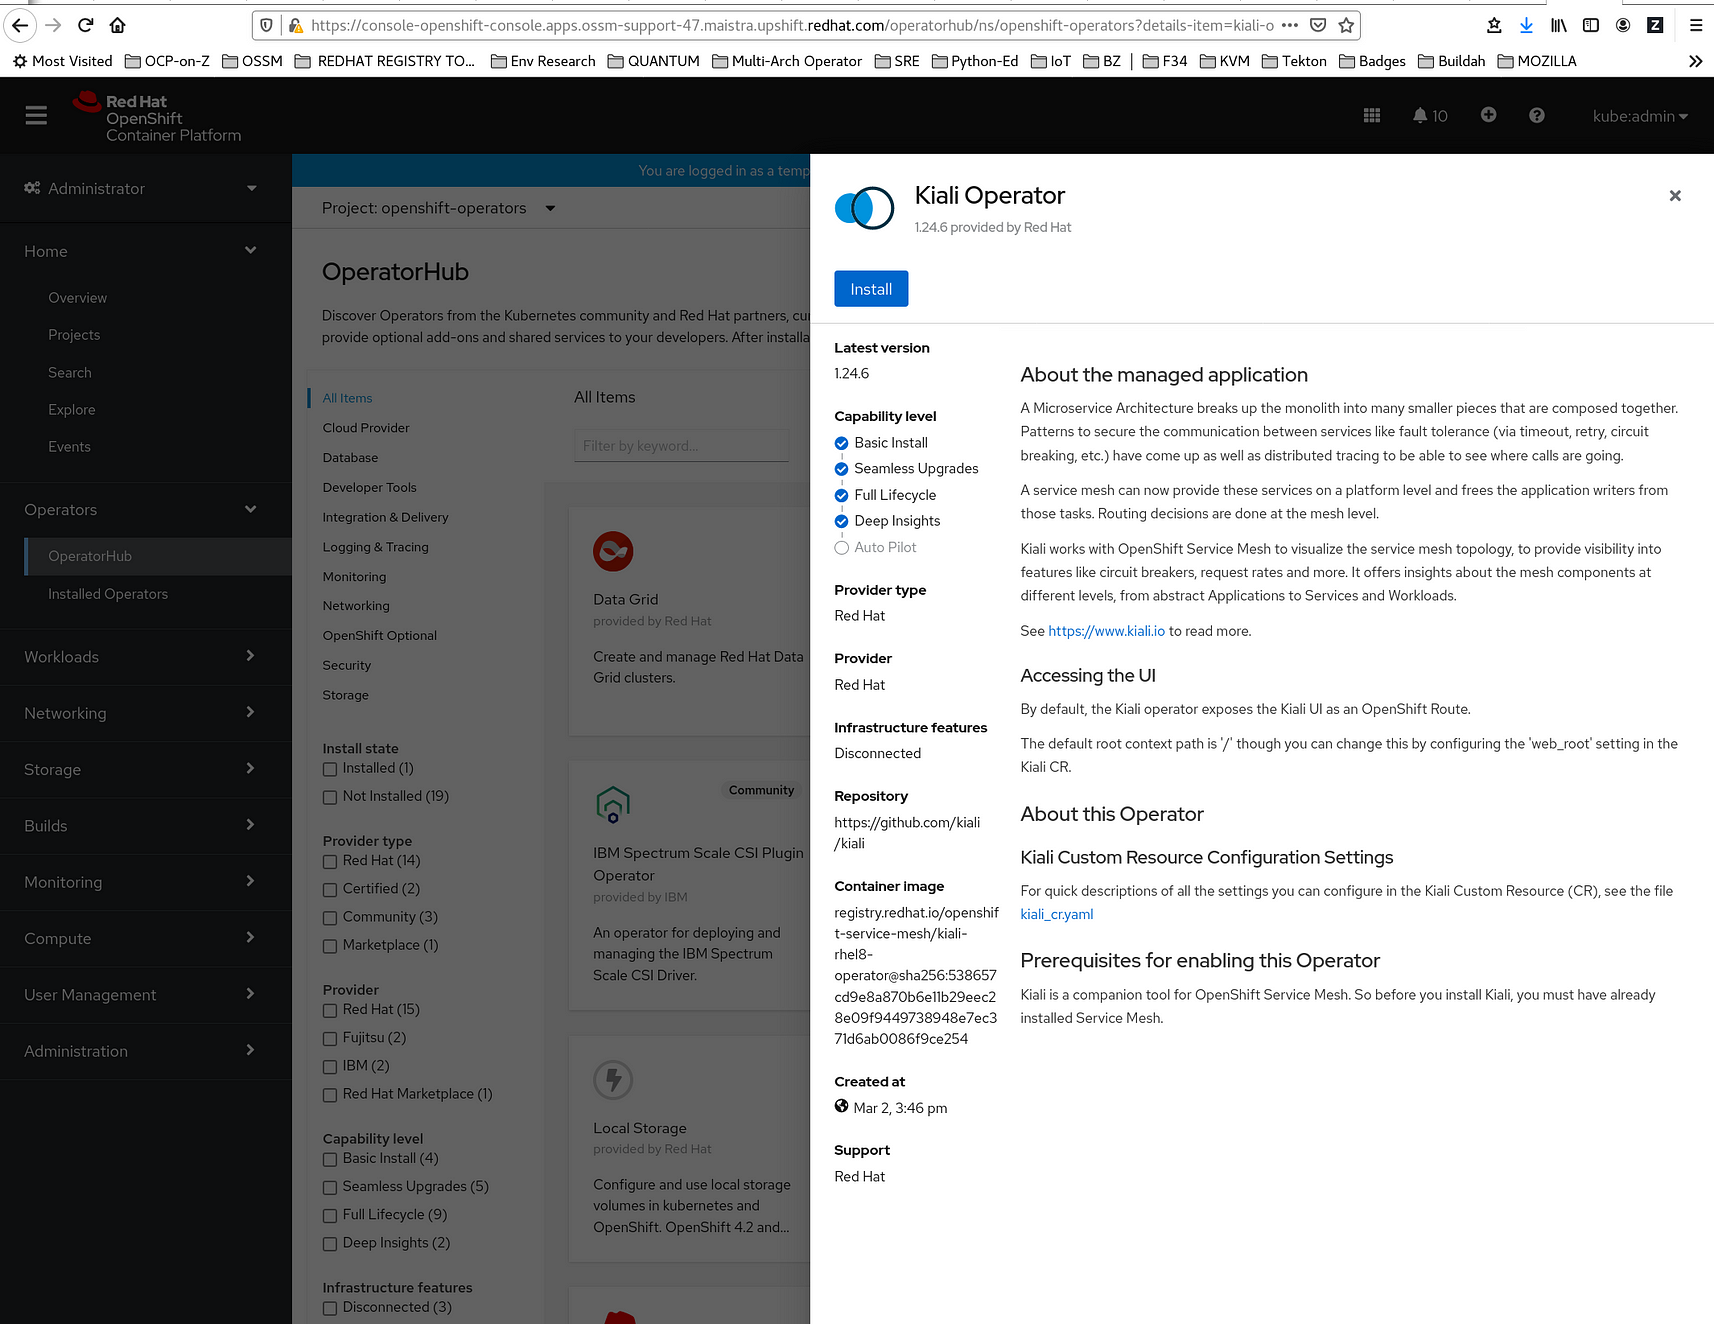
5. Click Install. This brings up the Operator Installation page:
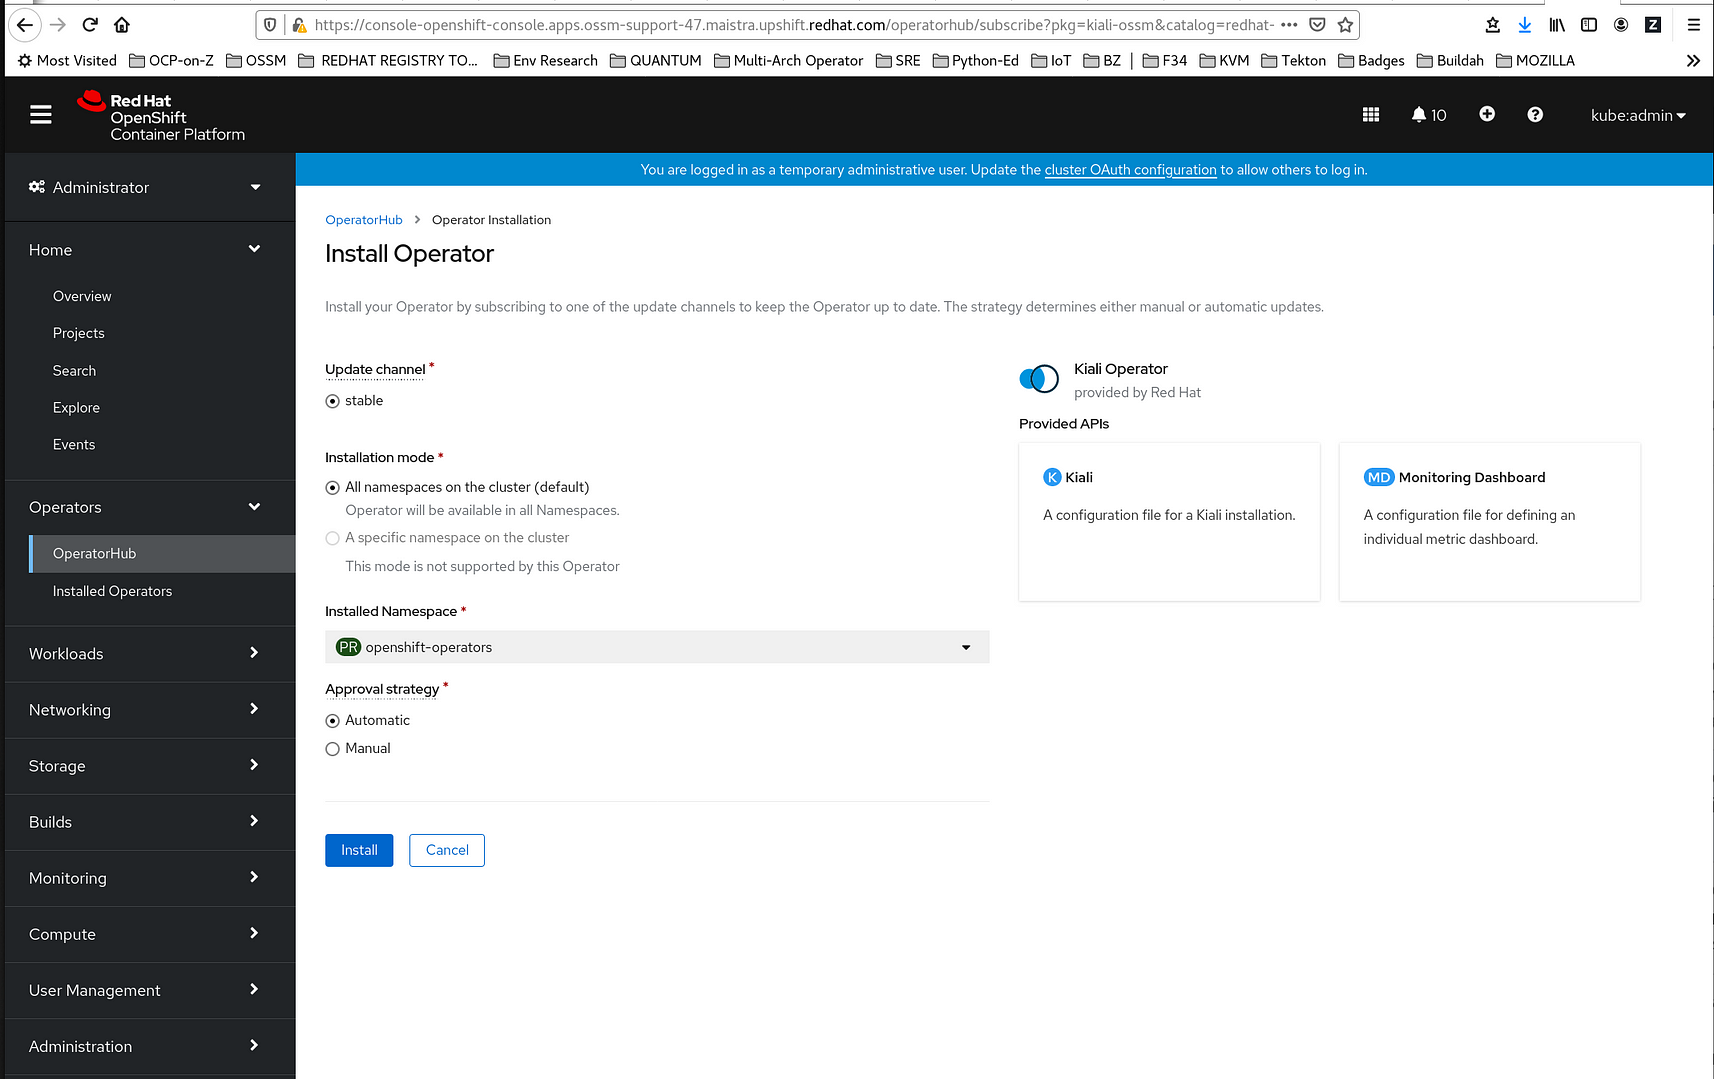
6. On the Operator Installation page, select the stable Update Channel.
7. Select All namespaces on the cluster (default). This installs the Operator in the default openshift-operators project and makes the Operator available to all projects in the cluster.
8. Select the Automatic Approval Strategy.
The Manual approval strategy requires a user with appropriate credentials to approve the Operator install and subscription process.
9. Click Install. This brings up a page like this:
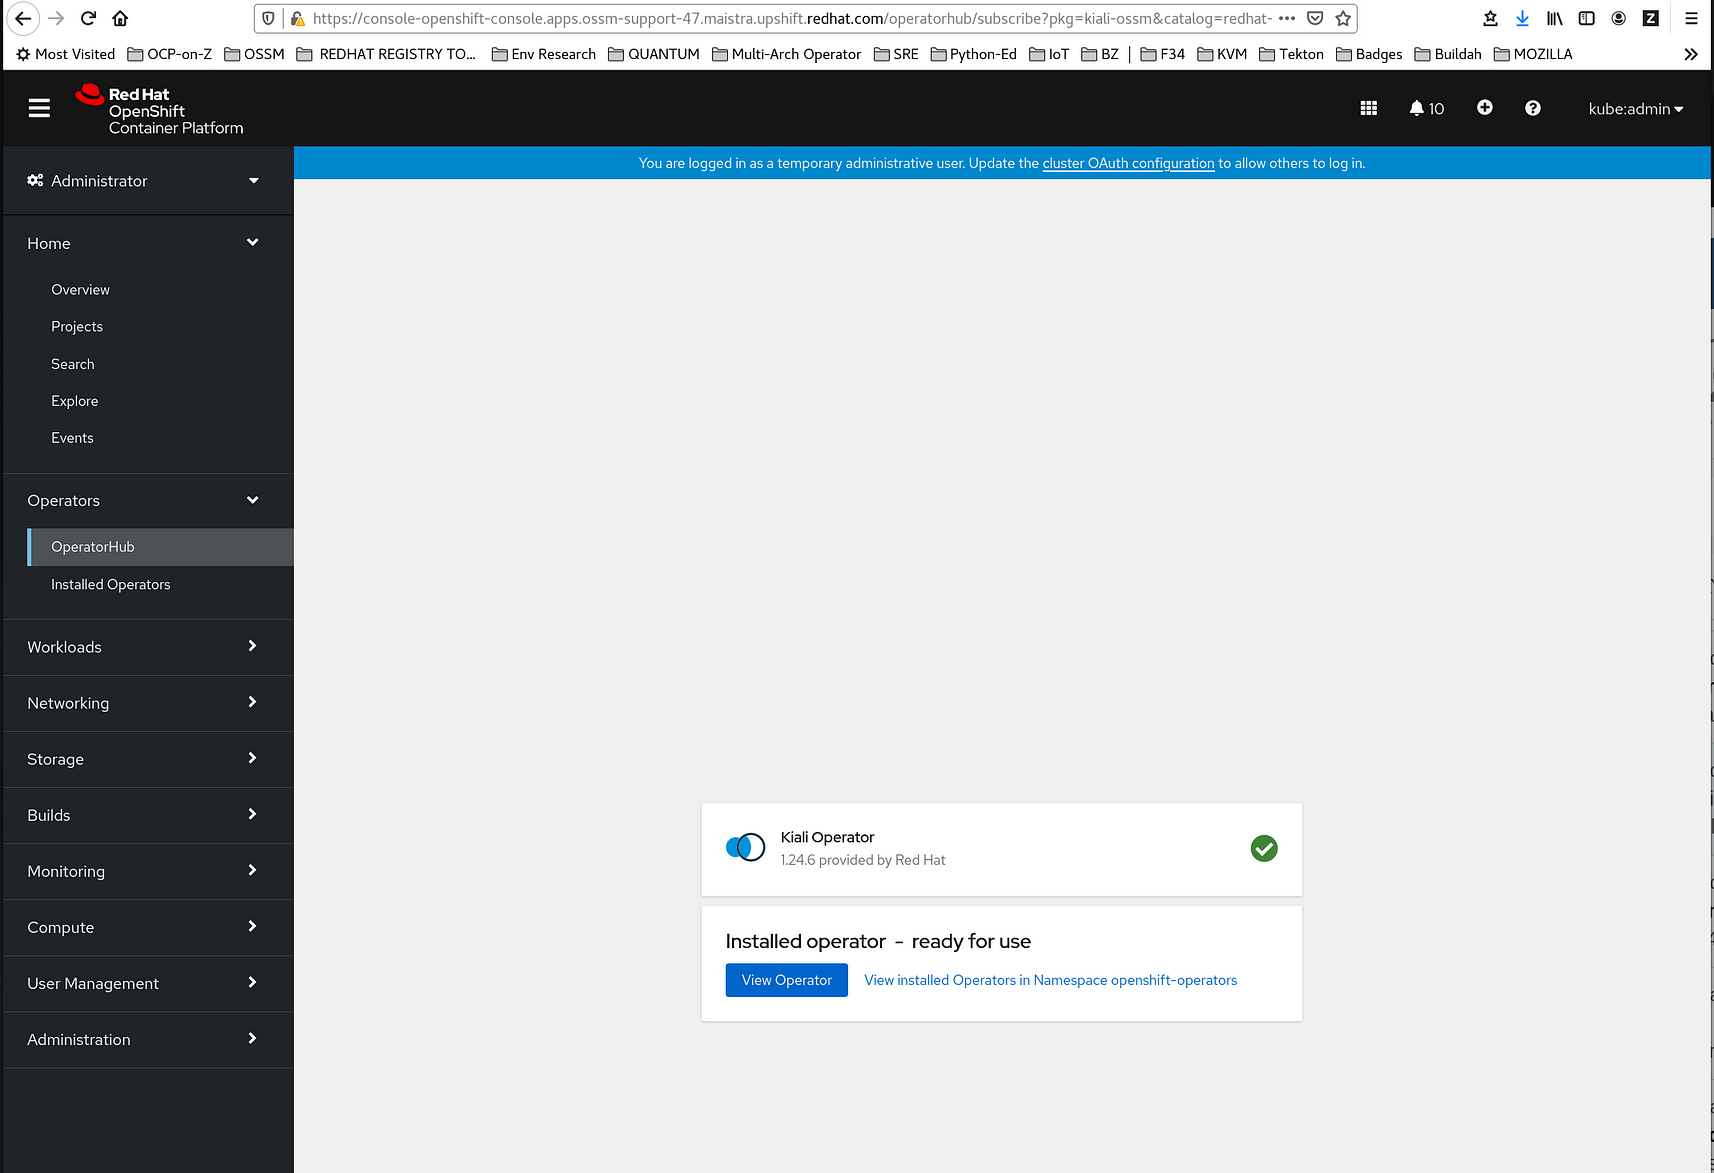
10. The Installed Operators page displays the Kiali Operator’s installation progress.
Et Voilà! The Kiali Operator she is installed. NOW you’re ready to install and configure the Service Mesh Operator.
Install The Service Mesh Operator
Again again, we’re going to use and quote the official documentation here in italics, annotated with screen shots.
- Log in to the OpenShift Container Platform web console.
- Navigate to Operators → OperatorHub.
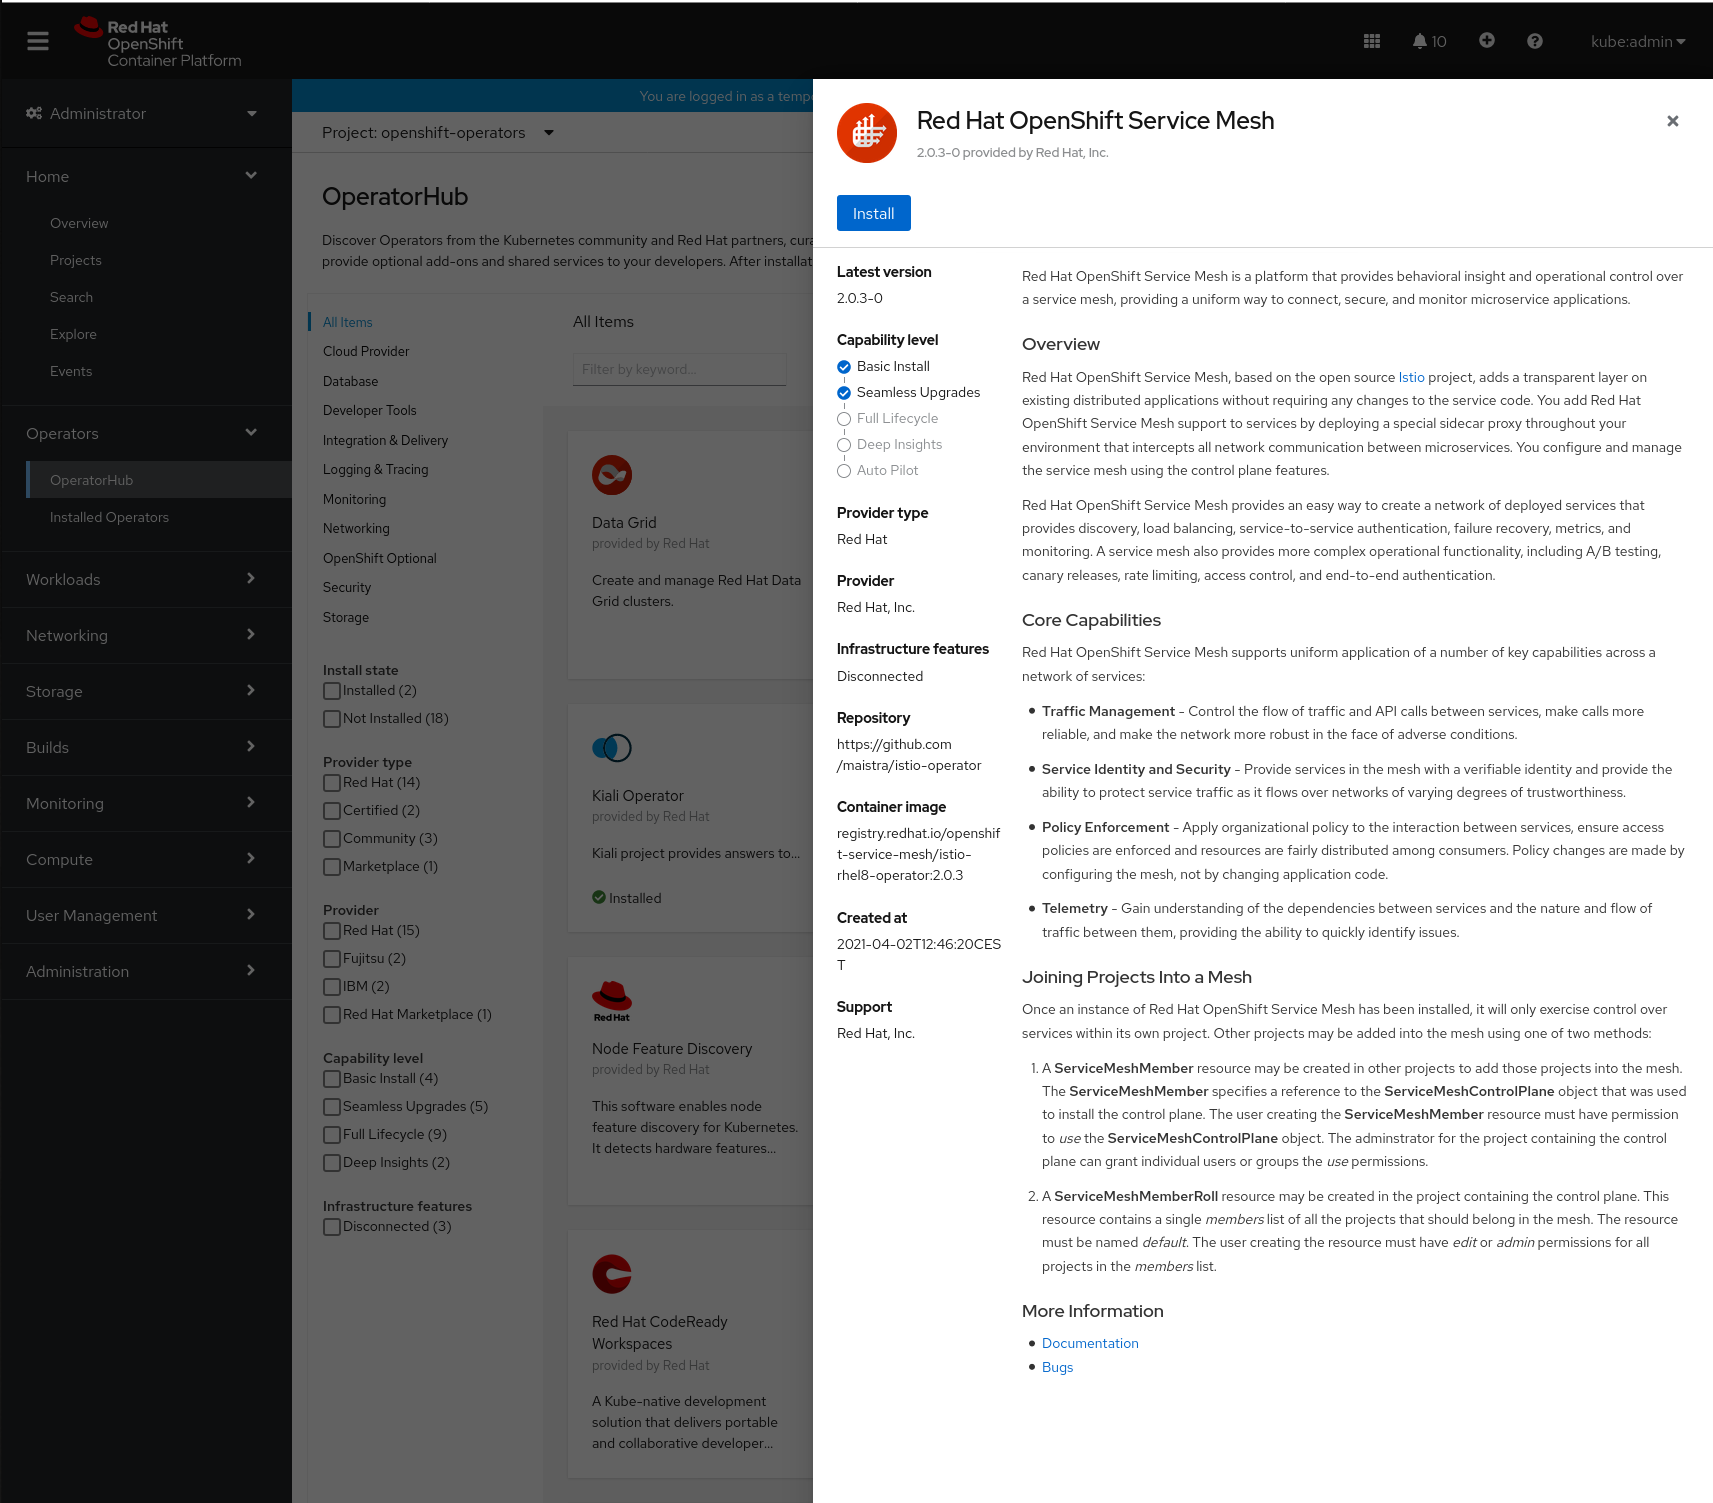
- Type Red Hat OpenShift Service Mesh into the filter box to find the Red Hat OpenShift Service Mesh Operator.
- Click the Red Hat OpenShift Service Mesh Operator to display information about the Operator.
5. Click Install.
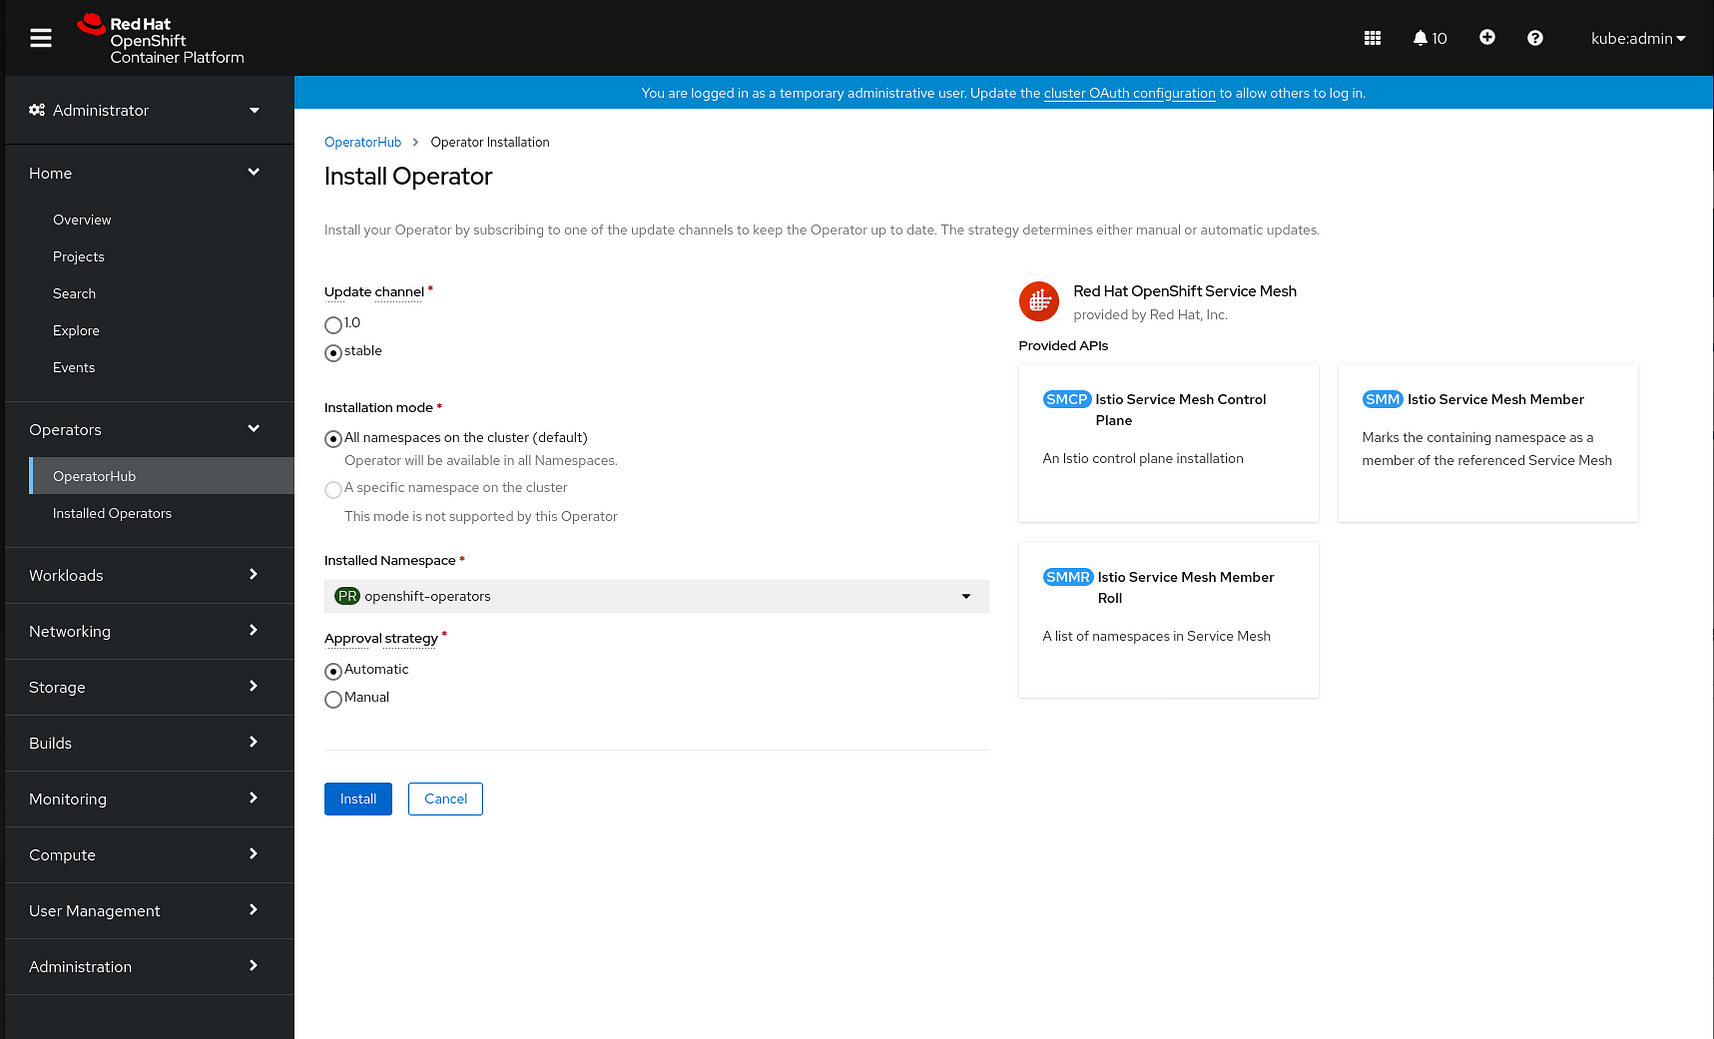
6. On the Operator Installation page, select the stable Update Channel.
7. In the Installation Mode section, select All namespaces on the cluster (default). This installs the Operator in the default openshift-operators project and makes the Operator available to all projects in the cluster.
8. Select the Automatic Approval Strategy.
- The Manual approval strategy requires a user with appropriate credentials to approve the Operator install and subscription process.
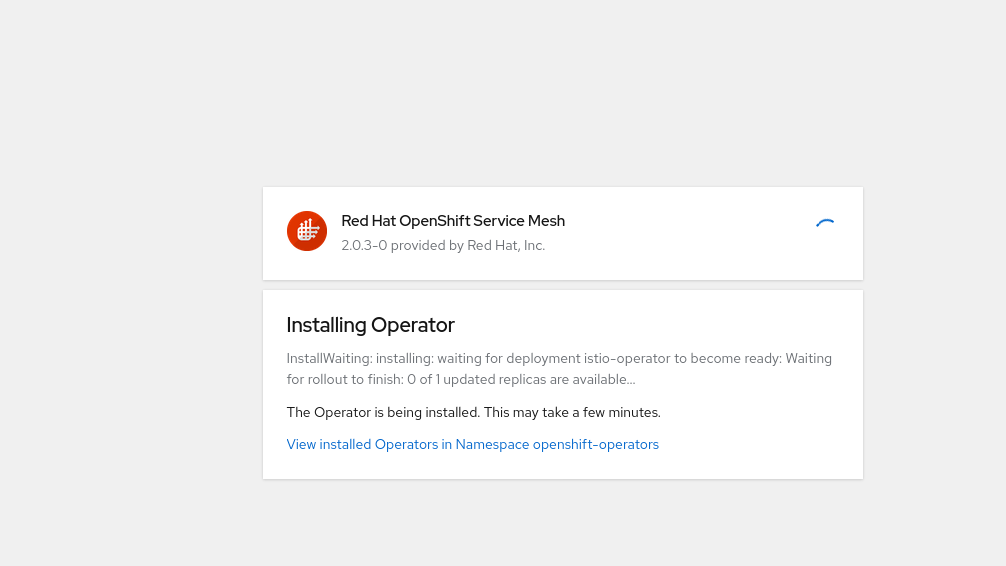
9. Click Install.
You might have to wait awhile for the images to be pulled down and installed:
But eventually you should see this when you navigate over to your Installed Operators page:
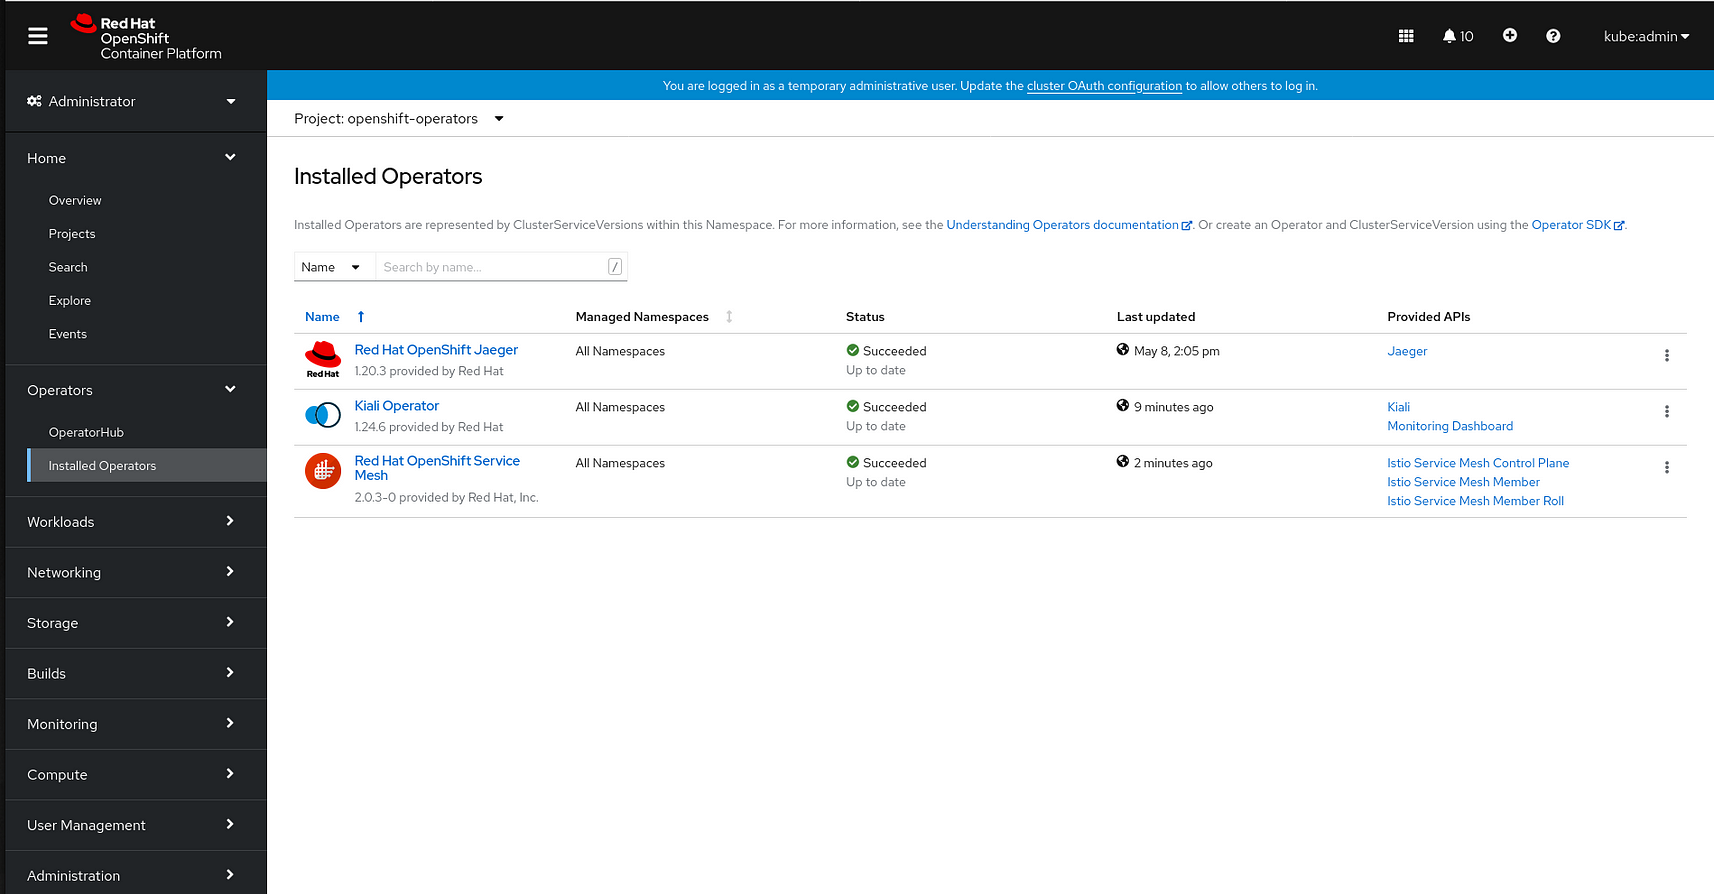
Now you’re ready to install the Service Mesh Control Plane ( smcp) and the Service Mesh Member Roll ( smmr )
Install The Service Mesh Control Plane
Before you can create the Service Mesh Control Plane (known as smcp in the operator’s Container Resource Definition aka crd) you will need to create a namespace called istio-system:
$ oc new-project istio-system
Now using project "istio-system" on server "https://api.<your server>:6443
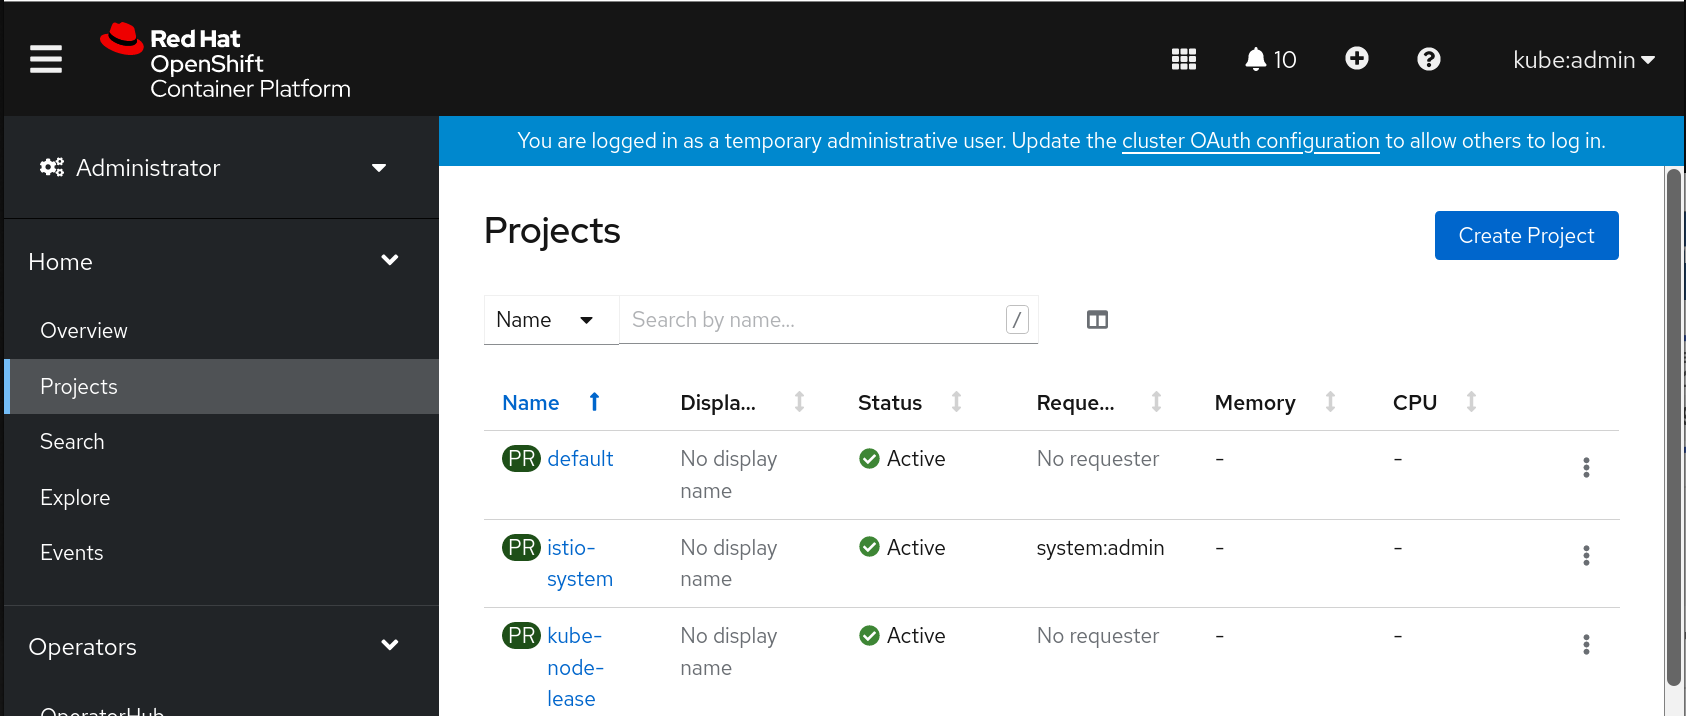
Or, alternatively, you can stay in the WebConsole, navigate to your projects page and click on create Project button:
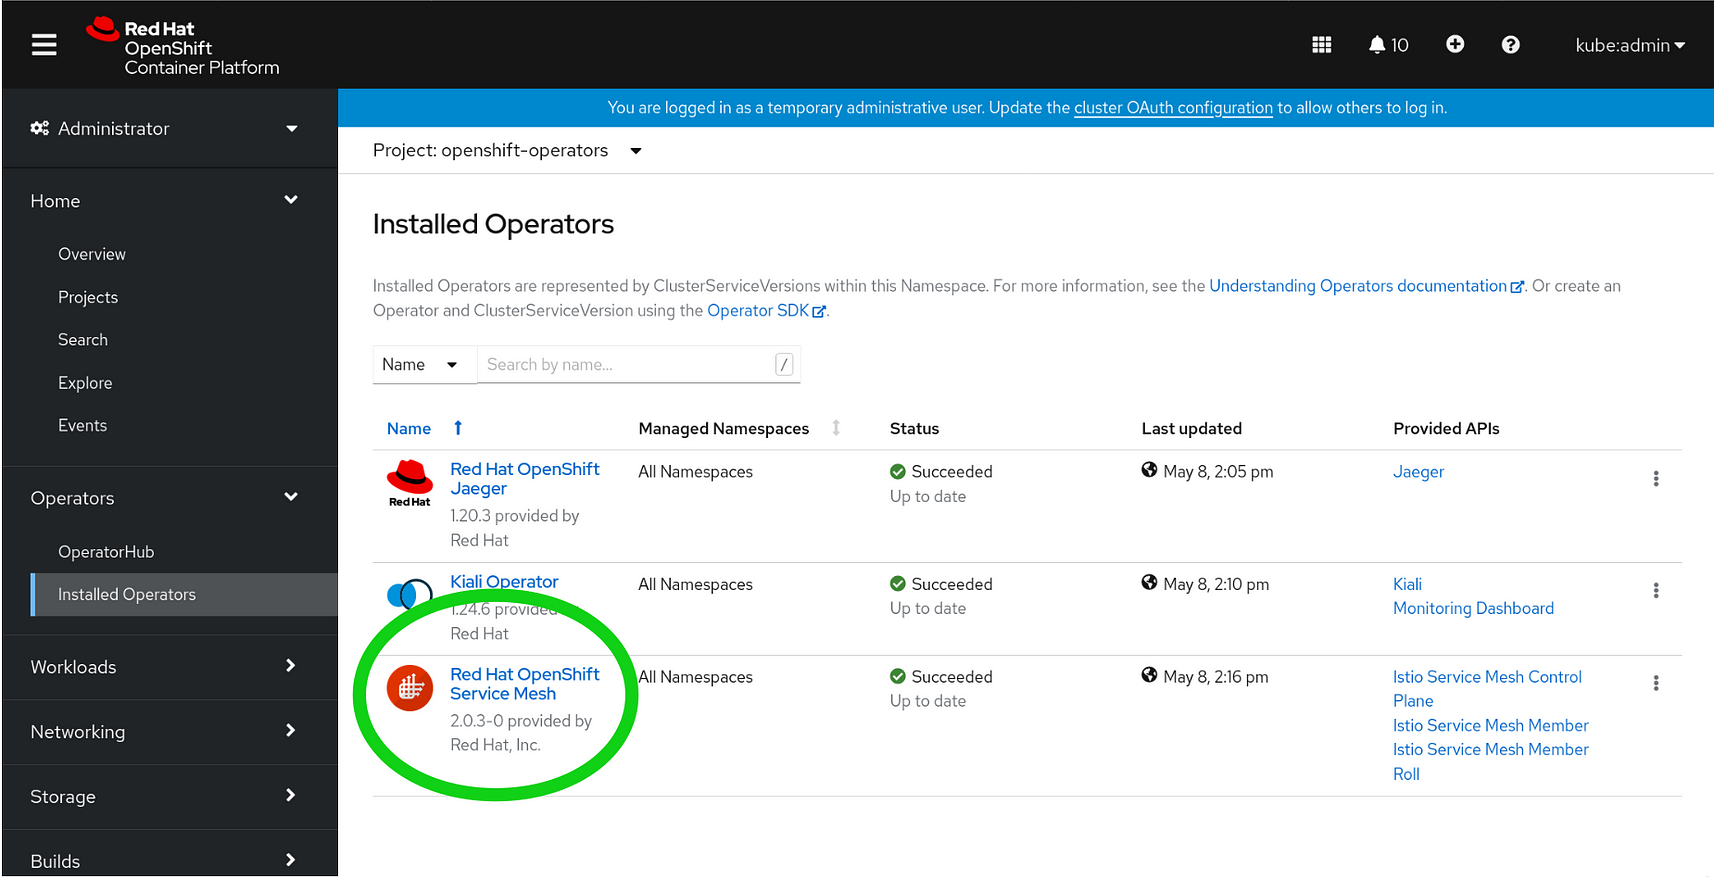
Now navigate back to your Installed Operators panel and click on the link circled in green here:
This takes you a page that gives you the opportunity to install the Service Mesh Control Plane. First set the project to istio-system:
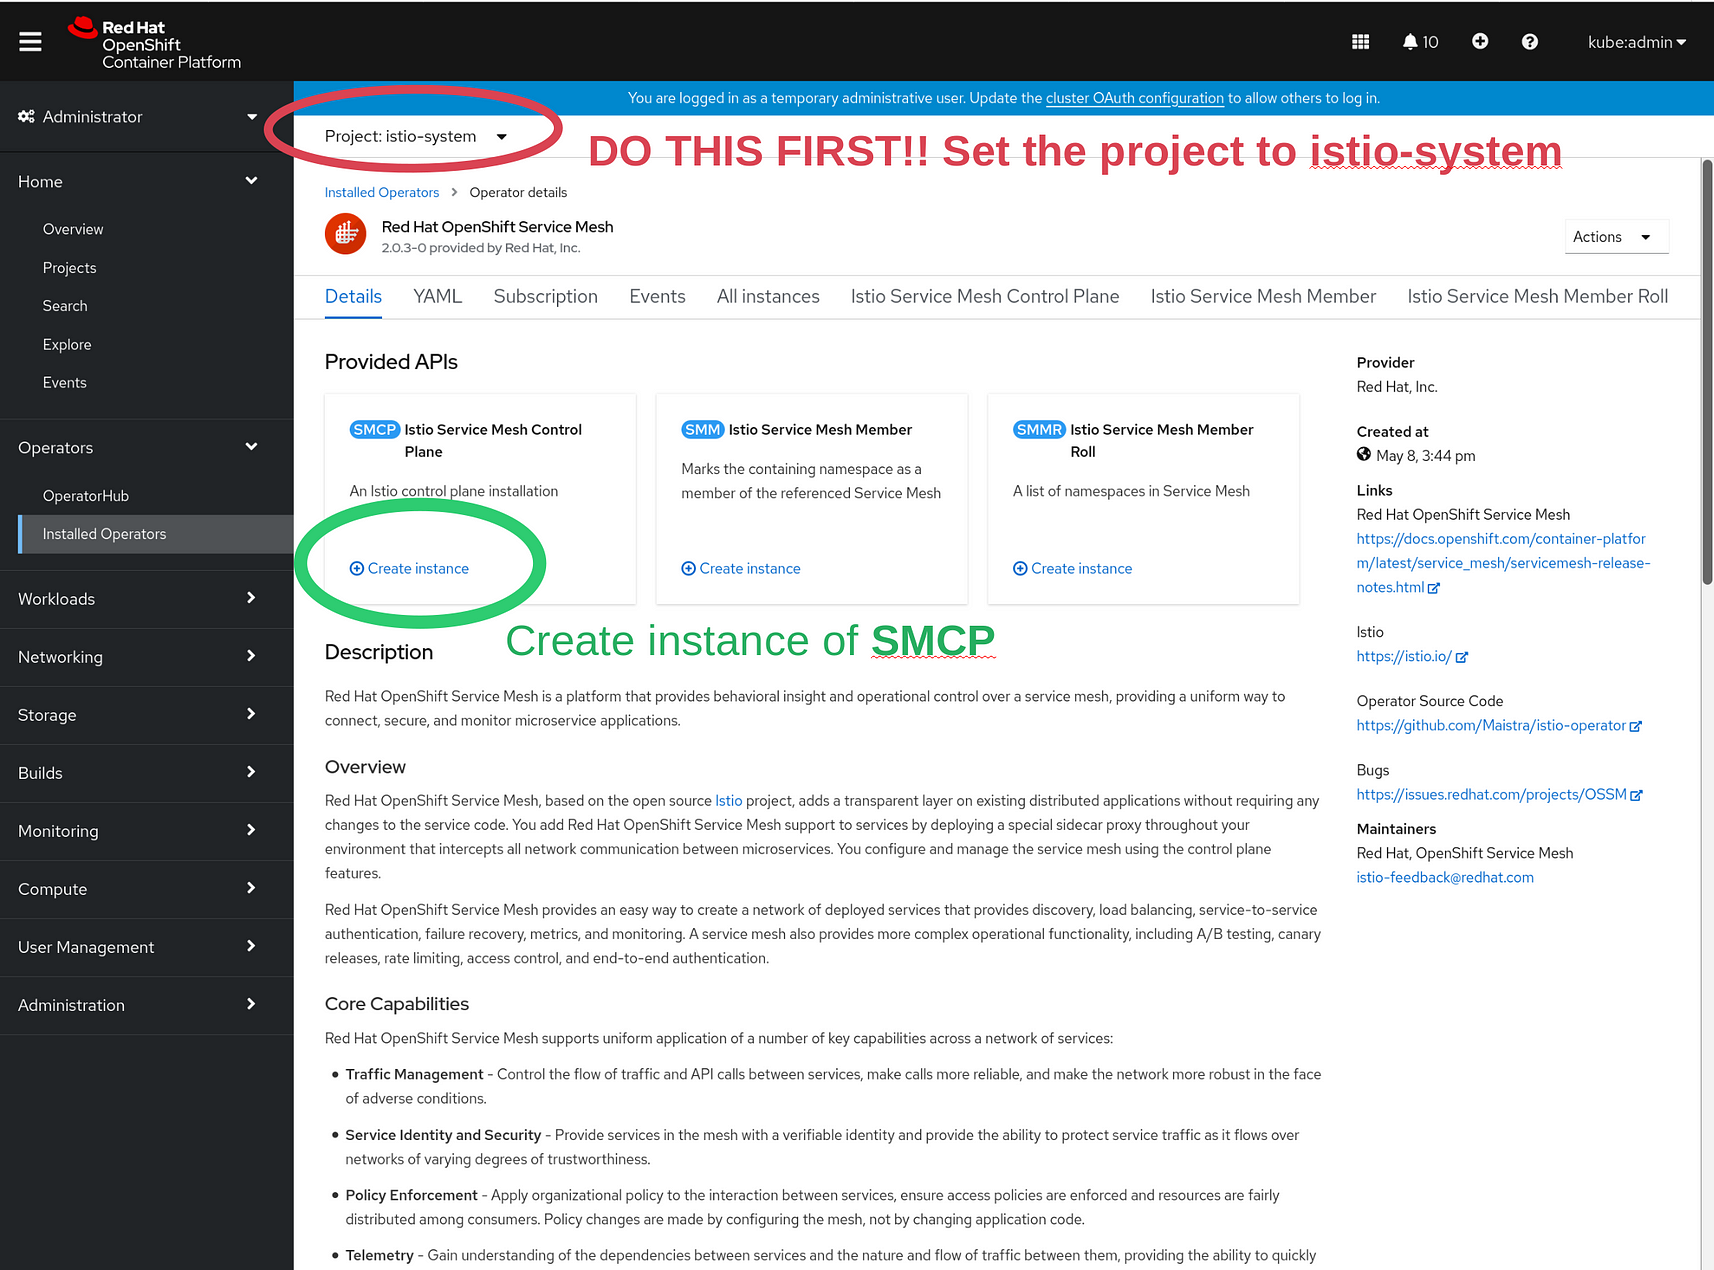
Then click on the button that says Create instance. This will take you to the SMCP configuration and creation page:
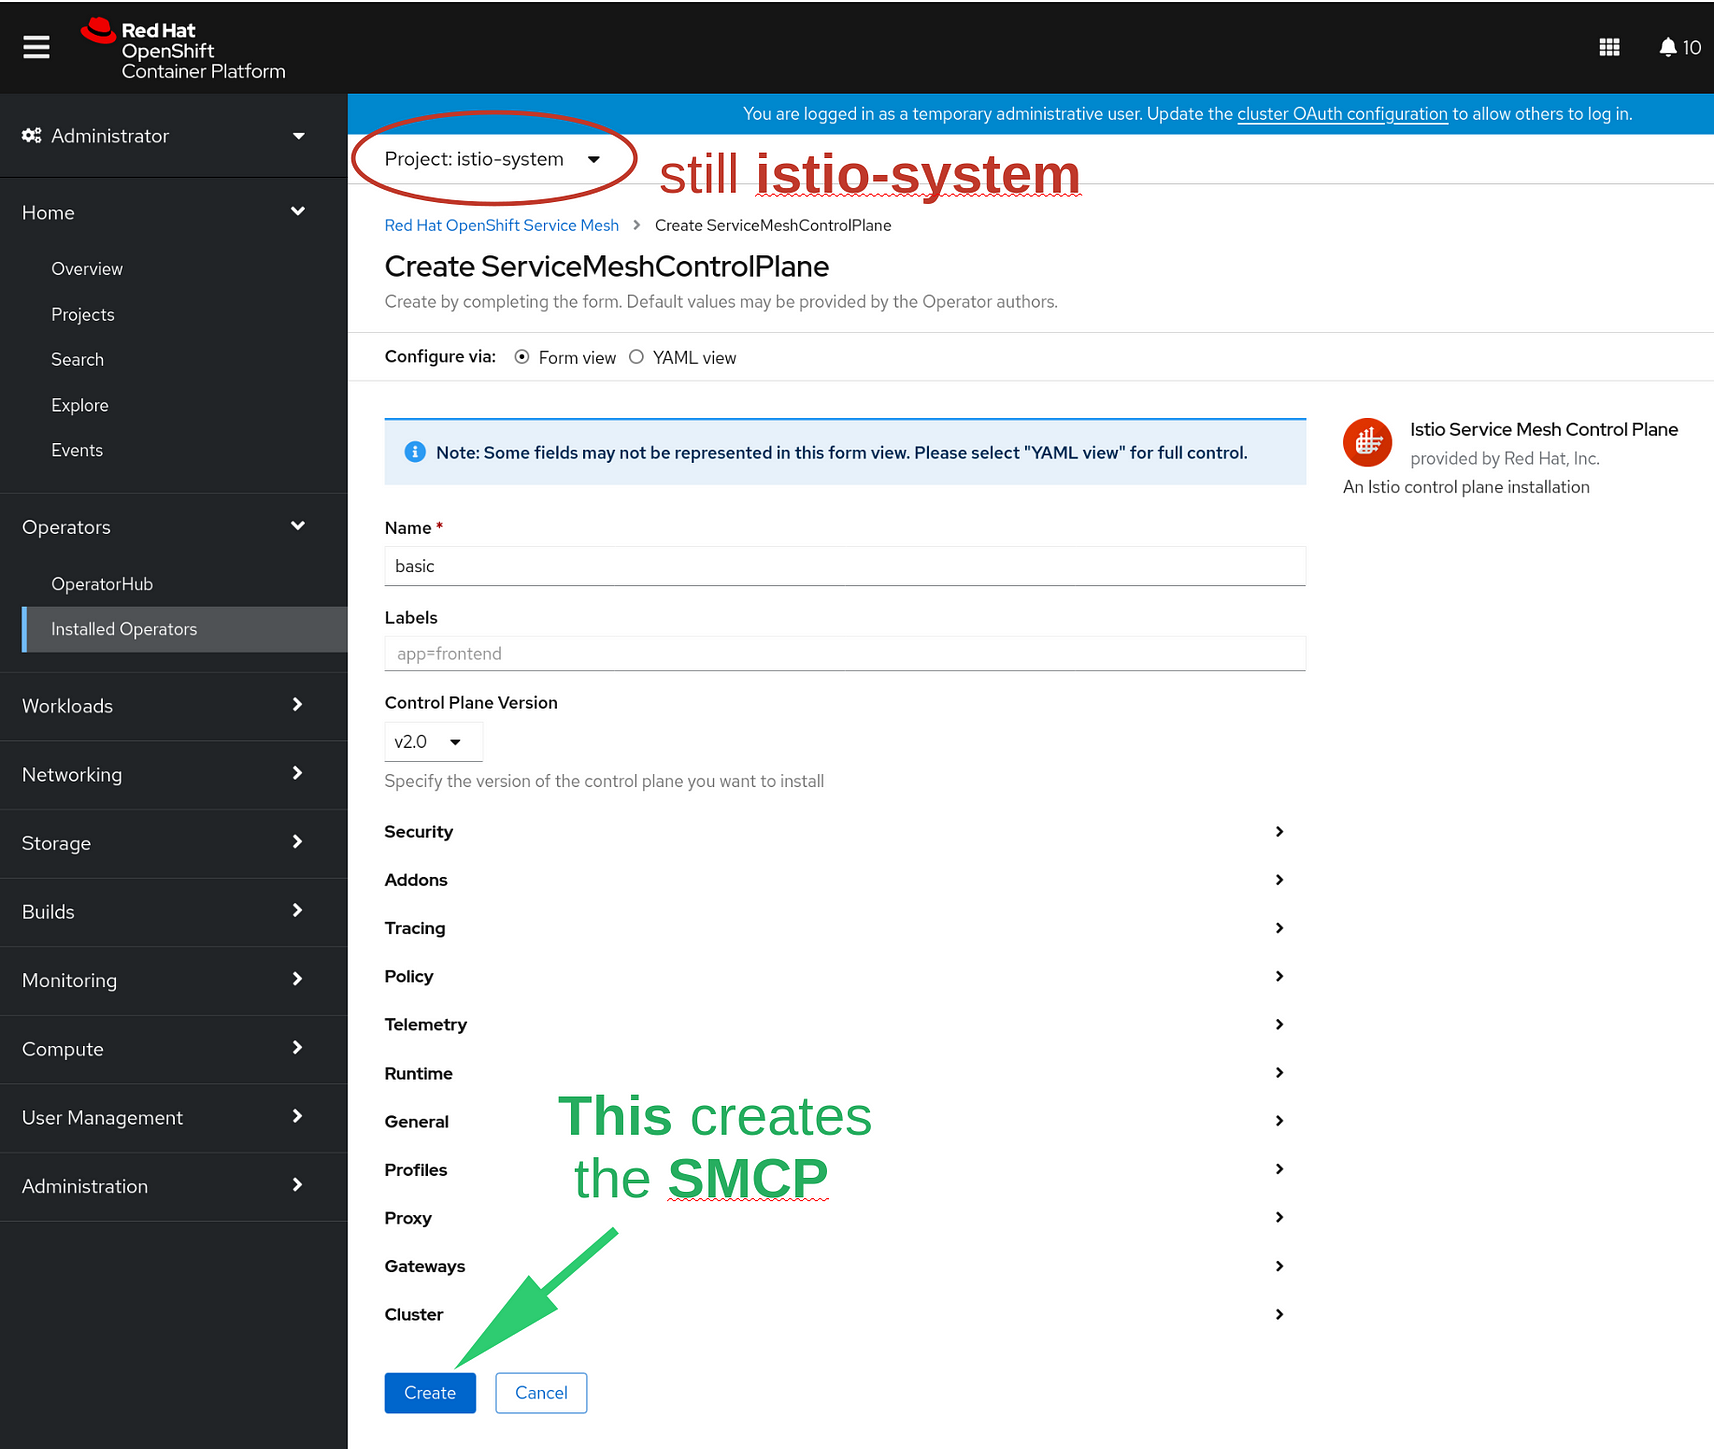 Note that ‘project’ namespace for SMCP is still istio-system
When you click the big blue Create button, it takes you to another page but there is something to watch out for here:
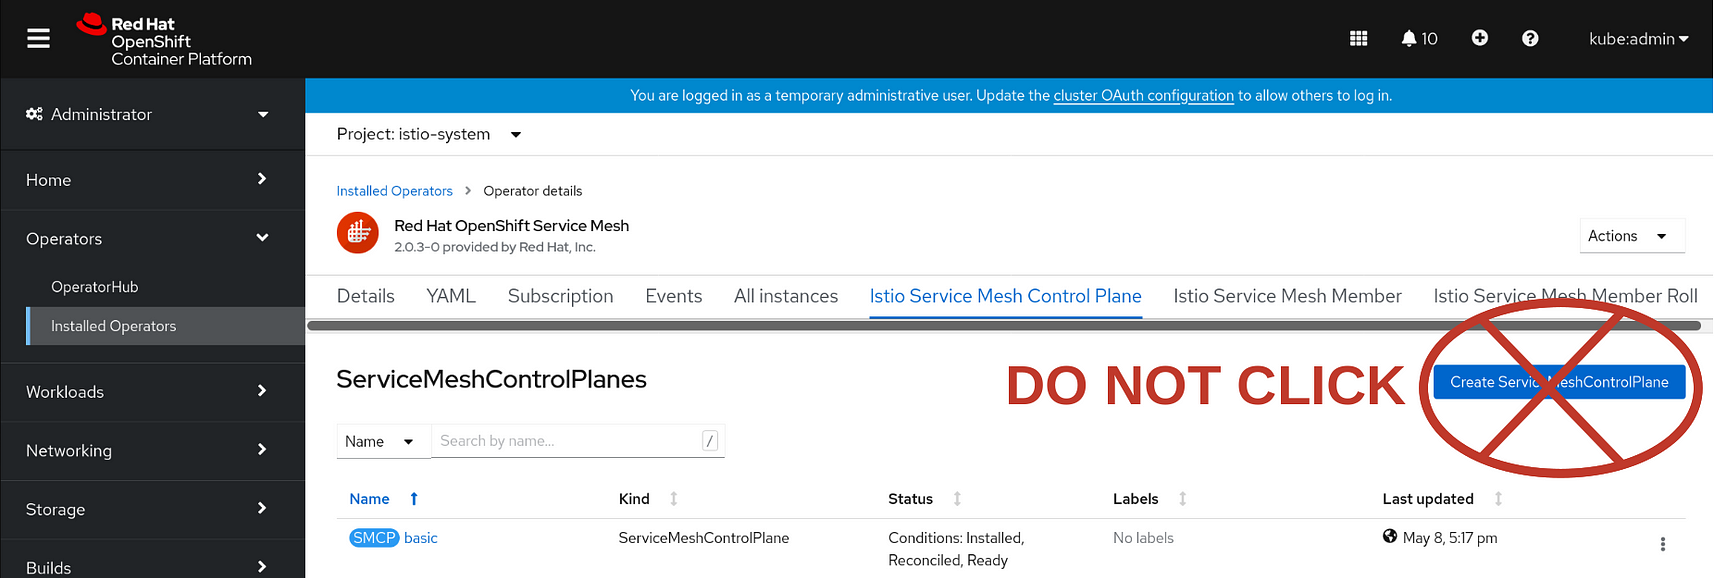
See the status of your SMCP? It’s Installed, Reconciled and Ready. (If not, something’s gone wrong.)
DO NOT hit the Create ServiceMesh Control Plane button. You’ve already created your SMCP. If you hit the Create ServiceMesh Control Plane button, it will create another one just like it. Don’t do that. It will only confuse the OSSM installation and then you’ll have to tell everything you do from here on out which SMCP to use. Save that ‘running multiple control planes’ thing for another day.
Anyway, you’re done creating the SMCP and ready to move on to creating the SMMR — the Service Mesh Membership Roll.
Install and Configure The Service Mesh Membership Roll
The Service Mesh Membership Roll or smmr tells the OSSM Operator which namespaces contain suites of microservices, and gives you some control over what kinds of things they’re allowed to do.
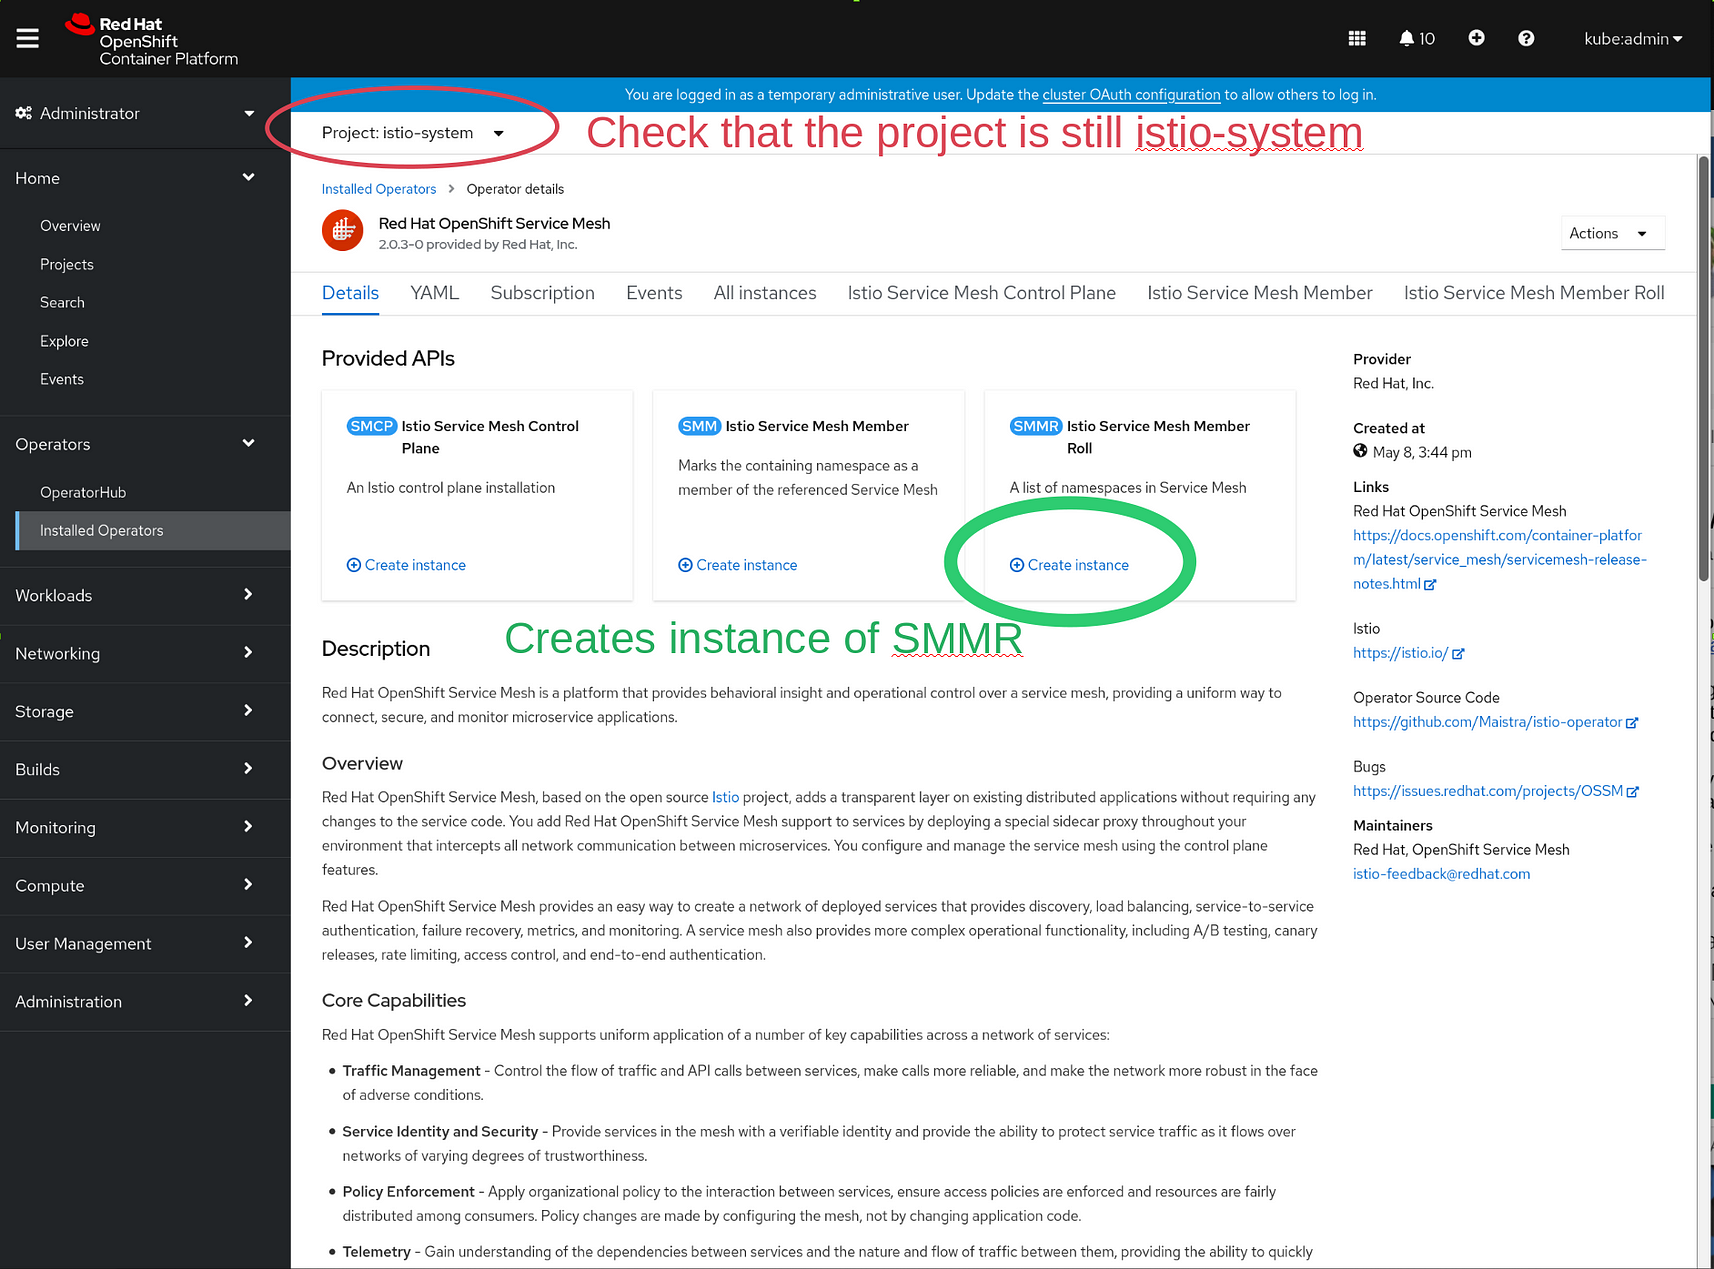
To create the Service Mesh Membership Roll, first navigate back to the OSSM Details page:

From here you can create the Service Mesh Membership Roll smmr :
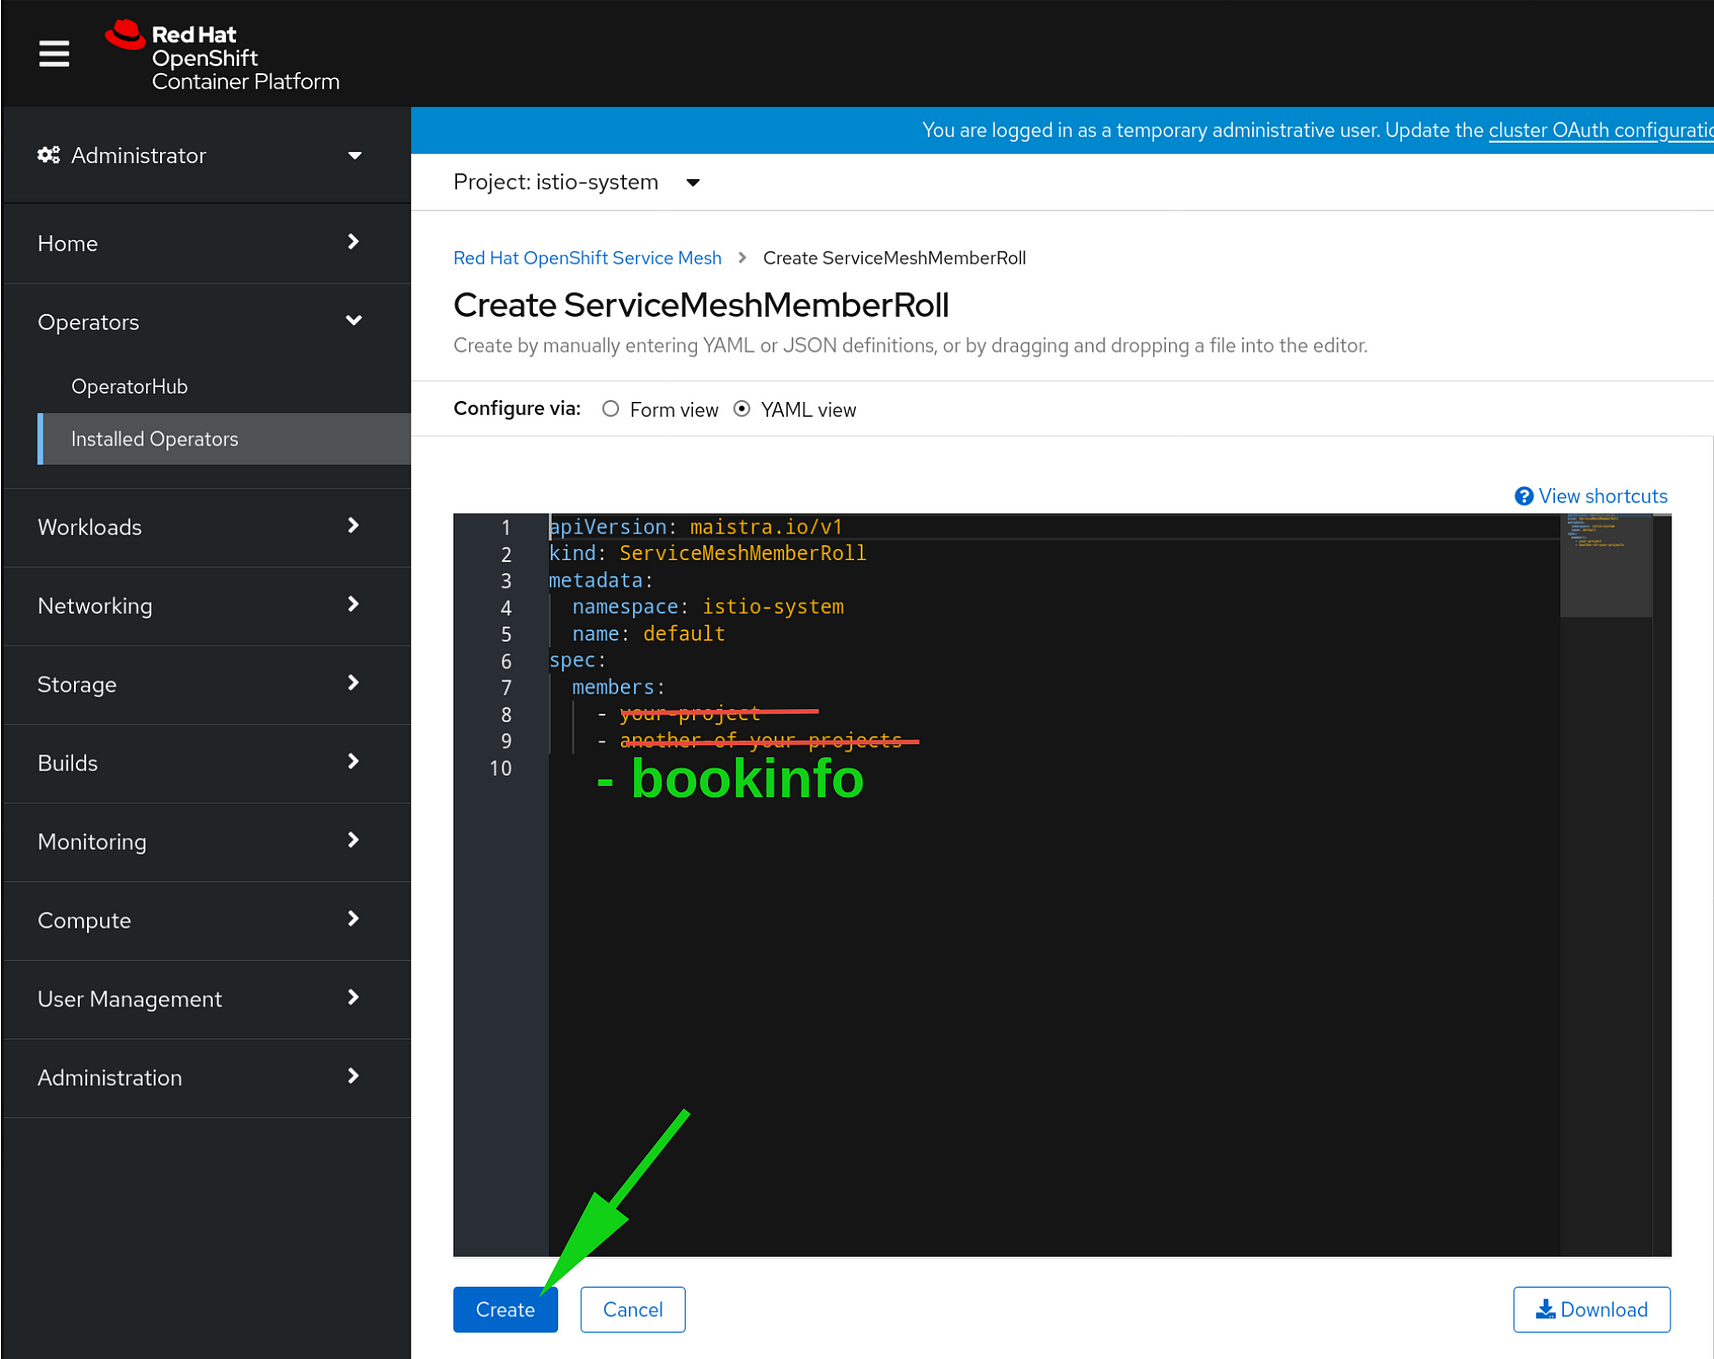
But wait! There’s MORE! Don’t just click CREATE here either! You want to configure the Service Mesh Member Roll to use the bookinfo namespace, so select YAML view:
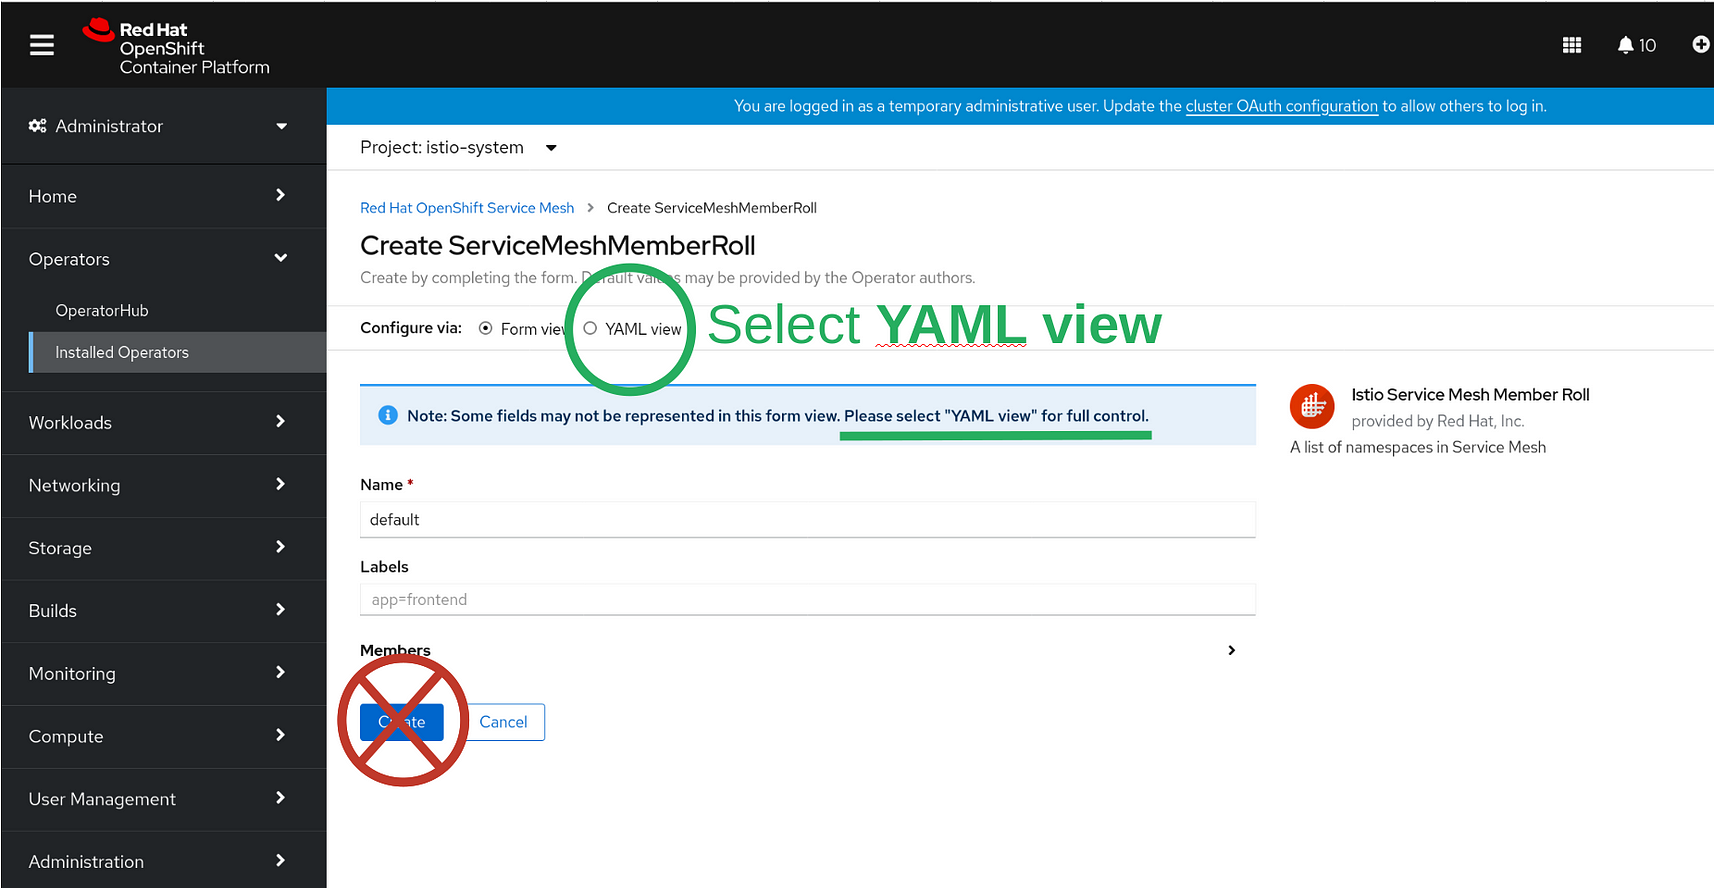
When you go into YAML view you’ll see some default example projects configured.
Delete these, and replace them with — bookinfo indented four (4) spaces:
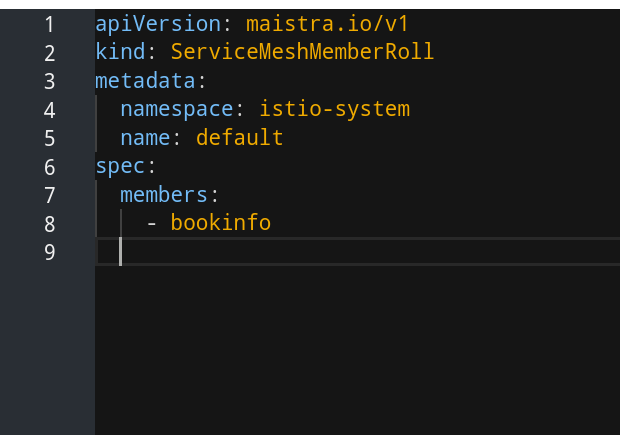
NOW you can create the Service Mesh Member Roll. Click the big blue CREATE button:
Congratulations! You have now installed Red Hat OpenShift Service Mesh, and configured it in preparation for running the bookinfo example suite of microservices for validation, test, and learning about all the amazing things you can do with Service Mesh!
Summary of Part I: Installation of Red Hat OSSM
In this article, we have installed the major components of Red Hat OpenShift Service Mesh and instantiated them in the standard istio-system namespace. Please proceed to Part II of this series to learn how to build the bookinfo images required to run this example test and validation suite on IBM System Z/LinuxONE. If you are running Red Hat Openshift on x86 architecture machines, you may wish to skip directly to Part III: Much Ado about Bookinfo.
Many thanks to Tony Gargya, Nourhane Bziouech, Mark Herman and Silke Niemann for editing assistance and source materials.