This lab introduces some advanced features with the Glossary in IBM Blueworks Live. To experience more about the basics of glossary management, please see this hands-on lab.
The Glossary is a place to define and store all the important terms that are used in the artifacts within your Blueworks Live account. Defining a set of preferred terms and associated descriptions can help achieve consistency and encourage best practices in documenting your business processes, policies, and decisions.
How to develop a heat map of potential process improvement areas by using your custom properties
Custom properties provide a framework to store your own process metadata.
Heat maps can be created by using existing and/or custom properties to better analyze and improve your processes.
Contents
Prerequisites
This lab requires the following:
- An IBM Blueworks Live Account, trial or permanent, with Account Admin access.
- Note: If you do not have Account Admin access, you can read the lab and follow along Tasks 1-3 and the included screen captures since you cannot create custom properties or enumerations.
- Note: You can still complete the heat map in Tasks 4-6 using some of the existing properties from IBM Blueworks Live, for example, Value Add and Risk, rather than the custom properties in this lab.
Task 1: Open the Administrative menu
In this task, you will open the administrative menus of your account. The administrative menus contain settings that are used to manage users, files, branding, security, and properties in your account. In this lab, you will create custom properties to use in your Process Blueprints.
- At the upper-right next to your name, click the Admin
- Click open the Properties tab.

3. On the
Properties tab, scroll down to the section for
Custom Process Properties.
This is where you will be able to create your own properties to use in Process Blueprint
Task 2:Create a custom property
In this task, you will create some custom properties to use in your account. Custom Properties can be numeric or text properties.
Benefit, Cost, and Volume are good indicators to evaluate any business process. These indicators can be used to determine whether a process is worthwhile considering for improvement and potentially even automation. Although these indicators are not predefined properties in IBM Blueworks Live, you can create them as custom properties to use in Process Blueprints.
Note: Cost is already a numeric property in IBM Blueworks Live. You can use this property to provide a precise cost value, such as a price, whereas the Cost Level custom property described below is used to provide a high-level indicator of cost.
|
Custom Property Name
|
Custom Property Description |
| Benefit Level |
Denotes the level of benefit that is provided by this process artifact. Benefit can include various factors such as: revenue, branding, quality, customer satisfaction, and so on. |
| Cost Level |
Denotes the level of cost that is incurred by this process artifact. Cost can include various factors such as: human resource cost, technology cost, real estate cost, other resource cost, lost opportunity cost, penalties, and so on. |
| Volume Level |
Denotes the level of volume that is incurred by this process artifact. Volume usually refers to the number of instances that run annually. For example, if this runs only occasionally, the volume level would be Low, if it runs at regular intervals, it is Medium, if it runs many times per day, it would be High. |
First, you will create a text custom property Benefit Level to record the amount of benefit provided by each process in your account.
To create the custom property in your account, click the Click to add a text property link under the Custom Process Properties section. Enter Benefit Level in the name field.

Click add tooltip to add a description for your custom property.
Enter the following: Denotes the level of benefit that is provided by this process artifact.
Benefit can include various factors such as: revenue, branding, quality, customer satisfaction, etc.

To the left of the Benefit Level name, select the checkbox to make it available to all users in the account. If you ever want to remove this custom property from visibility in the account, you can deselect this box and it will no longer be visible in the Details pane of Process Blueprints.

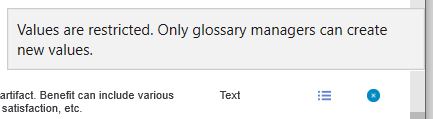
To the right side of the Benefit Level row, click the enumeration icon to make this custom property an Enumeration type. Note that custom properties and the System property that comes with IBM Blueworks Live (not user-defined) can support enumerations with values defined by Glossary Managers. Also, note that Glossary Managers do not have to be Account Admins; they can be Editors with permission to “Manage and Edit” glossary values.

The custom property is now available to any user within their Process Blueprints, but only glossary managers can define values for this custom property.
Create the additional custom properties Cost Level and Volume Level as per the table above.
Task 3:Create enumeration values
they are completed, you should see the three.
In this task, you will create enuariton values for the custom properties shown below.

Benefit Level custom property. The Glossary contains all values used in the properties of the Process Blueprints and Decision Models (accessed through the Details pane) in your account. Enumeration values will appear for the users when they access the Benefit Level custom property in the Details pane of their
Process Blueprints. Since this custom property is an Enumeration type, users will not be able to type their own values but must use the ones that are pre-defined in the Glossary.
Use the information in the following table to create the enumeration values later in this task.
| Enumeration Value |
Enumeration Value Description |
| Low |
Provides a low level of benefit, for example, low or small amount of revenue. |
| Medium |
Provides a medium level of benefit, for example, low or small amount of revenue. |
| High |
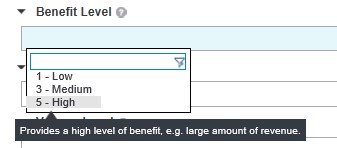
Provides a high level of benefit, for example, low or small amount of revenue. |
To access the Glossary in your account, click the Library link and open the Glossary tab.

The Glossary view defaults to the Values tab showing the Glossary contents. The Glossary contains items that are discovered when users document processes and decisions and automatically organizes the items into categories based on the type of information they represent. For more on the basics of glossary management see this hands-on lab (https://www.ibm.com/cloud/garage/dte/tutorial /glossary-management-blueworks-live). Scroll down to the Benefit Level section to view the custom property category.

To the right, click New Benefit Level to create a new enumeration value and enter Low in the Value field.
Click the Description field and enter the following: Provides a low level of benefit, for example, low or small amount of revenue. The results should look like the picture below.

Repeat the previous three steps to create the two other new enumeration values by using the information in the table at the beginning of this task.
When done, the results should look like the picture below.

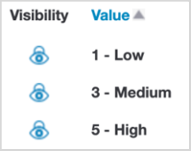
Click the triangle next to the Value header to sort the enumeration values alphabetically. The values are no longer in the preferred order. Note that the order they appear in the glossary is the order they will appear to a user when they access the custom property in the Details pane of their Process Blueprints.

To change the sort order, you can add numbers as pre-fixes to the values. The numbers should increase with each greater value, so the alphabetic sort order matches the expected sequence of values.
Edit each value and prepend a number with a dash to change the sort order to the following: 1-Low, 3-Medium, 5-High. The resulting sorted values will appear as follows when alphabetically sorted.
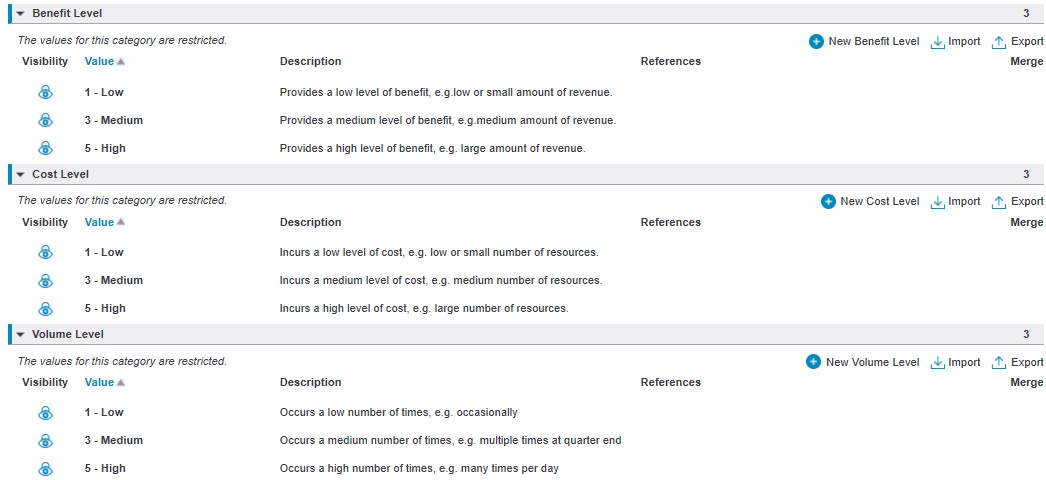
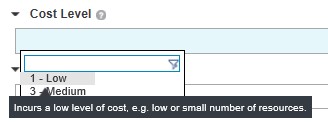
 Follow the steps above to create similar enumeration values for the Cost Level and Volume Level custom properties.
Once they are completed, you should see the three enumeration values for each Custom Property as shown below.
Task 4: Prepare the environment
In this task, you will create a Space and import process blueprints from the library of Templates available in IBM Blueworks Live. The process blueprints that you will use for this lab come from the American Productivity & Quality Center (APQC): “APQC Classification – Operating Processes”.
THE APQC PROCESS CLASSIFICATION FRAMEWORK (PCF)® was developed by non-profit APQC, a global resource for benchmarking and best practices, and its member companies as an open standard to facilitate improvement through process management and benchmarking, regardless of industry, size, or geography. The PCF organizes operating and management processes into 12 enterprise-level categories, including process groups and over 1,000 processes and associated activities. To download the full PCF or industry-specific versions of the PCF as well as associated measures and benchmarking, visit https://www.apqc.org/pcf (https://www.apqc.org/pcf).
Click the Library link and open the Spaces tab (note, you may have a different number of spaces).

On the right, click Create New Space.
In the dialog that opens, enter Custom Properties Lab.
Leave the default or select a space of your preference under Where to add this new space and then click Create Space.
Your new Space should now be open in IBM Blueworks Live and you are ready to import the process blueprints from the Templates library.
Navigate to Library and open the Templates tab.

Use APQC Operating in the Search dialog to find the APQC process blueprints.
You should see 4 process blueprints from the template library:
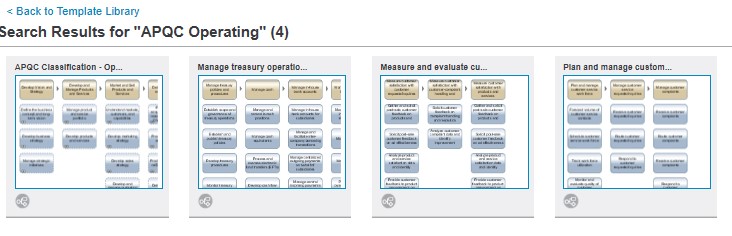
Hover over the first artifact, “APQC Classification – Operating Processes”, and you will see the description of this template artifact indicating that it comes from the Cross Industry Process Classification Framework from APQC.
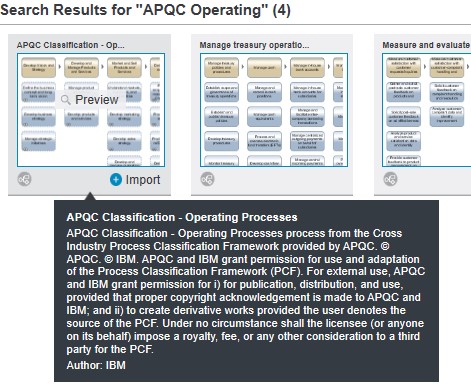
Click Import to import this template.
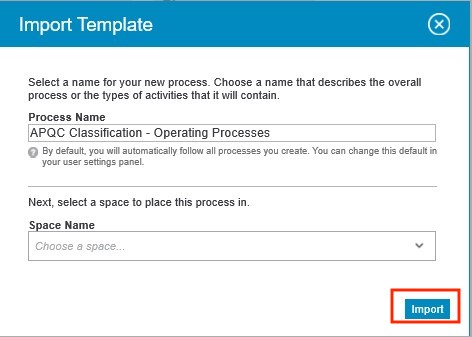
In the dialog that opens, accept the default Process name.
Locate the “Custom Properties Lab" space by using search and select it.
Click Import to import this template into your newly created Space.
The process blueprint, with its 18 associated subprocesses, is now available in your “Custom Properties Lab” Space.
Task 5: Develop heat map
h3>
Task 5: Develop the heat map
In this task, you will develop a heat map from the template process blueprint you imported in the previous task by associating values for the custom properties you created in earlier tasks with activities in the process blueprint.
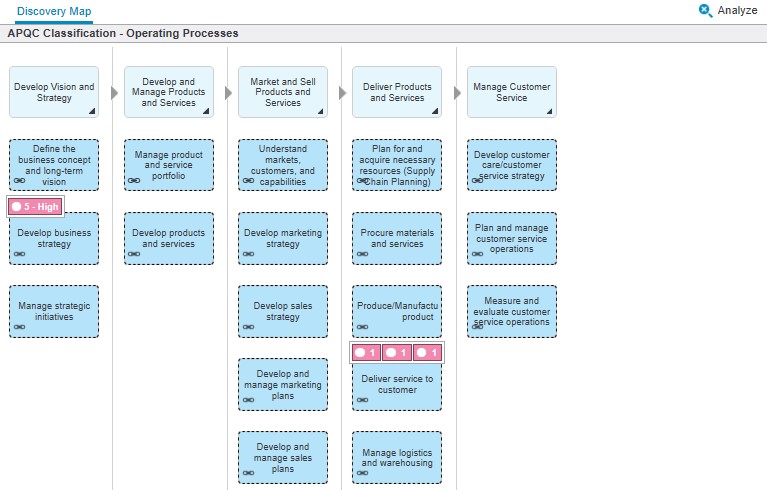
- In the Custom Properties Lab Space, click APQC Classification – Operating Processes to open it. It should open in the “Discovery Map” view as shown
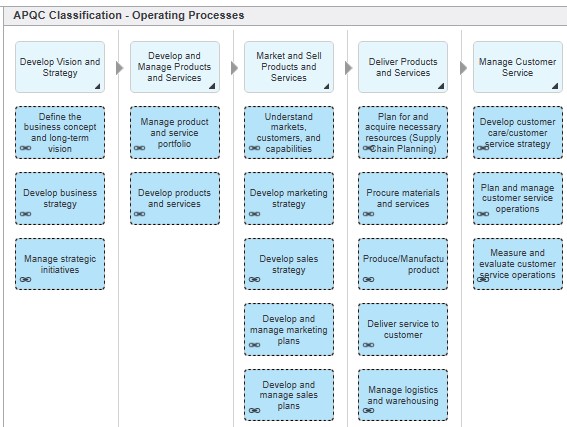
If it does not, at the upper-left, click the view menu to switch to
Discovery Map.

Double-click the Develop business strategy activity to open the Details view.
In the Details pane that opens, scroll down until you see the custom properties: Benefit Level, Cost Level, and Volume Level displayed.
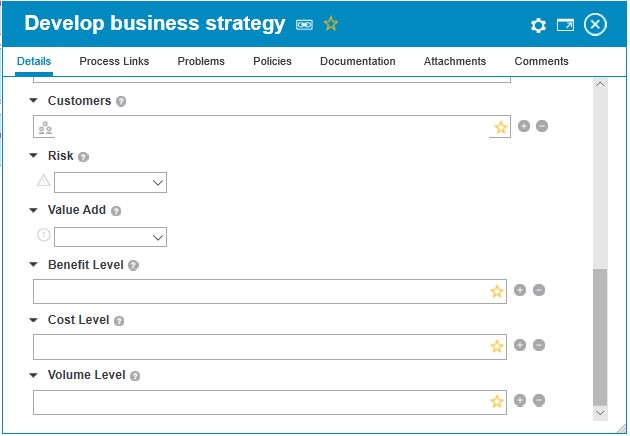
Click in the Benefit Level field and you will see a dropdown appear. Select 5-High from the dropdown.
Click in the Cost Level field and you will see a dropdown appear. Select 1-Low from the dropdown.
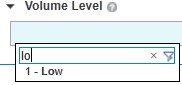
Click in the Volume Level field and you will see a dropdown appear. You can type any part of the value to filter the selection available. Start typing Low in the filter box; you will see that the choices in the dropdown are reduced to match your filter. Select 1-Low from the dropdown.
Click the X in the upper right of the Detail view for Develop business strategy to close it.

Double-click the Develop and manage marketing plans activity to open the Details window. Update the custom properties, as in steps 4-8, with the values in the table below.
| Property |
Value |
| Benefit Level |
3-Medium |
| Cost Level |
1-Low |
| Volume Level |
3-Medium |
Double-click the Procure materials and services activity to open the Details window. Update the custom properties, as in steps 4-8, with the values in the table below.
| Property |
Value |
| Benefit Level |
3-Medium |
| Cost Level |
3-Low |
| Volume Level |
3-Medium |
Double-click the Deliver service to customer activity to open the Details window. Update the custom properties, as in steps 4-8, with the values in the table below.
| Property |
Value |
| Benefit Level |
5-Medium |
| Cost Level |
5-Low |
| Volume Level |
5-Medium |
Double-click the Develop customer care/customer service strategyactivity to open the Details window. Update the custom properties, as in steps 4-8, with the values in the table below.
| Property |
Value |
| Benefit Level |
5-Medium |
| Cost Level |
5-Low |
| Volume Level |
5-Medium |
Your heat map is now ready for initial validation and analysis.
Task 6: Review heat map
In this task, you will review the heat map that you created in the previous task to see which processes ae identified as potential candidates for further improvements, that is, with the highest Benefit, Cost, and Volume.
- In the Discovery Map for the Process Blueprint APQC Classification – OperatingProcesses, click Analyze to switch to Analysis mode.

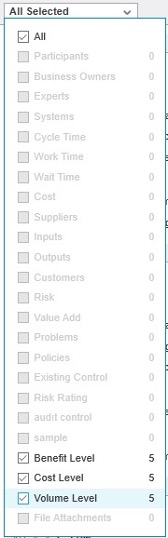
- On the left side, open the menu to select which properties are display in Analysis mode. One or more properties may be selected already.
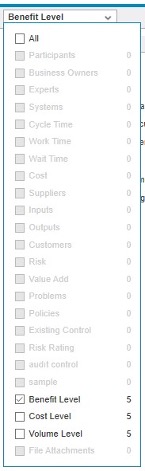
In the Properties menu, select the three custom properties: Benefit Level, Cost Level, and Volume Level. They will now be displayed in Analyze mode.
Confirm that your Discovery Map has the five activities that you previously updated highlighted with icons to indicate they have the custom properties set.
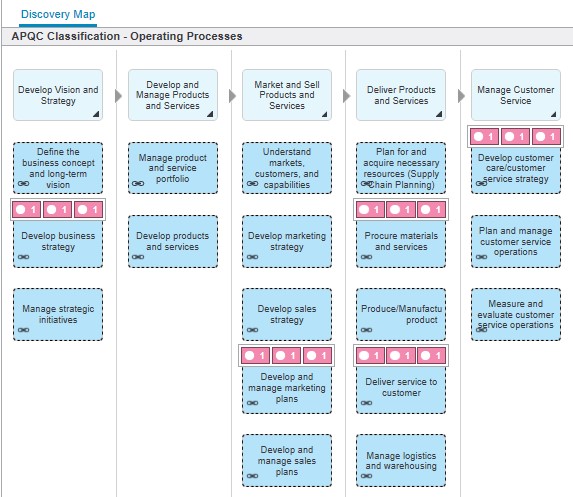
TIP: When entering property values in the Details for many activities, you can use Analyze mode to quickly validate which Activities have been updated.
On the left pane, you see a summary of which values of the custom properties are associated with which activities.
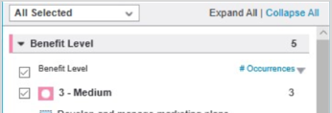

TIP: You can use this view to quickly identify all the activities with a particular value for one property.
In the left pane, deselect all values, except 5-High, from each of the three custom properties.

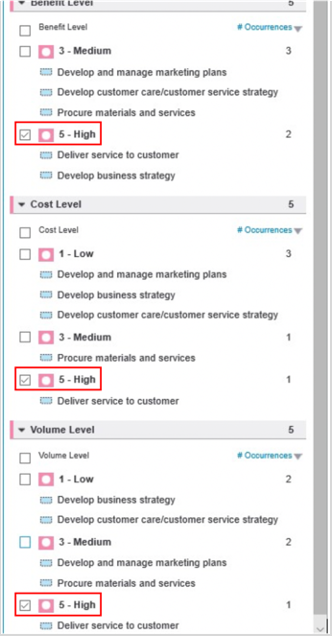
Based on your property value selections, the discovery Map is now updated to show that one Activity, Deliver service to customer, has all High values for the three custom properties. This activity would be a likely top priority candidate for process improvement efforts.
You can continue to experiment with different selections of the custom property values to see which activities get highlighted in your heat map, for example, High and Medium levels of both Volume and Benefit
Summary
Congratulations, you completed the Management Custom Properties in Blueworks Live tutorial! You experienced creating and managing custom properties and enumerated values in the glossary to help achieve greater consistency and encourage best practices in documenting your business processes and decisions. A structured approach to glossary management through the tools and techniques you learned will help your organization increase the value received from Blueworks Live by providing guidance and clarity to your users. We look forward to hearing your feedback and hope you keep modeling your business with Blueworks Live.